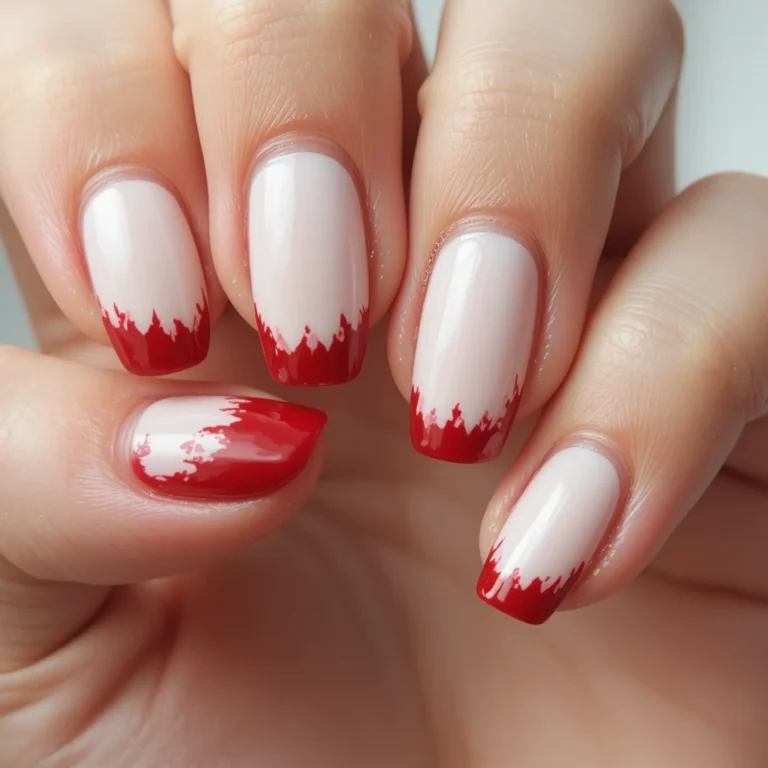
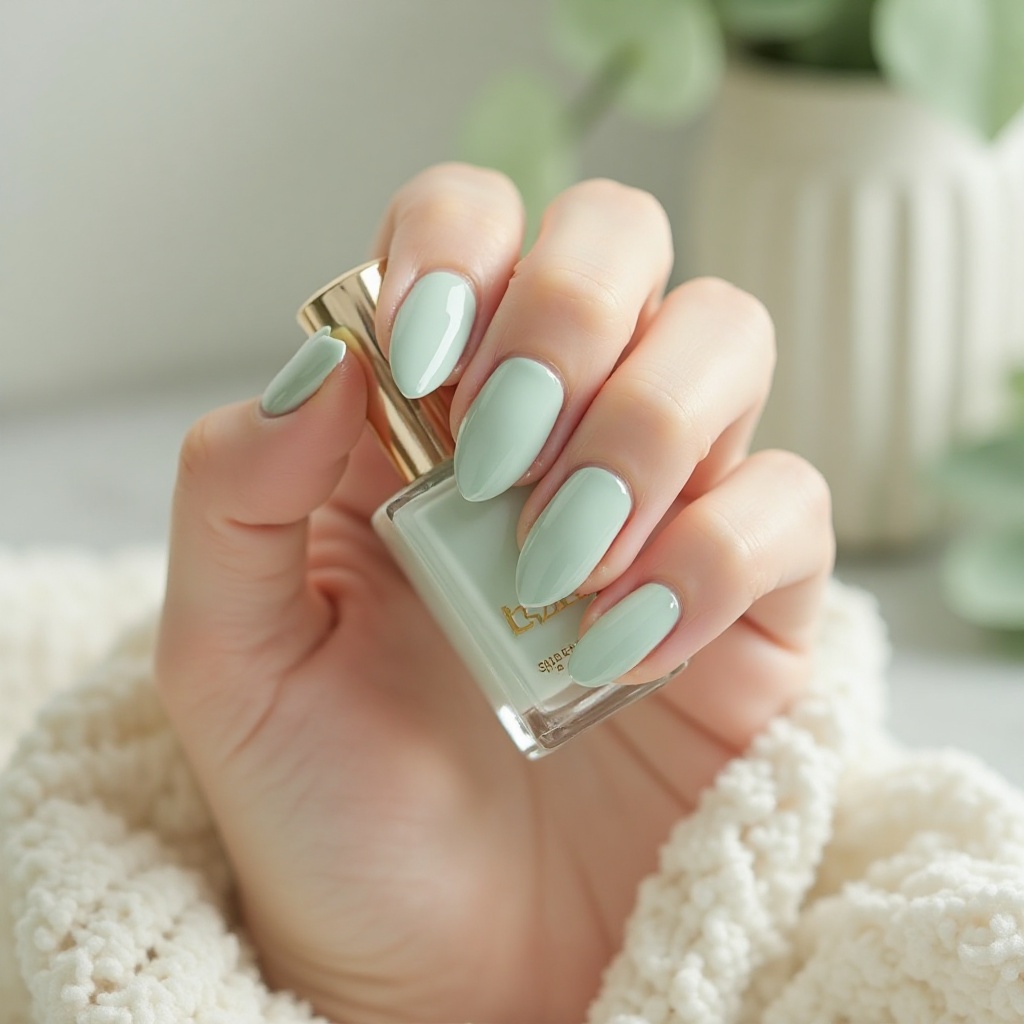
15 Pastel Green Nails That Look So Elegant
Pastel green nails sound simple until you’re standing in a nail aisle staring at forty shades that all technically qualify. This guide is different from the usual “15 pretty ideas” posts because every single design here includes complete step-by-step instructions, specific product names with prices, and an honest look at what actually goes wrong — and how to fix it.
Whether you’re doing this at home for the first time or looking for something new to try at the salon, you’ll leave knowing exactly which green suits your nails, your skin tone, your job, and how much patience you actually have.
How to Choose the Right Pastel Green Design
Before you scroll the designs, spend 30 seconds here — it’ll save you from picking something you’ll hate after 48 hours.
First time with pastel green? Start with Milky Mint Glaze (#1) or Pistachio French Tips (#2). Both are forgiving and can be done with regular drugstore polish.
Professional job with a conservative dress code? Sheer mint, muted sage, or seafoam with gray undertones are your safe zone. Matte Seafoam Nude (#3) and Mint with Pearl Accent (#8) both pass in most offices.
Special event coming up? Mint Chrome (#4), Pastel Green with Gold Foil (#7), or Seafoam Shimmer (#15) photograph beautifully and hold up for a weekend.
Comfortable with nail art already? Sage Green Marble (#10) and Mint Gradient Ombré (#6) give you something to actually work on.
Short nails (at or below fingertip)? Avoid electric mint and chrome — they can read as childish on very short nails. Muted Seafoam Nude (#3) or Sage Jelly (#5) work much better.
Hate maintenance? Skip anything chrome or with 3D elements. Sheer mint or matte sage needs the least upkeep.
Minimalist & Soft Pastel Green
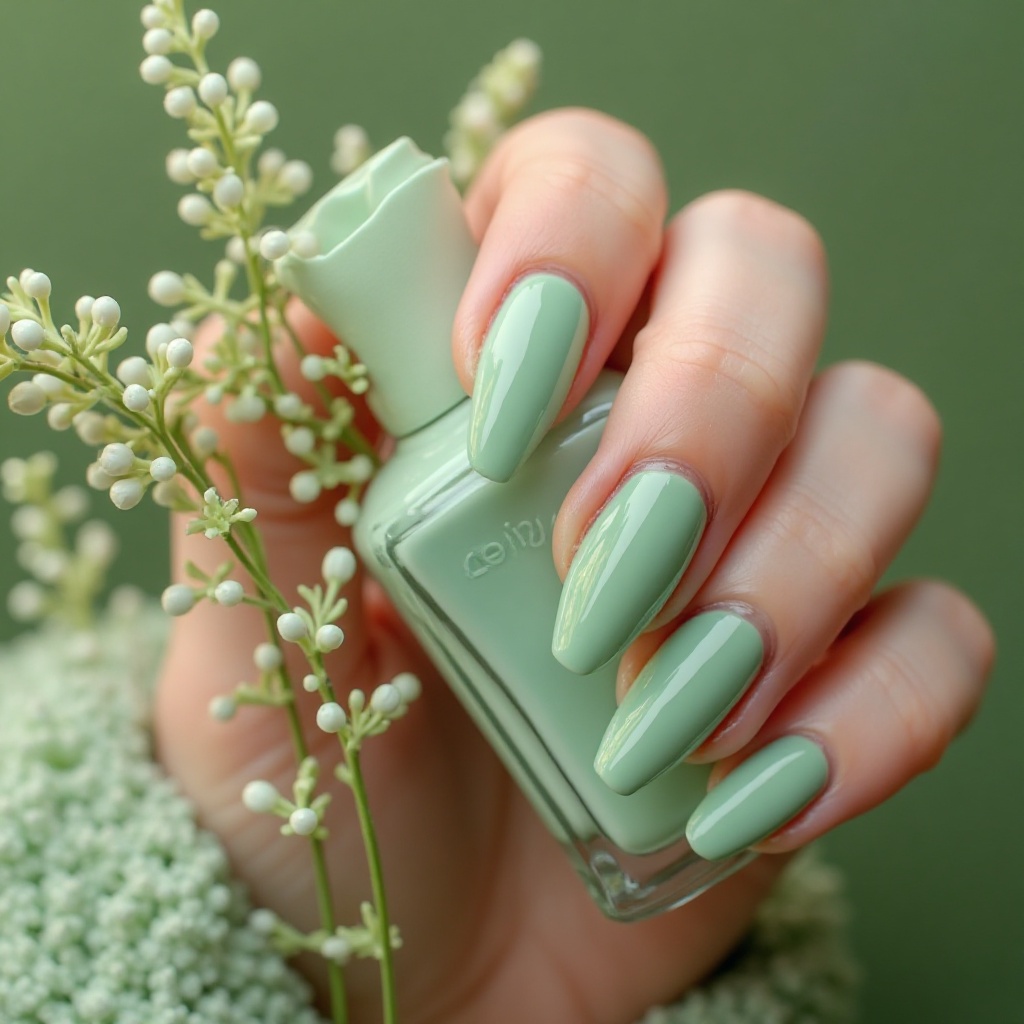
1. Milky Mint Glaze
A sheer, milky pastel green with a glossy finish that creates a “your nails but better” effect. The translucent wash of color feels incredibly fresh and modern, like morning dew on spring leaves. This barely-there green works beautifully on short to medium almond or oval nails for a polished, natural look.
Difficulty: Beginner
Time to complete: 25–30 minutes
Best for: First-time pastel green wearers who want something subtle and work-appropriate
Why it works: The sheer formula makes mistakes less visible and the glazed finish looks intentional even when your application isn’t perfect
What makes it different: Unlike full-coverage polishes, this one shows your natural nail underneath, which creates a “your nails but better” effect that solid colors can’t replicate
Product Recommendations:
- Budget: Essie “Mint Candy Apple” ($9 at Target or drugstores) — genuinely sheer with that glassy finish. Pair with Seche Vite Top Coat ($10) for glass-like shine
- Mid-range: OPI “This Cost Me a Mint” ($11 at Ulta) — slightly more opaque, works better if you want a bit more color. Add Seche Vite on top
- Quality pick: Olive & June “SM” sheer mint ($8 on their site) — their brush makes application easier for beginners, and their Super Glossy Top Coat ($8) extends wear noticeably
Common Mistakes:
- Thick first coat → bubbles. Go thin always
- Skipping base coat → nails stain faintly yellow-green over time
- Not capping the tip → chips start at the edge within 2 days
2. Pistachio French Tips
Classic French manicure reimagined with soft pistachio green tips instead of traditional white. The pale green creates a subtle twist on the timeless design, offering freshness without being too bold. It’s sophisticated enough for professional settings yet playful enough for weekend brunch dates.
Difficulty: Beginner–Intermediate
Time to complete: 35–45 minutes
Best for: Anyone who wants a twist on classic French nails without committing to bold color
Why it works: French tips already visually elongate fingers — pistachio just makes them feel current instead of 2003
What makes it different: The pale green reads as a neutral in most settings, which means you can wear this to a job interview or a garden party without overthinking it
Products:
- Nude/pink base: Essie “Bare Necessity” ($9) or OPI “Bubble Bath” ($11)
- Pistachio tip: Essie “Going Guru” ($9) or OPI “How Does Your Zen Garden Grow” ($11)
- French tip guides: Amazon nail tip stickers ($3–5 for a large pack)
- Detail cleanup brush: any small art brush or NYX brow brush works in a pinch
If freehand is not happening: French tip press-ons in light green ($8–12 at Amazon or Sally Beauty) look identical and you can file them shorter to match your natural nail length.
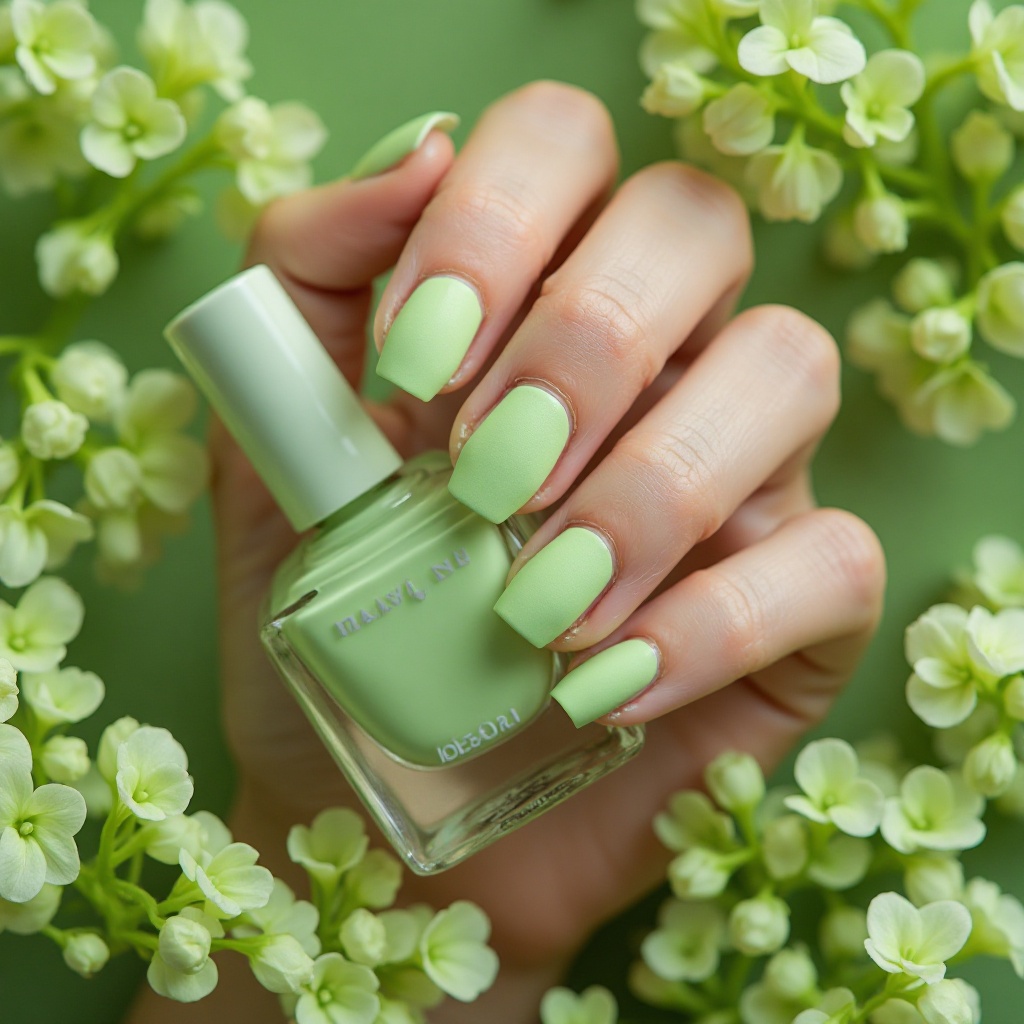
3. Matte Seafoam Nude
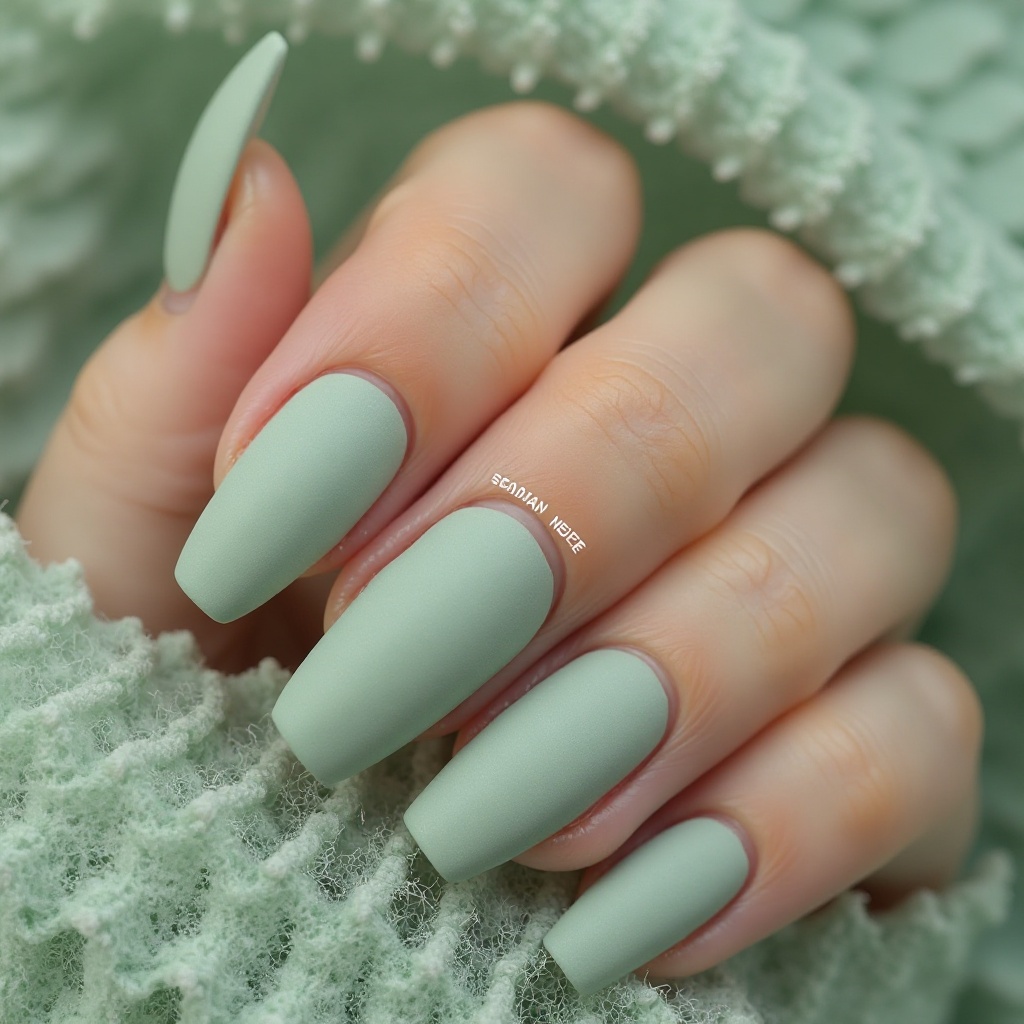
A muted seafoam green with nude undertones and a velvety matte finish that feels both earthy and elegant. This dusty pastel shade leans slightly gray-green, creating a sophisticated neutral that’s far more interesting than beige. The matte texture adds depth and makes the color appear softer and more wearable for everyday styling.
Difficulty: Beginner
Time to complete: 30 minutes
Best for: Office environments or anyone who finds regular pastel green “too much”
Why it works: The gray-green undertone reads closer to a sophisticated neutral than a nail color, which is exactly why it’s so wearable
What makes it different: While everyone else is wearing glossy mint, matte finish creates texture and depth that glossy versions lack — it photographs differently, too
Products:
- Color: China Glaze “Refresh-Mint” ($7 at Sally Beauty) for a true dusty seafoam
- Matte top coat: Essie Matte About You ($10) for a smoother finish, or Sally Hansen Big Matte Top Coat ($5) as a budget option
Maintenance note: Matte finish starts looking dull or patchy after a few days. Reapply matte top coat every 3–4 days to keep the velvet texture. If you don’t want to do that, you can switch to glossy top coat halfway through the week — it changes the look but extends wear.
Cool-Toned Pastel Greens
4. Icy Mint Chrome
A cool-toned mint green with metallic chrome powder that shifts and reflects light like liquid mercury. The icy undertones make this shade feel futuristic and editorial, while the mirror-like finish adds instant drama. This look works beautifully on longer coffin or stiletto nails where the chrome can really shine.
Difficulty: Intermediate–Advanced
Time to complete: 60–75 minutes (gel setup required)
Best for: Events, weekends, photos — not everyday wear
Why it works: The mirror-like surface on a cool mint base is genuinely striking and looks nothing like regular nail polish
What makes it different: Chrome shifts color depending on the light — it looks silver indoors, more green-blue in sunlight
What You Need:
- Gel base coat
- Icy mint gel polish (2 bottles if your shade is sheer)
- No-wipe gel top coat — this is non-negotiable. Regular gel top coat won’t work
- Silver/mirror chrome powder ($8–15 on Amazon — Rose & Earl and Born Pretty are both reliable)
- Silicone eyeshadow applicator or silicone brush for buffing
- 48W+ UV/LED lamp
- Regular gel top coat for the final seal
Honest expectations: Your first attempt will be uneven in spots. The technique clicks after 2–3 tries. Chrome powder gets everywhere — do this over a paper towel.
If you don’t have gel equipment: Chrome press-on nails ($10–15 at Amazon or Nail Labo) give the same look without any equipment.
5. Sage Green Jelly
A translucent sage green with a jelly-like, squishy finish that creates beautiful depth when layered. The slightly gray-green tone feels herbaceous and natural, reminiscent of fresh garden herbs. Multiple coats build intensity while maintaining that gorgeous see-through quality that’s so Instagram-worthy.
Difficulty: Beginner
Time to complete: 35–40 minutes
Best for: People who want an interesting finish without nail art skills
Why it works: The translucency creates visual depth — you can see through the layers, which makes it look almost three-dimensional
What makes it different: Jelly finish looks expensive and unusual even though it’s just layered sheer polish
Best Jelly Polishes:
- Essie “Going Guru” ($9 at Target) — the closest to a true sage jelly in a mainstream brand
- ILNP jelly polishes ($10–12 at ilnp.com) — indie brand with a larger shade range
- Cirque Colors “Eucalyptus” ($13 at cirquecolors.com) — beautiful quality
Advanced option (encapsulated jelly): After coat 2, place tiny pressed flowers or gold leaf flakes while the polish is slightly wet. Apply coat 3 over them to “trap” the elements inside. It looks like there’s something floating inside the nail.
6. Mint Gradient Ombré
A seamless gradient that transitions from white at the cuticle to saturated pastel mint at the tips. The soft fade creates visual interest without requiring intricate nail art skills, and the color shift elongates fingers beautifully. This design works on any nail length but truly shines on medium to long lengths.
Difficulty: Intermediate
Time to complete: 45–60 minutes
Best for: Anyone comfortable with cleanup and willing to try a technique
Why it works: The fade from white to mint creates the illusion of longer nails and adds movement that solid color doesn’t have
What makes it different: Looks more complex than it is once you know the sponge method
What You Need:
- White polish
- Pastel mint polish
- Makeup sponge cut into small nail-width pieces
- Paper plate or aluminum foil
- Liquid latex or petroleum jelly (apply around nails for easier cleanup)
- Cleanup brush + acetone
Troubleshooting:
- Gradient looks harsh → add more overlap between colors on the sponge
- Sponge texture showing → apply 2 thick coats of top coat, it smooths out
- Colors not blending → work faster, don’t let the sponge dry between nails
Elegant Accent & Metallic Details
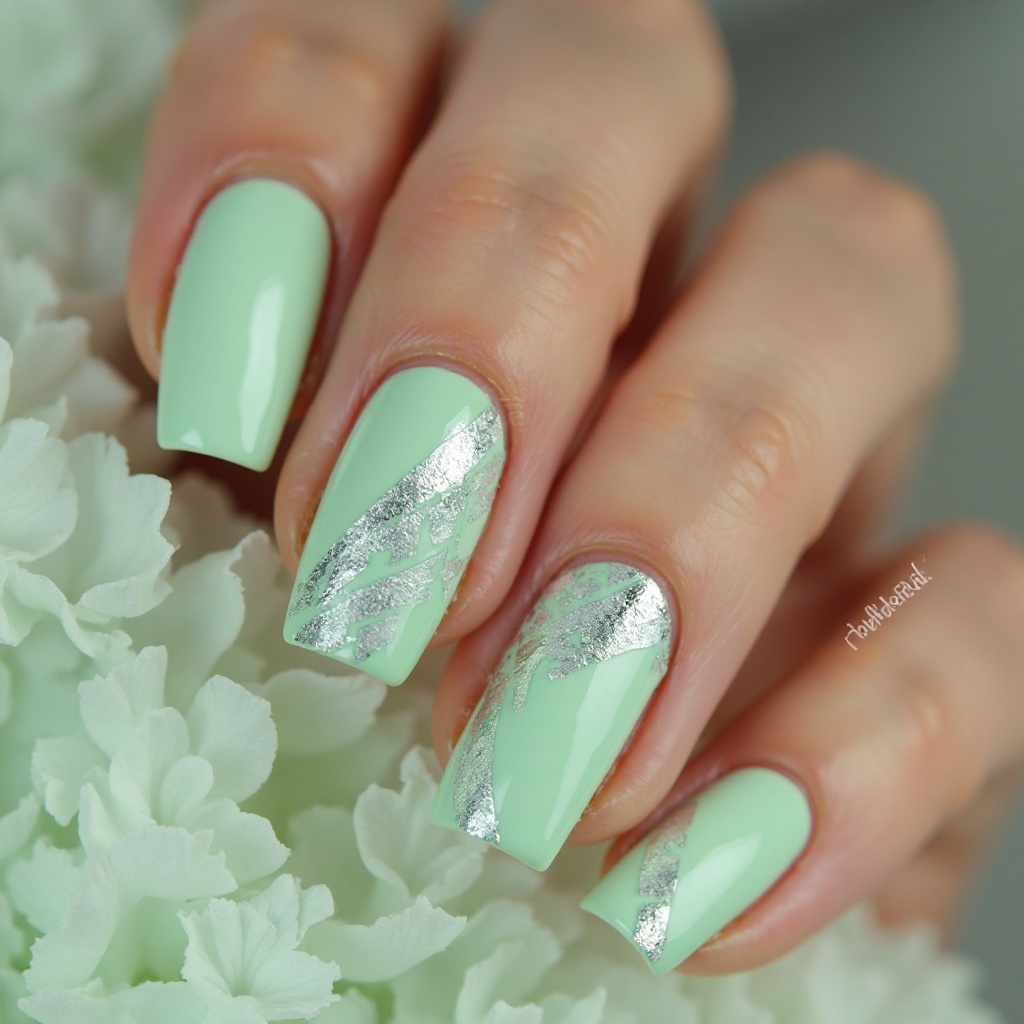
7. Pastel Green with Gold Foil Accent
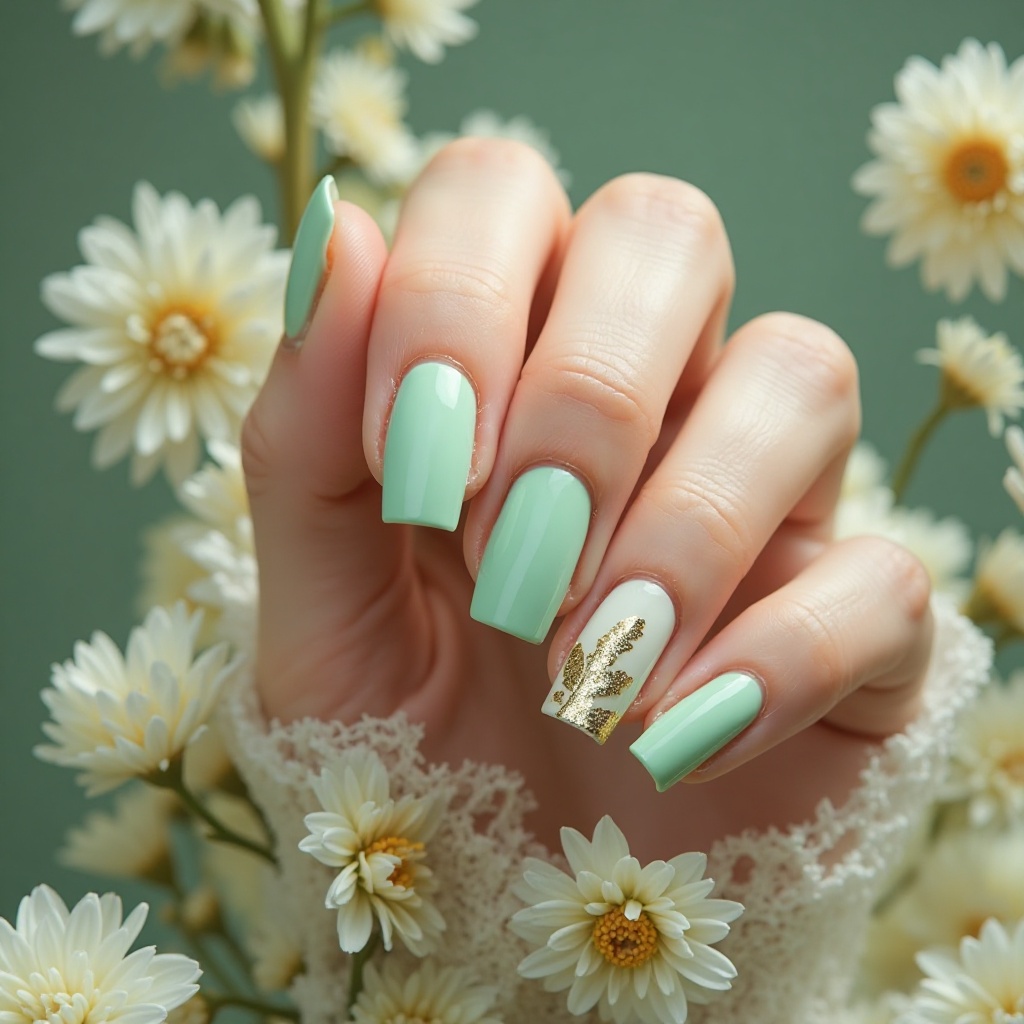
Soft pastel green base on all nails with delicate gold leaf foil applied to one or two accent nails. The metallic gold creates luxurious contrast against the muted green, adding just enough sparkle without overwhelming the look. The irregular foil patterns ensure each manicure is unique and organic-looking.
Difficulty: Beginner–Intermediate
Time to complete: 30–40 minutes
Best for: Anyone who wants one statement nail without committing to full nail art
Why it works: Gold and muted green is a classic pairing — the foil texture adds dimension that nail polish alone can’t create
What makes it different: No two foil applications look the same, so every manicure is genuinely unique
Products:
- Gold leaf sheets: Amazon 10-pack ($6–8) — search “nail gold leaf flakes”
- Foil adhesive: Modelones ($7 on Amazon)
- Transfer foil: Beetles 12-color set ($9 at Amazon) if you want more color options
Application tip: Less foil looks more expensive. Half-coverage with visible green underneath is the goal — full coverage looks less refined.
8. Mint with Pearl Accent Nail
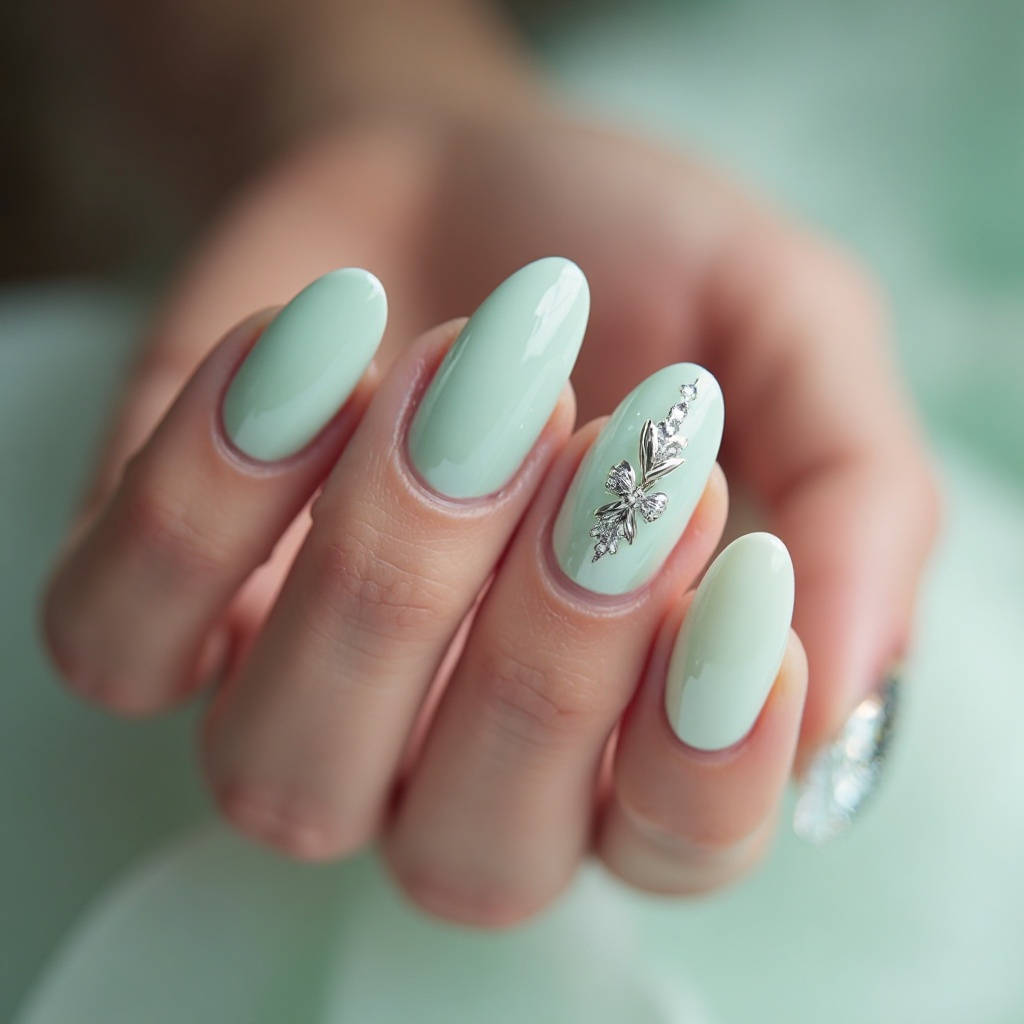
A soft mint green on nine nails with one accent nail featuring iridescent pearl or white chrome. The shimmer accent creates a focal point without requiring complex designs, and the pearl finish feels bridal-appropriate yet wearable. This combination is sophisticated enough for formal events but subtle enough for everyday wear.
Difficulty: Beginner
Time to complete: 25–35 minutes
Best for: Weddings, formal events, or anyone who wants elegance without effort
Why it works: One accent nail draws attention without requiring complex nail art — all the work is in choosing the right shimmer polish
What makes it different: Pearl finish behaves differently in different lighting, which makes it feel alive compared to flat color
Shortcut: Nail pearl sticker sheets ($3–5 at Amazon) applied over your mint base give essentially the same look in 2 minutes.
9. Pistachio with Silver Striping Tape
Creamy pistachio green base with thin silver striping tape creating geometric patterns or simple accent lines. The metallic silver adds modern edge to the soft pastel, and the clean lines create visual interest without busy-ness. This design works particularly well on square or squoval nail shapes.
Difficulty: Beginner
Time to complete: 30–35 minutes
Best for: People who like geometric or modern aesthetics but don’t want to freehand anything
Why it works: Silver tape on a warm pistachio creates modern edge without busy-ness — the contrast is crisp and clean
What makes it different: Tape creates precision that’s genuinely hard to achieve with a brush
What You Need:
- Pistachio polish
- Silver striping tape rolls ($3–5 for a set on Amazon — 3M nail tape or Born Pretty brand)
- Small scissors
- Tweezers
- Top coat
Critical tips:
- Wait 10 full minutes after base color before applying tape — wet polish won’t hold it
- Use thick top coat to secure edges — thin top coat lets tape lift
- Press tape edges firmly before top coat
- Don’t reuse tape pieces, they lose adhesive
This design lasts about 5–7 days before tape starts lifting at edges. Keep a top coat in your bag for touch-ups.
Artistic & Textured Pastel Greens
10. Sage Green Marble
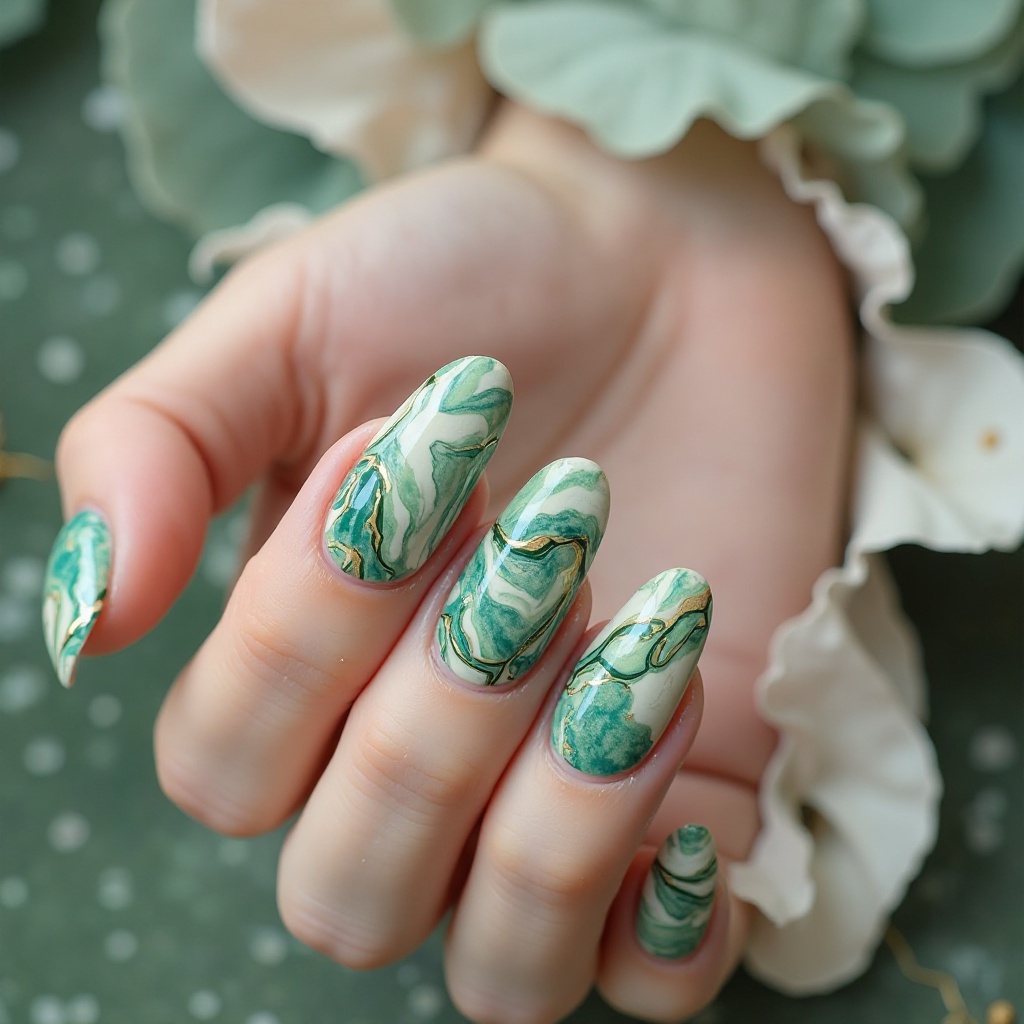
Swirling marble effect in varying shades of sage, mint, and white creating organic stone-like patterns. Each nail becomes a unique work of art with fluid, unpredictable veining that mimics natural marble. The sophisticated color palette makes this look feel expensive and custom despite being achievable at home.
Difficulty: Advanced (or Intermediate with dry method)
Time to complete: 45–60 minutes
Best for: People comfortable with nail art who want something that looks expensive and handmade
Why it works: Varying shades of sage, white, and mint together create depth and organic variation that solid color can’t replicate
What makes it different: Every nail looks different — there’s no template, which makes it genuinely custom
Marble Secrets:
- Practice the swirling motion on paper first — it’s a specific movement
- Room temperature matters: warmer rooms give you slightly more working time
- Asymmetry is the point. Don’t try to make each nail match
- Realistic expectation: first attempt will not look like Pinterest. The technique makes sense after 3–4 tries
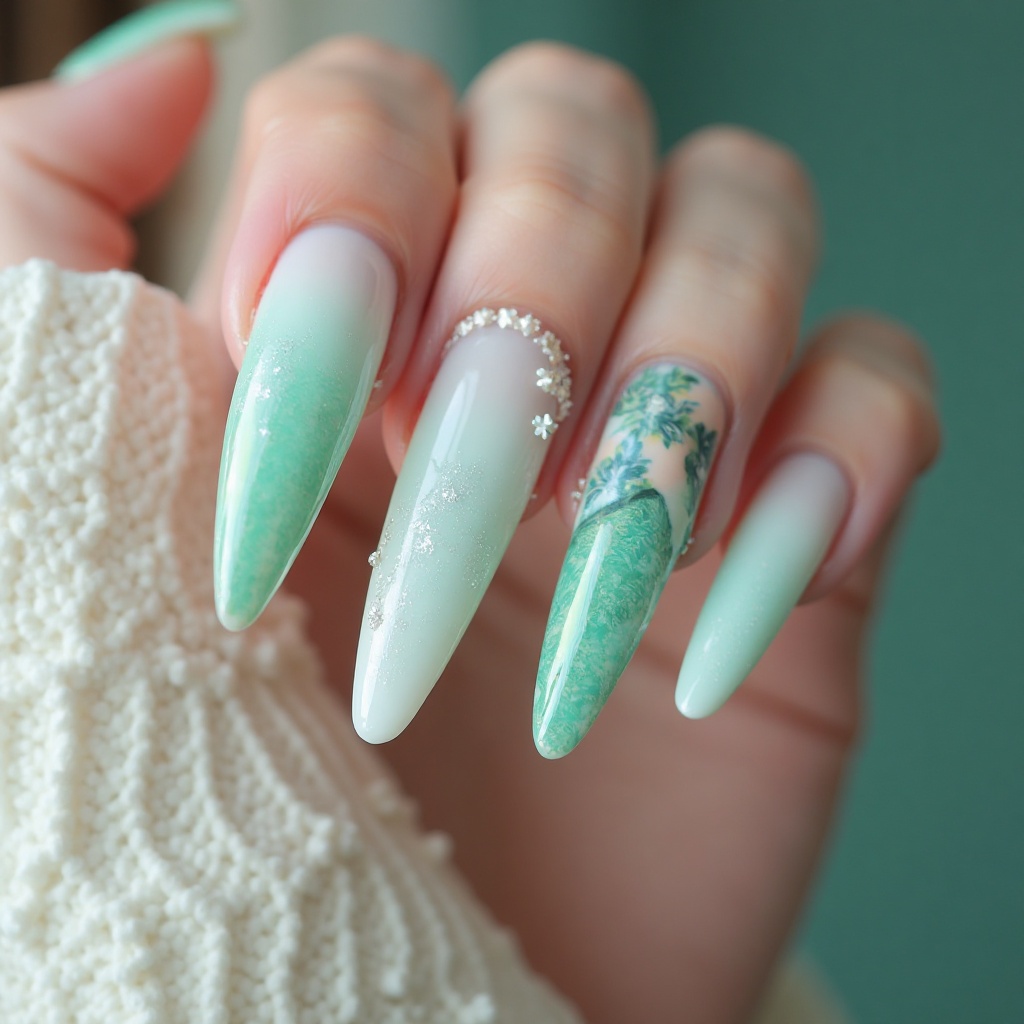
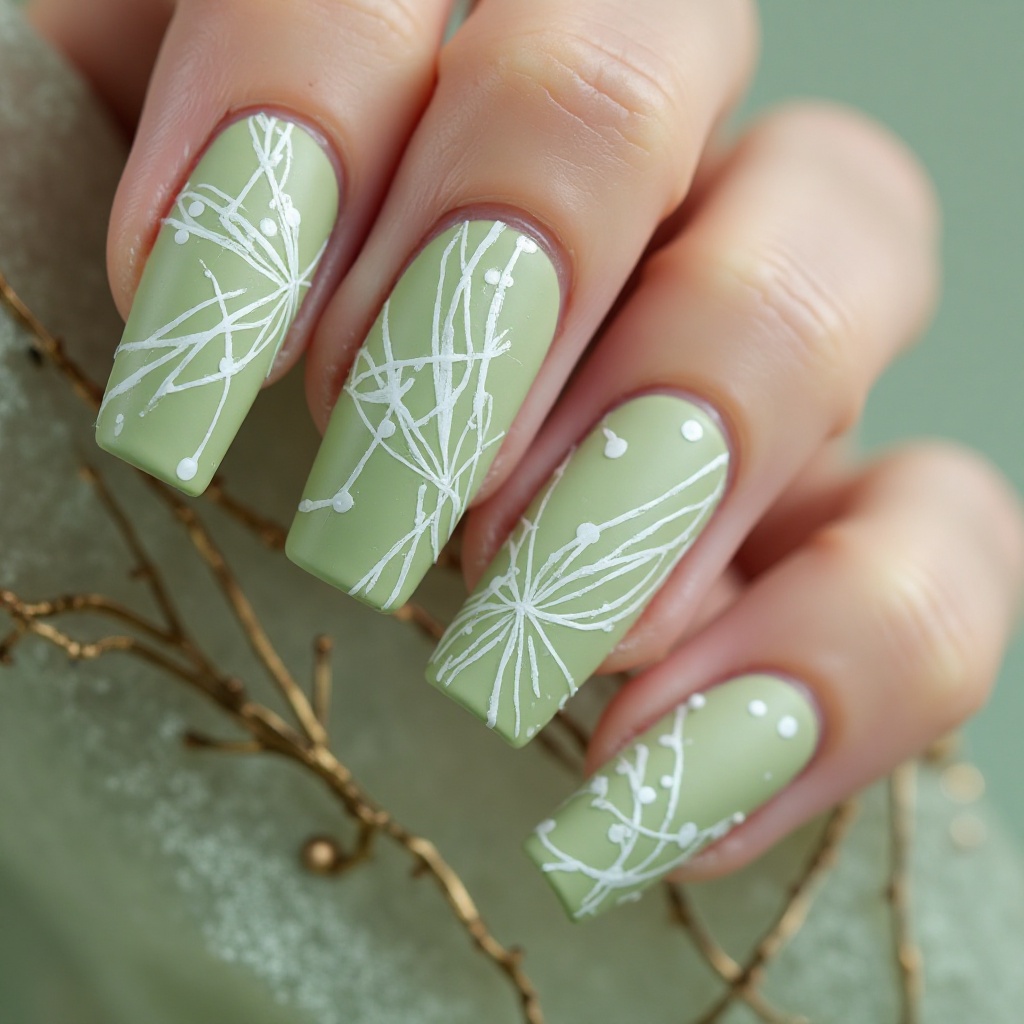
11. Textured Mint Garden
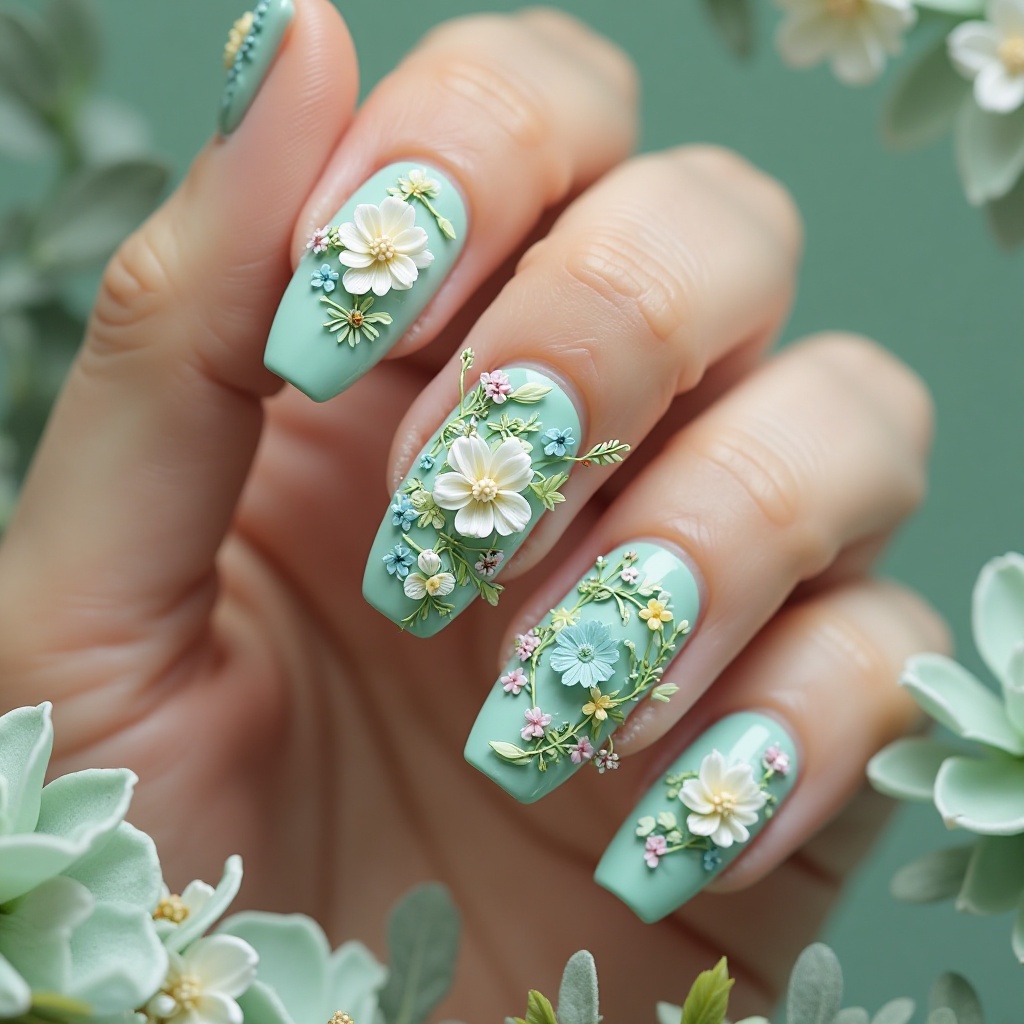
A pastel mint base with 3D floral embellishments, tiny dried flowers, or hand-painted botanical designs. The texture adds tactile interest, and the nature-inspired elements amplify spring’s garden party vibes. This maximalist approach works best on one or two accent nails while keeping others simple.
Difficulty: Beginner (with decals) to Advanced (hand-painted)
Time to complete: 30–75 minutes depending on method
Best for: Special occasions and anyone who wants something that generates compliments
Why it works: Dimensional elements on one or two accent nails against simple mint on the rest creates balance
What makes it different: Texture you can feel — it’s wearable art rather than flat color
Expect 5–7 days wear maximum on any textured design. Apply top coat every 2 days.
12. Pistachio with White Abstract Lines
Soft pistachio green base with freehand white abstract lines, squiggles, or dots creating modern art-inspired patterns. The white-on-green contrast is crisp and clean, and the abstract nature means you don’t need perfect painting skills. This design feels youthful and creative while maintaining sophistication through color choice.
Difficulty: Beginner
Time to complete: 25–30 minutes
Best for: Anyone who wants something that looks effortful without being technically difficult
Why it works: The white-on-pistachio contrast is high enough to read clearly, and abstract means imperfect lines are part of the design
What makes it different: No two nails need to match — each can have a completely different pattern
Products:
- White nail art pen: Sally Hansen ($6 at drugstores) — easier than a brush for beginners
- White polish: Essie “Blanc” ($9) with a thin brush
- Budget liner: LA Colors Art Deco white liner ($3 at Dollar Tree or drugstores)
The mindset that makes this work: Wobbly lines look intentional in abstract art. Asymmetry is part of the design. You cannot fail at this style.
Bold & Saturated Pastel Greens
13. Electric Mint
A vibrant, saturated pastel green that leans almost neon but maintains that soft pastel quality. This high-pigment shade makes a statement without going full neon, offering eye-catching color that still feels wearable. The glossy finish amplifies the color intensity and makes nails look healthy and vibrant.
Difficulty: Beginner
Time to complete: 30 minutes
Best for: Festivals, vacations, or anyone who wants maximum color impact
Why it works: High-pigment pastel is rare — most pastels are muted by nature, so a saturated mint reads as bold without going neon
What makes it different: Applying over white base makes the color genuinely vibrant rather than just “bright enough”
Best Electric Mint Polishes:
- Essie “Turquoise & Caicos” ($9) — more mint than turquoise in person
- China Glaze “Re-fresh Mint” ($7 at Sally Beauty)
- OPI “Gelato on My Mind” ($11)
Bright colors show chips more obviously than muted ones. Reapply top coat every 2 days and plan to repaint around day 5–6.
14. Celery Green with Matte Top
A unique yellow-toned pastel green reminiscent of fresh celery, finished with a matte top coat. This unconventional shade stands out from typical mint and sage options, offering a fresh perspective on green nails. The matte finish makes the unusual color feel sophisticated rather than loud.
Difficulty: Beginner
Time to complete: 30 minutes
Best for: People who want an unusual green that still reads as sophisticated
Why it works: Yellow-greens are surprisingly flattering on warm skin tones — the unexpected combo tends to generate more compliments than safer greens
What makes it different: Most “pastel green” looks are mint or sage — celery is genuinely less common and more memorable
Best Celery/Yellow-Green Polishes:
- OPI “How Does Your Zen Garden Grow” ($11 at Ulta)
- Essie “The More The Merrier” ($9 at Target)
- Sally Hansen Insta-Dri “Honeydew You Like It” ($7 at drugstores)
Plan for 4–5 days wear before the matte finish starts showing wear.
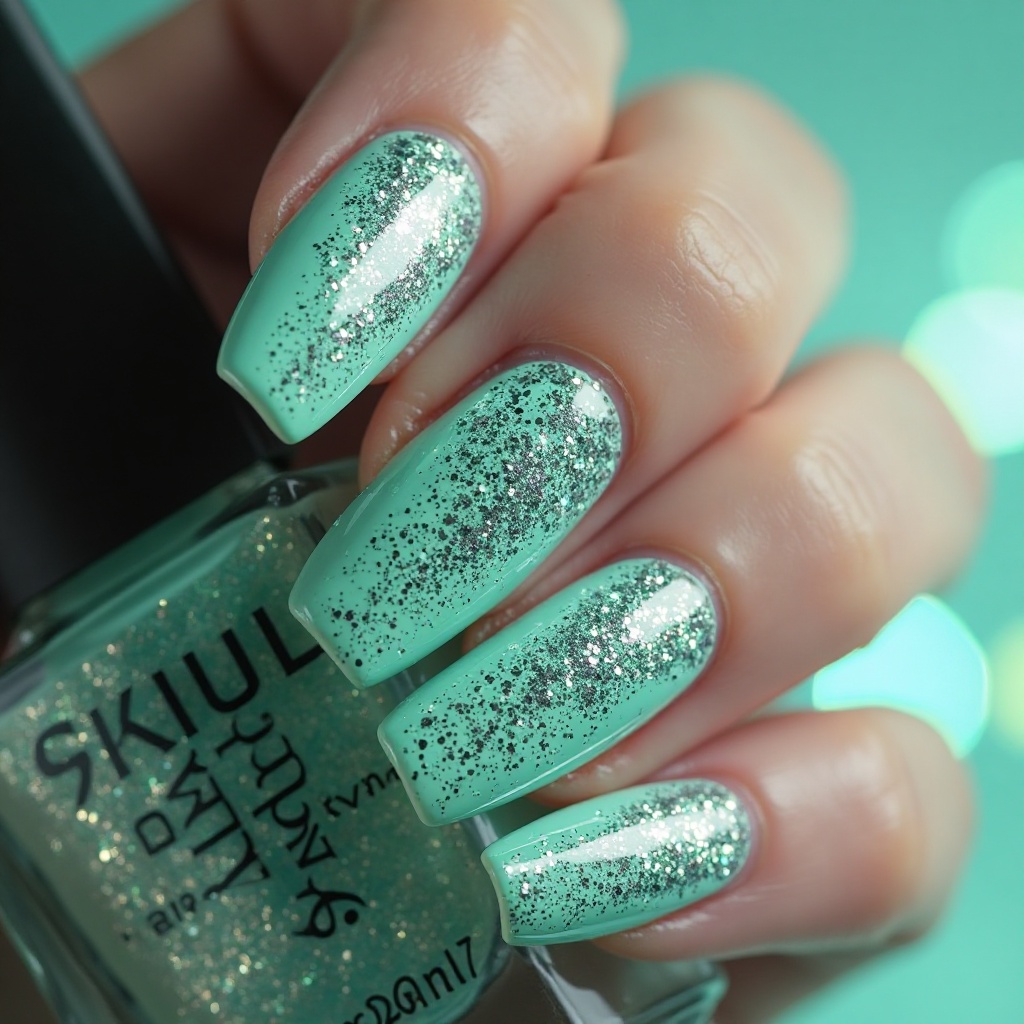
15. Seafoam Shimmer

A luminous seafoam green packed with fine silver shimmer particles that catch light with every movement. The shimmer adds dimension without looking glittery, creating a sophisticated sparkle that elevates the soft pastel base. This finish photographs beautifully and works for both day and evening wear.
Difficulty: Beginner
Time to complete: 25–30 minutes
Best for: Day-to-night wear, photographing well, anyone who wants color plus something extra
Why it works: Fine shimmer particles create depth that flat color doesn’t have — the nail looks different in sunlight versus indoor lighting
What makes it different: Shimmer adds movement without requiring any technique
Pros and Cons of Pastel Green Nails
✅ Pros
✅ Works across a huge range of skin tones — more forgiving than many colors
✅ Dozens of finish options in the same color family (matte, chrome, jelly, shimmer, sheer)
✅ Versatile enough for casual and semi-formal settings when you choose the right shade
✅ Photographs unusually well — both outdoors in natural light and indoors
✅ Pairs with most neutral wardrobe colors (white, cream, denim, black, navy)
✅ Works year-round if you pick the right undertone for the season
✅ Many shades are available at drugstores for under $10
❌ Cons
❌ Chips create a translucent edge that looks like your nails are literally growing green — harder to ignore than dark color chips
❌ Pastel green on very short nails can read as juvenile if you choose a bright or warm shade
❌ Shows dirt and oil transfer more visibly than dark colors — every fingerprint on chrome or gloss is visible
❌ Matte finish requires top coat reapplication every 3–4 days or it starts looking patchy and worn
❌ Chrome looks perfect for 3–5 days, then dulls noticeably — not practical for daily wear
❌ Yellow-toned greens (pistachio, celery) can make some skin tones look sallow — requires testing before committing
❌ Bright mint shows wear faster than muted shades — plan to repaint at day 5–6
Maintenance Guide
Days 1–3
- Avoid prolonged water exposure the first 24 hours (dishwashing, long showers without gloves)
- Apply cuticle oil morning and night — it keeps skin around the nail healthy and makes the whole manicure look better
- Check for any lifting at the edges — press down with a wood stick if you catch it early
Days 4–7
- Reapply top coat. This is the single most effective thing you can do to extend wear
- For matte nails: reapply matte top coat every 3–4 days, not just regular top coat
- For chrome: it’s starting to lose its mirror quality. Top coat won’t fully restore it — this is just the nature of chrome
Days 8–14 (gel only)
- Check for lifting at the cuticle edge. Press back down if caught early
- Apply cuticle oil daily — gel dries out the surrounding skin over time
- If a nail breaks, file smooth immediately so it doesn’t catch and tear further
When to Start Over
Regular polish: chips on 3+ nails or any chip that’s larger than 1mm — patching pastel green almost never matches well enough to be invisible. Remove and redo.
Gel: significant lifting on more than 2 nails, or any lifting that’s started lifting from the center rather than just the edges.
Common Mistakes and Fixes
Mistake 1: Chrome That Won’t Mirror
What it looks like: Powder goes on but looks cloudy or matte instead of reflective Why it happens: You used regular gel top coat instead of no-wipe gel top coat. Regular top coat has an inhibition layer that chrome can’t adhere to Fix: Soak off and start over using no-wipe top coat. There is no shortcut here — no-wipe is mandatory Effectiveness: 100% if you use the right product. Zero if you try to work around it
Mistake 2: Matte Top Coat Streaking
What it looks like: Brush marks visible in the matte finish, some areas glossier than others Why it happens: Matte top coat applied over polish that wasn’t fully dry, or you went over an area twice Fix: Let the matte dry 30 minutes, then apply one more coat in very deliberate single-direction strokes. If still bad, remove and repaint Effectiveness: A second coat fixes light streaking. Heavy streaking usually needs full removal
Mistake 3: Jelly Nails Look Cloudy Instead of Translucent
What it looks like: The sheer, glass effect is gone — nails look flat and opaque Why it happens: Colored base coat used underneath. The opaque base blocks the translucency Fix: Remove and restart with clear base coat only Effectiveness: This requires starting over — there’s no way to fix it on top
Mistake 4: Ombré Gradient is Harsh or Patchy
What it looks like: Two distinct colors instead of a smooth fade, or sponge texture is obvious Why it happens: Not enough overlap between colors on the sponge, or sponge too dry between applications Fix: Add more where the colors meet on your paper plate, then add 2–3 more sponge applications over existing gradient. Thick top coat also smooths visible texture Effectiveness: Usually fixable with additional sponge passes. Very patchy gradients may need starting over
Mistake 5: Foil Not Sticking
What it looks like: Foil lifts immediately when you try to pull the backing Why it happens: Adhesive wasn’t tacky enough when foil was applied (still wet) OR dried too much (fully dry) Fix: You need to catch adhesive at the tacky-but-clear stage — 2–3 minutes after application. Test a small area before committing Effectiveness: Good if you get the timing right
Real Wear Timeline
I wore sheer mint (regular polish) for a full two weeks to see what actually happens:
Day 1–3: Looks exactly as applied. Top coat still glossy, color even.
Day 4–5: First chips appear at the tips of the most-used fingers. The translucent edge effect is real — it doesn’t look like a standard chip, it looks like the green is growing out. Reapplied top coat; slowed further chipping.
Day 6–7: Two more chips on sides where nails catch against things. Tried to patch — the color didn’t match precisely enough to be invisible. Left it.
Day 8–10: Visible growth gap at the cuticle. This is more obvious with pastel color than dark polish. Still wearable but starting to look neglected.
Day 11–14: Multiple chips, growth gap, slightly yellowed appearance at the cuticle from natural oils. Removed on day 12.
Verdict: For regular polish, 5–7 days is a realistic lifespan for pastel green before it starts looking rough. Gel gets 12–14 days easily. Chrome (tested separately) peaked around day 3 and looked noticeably dull by day 6.
Pastel Green and Skin Tone
The standard “match your undertones” advice partially applies here, but with an important caveat:
Cool (pink/rosy) undertones work best with mint and seafoam — the color-on-color harmony looks clean. Avoid yellow-greens like celery and pistachio, which will fight with pink undertones.
Warm (yellow/golden) undertones can technically wear any pastel green, but sage and pistachio tend to look most harmonious. Avoid very icy mints, which can wash out warm skin.
Olive skin tones are honestly the luckiest here — most pastel greens look striking against olive skin because the contrast is naturally high.
The actual test: paint one nail. Look at your whole hand in natural light. If your skin looks gray or sallow, wrong green. If your skin looks warm and healthy, you’ve found your shade.
FAQ
Does pastel green work on dark skin tones? Yes, and it often looks especially striking. Brighter mints and saturated shades tend to create better contrast on deeper skin tones than very muted or gray-toned greens. Sage can sometimes read as too similar to the skin’s undertones — a true mint or seafoam usually reads more clearly.
How do I make pastel green nails polish last longer? Wrap the tips with each layer (drag the brush across the very edge of the nail), apply a new layer of top coat every 2–3 days, and avoid extended water exposure the first 24 hours. These three things together make the biggest difference in regular polish longevity.
Can I mix regular polish and gel for chrome nails? No. Chrome powder requires no-wipe gel top coat to adhere — it won’t work over regular polish. The process has to be entirely gel-based.
Will pastel green stain my nails? Lighter pastel greens with yellow pigment can leave faint staining over time, especially without a base coat. Mint and cool-toned greens stain less than warm yellowy-greens. Always use base coat; if you already have slight staining, a whitening treatment ($4–6 at most drugstores) or buffing lightly usually clears it.
A good place to start if you’re new to pastel green nails is Milky Mint Glaze — it’s the most forgiving, requires no equipment, and works on any nail length or shape. From there, Matte Seafoam Nude and Pistachio French Tips are natural next steps once you’re comfortable with the color family. If you want to try chrome at some point, plan it around an event so you get the full effect during its best window.