25 Unique May Nail Ideas That Stand Out This Month
Unlike most May nail ideas roundups that just show you a grid of images, this article gives you the full picture: real time estimates, the exact products I use, what’s beginner-friendly, what’s genuinely hard, and what to expect when you sit down and actually try these at home.
My favorite month is May nails—the palette is wide open, sitting between cool spring softness and warm early-summer brightness—and I’ve tested every design here on my own nails.
How to Choose the Best May Design for You {#how-to-choose}
For your first time doing nail art: Start with a single floral accent nail or a basic ombre. Paint all other nails in a plain solid. You’re only committing to getting one nail right—that alone makes a huge difference in how the session feels.
If you have a professional or office job: Soft French tips, pale lavender, or a nude base with a single tonal flower on the ring finger. Polished enough to look intentional, understated enough to stay appropriate.
If you want something for a special event: Pearlescent white with 3D florals, or soft pink gel with hand-painted anemones. These photograph beautifully and hold up through a full event day.
If you’re comfortable with nail art: Botanical full-cover designs, negative space florals, or the pressed-flower encapsulation look are all within reach and worth the time investment.
If you have short nails: Soft solid shades or simple dot-work. Avoid heavy horizontal design elements—they visually shorten nails that are already short.
If you change your mind often: Skip hard gel or acrylic. Stick with regular gel polish or even regular polish so removal is quick and clean when you want something new in two weeks.
25 May Nail Ideas
Soft Florals
1. White Daisy on Lavender
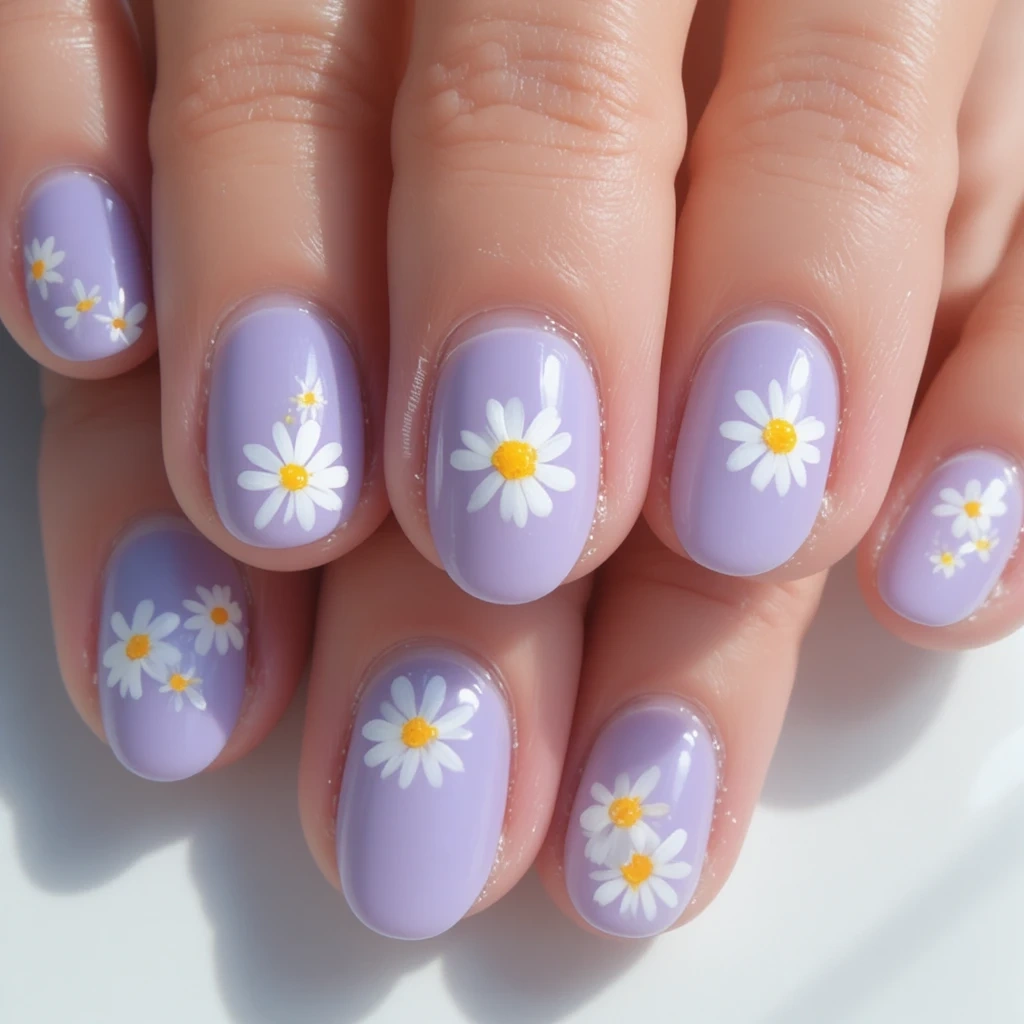
A soft lilac base with small white daisies clustered on one or two nails using a dotting tool. The daisies have five oval petals each and a yellow center dot, giving the whole set a cottage-garden feeling without being too precious. Pairs well with any casual spring outfit.
- Difficulty: Beginner
- Time to complete: 25 minutes
- Best for: First-time nail art attempts
- Why it works: The daisy shape forgives imperfect circles—slightly uneven petals actually look more natural, not worse.
- What makes it different: The lavender base stops white flowers from reading as “too bridal,” keeping the look grounded and wearable daily.
Key product: OPI Nail Art Dotting Tool ($6, Ulta) — the dual-ended tip gives you two petal sizes without buying multiple tools.
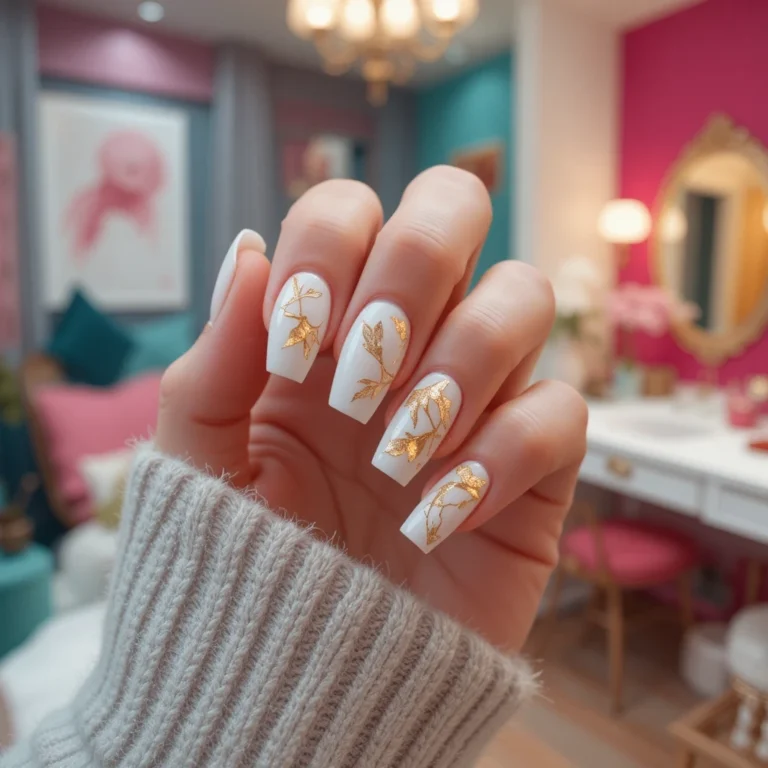
2. Cherry Blossom Branch
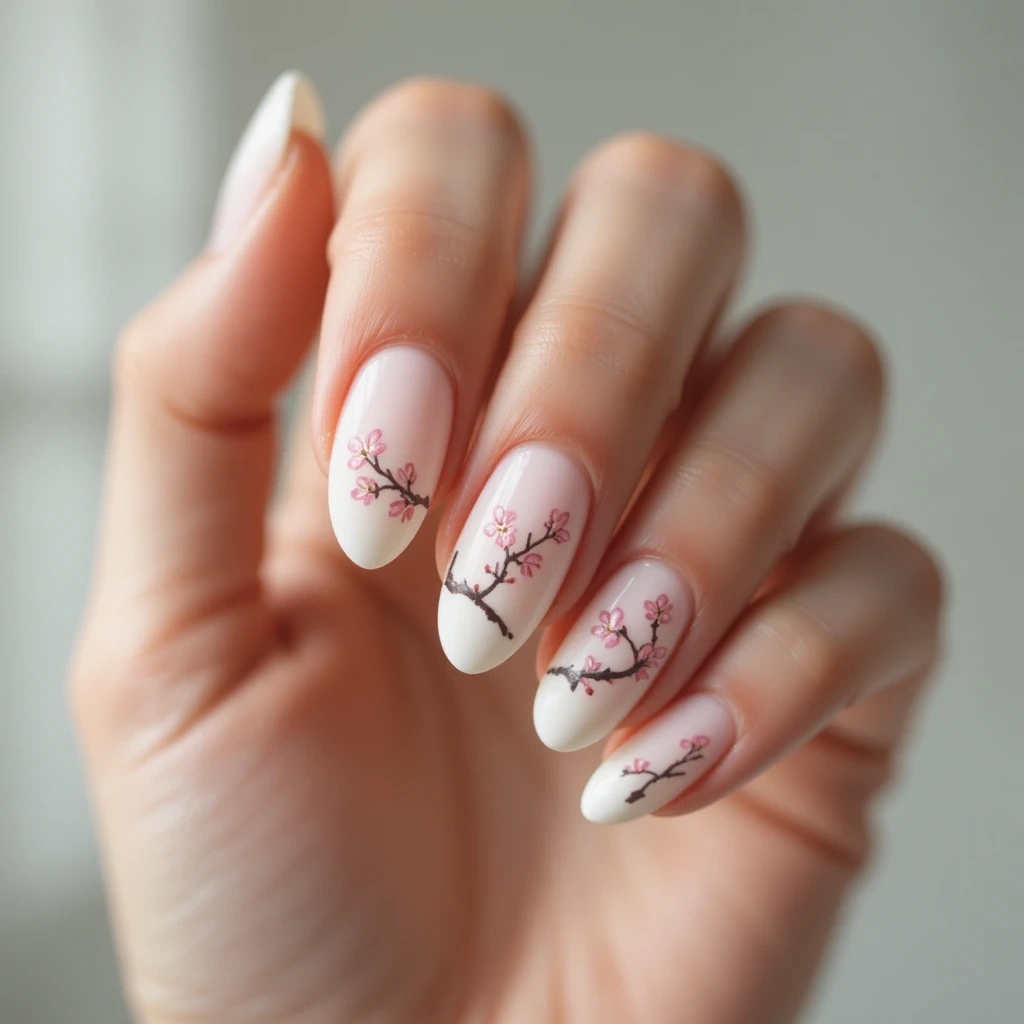
Delicate dark-brown branch lines with clusters of pale pink four-petal blossoms on a white or very light nude base. The branches extend from the base or side of the nail and feel airy and Japanese-inspired. Works beautifully on longer nails but still reads well on shorter ones if you scale down the branch.
- Difficulty: Intermediate
- Time to complete: 40 minutes
- Best for: People who’ve done one or two floral designs before
- Why it works: The sparse design on a pale base feels modern and editorial rather than overly crafty.
- What makes it different: Unlike roses, which require layered petal technique, these blossoms are 4–5 dots around a central dark dot—achievable without surgeon-level steadiness.
DIY at home: BORN PRETTY Nail Art Pen in brown for the branches, dotting tool with OPI Bubble Bath for pink petals. Simplify by doing branches on only two accent nails instead of all five. Simplification brings this to about 20 minutes.
Key product: BORN PRETTY Nail Art Pen Set ($12, Amazon) — the brown pen gives consistent line control; regular thin brushes drag too much on the nail surface.
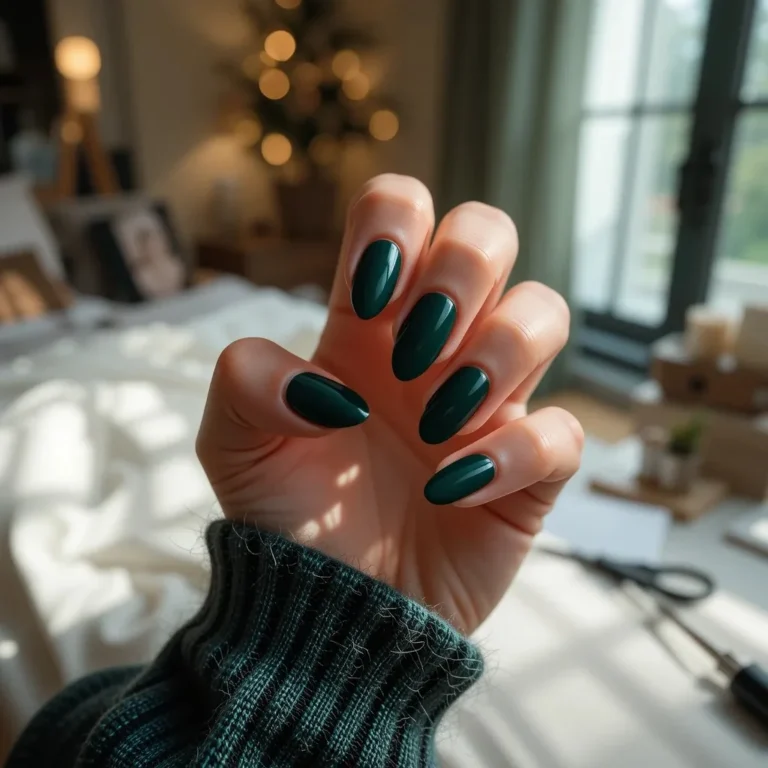
3. Pressed Flower Encapsulation
Real or faux dried pressed flowers embedded under a thick gel topcoat, creating the look of botanicals preserved inside glass. The base can be nude, white, or deep forest green. The 3D depth of these nails is genuinely eye-catching in person—photos don’t fully capture how they look.
- Difficulty: Intermediate
- Time to complete: 55 minutes
- Best for: Gel polish users with a UV lamp at home
- Why it works: The texture and dimension of actual dried flowers creates something no regular polish technique can replicate.
- What makes it different: Even when the flowers aren’t perfectly placed, the organic variation looks intentional. It’s one of the more forgiving “advanced-looking” techniques.
DIY at home: Wokoto Dried Flowers for Nails ($8, Amazon). Apply over cured gel base, press flowers in, then seal with 2–3 layers of thick gel topcoat, curing 60 seconds each layer. Requires a UV/LED lamp.
Key product: Beetles Gel Polish No Wipe Top Coat ($9, Amazon) — the thick formula seals flowers flat without the bumpy surface you get from thin topcoats.
4. Abstract Anemone

Large, loose anemone flowers painted on a white or pale grey base with thin black line centers and dark dot stamens. The petals are slightly translucent and overlapping, creating a watercolor effect. Modern, chic, and photographs beautifully thanks to the contrast of dark centers against pale petals.
- Difficulty: Advanced
- Time to complete: 60 minutes
- Best for: People who enjoy nail art as a relaxation practice and have time to spare
- Why it works: The abstract looseness means it doesn’t need to be botanically perfect—impressionistic petals look more artistic than overly rigid ones.
- What makes it different: Most DIY florals are small and busy; anemones are large and bold, making one flower per nail feel like enough.
Key product: Migi Nail Art Striper Brush ($6, Amazon) — the pointed tip lets you shape petals at the tip with precision.
5. Vintage Rose Bouquet
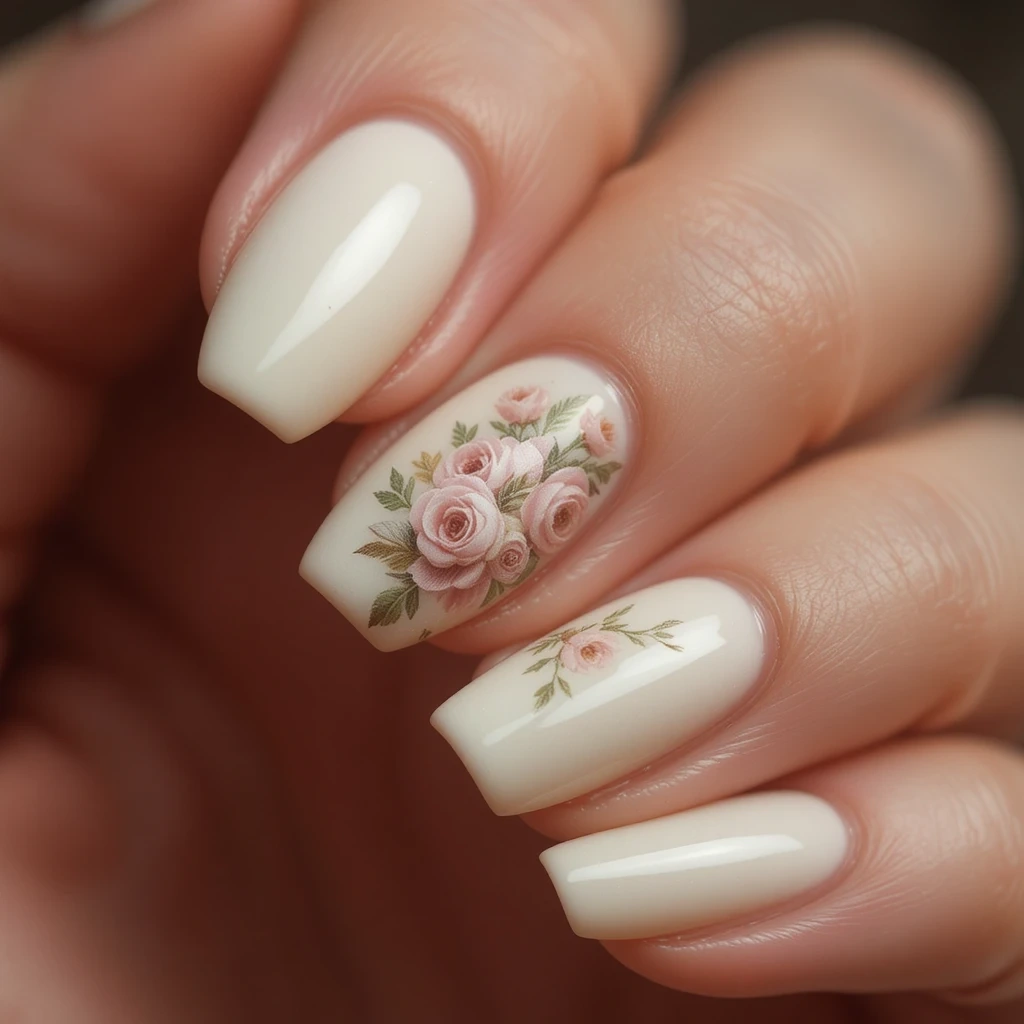
Small, tightly painted roses in blush, dusty rose, and ivory on a soft cream base—arranged as a loose bouquet on the ring finger with tiny leaf details. The rest of the nails stay plain cream. The vintage color palette gives these a timeless quality that looks very intentional and polished.
- Difficulty: Advanced
- Time to complete: 70 minutes
- Best for: People who want something genuinely show-stopping for a special occasion in May
- Why it works: The limited palette (cream, blush, dusty rose) keeps even a complex floral design feeling cohesive rather than overwhelming.
- What makes it different: The vintage muted tones separate this from the typical bright-pink DIY rose look that can read as more amateur.
Key product: Gellen Gel Nail Art Flat Brush ($9, Amazon) — the flat tip creates the curved petal strokes roses require; round brushes don’t give the same control.
6. Wisteria Drape
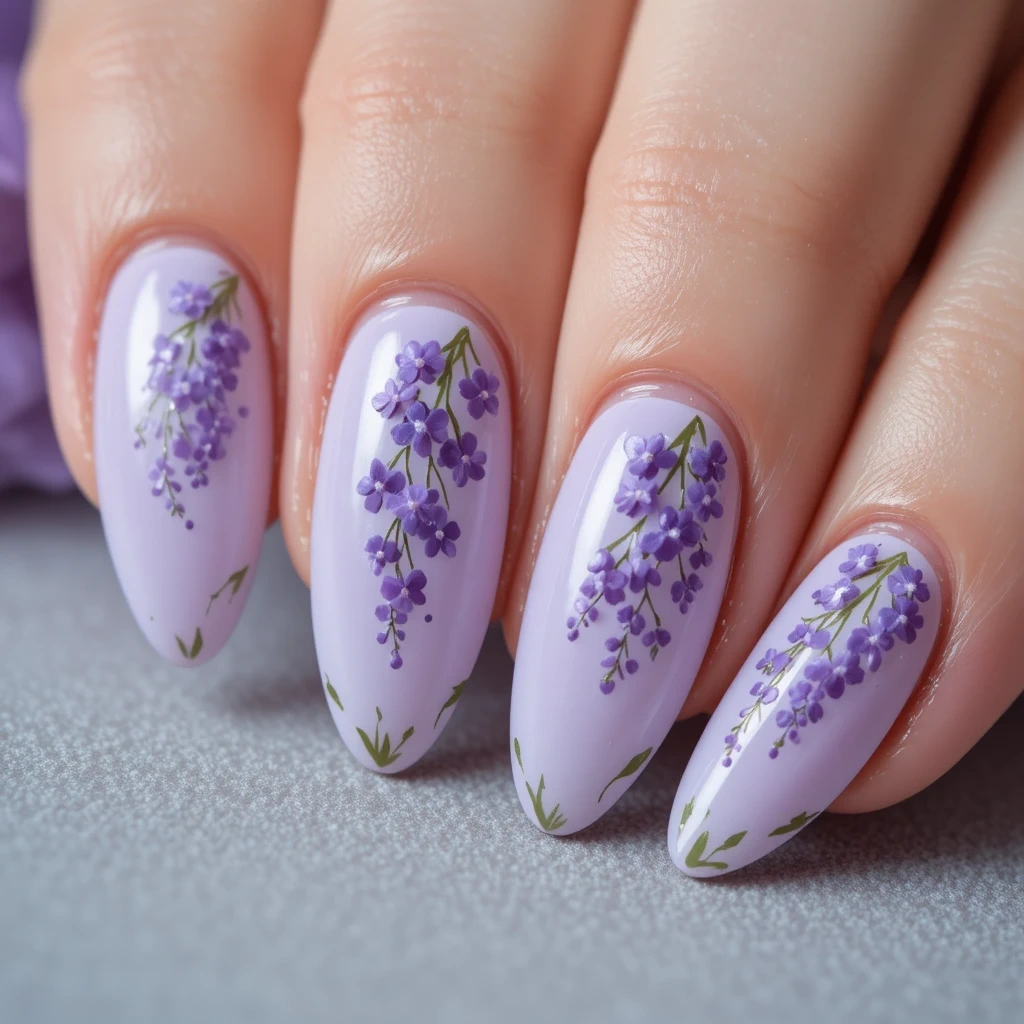
Long wisteria flower clusters painted vertically down the nail in cascading purple-to-lavender shades, with tiny individual floret dots creating the drooping panicle shape. Dark green curved leaves added at the cuticle complete the vine effect. The design works especially well on longer nail shapes.
- Difficulty: Intermediate
- Time to complete: 50 minutes
- Best for: People with longer nails who want a botanical design that uses vertical space
- Why it works: The vertical draping shape is naturally suited to the rectangular canvas of a nail, making this design feel purpose-built rather than adapted.
- What makes it different: Most floral nail art sits at the base or tip; wisteria fills the entire nail with the drooping cluster, which feels more immersive.
Key product: Moyra Stamping Polish No. 25 Purple ($7, Amazon) — the high-pigment formula makes the dots rich and opaque even at small sizes.
Pastels & Solids
7. Pistachio Green with Gold Foil
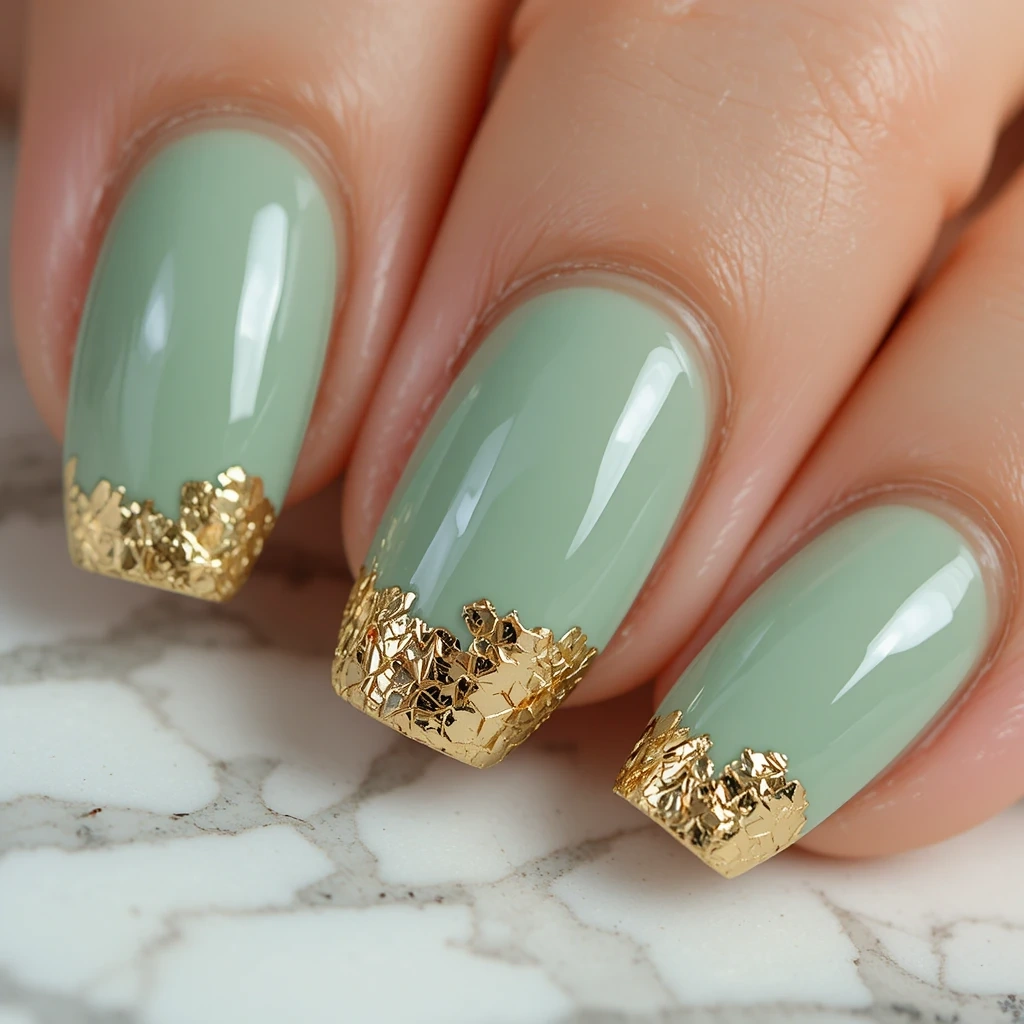
A single muted sage-pistachio green on all nails with irregular gold foil pieces pressed at the cuticle or tip of two to three accent nails. One of those “people will ask where you got your nails done” looks that is genuinely easy to pull off at home.
- Difficulty: Beginner
- Time to complete: 20 minutes
- Best for: Minimal effort, maximum compliments
- Why it works: Muted green is having a major moment, and the gold foil addition pushes it from “plain” to “styled” with almost no skill required.
- What makes it different: Foil looks slightly different every time it’s applied—no two nails are identical, which is beautiful rather than a problem.
Key product: Modelones Gold Foil Flakes ($7, Amazon) — these come with a small applicator stick that gives more control than tweezers when placing individual pieces.
8. Lilac Ombre into White
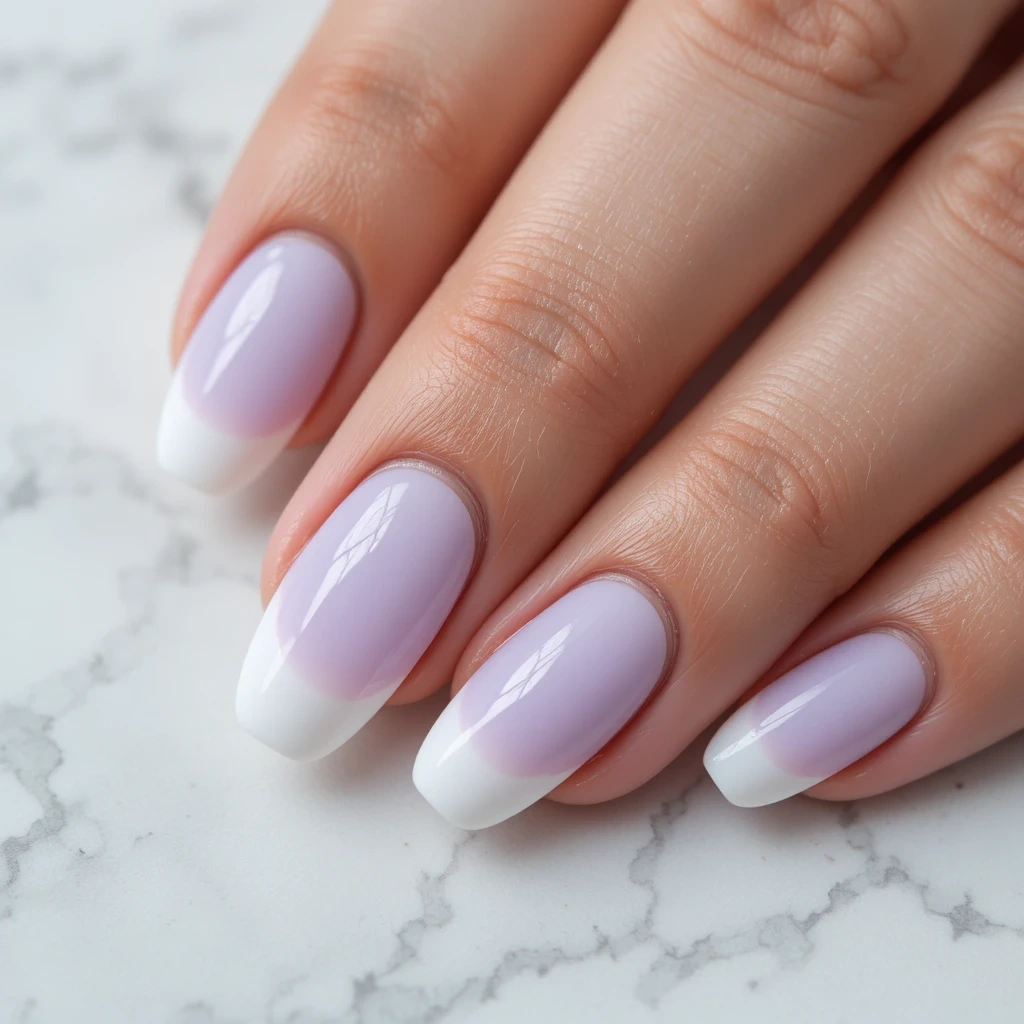
Pale lilac at the base of the nail fading into crisp white at the tips, creating a dreamy soft gradient. Genuinely flattering on most skin tones and works on any nail length.
- Difficulty: Beginner
- Time to complete: 30 minutes
- Best for: Anyone who wants a salon-looking result without salon skills
- Why it works: The sponge ombre technique is extremely forgiving—uneven blending looks like intentional texture.
- What makes it different: Most DIY ombres use bold colors that show every error; lilac-to-white is forgiving and beautiful.
DIY at home: Essie Lullaby for the lilac ($10, Ulta), OPI Funny Bunny for white. Sponge method. Seal with Seche Vite. 30 minutes including dry time.
Key product: Real Techniques Miracle Sponge ($5, Ulta) — the dense foam transfers polish more evenly than a cosmetic sponge from a compact.
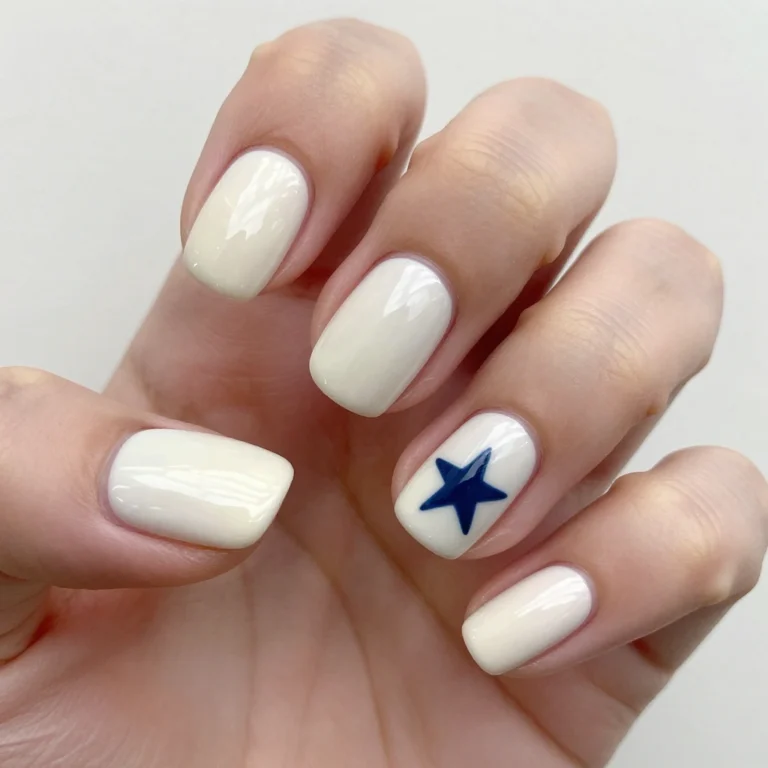
9. Butter Yellow Solid
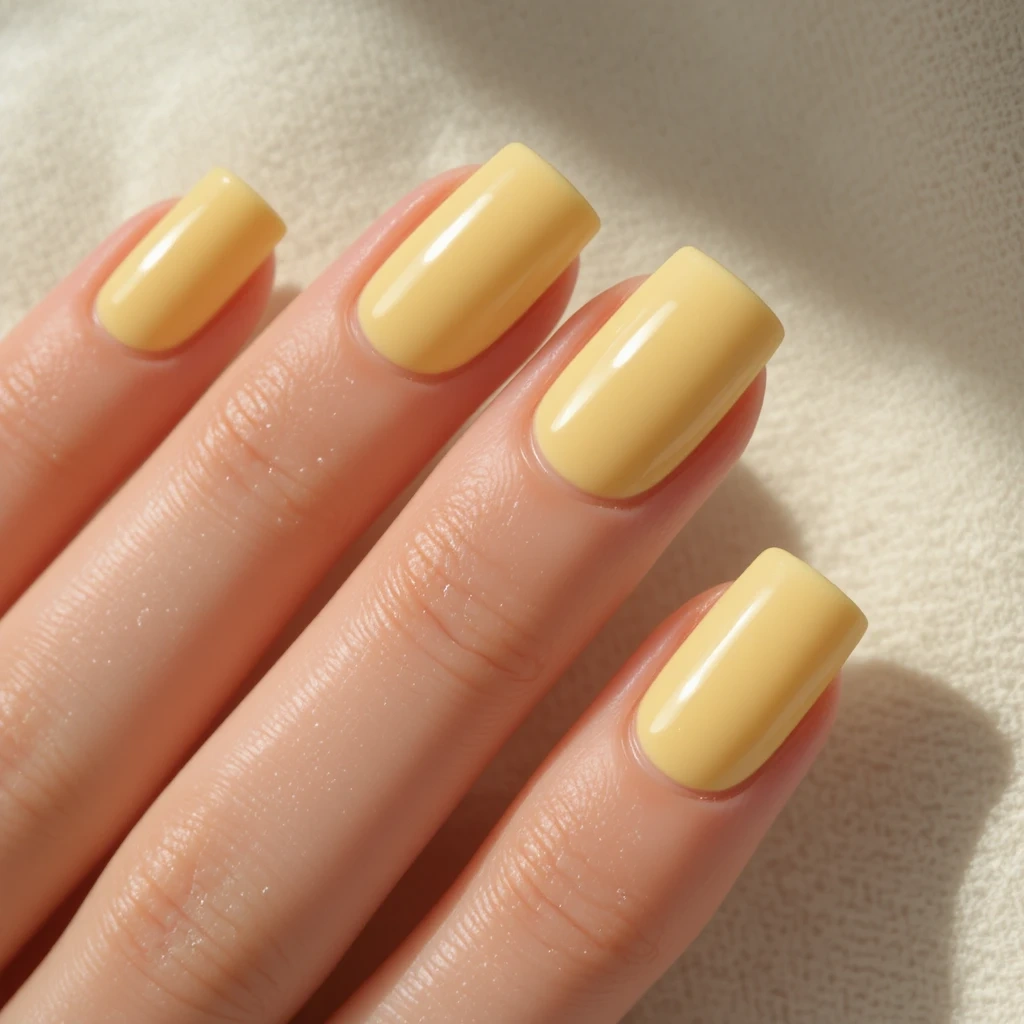
Warm, creamy butter yellow on all nails. Not bright canary, not pale lemon—that exact mid-tone that reads like warm sunlight. The shade I’ve gotten more May compliments on than any other color, and it requires zero nail art skills.
- Difficulty: Beginner
- Time to complete: 15 minutes
- Best for: People who want a pop of color with no nail art
- Why it works: Yellow is having a moment in spring fashion, and this mid-tone hits the sweet spot between trendy and wearable on all skin tones.
- What makes it different: Most yellows are either too neon or too pale; this specific shade avoids both extremes.
Key product: Essie Sunshine State of Mind ($10, Ulta) — this formula doesn’t streak on the first coat the way most yellows do.
10. Coral with Terracotta Tips

A warm coral base with a slightly deeper terracotta French-tip line replacing the traditional white. The warm tonal combination feels earthy and Mediterranean, especially on darker skin tones.
- Difficulty: Beginner
- Time to complete: 25 minutes
- Best for: People who like the French tip silhouette but find white too stark
- Why it works: Tonal French tips are current and interesting without requiring any freehand painting.
- What makes it different: The warmth of coral-on-terracotta reads as a considered design rather than a standard French manicure.
DIY at home: OPI In My Cord-ovan for the terracotta tip ($12, Ulta), Sally Hansen ColorStay in Coral Reef for the base ($8, drugstores). Use French tip guide stickers for a clean line. 25 minutes.
Key product: Makartt French Tip Guide Stickers ($6, Amazon) — peel-and-stick guides give a consistently clean tip line with no freehand painting.
11. Baby Blue with White Cloud Accents
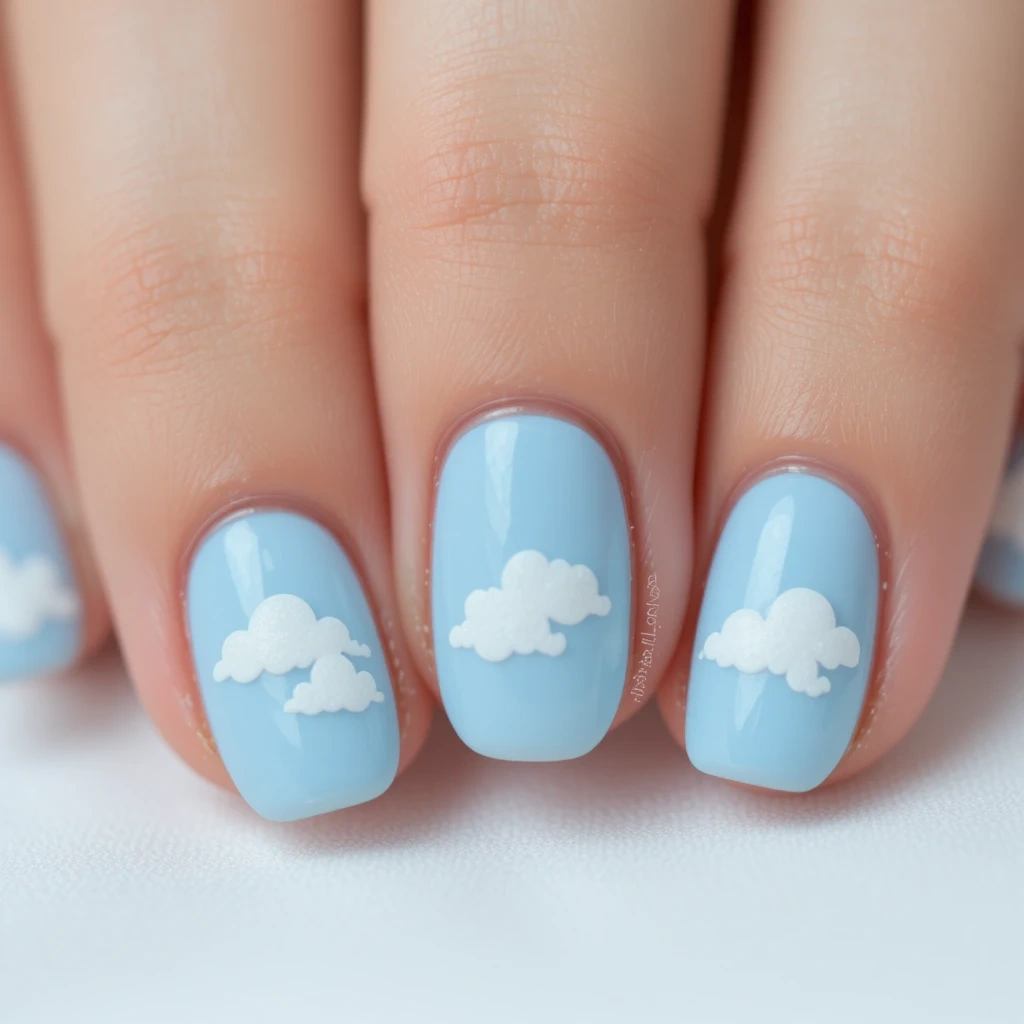
Soft sky blue base with tiny fluffy white cloud shapes painted on one or two nails. The clouds are simple—overlapping circles for the fluffy top edge and a flat straight base—but the effect is dreamy and nostalgic. Very popular right now and genuinely achievable for beginners.
- Difficulty: Beginner
- Time to complete: 25 minutes
- Best for: People who want something playful and current without it feeling too childish
- Why it works: The cloud motif is simple enough to execute with dots and curves, yet the finished look is recognizable and charming.
- What makes it different: Sky blue is a very on-trend shade for 2025, making this feel current without looking like you’re chasing a trend too literally.
Key product: Essie Bikini So Teeny ($10, Ulta) — the soft cornflower shade reads as sky blue without going neon or too grey.
Botanical & Nature-Inspired
12. Monstera Leaf Negative Space
Dark forest green base with the iconic split-leaf monstera shape left as a bare nail cutout. The unpainted portion shows the natural nail, creating a graphic negative space effect. Looks architectural and intentional rather than unfinished.
- Difficulty: Intermediate
- Time to complete: 35 minutes
- Best for: People who prefer bold graphic designs over soft florals
- Why it works: The monstera leaf is a recognizable enough shape that even a simplified version reads clearly.
- What makes it different: Most botanical nail art puts design on top of color; this inverts the relationship for a much more original effect.
Key product: Kiara Sky Liquid Latex Peel-Off Barrier ($8, Amazon) — applying this around the cutout shape before painting gives perfect edges without any freehand steadiness.
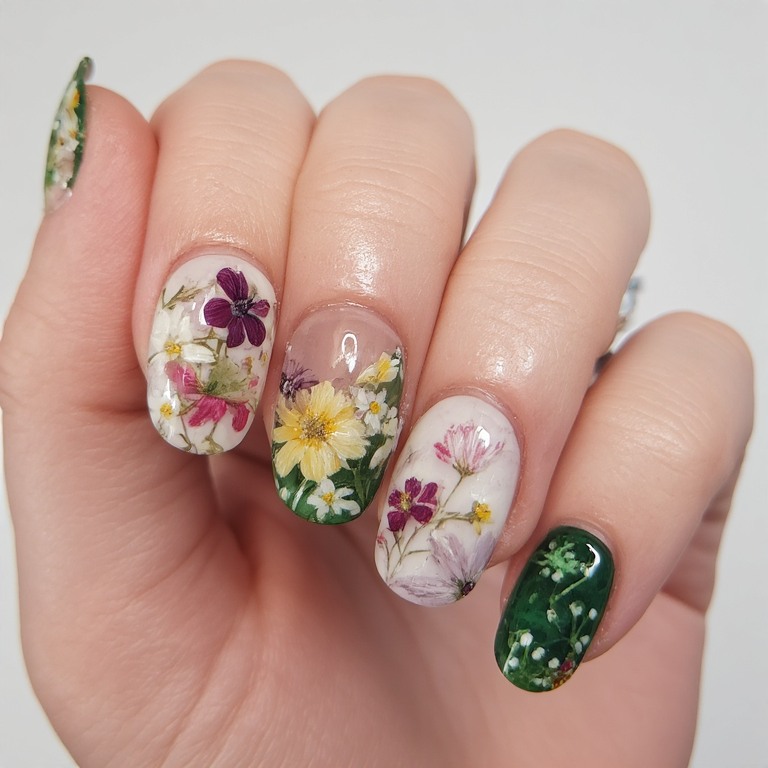
13. Watercolor Wildflower Field
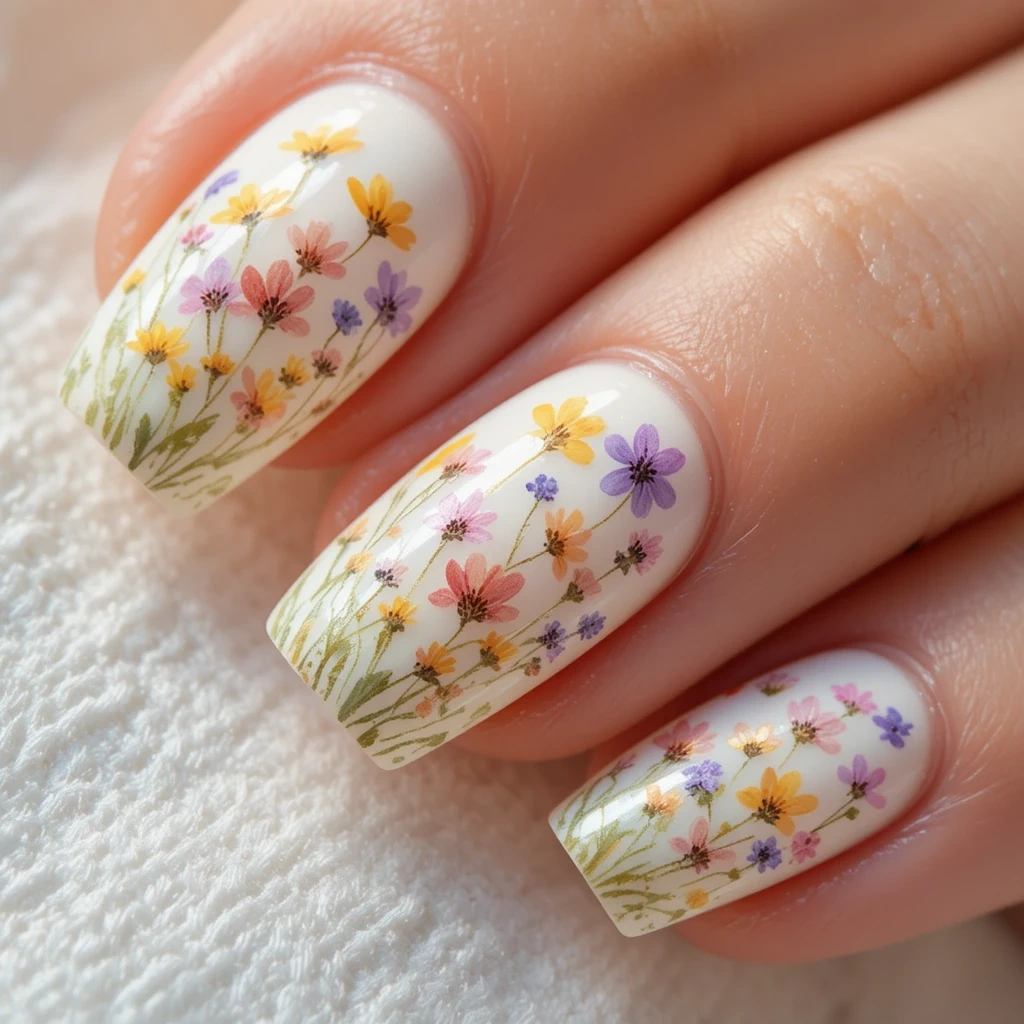
A white base with loose impressionistic wildflowers—tiny yellows, pinks, and purples scattered across the nail with thin green stem lines—creating the feeling of looking down at a spring meadow. Intentionally loose and organic; tight precision actually makes it look worse.
- Difficulty: Intermediate
- Time to complete: 45 minutes
- Best for: People who enjoy the process of painting and have 45 uninterrupted minutes
- Why it works: The watercolor aesthetic is inherently forgiving—thin, diluted strokes that bleed slightly look like an intentional style choice.
- What makes it different: Unlike symmetrical florals, this design uses randomness as part of the design, which takes the pressure off precision completely.
Key product: Gellen Gel Nail Art Liner Brushes Set ($9, Amazon) — the multi-size set lets you vary stem thickness and flower size with one kit.
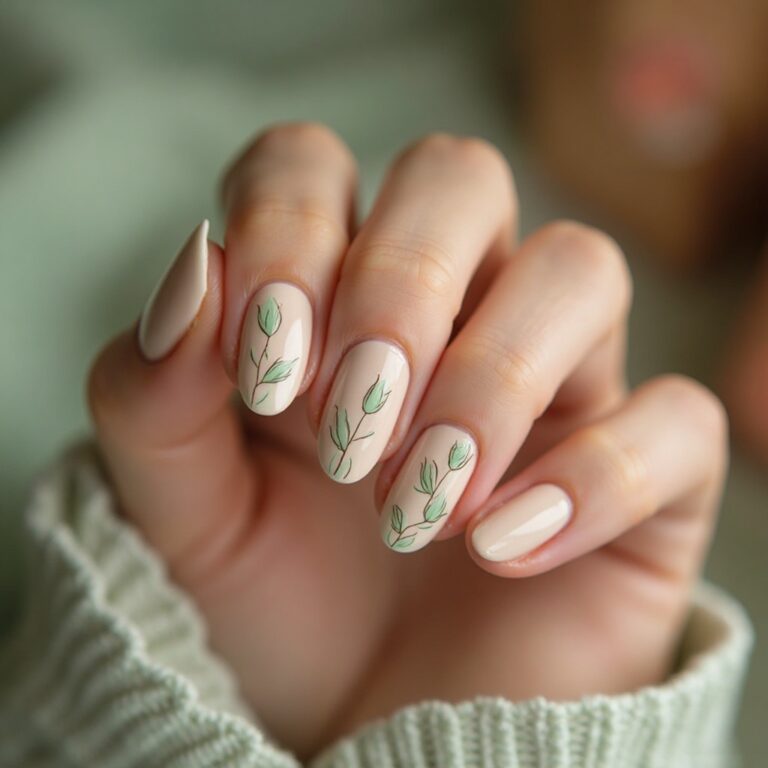
14. Eucalyptus Multi-Green Mix
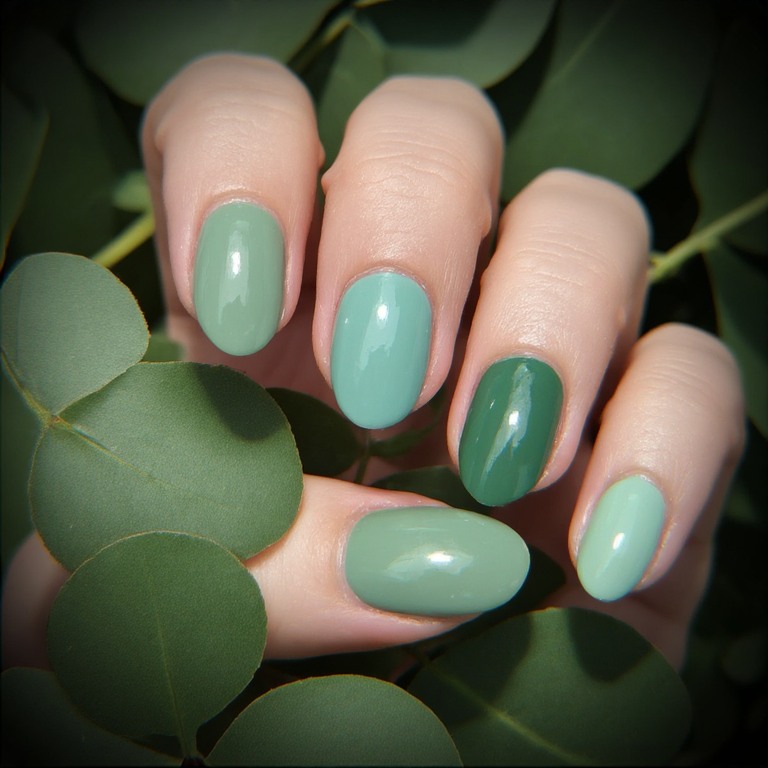
A mix of soft sage, dusty mint, and pale eucalyptus green across different nails—no art required, just a curated set of green-family shades worn together. Earthy, herbal, very of-the-moment.
- Difficulty: Beginner
- Time to complete: 20 minutes
- Best for: People who want variety without committing to nail art
- Why it works: The mismatched-but-coordinated look signals intentionality without requiring any brushwork.
- What makes it different: Using five different greens across ten nails (two nails per shade) creates a curated set effect rather than a random collection.
Key product: Essie Navigate Her ($10, Ulta) — the grey-green dustiness anchors the whole set and stops it reading too cheerful.
15. Lilac with Tiny Bumble Bee Accent
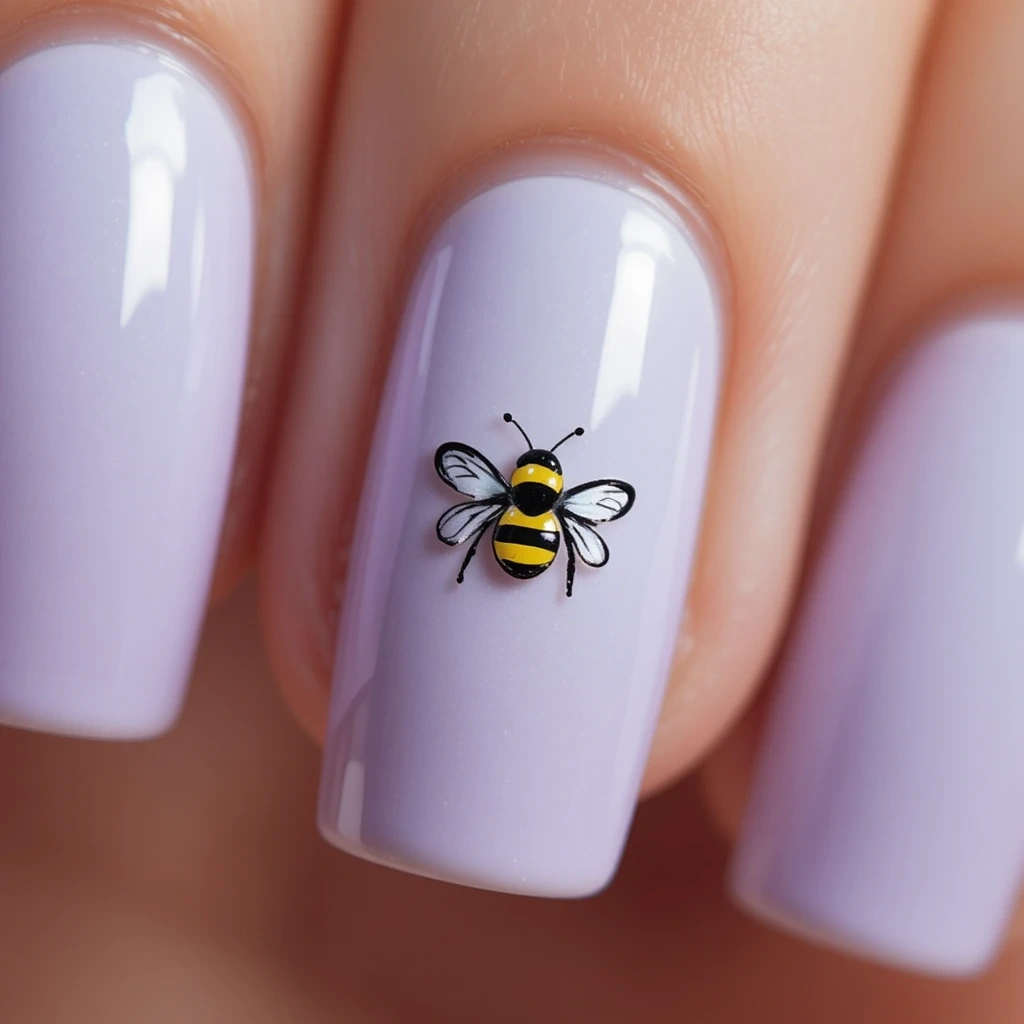
All nails in soft lilac with one accent nail featuring a small hand-drawn bumble bee on a white or pale yellow base. The bee is small—about the size of a pencil eraser—and sits alone on a blank nail.
- Difficulty: Beginner
- Time to complete: 20 minutes
- Best for: People who want something that makes people smile when they see it
- Why it works: The single small bee on a plain nail reads as confident and intentional rather than busy.
- What makes it different: The bee motif is spring-specific in a subtle way—it doesn’t scream “themed” the way a butterfly or flower accent might.
DIY at home: Use a nail art pen to draw the bee body (black oval), wings (two small white teardrop shapes), and yellow stripes. Simple enough to do freehand even if you’re not confident with brushwork.
Key product: BORN PRETTY Nail Art Pen in Black ($12, Amazon) — the fine tip lets you draw the bee’s body, stripes, and wing outlines in one tool.
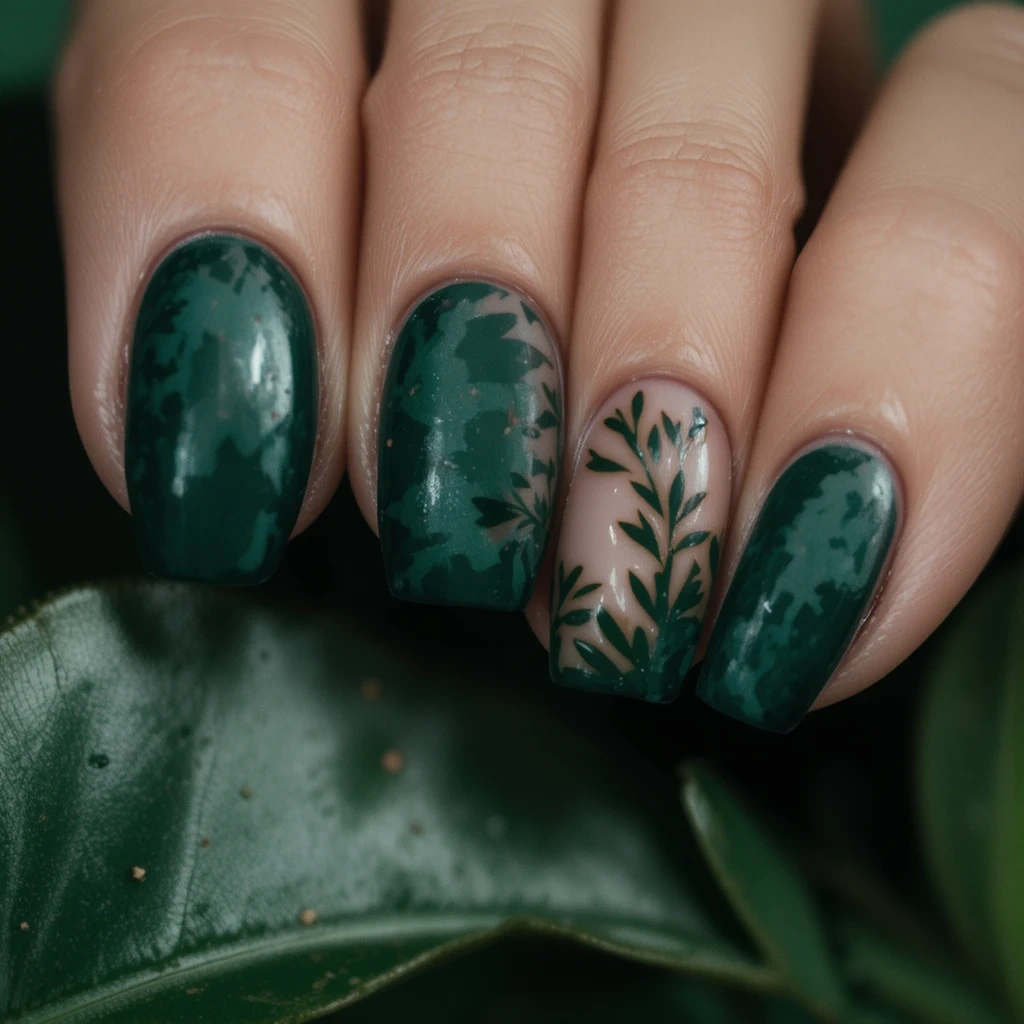
16. Fern and Foliage Full Cover
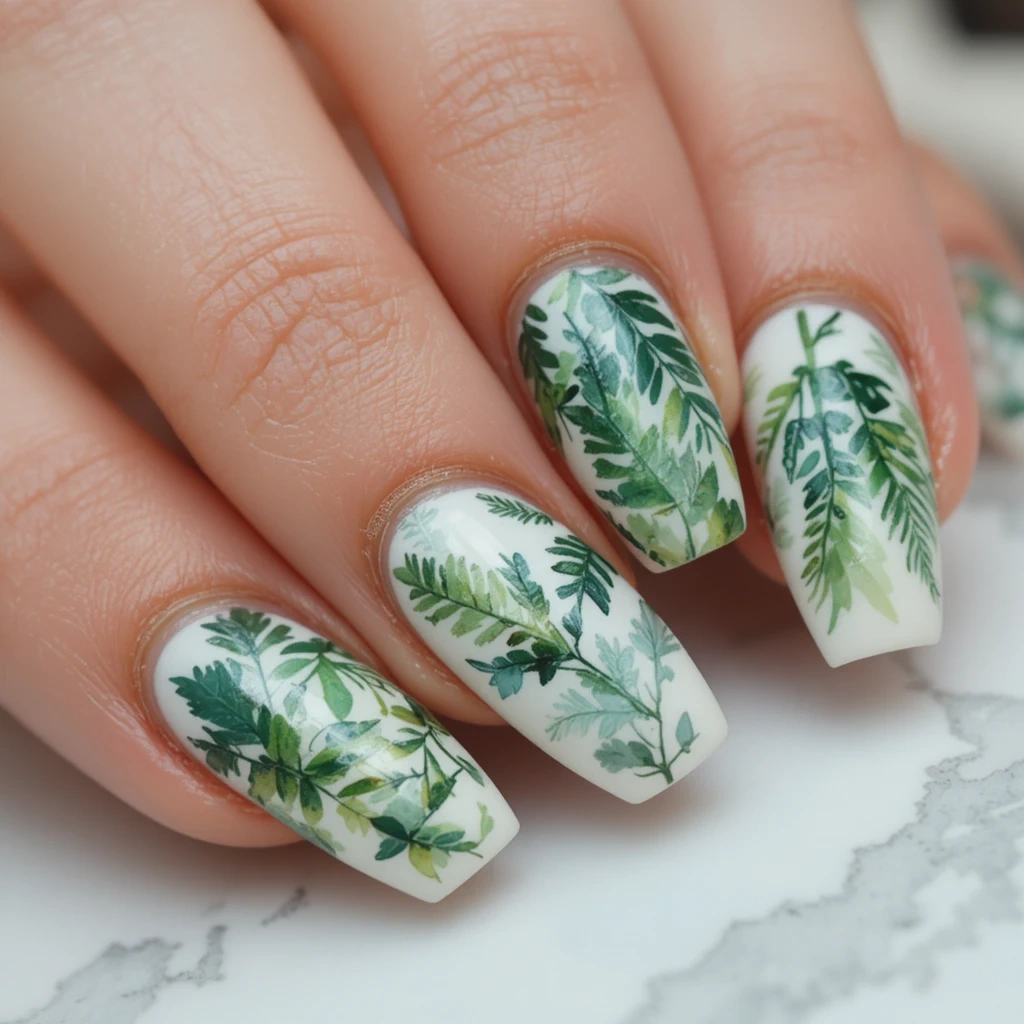
Each nail entirely covered with painted fern fronds and leaf shapes in varying greens on a white base, creating a dense botanical illustration effect. No florals—just leaves and greenery, which reads as sophisticated and design-forward.
- Difficulty: Advanced
- Time to complete: 75 minutes
- Best for: People comfortable with a fine nail art brush who want something genuinely show-stopping
- Why it works: The all-green palette with no accent colors creates a graphic consistency that elevates the complexity of the design.
- What makes it different: Full-cover nail art with no blank space reads much more editorial than designs that use the nail as a canvas with a small design on it.
DIY at home: White base, then build fern shapes with a fine liner brush using 3–4 green shades (dark forest, olive, sage, lime). Work nail by nail so the paint doesn’t dry before you add variation. This design genuinely requires practice.
Key product: Migi Nail Art Thin Brush ($6, Amazon) — the elongated tip creates natural-looking tapered leaf shapes that rounder brushes can’t.
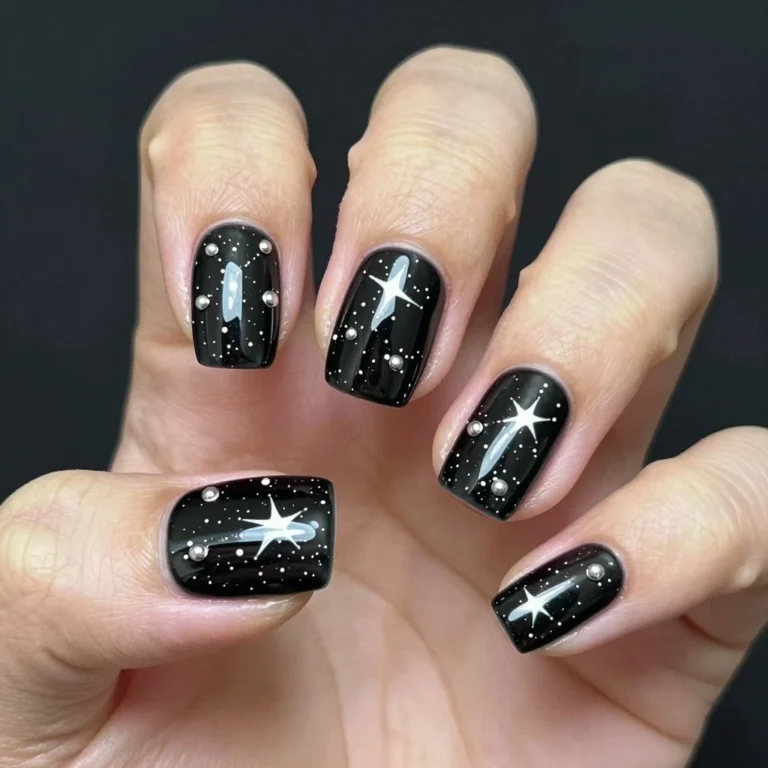
17. Dandelion Seed Dispersal
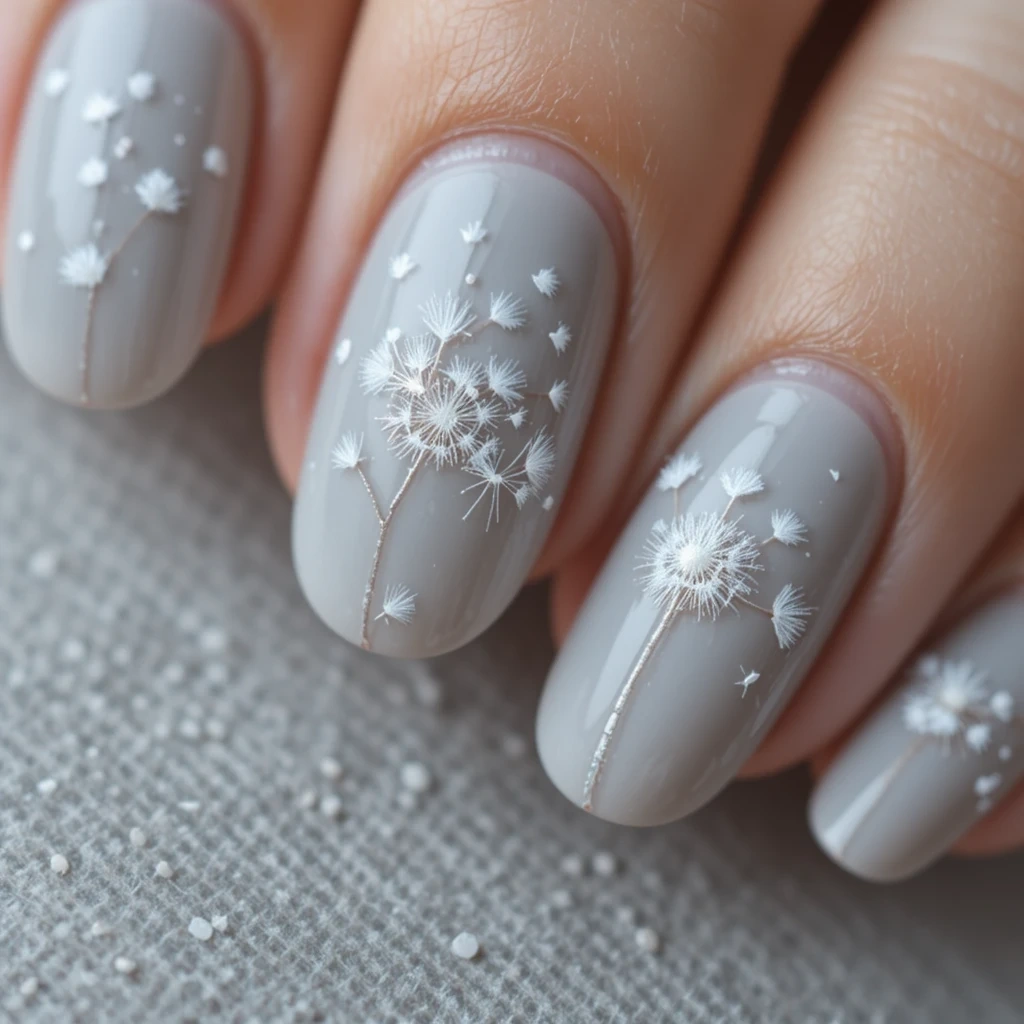
White puff-ball dandelion heads with long, thin seed lines extending outward like tiny floating clocks, painted on a soft grey or pale blue base. The seeds drift in one direction as if caught by wind, creating a sense of movement and lightness that’s very unique for nail art.
- Difficulty: Intermediate
- Time to complete: 40 minutes
- Best for: People who want something genuinely original that no one else at the office has
- Why it works: The fine radiating lines are achievable with a striper brush and look far more intricate than the actual skill required.
- What makes it different: Dandelions are rarely used in nail art, which makes this instantly distinctive among floral designs.
DIY at home: Pale grey base (Essie Minimalist is perfect at $10). Use a striper brush with white for the seed lines radiating from a small central dot. Keep the lines thin and slightly uneven—that imperfection creates the floating effect.
Key product: Migi Nail Art Striper Brush ($6, Amazon) — the only brush that makes these fine radiating lines achievable without frustration.
Modern & Graphic
18. Negative Space Half-Moon in Blush
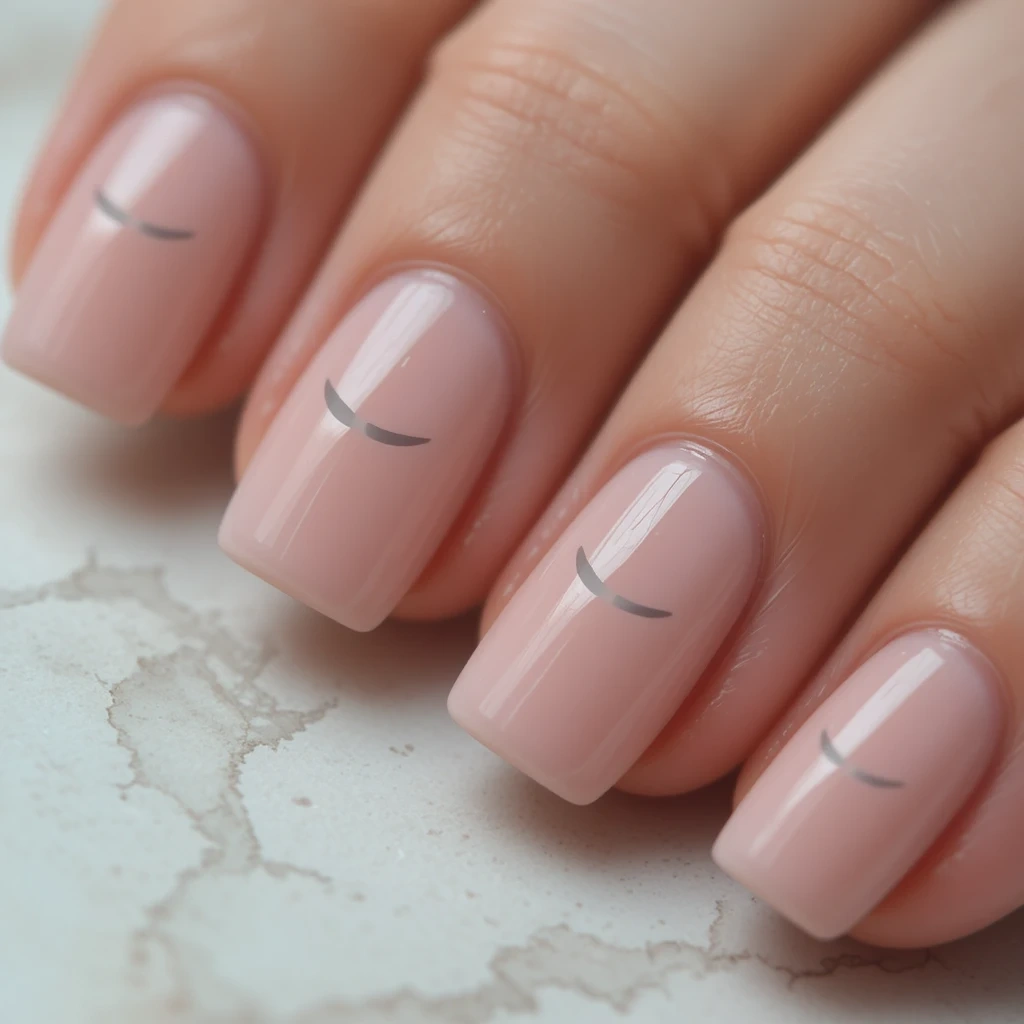
The lower half of the nail left bare (natural nail showing) with a perfect blush-pink half-moon shape painted from the middle upward to the tip. The sharp line between the bare nail and the color creates a graphic, architectural feel that’s very current.
- Difficulty: Intermediate
- Time to complete: 30 minutes
- Best for: People who prefer clean geometric designs over florals
- Why it works: The contrast between the natural nail and the color is striking without requiring any artistic skill—it’s all about the clean line.
- What makes it different: The traditional half-moon puts color at the base; inverting it to put color at the tip is unexpected and more modern.
DIY at home: Use a small round reinforce sticker (the kind used for binder holes) placed at the smile line, paint blush over the top half, then remove the sticker while wet. OPI Bubble Bath is the perfect blush shade ($12, Ulta).
Key product: Avery Hole Reinforcement Labels ($4, any office supply store) — the curved edge gives a perfectly clean moon line; it’s an old trick but it works every time.
19. Chrome Powder Lilac Ombre
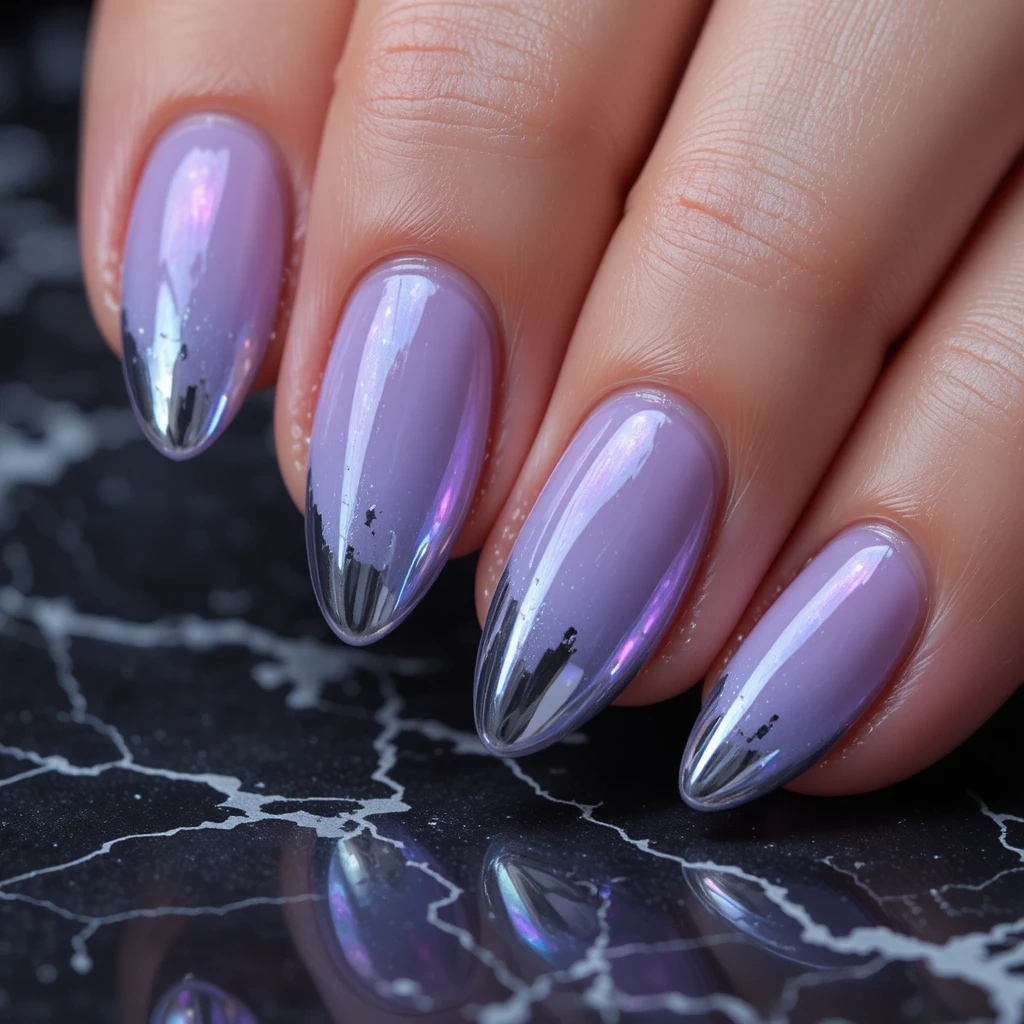
A soft lilac base buffed with a silver-lilac chrome powder at the tips, creating a mirror-shine gradient effect. The chrome transitions from the plain lilac base into a blinding metallic finish at the tip. This sounds complex but chrome powder application is actually beginner-friendly.
- Difficulty: Beginner (with the right tools)
- Time to complete: 25 minutes
- Best for: People who want something high-impact and contemporary
- Why it works: Chrome powder applied over a similar-toned base creates a seamless gradient that looks professionally done.
- What makes it different: The mirror finish catches light in a way that regular polish can’t replicate, making nails look dimensional and alive.
Key product: Modelones Chrome Powder Fairy ($10, Amazon) — the lilac-silver undertone in this specific powder keeps the chrome finish harmonious with a lilac base rather than looking disconnected.
20. Minimalist Single Stripe
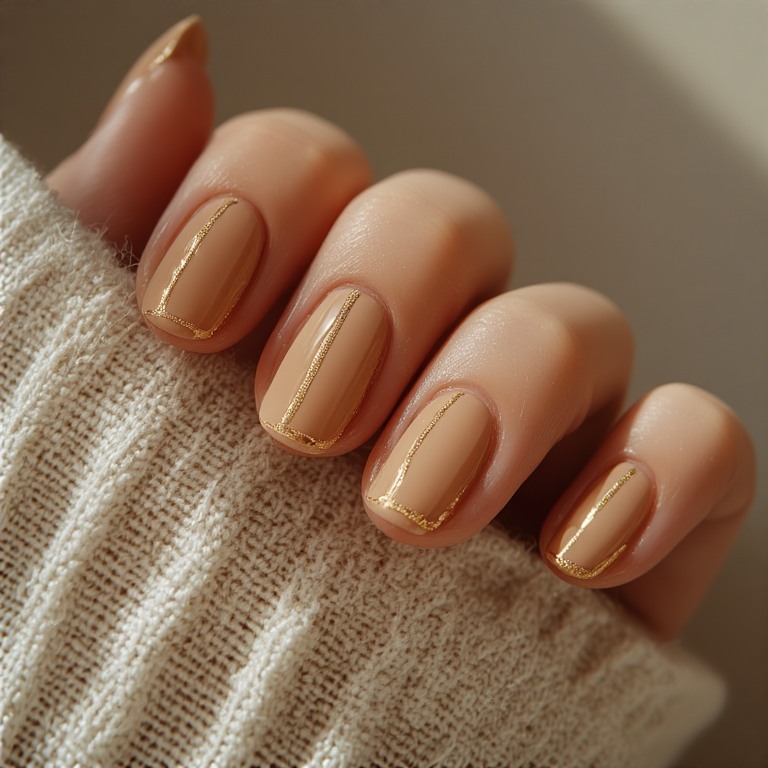
A clean nude or white base with one thin horizontal or diagonal line in a contrasting color (black, gold, or deep burgundy) across the center of each nail. No other decoration. The restraint is the whole point.
- Difficulty: Beginner (with a striper brush)
- Time to complete: 15 minutes
- Best for: People with very little time who still want nails that look considered
- Why it works: A single well-placed line on a neutral base reads as intentional and sophisticated—it doesn’t need anything else.
- What makes it different: The absolute restraint of one line per nail is harder to execute psychologically than technically—most people want to add more, which would ruin it.
Key product: BORN PRETTY Gold Nail Art Pen ($12, Amazon) — the consistency of the gold line matters for this design; uneven flow ruins the minimalist effect.
21. Color Block Diagonal

Each nail divided diagonally into two colors—one half in white, the other half in a bold spring shade (coral, yellow, or cobalt). The diagonal line runs from the top left corner to the bottom right corner of the nail. Graphic, modern, and instantly eye-catching.
- Difficulty: Intermediate
- Time to complete: 35 minutes
- Best for: People who love graphic design and bold color combinations
- Why it works: The diagonal split creates dynamism and movement in a way that horizontal or vertical splits don’t.
- What makes it different: Using a different bold color on each nail (all divided diagonally with the same white) creates a cohesive set that’s still colorful.
Key product: 3M ScotchBlue Painter’s Tape ($6, hardware stores) — thinner than regular tape, creates a sharper paint line, and removes cleanly without lifting the base.
Special Occasion
22. Pearlescent White with 3D Floral
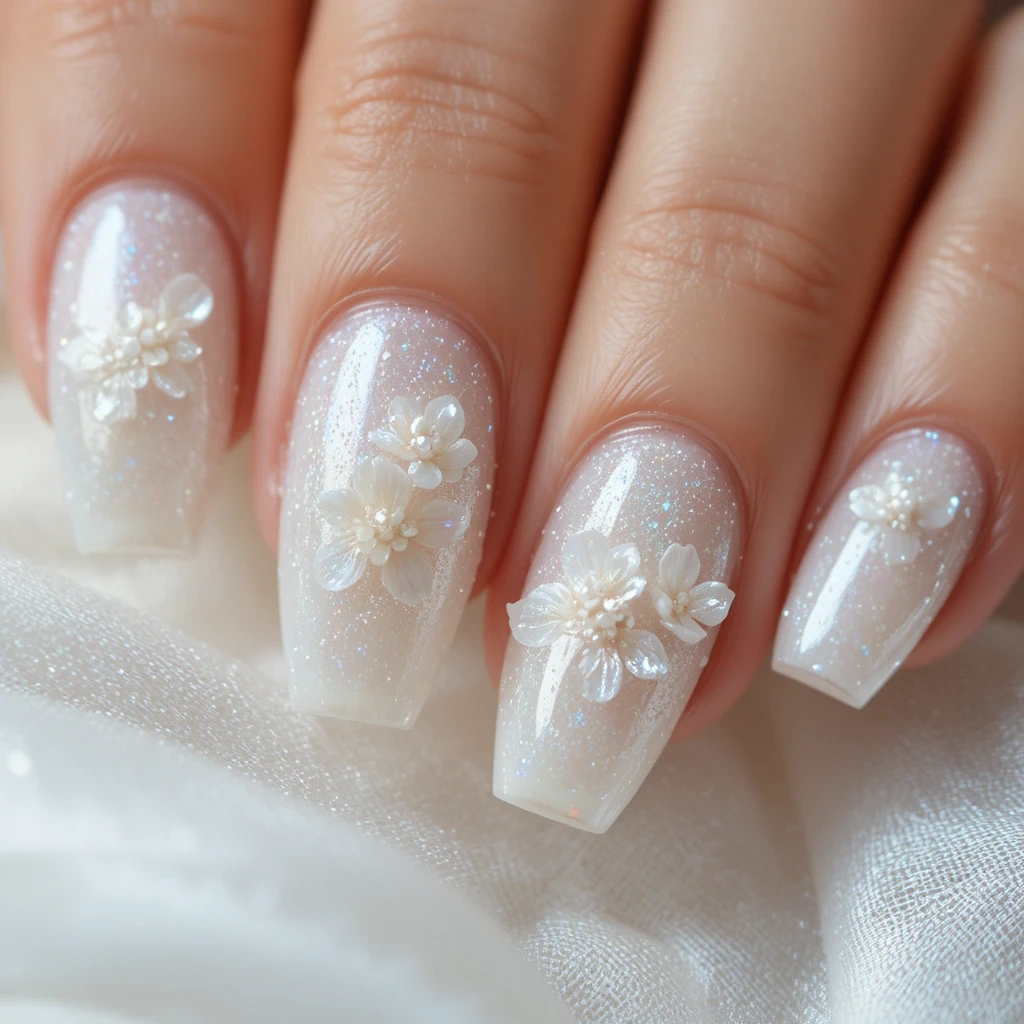
A white pearlescent base with small 3D sugar flowers applied on two accent nails. The flowers sit slightly raised above the nail surface and are usually pre-made from gel or purchased as dried resin pieces. The effect is bridal, ethereal, and genuinely beautiful in person.
- Difficulty: Intermediate (if using pre-made flowers)
- Time to complete: 45 minutes
- Best for: Weddings, graduations, or any event where you want truly special nails
- Why it works: The 3D element adds a dimension to nails that no flat painting technique can match—they look like jewelry.
- What makes it different: Pearl finishes and dimensional florals are having a major fashion moment right now, making this feel current rather than traditionally bridal.
DIY at home: Beetles Pearl White Gel ($9, Amazon) for the base. Pre-made 3D nail flowers from Amazon (Wokoto 3D Flowers, $8 for a set of 100). Attach with a small drop of gel and cure in place. Much easier than it looks.
Key product: Wokoto 3D Nail Flowers ($8, Amazon) — the pre-made resin pieces are perfectly sized for nails and require no crafting skill to attach.
23. Dusty Rose French with Pearl Detail
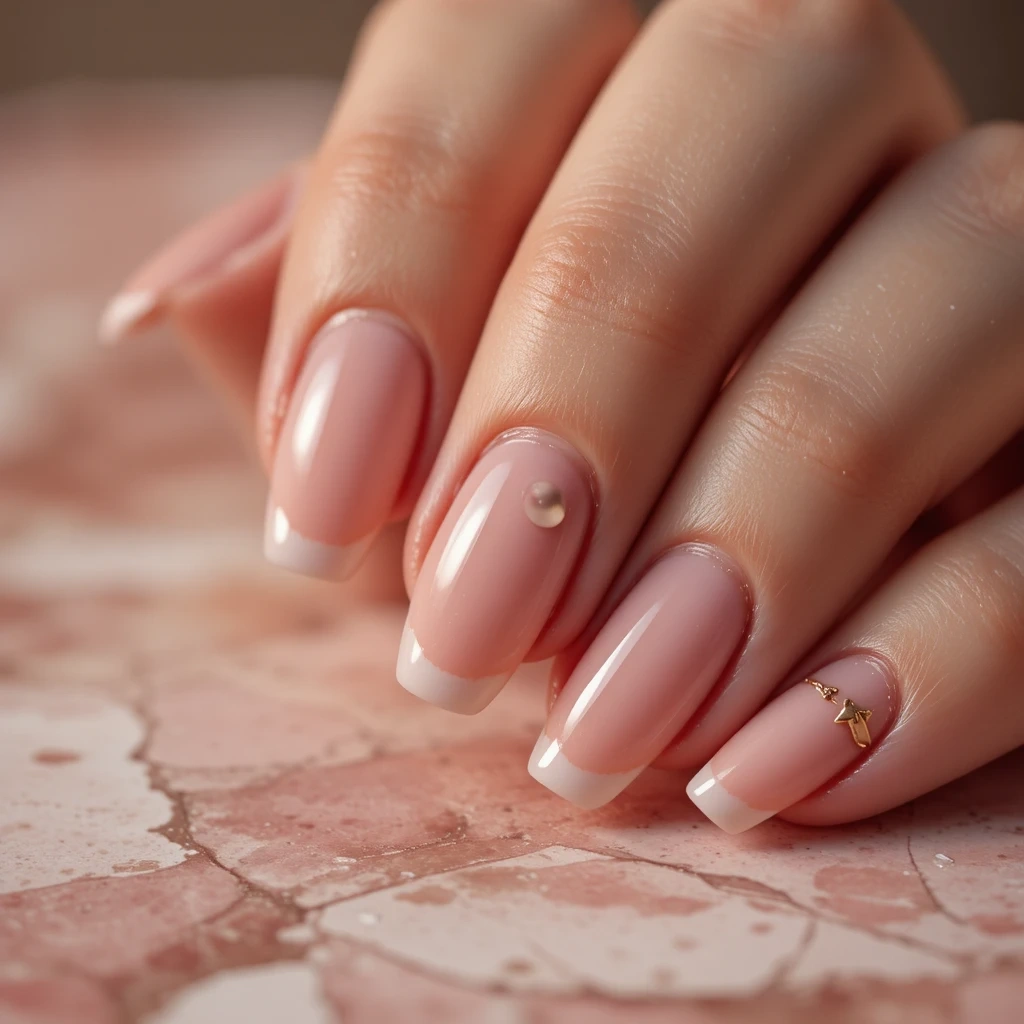
A soft dusty rose base with a slightly darker rose French tip and a tiny single freshwater pearl placed at the center of the smile line. Simple, elegant, and works for any formal occasion in May.
- Difficulty: Beginner to Intermediate
- Time to complete: 30 minutes
- Best for: People who want something elegant and special without anything too elaborate
- Why it works: The pearl detail at the smile line is one of the most current nail trends and elevates a simple French manicure to something genuinely elevated.
- What makes it different: The dusty rose tonal French tip is more interesting than a standard French while still being subtle enough for formal settings.
Key product: Leebeads Nail Pearls ($6, Amazon) — the consistent size and round shape of these make the single-pearl detail look deliberate and refined.
24. Iridescent Holographic Tips
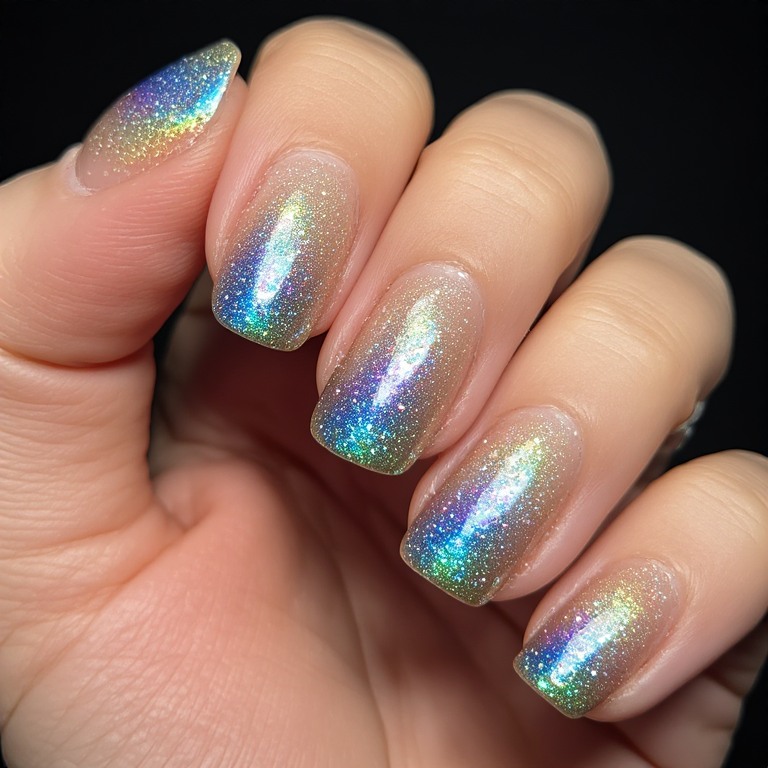
A sheer nude base with the tips dipped or painted in a fine holographic rainbow glitter that shifts colors in light. The holographic effect catches every light source and creates a prism effect at the nail tips. Very special for evening events or anywhere with interesting lighting.
- Difficulty: Beginner
- Time to complete: 20 minutes
- Best for: Evening events, parties, or any occasion where you want nails that genuinely sparkle in person
- Why it works: Holographic glitter tips on a nude base are understated in natural light but genuinely spectacular under warm or artificial light.
- What makes it different: Unlike regular glitter, holographic shifts through multiple colors with movement, making nails appear to change color.
Key product: Modelones Holographic Gel Glitter Rainbow ($9, Amazon) — the ultra-fine particles in this formula create a smooth holographic surface rather than the gritty texture of coarser glitters.
25. Lavender Glass Skin Nails
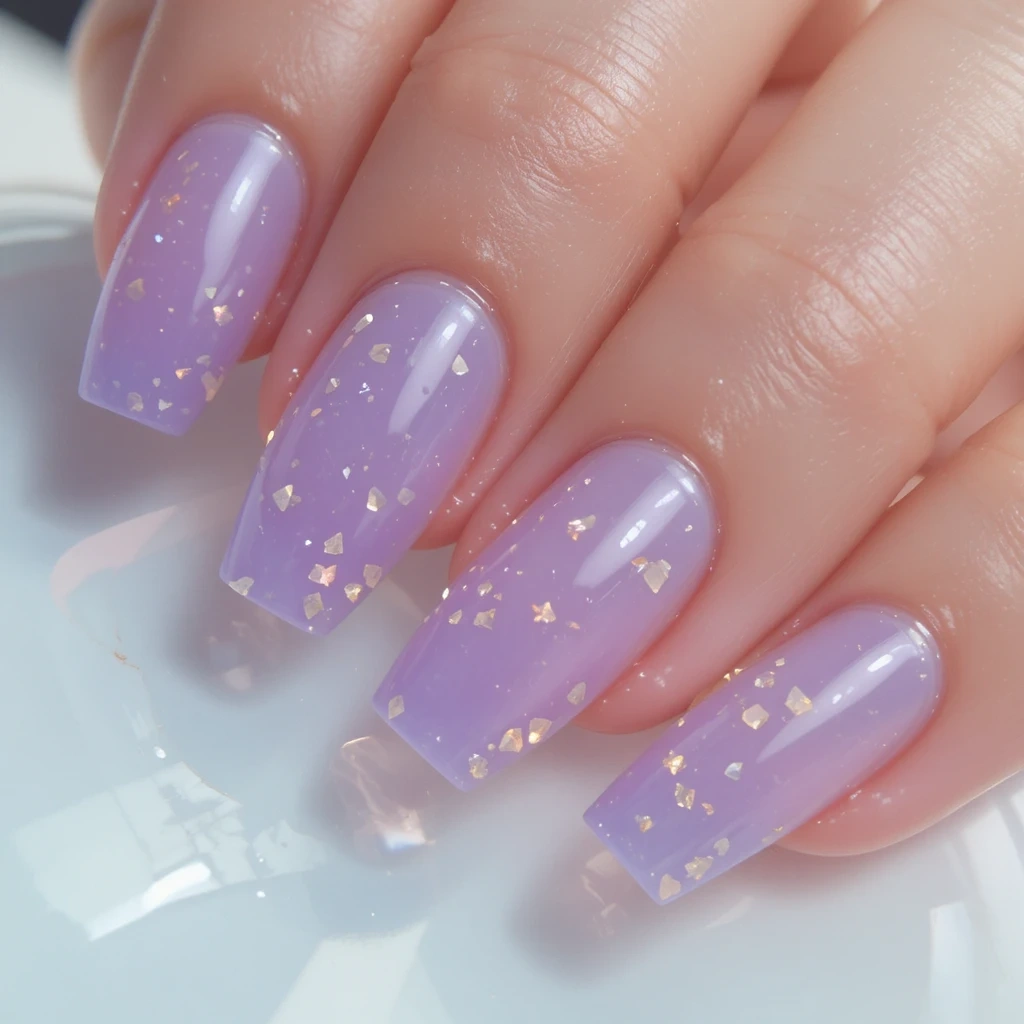
A completely sheer, jelly-like lavender tint over natural nails, creating the glass skin effect where the nail looks like a colored window. No art, no added elements—just the translucent color giving the nails a polished, almost wet look. The transparency means natural nail texture shows through, making these look uniquely “your” nails.
- Difficulty: Beginner
- Time to complete: 15 minutes
- Best for: People who want beautiful nails in literally 15 minutes
- Why it works: The glass skin nail trend is one of the most current in 2025 and relies entirely on the translucency of the polish, which is built into the formula—no technique required.
- What makes it different: The transparency means these nails change slightly with different lighting, making them more interesting than a standard opaque shade.
DIY at home: Beetles Jelly Gel in Lavender Ice ($9, Amazon). Apply 2–3 thin coats until you reach your preferred transparency level. The more coats, the more opaque; stop at 2 for the true glass effect.
Key product: Beetles Jelly Gel Lavender Ice ($9, Amazon) — the specific jelly formula creates the correct translucency; regular sheer polish doesn’t have the same glass depth.
Essential Tools & Products
The Basics (Under $35 Total)
- Orly Bonder Base Coat ($9, Sally Beauty) — Creates a rubberized adhesive layer that grips color polish instead of letting it sit loosely on top. I switched to this from a drugstore base coat and my manicures immediately lasted 3–4 days longer. Not an exaggeration.
- Seche Vite Dry Fast Top Coat ($10, Ulta) — Dries everything in about 5 minutes and gives a glass-like finish. I’ve tried probably a dozen top coats over the years and nothing else comes close for DIY regular polish.
- Revlon ColorStay Gel Envy in any pastel shade ($8, drugstores) — For May’s soft palette, Peony, Lavender, and Mint Chip are my most-reached-for shades from this line.
- Modelones Gel Polish Starter Kit ($28, Amazon) — If you’re doing gel at home, this is the most beginner-friendly kit I’ve used. The lamp is real UV/LED and actually cures properly, unlike some cheaper kits I wasted money on first.
The Game-Changers
- Migi Nail Art Striper Brush ($6, Amazon) — The ultra-thin brush tip makes drawing petal shapes and thin stems actually achievable for non-artists. I spent months struggling with regular brushes before finding this.
- Moyra Stamping Kit ($15, Amazon) — If you want detailed floral patterns without hand-painting, stamping is the answer. Moyra’s floral plates are especially good for May designs.
Nail Art Pens — Don’t Cheap Out Here
The BORN PRETTY Nail Art Pen Set ($12, Amazon) is where I tell everyone to spend their money. Cheap nail pens dry out or skip unevenly mid-stroke, which is incredibly frustrating when you’re trying to draw delicate flower petals. These have consistent flow and stay usable for months if you cap them properly.
Three Techniques Anyone Can Master {#techniques}
1. The Single Accent Nail — Beginner | 10 Minutes
Paint all nails a solid base color and add a design only to the ring finger. This works because you’re only committing to getting one nail right, which dramatically lowers the pressure. I used to try to do detailed art on all ten nails at once and inevitably smudged something. The one-accent approach made me actually enjoy nail sessions again.
2. The Sponge Ombre — Beginner to Intermediate | 20 Minutes
Two polish colors blended on a makeup sponge, then dabbed onto the nail. For May, blending white into any pastel creates a soft “washed out” spring gradient that looks expensive. When I first tried this, I put too much product on the sponge and ended up with thick, patchy layers. The fix: barely any polish on the sponge, built up with multiple light dabs.
3. The Dot Tool Floral — Beginner | 15–20 Minutes
A dotting tool (or the rounded end of a bobby pin) creates impressionist-style flowers by placing 5 dots in a circle with a smaller center dot. This is the technique I recommend to every beginner who wants florals without feeling like they need to be able to paint. Works best over a white or pale base so the dots read clearly.
Gel vs. Regular Polish for May Nails {#gel-vs-regular}
| Feature | Gel Polish | Regular Polish |
|---|---|---|
| Wear time | 2–3 weeks | 5–7 days |
| Drying time | Cures in 60–120 seconds under lamp | 10–15 minutes air dry |
| Cost (at home) | $25–40 for lamp + polish kit | $8–15 per bottle |
| Application difficulty | Slightly harder (thin coats, curing) | More forgiving |
| Removal process | 10–15 min with acetone soak | 3–5 minutes with remover |
| Nail damage potential | Moderate if removed incorrectly | Low |
| Best for | Detailed designs you want to keep | Frequent color changers |
| Flexibility | Slightly rigid | More flexible |
| Topcoat shine | Glass-like and lasting | Dulls within 2–3 days |
| At-home learning curve | 2–3 sessions to get right | Immediately usable |
My honest take: I use gel for detailed nail art because spending an hour painting something I want to last more than a week makes sense. For simple solids or when I know I’ll want something different in five days, regular polish with Seche Vite is faster and more practical. The key is matching the format to your intention, not defaulting to gel because it sounds more professional.
Pros and Cons of May Nail Art
✅ Pros
- ✅ The spring palette is the most flattering of the year—soft pastels, warm corals, and fresh greens suit almost every skin tone
- ✅ Florals and botanicals are on-trend year-round now, so May designs don’t look “seasonal” in the way Christmas nails do
- ✅ The variety is enormous—May works for everything from minimalist glass nails to full-cover botanical illustrations
- ✅ Spring designs photograph beautifully outdoors, which matters if you post nail content
- ✅ Many May designs (ombres, solid pastels, foil accents) are genuinely beginner-accessible and still look impressive
- ✅ Botanical and floral designs are the most forgiving nail art category—imperfect petals and wobbly stems often look more natural, not worse
❌ Cons
- ❌ Advanced designs like full-cover botanicals or 3D florals take 60–75 minutes minimum—that’s a significant time block
- ❌ Pastel polishes often require 3 coats for full opacity, which adds 10–15 minutes and more dry time risk
- ❌ Chrome powder and holographic finishes require gel polish specifically—they don’t work over regular polish
- ❌ Pressed flower encapsulation nails are genuinely thick—they catch on fine fabrics and can feel uncomfortable for the first day
- ❌ The learning curve for any freehand floral technique is real—your first 3–5 attempts will not look like the reference image, and that’s normal
- ❌ May weather (rain, humidity) slows regular polish drying time noticeably—gel is more reliable in wet spring conditions
Real Wear Test
I wore a gel set of the Lavender Glass Skin nails (Design 25) with two accent nails featuring pressed flowers (Design 3) for a full three weeks in May last year. Here’s what actually happened.
Days 1–5: Perfect condition. The lavender glass tint looked luminous, the pressed flowers sat flat and clean under the topcoat, and I got at least three comments. Zero chips or lifting.
Days 6–10: Slight lifting at the cuticle edge of my right thumb, which I get on every thumb regardless of design. I pushed it back down with a cuticle stick and applied a thin layer of topcoat over the edge, which bought me another week. The floral accent nails were still pristine.
Days 11–14: Visible regrowth at the cuticle line, about 1–1.5mm of bare nail. The design itself was still intact. At this point the nails looked less “fresh” but still definitely “done.”
Days 15–20: The regrowth gap was noticeable enough that I was conscious of it in meetings. Two small chips appeared on the index finger of my left hand (the hand I use more roughly). The glass tint still looked good in the middle of the nail.
Day 21: Removed everything. Two nails had small lifts, all had regrowth. The pressed flower accent nails were the last to show any wear.
Verdict: Gel glass nails with pressed flower accents realistically look fresh for about 10–12 days, presentable for 14–16 days, and then they’re past their best. Don’t expect salon results to last 3 weeks at home without any touch-ups.
Maintenance Tips
Days 1–7: Protection Phase
- Apply cuticle oil twice daily (morning and before bed). I use CND SolarOil ($8, Ulta) and keep one bottle by the kitchen sink. Hydrated cuticles make the gel-to-skin edge look cleaner and reduce early lifting.
- Wear gloves for dishes, cleaning, and gardening. Every time you skip this, you’re removing roughly a day of wear life.
- Apply a thin layer of fresh topcoat over your existing nails on day 3. This habit alone doubled how long my manicures look fresh—the shine dulls first, and one thin topcoat layer resets that completely.
Days 8–14: Preservation Phase
- If you see a small lift at the cuticle edge, address it immediately with a thin line of topcoat. Ignored lifts become full peels within 48 hours.
- Apply cuticle oil every 3 days at minimum (twice daily if you can).
- Avoid acetone-based removers anywhere near your nails—even removing other makeup can degrade the topcoat seal.
Days 15–21: Decision Phase
- If the regrowth gap bothers you, this is removal time. Trying to extend past 3 weeks with home gel usually causes more nail damage from the compromised seal than a clean removal would.
- Use the foil soak-off method rather than picking—wrap cotton soaked in acetone around each nail, foil wrap, leave for 12 minutes, then slide the gel off with a cuticle stick. Don’t force anything that doesn’t slide easily.
General Maintenance (All Phases)
- Never use your nails as tools. I had to actively retrain myself on this—reaching for a pen or a coin instead.
- Keep hand cream accessible. Dry skin around nails makes even perfect nail art look unkempt.
Common Mistakes and Fixes
Mistake 1: Painting over unprepared nails
What it looks like: Polish lifts from the cuticle edge within 24–48 hours, or color peels in one sheet a few days in.
Why it happens: Oil residue on the nail surface prevents adhesion. Your nails produce natural oils constantly, and even clean hands have some residue.
The fix:
- Wipe each nail with a lint-free pad soaked in acetone or alcohol immediately before painting
- Let dry for 60 seconds
- Do not touch the nail surface after this point—handle nails only by the sides
How well it works: Completely solves the problem. This step alone improved my gel lift issues more than any other change I made.
Mistake 2: Thick gel coats that never fully cure
What it looks like: Wrinkled, dimpled surface after curing; gel that feels soft or bendy when it should be hard.
Why it happens: UV/LED lamps can’t penetrate thick gel layers fully. The bottom layer stays uncured while the top appears set.
The fix:
- Apply gel in layers no thicker than a credit card
- Cure each layer fully before adding the next
- If you’ve already applied a thick coat, cure for double the recommended time from both sides if possible
How well it works: Thin layers cure perfectly every time. Trying to cure an already-applied thick coat helps but won’t fully fix it—removal and restart is the real answer.
Mistake 3: Skipping the topcoat wrap on gel
What it looks like: Gel that chips from the tip within the first week despite being perfectly cured.
Why it happens: The free edge of the nail (the tip) is the most vulnerable point. If topcoat doesn’t seal over the edge, moisture and impact find their way in from the end.
The fix:
- At the topcoat step, swipe the brush over the painted surface as normal
- Then run the brush along the very tip edge of the nail, pointing the brush downward
- Cure as normal
How well it works: This single step extended my tip wear by about 4–5 days consistently.
Mistake 4: Nail art on nails that are too short to support it
What it looks like: Designs that look smudged, overly small, or just wrong on the actual nail because the canvas was too small.
Why it happens: Designs scaled for the reference image (usually medium-to-long nails) don’t automatically scale down to short nails. The brain reads the design differently at different sizes.
The fix: For short nails, either simplify to 1–2 design elements instead of full-cover, or switch to designs that suit the scale—single dots, minimal lines, or small accent motifs work better than full botanicals.
How well it works: Scaling the design to the nail size works every time. The finished result looks deliberate instead of crowded.
Mistake 5: Trying to salvage a smudged wet nail
What it looks like: A nail that was smudged and then “fixed” by brushing over it, which creates a draggy, lumpy surface with the smudge visible underneath.
Why it happens: Brush strokes over wet or semi-dry polish never blend smoothly. The existing layer drags instead of integrating.
The fix:
- If you smudge a wet nail, let it dry fully—don’t touch it
- Once dry, buff the smudge very lightly with a fine buffer to flatten it
- Apply one thin coat of the same color over the top
How well it works: Fixes about 80% of smudges to an invisible or near-invisible level. The remaining 20% require full removal and restart.
FAQs
Why do my ombre nails always look streaky instead of blended? The sponge is likely too dry or you’re using too little polish on it. Load the sponge lightly, then dab it on a piece of paper towel first to remove excess before touching the nail. Multiple light layers blend far better than one heavy attempt. Also, the two colors need to overlap on the sponge by about 5mm before you dab—if they’re too far apart, the gradient won’t blend.
Can I do gel nail art on regular polish base coats? No—gel doesn’t adhere properly to regular polish and will peel within a day or two. If you’re doing gel art, everything underneath needs to be gel too, including the base coat. The exception is if you’re using gel art pen to add detail over a fully dry regular polish, then sealing with a regular (not gel) topcoat.
How do I stop my cuticle oil from ruining freshly done nails? Wait at least 2 hours after your final topcoat before applying cuticle oil. Apply it only to the skin around the nail, not on the nail surface—keep it off the nail plate and let it absorb into the cuticle skin only. Oil on cured gel actually helps it stay flexible, but oil on fresh regular polish will soften the surface.
What’s the easiest May design for someone with very shaky hands? The sponge ombre and the gold foil accent are both excellent for unsteady hands because neither requires controlled brushwork. The sponge technique is deliberately imprecise, and foil pieces are placed with a stick rather than painted on. Both produce impressive results with no freehand component.
How long should I wait between gel manicures? In my experience, waiting at least 3–5 days between gel removals gives the nail plate time to rehydrate. I apply cuticle oil daily in that gap and use a strengthening treatment like OPI Nail Envy ($18, Ulta) as a base coat during the break. Doing gel sets back-to-back every 3 weeks without any breaks long-term thins the nail plate.
Conclusion
May nail ideas designs range from a 15-minute butter yellow to a 75-minute full-cover botanical illustration—there’s genuinely a design in this list for every skill level and every amount of patience. If you’re just starting out, I’d suggest trying the Lilac Ombre into White (Design 8) or the Pistachio with Gold Foil (Design 7)—both give impressive results with beginner-level technique and minimal tools. Once those feel easy, move toward the Cherry Blossom Branch or the Watercolor Wildflower Field.
Don’t aim for the reference image on your first try. My first five attempts at any new technique looked rough, but each one taught me something the next one benefited from.