50+ Stunning Graduation Nails Ideas for a Perfect Grad Look
Graduation nails ideas are manicures designed specifically to celebrate finishing school — whether that’s high school, college, or grad school. They range from simple polish in your school colors to full-on acrylic sets with tiny diplomas, dates, and glitter ombré.
Basically, they’re your nails showing up to graduation the same way your family does: dressed up and proud of you.
How to Choose the Best Graduation Nails ideas
For your first time doing nail art: Stick with a solid color in a festive shade (champagne, navy, red) with one accent nail featuring a simple star or glitter tip. Nothing that requires a steady hand or special tools.
If you have a professional job starting soon: A clean French tip, sheer pink with gold accents, or a subtle nude with a tiny “Class of ’25” written in fine-liner gel. Polished without screaming “party nails.”
If you want something for the ceremony and the after-party: Go for a full glam set — almond or coffin shape, ombré in your school colors, or a full glitter gradient that photographs beautifully.
If you’re comfortable with nail art: Try the cap-and-diploma design on an accent nail, add your graduation year in fine script, or do a full themed set with stars, confetti shapes, and school-color French tips.
If you have short nails: Glitter gradients, solid colors with one rhinestone accent, and simple school-color tips all look amazing. Short nails actually photograph really cleanly — no need to go long.
If you want nails that also work at your first job: Avoid chunky 3D designs or anything that chips within 48 hours. Gel or gel-polish finishes last 2–3 weeks, and a clean design ages better than trend-heavy nail art.
Why Read THIS Article Instead of Any Other?
Unlike most graduation nail roundups that just drop a Pinterest grid and call it a day, this guide organizes everything by the exact keywords people actually search — white graduation nails, simple graduation nails, acrylic, almond shape, cute, and college-specific designs.
Every idea includes DIY instructions, the actual products you need by name and price, honest time estimates, and the one mistake I always see people make with each style. Whether you’re doing your nails at home the night before or booking a salon appointment a week out, you’ll leave here knowing exactly what to ask for.
White Graduation Nails
White is the graduation nail color right now. It reads as clean, celebratory, and photographs perfectly in every lighting condition. Here are the seven best takes on white graduation nails, from the simplest to the most involved.
1. Classic All-White Glossy

Description: Every nail coated in a clean, opaque bright white with a high-shine top coat finish. No design, no detail — just pure, sharp white that looks expensive against caps and gowns in every color. Pairs especially well with gold jewelry.
Difficulty: Beginner | Time: 20 minutes | Best for: Anyone who wants to look put-together without any nail art skills
Why it works: White doesn’t compete with your graduation outfit. It completes it.
What makes it different: Most people undercoat white polish poorly and get streaky results. Two thin coats of a white specifically formulated for opacity (not a sheer white) fixes this entirely.
DIY at Home:
OPI Alpine Snow ($11 at Ulta) — the most opaque white in one to two coats. Avoid “Funny Bunny,” which is actually sheer.
- Apply two thin coats. Thick coats of white always bubble and streak.
- Seal with Sally Hansen Insta-Dri Top Coat ($7) immediately.
2. White with Gold French Tips
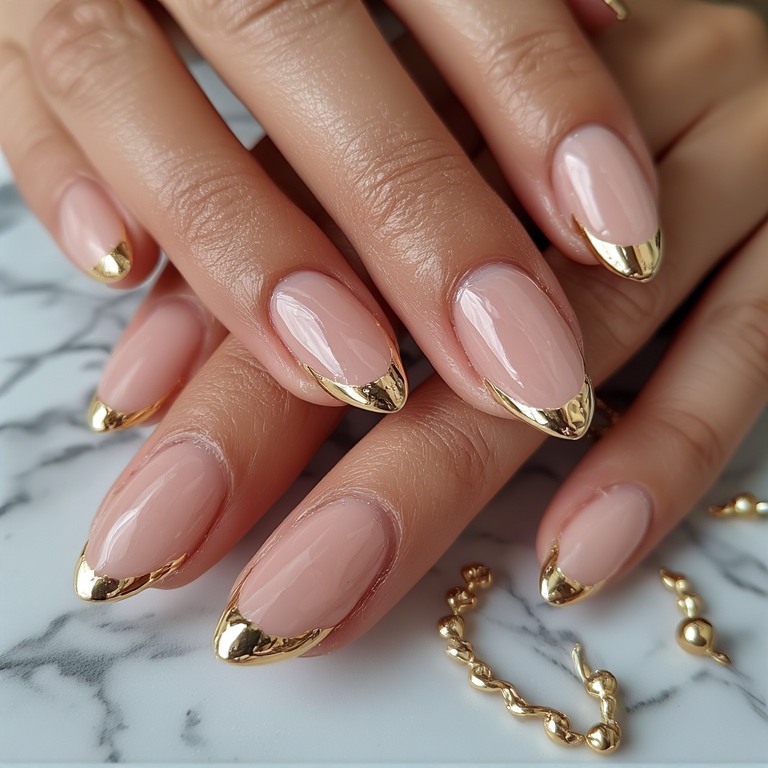
A sheer or nude base with a thin gold tip instead of the traditional white. Soft, warm, and graduation-appropriate without feeling basic. The gold tip catches light in photos in a way white tips never do.
Difficulty: Beginner (with tape guides) | Time: 25 minutes | Best for: People who want a French manicure but want something that feels more special than the standard version
Why it works: Gold tips say “celebration” without screaming it.
What makes it different: The combination of a sheer base (showing your natural nail) and metallic tips looks more expensive than an opaque-base French.
DIY at Home:
- OPI Bubble Bath as base ($13 at Ulta)
- Nail tip guides/stickers ($4 on Amazon) for the French line
- Sally Hansen Gold Chrome nail polish ($8 at CVS) for the tips — one thin coat
- Seal with top coat immediately so the chrome doesn’t smear
3. White Marble Accent
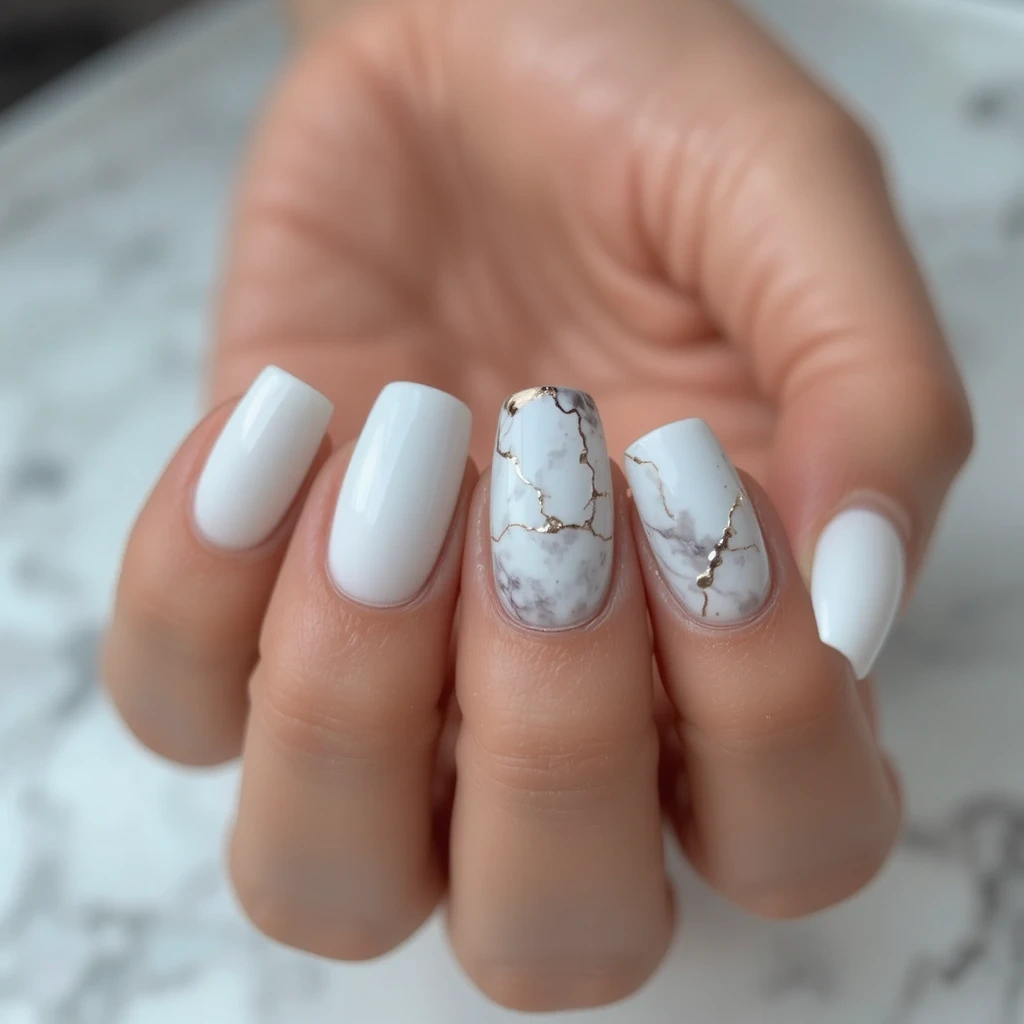
Four nails in clean matte or glossy white, with one accent nail per hand featuring a hand-painted marble effect in white and soft gray with gold veining. Looks editorial and intentional. Photos beautifully at every angle.
Difficulty: Intermediate | Time: 35 minutes | Best for: Anyone comfortable with a fine brush and willing to spend a few minutes on two accent nails
Why it works: Marble feels luxurious without being loud or distracting.
What makes it different: Using a matte top coat on the base nails and a glossy coat on the marble accent creates a texture contrast that looks like actual stone.
DIY at Home:
- OPI Alpine Snow base (all nails)
- Modelones liner brush ($7) in gray gel polish + gold gel liner for veining
- Draw veining in light diagonal strokes — press lightly and vary your pressure
- Glossy top coat on accent nails only; matte top coat (Zoya Matte Velvet, $12 at Ulta) on the rest
4. White with Tiny Star Accents
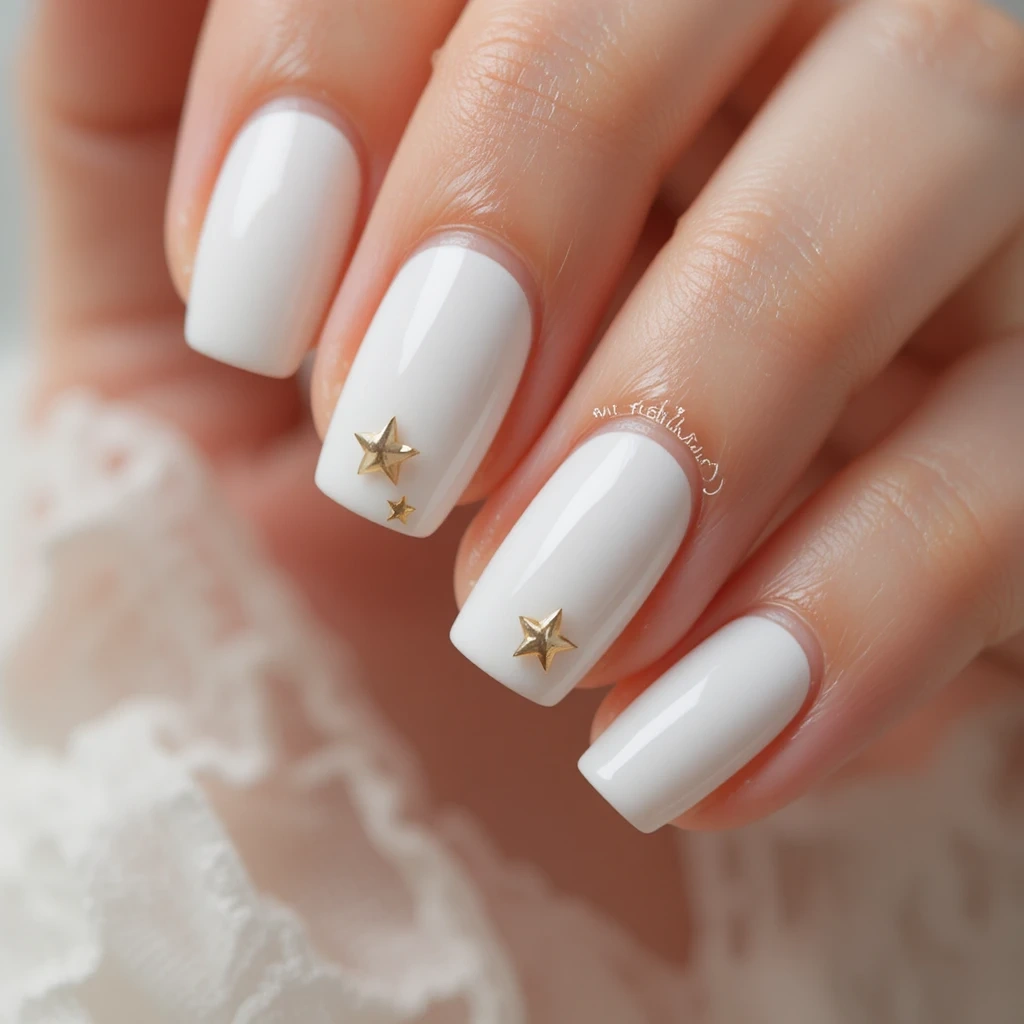
Description: All-white base with tiny five-point gold or silver stars painted or stamped near the cuticle of the ring finger nail. Simple, playful, and festive without crossing into novelty territory.
Difficulty: Beginner | Time: 20 minutes | Best for: People who want a subtle nod to the celebration without a full nail art look
Why it works: The stars are small enough to feel decorative rather than costume-y.
What makes it different: Stars near the cuticle (base of the nail) draw attention to the nail in a different way than tip designs. It photographs well because the detail stays visible even when hands are held flat.
DIY at Home:
- White base (any opaque white)
- Winstonia stamping kit with star plate ($12 on Amazon) — or apply loose star studs with a dotting tool dipped in top coat
- 1–3 stars per accent nail maximum — less is more
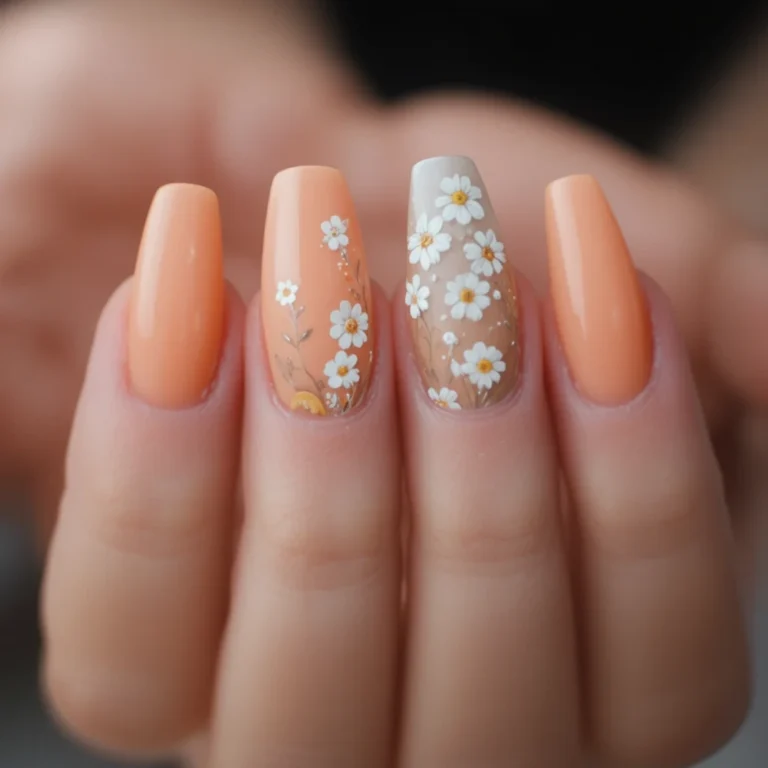
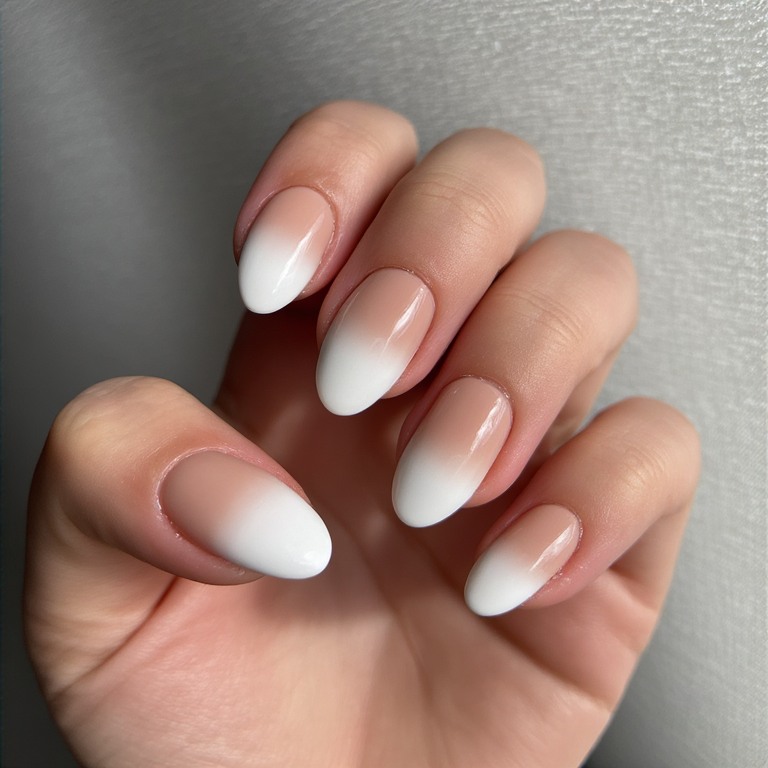
5. White Ombré into Nude
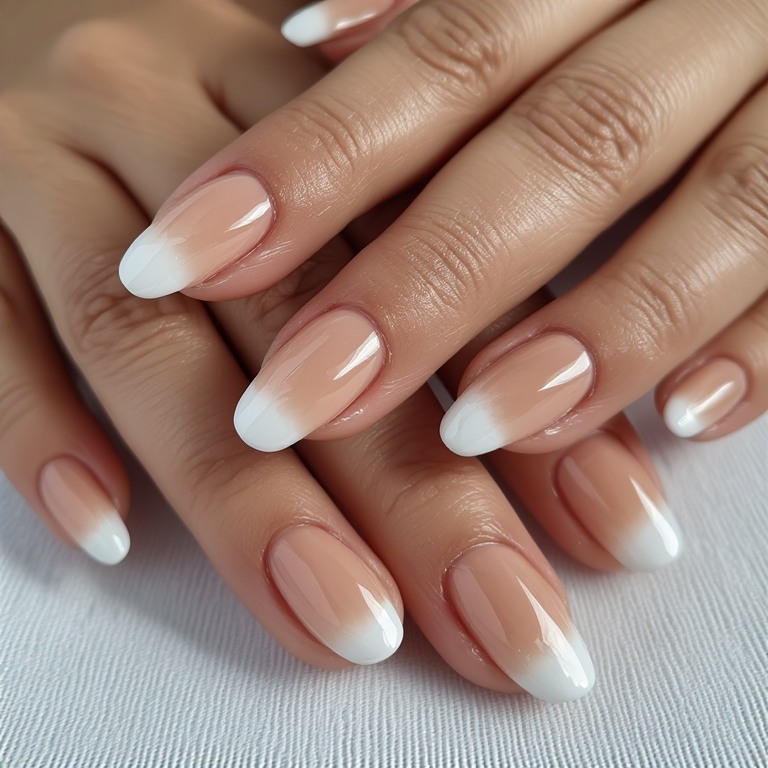
Description: A barely-there ombré that blends from pure white at the tip to a warm nude at the base. The result looks like a very sophisticated, wearable gradient that suits a ceremony and a dinner party equally well.
Difficulty: Beginner/Intermediate | Time: 30 minutes | Best for: People who love soft, elegant looks that aren’t going to feel “too much” in graduation photos
Why it works: The white at the tip lengthens the nail visually. The nude at the base keeps it skin-toned and wearable.
What makes it different: Unlike a harsh white tip French, this ombré reads as effortlessly natural until someone looks closely.
DIY at Home:
- OPI Bubble Bath (nude base)
- OPI Alpine Snow
- Small makeup sponge — dab white from tip inward, blending the transition zone
- Two to three light sponge applications build gradually without looking muddy
- Seal with glossy top coat
6. White with “2026” Written in Gold
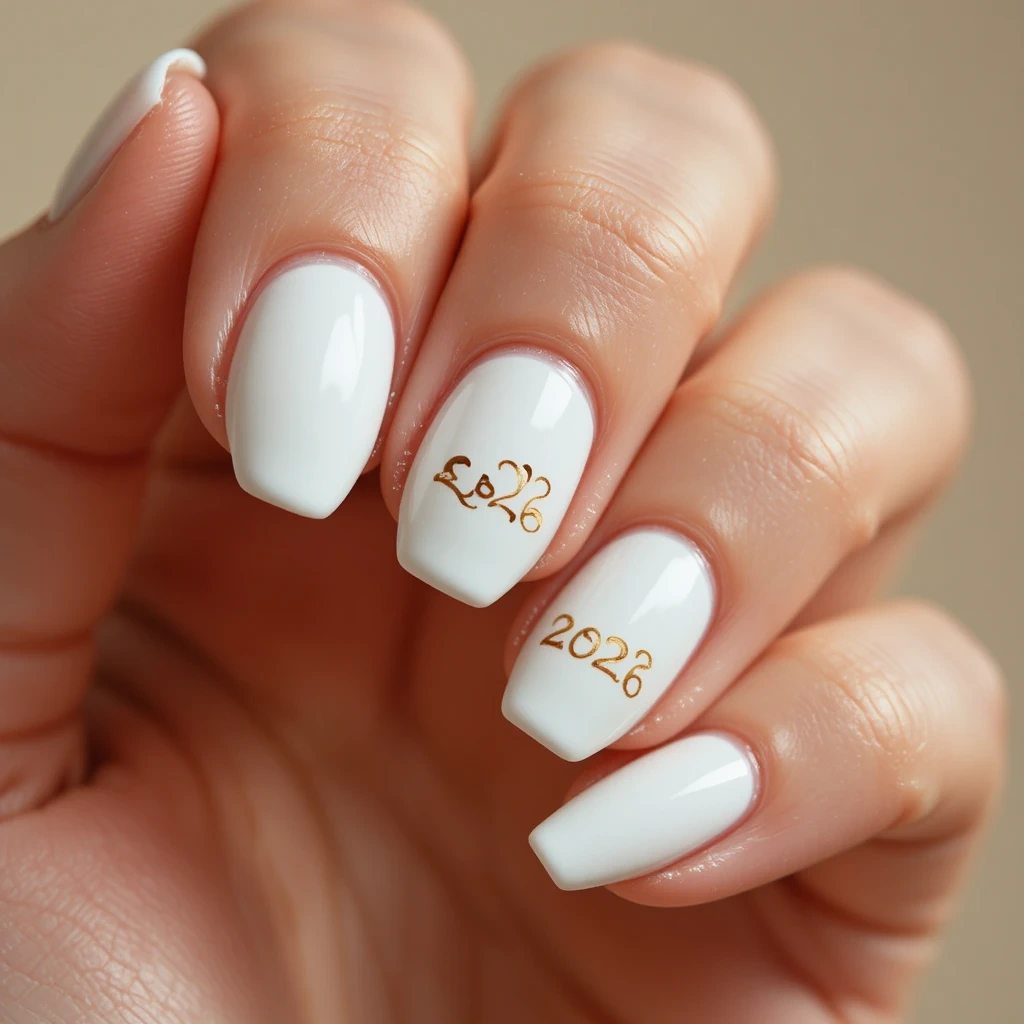
Description: A clean white base with your graduation year hand-painted or stamped in slim gold lettering on the ring finger accent nail. The year sits centered on the nail in a clean, modern font.
Difficulty: Intermediate | Time: 30 minutes | Best for: Anyone who wants a meaningful, personalized design without going full scrapbook-nail-art
Why it works: The date makes the nails genuinely yours. It’s the kind of design people notice and comment on.
What makes it different: Most “graduation year” nail art looks chunky or amateurish. Writing it small in thin gold lines on a white base keeps it sophisticated.
DIY at Home:
- OPI Alpine Snow base, fully cured/dried
- Modelones gold gel liner brush ($7) — or a striping brush dipped in gold nail art paint
- Write the year freehand in small print — practice on paper first
- If freehand feels too risky: use gold striping tape ($4 Amazon) to spell out the year in geometric block letters
- Seal with top coat once fully dry
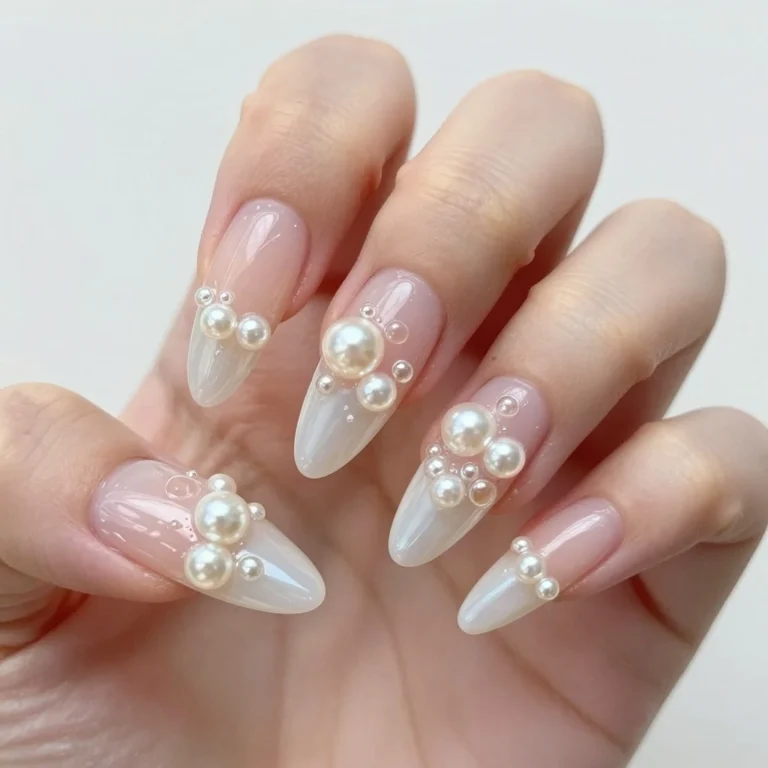
7. White with Pearls and Rhinestones
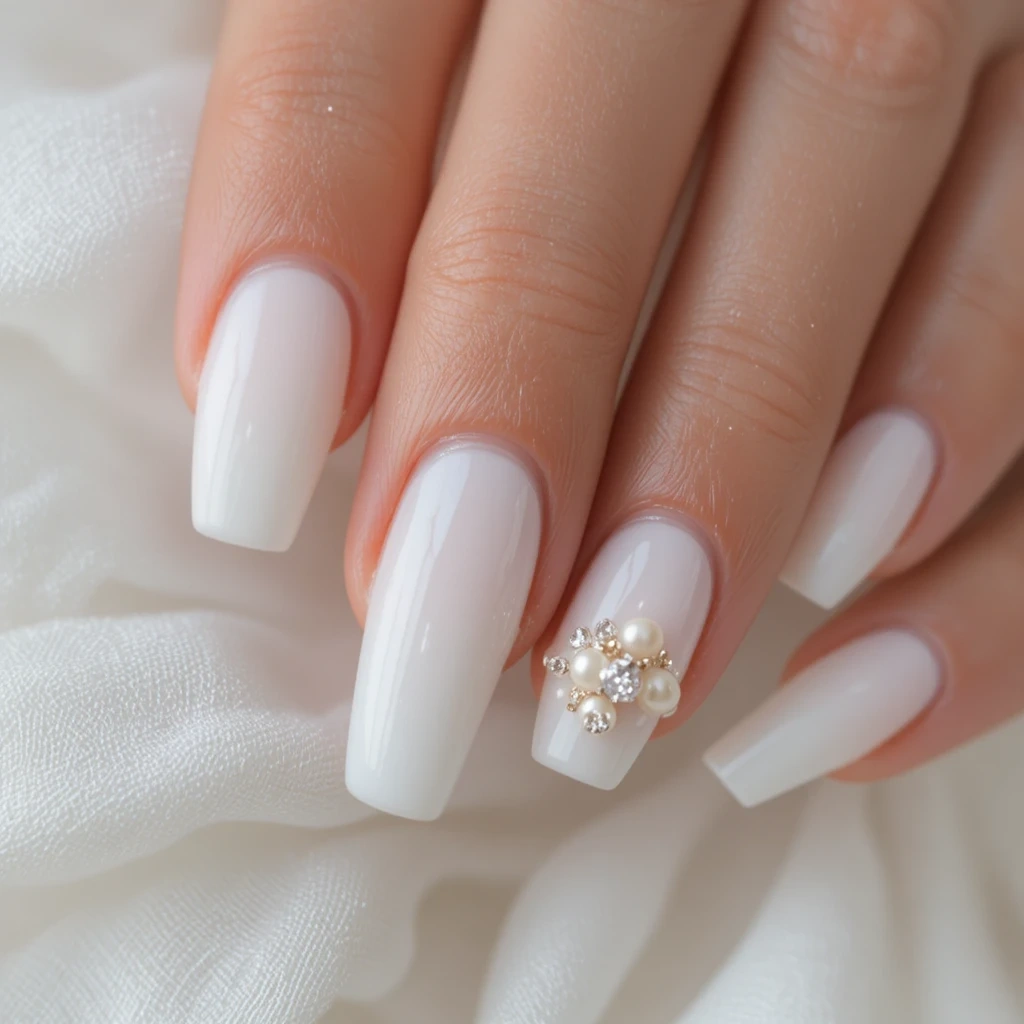
All-white base with 3–5 small pearlescent beads placed at the base of the accent nail, arranged in a casual cluster. Add one clear rhinestone in the center for a subtle sparkle. Soft, feminine, and graduation-appropriate.
Difficulty: Beginner | Time: 25 minutes | Best for: People who love bridal-adjacent aesthetics and want their nails to feel elevated without a lot of technique
Why it works: Pearls read as “special occasion” in the same way pearl earrings do.
What makes it different: The placement at the base rather than scattered across the full nail keeps the look clean and modern rather than busy.
Simple Graduation Nails
Simple doesn’t mean boring. These designs take 20–30 minutes, require no special tools beyond a steady hand, and look genuinely elegant. This section is for people who want to look intentional without spending two hours on their nails.
1. School Color Accent Nail
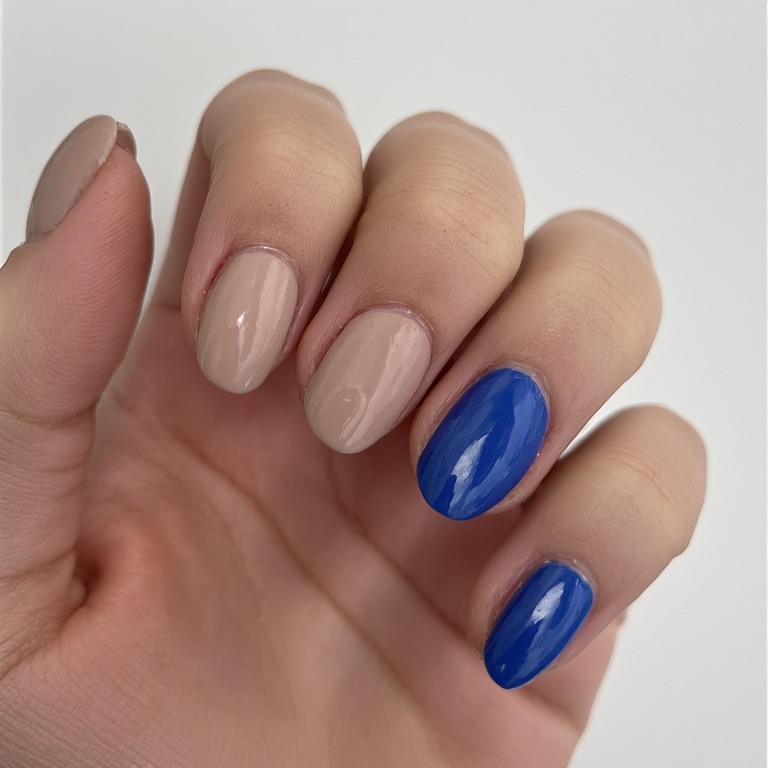
Four nails in a neutral (nude, white, or soft pink) and one accent nail per hand painted in your school’s primary color. Clean, balanced, and instantly recognizable in graduation photos.
Difficulty: Beginner | Time: 20 minutes | Best for: Anyone who wants to rep their school without wearing two colors on every finger
Why it works: The single accent nail approach is classic for a reason — it draws the eye without overwhelming.
What makes it different: Choosing a slightly deeper or more saturated version of your school color rather than a flat primary gives the accent nail more depth and sophistication.
DIY at Home:
- Base neutral: OPI Bubble Bath or any clean nude
- School color: match to Essie or OPI shades — OPI “I’m Not Really a Waitress” for red schools, Essie “Mesmerize” for royal blue, OPI “Don’t Talk Bach to Me” for gold/yellow tones
- One coat is usually enough for the accent nail to pop over a nude base
2. Classic French Manicure
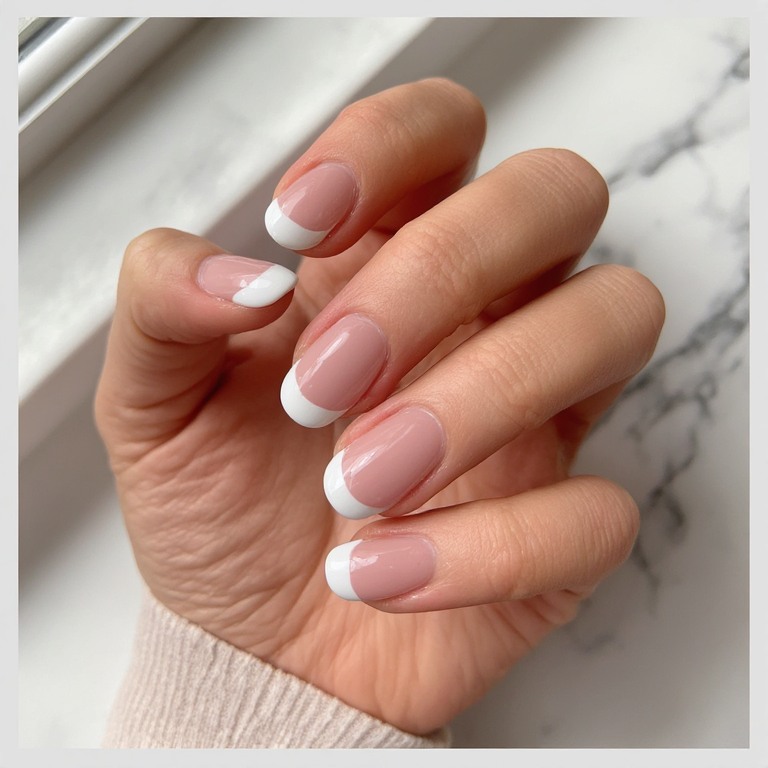
Sheer pink base with clean white tips in the traditional French style. Timeless, suits every graduation outfit, and works at the ceremony and every event after it. The one design your grandmother and your best friend will both compliment.
Difficulty: Beginner (with tip stickers) | Time: 25 minutes | Best for: People who want a universally flattering look that never reads as “trying too hard”
Why it works: French manicures photograph cleanly — no color competition, no distraction from your face.
What makes it different: Using a slightly warmer white (OPI “Funny Bunny” — despite being sheer on its own, it makes a perfect soft tip) instead of a blue-white tip looks more modern and less 2005.
DIY at Home:
- French tip nail guide stickers ($4 on Amazon) — apply before tipping, remove before drying
- Essie “Ballet Slippers” ($10 at Ulta) for the sheer pink base
- OPI “Funny Bunny” or Essie “Blanc” for the tips
- Top coat with Seche Vite ($8 at Sally Beauty) for the longest-lasting result
3. Solid Champagne with Gold Foil Accent
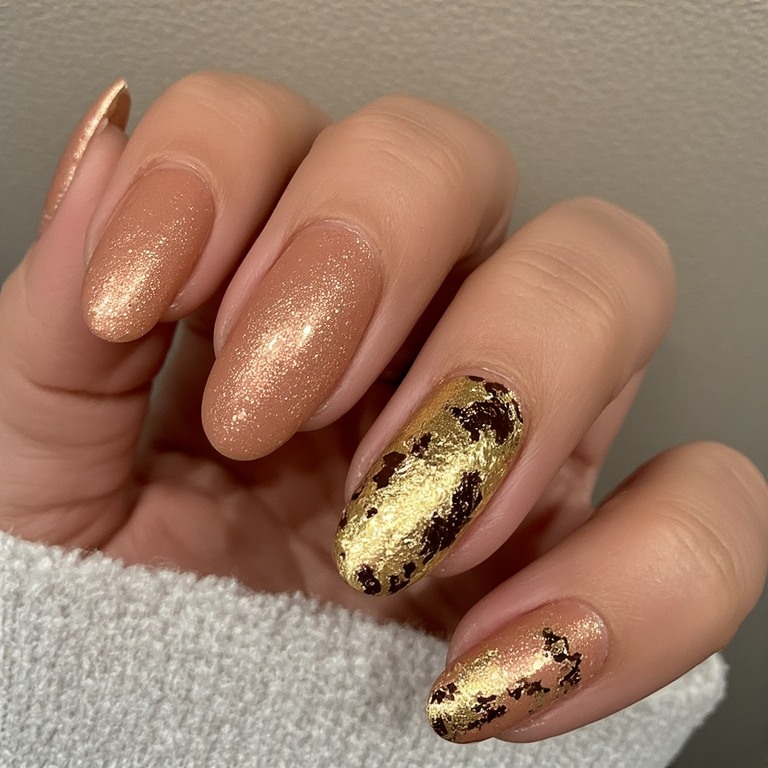
All nails in a warm champagne or gold-nude shade, with one accent nail per hand featuring pressed gold foil fragments applied over the polish. Festive, warm, and graduation-appropriate without being high-maintenance.
Difficulty: Beginner | Time: 20 minutes | Best for: People who want something that feels celebratory but not costumy
Why it works: Champagne is the graduation party in polish form. It suits every skin tone.
What makes it different: The foil accent adds texture you can see from a distance without requiring any artistic skill.
DIY at Home:
- Beetles “Champagne Toast” gel polish ($8 on Amazon) — two coats under UV lamp
- Born Pretty Foil Transfer Glue ($5 on Amazon) on accent nail only
- Gold foil paper ($4 on Amazon for a roll) — press and peel when glue is tacky
- Seal entire set with gel top coat
4. Nude with Thin Gold Line
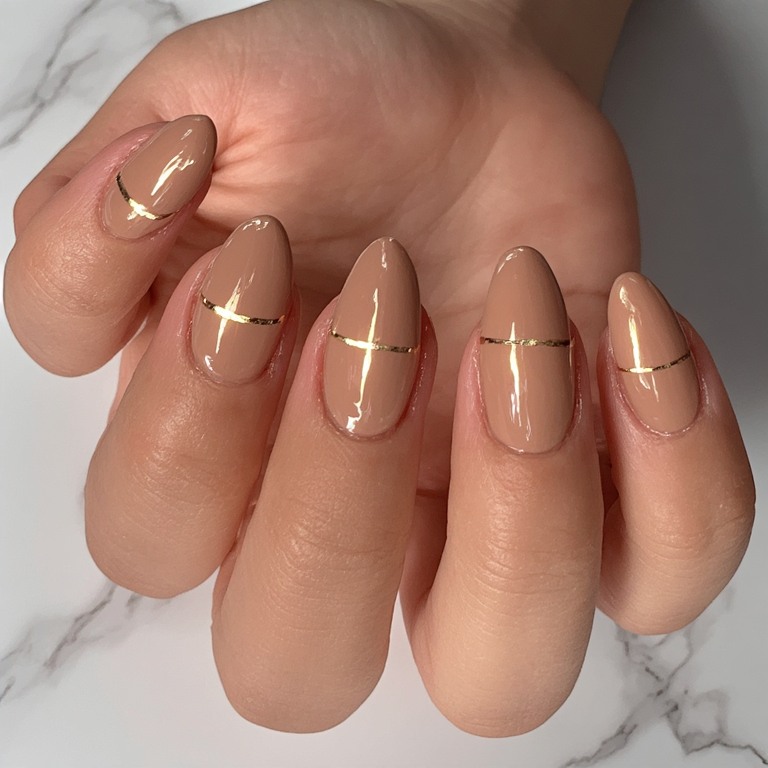
Description: All nails in a warm nude, with a single thin horizontal gold line painted across the center of the nail or near the tip. Architectural, modern, and surprisingly impactful for how simple it is.
Difficulty: Beginner | Time: 20 minutes | Best for: People with longer nail beds who want something geometric and editorial
Why it works: The line breaks up the nude base in a way that reads as deliberate nail art, not just plain polish.
What makes it different: Using gold striping tape ($4 on Amazon) instead of painting freehand gives you a perfectly straight line in 30 seconds.
DIY at Home:
- Any nude base, fully dried
- Gold nail striping tape: cut a length that spans the nail, press across the center
- Seal immediately with top coat — do not skip this step, as the tape can lift without sealant
- One line per nail, centered or offset toward the tip
5. Soft Pink with Glitter Tips
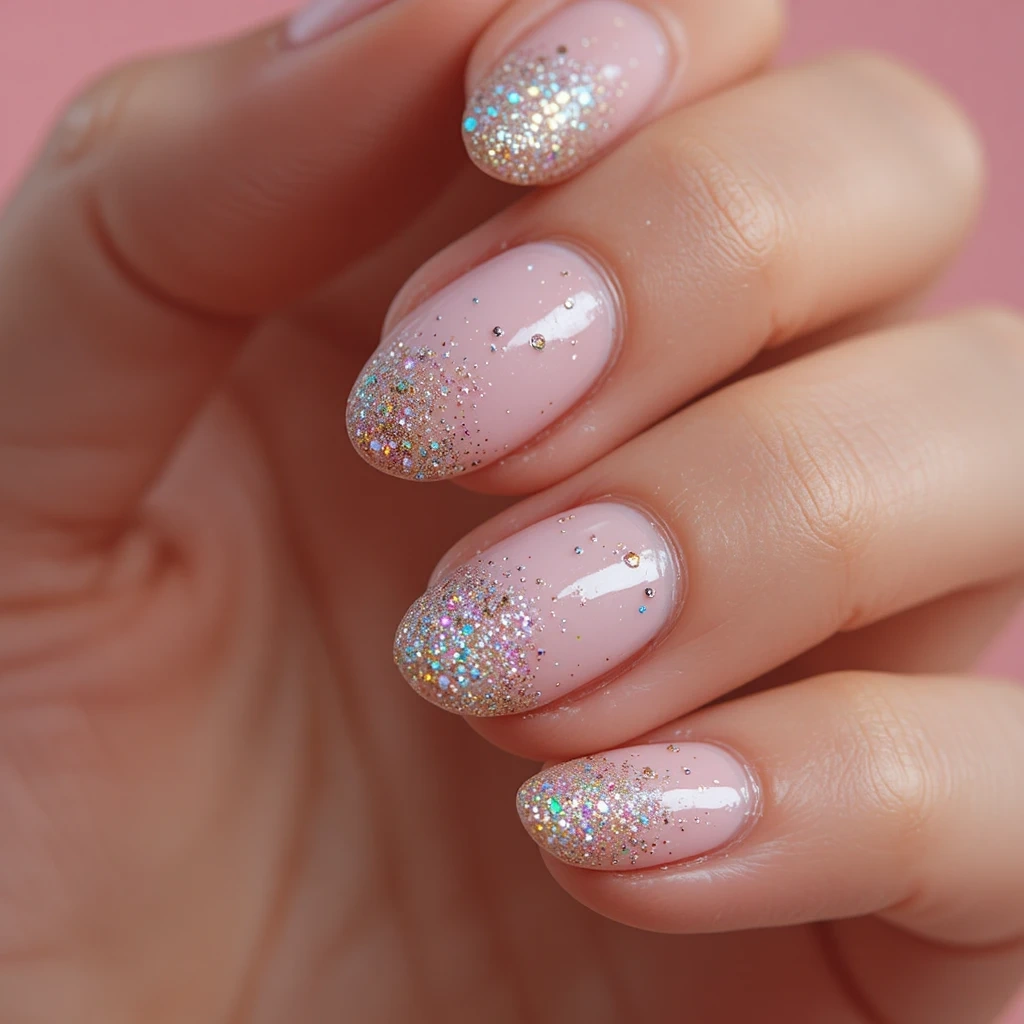
A soft pastel pink base that transitions into fine silver or gold glitter at the tip, replacing the white tip of a traditional French. Feminine, sparkly in a subtle way, and flattering in photos.
Difficulty: Beginner | Time: 25 minutes | Best for: People who love the French manicure silhouette but want more sparkle
Why it works: The glitter concentrates at the tip, so it catches light when your hand is open — exactly how graduation photos are usually taken.
What makes it different: Using fine micro-glitter rather than chunky glitter polish keeps the look sophisticated.
DIY at Home:
- Essie “Ballet Slippers” as base
- Essie “Glitter and Gild” ($10 at Ulta) or any fine champagne glitter polish
- Apply glitter only from the tip inward using a French tip sticker guide
- One coat of glitter is usually enough — it builds fast
6. Two-Tone School Colors
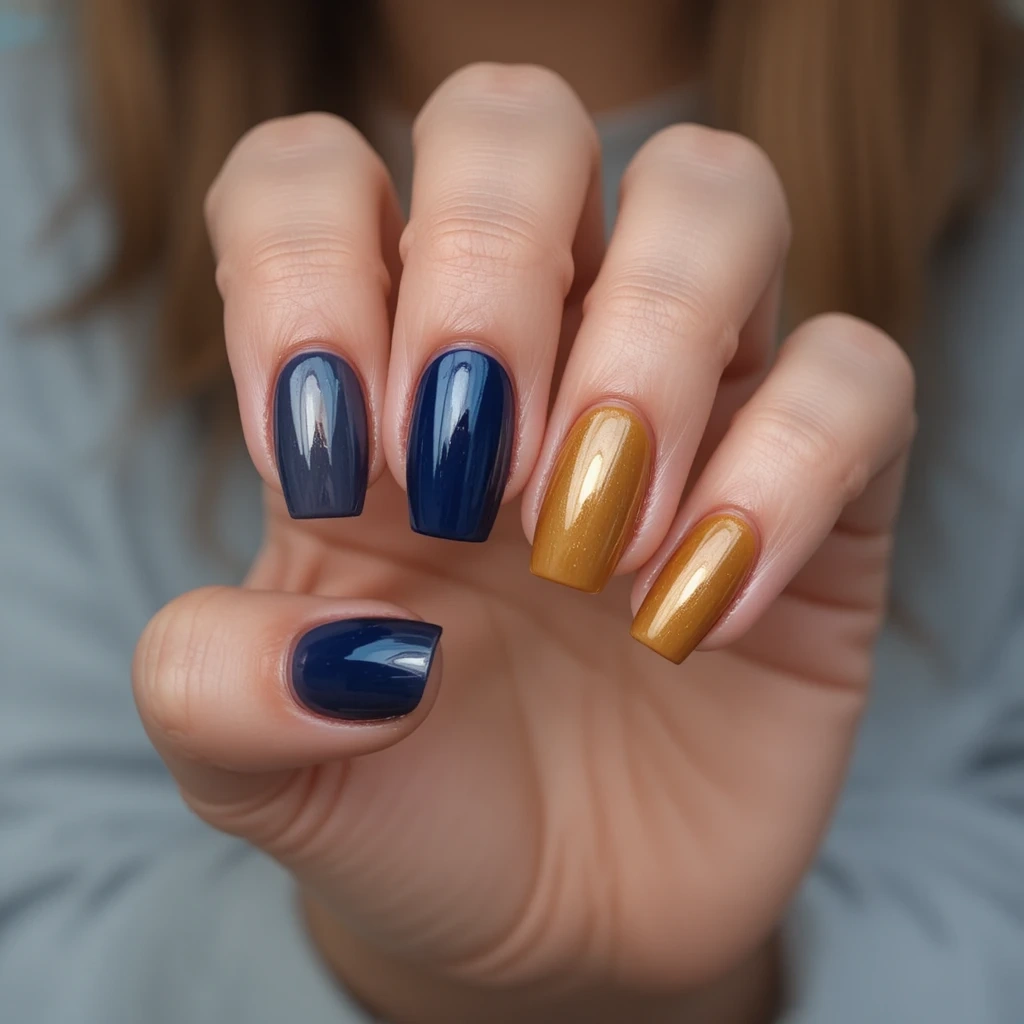
Alternating nails between your school’s two main colors. Thumb and middle finger in color A, index, ring, and pinky in color B (or alternate any pattern you like). Clean, readable, and impossible to misunderstand at a graduation ceremony.
Difficulty: Beginner | Time: 20 minutes | Best for: Anyone who wants to show school pride in the most direct, cheerful way possible
Why it works: The pattern is simple enough that it reads immediately in photos and from a distance.
What makes it different: Choosing slightly muted, sophisticated versions of your school colors (dusty navy instead of electric blue, burgundy instead of fire-engine red) makes the two-tone look wearable beyond just the ceremony day.
DIY at Home:
- Research your school’s Pantone colors and match to the closest OPI or Essie shade
- Two coats of each color, alternating as planned
- Same top coat on everything for a unified finish
7. Barely-There Tinted Glass Nails
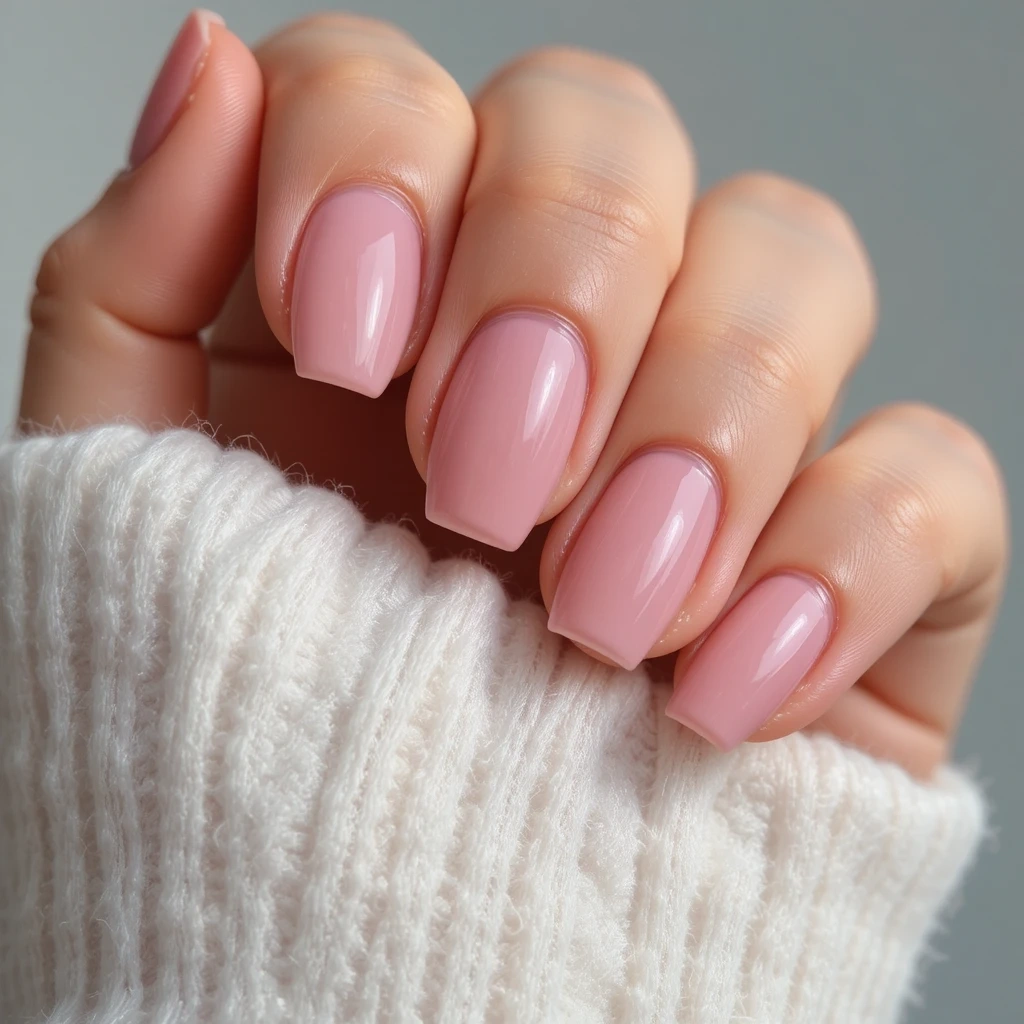
A sheer, jelly-like wash of soft color — dusty pink, pale lavender, or soft champagne — applied in two coats over bare nails. The effect looks like tinted glass: you can see your natural nail through the color. Ultra-minimal and thoroughly modern.
Difficulty: Beginner | Time: 15 minutes | Best for: People who want something genuinely different from everyone else at graduation without doing complicated nail art
Why it works: Glass nails catch light differently than opaque polish and look slightly editorial in photos.
What makes it different: Almost no one thinks to do this for graduation. It’s the nail trend that’s been everywhere in fashion editorial but hasn’t reached graduation-nail roundups yet.
DIY at Home:
- Cirque Colors Nail Polish in “Fleur” (sheer pink, $13 at cirquecolors.com) or any jelly-finish polish
- Two to three coats for the glass effect — you want translucency, not opacity
- High-shine top coat only (matte kills the glass effect)
Graduation Nails Acrylic
Acrylic sets are the choice when you want something that photographs like a luxury manicure and lasts through every graduation event on your calendar. These designs are built for acrylics — either done at a salon or with a nail extension kit at home.
1. Ombré in School Colors (Acrylic)
Description: Medium to long coffin or almond-shaped acrylic nails with a color ombré blending from one school color to another across the nail length. The gradient is built directly into the acrylic, giving it depth and permanence a gel ombré can’t match.
Difficulty: Advanced (salon recommended) | Time: 90 minutes at salon | Best for: Graduating seniors who want a full set that photographs as the centerpiece of every photo
Why it works: Ombré in two colors is an instant reference to the graduation milestone — it reads as intentional, not just pretty.
What makes it different: The color is baked into the acrylic powder, not painted on top, so it won’t chip or peel at the edges no matter how long you wear it.
DIY at Home: Recommend salon for this one. Request ombré acrylic powder — your nail tech will have colored acrylic powders on hand and can blend them at the mixing stage. Bring a reference photo.
Product if DIYing extensions: Morovan Acrylic Nail Kit ($35 on Amazon) includes white, pink, and clear powder plus a liquid monomer. You’d add colored acrylic powder separately (Nail Carriere brand, $8/jar on Amazon).
2. Long Coffin Acrylic with Stars and Glitter
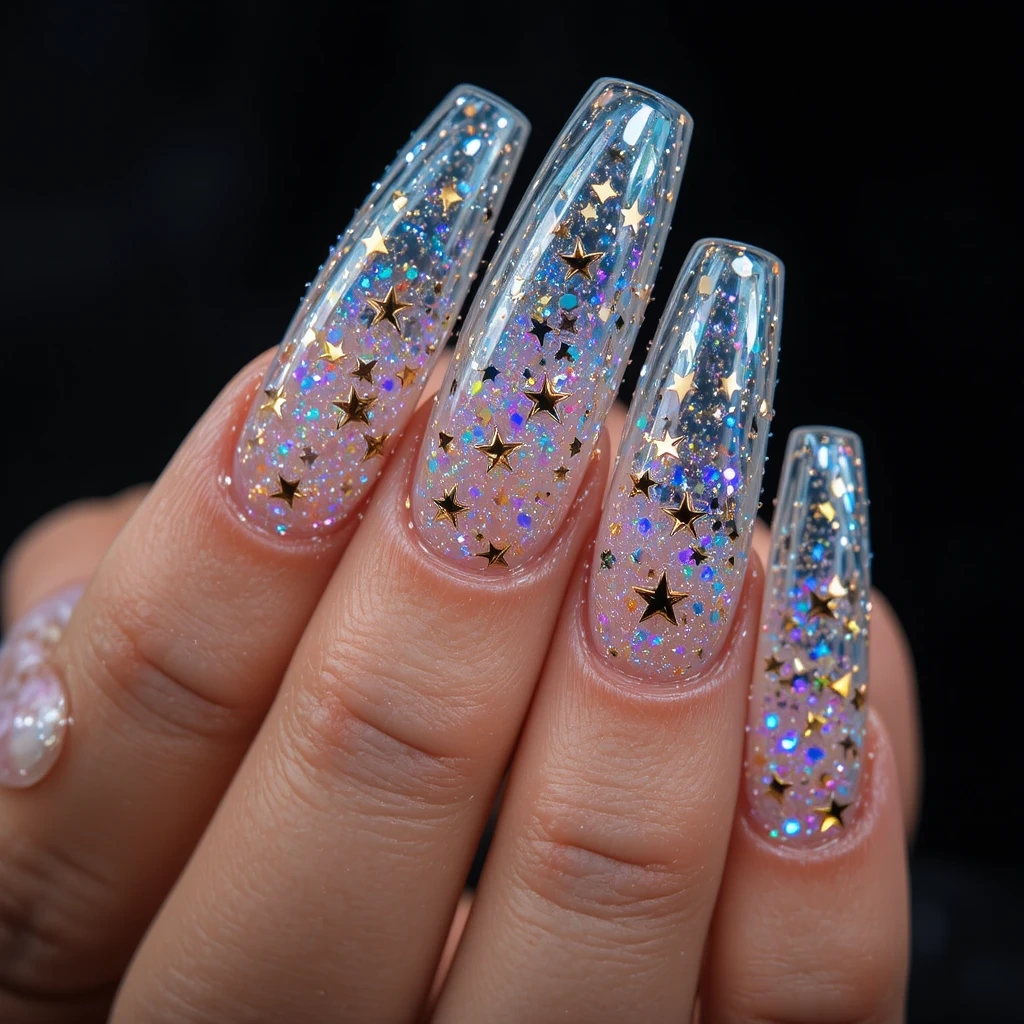
Long coffin-shaped acrylics with a clear or nude base loaded with holographic glitter and tiny gold star-shaped sequins embedded in the acrylic layer. The stars appear to float inside the nail like a snow globe.
Difficulty: Advanced | Time: 90–120 minutes | Best for: People who want statement nails that feel unique and won’t be duplicated by anyone else in the room
Why it works: The “objects floating inside the nail” look is inherently eye-catching and impossible to achieve any other way.
What makes it different: Most graduation nails put design on top of the nail. Embedding elements inside the acrylic makes the nail itself the design.
DIY at Home:
Apply first layer of clear acrylic
- Press in loose holographic glitter (Amazon, $6/jar) and star sequins before it fully sets
- Apply second clear acrylic layer over the top to seal everything inside
- File and shape, then finish with acrylic top coat
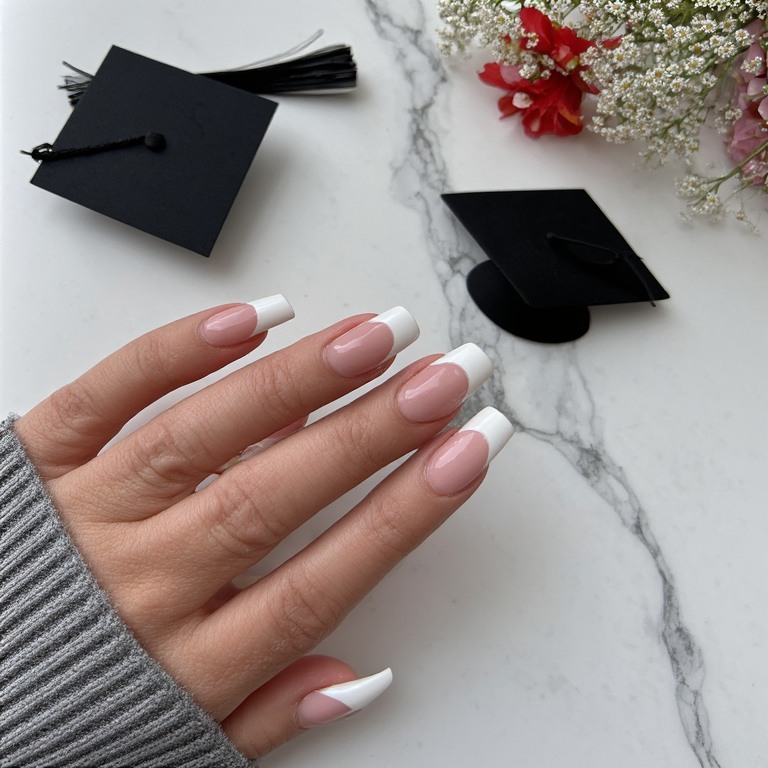
3. Classic White Tip with Nude Acrylic Base
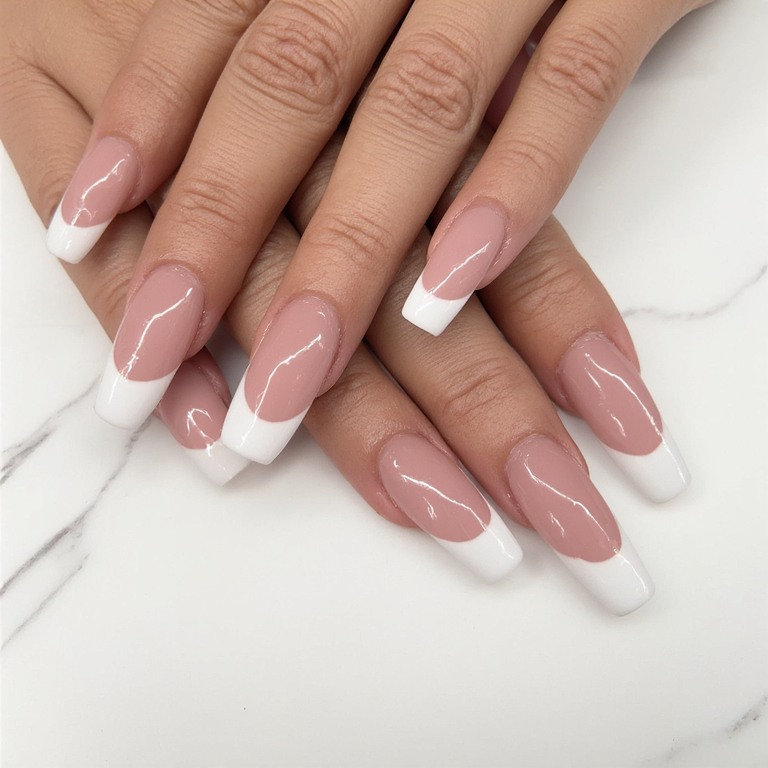
The definitive graduation acrylic set: medium to long coffin or square acrylics with a flawless nude pink base and perfectly sculpted white free edge. This is the nail set your graduation photographer’s camera will love.
Difficulty: Intermediate (manageable DIY) | Time: 60–90 minutes | Best for: People who want timeless, universally flattering nails they can wear confidently to every graduation event
Why it works: This is the most universally flattering nail set ever created. It suits every skin tone, nail shape, and outfit.
What makes it different: A sculpted acrylic white tip looks different from painted-on French tips — the white has three-dimensional shape that catches light from the side.
DIY at Home:
- Morovan Acrylic Nail Kit ($35 on Amazon)
- Apply white acrylic powder to the tip first, shape the free edge before it hardens
- Apply pink/nude acrylic to the base, blending into the white at the tip line
- File into coffin or square shape, buff smooth, apply top coat
4. Red Acrylic with Gold Foil and Glitter Tips
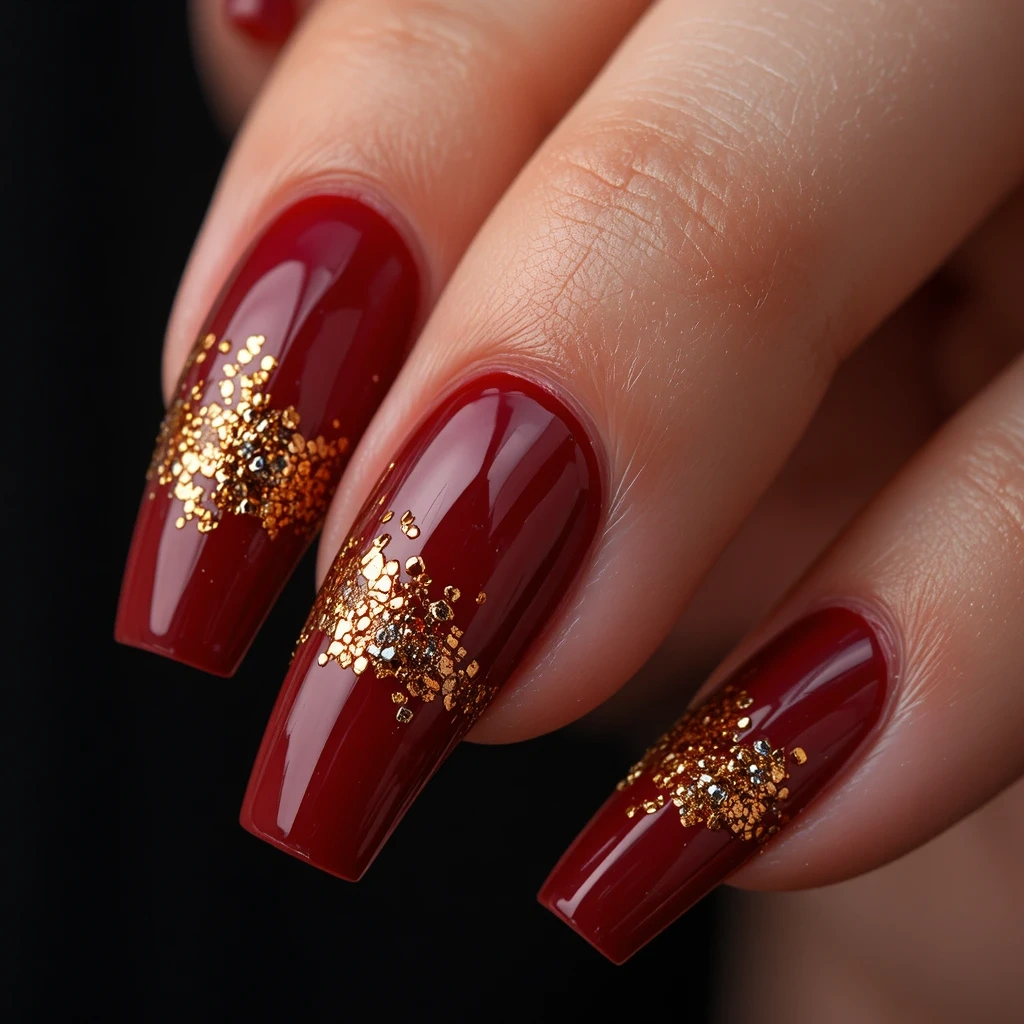
Rich, deep red acrylic with irregular patches of gold foil pressed onto the surface at the tip area, blending into scattered holographic glitter. Bold, warm, graduation-party-ready.
Difficulty: Intermediate | Time: 75 minutes | Best for: People whose schools use red and gold (USC, FSU, Iowa) or anyone who wants bold without going novelty
Why it works: Red and gold is historically a celebration color combination — it reads as festive and intentional.
What makes it different: The combination of foil and glitter gives two different types of light reflection, so the nail looks different in different lighting.
DIY at Home:
- Red acrylic powder (Nail Carriere “Red Passion,” $8 on Amazon)
- Apply foil transfer over cured gel top coat while tacky: Born Pretty Foil Glue ($5) + gold foil
- Dab fine holographic glitter at the tip with a sponge
- Seal with gel top coat
5. Coffin Nails with Diploma Design
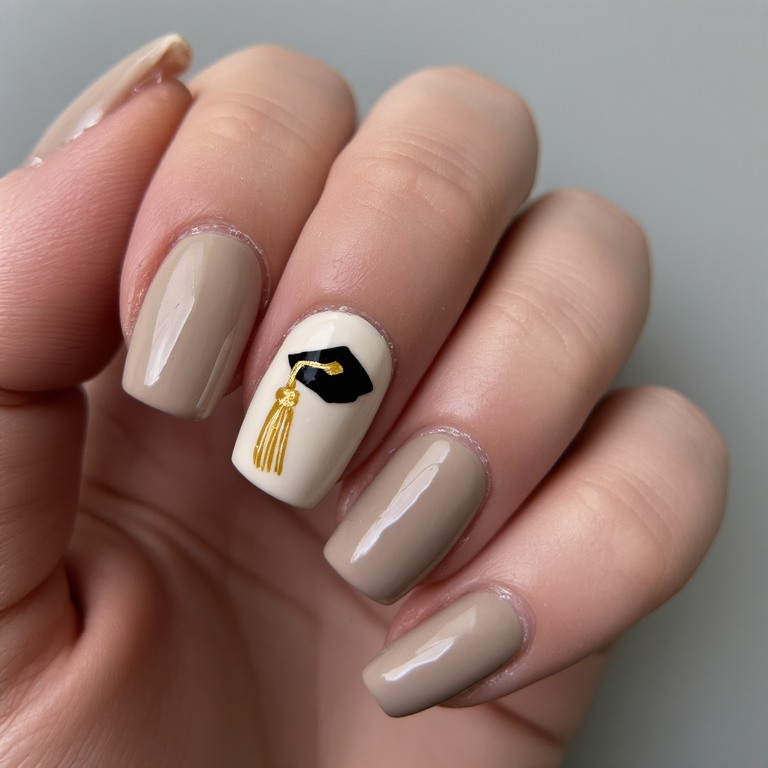
Medium coffin acrylics with a clean white or nude base and a tiny hand-painted diploma or graduation cap illustration on the ring finger accent nail. The design is small and detailed — diploma rolled with a gold ribbon, or a flat cap with a dangling tassel.
Difficulty: Advanced | Time: 90 minutes | Best for: Nail art enthusiasts who want something genuinely unique and personal
Why it works: It’s the most literal graduation nail design, but done small and delicately on one accent nail, it reads as charming rather than costume-y.
What makes it different: Everyone else will have glitter or school colors. No one else at your graduation will have a tiny diploma on their ring finger.
DIY at Home:
- Nude or white acrylic base (all nails)
- Modelones nail art brush set ($7) — use the ultra-fine 00 brush
- White gel paint for diploma shape, gold gel liner for the ribbon
- Cap design: black gel paint for the cap, gold for the tassel
- Practice the design three times on a piece of acetate before applying to the nail
6. Chrome Mirror Acrylic in Silver or Gold
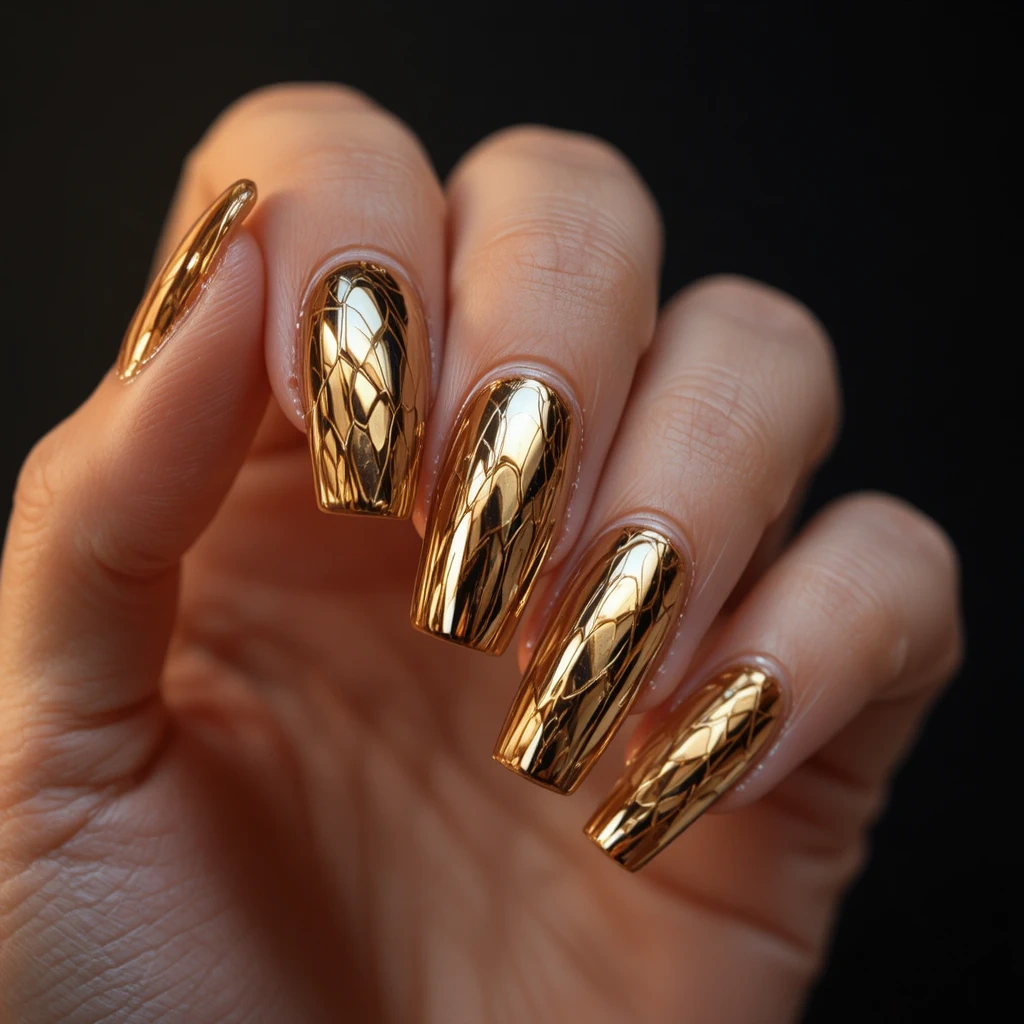
Medium coffin or almond acrylics buffed to a high gloss, then finished with chrome nail powder rubbed over the surface for a mirror-like metallic finish. Silver reads clean and modern; gold reads warm and celebratory.
Difficulty: Intermediate | Time: 60 minutes | Best for: People who want the maximum visual impact for the least amount of decorative nail art
Why it works: Chrome nails photograph like jewelry. They’re inherently graduation-level celebratory.
What makes it different: Chrome is a finish, not a color — it works with any nail shape and doesn’t date the way trend-specific designs do.
DIY at Home:
- Apply acrylic base, shape, and buff to a very smooth surface (this is critical for chrome — any scratches show)
- Apply a gel top coat, cure under UV lamp
- Rub chrome nail powder (Beetles Chrome Powder, $8 on Amazon) over the cured tacky gel layer using a felt applicator
- Seal with gel top coat — one thin coat, or the chrome dulls
7. Press-On Acrylic Set (The Fastest Option)
A pre-made press-on nail set designed to look like a full acrylic set — available in graduation themes, school colors, or classic styles. Applied with nail adhesive tabs in 20 minutes, looks indistinguishable from a salon set in photos.
Difficulty: Beginner | Time: 20 minutes | Best for: Anyone who wants acrylic-style nails without the commitment, the time, or the cost
Why it works: Modern press-ons are made from the same acrylic material as salon extensions. The difference is essentially invisible in photos.
What makes it different: You can change them for different graduation events and they cause zero nail damage if removed properly with acetate and gentle pressure.
DIY at Home:
- Beetles Press-On Nails in coffin sets ($12–$15 on Amazon) — search graduation-themed sets for diploma and star designs
- Kiss Impress adhesive tabs ($6 at drugstore) last longer than the adhesive that comes in most kits
- Soak off with acetate-soaked cotton balls, no prying
Cute Graduation Nails
“Cute” graduation nails hit a sweet spot between nail art and wearable polish. These designs are playful, personalized, and distinctly graduation-coded without being heavy-handed.
1. Pastel Rainbow with Tiny Diplomas
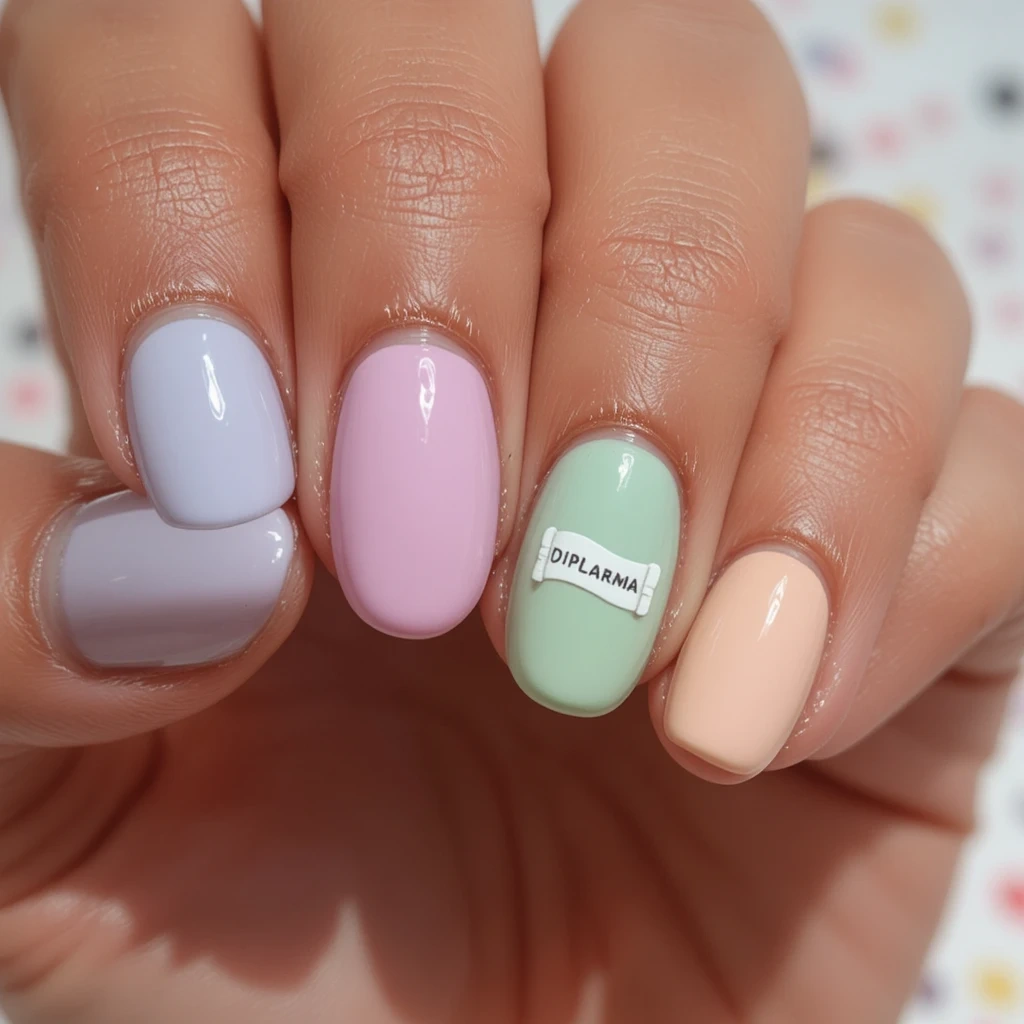
Five fingers each painted in a different soft pastel (lavender, mint, baby pink, buttercream, pale peach), with a tiny diploma illustration stamped or painted on the ring finger nail. Cheerful, colorful, and impossible to look at without smiling.
Difficulty: Beginner (with stamping kit) | Time: 30 minutes | Best for: People who love color and want nails that feel like a celebration before you even look at the design detail
Why it works: The pastel rainbow approach makes even very simple graduation nail art feel fresh and intentional.
What makes it different: The pastel color palette makes this look much more sophisticated than a bright primary rainbow would.
DIY at Home:
- Five different pastel Essie polishes ($10 each at Ulta, or buy a pastel bundle on Amazon for $25)
- Winstonia stamping plate with diploma image
- White or gold stamping polish for the diploma on the ring finger
2. “Congrats Grad” Letter Nails
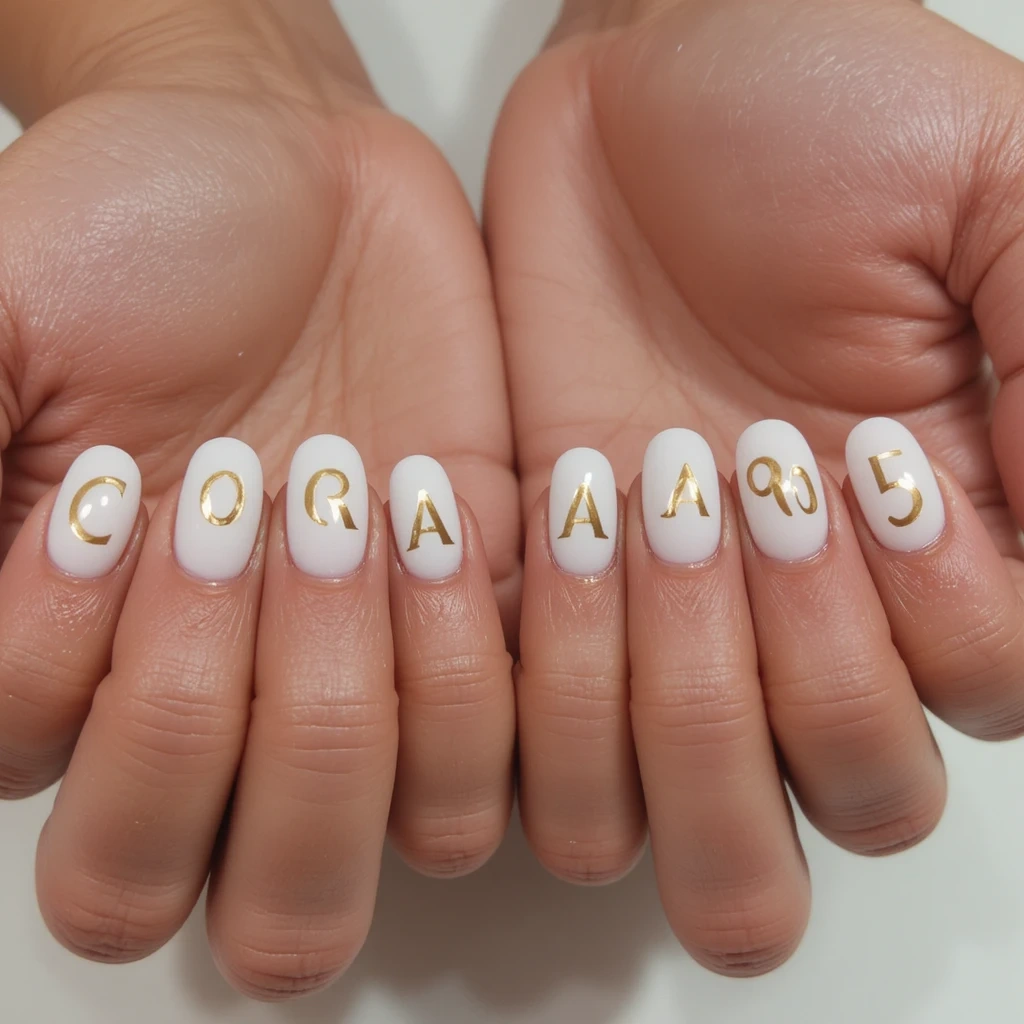
Each nail features one letter, spelling out “CONGRATS” across one hand and “GRAD ’25” across the other (adjusting for your year). Font-style letters painted in gold on a white or nude base.
Difficulty: Intermediate | Time: 45 minutes | Best for: People who love to commit to a concept and want nails that function as tiny signs in every photo
Why it works: It’s a walking celebration. Every photo of your hands tells the story without you saying anything.
What makes it different: Letter nails are everywhere, but graduation-specific wording — especially with your year — makes them a time capsule.
DIY at Home:
- White or nude base
- Modelones gold liner brush ($7) — print your letters on paper first, hold it next to your nail as a guide
- Use block letters (much easier than script) — keep each letter centered on the nail
- Alternative: nail letter stickers ($5 on Amazon) in gold foil
3. Mini Graduation Cap Accent
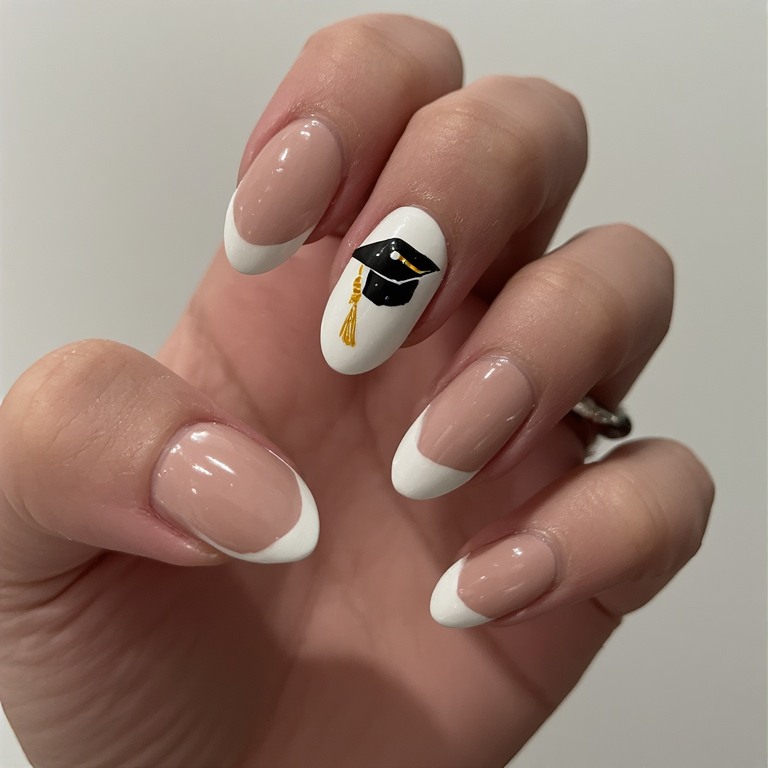
Four nails in a clean neutral and one accent nail per hand featuring a hand-painted or stamped miniature graduation cap — flat square top, thin band, dangling tassel in your school color.
Difficulty: Intermediate | Time: 30 minutes | Best for: Anyone who wants one meaningful nail art element without doing a full themed set
Why it works: The graduation cap is universally legible in any photo. It tells the story with zero ambiguity.
What makes it different: Keeping the cap small and on one nail only makes it a detail people discover rather than a design that screams at them.
4. Butterfly Nails in School Colors
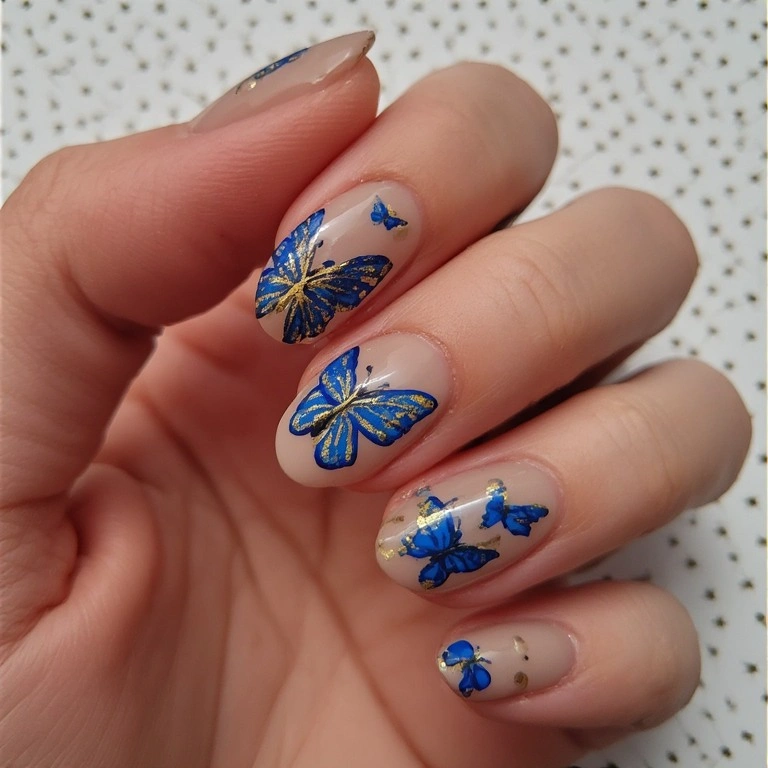
Description: Nude or white base with hand-painted or decal butterflies on the ring and middle finger accent nails in your school’s two colors. Delicate, feminine, and subtly themed.
Difficulty: Beginner (with decals) | Time: 20 minutes | Best for: People who love butterfly nails but want a graduation-relevant twist
Why it works: Butterflies signal transformation and new beginnings — it’s thematically perfect for graduation without being literal.
What makes it different: Most graduation nail art is cap-and-diploma imagery. Butterflies in school colors are graduation-themed without being obvious about it.
5. Confetti Nails

Clear or sheer base packed with tiny confetti-shaped glitter pieces in gold, silver, and your school color. The confetti appears to be falling mid-celebration across your nails.
Difficulty: Beginner | Time: 20 minutes | Best for: Anyone who wants something unambiguously festive that still photographs cleanly
Why it works: Confetti is universally understood as “celebration.” It needs zero further explanation.
What makes it different: Using school-color confetti glitter mixed with gold and silver makes this design personal rather than generic party nails.
6. Pink with “Grad” in Script
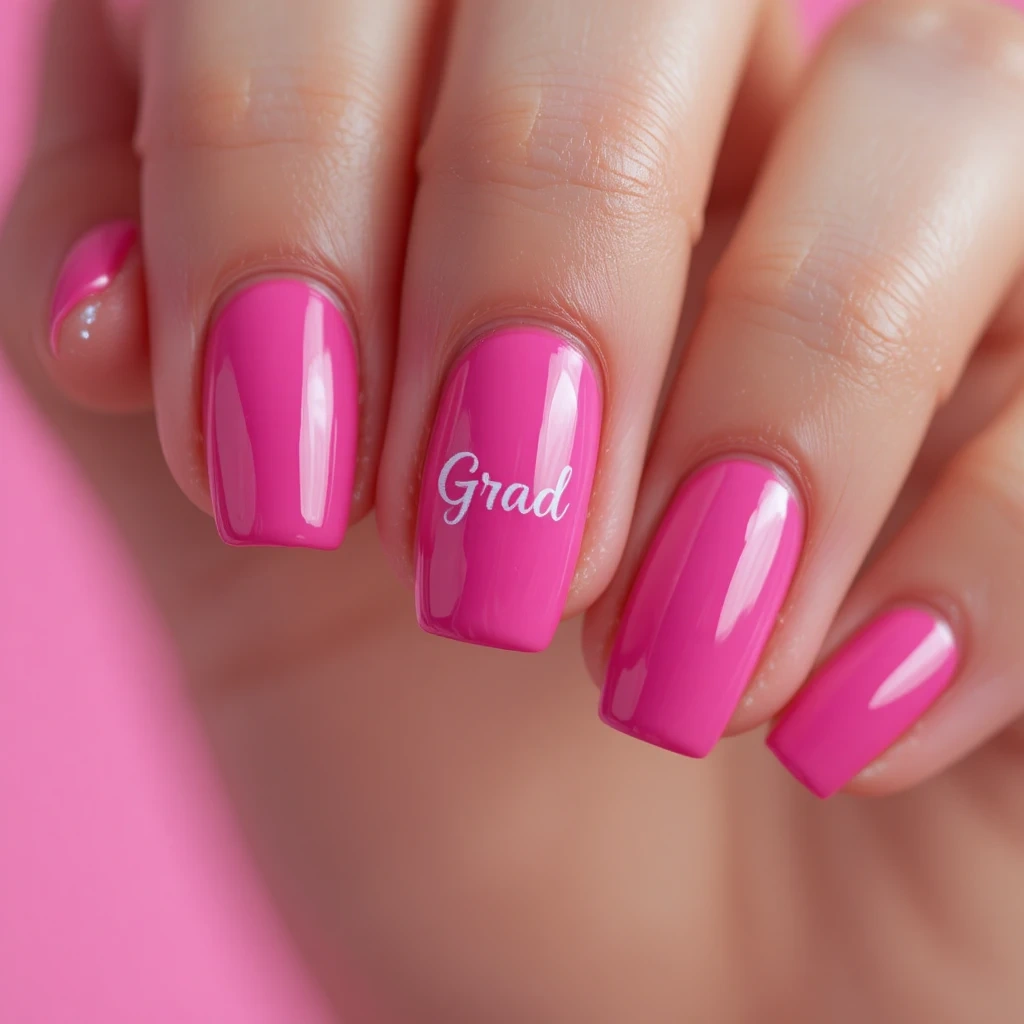
All nails in a soft hot pink or bubblegum pink, with “Grad” written in white script on the ring finger accent nail. Simple, direct, and surprisingly charming.
Difficulty: Beginner/Intermediate | Time: 25 minutes | Best for: People who love pink nails and want exactly one graduation-specific element
Why it works: It’s the nail equivalent of wearing a “Grad” sash — celebratory without any ambiguity.
What makes it different: “Grad” is shorter and easier to write cleanly than “Congrats” or your full school name.
7. Smiley Face Nails with Graduation Caps
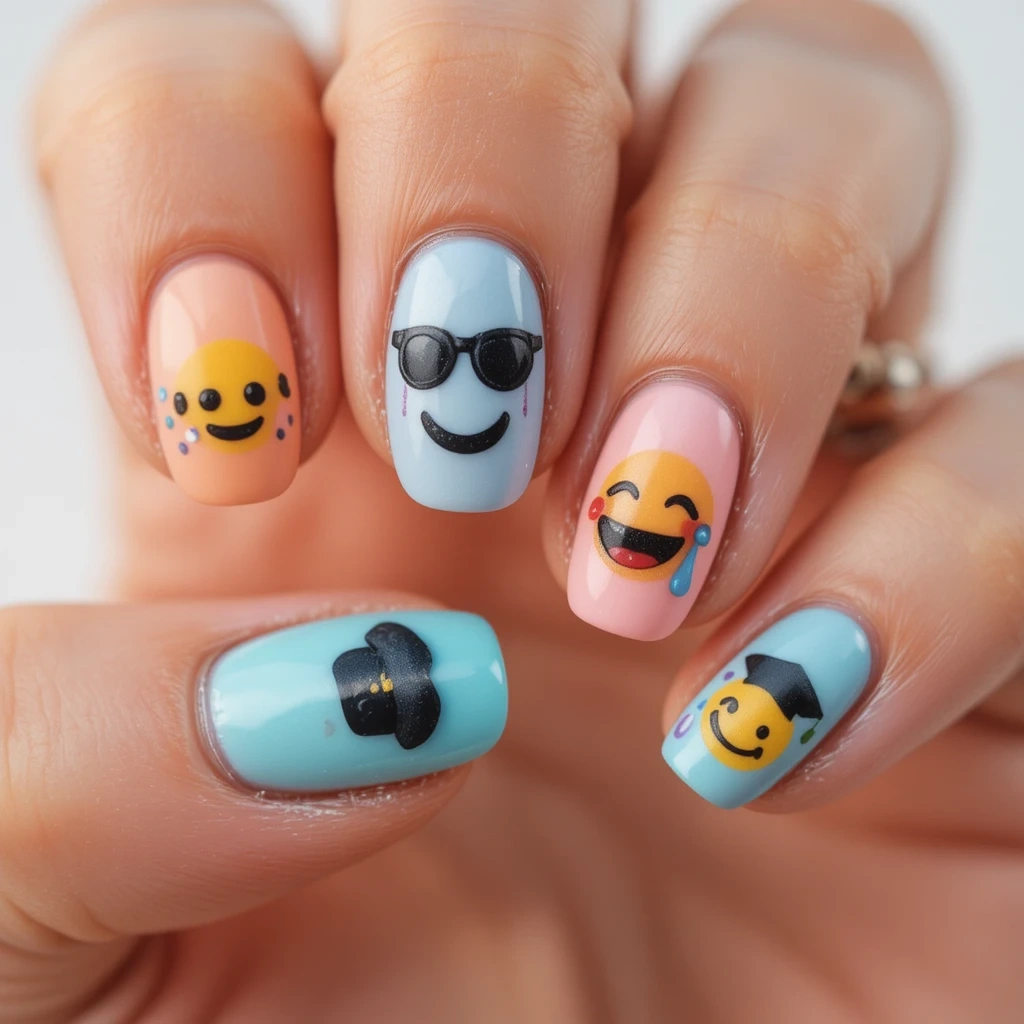
Description: Each nail features a different expression smiley face (happy, cool with sunglasses, surprised, laughing, crying with a cap on) on a solid pastel background. One accent nail has a tiny graduation cap on the smiley.
Difficulty: Intermediate | Time: 40 minutes | Best for: People with a playful aesthetic who want nails that make people laugh
Why it works: It’s a genuine conversation starter and photographs better than you’d expect because each finger tells a different story.
What makes it different: No one else at graduation will have smiley face nails. It’s memorable in a sea of glitter and school colors.
Graduation Nails Almond Shape
Almond is the graduation nail shape right now — it lengthens short fingers, photographs elegantly, and carries nail art in a way square and coffin shapes don’t. Here are seven designs built specifically for the almond silhouette.
1. Almond in Champagne with Glitter Tips
Medium almond nails in a warm champagne gel color, with fine holographic glitter concentrated at the tip blending into the base. The almond shape makes the glitter tip look like a crescent moon of sparkle at the end of each nail.
Difficulty: Beginner | Time: 30 minutes | Best for: Anyone who wants to celebrate without being over the top
Why it works: Champagne is already the graduation color. The almond shape makes it look intentionally styled.
What makes it different: The almond tip means the glitter gradient follows the curve of the nail edge — it naturally tapers rather than ending in a flat line.
2. Almond White with Pearl Tip
Clean matte white almond nails with a row of tiny seed pearls running along the very tip of each nail, following the almond curve. The result looks architectural and bridal-adjacent.
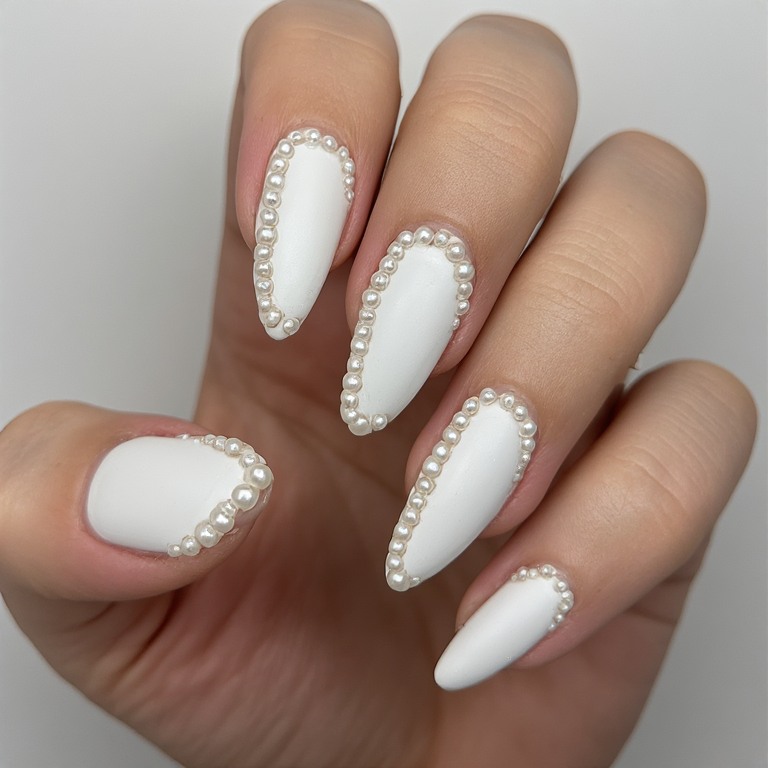
Difficulty: Intermediate | Time: 35 minutes | Best for: People who want nails that feel like jewelry
Why it works: The pearl tip on an almond nail is one of those details that looks incredibly difficult but takes 10 minutes with the right products.
What makes it different: The curved almond tip turns the pearl row into a natural arch shape — it looks custom-designed for the nail.
3. Almond Nude with School Color Tip
Description: Sheer nude almonds with a thin coat of your school’s primary color painting only the last 2mm of the tip — a colored French. Refined, school-themed, and so much more interesting than a full-color accent nail.
Difficulty: Beginner | Time: 25 minutes | Best for: Anyone who wants to represent their school without it being the first thing you see
Why it works: The colored tip is a subtle callback — people notice it when they look closely.
What makes it different: The almond shape makes the colored tip into a thin crescent rather than a blunt line — looks intentional and custom.
4. Almond Ombré in Two Neutrals
Description: A dreamy gradient on almond nails blending from a cool white at the tip down to a warm nude at the base. The almond shape frames the gradient in an arch at the top that makes the ombré look painterly and deliberate.
Difficulty: Intermediate | Time: 35 minutes | Best for: People who love the ombré look but want something wearable everywhere
Why it works: Two neutrals can’t clash with anything you wear. It’s the most versatile graduation nail option.
What makes it different: The almond tip frames the gradient — the white tip arches across the top in a way that reads as an abstract design even from a distance.
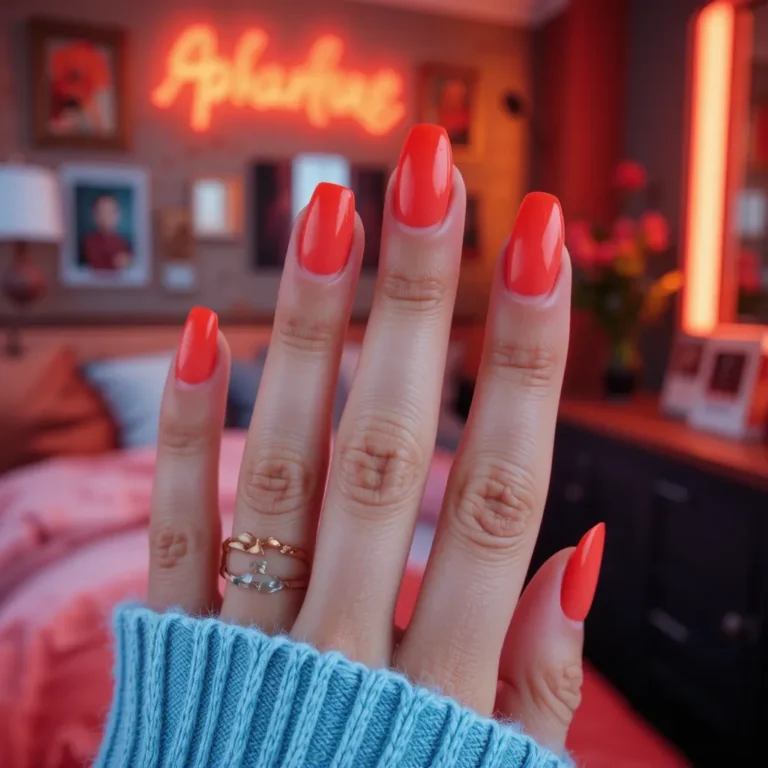
5. Almond Red with Gold Stars
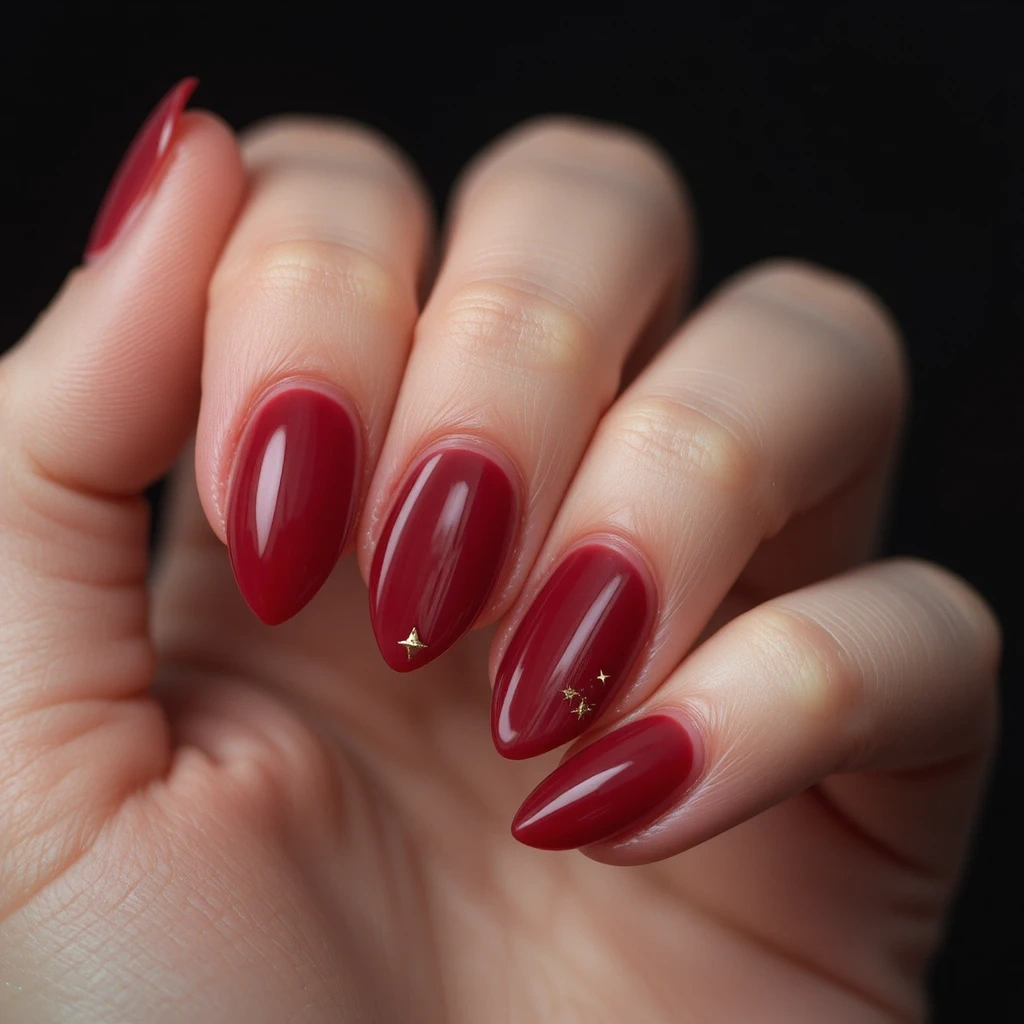
A deep, warm red almond nail with 2–3 tiny gold star accents near the base of the ring finger nail. Classic, striking, graduation-ready.
Difficulty: Beginner | Time: 25 minutes | Best for: Anyone whose school colors include red, or anyone who just wants a bold, classic graduation color
Why it works: Red reads as confident and celebratory — it’s been the color of achievement for centuries.
What makes it different: The gold stars on the almond shape sit in the curved well near the cuticle, which is the most flattering placement on this nail shape.
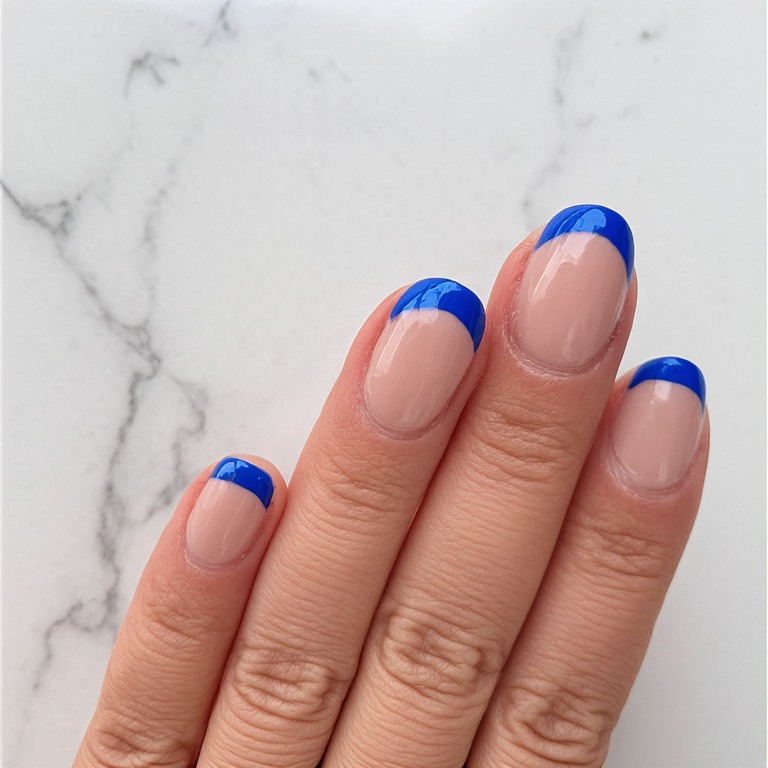
6. French Almond with Colored Tips
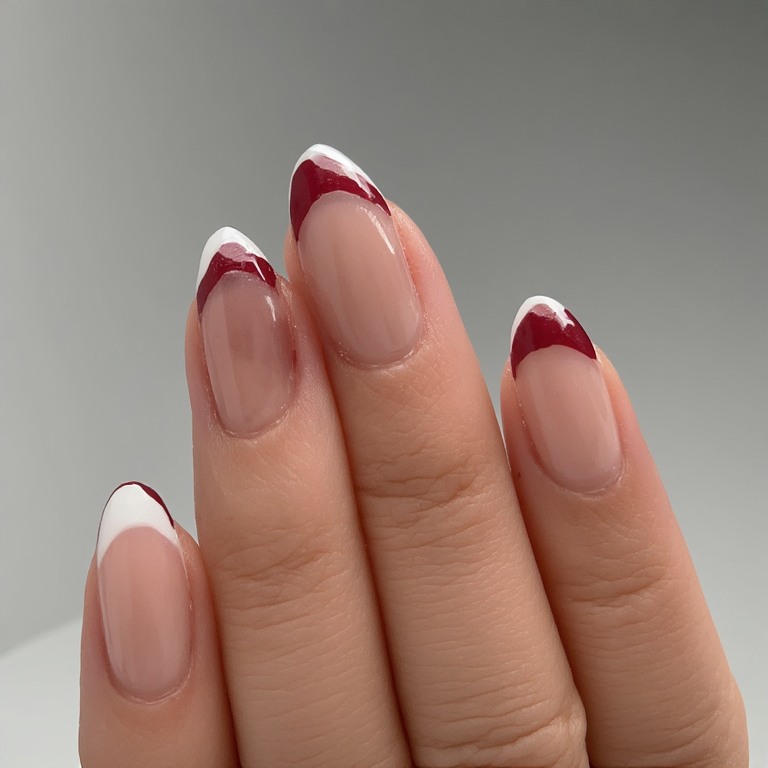
Classic French almond shape but with your school color as the tip instead of white. The soft nude base keeps it sophisticated while the colored tip makes it unmistakably graduation-themed.
Difficulty: Beginner | Time: 25 minutes | Best for: People who love a French manicure but want to customize it for the occasion
Why it works: It’s a design that looks intentional and personal without requiring any nail art skill.
What makes it different: The almond shape naturally elongates the tip, so the colored French band has a graceful, tapered quality that square nails can’t replicate.
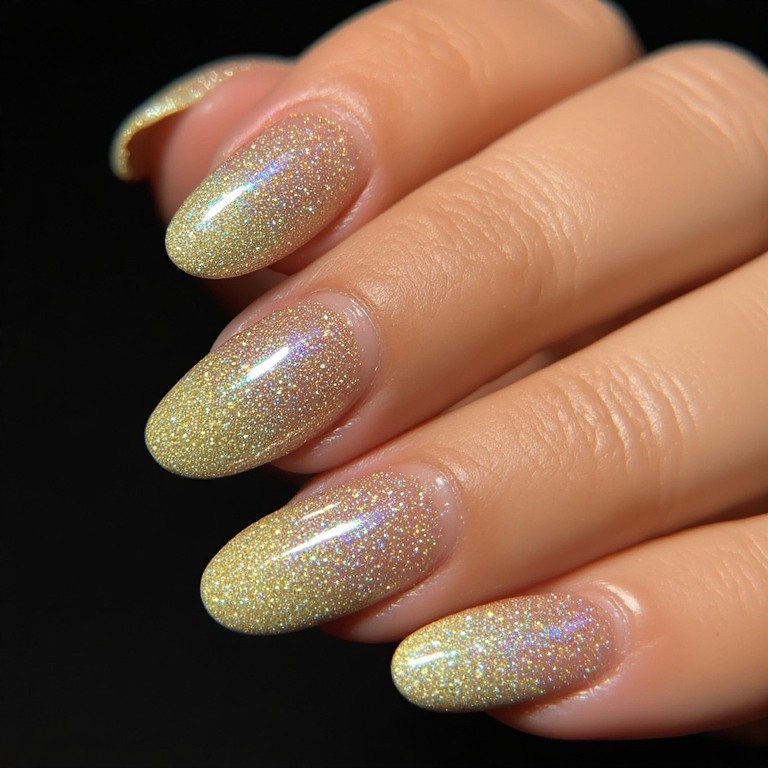
7. Holographic Silver Almond
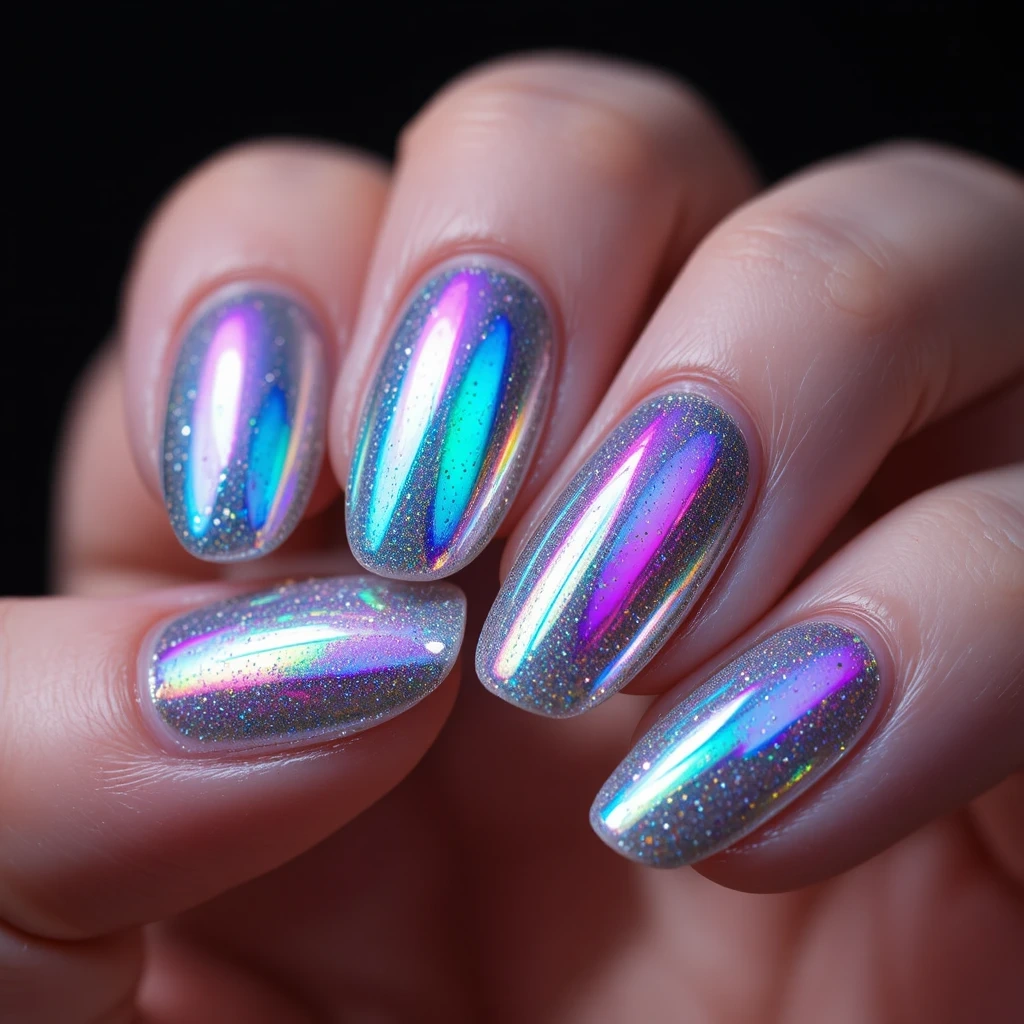
Almond-shaped nails polished with a holographic silver polish that shifts color under different light — appearing silver, then pink, then lavender, then gold depending on the angle. Stunning in graduation photos.
Difficulty: Beginner | Time: 20 minutes | Best for: People who want maximum visual impact with zero nail art
Why it works: Holographic polish does all the work. You just apply it like regular polish.
What makes it different: The almond shape maximizes the amount of light reflection surface area per nail — the holographic effect is visibly more dramatic on an almond than on a square nail.
DIY at Home:
- Holo Taco “Unicorn Skin” ($14 at holotaco.com) — the most widely photographed and reviewed holographic polish available
- Apply two coats on a white base (holo pops more over white than over a clear base)
- High-shine top coat only — never matte, or you kill the holo effect
College Graduation Nails
College graduation is different from high school graduation in one key way: the stakes feel higher and you’re going to be in a lot more professional photos. These designs balance celebration and sophistication for a four-year milestone that deserves a manicure that holds up to both the ceremony and every party after it.
1. Varsity Letter Nail
A clean set in your school’s primary color with your university’s initial letter painted in the contrasting school color on the ring finger accent nail. Your school’s “G” or “M” or “P” rendered like a varsity letter — block font, bold, immediately recognizable.
Difficulty: Intermediate | Time: 30 minutes | Best for: People who feel proud of their specific school and want nails that reflect where they went, not just that they graduated
Why it works: It’s the most personalized graduation nail design possible. It says exactly which milestone you’re celebrating.
What makes it different: Anyone can do school colors. Writing the actual initial makes this nail set uniquely yours.
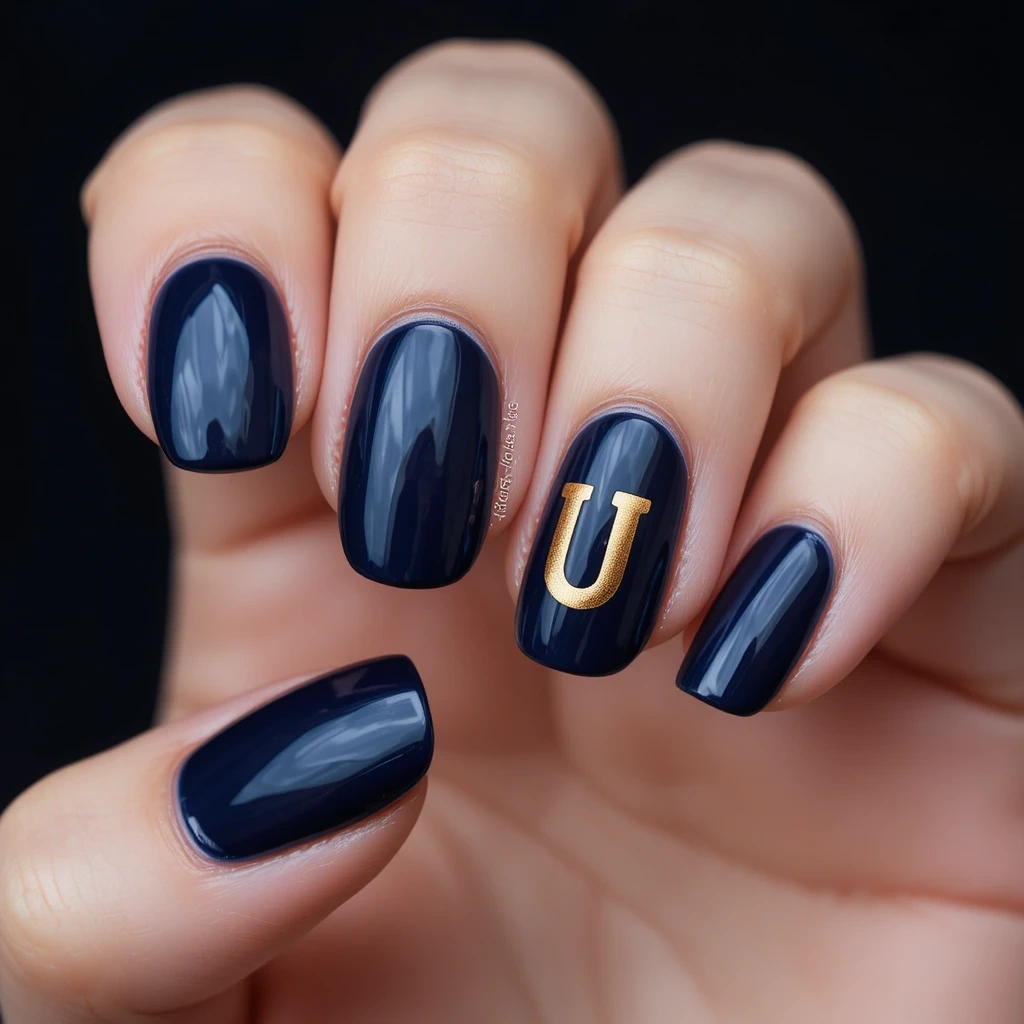
2. Midnight Navy with Gold Accents

Deep midnight navy gel on all nails with gold foil fragments pressed onto the ring finger accent nail and a thin gold stripe across the tip of the middle finger. Regal, academic, and suits literally any college color combination.
Difficulty: Beginner/Intermediate | Time: 30 minutes | Best for: People at schools with navy or dark blue colors — or anyone who wants a sophisticated, non-themed graduation set
Why it works: Navy and gold is the academic color combination. It reads as accomplished without being obvious.
What makes it different: The combination of foil (matte texture) and stripe (linear) on different nails gives the design variety without using more than two design elements.
3. Graduation Year Roman Numerals
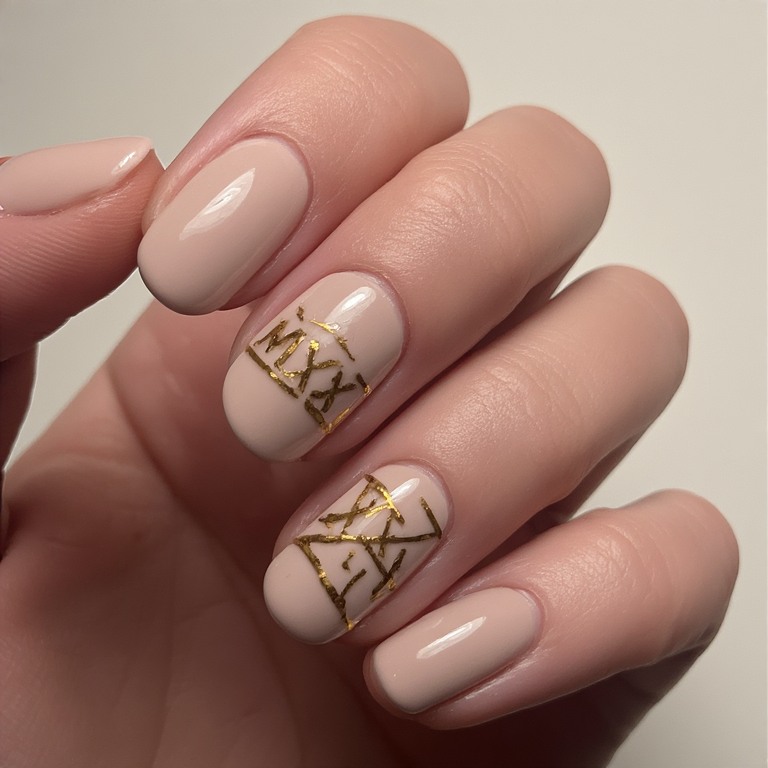
A clean nude or soft white base with your graduation year written in Roman numerals on the ring finger nail — “MMXXV” for 2025. Written in a thin gold font, it reads as architectural and intentional.
Difficulty: Intermediate | Time: 35 minutes | Best for: People who want a subtle design that’s deeply personal and will still make sense in photos years from now
Why it works: Roman numerals read as timeless in a way Arabic numbers don’t — they feel etched rather than written.
What makes it different: “MMXXV” is a more unusual design than “2025” and photographs beautifully because the letterforms are all vertical lines and angles.
4. School Color Chrome
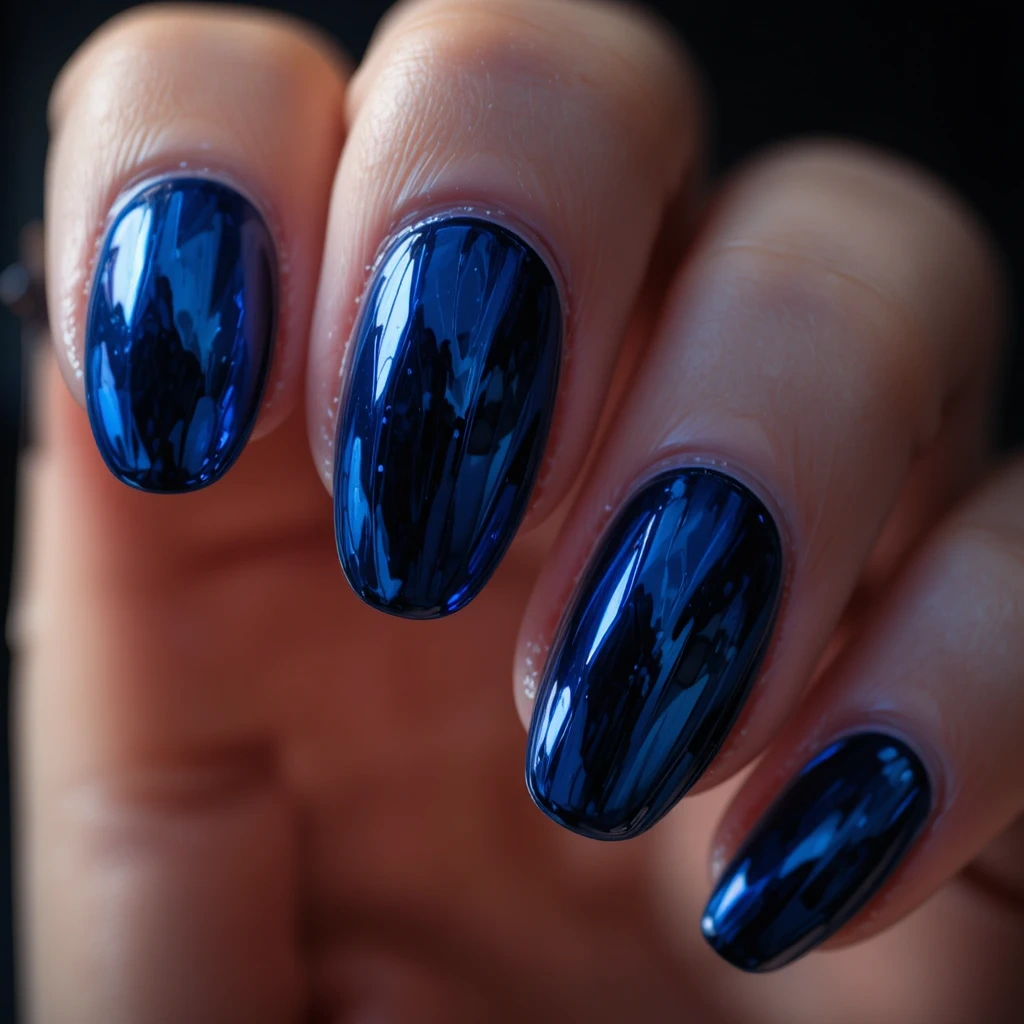
Chrome nail powder applied over your school’s color gel base — so the chrome takes on the color of the base beneath it. A blue base gives you a blue chrome; a red base gives you a red chrome. The result looks like metallic paint.
Difficulty: Intermediate | Time: 45 minutes | Best for: Anyone who wants their school colors to look absolutely stunning rather than just painted-on
Why it works: Chrome elevates any color. Your school’s navy becomes a liquid metal. Your school’s burgundy becomes a mirror-like deep red.
What makes it different: No one else will have school-color chrome nails. It’s a technique most people haven’t seen done this way.
5. Diploma Scroll Accent
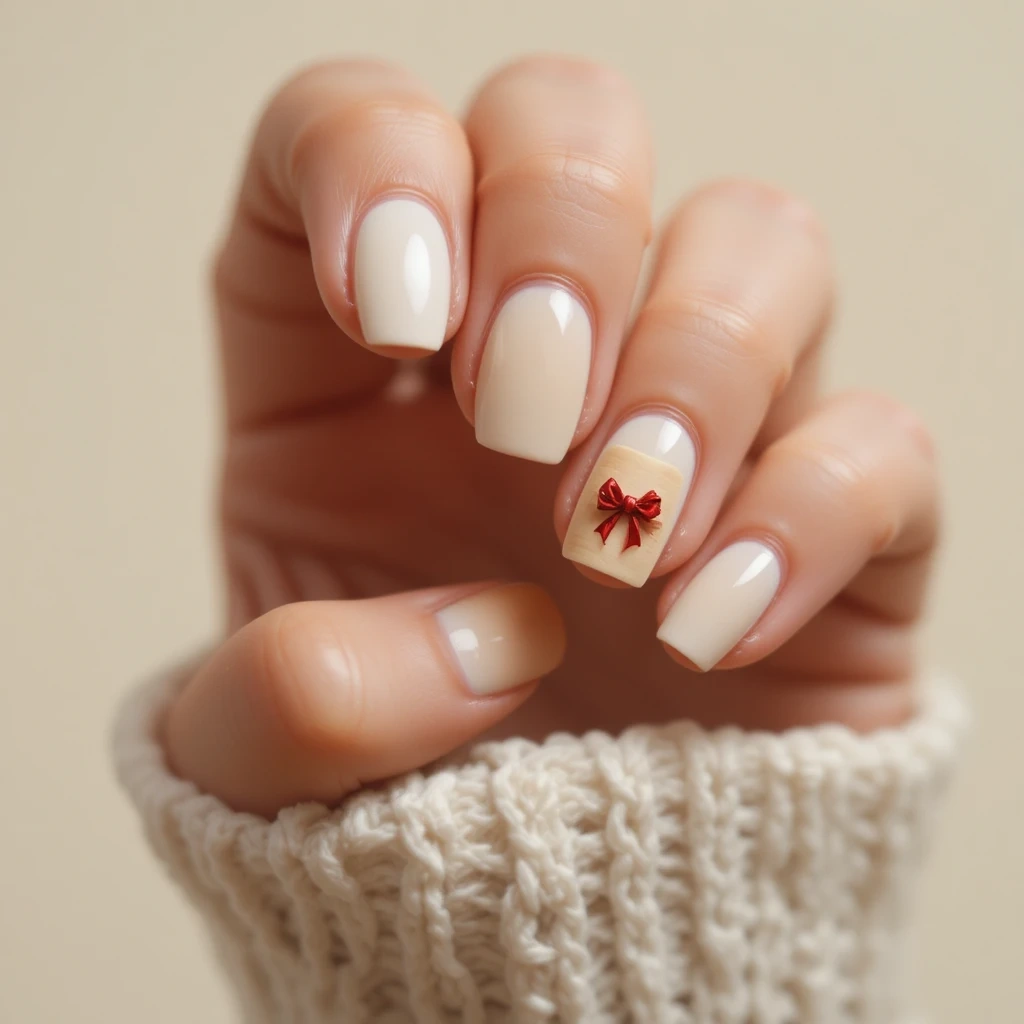
Three nails in a clean white or cream, two nails in a pale gold, and one ring finger accent nail with a hand-painted diploma scroll — a small rolled paper with a red or school-color ribbon tied around the middle.
Difficulty: Advanced | Time: 45 minutes | Best for: Nail art enthusiasts who want a genuinely unique design that will be the most-photographed nails at the ceremony
Why it works: The diploma is the object that represents the entire achievement of graduating college — wearing it on your nails is as personal as you can get.
What makes it different: Nobody else will have it. Not one other person.
DIY at Home:
- White/cream base (most nails) + pale gold on two nails
- Diploma on ring finger: white gel paint for the rolled scroll shape, a few thin horizontal lines for “text,” school-color gel liner for the ribbon
- Modelones brush set ($7) — the scroll requires a medium brush and a fine liner
- Practice 5–6 times first; the scroll shape is simple once you understand it as a rectangle with curved ends
6. University Seal Inspired Nails
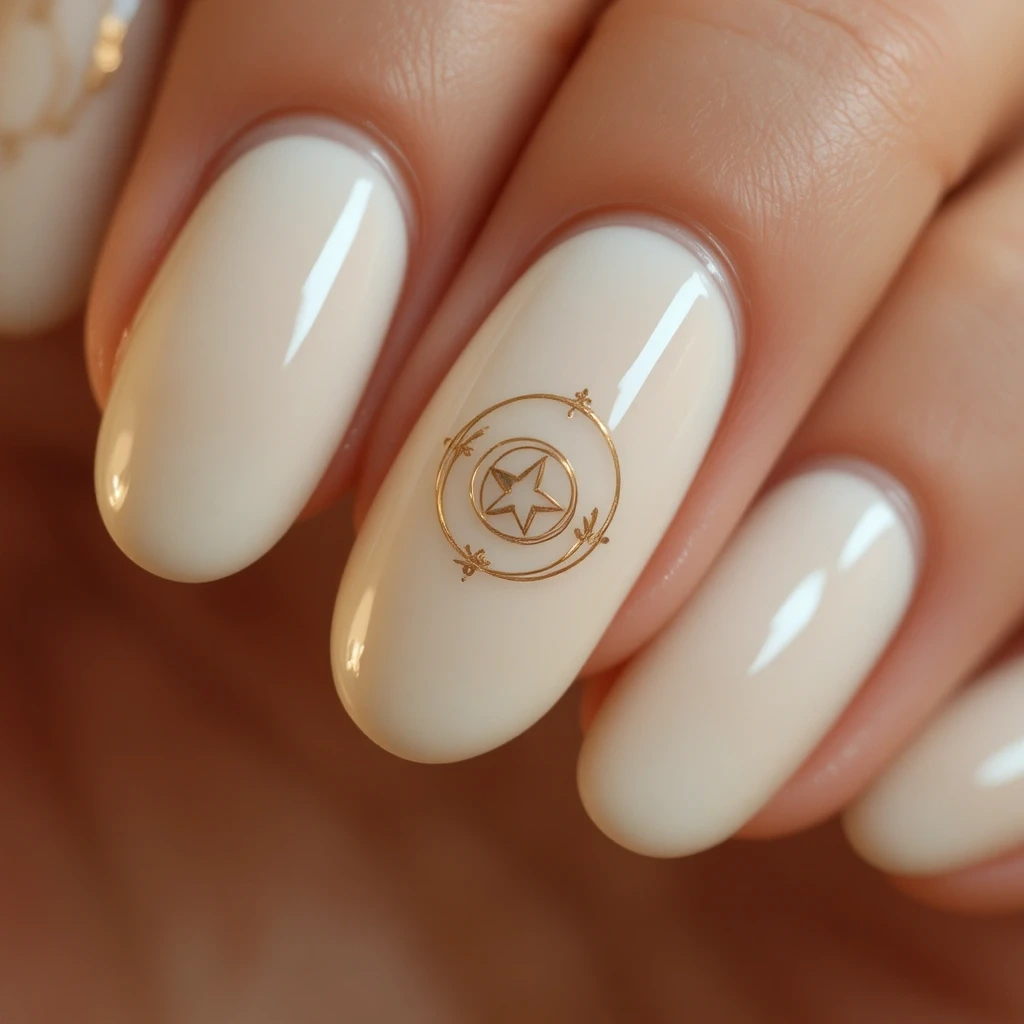
A clean, sophisticated set in white or cream with a small circular design on the ring finger accent nail that’s inspired by (not a copy of) your university’s seal — concentric circles, a star in the center, or your university’s motto initials in small text.
Difficulty: Advanced | Time: 50 minutes | Best for: People who are deeply proud of their specific school and want something design-forward rather than literal
Why it works: It turns a real institutional symbol into wearable art. It’s the kind of design that makes people ask “what’s that?”
What makes it different: Most graduation nails are generic. This is specific to your institution in a subtle, sophisticated way.
7. Tassel Worth the Hassle Nails
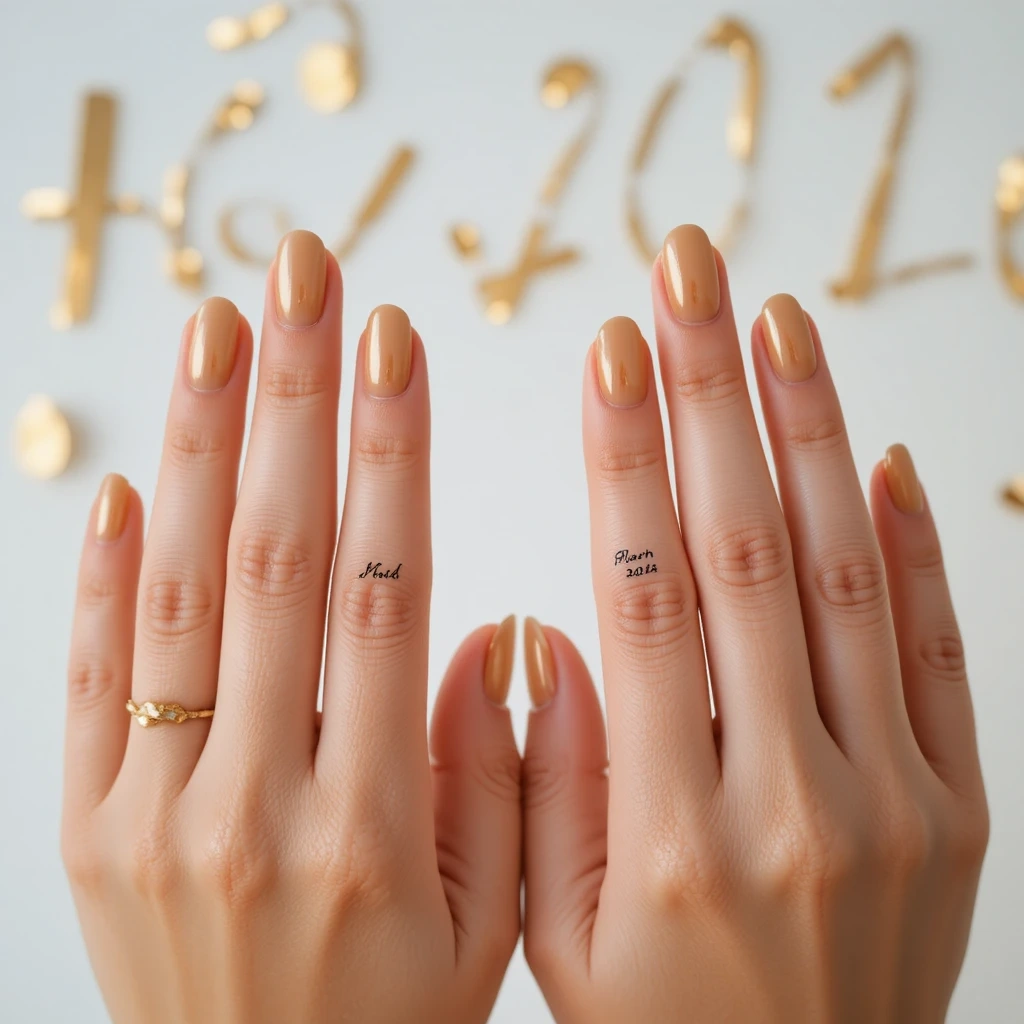
A clean set in gold or champagne, with “Worth the Hassle” written in tiny black script across the ring finger nail on one hand, and your graduation year across the ring finger on the other. It’s a direct nod to the graduation phrase “the tassel is worth the hassle.”
Difficulty: Intermediate | Time: 35 minutes | Best for: People with a sense of humor about what getting a college degree actually took
Why it works: It’s personal, funny, and true. It’ll start conversations.
What makes it different: It’s the only graduation nail design that makes your guests laugh.
Essential Tools & Products
The Basics (Under $30 Total)
Orly Bonder Base Coat ($9 at Sally Beauty) — This is the rubberized base coat that changed everything for me. Unlike cheap base coats that stay rigid and crack at the edges, Orly Bonder flexes with your nail. My polish lasts 4–5 extra days when I use this versus a drugstore base coat. Non-negotiable for any graduation nail look.
Sally Hansen Insta-Dri Top Coat ($7 at Target or drugstore) — Dries in 60 seconds flat and gives a high-shine finish that makes even basic polish look like a salon job. I’ve used this over gel-polish looks, glitter, and regular polish. It holds up.
Modelones Gel Nail Polish Starter Kit ($22 on Amazon) — Includes base coat, top coat, and 8 gel colors plus a UV lamp. The quality is way better than the price suggests. The lamp is small but it works. If you’re doing a gel look at home for graduation, this is where I’d start.
A good nail file — Mont Bleu Glass Nail File ($8 on Amazon) — Glass files seal the nail edge as they file instead of tearing it like cheap emery boards. Fewer chips. Worth the $8 permanently.
The Game-Changers
Born Pretty Nail Foil Transfer Glue ($5 on Amazon) — If you want metallic foil accents for a school-color look without hand-painting, this is the trick. Apply a thin layer, wait until it’s tacky (not wet), press foil paper on, peel off. Looks custom, costs almost nothing, takes 3 minutes.
Beetles Gel Polish in “Champagne Toast” ($8 on Amazon) — This specific color reads as a warm champagne in photos but wears sophisticated enough for the actual ceremony. It’s the graduation shade I recommend to everyone.
OPI Infinite Shine in “Bubble Bath” ($13 at Ulta) — The best sheer pink that works on every skin tone. It’s not a boring nude — it has just enough warmth to look like your nails but better. Pairs with anything.
Nail Art Tools (Don’t Cheap Out Here)
Modelones Nail Art Liner Brushes Set ($7 on Amazon) — You need a fine liner brush (size 0 or 00) to write graduation years, draw tiny diplomas, or do thin French tips freehand. The cheap sets sold in general craft stores shed bristles mid-stroke. These don’t.
Winstonia Store Nail Stamping Kit ($12 on Amazon) — Comes with a stamping plate that has graduation-specific images (caps, diplomas, stars), a stamper, and scraper. If you’re not confident hand-painting, stamping gives you clean nail art in 10 minutes.
Three Techniques Anyone Can Master
1. The “Foil Accent” Technique — Beginner, 15 Minutes Total
You apply gel or regular polish as your base, cure or dry it fully, then dab foil transfer glue on one or two accent nails. Once tacky, press metallic foil (gold, silver, rose gold) over it and pull away. The foil sticks to the glue lines and nowhere else, leaving you with random organic metallic patches that look intentional and editorial.
I learned the hard way that if you apply the foil while the glue is still shiny-wet, it doesn’t transfer cleanly. Wait until the glue goes from shiny to matte-tacky — about 60 to 90 seconds — and it peels perfectly every time.
2. The “Reverse French” Technique — Beginner/Intermediate, 20 Minutes
Instead of white tips, the color goes at the base of the nail (the moon area) and the rest of the nail is nude or sheer. For graduation, use your school color as the moon. It photographs beautifully and the color placement makes short nails look longer.
The trick is using hole-reinforcement stickers (the white paper ones from an office supply store) as a guide for the curve. Press one sticker at the base of each nail, paint your color, remove the sticker before it fully dries. Perfect curve every time.
3. The “Glitter Gradient” Technique — Beginner, 25 Minutes
Apply your base color first. Then dab loose glitter or a glitter gel polish starting from the tip using a small makeup sponge, getting heavier concentration toward the free edge and lighter as you move toward the center. This blends into the base naturally instead of having a harsh glitter line.
I used to try to brush glitter gradient on with a regular brush and it always looked choppy. The sponge method takes 60 seconds per nail and blends itself.
Gel vs. Acrylic for Graduation
| Feature | Gel | Acrylic |
|---|---|---|
| Wear time | 2–3 weeks chip-free | 3–4 weeks chip-free |
| Drying time | Instant (UV lamp cure) | 30–45 minutes to fully harden |
| Cost at salon | $45–$75 | $65–$100+ |
| DIY difficulty | Moderate | Advanced |
| Removal process | Soak in acetone, 15–20 minutes | Soak or file, 30–45 minutes |
| Nail damage | Minimal with proper removal | More with acrylics if pried off |
| Best for | Natural nails, shorter lengths | Extensions, long designs |
| Flexibility | Slight natural flex | Rigid |
| Weight | Light, natural feel | Slightly heavier |
| Design detail | Good | Excellent (especially 3D) |
My honest take: For most people, gel is the graduation choice. It’s faster, easier to remove, and the result is beautiful. I use gel for short to medium-length designs and anything I want to DIY at home. I only go acrylic when I want genuine length extensions or when a design requires embedding objects in the nail (like the confetti nails above). If you’re doing your nails at home the night before graduation, absolutely choose gel.
Pros and Cons
Pros
✅ Graduation nails give you something to look down at and feel good about during a long, emotional ceremony
✅ They photograph beautifully in every graduation photo format — close-up diploma shots, ring photos, family photos
✅ A gel manicure done 4–5 days before graduation is still fresh on the day without any touch-ups
✅ School-color designs are a way to show pride that isn’t as bulky as a sweatshirt or as obvious as face paint
✅ Almond and coffin shapes make hands look elegant in photos even with no design at all
✅ Graduation nails give you something to focus on in the week before — a small, controllable ritual when everything else feels chaotic
✅ DIY options are genuinely achievable and look professional with the right products
Cons
❌ Gel nails take 45–60 minutes minimum to apply at home — not a day-before-graduation option if you’re also packing, cleaning, and family-managing
❌ Acrylic sets at salons run $65–$100+, which adds up fast around graduation season when you’re already spending on outfits, travel, and events
❌ Elaborate nail art (letter nails, diploma designs) shows mistakes clearly — if you don’t practice first, it’ll look rushed
❌ Long acrylic nails make the next 2–3 weeks of job applications and moving boxes genuinely annoying
❌ Chrome and foil finishes show scratches and dents within a week — not ideal if you want nails that look fresh for two weeks of graduation parties
❌ Getting a chip in nail art the morning of the ceremony is a specific kind of stress you can avoid by keeping the design simple or doing press-ons
Real Wear Test: What Happens After 2 Weeks?
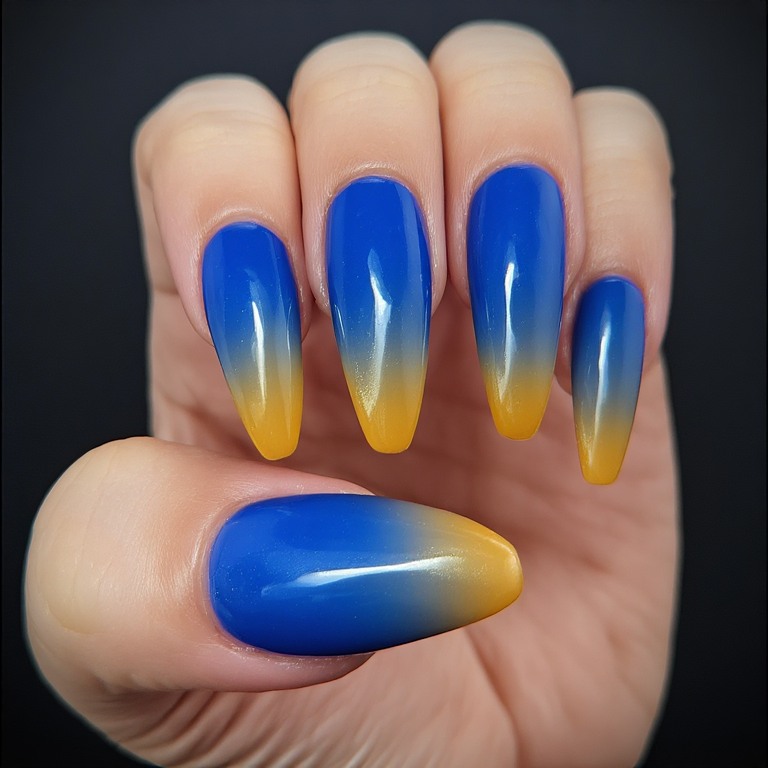
I wore a gel-polish set — school-color ombré in blue and gold on almond-shaped natural nails — from ceremony day through two weeks of graduation parties, family dinners, a road trip, and unpacking a dorm room.
Days 1–3: Perfect. Glossy, sharp, zero lifting. Multiple compliments including from a professor who asked what shade the blue was. The ombré photographs exactly as well as I hoped — the gradient reads clearly in indoor and outdoor lighting.
Days 4–7: Still fully intact. The tips took the most wear — visible micro-wear at the very tip on my dominant hand from typing and texting. Nothing that’s visible unless you’re looking closely.
Days 8–10: The first lifting appeared at the sidewalls of my thumbs (always the thumbs first). Not visible from above but I could feel it catching slightly. The ombré colors are still vibrant.
Days 11–14: Two tips on my right hand chipped during the unpacking process. The base-to-color transition on the ombré is starting to look soft rather than gradient — the color has shifted very slightly from product oxidation.
Verdict: Gel graduation nails look fresh for about 7–9 days of heavy use. If you apply 3 days before the ceremony, you’re gorgeous through the ceremony and the immediate parties. By week two you’ll want a refresh, but nothing is catastrophically wrong until you’re past day 12–13.
Maintenance Tips
Days 1–7: Protection Phase
Apply cuticle oil (CND Solar Oil, $10 at Sally Beauty) to each cuticle twice daily — morning and before bed. This keeps the skin around the nail flexible, which prevents the polish from cracking at the edges. I keep a small bottle in my bag at all times during graduation week.
Wear rubber gloves for any dish washing or cleaning. Hot water breaks down gel polish faster than almost anything else. A single long dish-washing session without gloves can introduce micro-lifts that accelerate further peeling.
Avoid picking at any lifting that starts. If a corner lifts, seal it down with a drop of gel top coat and cure under a UV lamp (or use a no-light top coat). Picking turns a 1mm lift into a 5mm peel in minutes.
Days 8–14: Preservation Phase
Apply a fresh layer of top coat over the entire nail surface every 3–4 days. This reseals the tip edge where wear starts and restores the shine without removing and redoing the whole manicure. I use Seche Vite ($8) for regular polish or a gel top coat under my UV lamp for gel.
Check for lifting daily at the sidewalls and free edge. Press any lifting areas down with an orange stick and a drop of top coat before they develop into chips. It takes 30 seconds and buys you 3–4 more days of clean nails.
Days 15–21: Decision Phase
By this point you’re making a decision: refresh the top coat one more time and get another week, or remove and redo. If your graduation events are fully behind you and you’re moving into work mode, remove the nails properly with acetone-soaked cotton rounds wrapped in foil (soak 15–20 minutes for gel, never peel).
General Maintenance (All Phases)
Keep your nails away from your teeth — obvious, but worth saying. Nervous habits at graduation ceremonies are real. File any sharp corners with a glass nail file ($8) immediately rather than letting them snag on fabric or hair. Drink water — hydrated nails hold polish longer, and graduation weekend involves a lot of alcohol and not enough water.
Common Graduation Nail Mistakes
Mistake #1: Doing Your Nails The Night Before
What it looks like: Nails that are smudged, dented, or still tacky on graduation morning because you ran out of time and didn’t let them fully cure or dry.
Why it happens: Graduation week is genuinely chaotic and nails always end up being the last thing on the list.
The fix:
- Schedule your nail appointment or DIY session 3–5 days before the ceremony
- This gives any gel proper cure time, lets your top coat fully harden, and gives you time to repair one chip if it happens
- If you truly can only do them the night before, use press-ons — they’re fully set the moment they’re applied
How well it works: Prevention is 100% effective. Night-before nails smudge because they’re rushed — building in 3 days of buffer fixes everything.
Mistake #2: Skipping Base Coat
What it looks like: School-color polish that stains your nails yellow, green, or whatever the pigment of the color is, visible for weeks after removal.
Why it happens: Base coat feels like an unnecessary extra step, especially when you’re in a hurry.
The fix:
- Always apply one thin coat of base coat before any pigmented color
- For reds, blues, and greens especially, use a stain-blocking base coat (OPI Natural Nail Base Coat, $11) rather than a standard base coat
- If staining has already happened: soak nails in lemon juice for 10 minutes, then buff very gently
How well it works: Prevention is complete. Lemon juice removes light staining; deep staining needs time to grow out.
Mistake #3: Applying Polish Too Thick
What it looks like: Bubbles in the polish surface, dents from touching before dry, visible streaks in white and pastel shades.
Why it happens: The instinct is that more polish = more coverage = better results. It doesn’t work that way.
The fix:
- Wipe most of the polish off the brush before applying — you want just a thin film on the bristles
- Apply two to three thin coats rather than one thick coat
- Let each coat become touch-dry before the next (60–90 seconds for regular polish, full UV cure for gel)
How well it works: Two thin coats applied correctly always outlasts one thick coat. The difference is noticeable within 48 hours.
Mistake #4: Not Capping the Tips
What it looks like: Chips starting at the very tip of the nail within 24–48 hours, specifically on the free edge, while the rest of the nail stays perfect.
Why it happens: Most people paint the top surface of the nail but forget to swipe the brush across the very tip edge, leaving it unsealed.
The fix:
- After applying each coat of color and your top coat, drag the brush across the thin edge at the tip of the nail
- This seals the free edge and is the single most effective chip-prevention technique
- Do this for base coat, each color coat, and top coat
How well it works: Capping the tips adds 3–5 days to wear time. It’s the highest-impact 5-second step in the whole process.
Mistake #5: Rushing the Nail Art
What it looks like: Wobbly letters, graduation caps with uneven sides, ombré that has a visible harsh line in the middle rather than a smooth gradient.
Why it happens: Nail art is a motor skill. People try it once directly on their nail without practicing first.
The fix:
- Practice every design element on paper or on a plastic bag first — three to five times minimum
- Use a light touch and a nearly dry brush for fine details
- If it goes wrong on the nail: wipe immediately with a brush dipped in acetone before it dries
How well it works: Practice on paper gives you the muscle memory. I’ve never had nail art look worse after practicing — it always improves after the third attempt.
Mistake #6: Prying Off Acrylic or Gel
What it looks like: Nails that are rough, thin, and peeling for weeks after graduation because the layers of the nail surface were removed along with the polish.
Why it happens: People peel acrylic and gel when it starts lifting because it’s satisfying and immediate. It takes a piece of your natural nail with it every time.
The fix:
- Soak cotton balls in 100% acetone, place on each nail, wrap in foil squares
- Wait 15–20 minutes minimum — gel needs the full time to dissolve
- Use an orange stick to gently push loosened product off; never metal tools, never force
How well it works: Proper soak-off removal causes zero nail damage. Peeling causes damage every time. There is no middle ground here.
FAQ
Q: How far in advance should I get graduation nails? Gel: 3–5 days before the ceremony is ideal — fully cured, still at peak shine, and you have time to repair one chip. Acrylic: 3–7 days. The acrylic needs 24–48 hours to fully harden and you want to make sure the shape and length feel comfortable before the ceremony.
Q: Can I do graduation nails on very short nails? Yes, and short nails often look better than medium nails for certain designs. Glitter gradients, solid colors with a single rhinestone, and sheer glass nails all look proportionally perfect on short nails. Avoid very detailed nail art (like diploma designs) because there’s less surface area to work with.
Q: Will my graduation nails show under my cap? Only when you move your hands — which is exactly when everyone is looking at you. During the diploma handshake, everyone in the audience can see your nails. This is the moment all the nail photos are taken. Plan for it.
Q: What’s the easiest graduation nail design that still looks impressive? Holographic polish (Holo Taco “Unicorn Skin,” $14) applied over a white base on almond or oval nails. It takes 15 minutes, requires zero nail art skill, and looks different from every other graduation nail set in the room. One product does all the work.
Q: How do I make my graduation nails match both ceremony and evening party? Keep the base design sophisticated (nude, white, or school color) and add one removable element — a rhinestone or foil accent — that you can cover with a fresh top coat for work/professional photos the next week. Alternatively, do press-ons: wear a full glam set for graduation weekend, remove them for the professional context the following week, zero commitment.
Q: Can I use regular nail polish instead of gel for graduation? Yes, with caveats. Use Orly Bonder base coat ($9), OPI or Essie polish, and Seche Vite top coat ($8). This combination gives 5–7 days of chip-free wear on toenails and 3–5 days on fingernails. Apply 2 days before graduation for maximum hardness. Regular polish is totally fine for the ceremony and immediate events — just don’t expect week-two freshness.
Conclusion
Graduation nails range from a $9 bottle of champagne polish applied the afternoon before to a custom acrylic set with embedded confetti and hand-painted diplomas — there’s a design for every skill level, budget, and school color.
If you’re starting out, I’d suggest trying the white with gold French tips using tip guide stickers and Sally Hansen Insta-Dri, and seeing how confident you feel with that before attempting nail art.
Once you’re comfortable with the basics, the holographic polish and almond-shape combination gives you maximum visual impact with minimal effort. Most importantly, don’t expect your first nail art attempt to look exactly like the inspiration photo — mine never do on the first try, and they always get noticeably better by the third.