7 Amethyst Nails Design That Look So Luxurious
Amethyst nails are any manicure featuring purple shades inspired by the amethyst gemstone—ranging from soft lavender to deep plum with blue undertones. Unlike basic purple polish, amethyst nails specifically reference those cool-toned, jewel-like purples that shift slightly in different lighting, mimicking how real amethyst crystals catch the light.
They’re popular because purple sits in that sweet spot between bold and professional, making it way more versatile than you’d expect.
Why This Guide Is Different
Unlike other roundups that just show you pretty pictures, this guide includes complete step-by-step instructions for creating each look at home, specific product recommendations with real prices, and troubleshooting for the most common problems I’ve seen when working with purple polish.
You’ll also get honest difficulty ratings and time estimates so you know exactly what you’re getting into before you start.
How to Choose the Best Amethyst Design
For your first time: Start with Soft Lavender Nude or Matte Plum Perfection—both use simple one-color application with no nail art skills required, and mistakes are easy to fix.
If you have a professional job: Stick with Soft Lavender Nude, Amethyst French Tips, or lighter shades of Glossy Deep Amethyst. These read as polished and intentional rather than distracting.
If you want something for special events: Try Icy Lilac Chrome or Amethyst with Gold Foil Accents—both have that elevated, expensive look that photographs beautifully and feels occasion-appropriate.
If you’re comfortable with nail art: Go for Amethyst Ombré Fade or designs combining multiple finishes. These require steadier hands and more patience but create truly unique results.
If you have short nails: Lighter amethyst shades and matte finishes work best. Deep glossy purples can overwhelm short nail beds and make them look even smaller.
If you change your mind often: Avoid chrome finishes and gel polish. Regular polish removes in 5 minutes, while gel requires 15-20 minutes of soaking, and chrome powder can be stubborn to remove completely.
Minimalist & Elegant Amethyst
1. Soft Lavender Nude
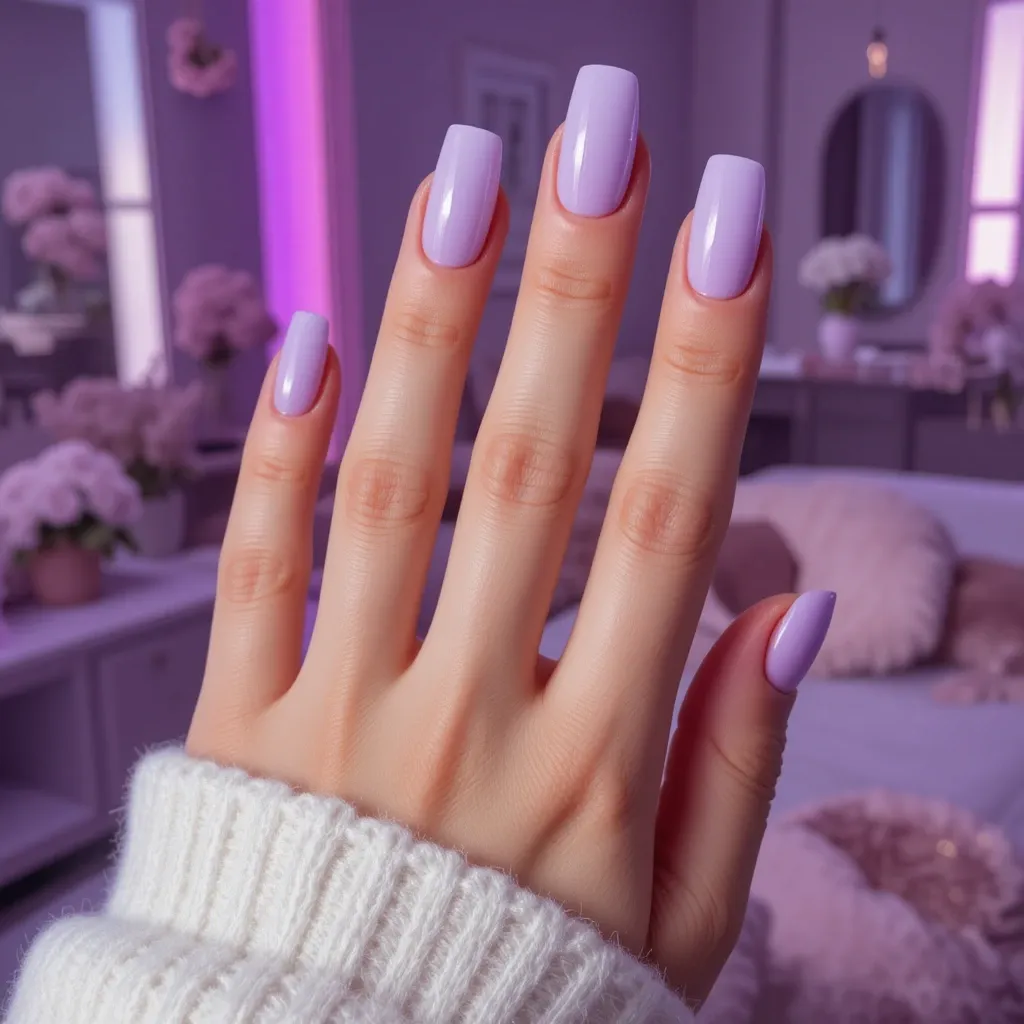
A barely-there lavender base with subtle purple undertones creates an ethereal, sophisticated look that’s perfect for those who want just a hint of color. The milky finish keeps things modern and fresh, while the delicate purple tint adds unexpected dimension. This shade works beautifully on any nail length and pairs effortlessly with both silver and gold jewelry.
Difficulty: Beginner
Time to complete: 25-30 minutes
Best for: First-timers who want to test amethyst tones without full commitment
Why it works: The sheer formula is forgiving of application mistakes
What makes it different: Unlike solid purples, this has a milky, translucent quality that creates depth
Pro Tip: Almond or oval nail shapes make this shade look incredibly chic and elongating. If you’re shaping at home, file in one direction only (never sawing back and forth) to prevent splitting.
2. Glossy Deep Amethyst
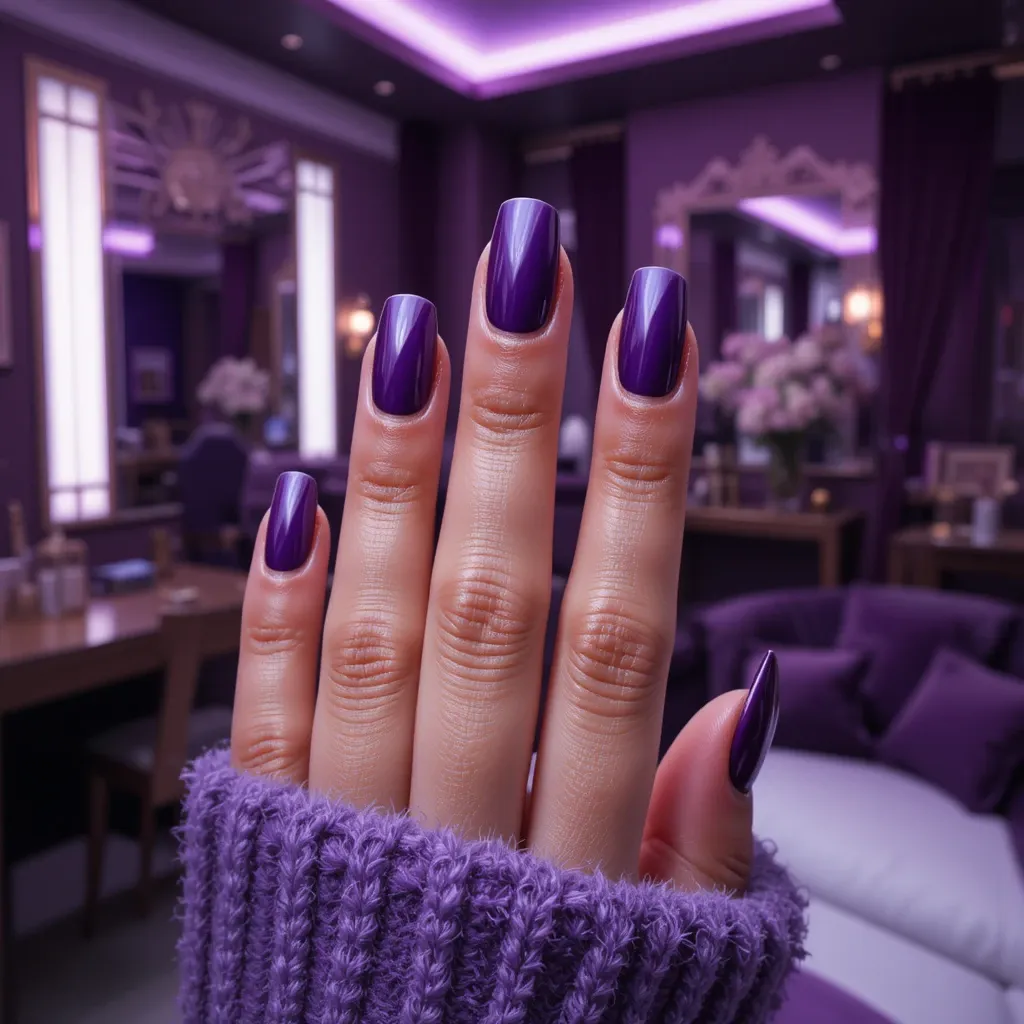
A rich, jewel-toned purple with blue undertones that captures the depth and brilliance of actual amethyst crystals when finished with a high-shine top coat. The color shifts subtly in different lighting, revealing hidden dimensions that make your nails look like wearable art. This shade makes a bold statement while still maintaining an air of sophistication and elegance.
Difficulty: Beginner
Time to complete: 20-25 minutes
Best for: Anyone who wants classic, bold color with zero nail art required
Why it works: Deep purple is forgiving—small application mistakes blend into the dark color
What makes it different: The blue undertones keep it sophisticated instead of looking like children’s grape polish
Pro Tip: Apply petroleum jelly or cuticle oil around your nails before polishing—any mistakes wipe away easily with a cotton swab, making cleanup effortless. This shade looks particularly stunning on shorter, square-shaped nails for a modern edge.
Cool-Toned Amethyst Variations
3. Icy Lilac Chrome
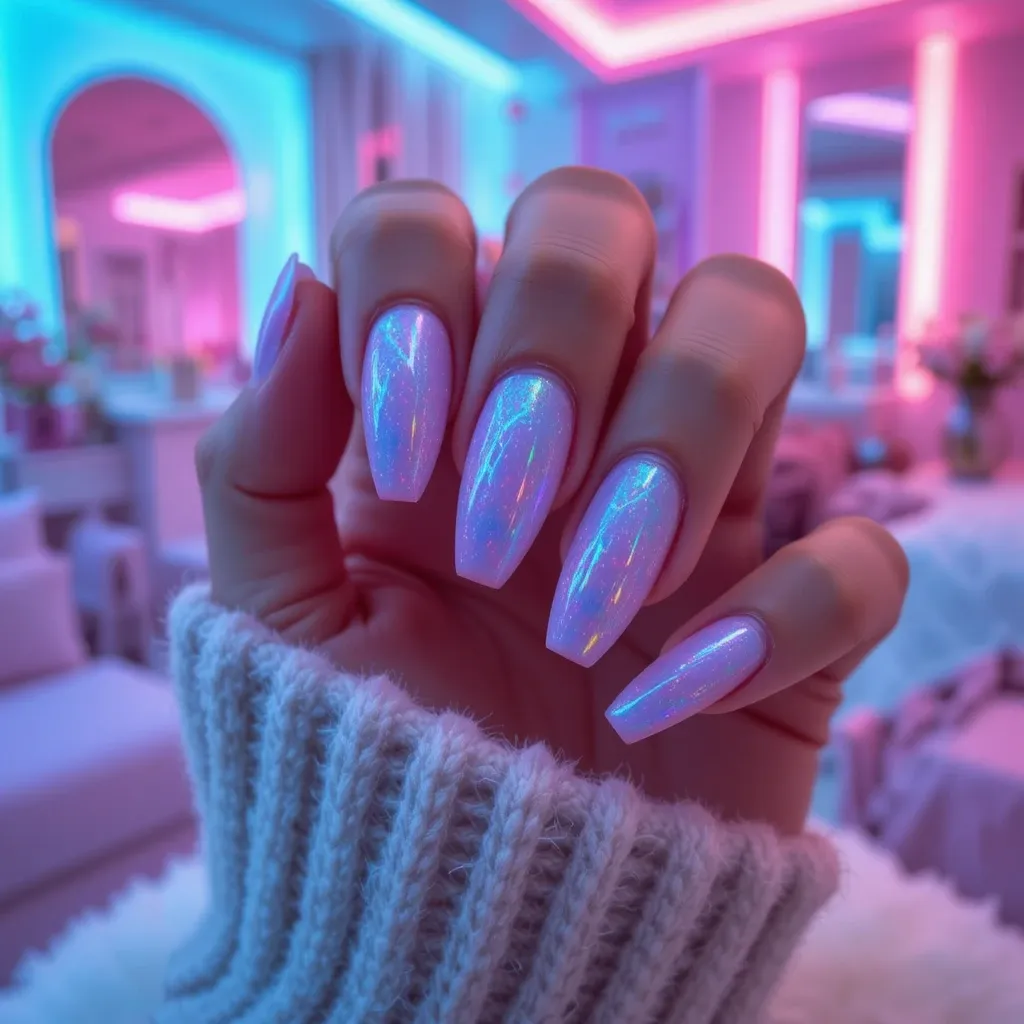
A cool-toned lilac base topped with reflective chrome powder creates an iridescent, almost holographic effect that catches the light beautifully. The metallic finish gives this soft purple shade an futuristic edge while maintaining its feminine appeal. The result is nails that literally shimmer and shift colors as you move your hands.
Difficulty: Beginner
Time to complete: 25 minutes
Best for: People who want something different without learning new techniques
Why it works: Matte finish hides minor application imperfections better than glossy
What makes it different: The velvety texture creates visual interest without any nail art
Pro Tip: Avoid hand lotions and oils for at least 2 hours after application—they create shiny spots on matte finishes. Focus moisturizing on your cuticles only using a targeted cuticle oil pen.
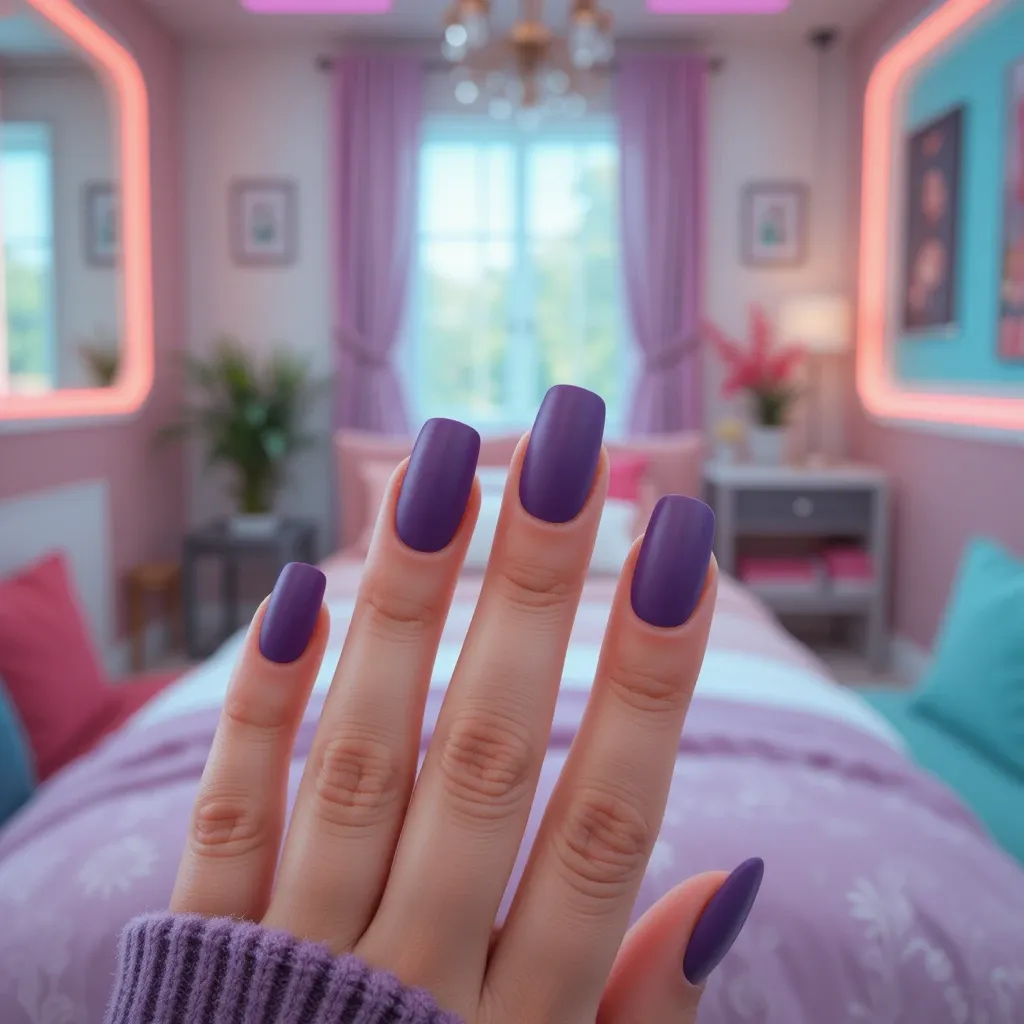
4. Matte Plum Perfection

A velvety matte finish transforms a medium-toned plum purple into something utterly sophisticated and touchably soft-looking. The lack of shine creates visual interest through texture rather than sparkle, giving your nails an almost suede-like appearance. This shade reads as both mysterious and approachable, making it perfect for transitioning from day to night.
Difficulty: Beginner
Time to complete: 25 minutes
Best for: People who want something different without learning new techniques
Why it works: Matte finish hides minor application imperfections better than glossy
What makes it different: The velvety texture creates visual interest without any nail art
Pro Tip: Avoid hand lotions and oils for at least 2 hours after application—they create shiny spots on matte finishes. Focus moisturizing on your cuticles only using a targeted cuticle oil pen.
Amethyst Accent & Mixed Designs
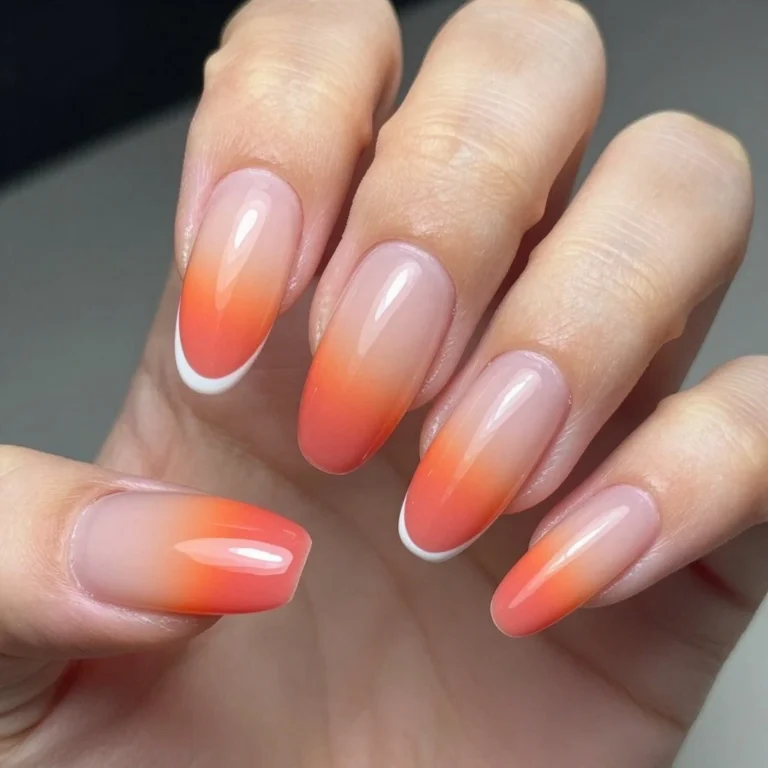
5. Amethyst French Tips
A modern twist on the classic French manicure featuring deep amethyst tips instead of traditional white, creating a fresh and unexpected look. The nude or sheer pink base keeps things grounded while the purple tips add that perfect pop of personality. This design works beautifully with both curved and straight tip lines, depending on your preferred aesthetic.
Difficulty: Intermediate
Time to complete: 40-45 minutes
Best for: People who love French manicures but want a modern twist
Why it works: The guides create clean lines even if you have shaky hands
What makes it different: Purple tips feel current and fresh instead of dated like white tips
Pro Tip: For a more organic, hand-painted look that’s actually easier, skip the guides entirely and freehand a slightly imperfect line using a thin detail brush. The “artistic French” look is very on-trend and mistakes just add to the handmade charm.
6. Amethyst Ombré Fade
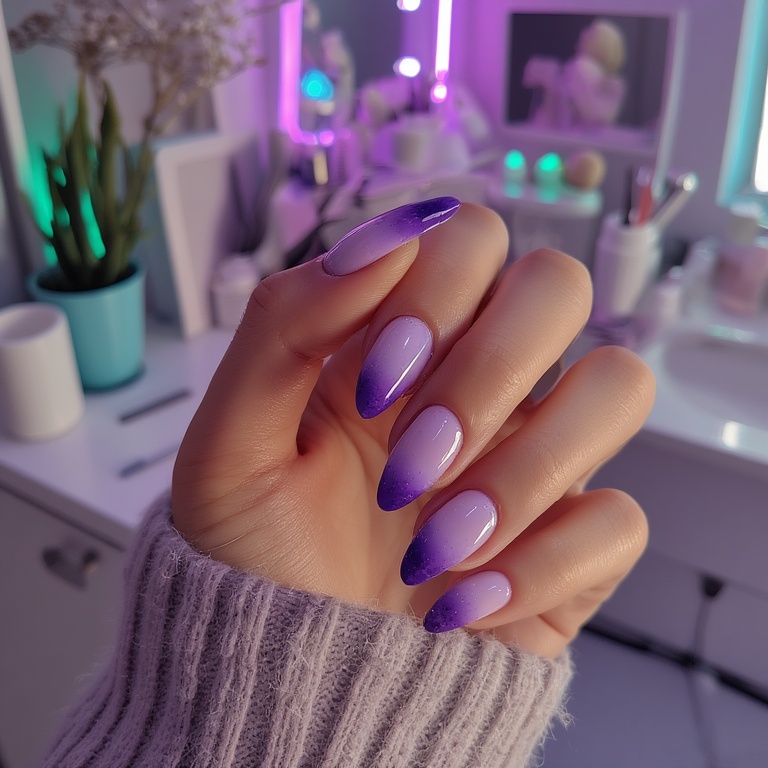
A gradient transition from soft lilac at the cuticle to deep purple at the tips creates a dimensional, multifaceted look that mimics actual amethyst geodes. The seamless color fade requires skillful blending but results in nails that look like miniature works of art. Each nail becomes a unique purple spectrum that catches attention without relying on rhinestones or complicated nail art.
Difficulty: Advanced
Time to complete: 45-55 minutes
Best for: People with patience who enjoy nail art as a relaxing activity
Why it works: The sponge does the blending for you
What makes it different: Each nail is unique—the gradient never looks exactly the same twice
Pro Tip: Use a fresh section of sponge for each nail to prevent colors from getting too muddy and mixed. Cut one sponge into 10 pieces before you start so you’re not scrambling mid-manicure
Bold & Statement Amethyst
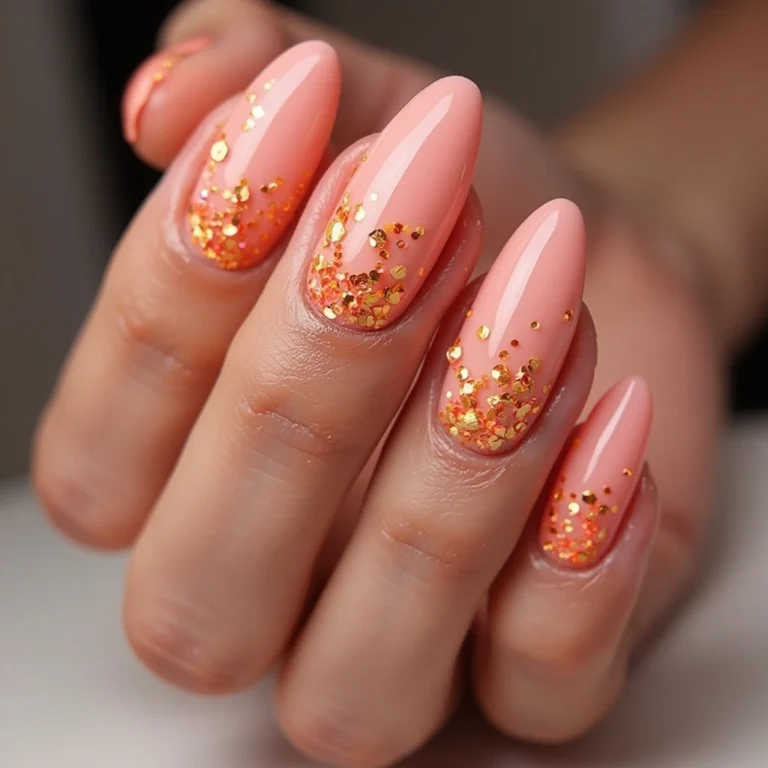
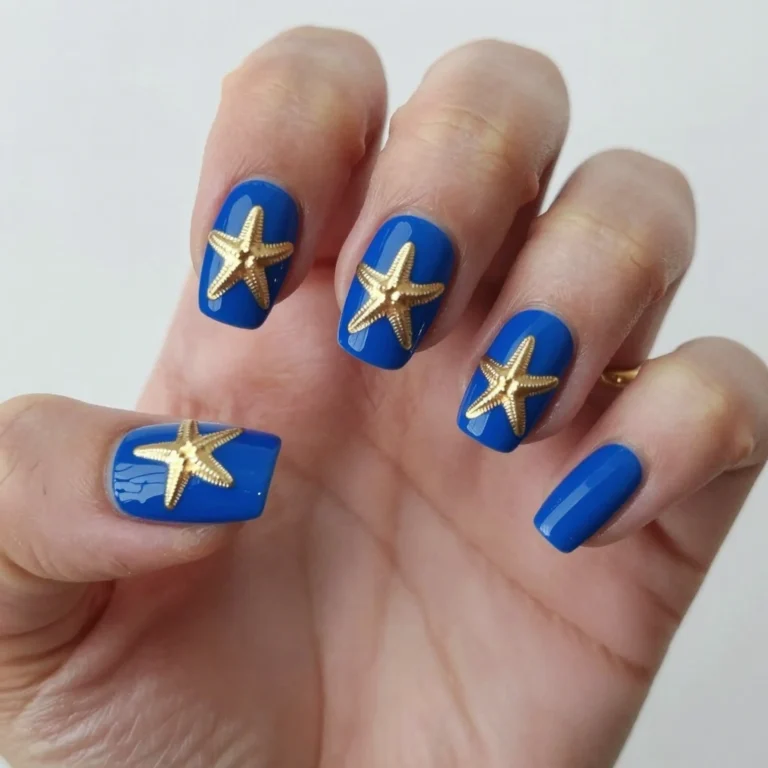
7. Amethyst with Gold Foil Accents
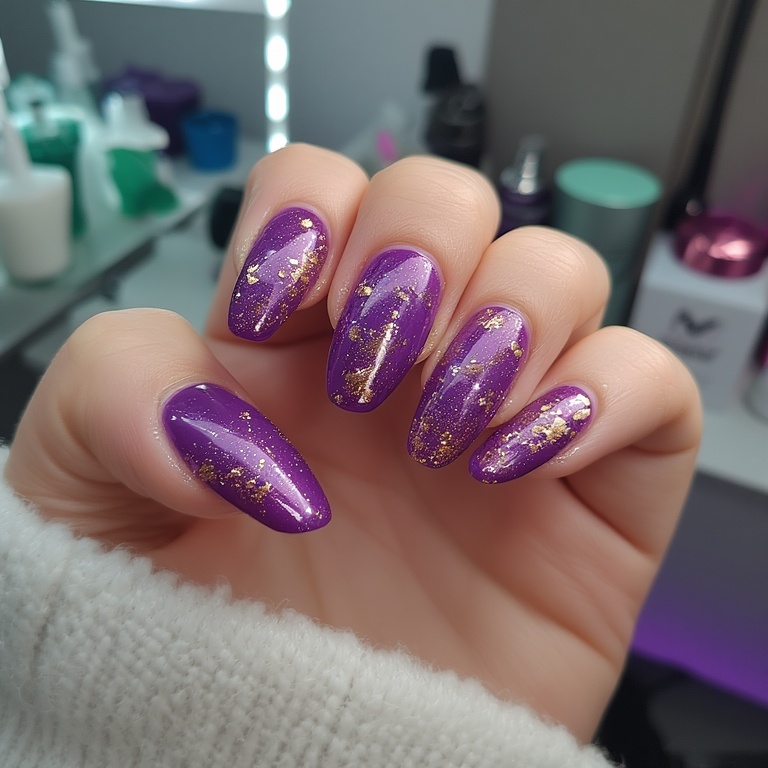
Deep amethyst base color adorned with delicate gold foil flakes or accent stripes creates a luxurious, almost regal appearance. The warm gold contrasts beautifully with cool purple tones, creating visual drama while maintaining sophistication. This combination feels special and celebratory without requiring complex nail art skills or excessive embellishments.
Difficulty: Intermediate
Time to complete: 35-40 minutes
Best for: Special occasions when you want something elevated but wearable
Why it works: Foil looks expensive but requires zero artistic skill
What makes it different: The gold creates warmth against cool purple for unexpected contrast
Pro Tip: Less is more with foil—3-5 small pieces per accent nail looks elegant, while covering the entire nail looks messy. Start minimal and you can always add more pieces if needed.
Essential Tools & Products for At-Home Amethyst Nails
Your Starter Kit (Under $50 Total):
I put together this list after making a lot of expensive mistakes buying products I never used. This kit covers everything you need for 90% of these looks:
- Base coat: OPI Natural Nail Base Coat ($10) – Ridge-filling formula works better under sheer purples than basic base coats
- Top coat: Seche Vite ($5) – Dries genuinely fast (not just “fast-dry” marketing) and creates glass-like shine
- Amethyst shades: Get 2-3 different tones
- Light: Essie “Lilacism” ($9)
- Medium: OPI “Do You Have This Color in Stock-holm?” ($11)
- Deep: Zoya “Mira” ($10)
- File and buffer: Revlon 6-piece set ($4) – Has everything including the 180-grit buffer that’s perfect for prep
- Cuticle oil: CND Solar Oil ($8) – The almond scent is pleasant and the dropper prevents waste
- Remover: Cutex Non-Acetone ($4) for light colors, pure acetone ($3) for deep purples that stain
This basic kit lasts for 30-40 manicures, making each manicure cost about $1-2 in products.
When Gel Makes Sense:
I resisted gel for two years because the upfront cost seemed ridiculous. Then I calculated that I was doing my nails every 4-5 days with regular polish (12-15 manicures per month). With gel lasting 2-3 weeks, I now do 2-3 manicures per month. The time savings alone made it worth it.
Get the Beetles Gel Nail Polish Kit ($35 on Amazon) which includes:
- UV/LED lamp (faster than just UV)
- Gel base and top coat
- 6 gel colors including two purples
- All the tools (files, buffers, cuticle pusher)
The lamp is the key investment—once you have it, individual gel polishes cost $6-8 and last forever because you use tiny amounts.
Product Quality Reality Check:
I’ve tried the $1.99 bargain bin polishes and honestly, they’re unusable. You need 4-5 coats for opacity, they dry gummy instead of hard, and they chip within 24 hours. Even if you’re on a tight budget, stick with drugstore brands (Essie, Sally Hansen, Revlon) that are $5-9. They apply in 2 coats, dry properly, and last 4-6 days instead of 1-2.
The quality difference between a $9 drugstore polish and a $15 professional salon brand is minimal. Save your money—the drugstore options are genuinely good.
Amethyst Nails: Pros and Cons
After wearing various amethyst designs for the past six months, here’s the honest reality:
Pros:
✅ More versatile than you’d expect – Works for both professional settings and nights out, unlike neon colors that only work in one context
✅ Doesn’t show wear as badly as light colors – Small chips blend into the color instead of being glaringly obvious like they are with white or nude polish
✅ Photographs beautifully – Purple tones show up clearly in photos without looking garish, making your hands look intentional in pictures
✅ Universally flattering on all skin tones – I’ve yet to see someone where purple looked genuinely bad, unlike some colors (yellow, orange) that only work on specific undertones
✅ Inexpensive to experiment with – Purple polish is widely available at every price point, so you can test the color without investing in expensive specialty brands
✅ Easy to find matching shades – Unlike obscure trendy colors, every brand makes multiple purple options, so finding your perfect amethyst is simple
Cons:
❌ Deep purples stain natural nails badly – Even with base coat, I’ve ended up with yellow-tinted nails that took 3 weeks to grow out after using cheap base coat under dark plum
❌ Purple pigment fades in sunlight – After a week of summer sun exposure, my deep amethyst turned muddy brownish-purple and looked terrible
❌ Chrome finish requires gel equipment – You can’t achieve true chrome with regular polish, so you need to invest in a $25-35 UV lamp or pay for salon visits
❌ Matte finish shows fingerprints and smudges – Every time you touch something oily, it leaves a shiny mark on the matte surface that you can’t wipe off
❌ Ombré designs waste a lot of polish – You apply polish to a sponge multiple times, and most of it ends up in the trash instead of on your nails
❌ Removal takes longer than other colors – Deep purple pigment clings to your nails, requiring extra soaking time—10 minutes instead of the usual 5
❌ Limited “professional” shades available – Most purples read as fun/casual; finding ones that work in conservative offices takes more searching
❌ Foil accents catch on everything – If your top coat isn’t thick enough, the edges of foil pieces catch on your hair, clothing, and literally everything you touch
Gel vs Regular Polish for Amethyst Shades
| Feature | Gel Polish | Regular Polish |
|---|---|---|
| Wear time | 2-3 weeks without chipping | 4-7 days before visible wear |
| Drying time | Instant after 60-second cure | 15-20 minutes for full hardness |
| Upfront cost | $35-50 for UV lamp + supplies | $15-25 for basic supplies |
| Per-manicure cost | $0.50-1 (gel lasts months) | $1-2 (need more frequent applications) |
| Color vibrancy | Stays true for entire 2-3 weeks | Fades noticeably after day 7-10 |
| Removal difficulty | 15-20 minutes with acetone wraps | 5 minutes with regular remover |
| Nail damage risk | High if picked/peeled off | Low with proper removal |
| Chrome finish capability | Yes—required for true chrome | No—chrome powder doesn’t work |
| Best for | People who can’t do nails weekly | People who like changing colors often |
My recommendation: If you commit to one nail look for 2+ weeks and hate chipped polish, gel is worth it. If you get bored easily and like trying new colors every few days, stick with regular polish. I use gel for work weeks and regular polish for experimenting with new looks on weekends.
Common Mistakes & How to Fix Them
Mistake 1: Streaky Purple Application
What it looks like: The first coat goes on patchy with visible brush strokes, some areas more opaque than others.
Why it happens: Purple pigments (especially lighter lavenders) have large pigment particles that don’t suspend evenly in the polish formula, creating uneven color distribution in one coat.
The fix:
- Accept that your first coat will look terrible—that’s normal for purple
- Apply it as thin as possible in smooth, even strokes
- Let it dry completely (4 minutes minimum)
- Apply a second thin coat—the coverage improves dramatically
- If still streaky, add a third thin coat
How well it works: This completely solves the problem. I’ve never had a purple polish that didn’t need 2-3 coats, so just plan for it from the start.
Mistake 2: Bubbles Throughout the Polish
What it looks like: Tiny air bubbles trapped in the polish that create a bumpy, textured surface instead of smooth glass-like finish.
Why it happens: Shaking the bottle before use incorporates air into the formula. Purple polish is often thicker than other colors, which traps air bubbles more easily.
The fix:
- Roll the bottle between your palms instead of shaking (10-15 rolls)
- If you already shook it, let it sit undisturbed for 5 minutes before opening
- For polish already on nails: Let dry completely, use 220-grit buffer to gently smooth the surface, wipe with alcohol, then apply a fresh coat
- Apply thinner coats—thick polish traps more air
How well it works: Rolling instead of shaking prevents 90% of bubble problems. The buffing fix works but you lose some depth of color, so prevention is better.
Mistake 3: Polish Peeling Off in Sheets Within 24 Hours
What it looks like: The entire polish layer lifts off the nail in one piece, like a sticker, especially starting at the tips.
Why it happens: Oil residue on your nails before polishing prevents proper adhesion. This happens more with purple polish because the thick pigmented formulas need better bonding.
The fix:
- Before you start, wipe each nail with rubbing alcohol or acetone using a lint-free pad
- Don’t apply hand lotion for at least 30 minutes before polishing
- Make sure you’re capping the free edge—swipe the brush across the tip of your nail with each coat (base, color, top coat)
- If it’s already peeling: Remove all polish, prep properly, and start over. There’s no salvaging this.
How well it works: The alcohol wipe before polishing prevents this completely. I haven’t had peeling issues since I started doing this religiously.
Mistake 4: Chrome Powder Won’t Buff to a Mirror Finish
What it looks like: The chrome powder creates a dull, patchy metallic effect instead of a smooth mirror-like reflection. Some areas are shiny while others look matte.
Why it happens: Either the top coat underneath dried too much before you applied powder, or you didn’t buff long enough with enough pressure.
The fix:
- Work on one nail at a time—apply top coat to ONE nail, immediately apply chrome powder, then move to the next nail
- Use a silicone applicator (not a makeup sponge which is too soft)
- Buff in firm circular motions for 30-60 seconds per nail—it takes more time and pressure than you think
- If you’ve already cured it and it’s dull: You have to remove the top coat layer with acetone, reapply sticky top coat, and try again
How well it works: Working one nail at a time solves 95% of chrome application problems. The fix (removing and redoing) works but wastes product, so getting it right the first time is worth the slower pace.
What Happens After 2 Weeks: Real Wear Test
I wore deep amethyst gel polish (OPI “Do You Have This Color in Stock-holm?”) for three weeks to see how it actually holds up. Here’s the honest timeline:
Days 1-7: The manicure looked perfect. High shine, no chips, clean cuticle lines. I did dishes daily, typed constantly, and worked out three times—zero visible wear. The only change was my cuticles started showing growth by day 5, with about 1mm of bare nail visible at the base.
Days 8-14: Cuticle growth became more obvious (2-3mm gap), making the manicure look slightly grown out but not unprofessional. I got one tiny chip on my right index finger nail tip on day 11 after aggressively opening a package. The shine dulled slightly from daily hand washing but still looked good. I applied regular top coat on day 10 which brought the shine back to about 85% of original.
Days 15-21: By day 16, the cuticle gap was noticeable enough that people asked if I needed a fill. The one chip got slightly bigger (about 2mm of missing color at the tip). Two more nails developed tiny edge wear where the color wore off just at the very tip—not technically chips, but visible loss of color. The purple itself hadn’t faded at all, which surprised me. On day 19, I got a second actual chip on my thumb.
Days 22-28: This is when it started looking bad. Four nails had visible chips, the cuticle gap was 4-5mm (clearly grown out), and the remaining perfect nails looked odd next to the damaged ones. I could’ve kept wearing it technically, but it looked unprofessional. Removed on day 24.
The verdict: Two solid weeks of perfect wear, one week of “acceptable but clearly worn,” and one week of “really should remove this.” For gel, that’s pretty good longevity.
Maintenance Timeline: Keeping Your Amethyst Nails Looking Fresh
Days 1-3: The Perfect Phase
What to do:
- Nothing special needed—just avoid heavy water exposure in the first 24 hours to let polish fully cure
- Apply cuticle oil before bed using a pen applicator like Burt’s Bees Lemon Butter Cuticle Cream ($6)
Why it matters: The first 24 hours is when polish is most vulnerable to smudging and denting, even if it feels dry to touch.
Days 4-7: First Refresh
What to do:
- Day 5: Apply a fresh layer of top coat to restore shine and seal any micro-chips you can’t see yet
- Wear gloves for tasks like dishes, cleaning, or gardening—harsh chemicals and hot water break down polish faster
- Apply cuticle oil every night
Why it matters: This refresh coat can extend your manicure by 2-3 days by preventing small chips from becoming big ones.
Days 8-14: Maintenance Mode
What to do:
- Day 10: Apply another refresh top coat—by now the original shine has dulled from hand washing
- Address small chips immediately: if you get a chip, apply a tiny dot of your original color just to the chip, let dry, then top coat over the entire nail. This prevents the chip from spreading.
- Push back cuticles gently with a wooden orange stick after showering—don’t trim, just push back to minimize the appearance of nail growth
Why it matters: Small touch-ups take 2 minutes and buy you 3-5 more days of wear. Completely redoing your nails takes 30-40 minutes.
Week 3+: Gel Only
What to do (gel polish):
- Continue daily cuticle oil application
- Assess whether chips or growth gaps look unprofessional
- If keeping longer: apply another top coat refresh on day 17-18
For regular polish: By week 2, regular polish usually needs complete removal and reapplication rather than maintenance.
Why it matters: Gel can technically last 3-4 weeks, but growth gaps make it look sloppy after week 2 for most people. If you have slower nail growth, you can push it to week 3.
General Maintenance Rules
Every day: Apply cuticle oil at night. This one habit makes the biggest visual difference in how maintained your nails look.
Every 2-3 days: Reapply top coat if you want maximum longevity. Skip this if you’re lazy—it’s optional, not critical.
When washing hands: Use lukewarm water, not hot. Hot water expands the polish and makes it more prone to chipping.
Before bed for the first week: Avoid sleeping on your hands or pressing your nails into the pillow—nocturnal pressure creates dents you won’t see until morning.
FAQ About Amethyst Nails
How long do amethyst gel nails last compared to regular polish?
Gel amethyst nails last 2-3 weeks with zero chipping if applied correctly, while regular polish lasts 4-7 days before showing significant wear. The difference comes down to curing—gel hardens completely under UV light, creating a plastic-like coating, while regular polish air-dries and remains slightly flexible, making it more prone to chipping from daily activities.
Can you do chrome amethyst nails with regular polish?
No, chrome powder requires a gel polish base to work properly. The powder needs to bond to the tacky, uncured gel top coat surface—regular polish dries too quickly and doesn’t create the sticky layer needed for chrome adhesion. If you want chrome nails without gel, you’ll need to visit a salon or invest in a $25-30 UV lamp and gel polish starter kit.
Why do my amethyst nails turn yellowish after a week?
This happens when deep purple pigment sits directly on natural nails without proper base coat protection, or when you use a thin/cheap base coat that doesn’t fully block pigment transfer. The purple pigment chemically stains the keratin in your nails, leaving a yellowish tint that can take 2-3 weeks to grow out. Always use a quality, opaque base coat (white-tinted base coats work best) under any dark purple shade.
Do amethyst nails look professional enough for office jobs?
Lighter amethyst shades (lavender, lilac, soft plum) are generally acceptable in most professional environments and read as sophisticated rather than flashy. Deep, vibrant purples work in creative industries but may be too bold for conservative corporate settings like law or finance. If you’re unsure, test it on a long weekend first and see if you feel comfortable wearing it to work on Monday.
Ready to Try Amethyst Nails?
Start with the Soft Lavender Nude or Matte Plum Perfection if you’re new to doing your own nails—both are beginner-friendly and hard to mess up. Once you’re comfortable with basic application, try the Amethyst French Tips for a slightly more challenging design that still looks professional.
Save this guide to reference the step-by-step instructions when you’re ready to try each look, and remember that your first attempt won’t be perfect—even my eighth attempt at ombré nails had some wonky transitions.