12+ Citrus Nails Ideas for a Fresh and Bright Summer Look
So, why should you read this guide instead of just scrolling through Pinterest? Because I’m not just showing you pretty pictures. I’m giving you the step-by-step breakdown for each design, the exact products I’d use to get the look, and the specific challenges you might run into (like getting that chrome powder to stick).
Whether you’re a beginner or a seasoned pro, you’ll find a design here that actually works for your skill level and your lifestyle.
What Are Citrus Nails?
Citrus nails are exactly what they sound like: nail art inspired by lemons, oranges, limes, and grapefruits. Think bright, zesty yellows, juicy oranges, and fresh greens. It can be anything from a single tiny lemon slice on a neutral base to an abstract, neon explosion of color. It’s the go-to style for summer, but honestly, a good citrus mani can brighten up the grayest winter day, too.
How to Choose the Best Citrus Design for You
Before we dive into the 12+ ideas, let’s be real about which one you should actually pick. The design that looks amazing on Instagram might be a total nightmare for your specific situation. Here’s a quick guide:
- For your first time trying nail art: Go for the Accent Nail Citrus Slices or the Citrus Boho Minimalist designs. They use simple tools like dotting tools or a thin brush and don’t require perfect, steady hands.
- If you have a professional job: You want something fun but subtle. The Sheer Citrus Jelly or the Tiny Lemon Accent on French Tip are perfect. They’re elevated and chic, not like you’re heading to a rave.
- For a special event (vacation, wedding, party): Go all out! The Glossy Orange Slice 3D or the Neon Grapefruit Abstract are guaranteed conversation starters.
- If you’re comfortable with nail art: Try the Watercolor Citrus or Lime Green with Studs. These involve techniques like watercolor blending or working with chrome powder, which have a bit of a learning curve.
- If you have short nails: Whole Lemon Yellow or Citrus Boho Minimalist look amazing. Painting the whole nail a bright color makes short nails pop, and simple line art doesn’t get lost.
- If you change your mind often: Avoid the 3D designs. They’re a pain to remove. Stick with regular polish designs, which are easy to swap out in a few days.
14 Citrus Nail Ideas You Need to Try This Summer
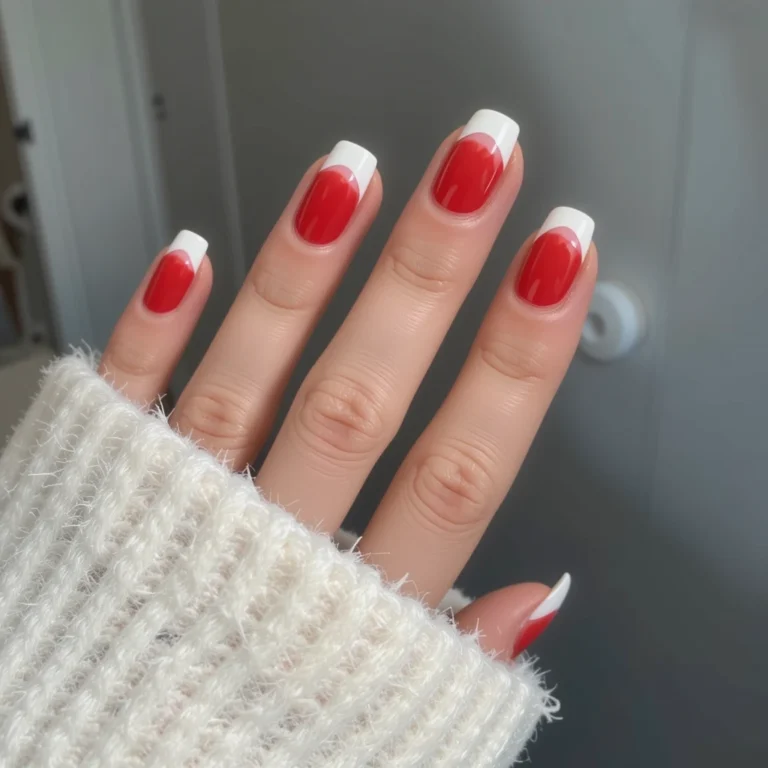
1. Classic Lemon Slice on French Tip
- Difficulty: Beginner
- Time to complete: 30-40 minutes
- Best for: Someone who wants a fresh, clean look that’s still obviously summer-themed.
- Why it works: The negative space of a French tip keeps it from feeling too heavy, while the lemon slice adds a playful pop.
- What makes it different: It’s a modern twist on two classics: the French manicure and the fruit nail.
This design is a staple for a reason. It’s elegant but still screams summer. The key is getting that lemon slice to look like a slice, not a blob.
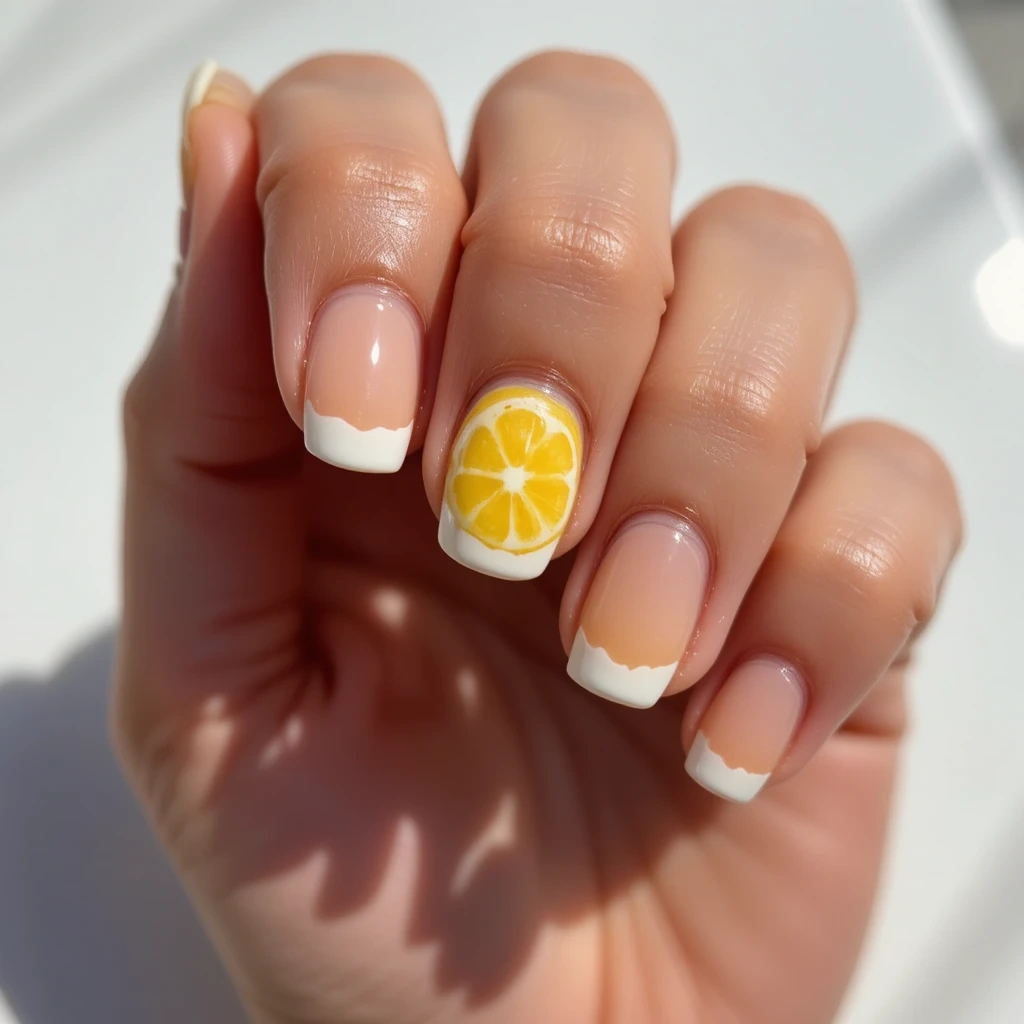
A close-up of a hand with a classic French manicure. On the ring finger, instead of a white tip, there is a perfectly painted lemon slice. The slice has a bright yellow outer rim, a white inner ring, and a central star shape with tiny green seeds. The background is a clean, sun-drenched white surface.
2. Glossy Orange Slice 3D
- Difficulty: Advanced
- Time to complete: 45-60 minutes
- Best for: A special event or vacation where you want a tactile, eye-catching detail.
- Why it works: The 3D element catches the light and looks surprisingly realistic, like you’ve glued a real candy slice to your nail.
- What makes it different: It’s not just painted; it’s sculpted, giving it a playful, dimensional look.
This is a bit more advanced because it involves building up gel to create a dome. It’s worth the effort for the “wow” factor.
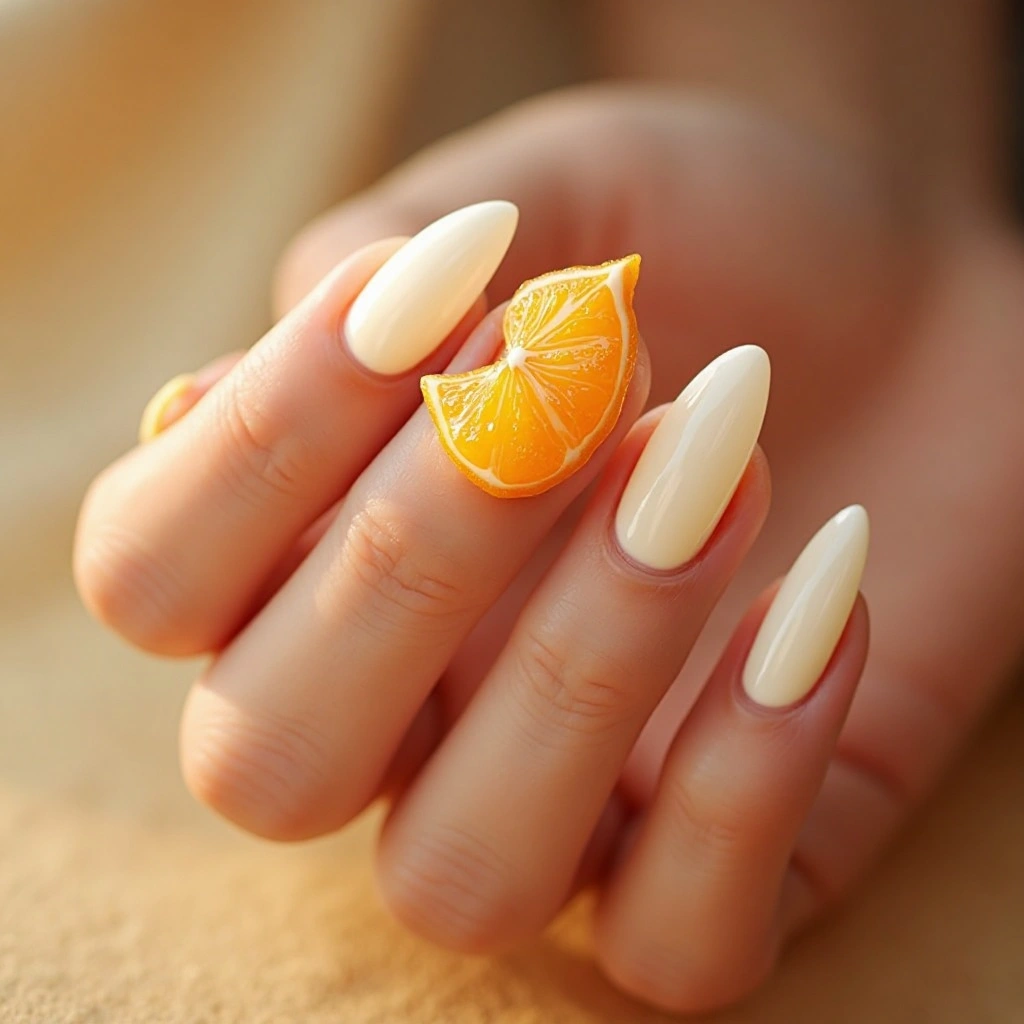
A hand with long, almond-shaped nails painted in a glossy milky white. On the middle finger, a hyper-realistic 3D orange slice sits on the nail. The slice is domed and shiny, with individual segments visible, a thin white pith line, and a textured peel. It looks like a gummy candy.
3. Whole Lemon Yellow with Green Leaf
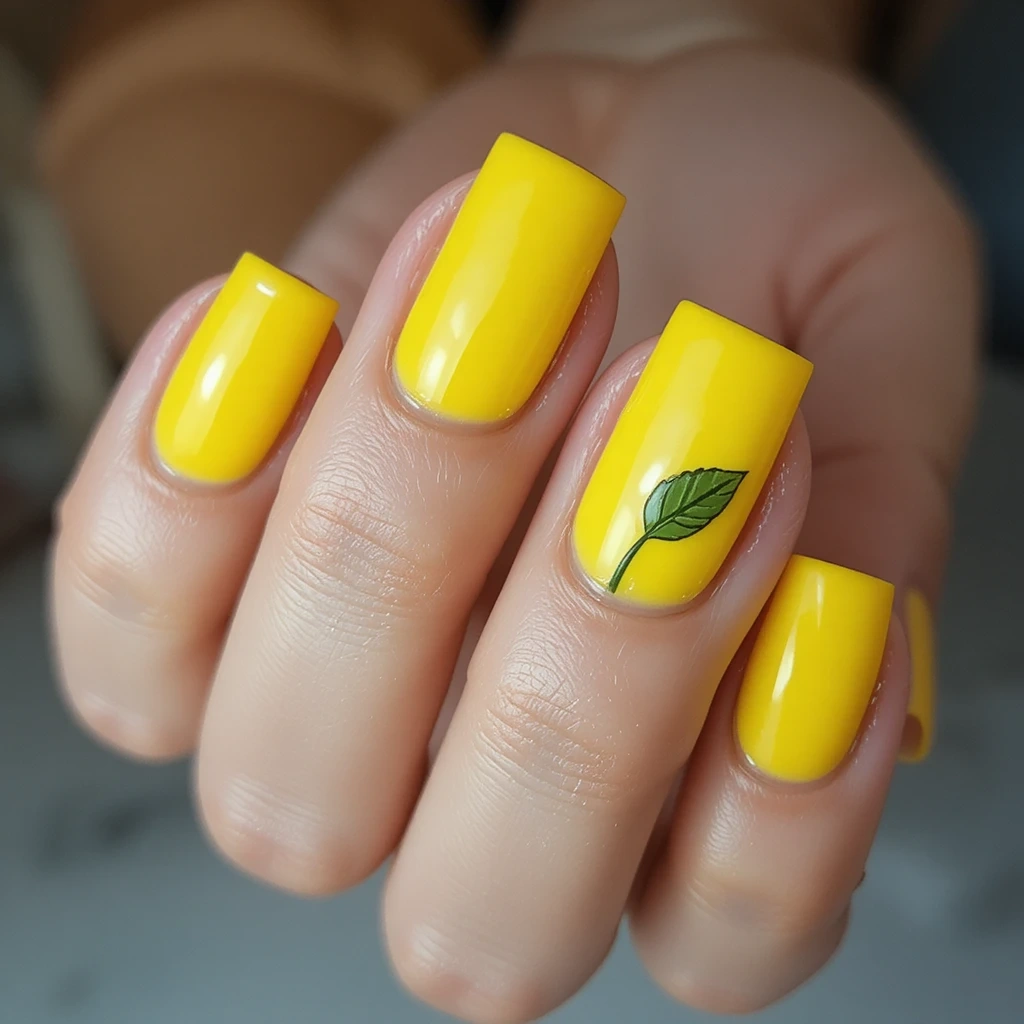
- Difficulty: Beginner
- Time to complete: 20-25 minutes
- Best for: Anyone who wants a bold, happy pop of color with a simple but effective detail.
- Why it works: It’s simple, clean, and instantly recognizable.
- What makes it different: The focus is on the perfect, vibrant color and the single, well-placed leaf.
Sometimes simple is best. This is all about nailing that perfect, sunshine-yellow and adding one tiny detail that makes it art.
A set of short, square nails painted in a solid, high-gloss lemon yellow. On the ring finger, near the cuticle, there is a single, hand-painted green leaf with a thin stem. The contrast between the bright yellow and the deep green is crisp and clean.
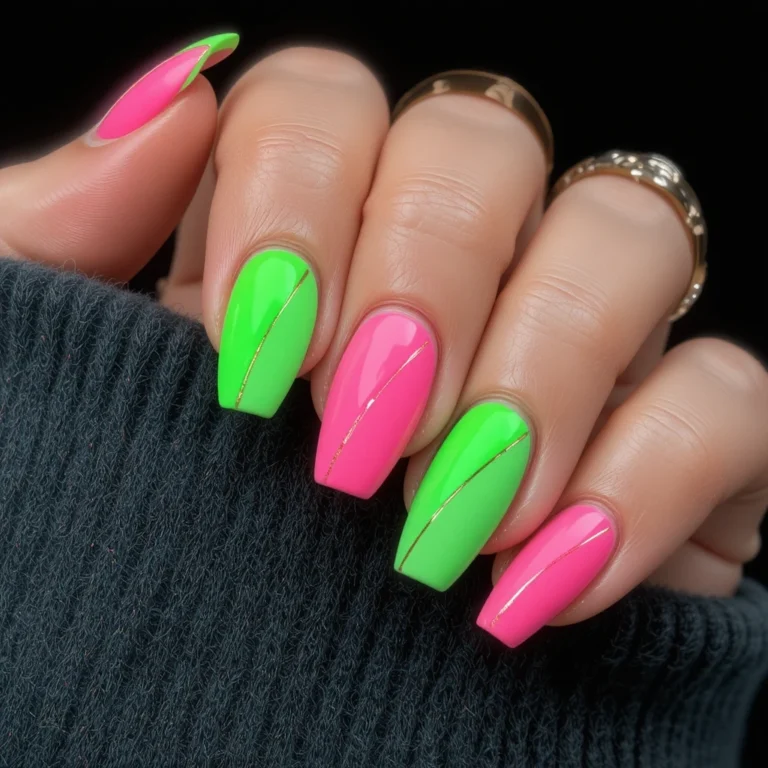
4. Neon Grapefruit Abstract
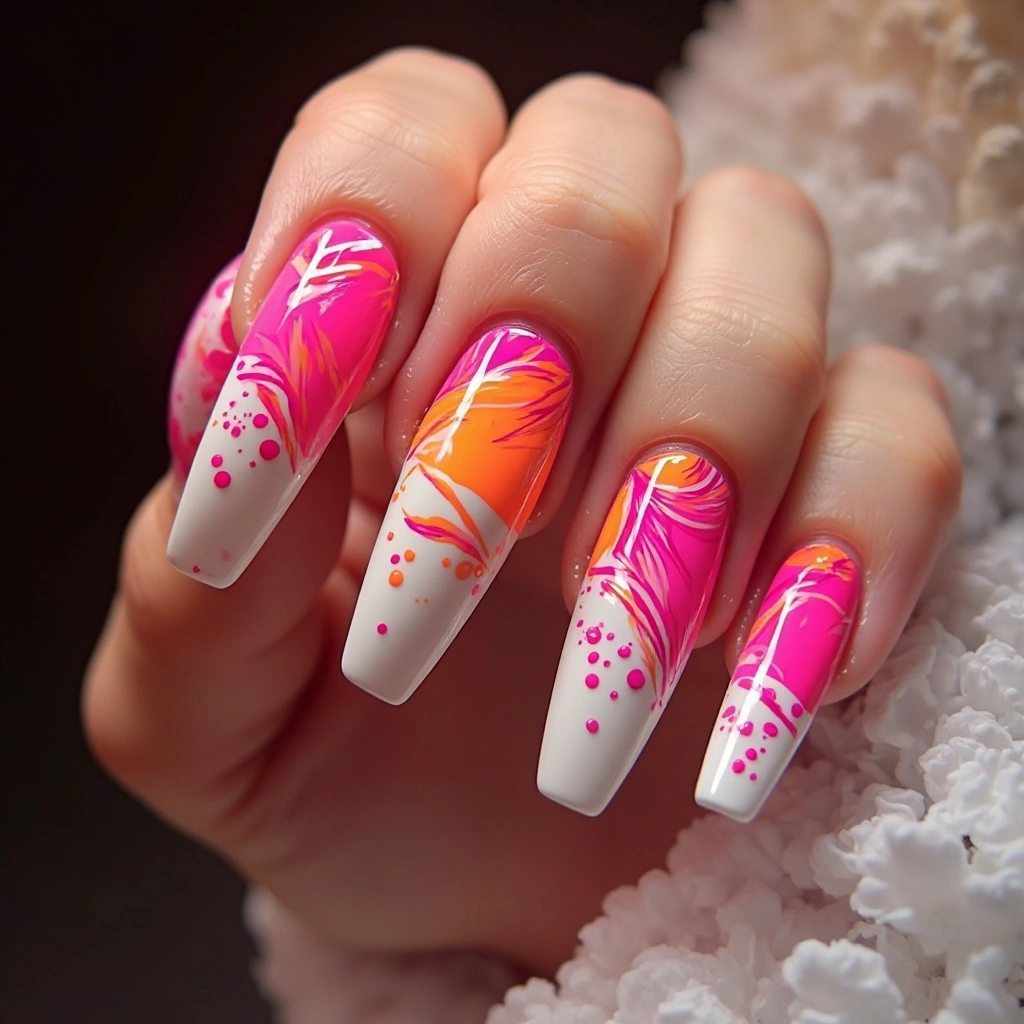
- Difficulty: Intermediate
- Time to complete: 35-45 minutes
- Best for: Someone with an edgy, modern style who isn’t afraid of bold color.
- Why it works: The abstract shapes feel artistic and current, while the neon pink and orange keep it fun.
- What makes it different: It ditches the realistic fruit for a cool, deconstructed, almost pop-art vibe.
This design is about capturing the feeling of a grapefruit—bright, tangy, and energetic—without painting a literal picture.
A hand with long, stiletto nails. Each nail features a unique abstract design in neon pink, vibrant orange, and hot magenta on a stark white base. Some nails have bold stripes, others have sharp geometric shapes, and one has a few painterly dots. It’s very modern and artistic.
5. Lime Green with Gold Studs
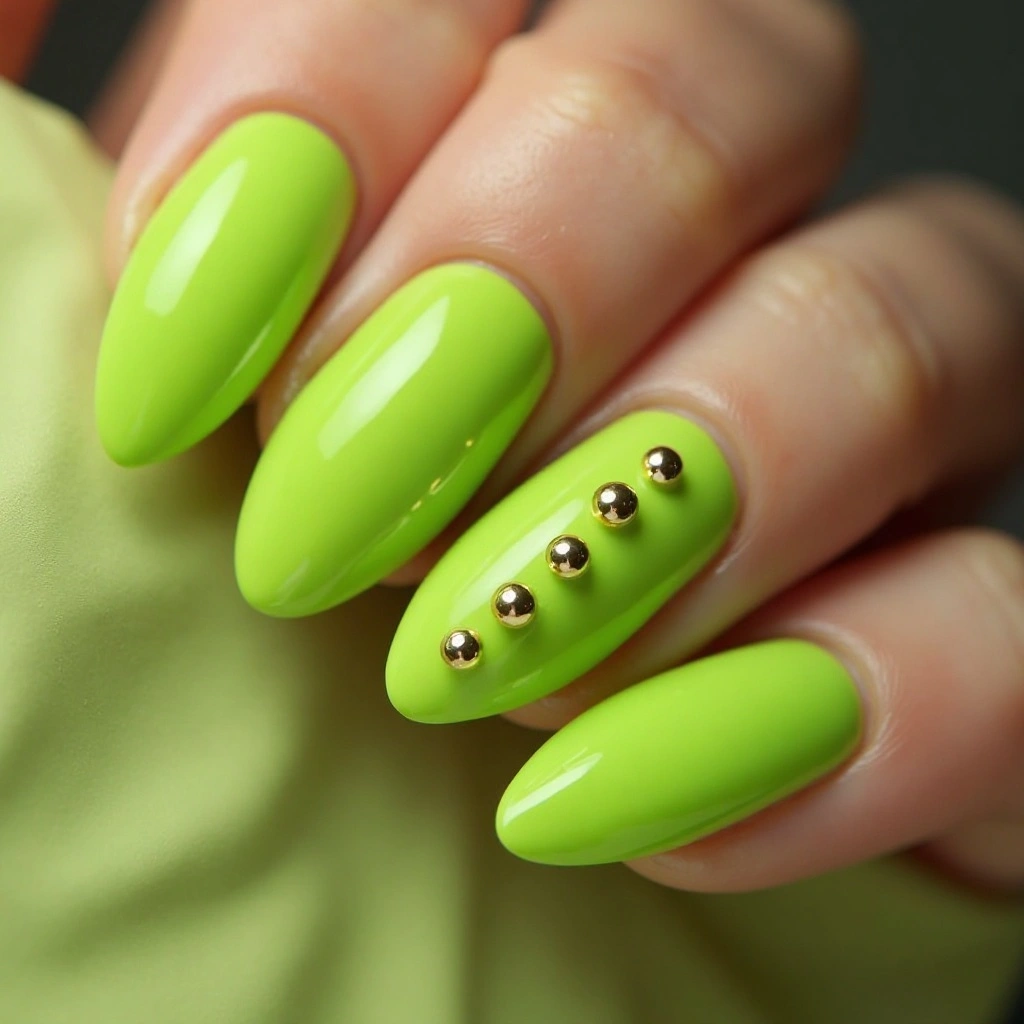
- Difficulty: Beginner
- Time to complete: 20 minutes
- Best for: Someone who wants an easy way to elevate a solid color.
- Why it works: Gold and green are a classic, sophisticated pairing.
- What makes it different: The texture and shine of the gold studs break up the solid color in a luxurious way.
This is my go-to when I want a citrus vibe but don’t have much time. It’s simple but looks put-together.
A close-up of almond-shaped nails painted in a bright, matte lime green. Along the cuticle line of one nail, three small, shiny gold ball studs are placed in a neat row. The contrast between the matte green and the glossy gold is visually appealing.
6. Watercolor Citrus
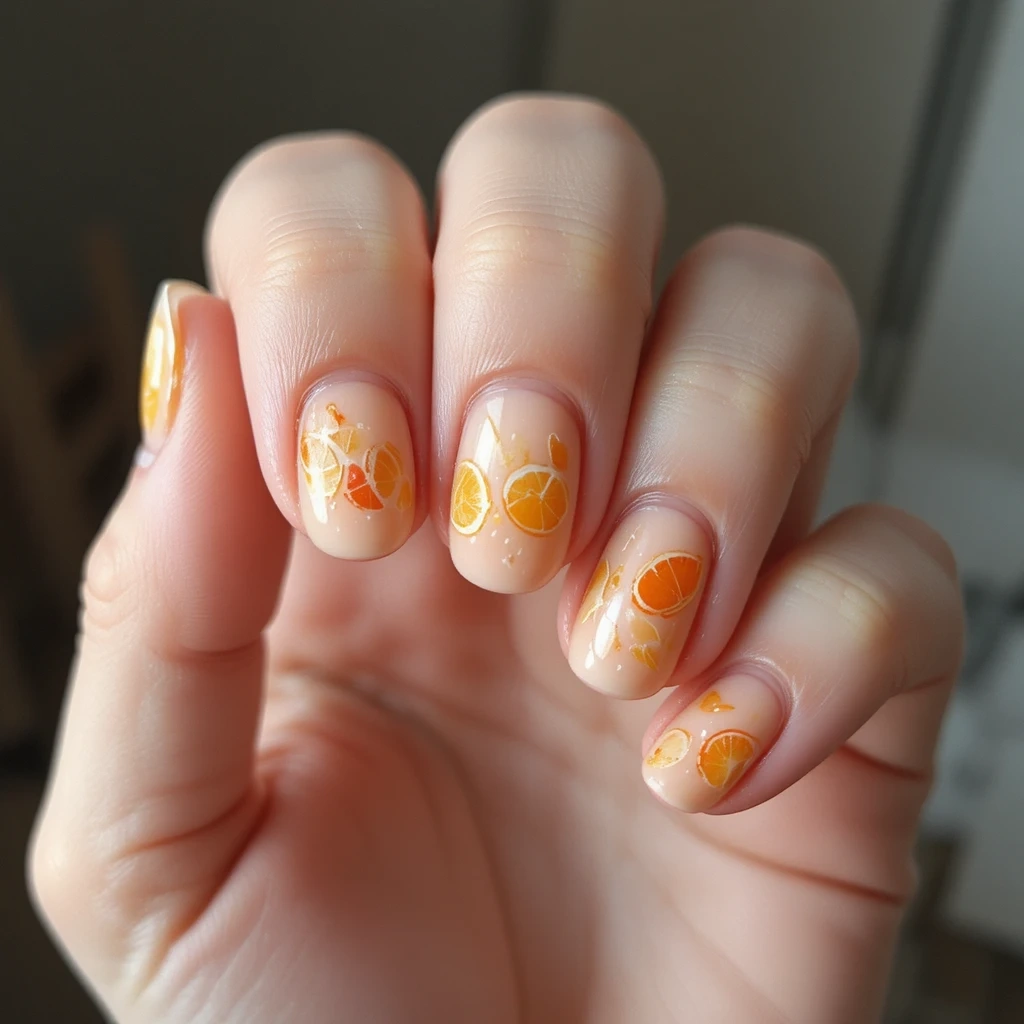
- Difficulty: Intermediate
- Time to complete: 40 minutes
- Best for: Someone who loves a soft, romantic, and artistic look.
- Why it works: The watercolor effect is dreamy and forgiving—mistakes just look like part of the art.
- What makes it different: It has a soft, painterly quality that’s the opposite of sharp, graphic nail art.
This technique is one of my favorites because it looks so impressive but is actually pretty forgiving. You’re essentially making a little painting on your nail.
A hand with short, round nails. On a soft, peachy-beige base, there are faded, watercolor-style paintings of citrus fruits. The edges of the lemon and orange slices are soft and blurred, with the colors bleeding gently into each other. It looks like a tiny, delicate painting.
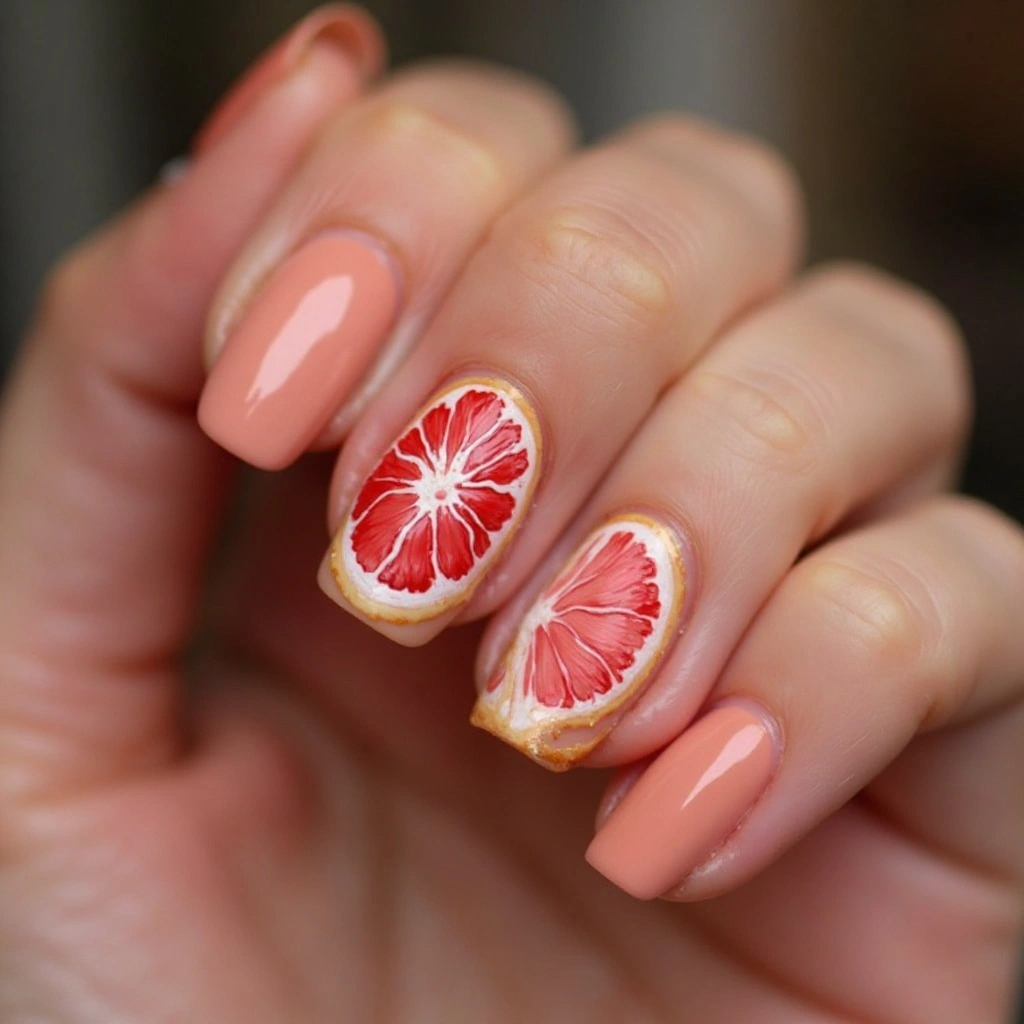
7. Half Grapefruit Accent Nail
- Difficulty: Intermediate
- Time to complete: 35 minutes
- Best for: Someone who wants the detail of a fruit without the nail looking too busy.
- Why it works: The half-fruit design uses the shape of the nail perfectly, like the fruit is peeking out from the cuticle.
- What makes it different: It uses the negative space of the nail to create a unique, almost illustrative composition.
This design is really satisfying to create. It uses the natural curve of your cuticle to form the shape of the fruit.
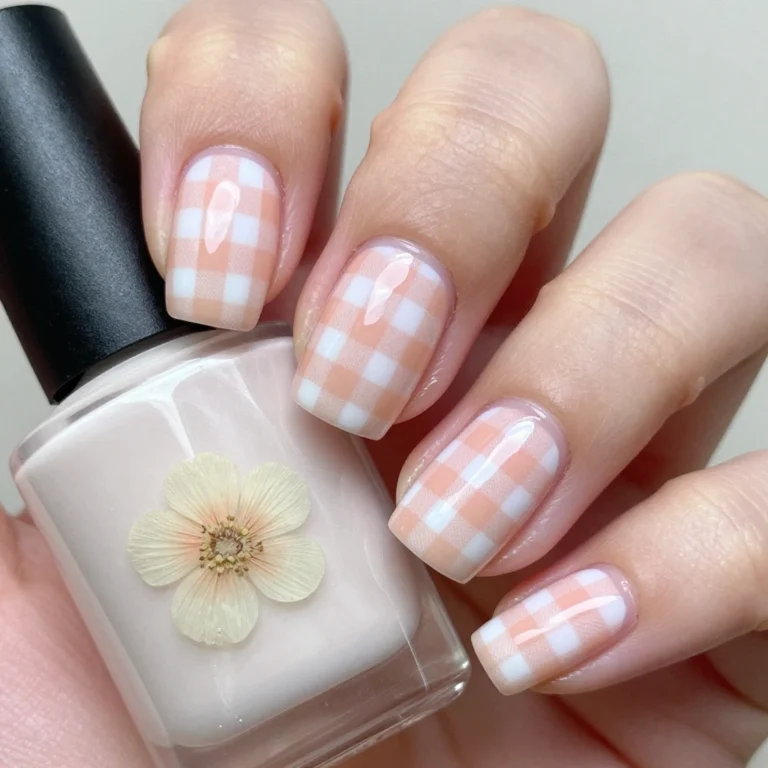
A hand with nude pink nails. On the ring finger, the bottom half of the nail near the cuticle is painted to look like a cut grapefruit. You can see the pink flesh, the white pith, and the segmented interior. The top half of the nail remains the sheer nude color.
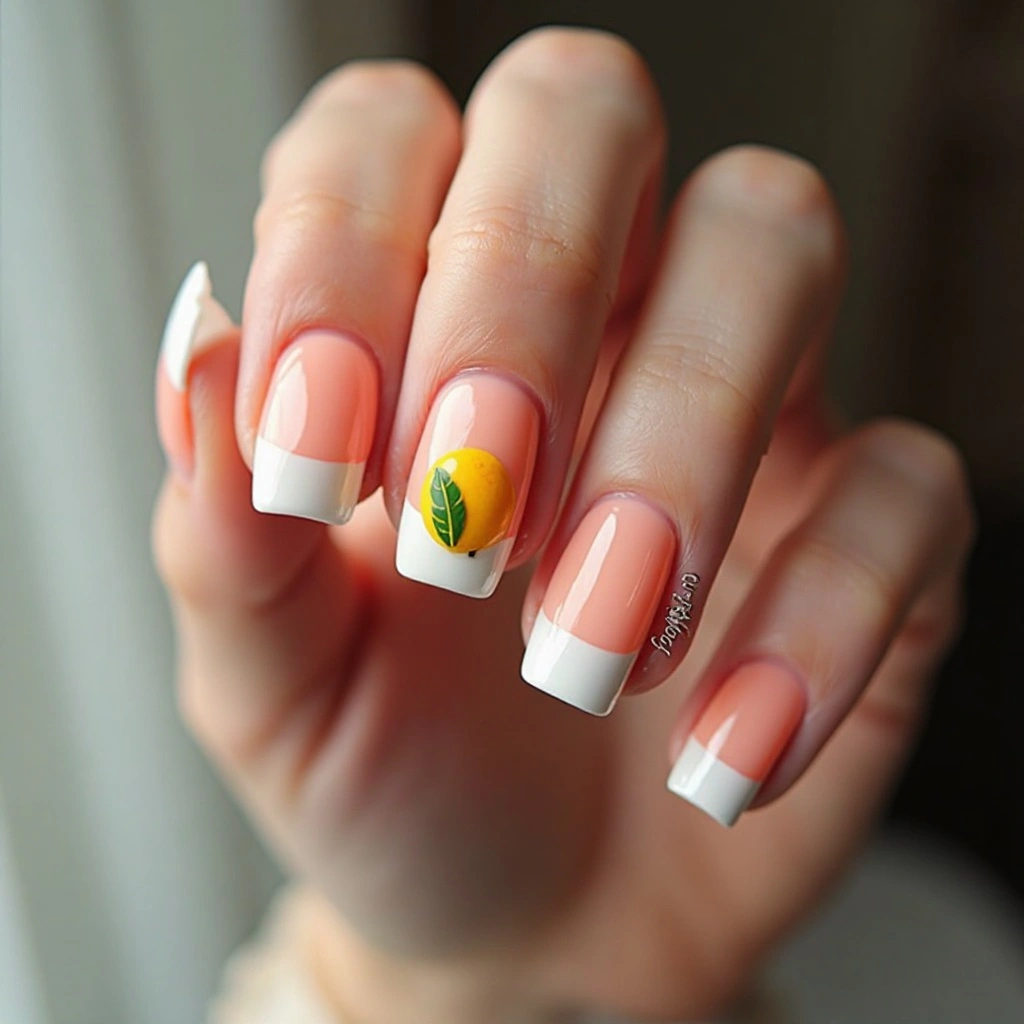
8. Tiny Lemon Accent on French Tip
- Difficulty: Beginner
- Time to complete: 25-30 minutes
- Best for: Someone who wants a “barely there” citrus look.
- Why it works: The tiny lemon is a secret little detail that’s cute but not overwhelming.
- What makes it different: It’s subtle and understated, perfect for someone who doesn’t usually wear bold nail art.
This is the minimalist cousin of the first design. The lemon is tiny and tucked away, making it a sweet little surprise.
A hand with very short, clean nails done in a sheer pink French manicure. In the corner of the white tip on the pinky finger, there is a single, tiny, perfect lemon painted. The lemon is no bigger than a pinhead, with a small green leaf.
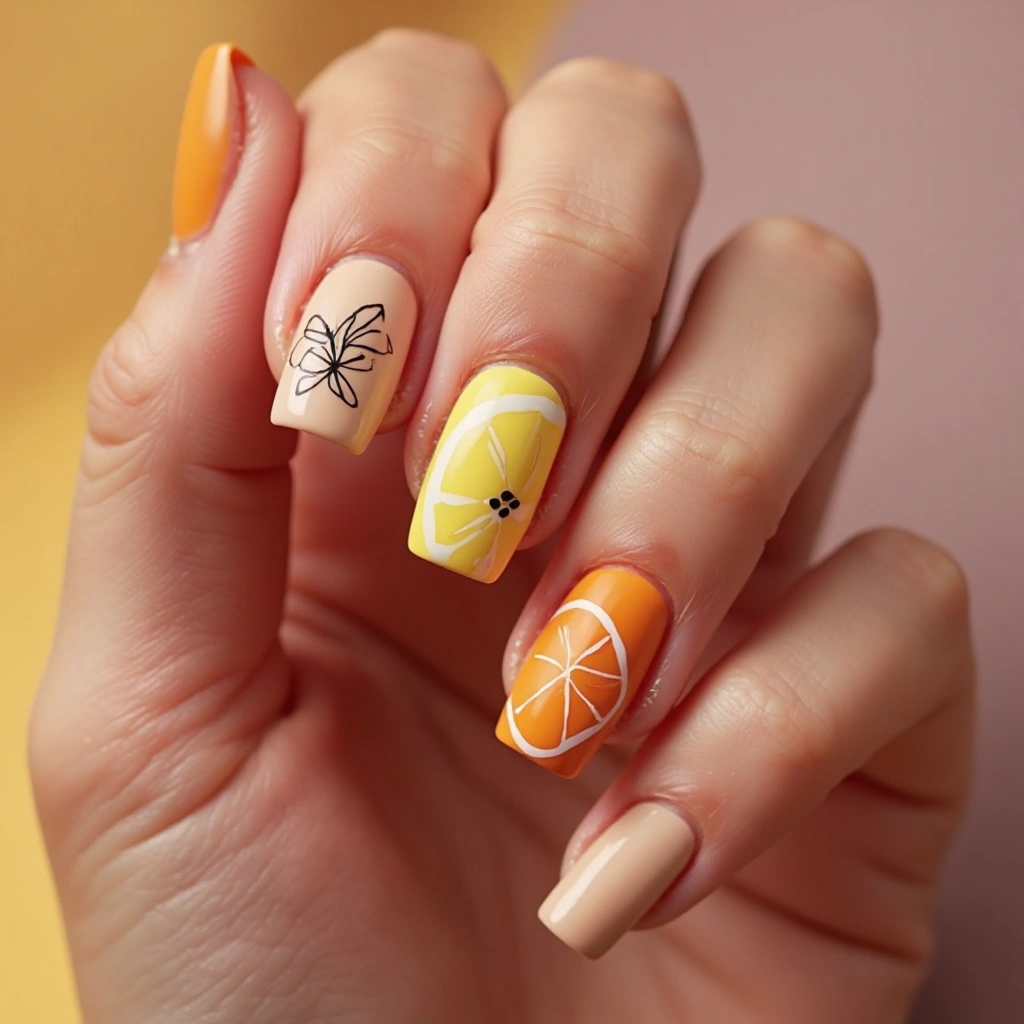
9. Citrus Boho Minimalist
- Difficulty: Beginner
- Time to complete: 25 minutes
- Best for: A first-time nail artist or someone who loves clean, simple lines.
- Why it works: Line art is trendy, easy to do, and looks hand-drawn and personal.
- What makes it different: It’s more about the idea of a citrus fruit than a realistic rendering, giving it a cool, artistic feel.
I love this design because a wobbly line just makes it look more authentic and “handmade.”
A hand with short, square nails painted in a matte nude color. On each nail, simple, thin black lines form abstract citrus fruits. One nail has a simple outline of a lemon, another has a few lines suggesting a sliced orange, and a third has a minimalist grapefruit shape with a single seed.
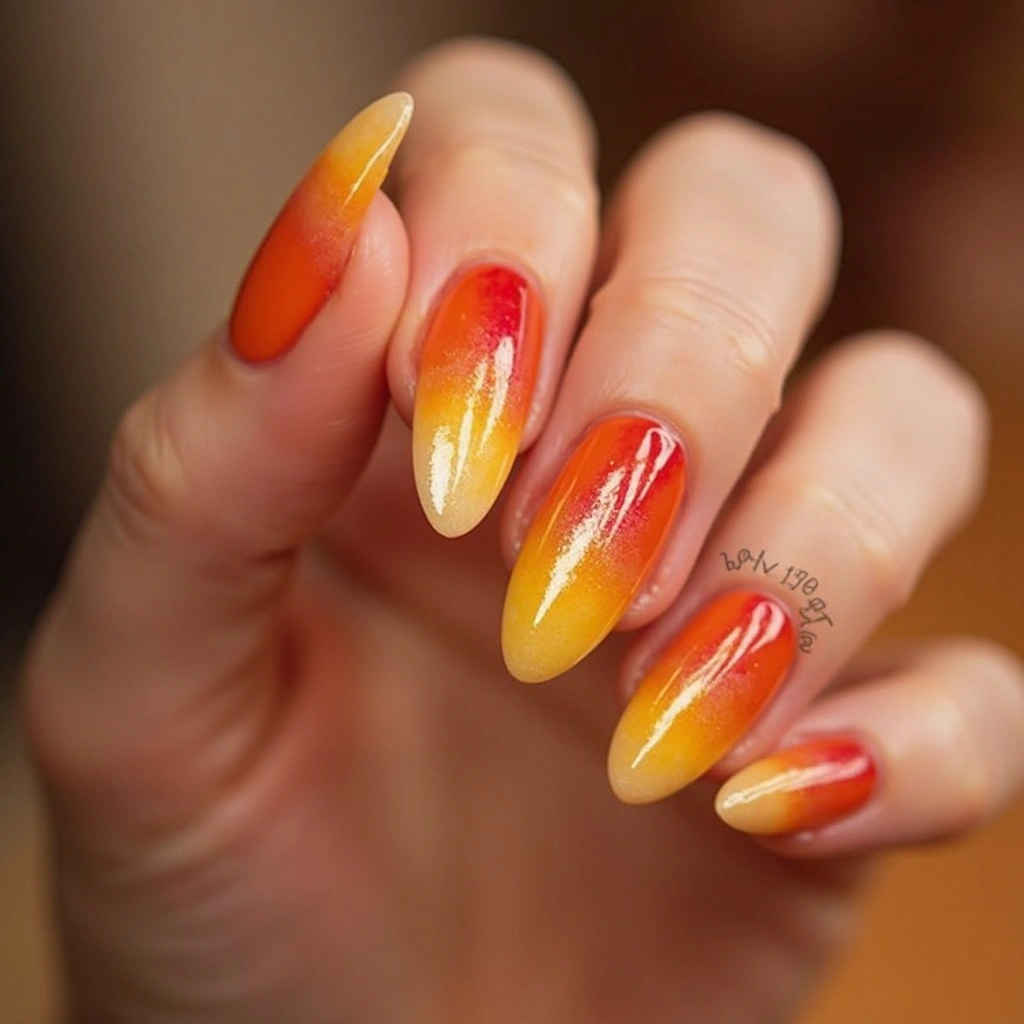
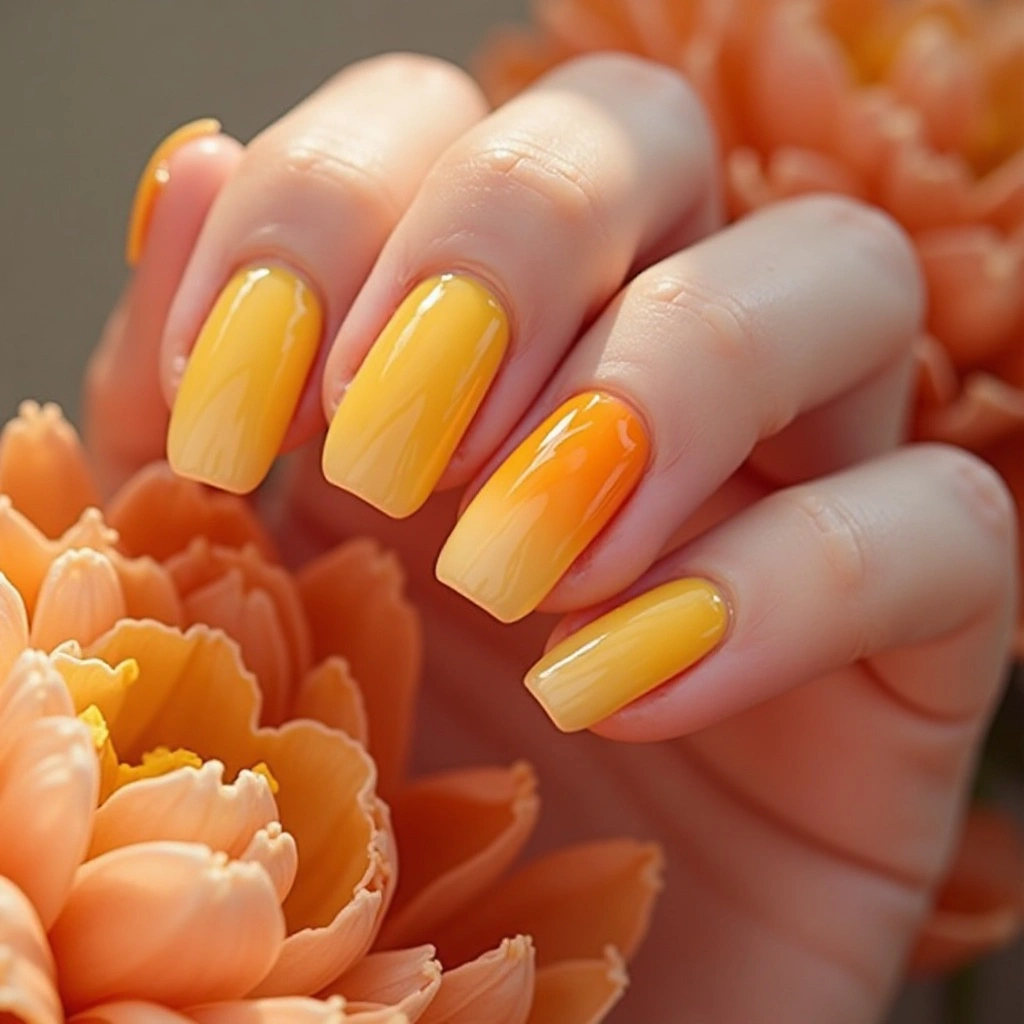
10. Juicy Orange Ombre
- Difficulty: Intermediate
- Time to complete: 30 minutes
- Best for: Someone who loves a gradient effect.
- Why it works: The ombre mimics the gradient of color you see in a real orange, from the pale yellow near the pith to the deep orange in the center.
- What makes it different: It’s an abstract take on citrus that’s all about color and blend.
A hand with long, oval nails. Each nail features a perfect orange-to-yellow ombre gradient. The color is most intense at the tip of the nail and fades to a soft, pale yellow at the cuticle. The finish is extremely glossy, making it look like liquid candy.
11. Lemon and Lime Checkerboard
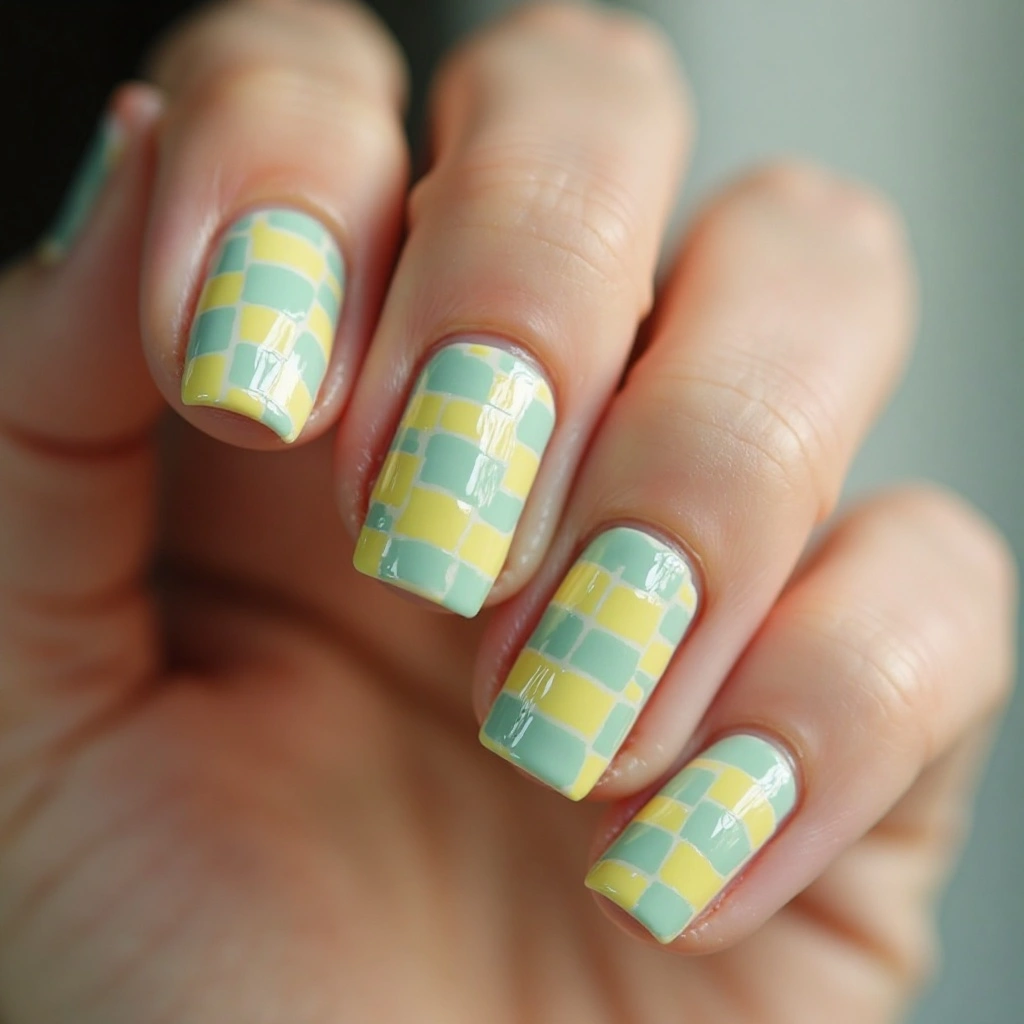
- Difficulty: Advanced
- Time to complete: 60+ minutes
- Best for: A patient, detail-oriented person who loves a bold, graphic look.
- Why it works: The checkerboard pattern is a classic in fashion, and the lemon/lime color palette gives it a fresh, summer update.
- What makes it different: It’s the most graphic and high-impact design in the list.
This one takes time and a steady hand, but the result is so worth it. It’s a total head-turner.
A hand with medium-length square nails. The nails feature a perfect checkerboard pattern, alternating between pastel yellow and mint green squares. The lines are crisp and clean, and the squares are uniform in size, covering the entire nail surface.
12. Sheer Citrus Jelly
- Difficulty: Beginner
- Time to complete: 15 minutes
- Best for: A low-maintenance, professional, and “your nails but better” citrus look.
- Why it works: The jelly finish is trendy and gives a subtle wash of color, like you’re looking at a fruit through stained glass.
- What makes it different: It’s the most understated and elegant citrus option. It relies on the transparency of the polish.
A hand with perfectly manicured nails. The nails are painted with a translucent, “jelly” finish in a soft lemon yellow and a pale tangerine orange. You can just barely see the natural nail line through the color. The finish is super glossy and wet-looking.
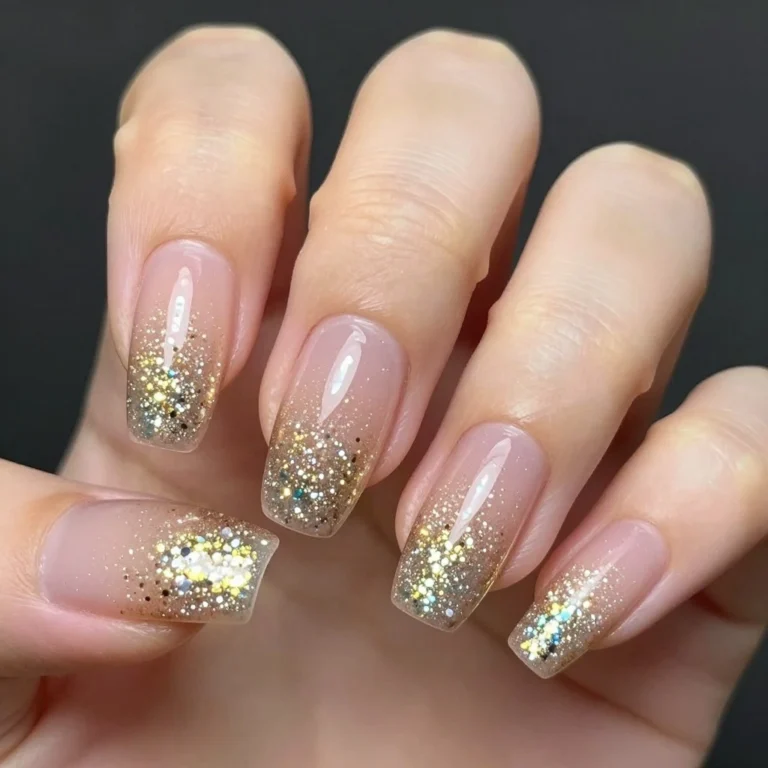
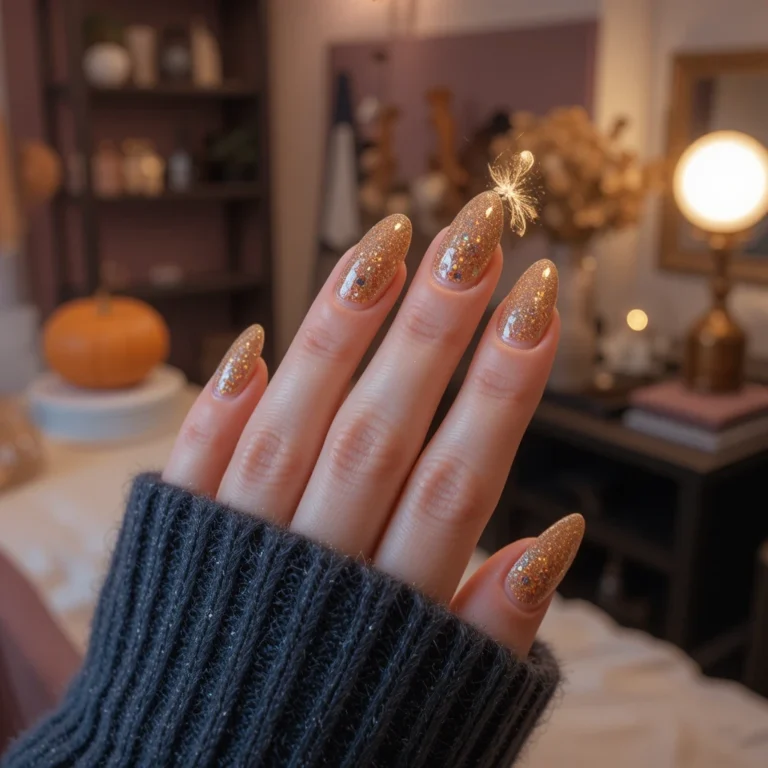
13. Sunkissed Citrus Glitter
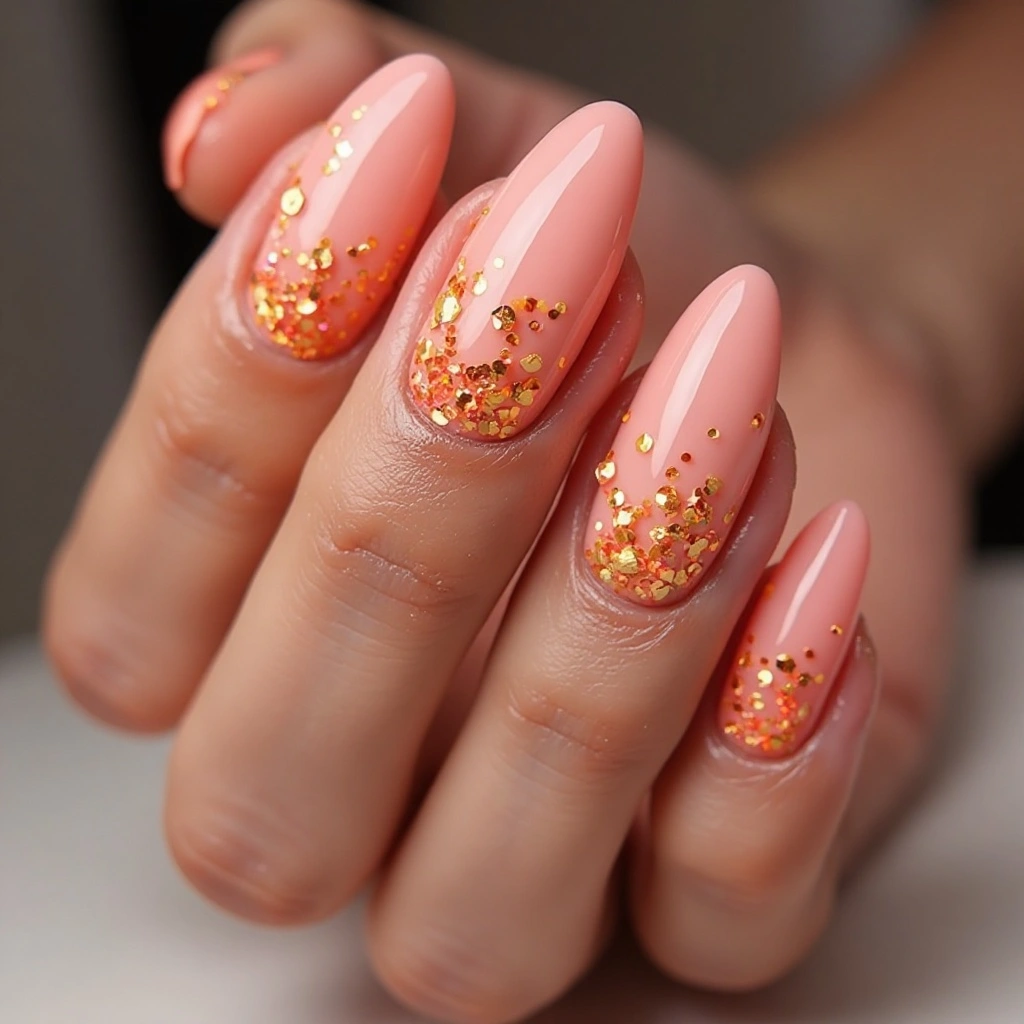
- Difficulty: Beginner
- Time to complete: 20 minutes
- Best for: A fun, festive look, perfect for parties or a vacation.
- Why it works: The glitter captures the light and adds a celebratory feel to the citrus theme.
- What makes it different: It’s high-impact and sparkly, combining two popular trends: fruit and glitter.
A hand with almond-shaped nails painted in a soft coral base. The tips of the nails are heavily coated in a fine, iridescent glitter that shifts from gold to pink. Small, flat, hexagon-shaped glitter pieces in orange and yellow are scattered near the tips, catching the light.
Pros and Cons of Citrus Nails
Let’s be real: they’re fun, but they’re not perfect.
✅ PROS:
- Instantly uplifting: A bright lemon on your nail genuinely makes me happier when I look at it.
- Perfect for summer: They match everything from swimsuits to sundresses.
- Versatile: As you’ve seen, the style ranges from super subtle to wild and graphic.
- Good for all nail shapes: Simple fruit slices look great on short nails, and detailed art has room to shine on long nails.
- Photogenic: They always look good in photos, especially for vacation pics.
❌ CONS:
- Yellow stains: If you skip base coat, yellow pigments can stain your natural nail. It takes a few days for the stain to fade.
- Chrome issues: Some of the neon powders and chrome finishes show every single tiny bump or imperfection in your nail bed.
- 3D snagging: The 3D designs can catch on hair and knitwear if you don’t seal the edges perfectly.
- Time investment: Even the “beginner” designs take a solid 30 minutes if you do them neatly.
- Learning curve: Getting a perfect watercolor blend or a smooth 3D dome takes a few tries. Your first attempt might not be Instagram-worthy.
- Not “office appropriate” everywhere: Some of the brighter, bolder designs might get you side-eye in a very conservative workplace.
Maintenance Tips
To keep your citrus nails looking fresh and juicy for as long as possible, here’s what I do:
- Day 1-3: The Seal is Key. For the first few days, reapply a thin layer of quick-dry top coat. I like Seche Vite ($8-10, drugstores) . It seals the edges of the art and prevents the tips from lifting or chipping early.
- Day 5: Oil the Life Out of Them. Citrus art often means multiple layers of polish, which can dry out your nails. Starting on day 5, massage CND SolarOil ($12-15, Amazon/salons) into your cuticles and under the free edge of the nail every night. It keeps the polish flexible so it’s less likely to crack.
- Day 10: Watch the Tips. If you see a tiny chip on a tip, don’t pick at it! File it smooth and dab on a tiny bit of clear top coat just on the tip to seal it. This can buy you another 3-4 days.
- Wear Gloves. I know, it’s annoying, but washing dishes or cleaning with bleach-based products will instantly dull the shine and break down the edges of the art.
- Avoid “Prying.” Don’t use your nails to open soda cans or scrape stickers off things. The leverage will crack the art at the stress point.
Common Mistakes with Citrus Nail Art
We all make these mistakes. Here’s how to fix them when you do.
- Mistake #1: The Lemon Looks Like a Blob.
- Why it happens: Your yellow polish was too thick, or you tried to paint the details before the base was dry.
- Exact fix: This is a temporary fix, but you can salvage it. Dip a small brush in 100% acetone, squeeze out the excess on a paper towel, and gently “erase” the messy edges of the slice to create a cleaner shape. Let it dry and try again with thinner coats.
- Mistake #2: The Watercolor Turned into a Muddy Mess.
- Why it happens: You mixed too many colors on the nail, and they all blended into a brownish-greenish color.
- Exact fix: Unfortunately, you can’t fix this without starting over. To prevent it next time, use less polish on your brush and clean your brush with alcohol between each color application.
- Mistake #3: Chrome Powder Looks Patchy.
- Why it happens: You didn’t cure the “tacky” layer long enough, or the base color underneath wasn’t perfectly smooth.
- Exact fix: If it’s already on and patchy, your only option is to buff it very lightly with a fine grit buffer and reapply a fresh tacky layer. For next time, use a specific base for chrome, like Beetles Gel Base Coat ($9-11, Amazon) . It creates a tacky layer that stays workable longer than cheaper bases, giving you more time to rub the powder in smoothly.
- Mistake #4: The 3D Element Popped Off.
- Why it happens: You built the 3D element over the polish without creating a rough surface for it to grip onto.
- Exact fix: You can’t fix it once it’s gone. But you can try to glue it back on with nail glue. It’s a temporary fix. Next time, gently buff the area where the 3D element will go with a fine buffer to create “teeth” for the gel to hold onto.
What Happens After 3 Weeks? A Real Wear Test
I wore the Classic Lemon Slice on French Tip design for three weeks using gel. Here’s the honest play-by-play:
- Week 1: Flawless. The top coat was shiny, the lemon slice was crisp, and I got about five compliments. I was careful with everything.
- Week 2: I noticed the very tips of my index fingers had started to wear down slightly. The shine dulled a tiny bit from all the hand-washing. The art on the accent nails still looked perfect, though.
- Week 3: This is where it got real. The growth at the cuticle was very obvious—about 3-4mm of bare nail. The tips on my dominant hand’s thumb and index finger had tiny chips. The lemon slice on my ring finger was still intact, but the top coat wasn’t as glassy.
- End of Week 3: I removed them. The design lasted well, but the growth was too noticeable for me to feel like my manicure looked “done” anymore.
FAQ
1. Can I do citrus nail art on natural nails?
Yes, absolutely. All of these designs work on natural nails. The key is to use a good quality base coat. If you’re using bright yellows or oranges, the base coat prevents your natural nail from staining.
2. How do I make my citrus decals last longer?
If you’re using water decals or stickers, you must encapsulate them. Place the decal on a cured layer of gel, then apply a thin layer of clear gel over the top and cure it. This seals the decal in so it can’t peel or catch on things.
3. What’s the best top coat for nail art?
It depends on the look. For a thick, glossy, “encapsulated” finish, I use a hard gel top coat like Gelish Top It Off ($13-15, salons/Amazon) . If I want a quick-dry option for regular polish, Seche Vite is the best because it self-levels and dries rock hard, protecting the art underneath.
Conclusion
Citrus nails are one of those trends that comes back every summer for a reason. They’re fun, fresh, and there’s truly a design for everyone. Whether you want to spend an hour on a detailed 3D orange or just slap on some lime green polish with gold studs, you can’t go wrong.
A good place to start is with the Classic Lemon Slice on French Tip or the Citrus Boho Minimalist. They’re easy, forgiving, and will give you that instant hit of summer happiness every time you look at your hands.