8 Stunning Country Concert Nails Ideas
Most country concert nail guides are just pretty photo roundups with no real help. This one is different—every design includes complete step-by-step instructions, honest product recommendations with prices, and a real talk section on what survives a 4-hour show versus what chips before the opening act ends.
Country concert nails are manicure styles that blend Western-inspired aesthetics—think warm earth tones, turquoise, gold, and rustic textures—with enough durability to survive hours of dancing, clapping, and cold drinks.
They sit somewhere between “dressed up” and “practical,” because a country show isn’t exactly a sit-still event. The best ones look great in photos AND hold up through an encore.
How to Choose the Right Design for You
Before you scroll through all eight designs, here’s a quick guide to find your match:
- First time doing nail art? Start with Honey Whiskey Nude (#1) or Deep Burgundy Barn (#5). Solid colors are forgiving and still look intentional.
- Have a professional job Monday after the show? Dusty Rose Western (#2) or Creamy Vanilla Latte (#3) will transition easily to the office.
- Going to a big once-a-year event (CMA Fest, Stagecoach)? Go all-in on Gold Rush Glitter (#6) or Pearl Chrome Western (#8)—you can deal with removal later.
- Comfortable with nail art basics? Turquoise Stone Accent (#7) looks advanced but the technique is more accessible than it appears.
- Have short nails? Every design here works on short nails. Burnt Orange Sunset (#4) and burgundy especially look great on shorter lengths.
- Change your mind constantly? Avoid the chrome and glitter—removal is a
Here Country Concert Nails Ideas
Rustic & Natural Vibes
1. Honey Whiskey Nude
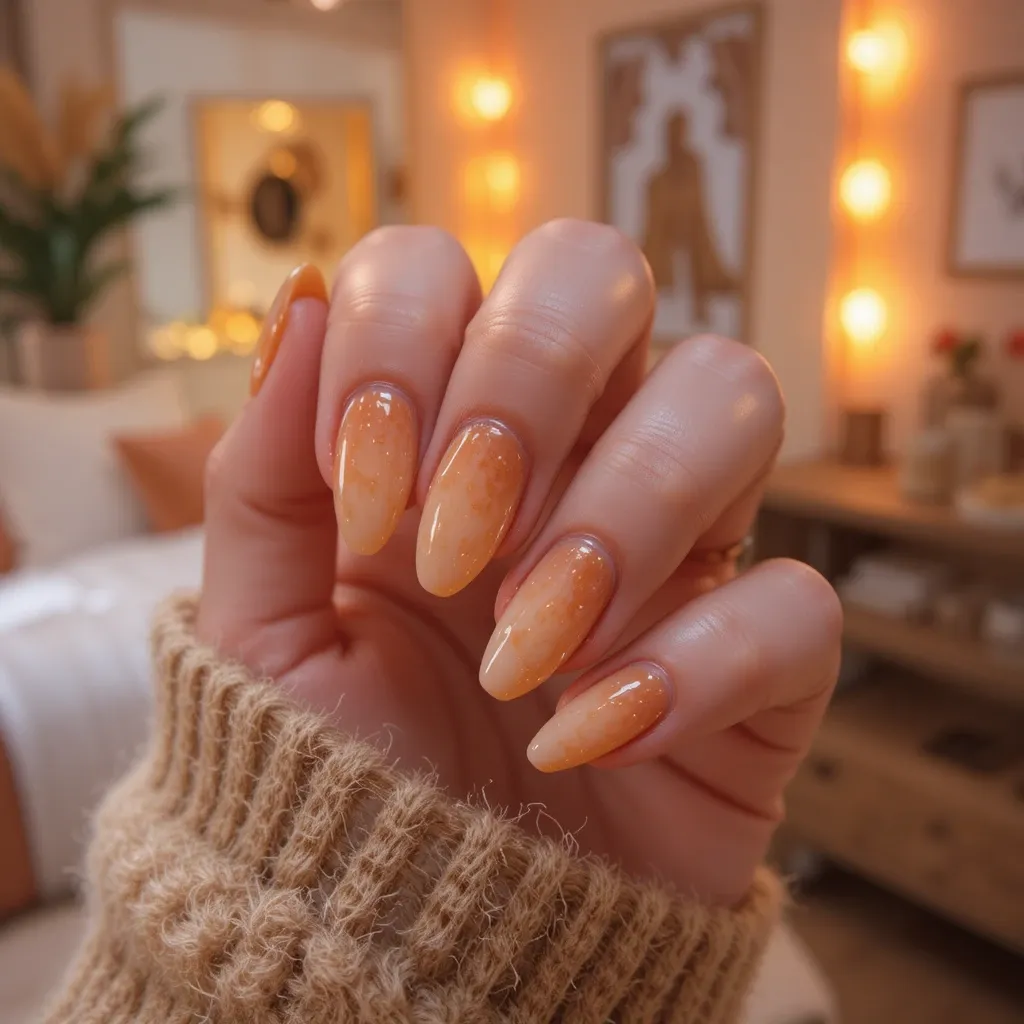
A warm, golden-toned nude with a creamy finish that catches the light like liquid amber in a glass. This versatile shade has peachy-bronze undertones that add depth without being too bold, creating an effortlessly polished look. The semi-glossy finish gives off that “my nails but better” vibe that pairs perfectly with denim and leather.
Difficulty: Beginner
Time to complete: 20–25 minutes
Best for: Anyone who wants a “my nails but better” look that works from the parking lot to Monday morning.
Why it works: Warm golden-nude shades flatter every skin tone and photograph well under both indoor arena lighting and outdoor sun—something icy pinks just don’t do.
What makes it different: The peachy-bronze undertone gives depth that a plain beige doesn’t have, making it look like you made a considered choice rather than just going neutral.
Products: OPI “Samoan Sand” ($10–12, ulta.com or Target) applies in two smooth coats with minimal streaking. Essie “Au Natural” ($9–11, drugstores) runs slightly cooler if you prefer that. For drugstore budget, Sally Hansen Complete Salon Manicure “Buff and Tumble” ($6–8) is the most forgiving formula I’ve used at that price point. For two-week wear, Olive & June Gel Polish “AN” ($10–13, oliveandjune.com) is worth it.
Common Mistake: Shaking the bottle creates air bubbles that show up as tiny craters in the finish. Roll it between your palms instead. Also—two thin coats always beats one thick coat. Thick coats take forever to dry and dent easily.
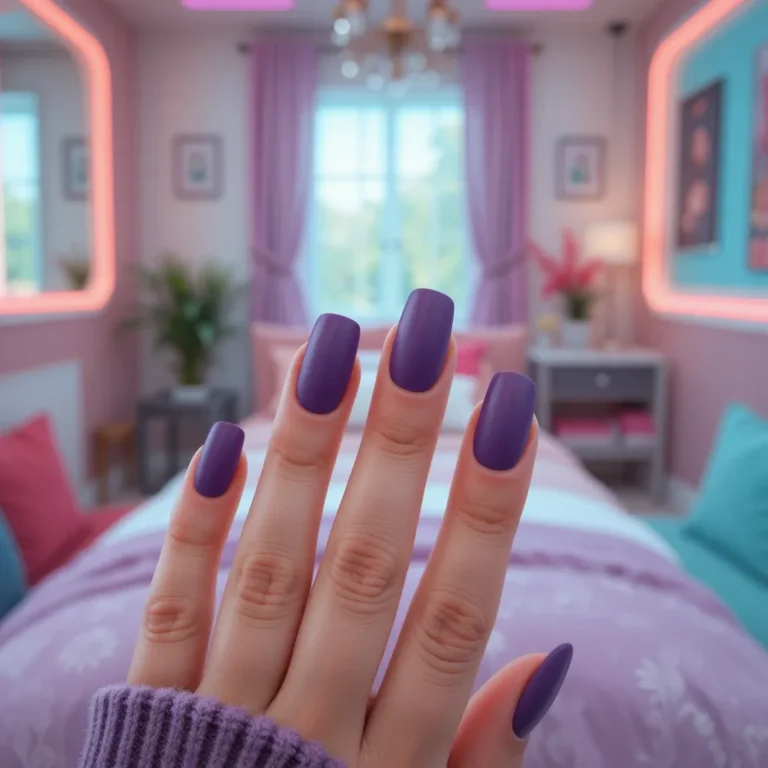
2. Dusty Rose Western
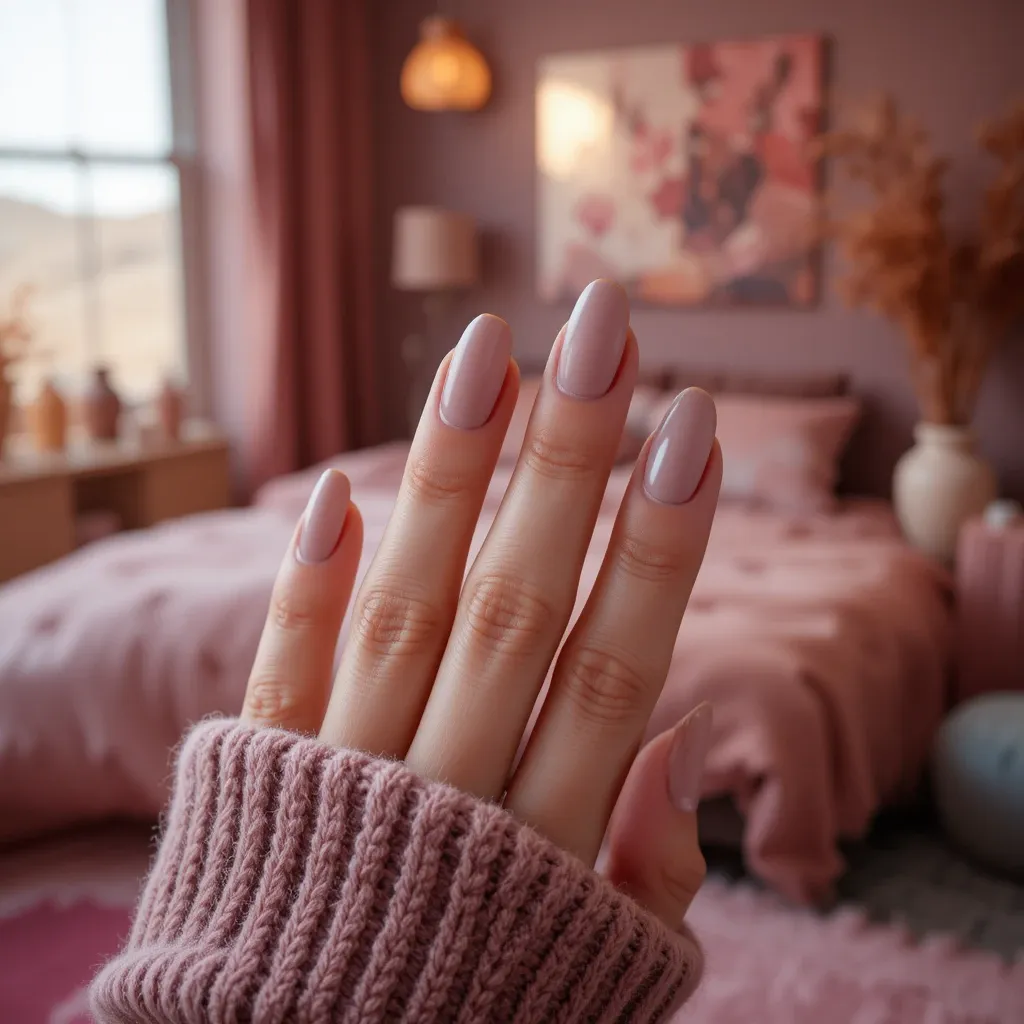
A muted mauve-pink with gray undertones that evokes dusty desert sunsets and vintage cowgirl aesthetics. This sophisticated neutral has just enough color to feel intentional while maintaining that understated elegance country concert nails style is known for. The soft matte finish adds a modern, velvety texture that feels expensive and curated.
Difficulty: Beginner
Time to complete: 25–30 minutes (matte top coat needs fully dry color underneath)
Best for: Someone who wants visible color that still reads as “professional” in most settings.
Why it works: The gray undertones in dusty rose keep it from going too sweet or too pink, landing in that versatile zone that works with denim, plaid, and leather equally well.
What makes it different: The matte finish adds a velvety texture that makes an ordinary mauve feel intentional and current rather than basic.
Products: Essie “Lady Like” ($9–11) is the dusty rose standard—consistent, opaque in two coats, doesn’t streak. OPI “Taupe-less Beach” ($10–12) runs slightly warmer. For the matte top coat, Essie “Matte About You” ($9–11) is reliable and doesn’t leave a milky film the way some cheaper mattes do. Wet n Wild “It’s Sher-bert Day” ($3–5) is genuinely good for the price if you’re testing the shade before committing.
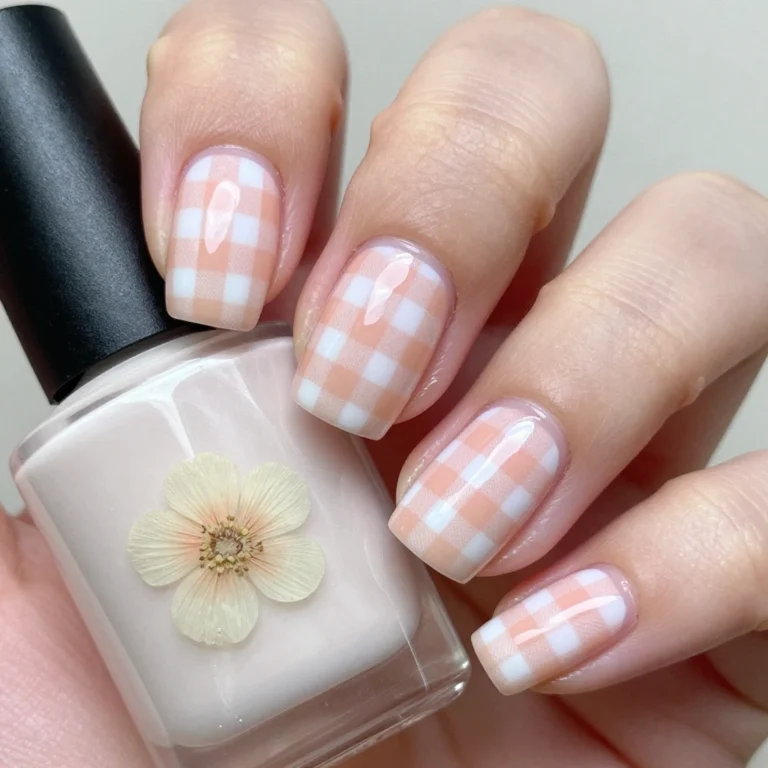
3. Creamy Vanilla Latte
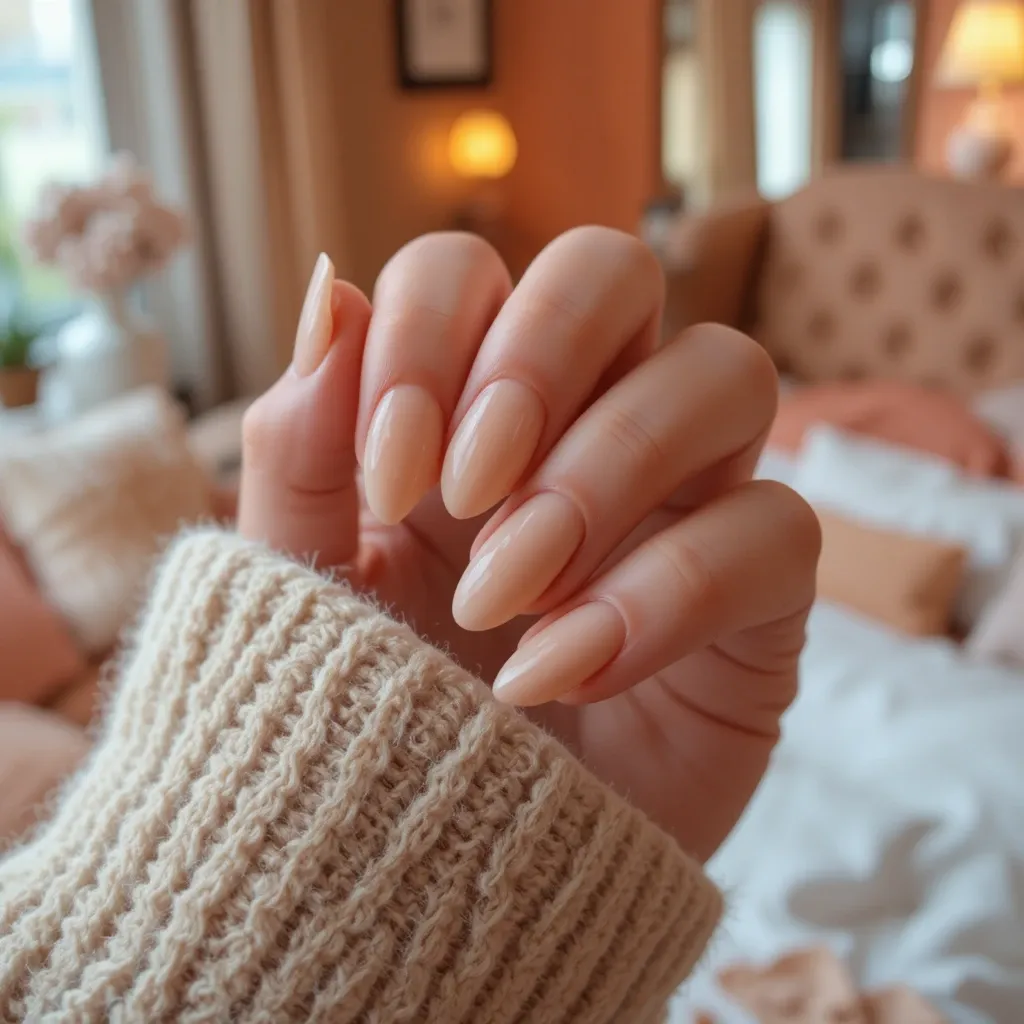
A soft, milky beige with warm undertones that resembles the foam on your morning coffee—clean, classic, and endlessly wearable. This shade has just enough pigment to avoid looking washed out while maintaining that fresh, natural appearance. The glossy finish gives nails a healthy, well-maintained look that feels polished without being overdone.
Difficulty: Beginner (with a technique adjustment for light colors)
Time to complete: 25–30 minutes
Best for: Someone attending a more traditional, classic-country show who wants polish without statement color.
Why it works: It reads as “put together” without drawing attention away from your outfit, which is usually the goal for a neutral.
What makes it different: The warm, milky undertone keeps it from looking clinical or bridal—it has a little personality without being loud.
Products: OPI “Bubble Bath” ($10–12) is famous for a reason—it applies evenly and never goes gloopy. Essie “Ballet Slippers” ($9–11) is a hair sheerer and may need 3–4 coats. Avoid ultra-cheap formulas for light nudes—watery formula means 4–5 coats, which ends up looking thick and unnatural. For rhinestones, any small flat-back crystals from Amazon work fine ($5–8 for a pack).
Bold & Western-Inspired
4. Burnt Orange Sunset
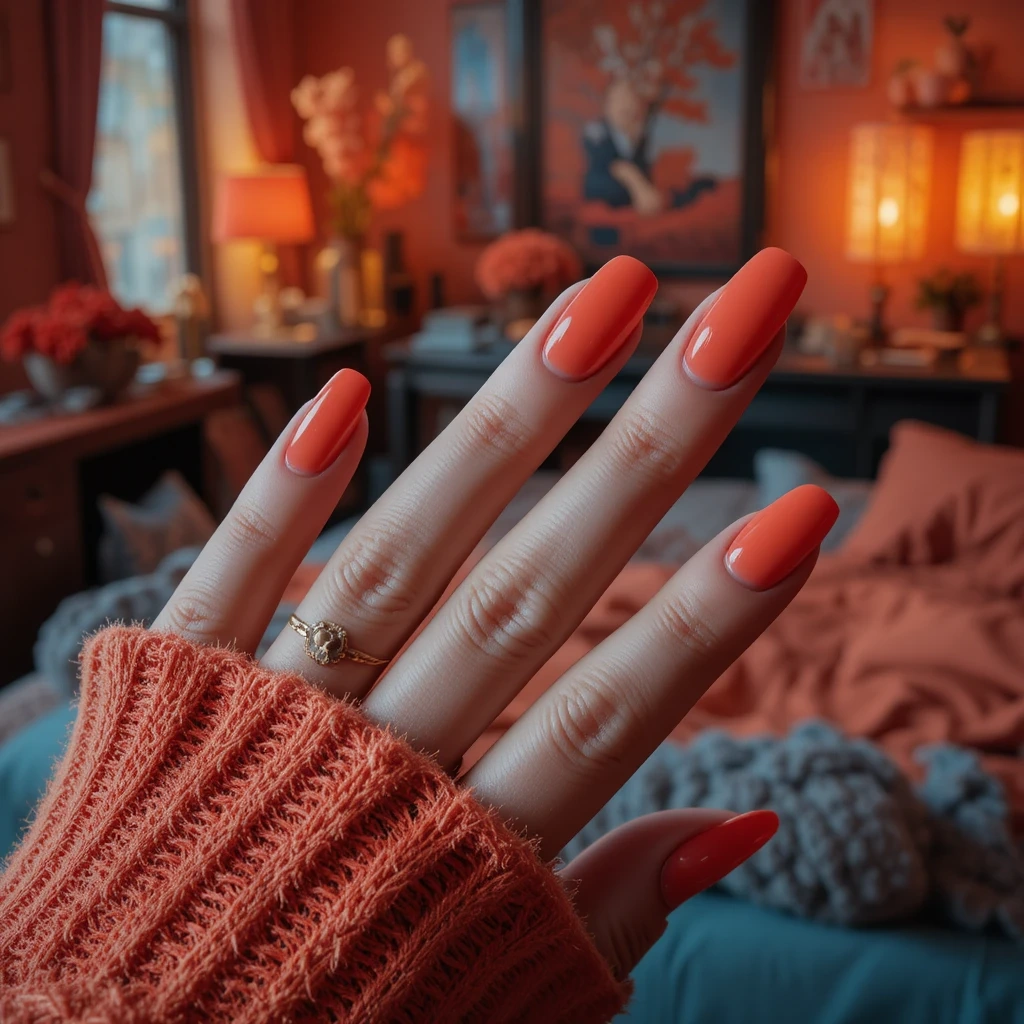
A rich, terracotta-inspired orange with warm red undertones that captures the essence of a Texas sunset over the open range. This bold yet earthy shade has enough depth to feel grounded rather than neon, making it surprisingly versatile. The cream finish provides solid, opaque coverage that looks intentional and statement-making.
Difficulty: Beginner
Time to complete: 20–25 minutes
Best for: Modern country/festival vibes—Stagecoach, outdoor ampitheatres, anyone leaning into the Western aesthetic fully.
Why it works: Terracotta and burnt orange tones look incredible in outdoor sunset lighting and photograph better than most colors in bright sun.
What makes it different: This shade has enough brown in it to avoid looking neon, making it wearable without feeling costume-y.
Products: Essie “Playing Koi” ($9–11) is a true burnt orange with no red-orange confusion. OPI “Freedom of Peach” ($10–12) is slightly softer if full orange feels bold. China Glaze “Papaya Punch” ($7–9) leans deeper terracotta. All three are creamy and opaque—no fighting with streaks.
Making It Last: Bold colors show chips more obviously than neutrals. Apply a fresh layer of top coat every 2–3 days and wear gloves for dishes. Cuticle oil applied daily helps prevent the lifting that leads to chipping.
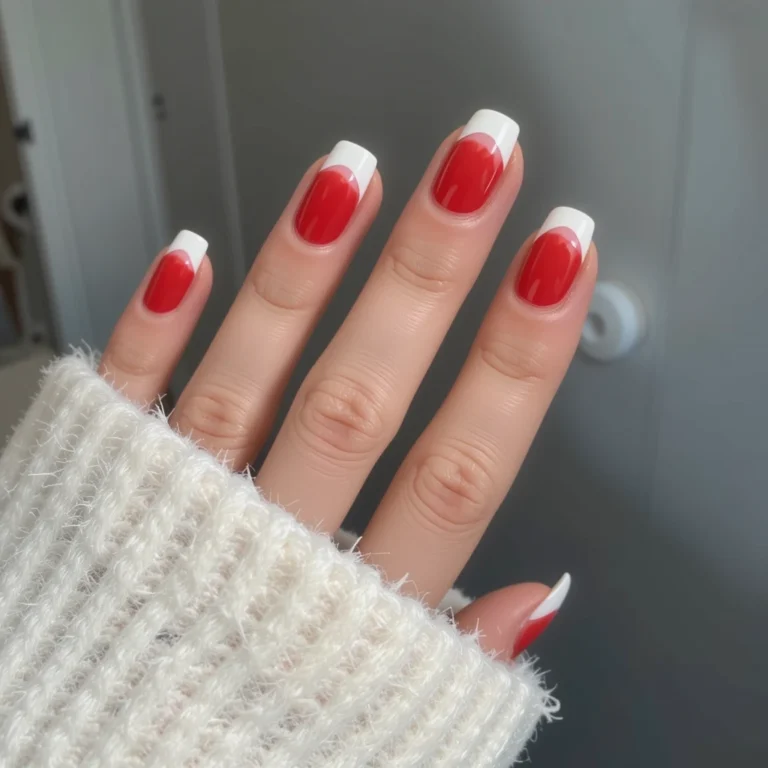
5. Deep Burgundy Barn
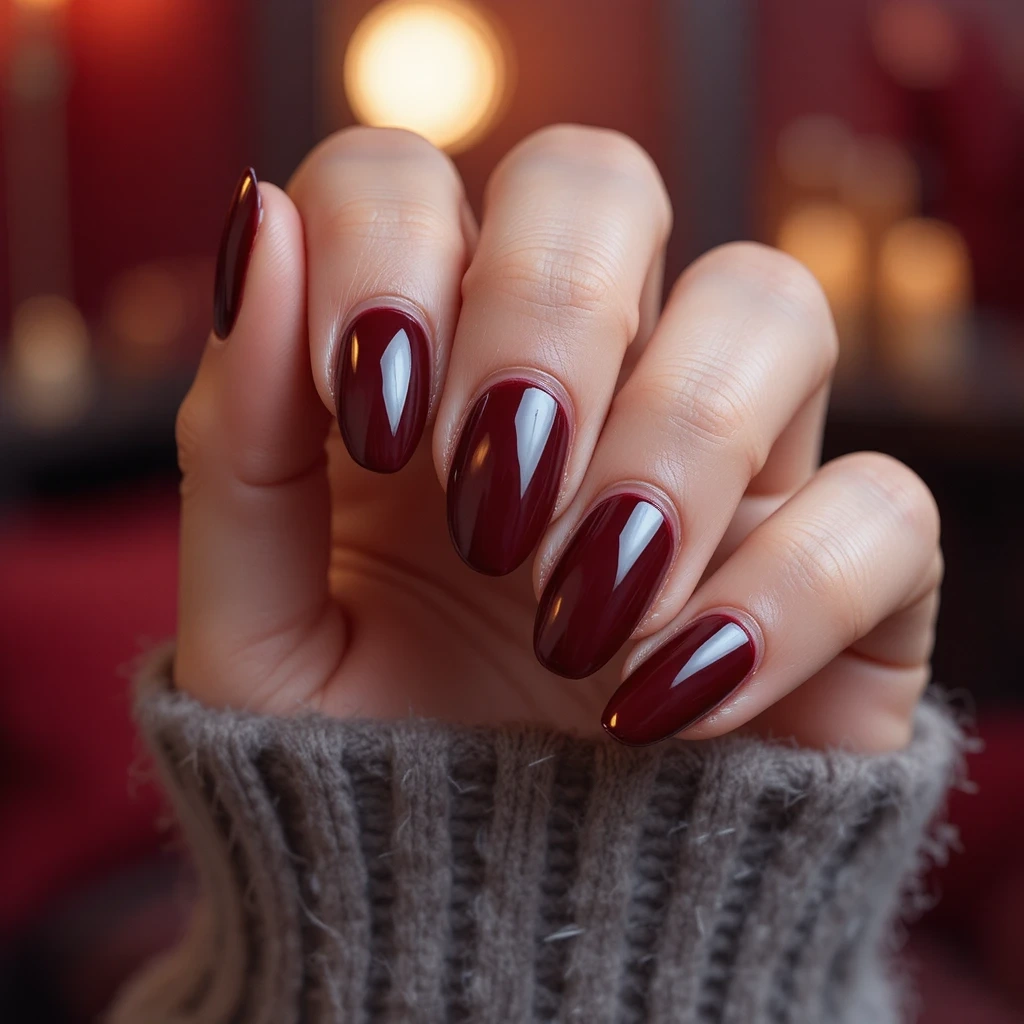
A rich, wine-colored burgundy with chocolate undertones that feels both sophisticated and country-appropriate. This deep shade has enough red to avoid looking gothic while maintaining a moody, dramatic presence that photographs beautifully. The glossy finish adds a luxe, jewel-like quality that elevates any outfit from casual to concert-ready.
Difficulty: Beginner (but needs attention to detail)
Time to complete: 30–35 minutes
Best for: Classic country shows, indoor venues, anyone who wants drama without going trendy.
Why it works: Deep burgundy photographs like a jewel tone under arena lighting—it has depth and richness that plain red doesn’t.
What makes it different: The chocolate undertones keep it grounded and warm rather than vampy, which means it works on more people and in more settings.
Products: OPI “Lincoln Park After Dark” ($10–12) is the standard—smooth, fully opaque in two coats. Essie “Bordeaux” ($9–11) skews slightly more red. For budget, Revlon “Vixen” ($5–7) is genuinely good pigmentation for the price. All three have formulas that don’t streak, which matters more for dark colors where every imperfection shows.
Sparkle & Accent Nails
6. Gold Rush Glitter
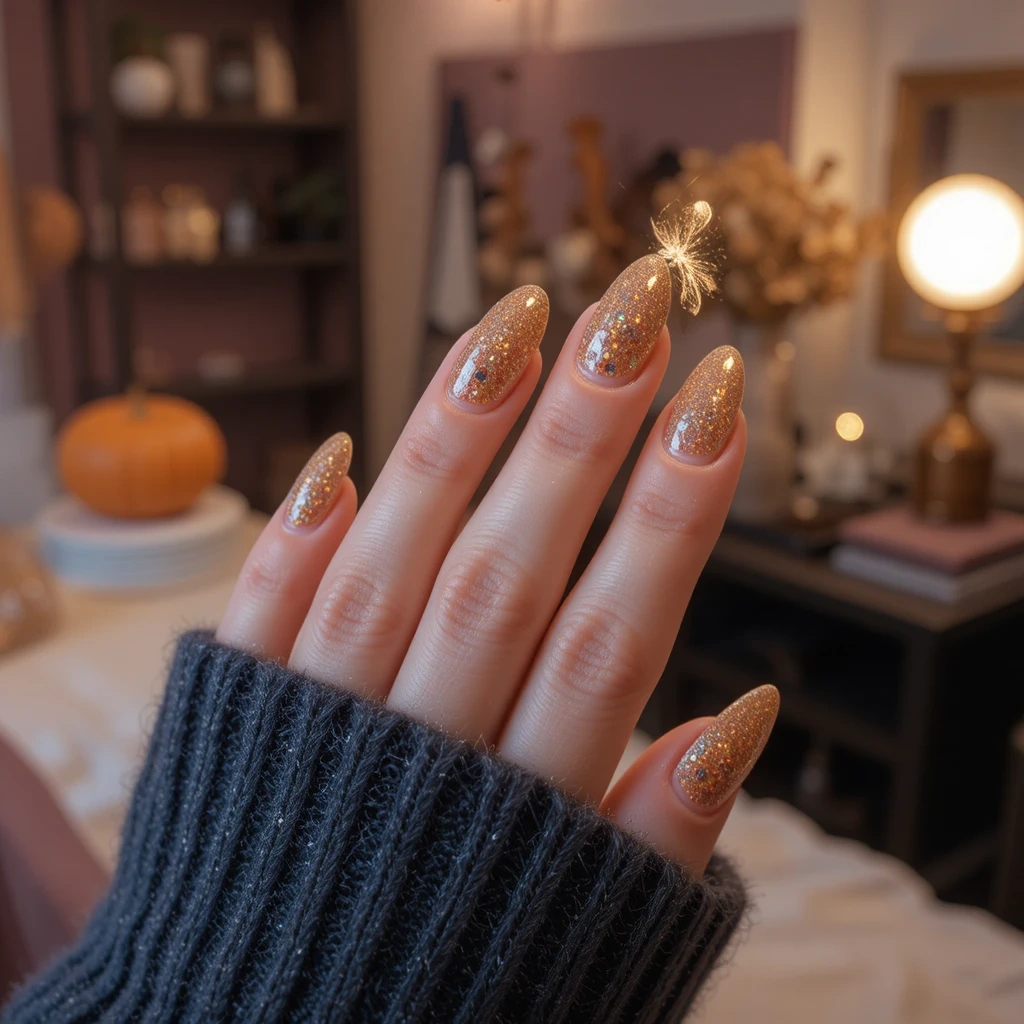
A warm champagne-gold glitter packed with various sizes of shimmer particles that catch every spotlight and camera flash. This isn’t your basic glitter—it has a sophisticated, almost metallic quality with both fine shimmer and larger hexagonal flakes. The effect is pure sparkle without being childish, creating that perfect concert-ready glamour.
Difficulty: Beginner–Intermediate
Time to complete: 35–40 minutes (drying time is the main factor)
Best for: Anyone who wants maximum sparkle with minimum effort—photogenic without requiring nail art skills.
Why it works: Glitter catches every light source in a venue—arena lights, phone flashes, outdoor sun—making your hands visible and camera-ready in any shot.
What makes it different: Applying with a makeup sponge (instead of brushing it on) gives dense, opaque glitter coverage without 5 coats, and creates a packed-sparkle effect that looks professional.
Products: OPI “Goldeneye” ($10–12) is a warm champagne gold with mixed particle sizes that gives the sophisticated-not-childish effect. Essie “Summit of Style” ($9–11) is another option with slightly larger flakes. Beetles Gold Glitter Gel (Amazon, $8–12) is excellent if you have a UV lamp. Avoid craft glitter mixed into clear polish—it never adheres properly.
Removal: Soak cotton pads in acetone, place on each nail, wrap each finger in foil, wait 10 minutes. It wipes off clean instead of requiring aggressive scrubbing. This step matters with glitter.
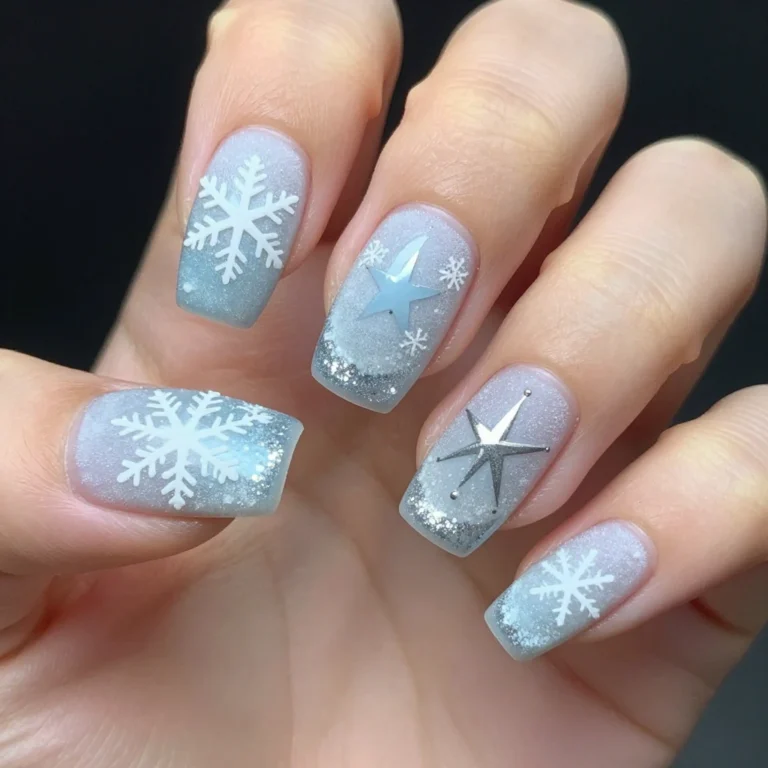
7. Turquoise Stone Accent
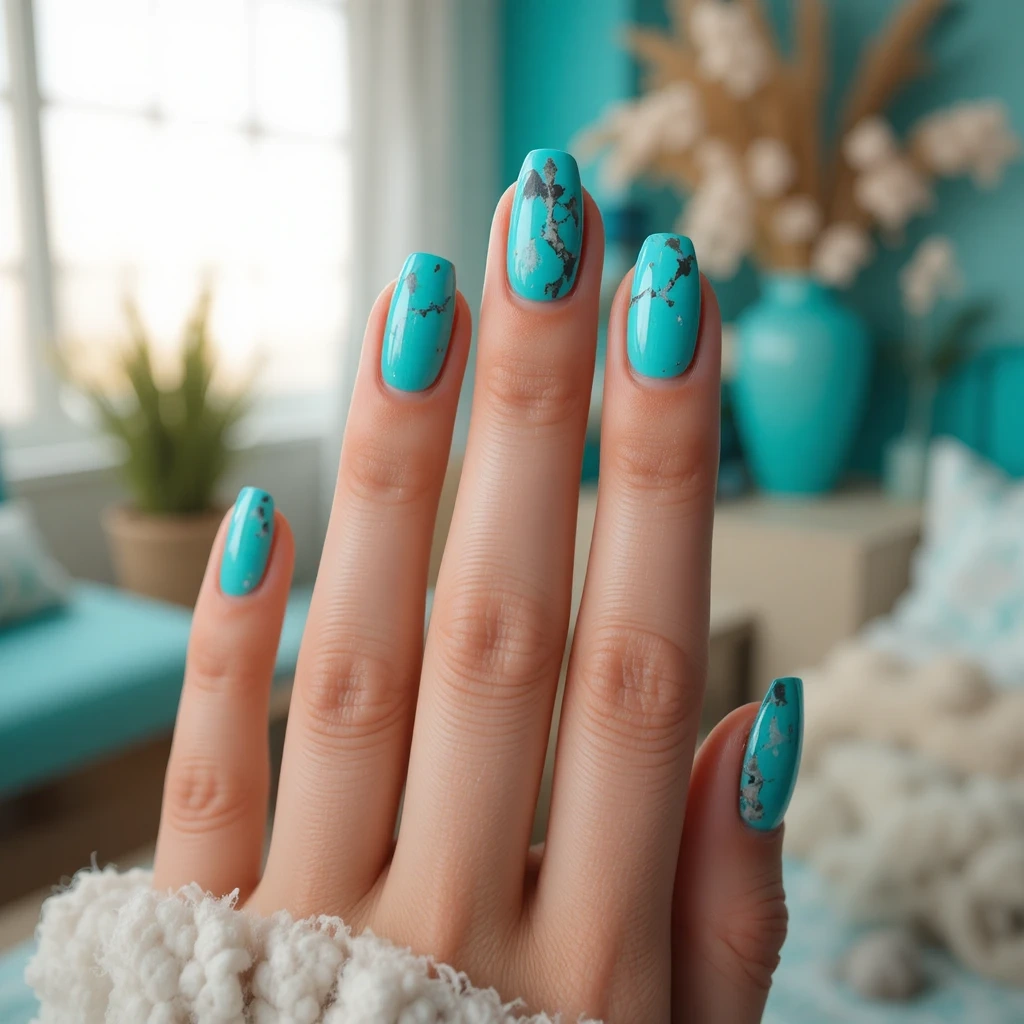
A genuine turquoise-inspired blue-green with matrix-like darker veining that mimics authentic Western turquoise jewelry. This accent nail design uses a marble or watercolor technique to recreate that stone-like appearance with depth and variation. The colors shift between seafoam green and sky blue with charcoal or brown veining, creating an authentic gemstone effect.
Difficulty: Intermediate
Time to complete: 40–50 minutes
Best for: Someone comfortable with nail art basics who wants a design that looks custom and handmade rather than polished-generic.
Why it works: Turquoise is deeply embedded in Western and country aesthetics—it reads immediately as intentional and on-theme without being literal about it.
What makes it different: The veining technique creates genuine variation between nails, making it look like actual stone rather than a printed pattern.
Products: OPI “Teal the Cows Come Home” ($10–12) mixed with Essie “Go Overboard” ($9–11) and OPI “Alpine Snow” ($10–12) creates the right color range. Sally Hansen I Heart Nail Art pens ($4–6, drugstores) work perfectly for veining—the fine tip gives you control without needing a specialty brush.
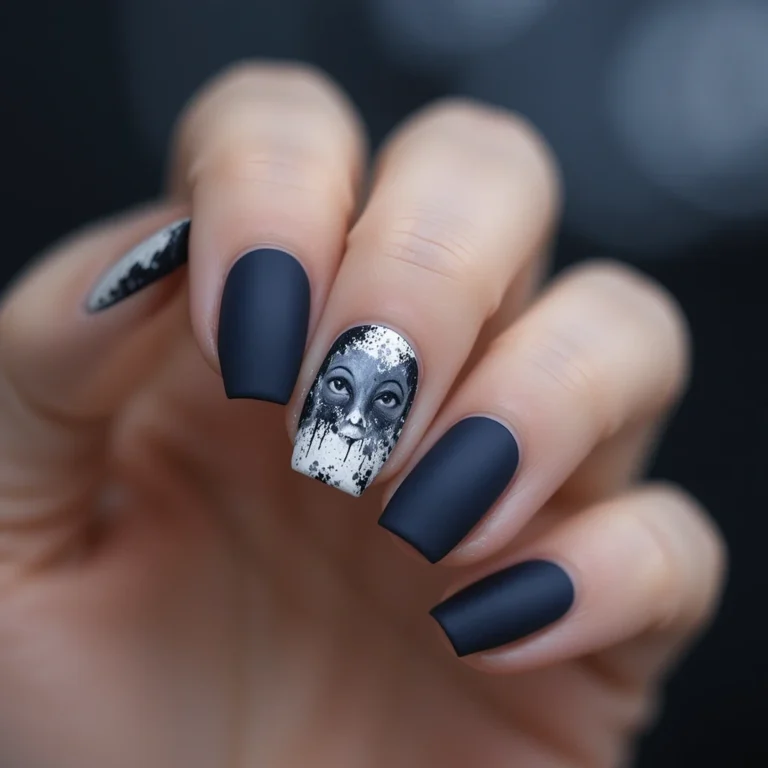
8. Pearl Chrome Western
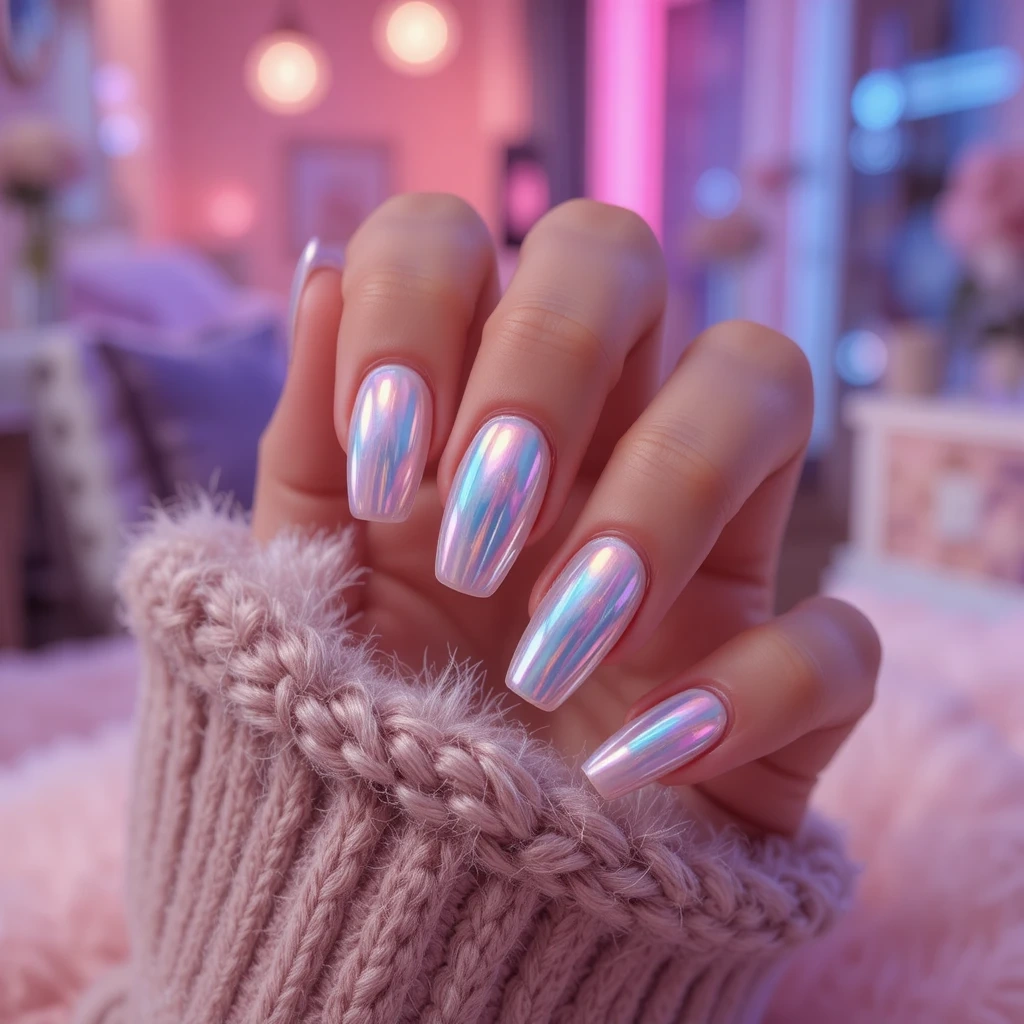
A soft, iridescent pearl chrome with pink and blue shifting tones that creates a modern take on classic pearl snap shirts. This finish has a smooth, reflective quality that looks almost liquid on the nail, catching light from every angle. The opalescent effect feels both ethereal and contemporary, bridging traditional country aesthetics with current nail trends.
Difficulty: Intermediate (polish method) / Advanced (true gel chrome)
Time to complete: 30–35 minutes (polish method) / 50–60 minutes (gel method)
Best for: Modern country fans who want something ethereal and current rather than traditionally Western.
Why it works: The pink-blue color shift in pearl chrome catches light from every angle, which photographs beautifully in both dim venue lighting and bright outdoor sun.
What makes it different: It bridges the gap between the traditional pearl snap aesthetic of classic country fashion and the modern iridescent trend, making it feel both nostalgic and current.
Products: For the polish method, Sally Hansen “Glass Slipper” ($6–8) gives a soft pearl shift. Essie “Pure Pearlfection” ($9–11) is another good option. For true chrome powder, Makartt Chrome Powder “Pearl White” (Amazon, $7–10) is affordable and easy to apply. Born Pretty chrome powders (Amazon, $4–6 per shade) are a good budget option.
Pros and Cons of Country Concert Nails
✅ Pros
- Western-inspired colors (nudes, burnt orange, burgundy) photograph well in almost every concert lighting situation
- Most of these designs can transition from concert to work week without looking out of place
- Designs like the stone accent and chrome are genuinely conversation starters—people will ask about your nails
- Solid colors and simple techniques are accessible even without nail art experience
- These aesthetics are flexible—they work at intimate honky-tonks and large outdoor festivals equally
❌ Cons
- Gel removal takes 10–15 minutes with acetone and foil wraps—not a quick thing to undo
- Chrome finishes scratch easily; any time you use your nails as tools it shows permanently
- Glitter nails require deliberate, time-consuming removal—you can’t just wipe them off
- Matte finishes show every fingerprint and scratch in normal use between the concert and removal
- True chrome requires a UV gel system—the at-home powder method isn’t available without one
- Turquoise stone nails are genuinely difficult to get looking right on the first try; expect imperfection
- Any regular (non-gel) polish will show wear at a multi-day festival by day 2–3 regardless of top coat
- Long nail lengths that look great in photos become a practical problem at crowded, active venues
Maintenance Tips
Days 1–3 (Right After the Manicure):
- Avoid submerging hands in water for the first 2–3 hours after finishing—water causes the polish to lift slightly before it fully sets.
- Apply cuticle oil (CND SolarOil, $10–12, or any jojoba-based oil) to each nail daily. Hydrated nails are less likely to lift polish at the edges.
- Don’t use your nails as tools. Opening cans, peeling stickers, prying things—these cause tip chips immediately.
Days 4–7:
- Apply a fresh layer of top coat every 3 days. This refreshes the shine and seals any micro-cracks before they become visible chips. Use the same top coat you started with for best adhesion.
- If you get a small chip on the tip, file it smooth rather than trying to paint over it—painting over a chip rarely looks seamless.
During the Concert:
- Use hand sanitizer wipes rather than gel sanitizer—squirting liquid sanitizer directly on nails streaks glitter and leaves residue on chrome finishes.
- If you have a file in your bag and a nail snags on something, file it immediately rather than letting it catch further.
- Be conscious around zippers, rough denim seams, and bags with metal hardware—these are the most common sources of unexpected chips.
After the Concert:
- If you’re keeping the manicure for another week, apply top coat the morning after the show to refresh it. Concert conditions are hard on nails.
- Remove glitter within 10 days maximum—longer wear makes it harder to remove without aggressive scrubbing that damages nails.
Common Mistakes and How to Fix Them
Mistake 1: Flooded Cuticles
What it looks like: Polish pooling in the cuticle area, making edges look messy and unprofessional. Why it happens: Too much product on the brush, starting too close to the cuticle, or the brush touching the cuticle and pulling polish upward.
Fix: Before the top coat goes on, dip a thin nail art brush or orangewood stick wrapped in cotton in acetone and run it around each nail’s edge. Clean up has to happen before the top coat seals everything. Honesty: This fix works well when done carefully. It’s worth the extra 5 minutes.
Mistake 2: Bubbles in the Finish
What it looks like: Tiny raised circles trapped in the polish layer, visible especially on solid colors. Why it happens: Shaking the polish bottle (introduces air), applying too thick, or painting over polish that wasn’t fully dry.
Fix: Once fully dry, apply a thin layer of top coat to smooth the surface. It won’t eliminate the bubbles but fills them in enough to be less visible. Prevention is better: Roll the bottle between palms instead of shaking, apply thin coats, and wait fully between layers.
Mistake 3: Matte Top Coat Going Patchy
What it looks like: Uneven matte finish with some areas shinier than others, sometimes with drag marks in the color underneath. Why it happens: Applying matte top coat over polish that wasn’t completely dry.
Fix: If it’s minor patchiness, a second thin coat of matte top coat over the first can even it out. If the drag marks show through, you need to remove and start the color over. Honest assessment: This is one of the harder mistakes to recover from cleanly. Waiting the full 10 minutes for color to dry before matte top coat is worth it.
Mistake 4: Chrome Powder Not Adhering
What it looks like: Chrome powder rubbing off instead of adhering, or sticking only in patches. Why it happens: The no-wipe gel top coat wasn’t cured long enough, or regular (wipe) top coat was used instead of no-wipe.
Fix: Remove what’s there with acetone, re-cure the no-wipe gel top coat for the full time your lamp requires, then try the powder again. Note: Chrome powder only works properly on gel—there’s no real fix for trying it on regular polish. Use the sponge-pearl method in Design #8 instead.
Real Wear Timeline: What Happens After the Concert
I wore gel nails in the Burnt Orange Sunset shade for three weeks to give you a realistic timeline.
Week 1: Nails look exactly as applied—full color, no chips, clean edges. The one visible change by day 5 or 6 is very slight nail growth showing at the base, maybe 1–2mm of natural nail at the cuticle line. Not noticeable at a glance.
Week 2: Growth at the base is now more visible, maybe 2–3mm. The color and finish are still intact on the painted portion. If there’s going to be any lifting, it usually starts at one or two corners—you’ll feel it catch slightly. Don’t pick at it; apply cuticle oil and it often re-adheres, or at least slows the lifting.
Week 3: Growth gap is clearly visible up close—about 4mm. Some people find this fine; others find it distracting. One or two nails may have small chips at the corners of the tip, especially on the dominant hand. The color in the middle of the nail still looks fresh.
Week 4: At this point you’re pushing it. The growth gap is significant, and most nails have some wear at the tips. The manicure looks “grown out” rather than polished. For regular polish, expect this timeline compressed to about 10–14 days rather than a full month.
FAQs
Can I do country concert nails at home without any special tools? Yes—every solid color design here (1 through 5) needs only polish, a base coat, top coat, and a cleanup brush. The stone and chrome designs need either a nail art pen or a makeup sponge, both of which cost under $5 at a drugstore.
How long before the concert should I do my nails? For regular polish, the night before is ideal—gives full drying time overnight without risking smudges. For gel, you can do it the morning of since gel cures hard under the lamp immediately.
Will hand sanitizer ruin my nails at the concert? Gel polish is largely unaffected. Regular polish can get streaky if you use liquid hand sanitizer directly on the nails—use hand sanitizer wipes and pat rather than rub to minimize contact.
What’s the easiest way to remove glitter nails after the concert? Soak cotton pads in acetone, press one onto each nail, wrap each finger in a small square of aluminum foil, and wait 10 minutes. The glitter releases without scrubbing, which protects your nails.
Final Thought
Start with a shade that makes you feel good and that you’re not going to stress about. Honey Whiskey Nude or Dusty Rose Western are both good starting points if you’re newer to nail art—they look intentional with minimal technique. If you want to try something more involved, the Turquoise Stone Accent is worth the learning curve.