40+ Stunning Summer Nail Colors Ideas for a Bold Summer Vibe
Summer nail colors are any shades that feel alive, sun-soaked, and seasonally relevant—think everything from neon coral and ocean teal to dusty terracotta and even moody black with a warm twist.
They’re not a strict category; they’re more of a feeling—nails that look intentional when you’re holding a cold drink at a rooftop party or digging your toes into sand. So let Jumpt to the 40+ Summer Nail Colors Ideas
How to Choose the Best Summer Nail Colors ideas
For your first time experimenting with summer shades: Start with a warm coral or a soft peach. They’re flattering on almost every skin tone and forgiving if your application isn’t perfect yet.
If you have a professional job: Stick to dusty rose, nude coral, deep teal, or rich burgundy-adjacent reds. These read “polished” in a meeting but still feel summery in sunlight.
If you want something for special events: Shimmer finishes in gold-orange, metallic teal, or chrome red are show-stoppers at weddings, brunches, and vacations.
If you’re comfortable with nail art: Layer contrasting summer colors with negative space designs or abstract line art. Black-and-white with a single orange accent nail is surprisingly wearable.
If you have short nails: Bright, saturated single shades work best—orange, yellow, and red make short nails look intentionally chic rather than just small.
If you change your mind often: Avoid time-intensive nail art and opt for solid bold colors or simple two-tone looks. That way, removing and switching feels less painful.
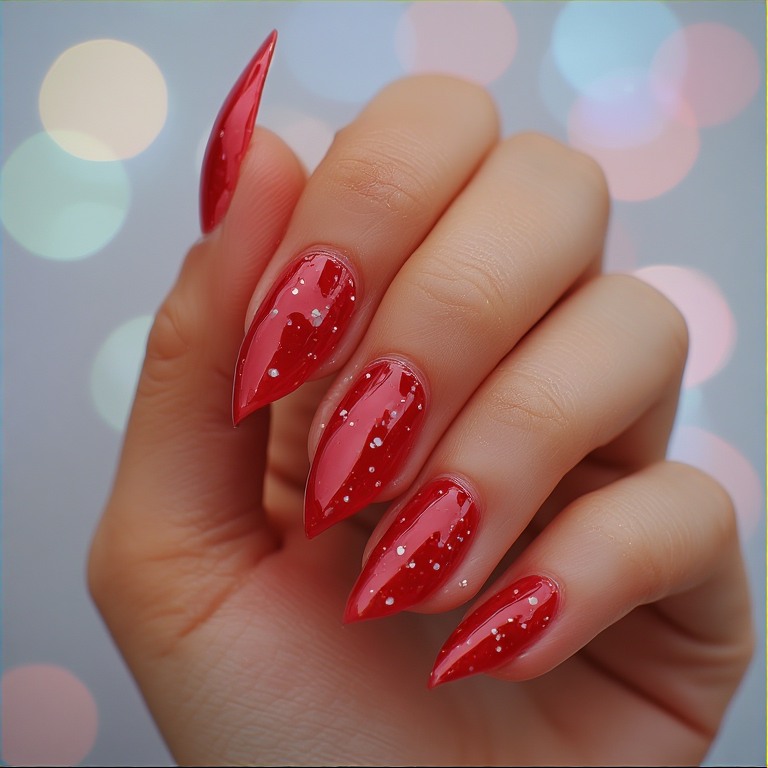
Summer Red Nails
Red nails have never actually gone out of style, but summer reds are their own category—warmer, more saturated, sometimes sheer. Here are 7 looks worth trying.
1. Classic Cherry Red Creme
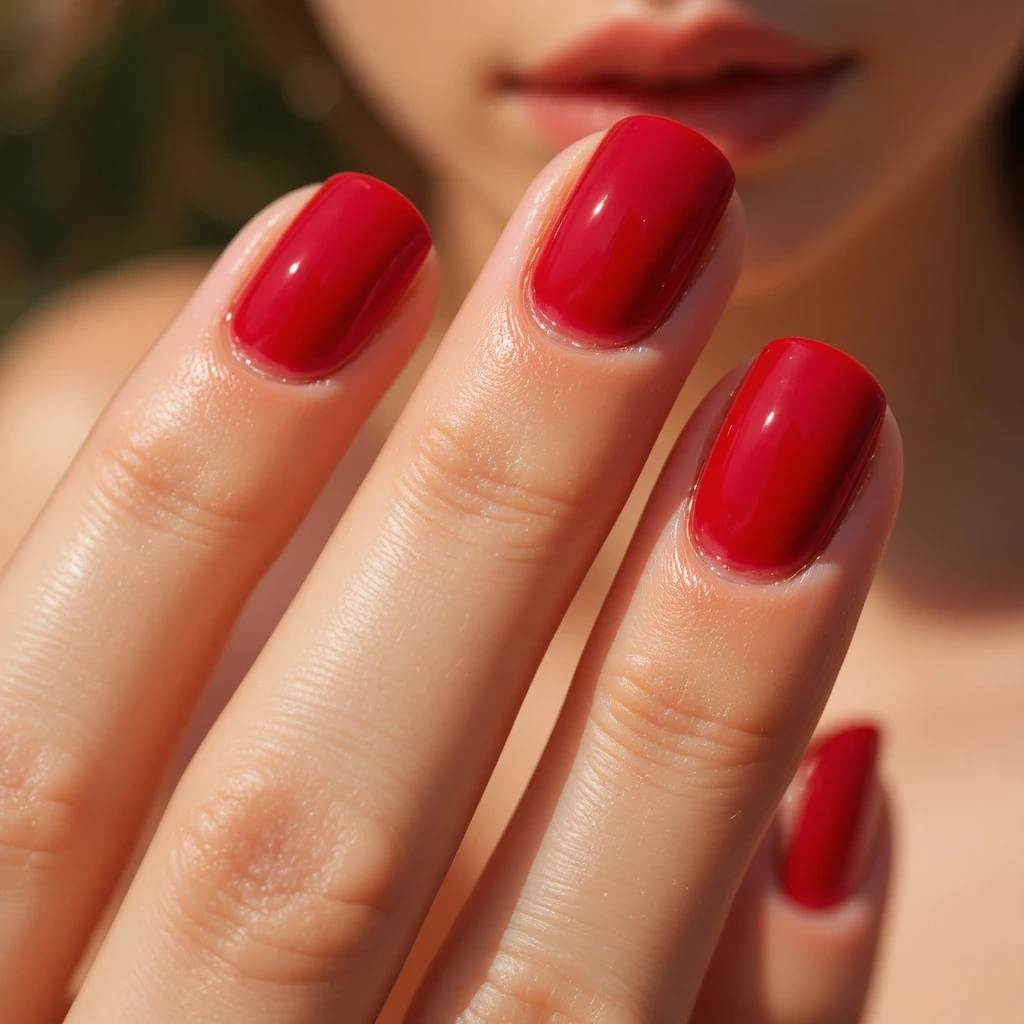
A glossy, uninterrupted cherry red with zero shimmer or effect. Deeply saturated, smooth as glass, and looks equally good at a dinner reservation or on the beach. Think old Hollywood glamour meets modern minimalism.
Difficulty: Beginner
Time to complete: 30 minutes
Best for: Anyone who wants a polished, foolproof look that works for literally every occasion
Why it works: Red is the most universally flattering nail color ever discovered—warm enough for summer, confident enough for professional settings
What makes it different: No shimmer or texture means the quality of your application shows, but it also photographs beautifully in every lighting condition
Product to get: OPI Big Apple Red ($11 at Ulta). The formula self-levels, which means brush strokes disappear on their own.
2. Sheer Red Jelly
A translucent red with a candy-like finish that lets your natural nail show through. It reads romantic and understated without being boring—like a red lip but quieter.
Difficulty: Beginner Time to complete: 20 minutes Best for: People who love red but find full-coverage shades too intense for everyday wear Why it works: The sheerness makes it forgiving to apply and removes cleanly without staining What makes it different: Most red polishes stain; jelly formulas don’t, which means no yellow tinge on your nail bed after removal
Product to get: Essie Bordeaux ($10 at Target). Apply one thin coat for jelly effect
3. Metallic Flame Red
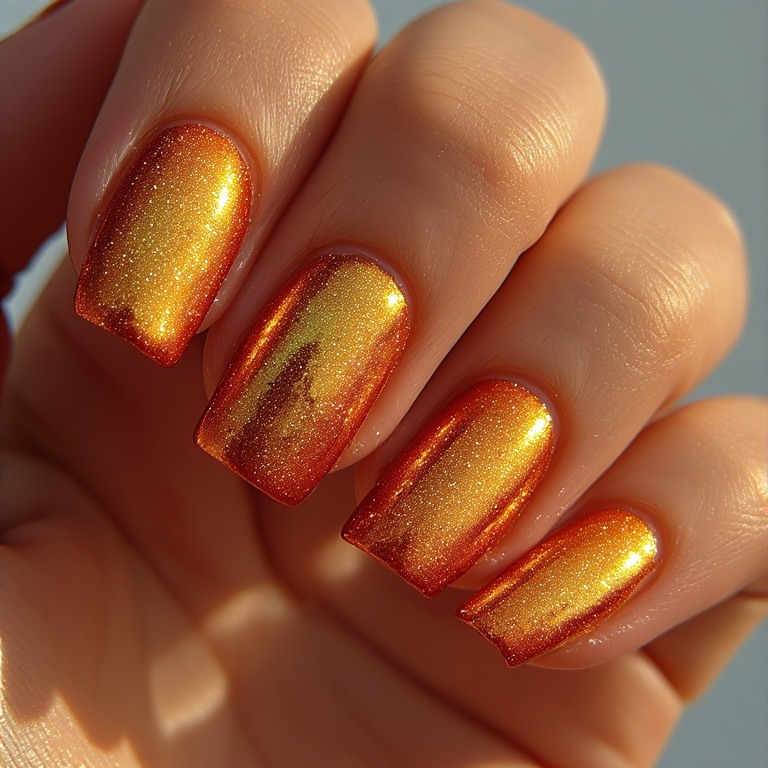
A red with strong gold-metallic shimmer that shifts slightly orange in sunlight. It catches light like a lit match and photographs like something off a runway.
Difficulty: Intermediate Time to complete: 35 minutes Best for: Summer events, vacations, or any time you want nails that carry a whole outfit Why it works: The gold undertone reads warm and sun-kissed rather than cold or harsh What makes it different: This isn’t glitter—it’s a foil-like shift that looks expensive even in a drugstore formula
Product to get: Sally Hansen Miracle Gel in Red-y to Rumble ($10 at Walmart). This two-step gel system has the best metallic red formula in the drugstore range.
4. Fire Red with Gold Flake Accent
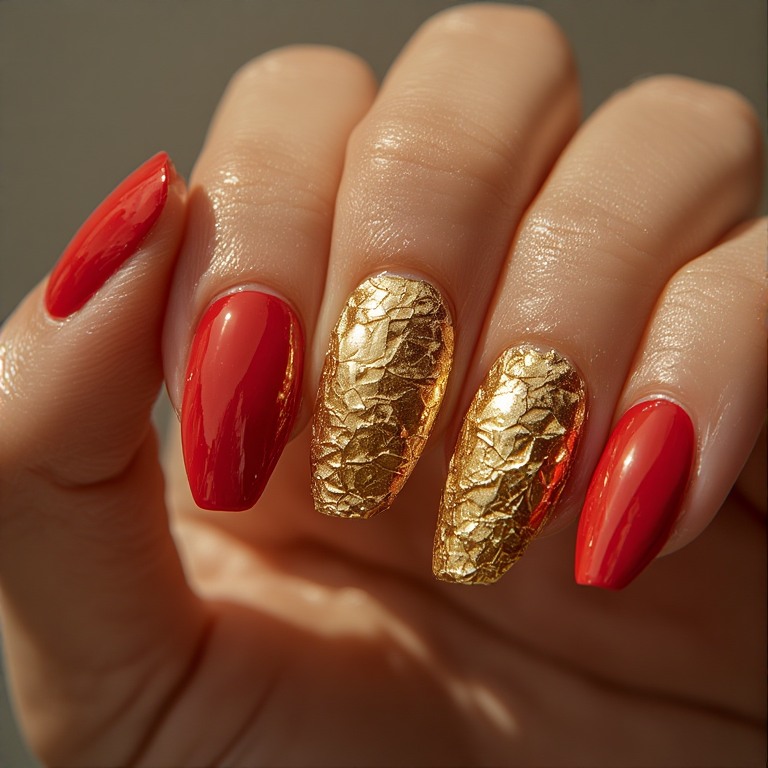
A full-coverage fire red base with one or two accent nails covered in chunky gold leaf flakes. Bold but structured—the flakes add texture without chaos.
Difficulty: Intermediate Time to complete: 45 minutes Best for: Vacations, bachelorette weekends, or any event where you want your hands photographed Why it works: The red-gold combination is one of the warmest, most summer-appropriate pairings that exists What makes it different: Gold flake is more tactile than glitter—it has a handmade, editorial quality
Product to get: Born Pretty Gold Foil Flakes ($6 on Amazon). A little goes further than you expect—start with less than you think you need.
5. Tomato Red (Orange-Red)
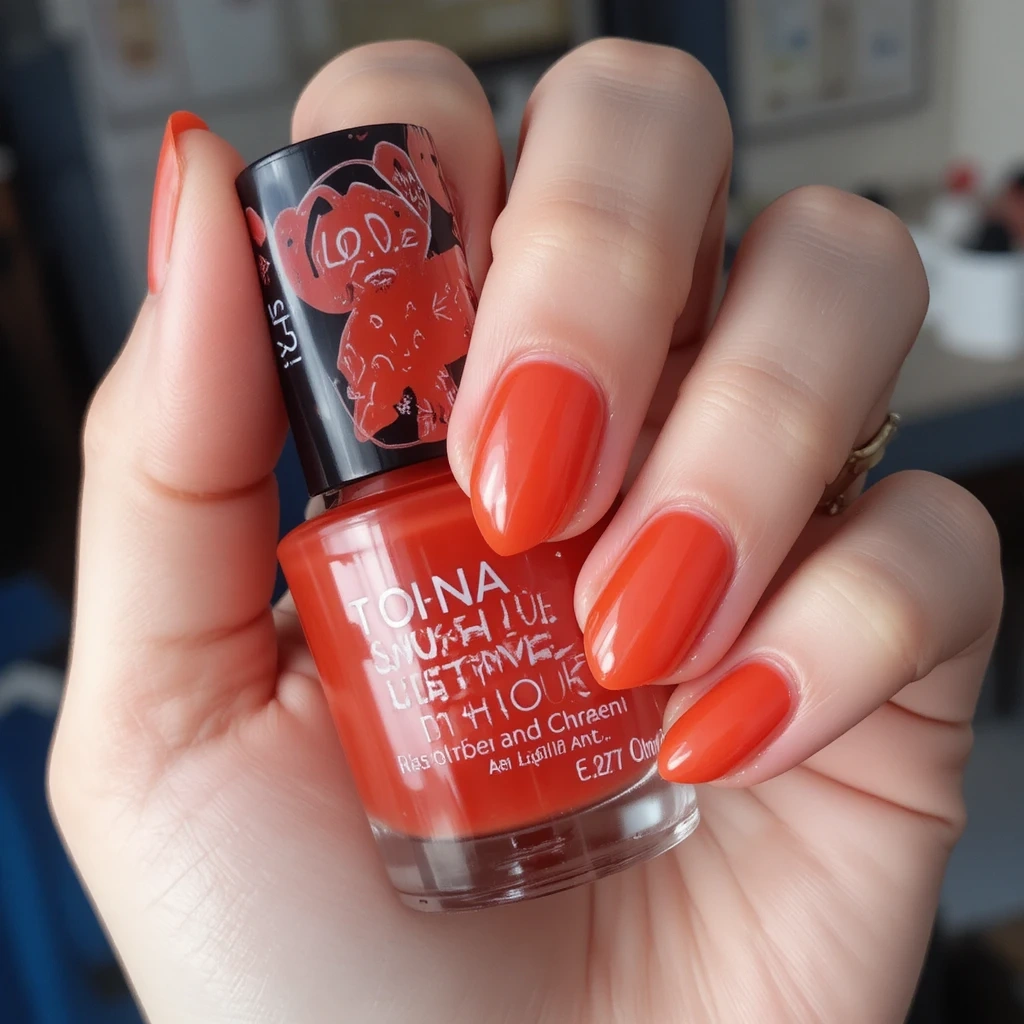
A red that leans unmistakably warm—almost orange—without crossing the line into full orange territory. It’s the most summer-specific red on this list.
Difficulty: Beginner Time to complete: 30 minutes Best for: Fair to medium skin tones, especially with sun-kissed or freckled skin Why it works: Warm reds look incredible against tan skin and pop beautifully against white summer outfits What makes it different: This is a year-round red that reads dramatically different in summer versus winter—it transforms with your tan
Product to get: OPI Cajun Shrimp ($11 at Ulta). This shade has been continuously repurchased for a decade—it’s not an accident.
6. Matte Brick Red
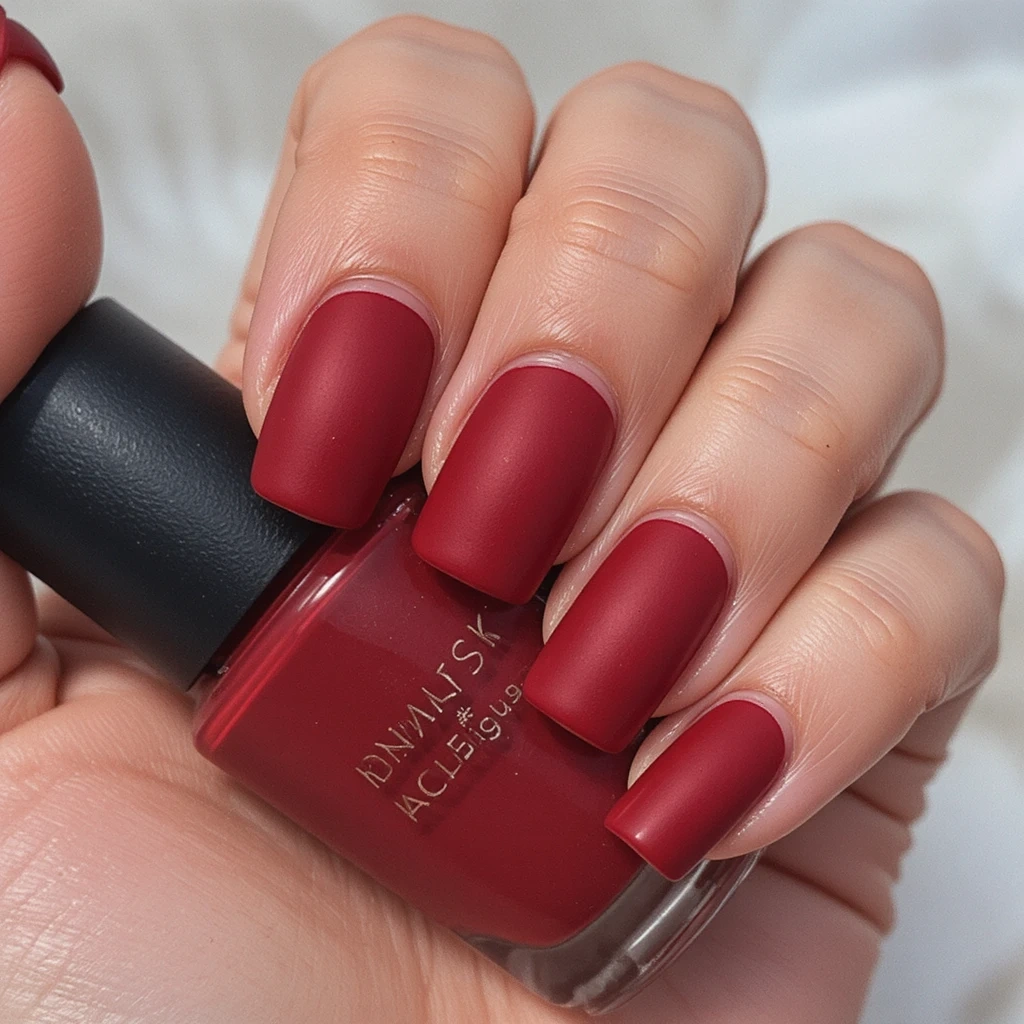
A deep, brick-toned red with a completely flat matte finish. Sophisticated and unexpected—matte finishes in summer feel counterintuitive, which is exactly why they work.
Difficulty: Beginner Time to complete: 30 minutes Best for: People with professional jobs who want something interesting without being flashy Why it works: Matte finish makes saturated colors look more wearable and editorial What makes it different: This won’t look like everyone else’s summer manicure—it reads more fashion-forward than festive
Product to get: OPI Matte Top Coat ($12 at Ulta). Works over any color to instantly change the finish.
7. Red French Tips on Natural Nails
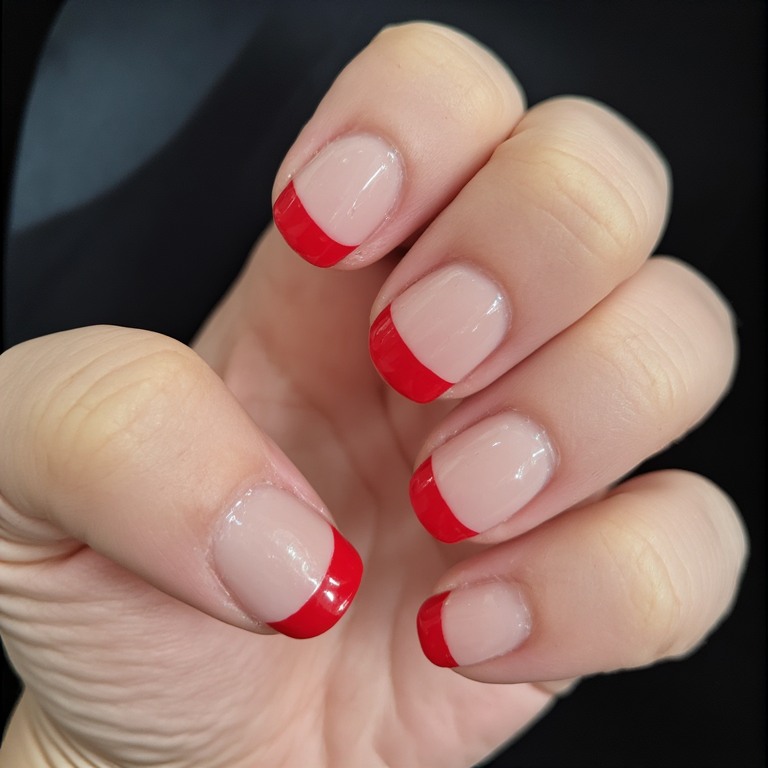
A clear or nude base with a red tip painted in the French manicure style. More modern than white French tips and unexpectedly chic.
Difficulty: Intermediate Time to complete: 40 minutes Best for: People who want something distinctive without committing to full-color nails Why it works: Red tips against a natural nail read clean and editorial—it’s the French manicure updated for people who find classic French tips boring What makes it different: The contrast between bare nail and saturated tip is more striking than white-tip French on most skin tones
Product to get: Beetles Nail Art Stickers ($8 on Amazon). Without guides, getting a clean French tip line freehand takes months of practice.
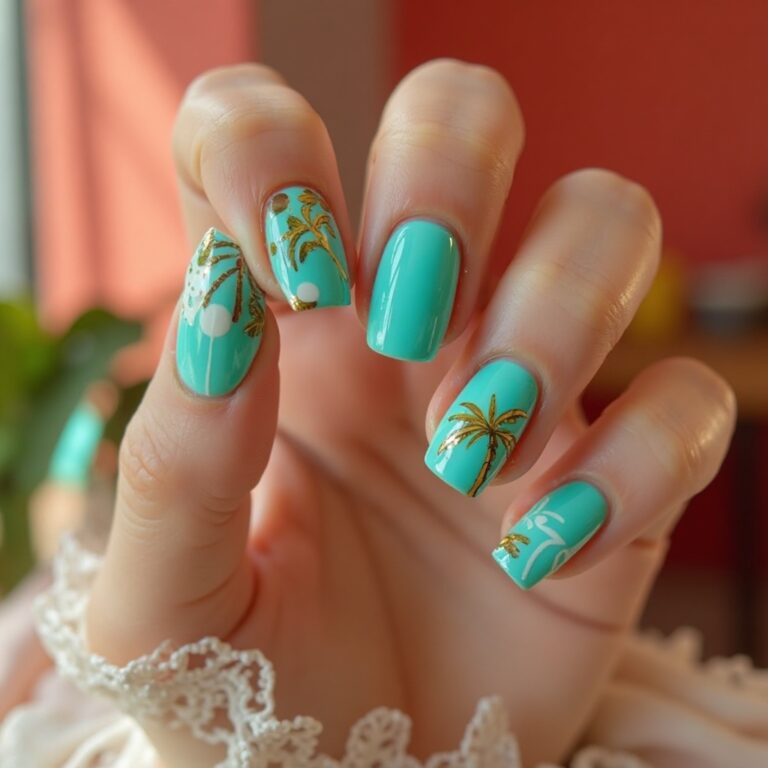
Teal Summer Nails
Teal is one of the most universally flattering summer shades—it sits between blue and green in a way that works across skin tones and looks genuinely distinctive at a time when pinks and corals dominate.
1. Deep Ocean Teal Creme
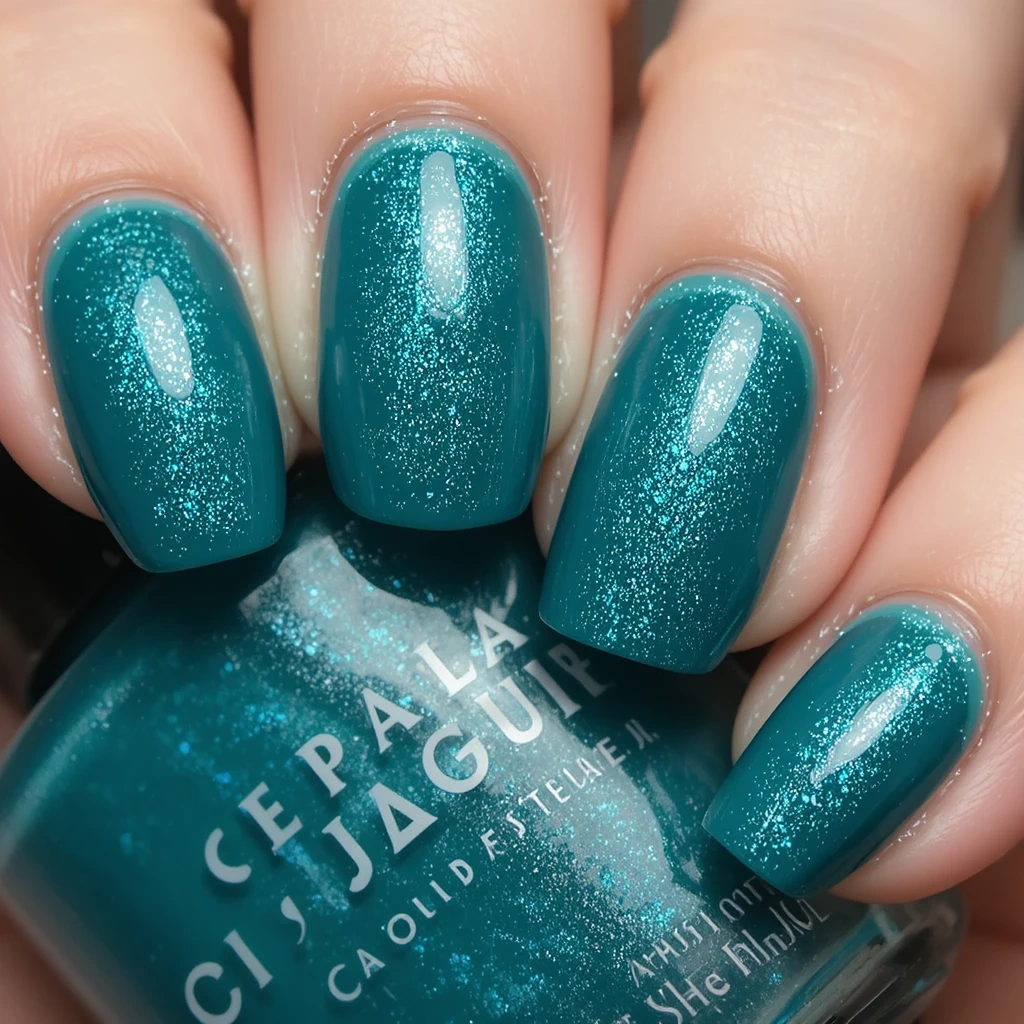
A rich, fully saturated teal with no shimmer—deep enough to read jewel-toned but still unmistakably summery. It looks dramatic but requires zero nail art skill.
Difficulty: Beginner Time to complete: 30 minutes Best for: Anyone who wants a bold statement nail without actual nail art Why it works: Deep teal photographs beautifully against skin of every tone, especially with warm summer lighting What makes it different: Most teal polishes run green or blue; this shade sits right in the middle
Product to get: Zoya Rebel ($10 on zoya.com). The formula doesn’t streak the way most dark polishes do.
2. Teal Chrome Powder Nails
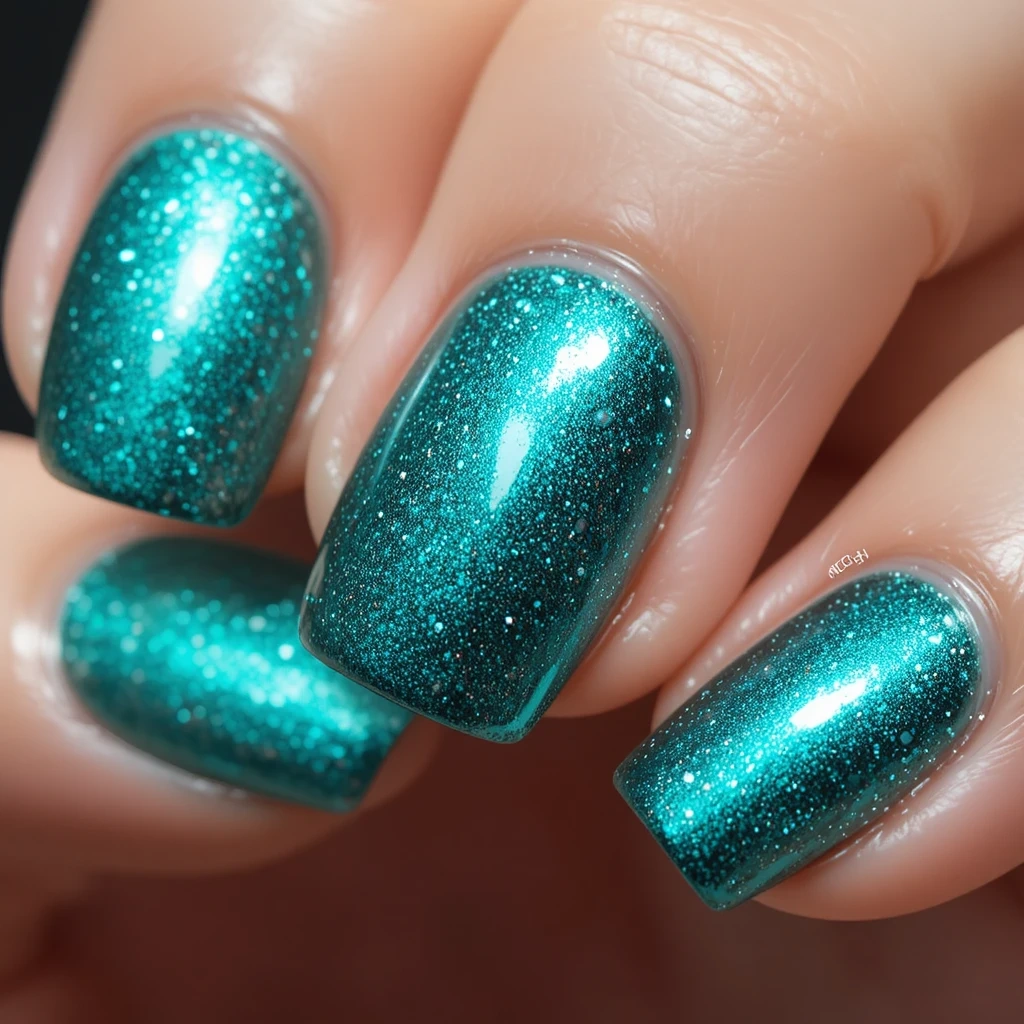
A teal base finished with a metallic chrome powder rubbed over the top, creating a mirror-like, color-shifting surface. The effect looks incredibly expensive and changes in sunlight.
Difficulty: Intermediate to Advanced Time to complete: 50 minutes Best for: Vacations, events, anywhere you’ll be in natural light Why it works: Chrome finishes pick up light in a way that photographs like an editorial shoot What makes it different: The teal chrome shift hits differently than silver or gold—it looks iridescent, almost mermaid-like
Product to get: Modelones Chrome Powder in teal/aurora ($7 on Amazon). The silicone applicator is included in the set—use it, not your finger.
3. Teal and White Geometric Nail Art
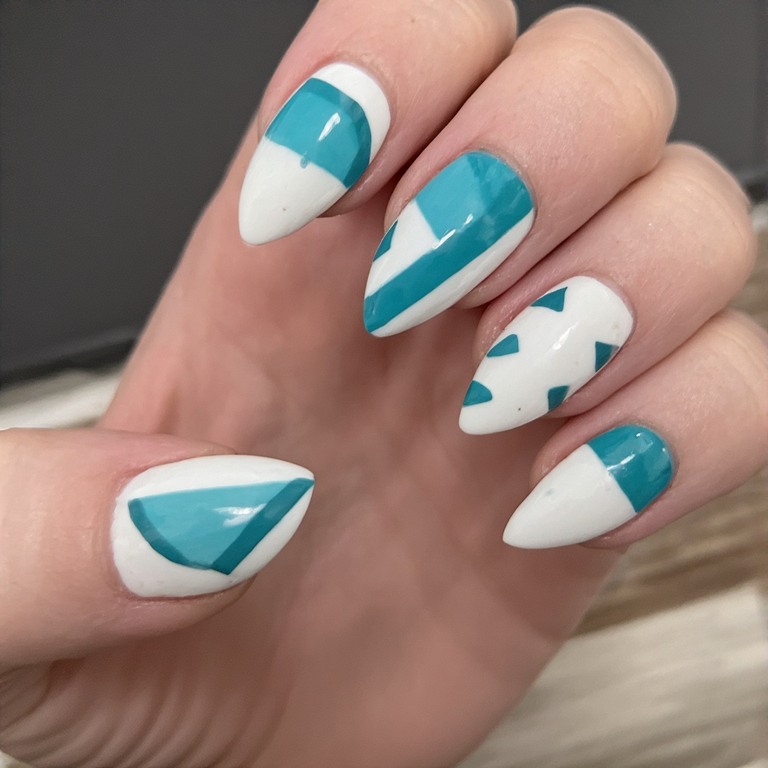
A white base on most nails with two accent nails featuring simple geometric shapes—triangles or color-blocked halves—in teal. Clean, modern, minimal.
Difficulty: Intermediate Time to complete: 50 minutes Best for: People comfortable with nail art who want something graphic and intentional Why it works: The white-teal contrast is crisp and summer-appropriate without being expected What makes it different: Geometric nail art ages better than floral or character designs—it doesn’t look dated after a week
Product to get: Winstonia Striping Tape ($6 on Amazon). Press it down hard before painting over, or the color will bleed underneath.
4. Sheer Teal Jelly Nails
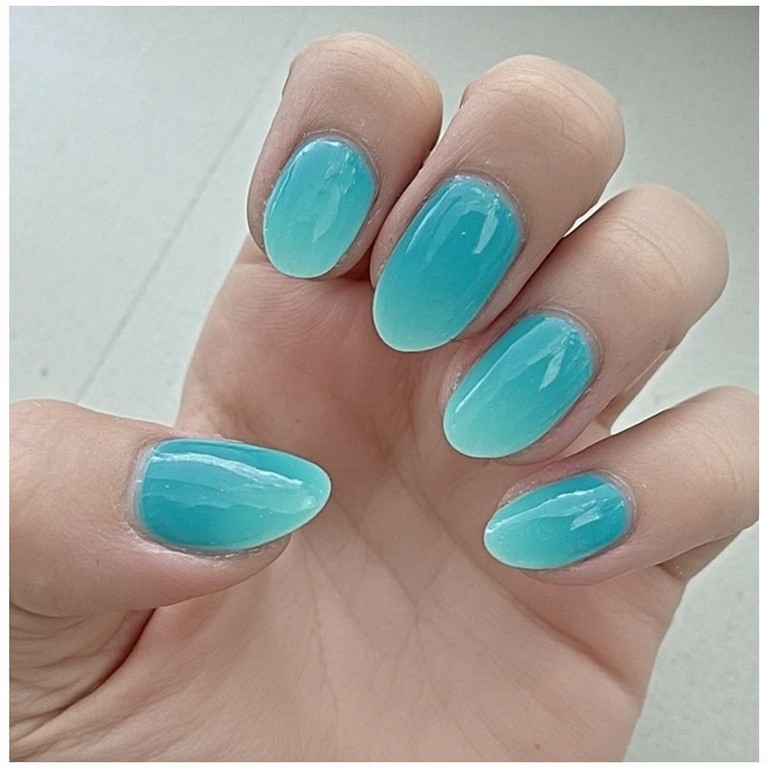
A translucent teal that gives a glass-like, aquatic effect—like you dipped your nails in tropical seawater. Surprisingly easy to pull off.
Difficulty: Beginner Time to complete: 25 minutes Best for: Summer beach days, people who love the “your nails but better” aesthetic Why it works: Sheer teal reads cool and watery without the commitment of full-coverage color What makes it different: It’s the one teal shade that works in professional settings because it reads almost neutral at first glance
Product to get: Cirque Colors Hydra ($14 on cirquecolors.com). The formula self-levels for a perfect glass finish.
5. Teal Glitter Ombre
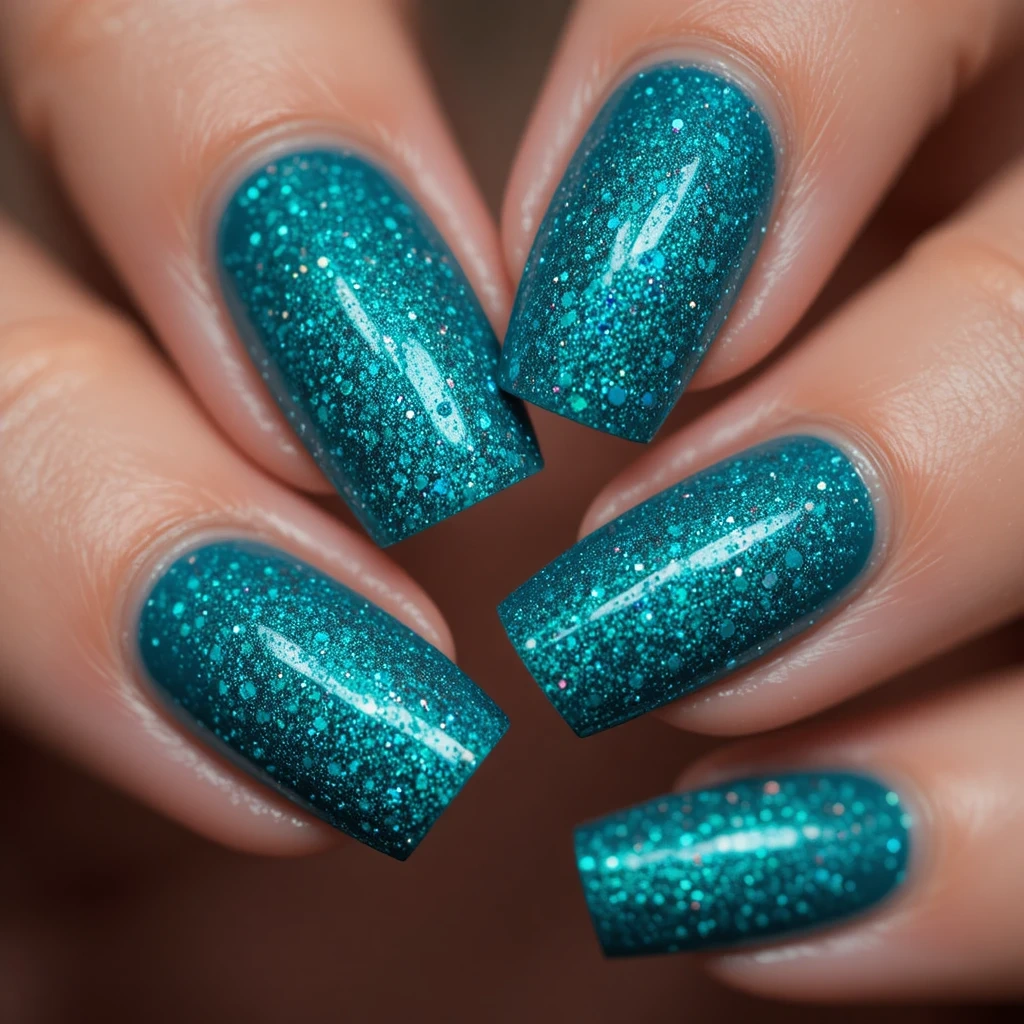
A deep teal fading into chunky teal glitter at the tips, sponged on for a gradient effect. More dramatic than plain ombre, more wearable than full glitter.
Difficulty: Intermediate Time to complete: 45 minutes Best for: Parties, vacations, evenings out—anywhere nails will catch light Why it works: The ombre technique makes even chunky glitter look intentional and polished What makes it different: The teal-on-teal palette keeps it cohesive rather than chaotic
Product to get: A torn cosmetic wedge sponge (any drugstore, $3–$5 for a pack). The torn edge creates a softer gradient than a clean-cut sponge.
6. Dusty Sage-Teal (Muted Summer Shade)
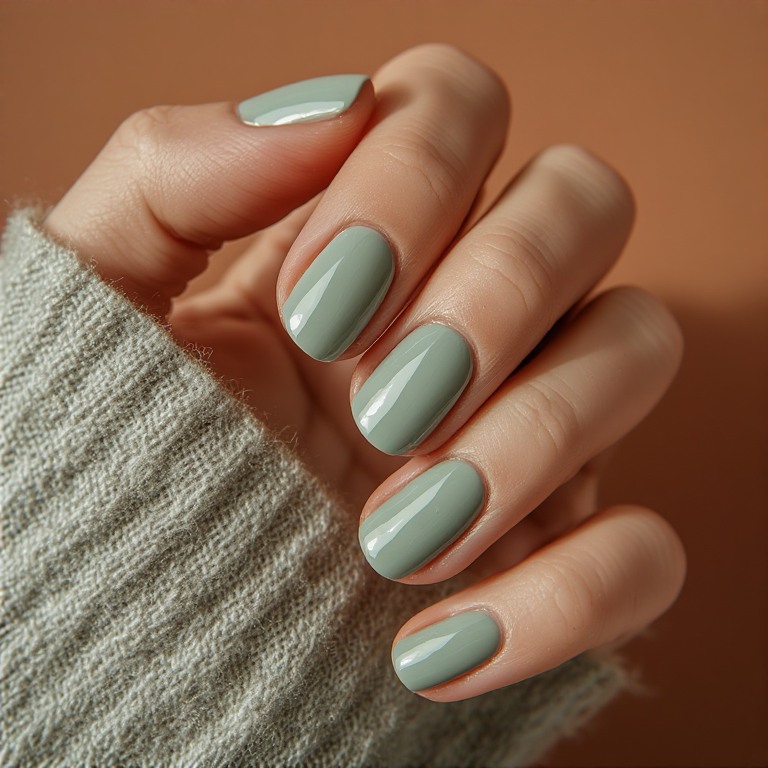
A grayed-out teal that reads more sage than electric—earthy, muted, and sophisticated. It’s the version of teal for people who find bright teals too bold.
Difficulty: Beginner Time to complete: 30 minutes Best for: Professional settings, minimalist aesthetics, people who prefer muted nail colors Why it works: Muted teal sits beautifully against warm skin tones in summer without screaming “look at me” What makes it different: This is the teal that goes with earthy summer outfits—linen, terracotta, olive—in a way bright teal never could
Product to get: Essie Maximillian Strasse Her ($10 at Target). Widely available, consistently great formula.
7. Teal Negative Space Nails
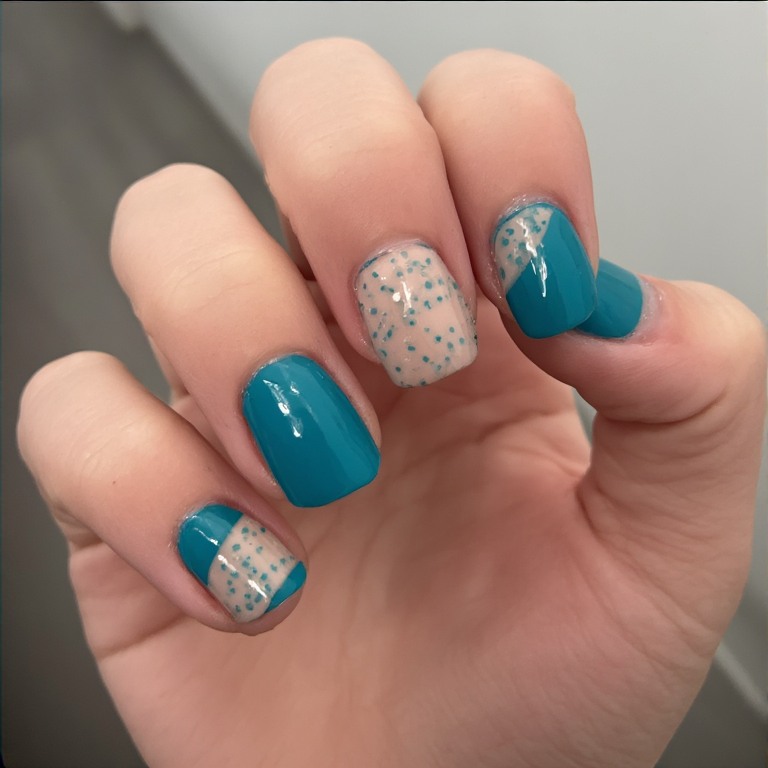
A nude or clear base where teal polish is applied only to portions of the nail—leaving sections of bare nail visible as part of the design. Graphic and modern.
Difficulty: Advanced Time to complete: 60 minutes Best for: Nail art enthusiasts who want something genuinely unique Why it works: Negative space designs are architectural and intentional—they look like they required actual planning (because they do) What makes it different: This reads more like wearable art than a nail color—it’s a conversation starter
Product to get: Covered in Art Peel-Off Latex ($8 on Amazon). This changes negative space nail art from frustrating to genuinely manageable.
Summer Almond Nails
Almond shape—tapered sides with a rounded tip—is the most flattering nail shape for long fingers and makes shorter nails appear longer. These designs are specifically suited to the elongated silhouette almond creates.
1. Nude Almond Nails with Thin Gold Lines
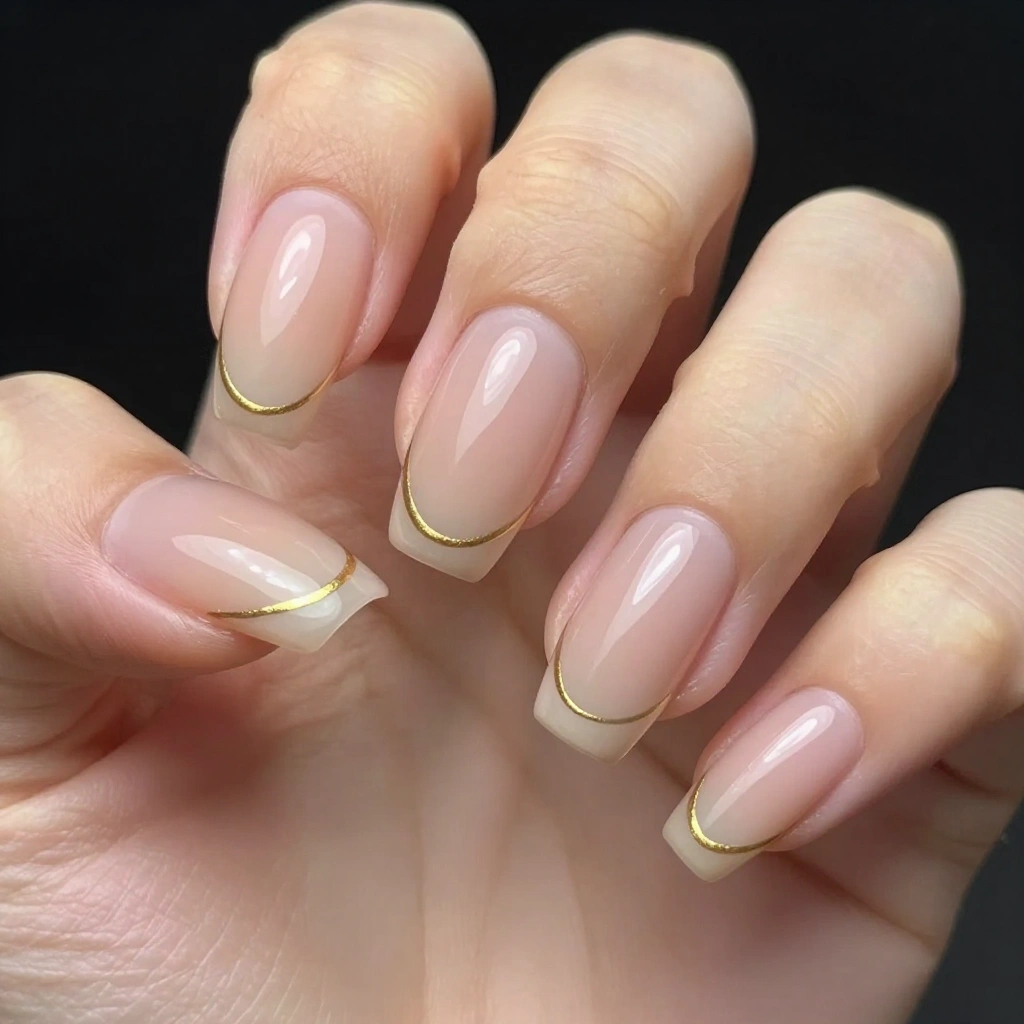
A skin-tone nude base with a single fine gold line hand-painted down the center or along the side of each nail. Minimal, luxurious, quietly stunning.
Difficulty: Intermediate Time to complete: 40 minutes Best for: Weddings, events, professional settings where you want to look polished without distraction Why it works: Nude plus gold is the nail equivalent of a simple gold necklace—it elevates without competing What makes it different: The almond shape makes the line look intentional and architectural rather than random
Product to get: Born Pretty 1mm Gold Striping Tape ($5 on Amazon). Press firmly and seal with top coat immediately before the tape edges lift.
2. Peach-Pink Almond Nails
A warm, peachy-pink that reads almost like a flushed skin tone but with clear color intention. Flattering, fresh, and ideal for the almond shape.
Difficulty: Beginner Time to complete: 25 minutes Best for: Everyday summer wear, anyone who wants pretty nails with zero effort Why it works: Peach-pink is the universally flattering shade—it makes hands look healthy and warm What makes it different: On almond nails, this shade reads elegant rather than ordinary
Product to get: OPI Passion ($11 at Ulta). Self-leveling formula that’s especially forgiving on shaped nails.
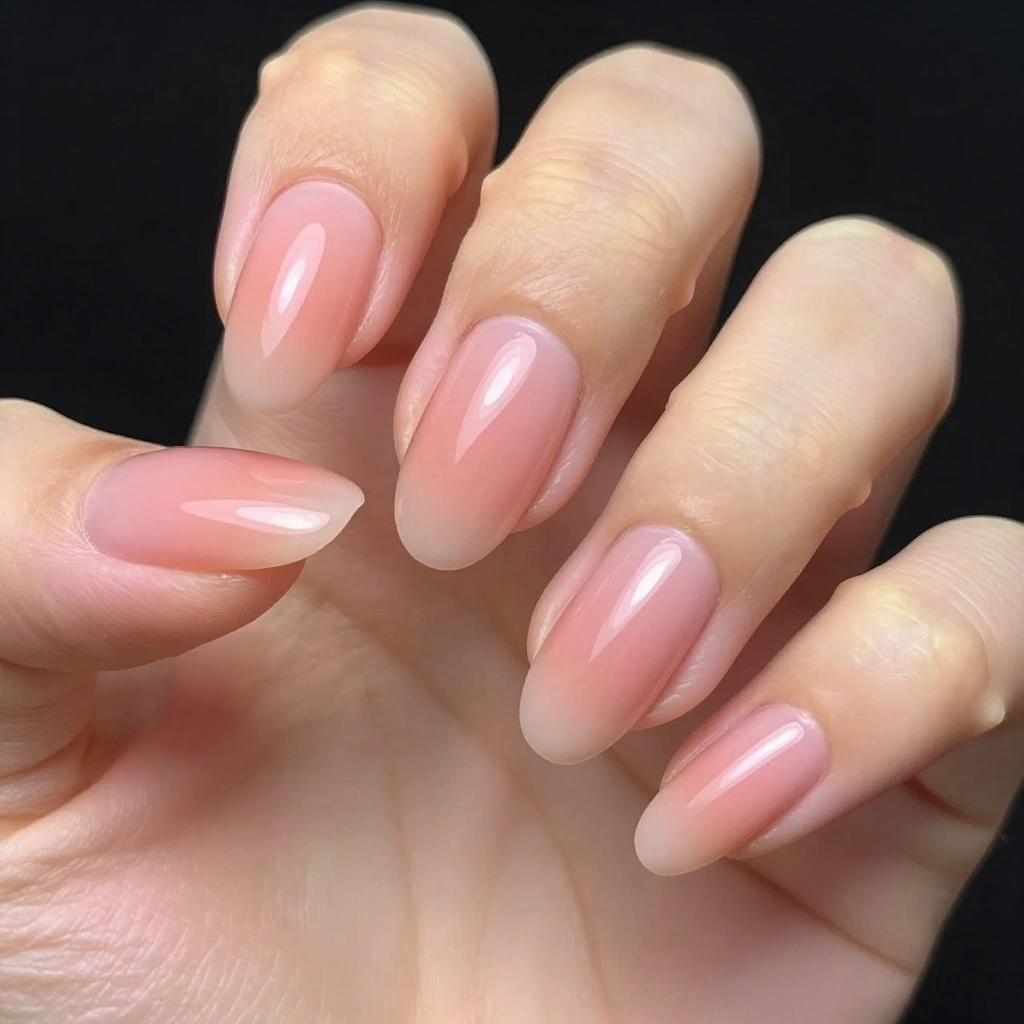
3. Milky White Almond Nails
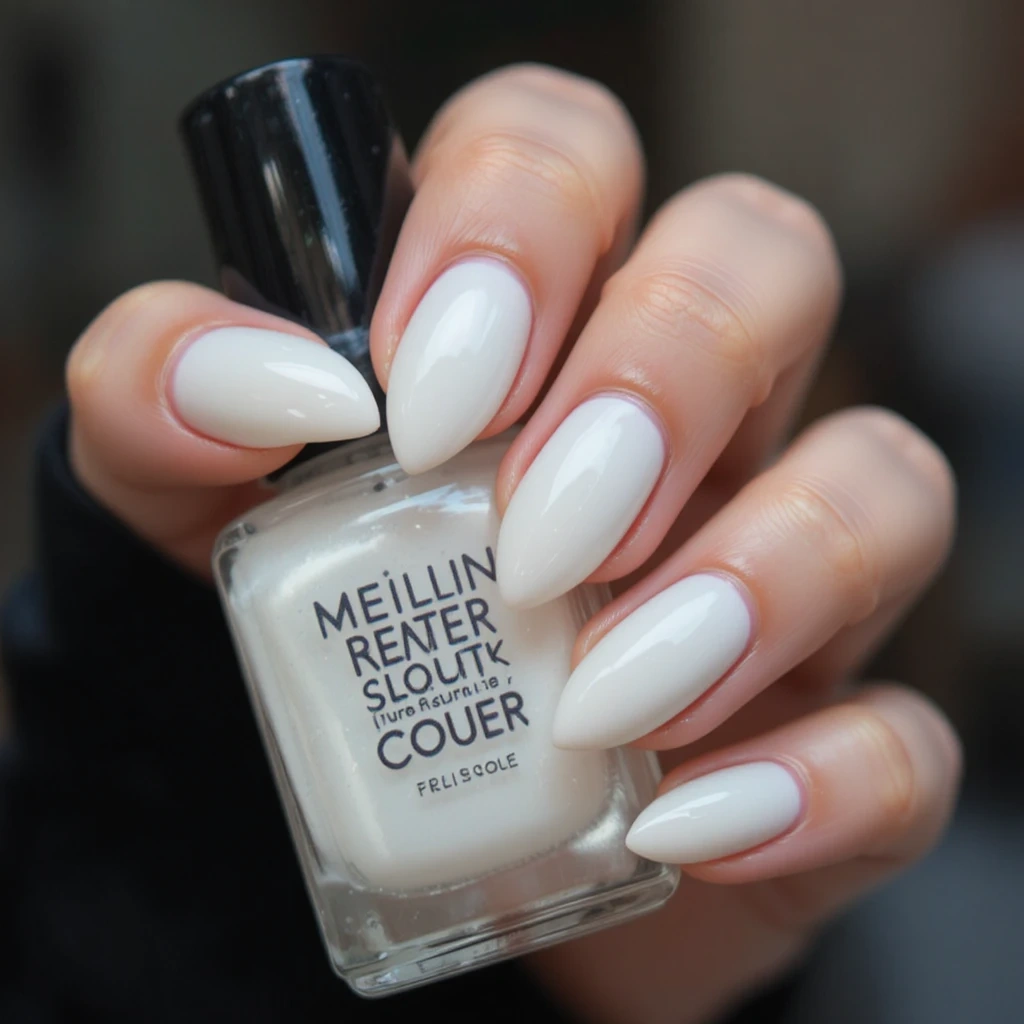
A semi-opaque, slightly warm white that’s sheer enough to show a soft glow from beneath but opaque enough to read as a color. The most elegant summer nail look right now.
Difficulty: Beginner Time to complete: 30 minutes Best for: People who want on-trend nails without bold color Why it works: Milky white on almond shape is everywhere right now—it’s the minimalist aesthetic at its most refined What makes it different: The warmth of the white prevents it from looking clinical or bridal—it reads summer, not hospital
Product to get: Essie Blanc ($10 at Target). Two coats gives milky; three gives full coverage.
4. French Almond Nails with a Colored Tip
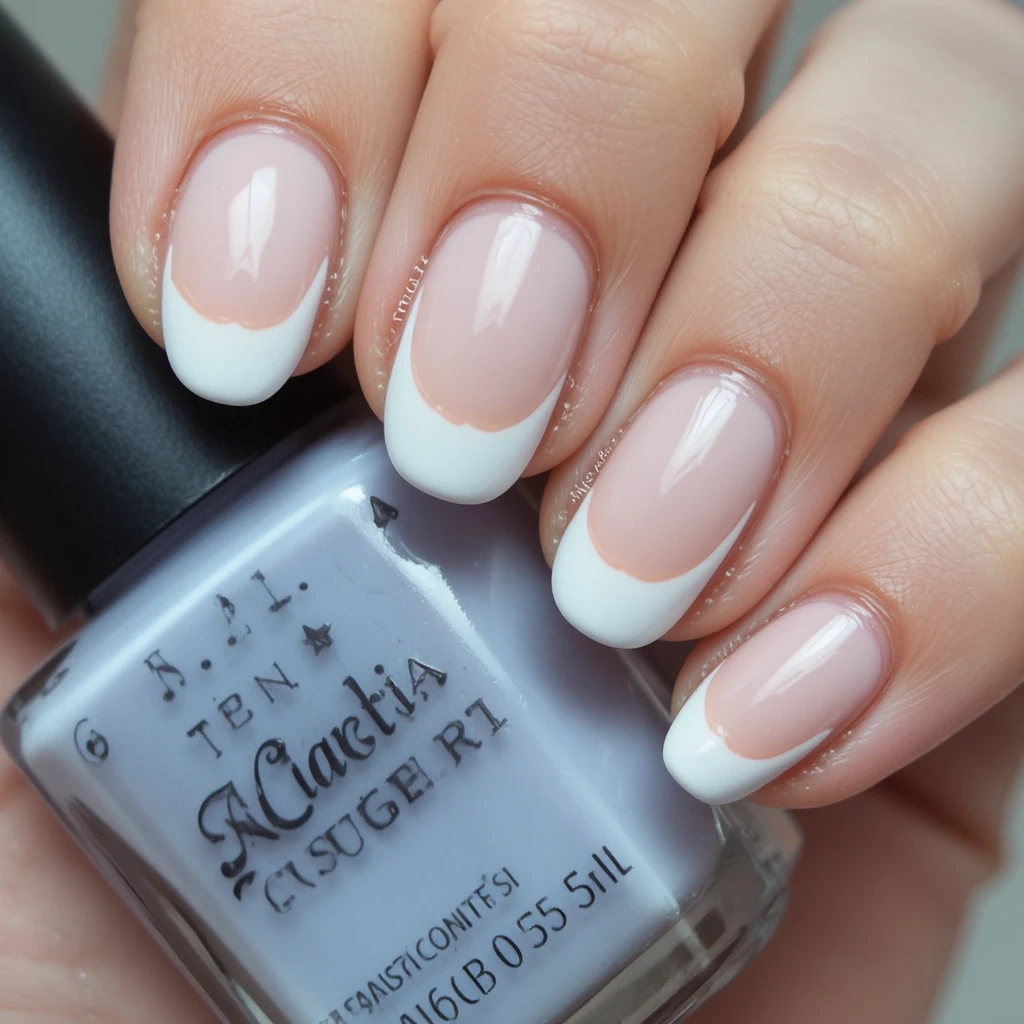
Classic French manicure structure on almond nails, but with a colored tip—lavender, peach, or soft blue instead of white. The almond shape shows off the curved tip beautifully.
Difficulty: Intermediate Time to complete: 45 minutes Best for: People who love French manicures but want a summer update Why it works: Colored tips on almond nails have a romantic, vintage quality that photographs beautifully What makes it different: The curve of the almond tip makes the French line look deliberate and graceful, not straight and rigid
Product to get: Cina Curved French Tip Stencils ($5 on Amazon). Specifically shaped for almond and oval nails—flat stencils won’t follow the curve properly.
5. Almond Nails with Floral Decals
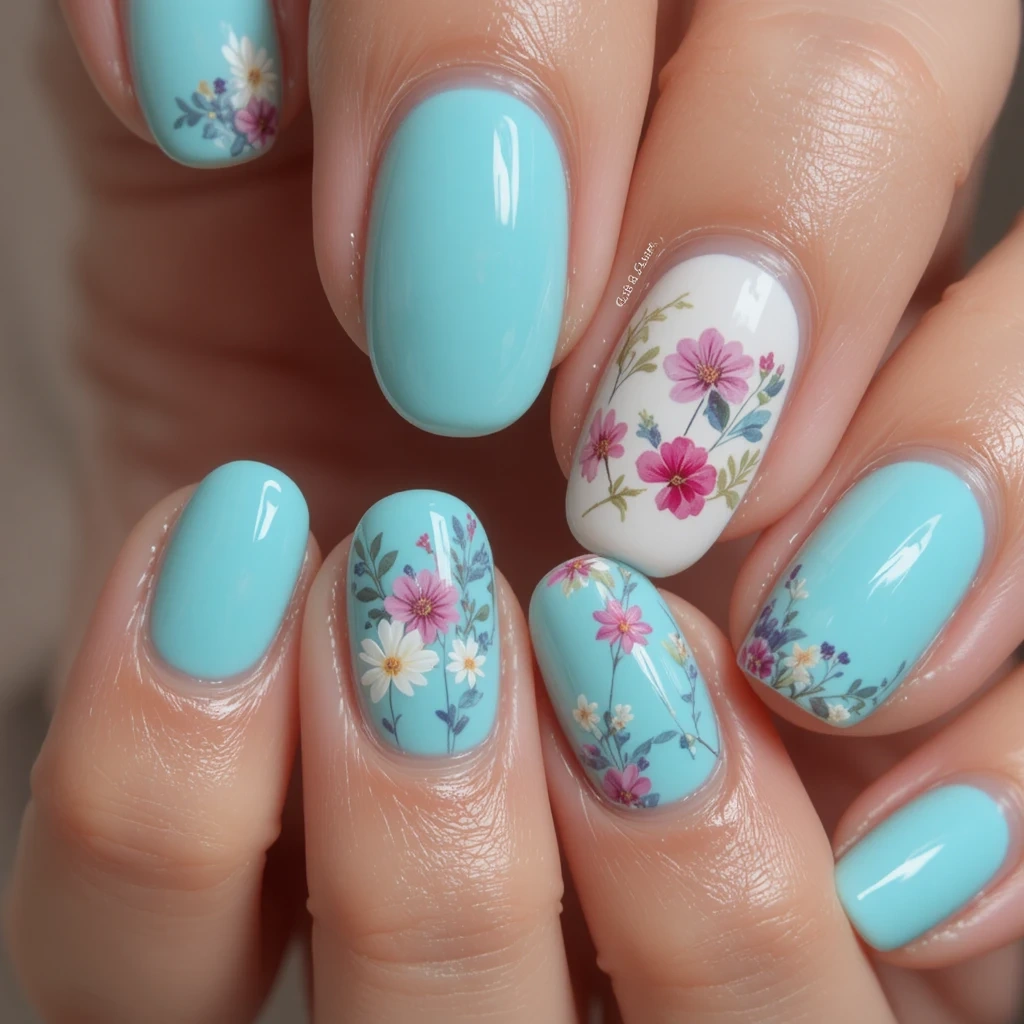
A single-color base (any summer shade) on most nails, with one or two accent nails featuring tiny floral decals—daisies, hibiscus, or wildflowers.
Difficulty: Beginner Time to complete: 35 minutes Best for: People who want nail art results without nail art skills Why it works: Decals on almond nails look intentional because the longer shape provides canvas without crowding What makes it different: Choosing botanical decals keeps it summery without being tacky
Product to get: Born Pretty Flower Decals ($5 on Amazon). Seal with Seche Vite immediately after applying or they lift within hours.
6. Sunset Ombre Almond Nails

A gradient from coral at the base to golden yellow at the tip, sponged for a seamless blend. The almond shape mimics the tapered horizon of an actual sunset.
Difficulty: Intermediate Time to complete: 55 minutes Best for: Vacations, beach weekends, people who want something that feels artful Why it works: Warm ombre is the most visually satisfying nail look—the gradient does all the work What makes it different: On almond nails, the ombre follows the natural curve of the shape rather than fighting it
Product to get: A cosmetic wedge sponge pack ($3–$5 at any drugstore). Replace the sponge between nails to avoid muddy color mixing.
Blue Summer Nails
Summer blue nails are more versatile than people give them credit for. The trick is choosing the right type of blue—sky blues and aquas feel summery; navy and royal blue read more year-round.
1. Sky Blue Creme
A soft, clear sky blue—no shimmer, no darkness, just the exact color of a sunny-day sky. It looks amazing against a tan.
Difficulty: Beginner Time to complete: 30 minutes Best for: Everyday summer wear, especially with white outfits Why it works: Sky blue against tan skin is a visual that’s hard to improve upon What makes it different: This shade is cheerful without being childish—it reads fresh and light
Product to get: Essie Bikini So Teeny ($10 at Target). A summer classic for a reason—the formula is perfect.
2. Cobalt Blue Glossy Nails
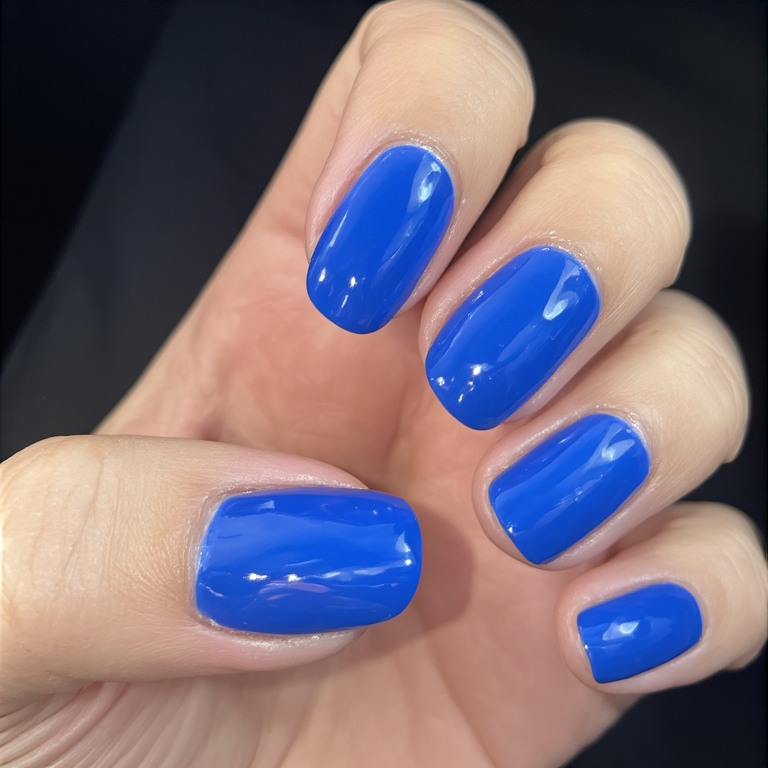
A deep, electric cobalt with maximum shine. Saturated and confident—this is the blue that gets noticed.
Difficulty: Beginner Time to complete: 30 minutes Best for: People who want bold without committing to red or orange Why it works: Cobalt is vibrant enough to function as a statement color but doesn’t read as warm as typical summer shades What makes it different: On darker skin tones especially, cobalt is one of the most striking nail choices possible
Product to get: OPI No Room for the Blues ($11 at Ulta). Self-leveling formula—no streaks even in one coat on most nails.
3. Blue Holographic Glitter Nails
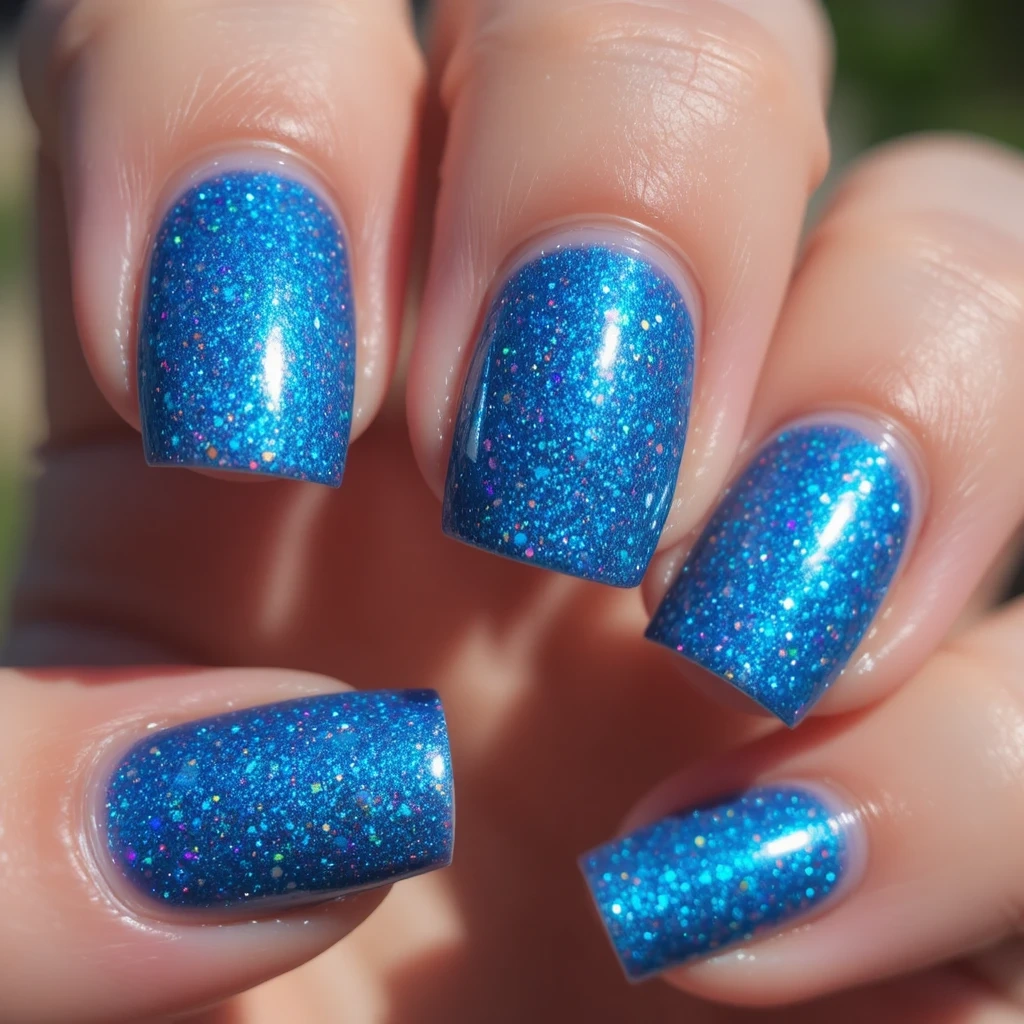
A blue base with holographic glitter that creates a rainbow prism effect in sunlight. Every time your hand moves, the color shifts.
Difficulty: Beginner Time to complete: 30 minutes Best for: Evening events, parties, anywhere with direct light Why it works: Holographic polish is one of the easiest ways to get a dramatic effect with zero nail art skill What makes it different: The blue base anchors the rainbow holo so it reads cohesive rather than chaotic
Product to get: ILNP Ultra Holo Blue ($10.50 on ilnp.com). The pigment density in ILNP’s formula is significantly better than drugstore holo polishes.
4. Baby Blue with White Cloud Nail Art
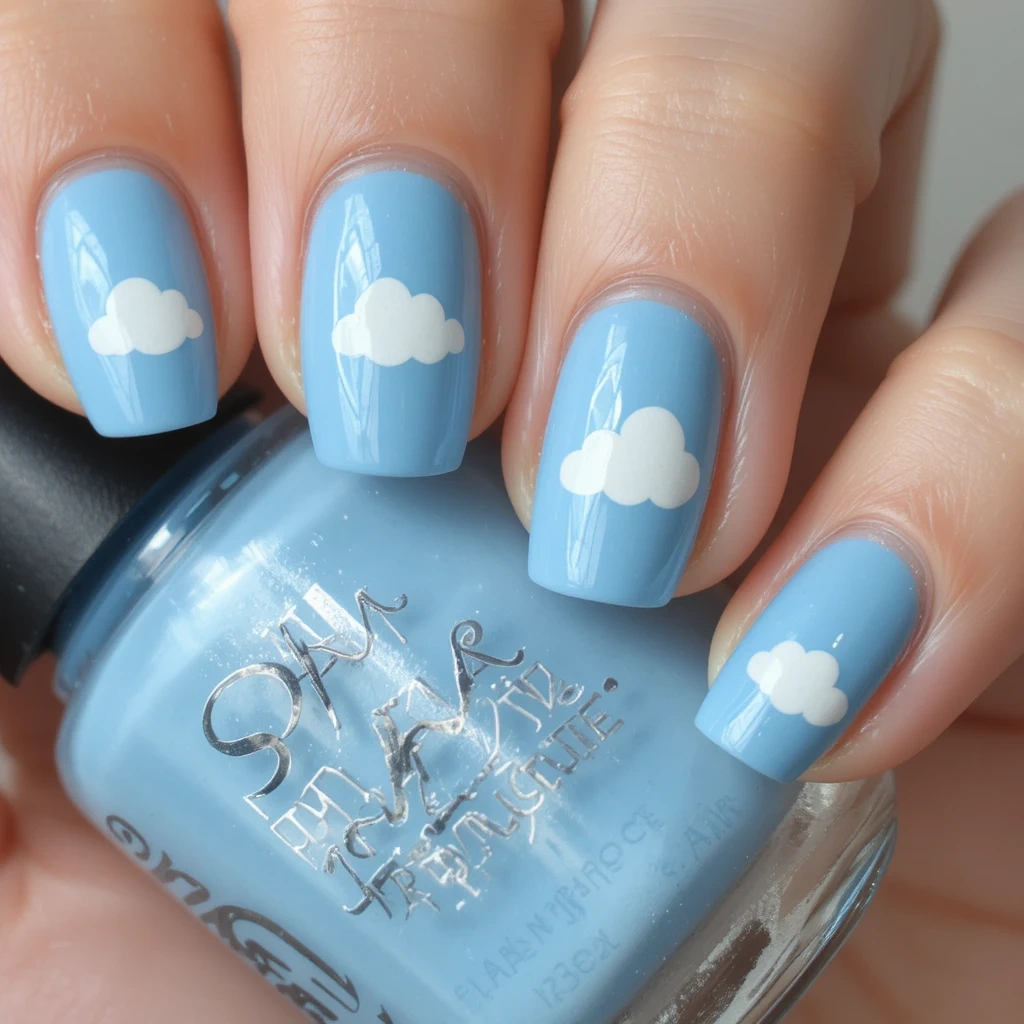
A soft baby blue base with tiny white clouds hand-painted or stamped on one or two accent nails. Whimsical and summery without being kitschy.
Difficulty: Intermediate Time to complete: 45 minutes Best for: Summer casual looks, people who want nail art that sparks joy Why it works: The sky-and-cloud concept translates intuitively to nails—it’s immediately readable What makes it different: Simple clouds are one of the most achievable nail art designs for beginners because the organic shape forgives imperfect brushwork
Product to get: A dotting tool set ($5 on Amazon). Clouds are made by overlapping dots of white in a cluster—no painting skill needed.
5. Navy Blue Nails with Gold Accents
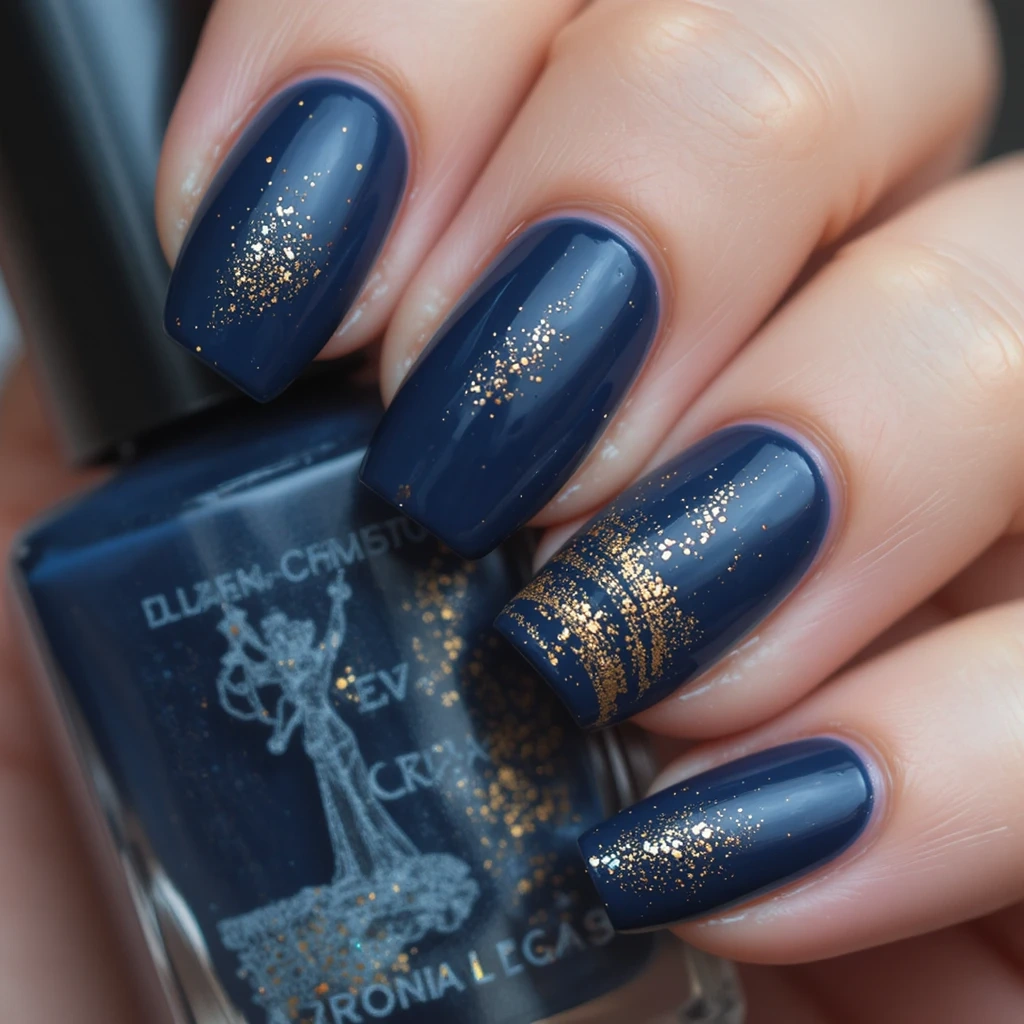
A deep navy base with a single gold flake or gold striping on one accent nail. Summer-appropriate when paired with warm gold—reads nautical and intentional.
Difficulty: Intermediate Time to complete: 40 minutes Best for: Coastal vacations, evening wear, professional settings where you still want presence Why it works: Navy plus gold is a timeless pairing—rich, structured, and completely summer-appropriate with the right pieces What makes it different: Most people think navy is a fall color; paired with gold accents and worn in summer, it reads vintage Riviera
Product to get: OPI Russian Navy ($11 at Ulta). The depth and formula consistency is unmatched in the drugstore range.
6. Aqua Blue Jelly Nails
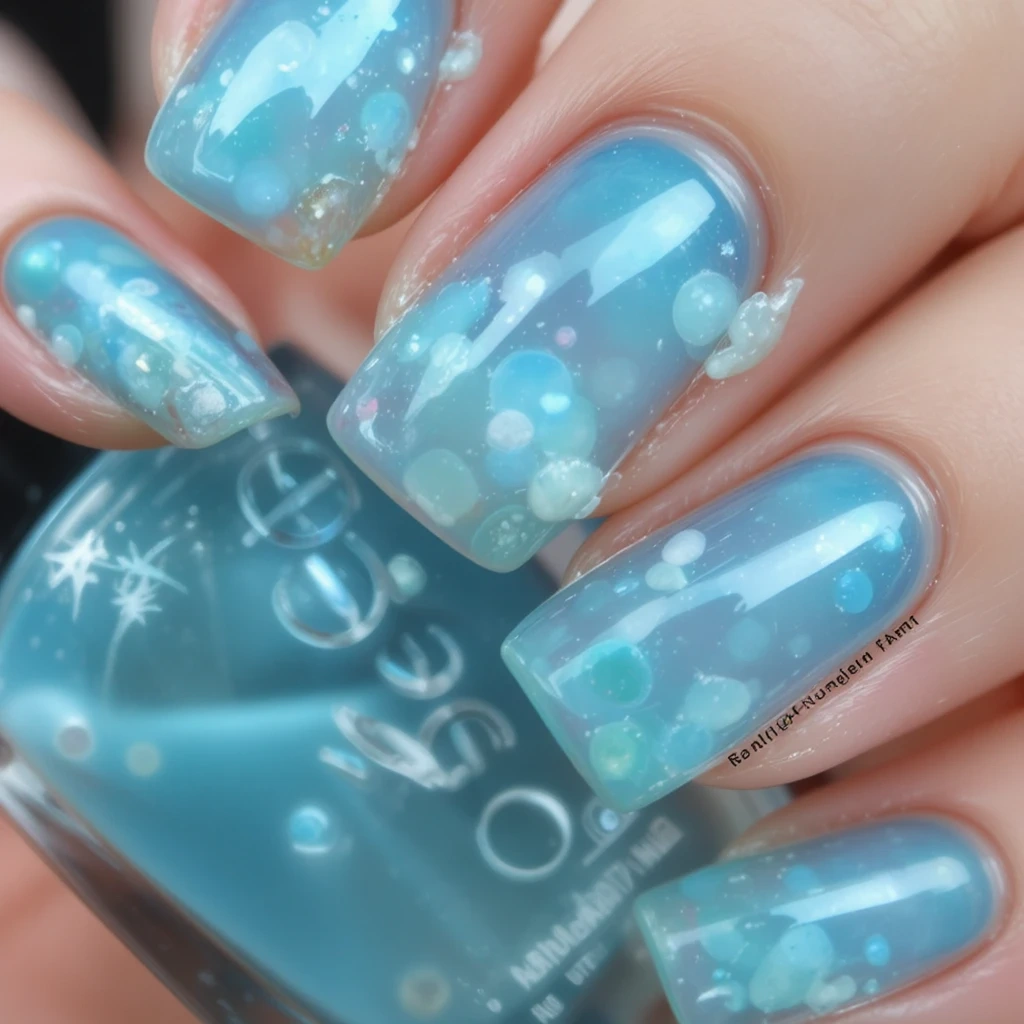
A clear aqua blue that’s see-through, jellyfish-like, and completely captivating. The transparency creates an almost 3D depth effect.
Difficulty: Beginner Time to complete: 25 minutes Best for: Beach days, pool parties, anyone who wants nails that look like ocean water Why it works: Aqua jelly is one of the most photographable nail finishes—it interacts with light and skin tone uniquely What makes it different: The see-through quality means it looks different on every person, which makes it feel personalized
Product to get: KBShimmer Sea-esta Time ($10 on kbshimmer.com). The formula is thin by design—don’t try to make it opaque in two coats.
Orange Nails Summer
Orange is the most underrated summer nail color. It’s warmer than yellow, bolder than coral, and flattering on a tan in a way that’s hard to explain until you try it.
1. Neon Orange Nails
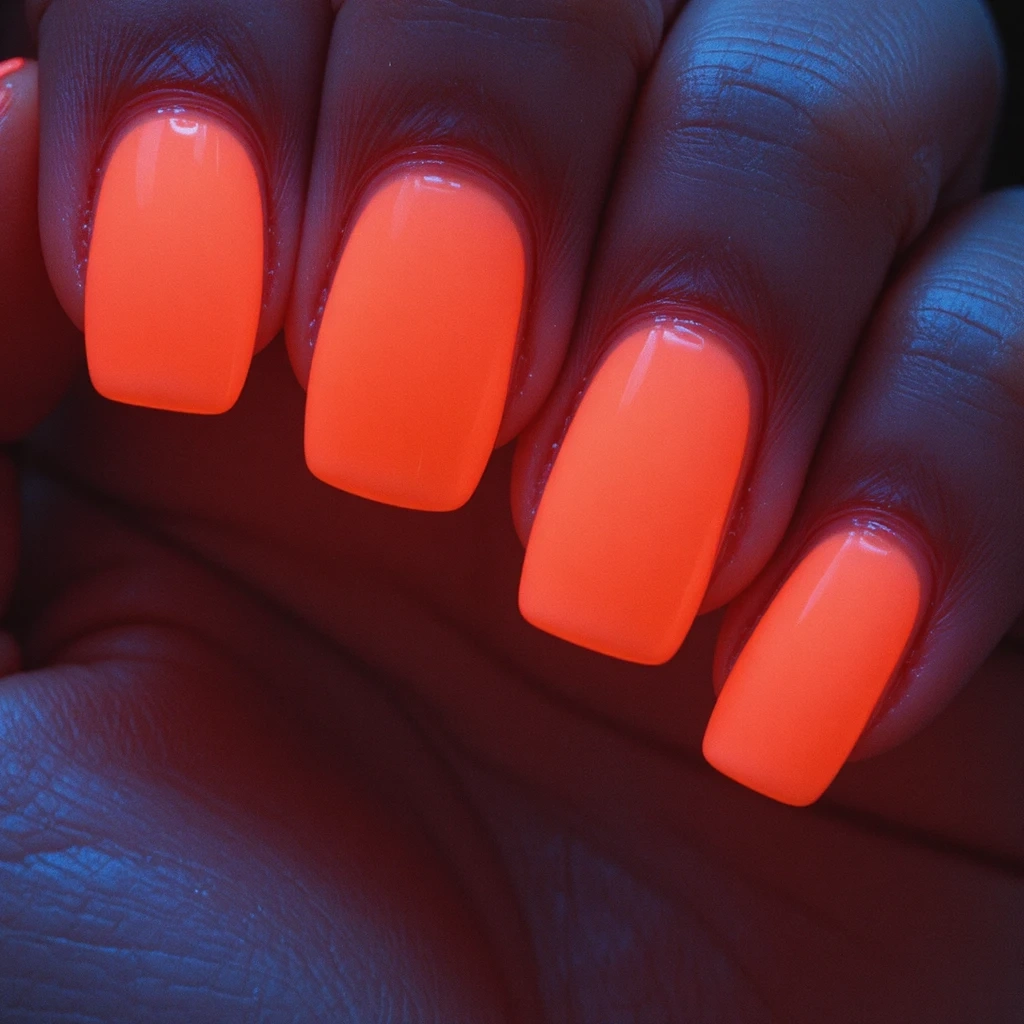
An electric, screaming-bright orange that glows under UV light and absolutely pops against tan skin. Not subtle, not trying to be.
Difficulty: Beginner Time to complete: 30 minutes Best for: People who want maximum visibility—this is for the beach, the festival, the party Why it works: Neon orange is scientifically bright—it’s used in safety equipment for a reason What makes it different: Most orange nails look muted in photos; neon orange photographs just as vivid as it looks in person
Product to get: Orly Neon Heat ($10 at Sally Beauty). The white base coat underneath is not optional—it makes a visible difference.
2. Terracotta Orange Nails
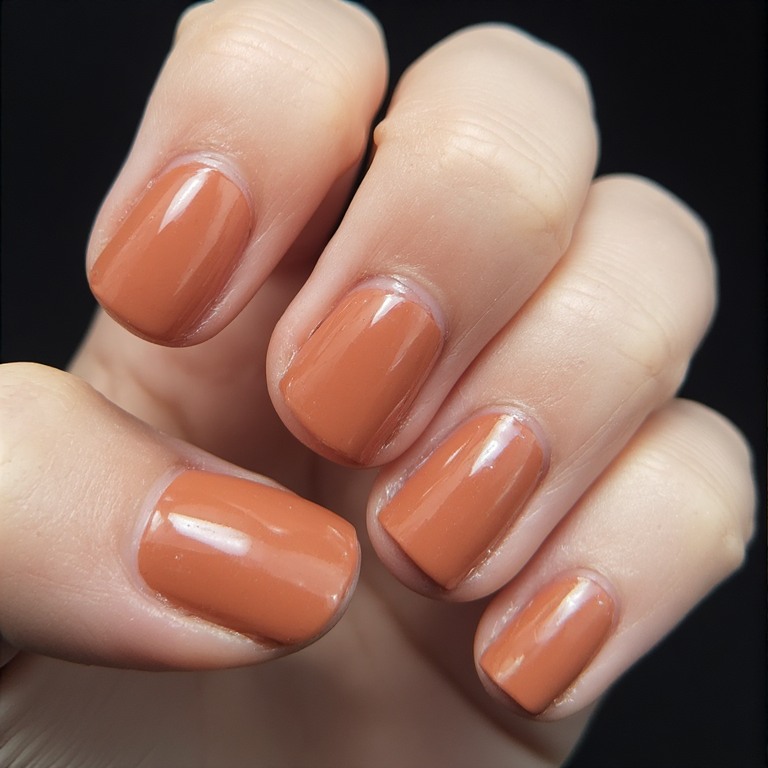
A dusty, earthy orange-brown that reads warm and grounded. The muted version of orange for people who find neon too much.
Difficulty: Beginner Time to complete: 30 minutes Best for: Professional settings, minimalist aesthetics, people who love earthy palettes Why it works: Terracotta is the most wearable orange—it works with linen, neutrals, olive, and denim simultaneously What makes it different: This shade looks dramatically different on different skin tones—cooler on fair skin, richer on dark skin
Product to get: Zoya Tierra ($10 on zoya.com). More pigmented than similar drugstore terracottas, which tend to look pink rather than orange-brown.
3. Burnt Orange with Bronze Shimmer
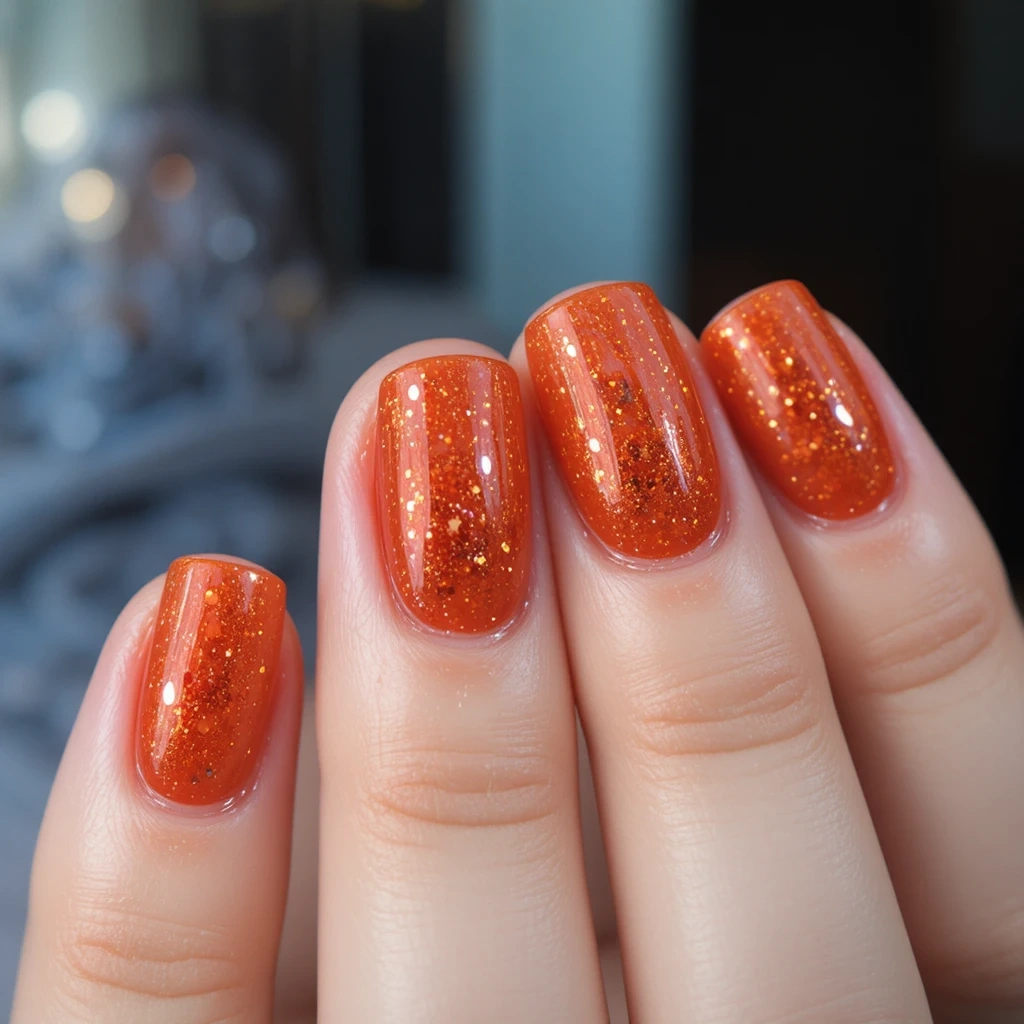
A deep burnt orange with flecks of bronze shimmer that catches light like a late-summer sunset. Warm, complex, and rich.
Difficulty: Beginner Time to complete: 30 minutes Best for: Evening looks, people with medium to dark skin tones, anyone who finds plain orange too simple Why it works: The bronze shimmer adds dimension that plain creme orange lacks What makes it different: Burnt orange shifts from looking red to orange depending on the light—it’s a shape-shifting shade
Product to get: OPI It’s a Piazza Cake ($11 at Ulta). One of the most complex-looking drugstore shades in the orange family.
4. Orange French Tips
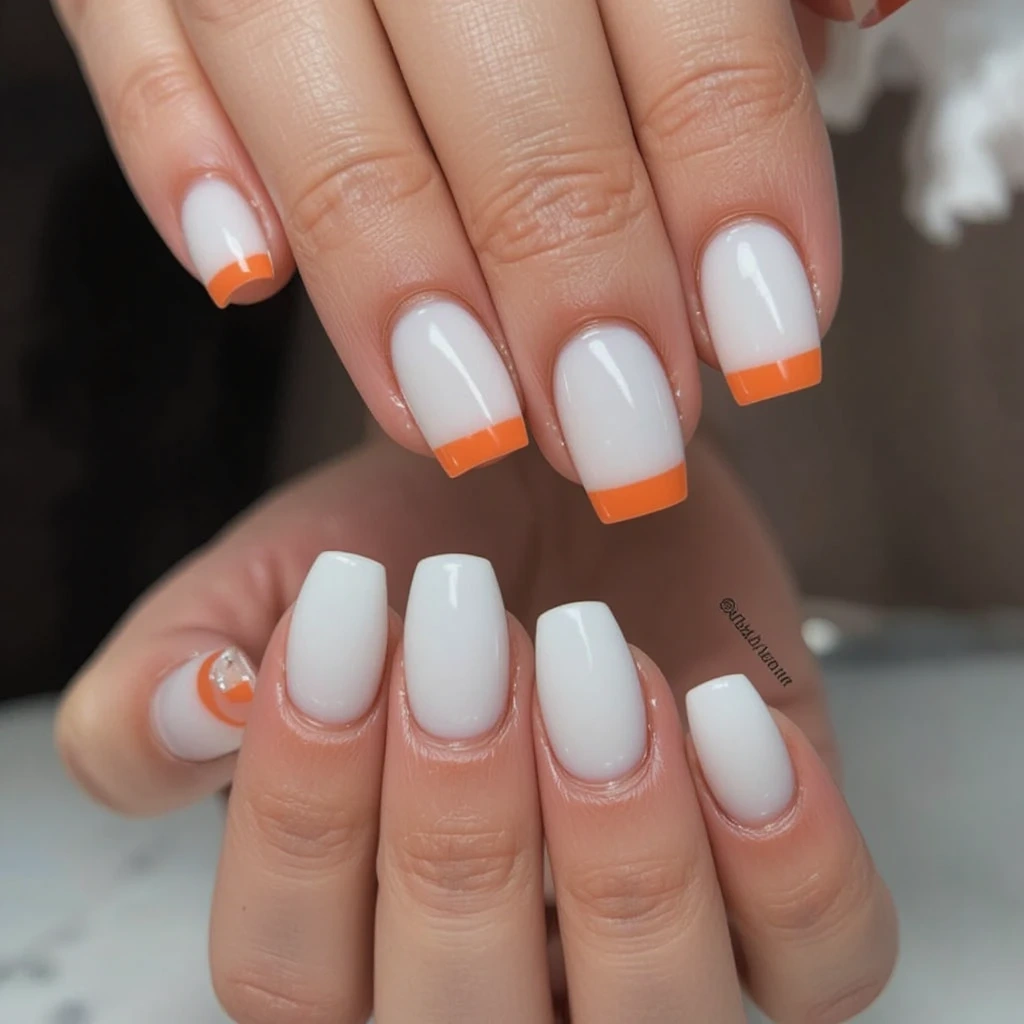
White almond or oval nails with bright orange painted only at the tips, French-manicure style. Modern, graphic, a little retro.
Difficulty: Intermediate Time to complete: 40 minutes Best for: People who like the French manicure concept but want a summer update Why it works: Orange tips on a nude base are more unusual than a classic French but still readable as “put together” What makes it different: The color contrast between nude and orange is sharper than nude and white—it reads bolder
Product to get: OPI Cajun Shrimp ($11 at Ulta) for the tip—warmer than true orange and more flattering against nude.
5. Orange and White Swirl Nail Art
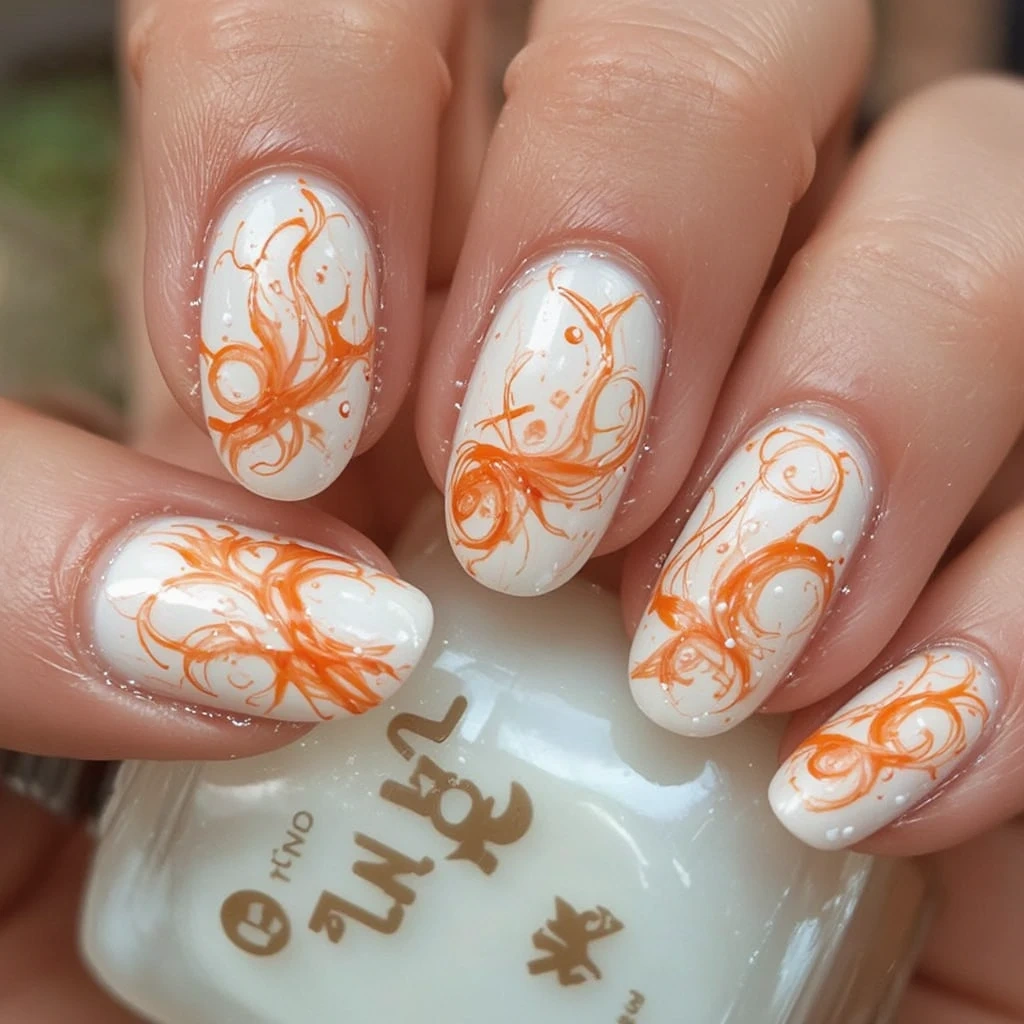
A white base with an orange swirl painted on each nail—organic, abstract, and one of the most achievable nail art styles for beginners.
Difficulty: Intermediate Time to complete: 50 minutes Best for: People who want artistic nails without requiring precision Why it works: Swirl designs are intentionally imperfect—variation between nails is expected and adds charm What makes it different: The orange-white combination is crisp and summery without the expected beach-motif imagery
Product to get: Wrapables Swirl Nail Stickers ($6 on Amazon). The all-over pattern versions are more forgiving than accent decals.
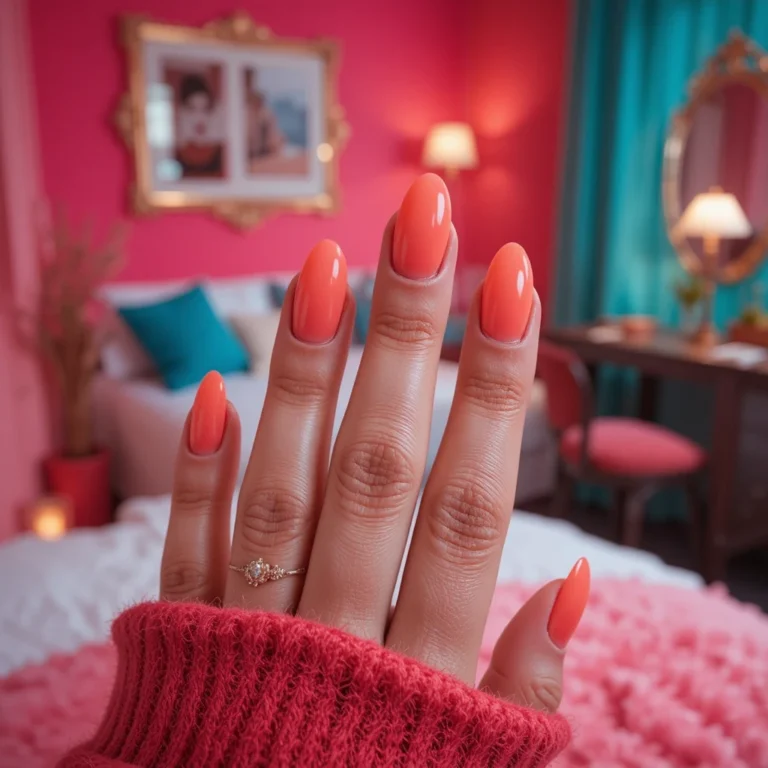
6. Coral Orange (The Middle Ground)
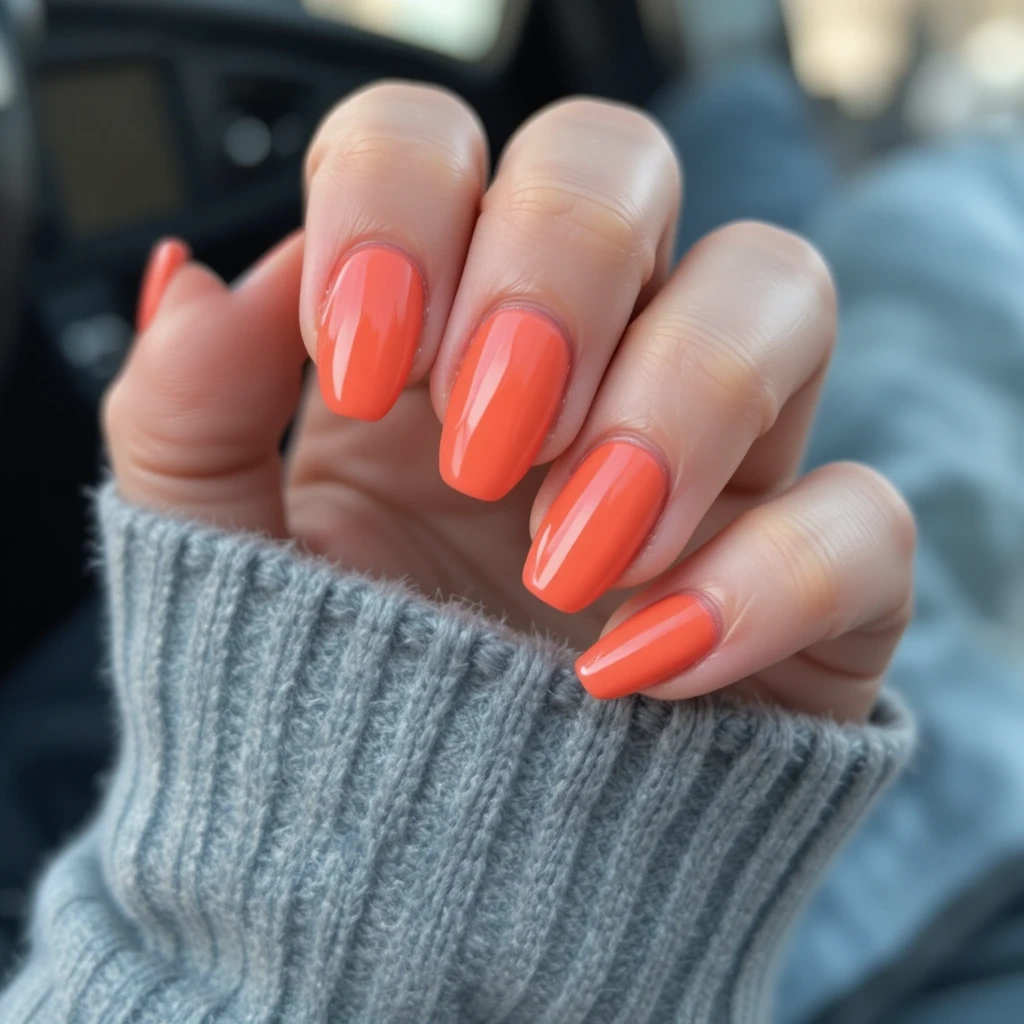
A true coral—half orange, half pink—that’s technically orange-adjacent but softer. This is the orange for people who aren’t sure they can pull off orange.
Difficulty: Beginner Time to complete: 25 minutes Best for: Almost literally everyone—coral is universally flattering Why it works: Coral sits in a sweet spot where it flatters warm and cool undertones without strongly leaning toward either What makes it different: Unlike pure orange or pure pink, coral reads as both simultaneously—it’s the most adaptable summer shade
Product to get: Essie Tart Deco ($10 at Target). Consistently the most flattering coral formula in the Essie range.
Black Summer Nails
Black in summer feels counterintuitive until you see it against a tan. The contrast is striking, and there are ways to wear black that read warm rather than gothic.
1. Glossy Black Nails
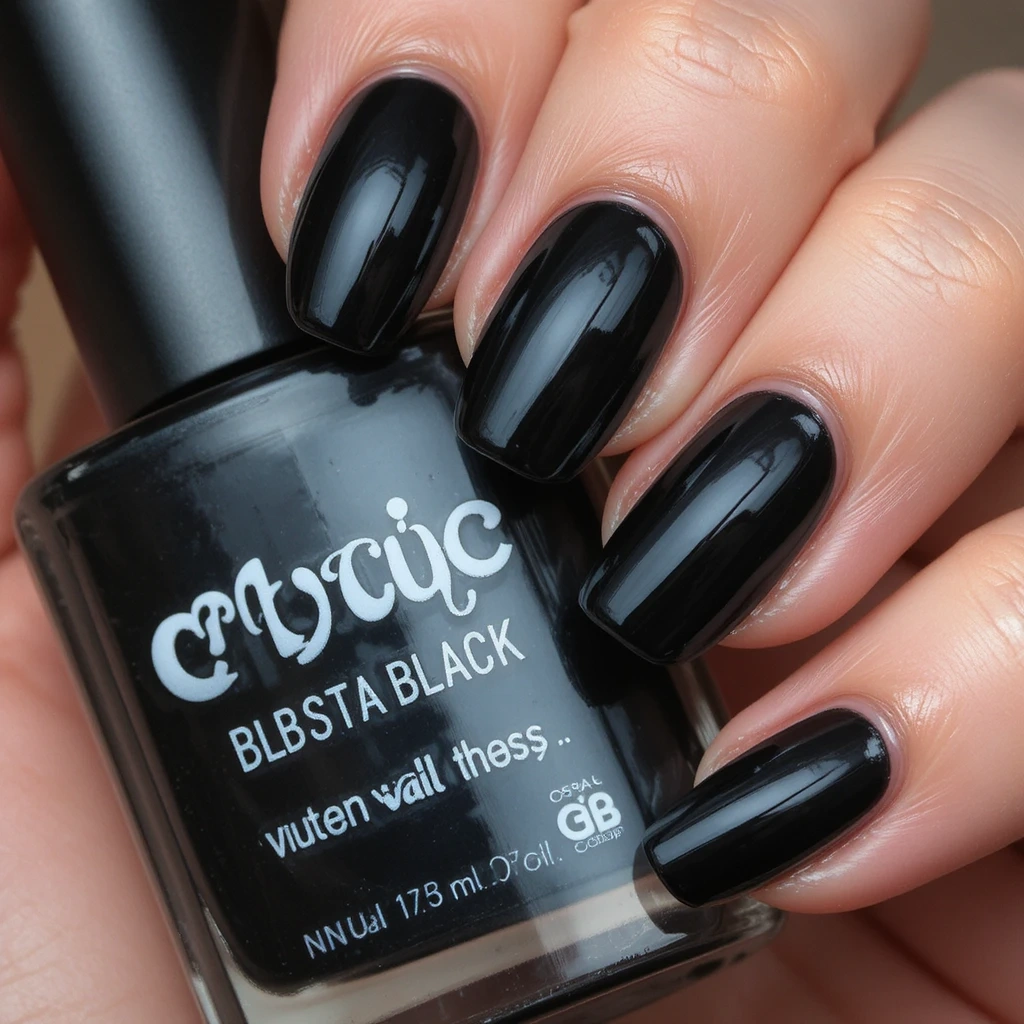
Maximum-shine black with no texture or effect. It’s the nail equivalent of a little black dress—works everywhere, always looks intentional.
Difficulty: Beginner Time to complete: 30 minutes Best for: People who default to black in their wardrobe—nails should match the aesthetic Why it works: High-gloss black against summer-tan skin creates a contrast that’s genuinely striking What makes it different: Glossy finish separates this from goth-adjacent matte black—it reads fashion, not subculture
Product to get: OPI Black Onyx ($11 at Ulta). Chip-resistant and opaque in two coats.
2. Black with Gold Foil Accent
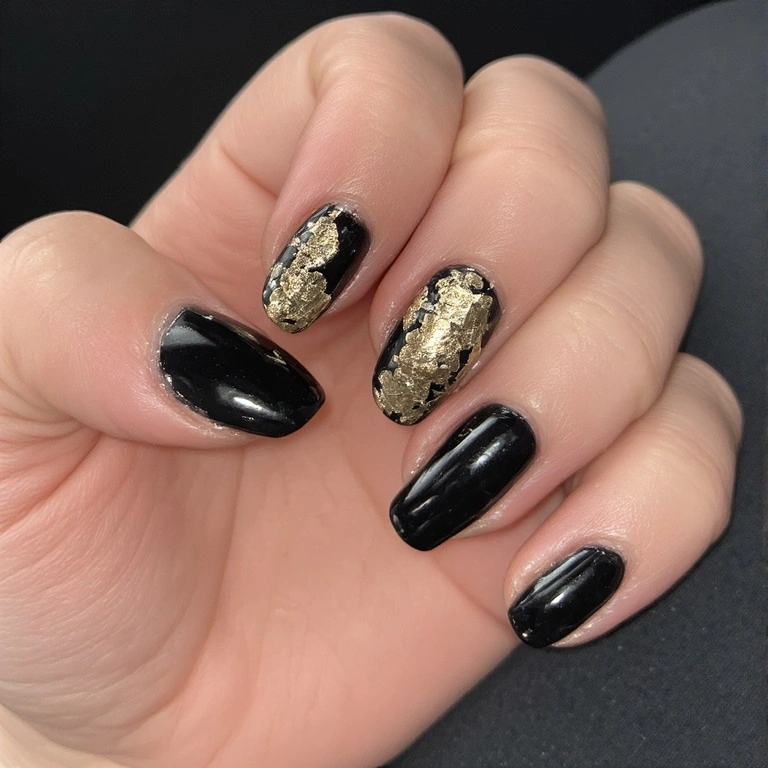
Black base on most nails, one or two accent nails covered in crinkled gold leaf. The combination reads maximalist-luxury.
Difficulty: Intermediate Time to complete: 45 minutes Best for: Events, evenings, anywhere you want maximum impact Why it works: Black and gold is one of those combinations that always looks deliberate and expensive What makes it different: The gold foil texture against glossy black creates tactile contrast that’s more interesting than glitter
Product to get: Born Pretty Gold Foil ($6 on Amazon). Press foil down gently and peel back slowly—rushing lifts the base color.
3. Black with Colorful Negative Space

A black base where thin strips or shapes of bare nail (or a bright color underneath) are left exposed. It creates a stained-glass effect that’s graphic and unique.
Difficulty: Advanced Time to complete: 60 minutes Best for: Nail art enthusiasts, people who want something truly different Why it works: The contrast between black and a bright summer color (orange, teal, yellow) is visually arresting What makes it different: This genuinely looks like something you’d see in an editorial—not a home manicure
Product to get: Scotch Tape in thin strips, or precision tape from a craft store. Painter’s tape leaves too wide a gap.
4. Matte Black Nails
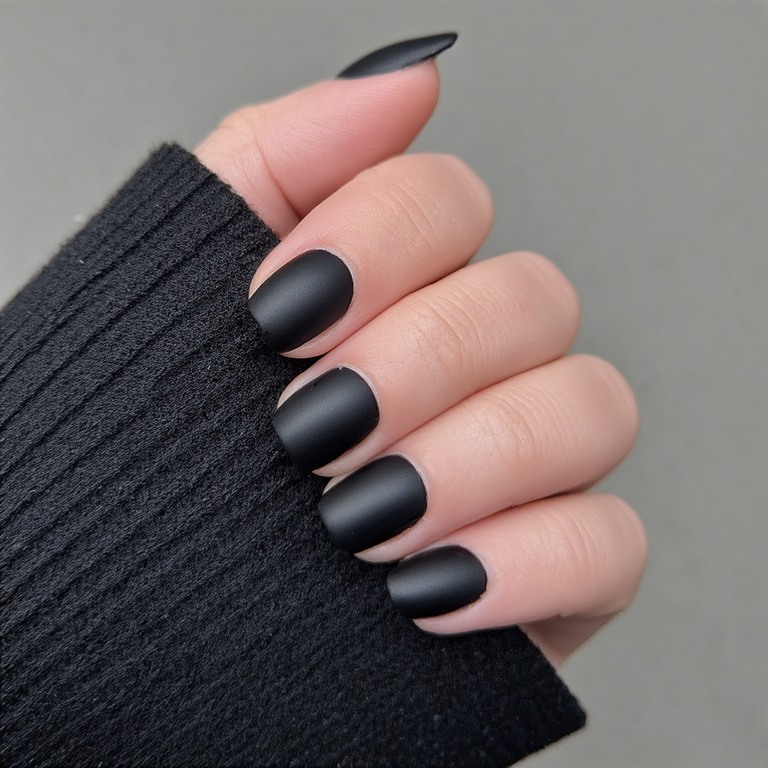
Flat, non-reflective black that looks understated from a distance and textural up close. The anti-gloss summer nail.
Difficulty: Beginner Time to complete: 30 minutes Best for: Minimalists, people with edgier personal style, those who want black nails that don’t compete with jewelry Why it works: Matte black has a velvety quality that’s more understated and wearable in summer heat than glossy What makes it different: The matte finish absorbs light rather than reflecting it—it changes the whole energy of a black nail
Product to get: OPI Matte Top Coat ($12 at Ulta). Applied over any color for instant matte finish—more reliable than buying matte-formula polishes separately.
5. Black with Floral Nail Art
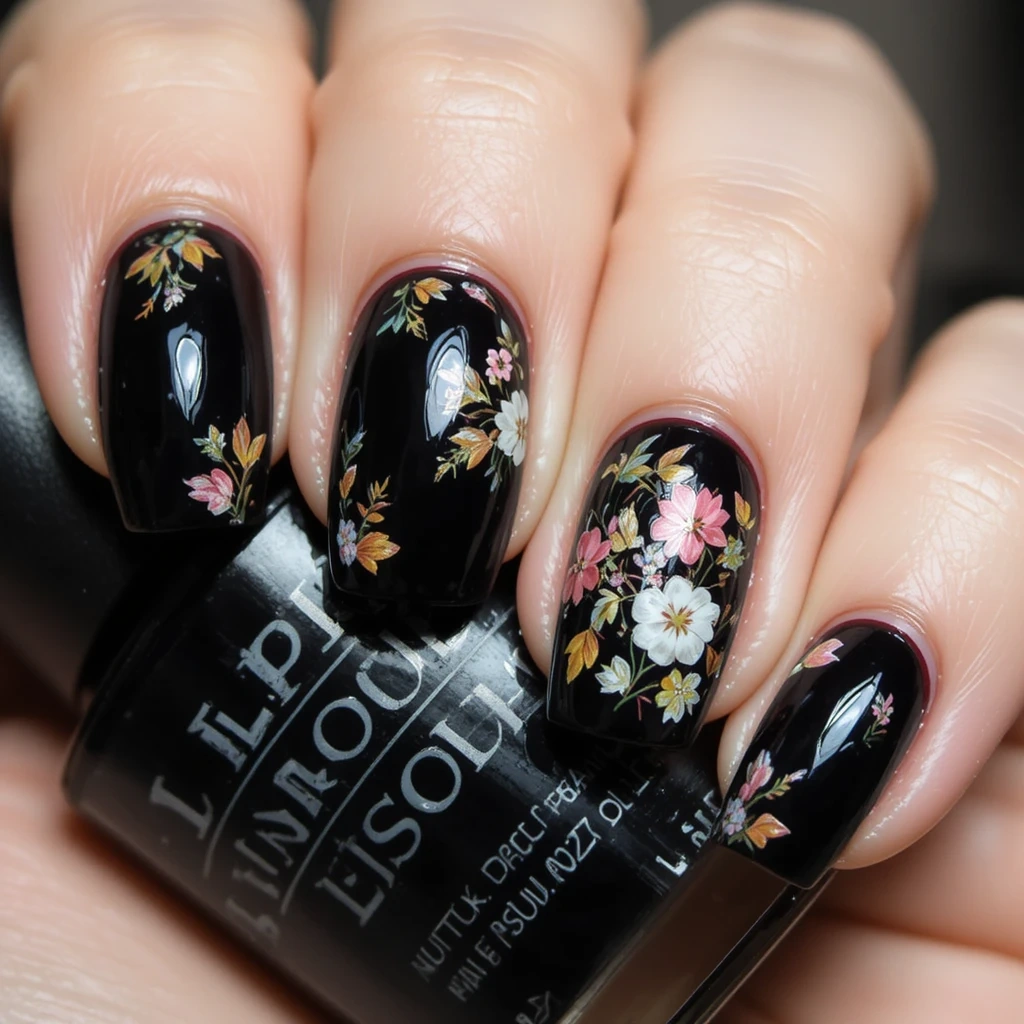
A black base with delicate flowers hand-painted in white, pink, or yellow on accent nails. The dark background makes the florals pop dramatically.
Difficulty: Advanced Time to complete: 65 minutes Best for: People with some nail art experience who want a statement look Why it works: Flowers on black look more editorial than flowers on a light background—the contrast changes the entire mood What makes it different: This look reads completely different in photos versus in person—it’s consistently one of the most-complimented nail art styles
Product to get: Born Pretty Fine Nail Art Brush Set ($8 on Amazon). The detail brush (#000) is the one you’ll use for florals.
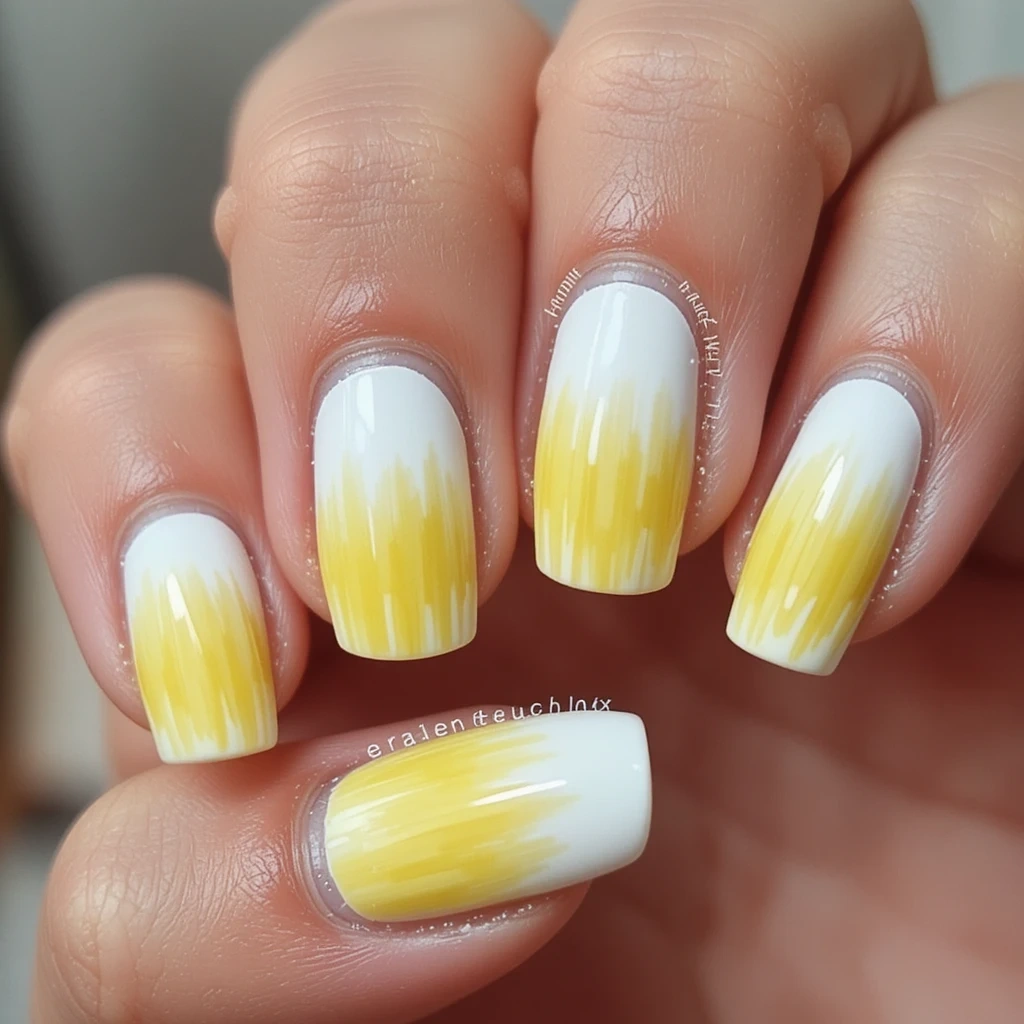
Yellow Summer Nails
Yellow is the most summer-coded nail color that most people are afraid to try. The secret is finding the right yellow for your skin tone—warm yellow for cool undertones, brighter yellow for warm undertones.
1. Sunflower Yellow Creme
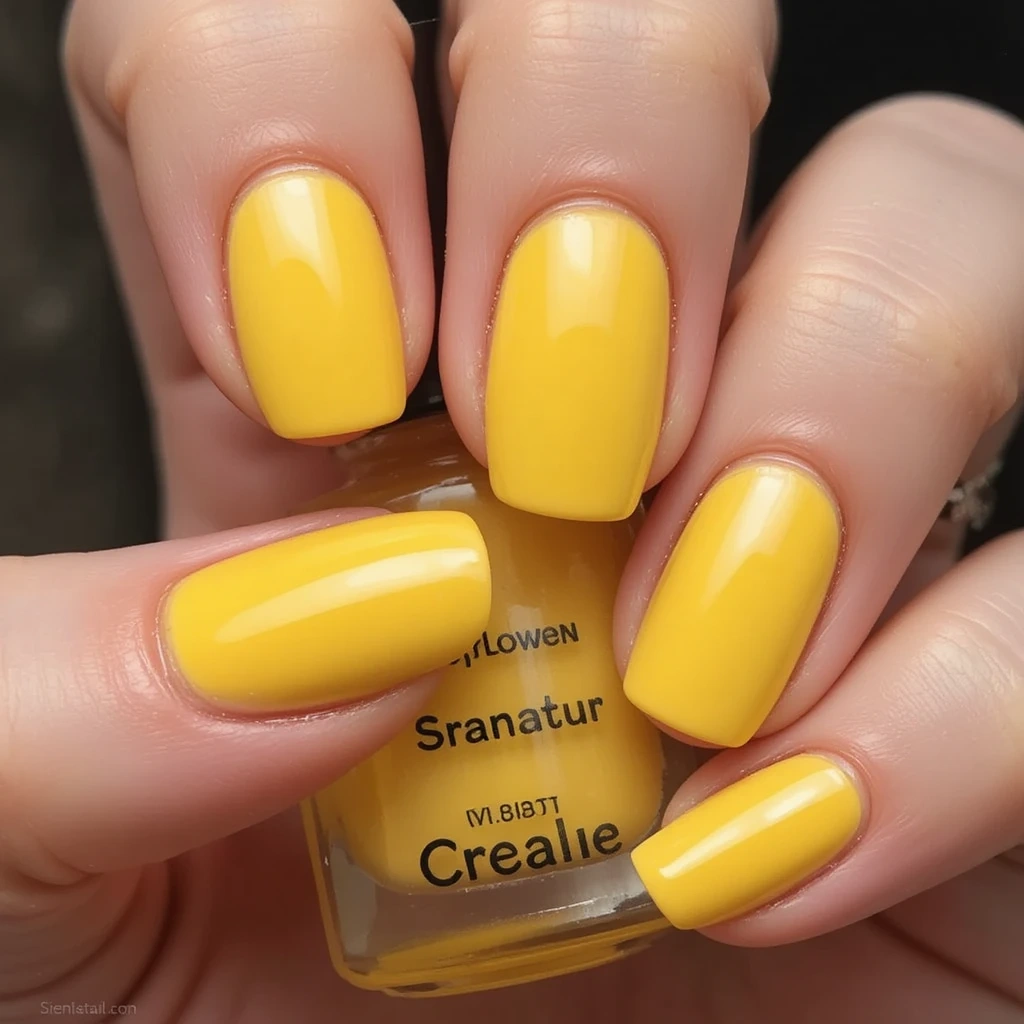
A warm, medium yellow that’s neither neon nor pale—exactly the color of a sunflower petal. The friendliest yellow for most skin tones.
Difficulty: Beginner Time to complete: 30 minutes Best for: First-time yellow wearers; universally flattering within the yellow family Why it works: Warm yellow reads cheerful and summer-appropriate without the intensity of neon What makes it different: This yellow pairs naturally with denim, white, and green—it integrates into summer outfits rather than competing with them
Product to get: Essie Bananagram ($10 at Target). Apply over a white base coat—it makes an enormous difference with yellows.
2. Neon Yellow Nails
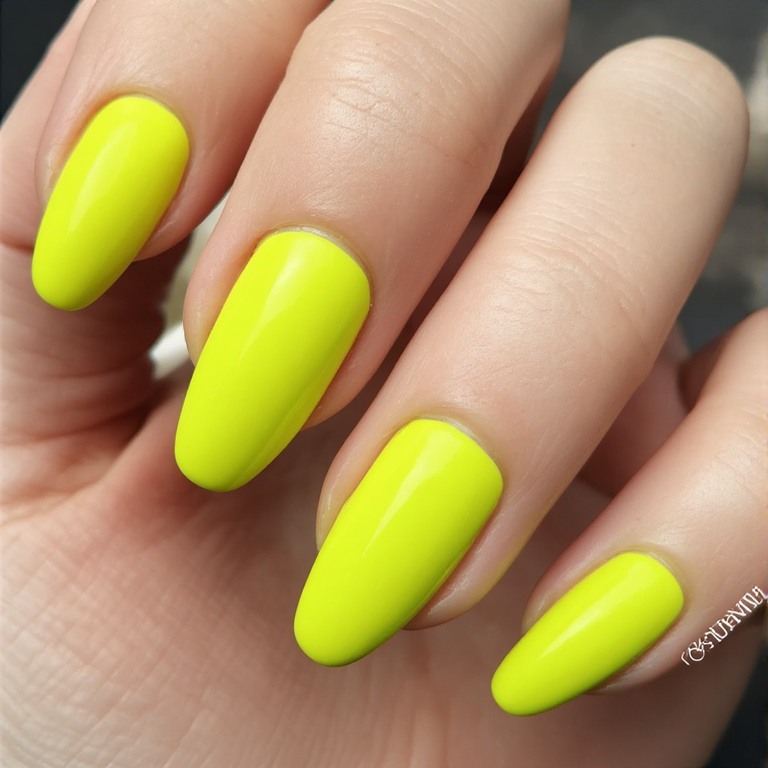
An electric, almost highlighter yellow. This is the boldest summer nail choice on this entire list.
Difficulty: Beginner Time to complete: 30 minutes Best for: People with dark tan or deep skin tones where neon yellow creates maximum contrast; summer festivals and events Why it works: Neon yellow photographs almost luminously—it catches every light source What makes it different: While everyone else has coral or red, neon yellow is unexpected and immediately identifiable as a deliberate choice
Product to get: OPI I Just Can’t Cope-acabana ($11 at Ulta). Builds to a fully opaque neon in three thin coats over white.
3. Butter Yellow (Soft, Milky Yellow)
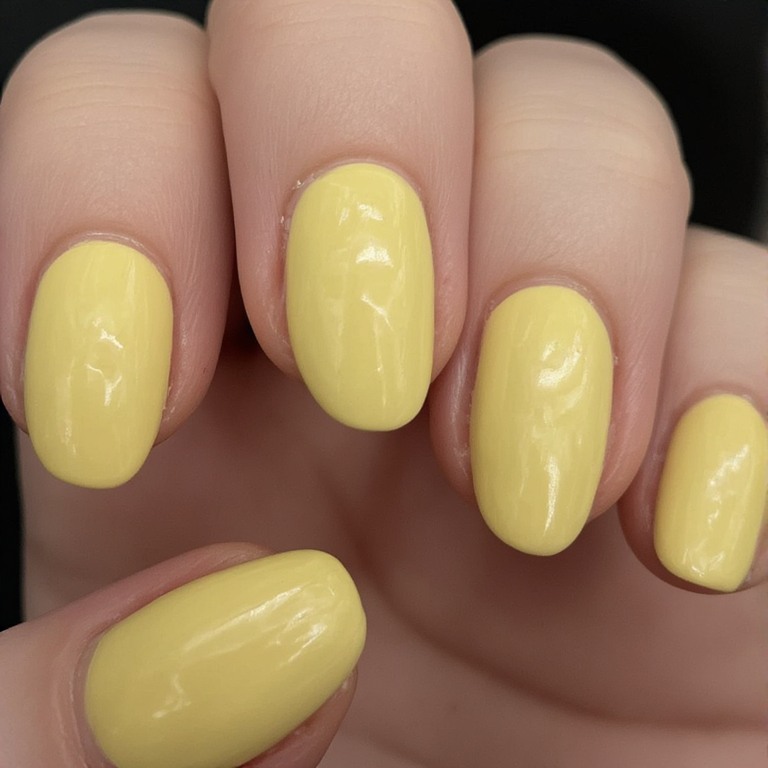
A pale, soft yellow that’s almost cream—warm without being aggressive. The most professional-appropriate yellow on this list.
Difficulty: Beginner Time to complete: 25 minutes Best for: People who want a summer nail that doesn’t shout; professional settings that still allow color Why it works: Butter yellow reads as a sophisticated, wearable neutral in most professional contexts while still being clearly yellow What makes it different: This is the yellow that looks intentional on fair skin without washing out—the warmth prevents it from looking ashy
Product to get: Zoya Bela ($10 on zoya.com). The formula is thicker than most yellows, which prevents the sheerness problem.
4. Yellow and White Daisy Nail Art

A white base with simple daisy designs on accent nails—white petals, yellow center. The most summer-specific nail art possible.
Difficulty: Intermediate Time to complete: 50 minutes Best for: People who love cottagecore, botanical aesthetics, or just flowers Why it works: Daisies are the easiest nail art design to learn because the petals don’t require precise shapes What makes it different: Yellow centers against a white base read cleaner than full-coverage yellow—the daisy is the design, not a color dump
Product to get: Born Pretty Nail Art Dotting Tool Set ($5 on Amazon). Daisies are literally just dots arranged in a circle—you don’t need to paint at all.
5. Yellow Ombre into White
A gradient from bold yellow at the base of the nail fading into clean white at the tip. Fresh, airy, and surprisingly wearable.
Difficulty: Intermediate Time to complete: 45 minutes Best for: People who like yellow but find full-coverage too bold; people who love ombre Why it works: The white tip softens the yellow, making the overall effect feel lighter and more versatile What makes it different: Yellow-to-white ombre is less expected than coral-to-orange and reads fresher and more editorial
Product to get: Cosmetic wedge sponges ($3–$5 at any drugstore). Replace between nails; shared sponges muddy the colors
Gel vs. Regular Polish for Summer
| Feature | Gel Polish | Regular Polish |
|---|---|---|
| Wear time | 2–3 weeks | 5–10 days |
| Drying time | Instant (UV lamp) | 20–45 minutes |
| Cost at salon | $40–$65 | $20–$35 |
| At-home cost | $25–$50 for kit | $8–$15 per bottle |
| Application difficulty | Intermediate | Beginner |
| Removal process | 10–15 min acetone soak | 2–5 minutes |
| Nail damage potential | Moderate (if peeled off) | Low |
| Best for | Vacations, events | Frequent color-changers |
| Finish quality | High-gloss, perfect | Good with proper technique |
| Summer durability | Excellent in heat/humidity | Fair—humidity extends dry time |
My honest take: I use gel for vacations (I don’t want to deal with chips on a beach trip) and regular polish for everyday because I change my mind constantly. If you’re going somewhere for 10+ days, gel is worth the extra setup cost. For regular life, a good regular polish with Seche Vite does the job.
Pros and Cons
Pros
✅ Summer nail colors genuinely photograph better—natural light is a nail’s best friend
✅ Bold colors hide minor growth better than nudes, extending the look’s lifespan
✅ Bright nails require zero other accessories to look put-together
✅ Summer formulas dry faster in heat (low humidity days specifically)
✅ Vibrant nails can shift an entire outfit without changing clothes
✅ Short nails in bright solid colors look intentionally chic, not just short
✅ Summer shades are widely available and often on sale at the season’s end
Cons
❌ High temperatures can cause regular polish to smudge or bubble during application—you need to work in a cool, dry room
❌ Sun exposure fades polish faster than indoor wear—especially reds and purples
❌ Sunscreen and bug spray are polish-killers; reapplication is not avoidable
❌ Bright colors show tip wear and chips more visibly than neutral shades
❌ Neons require a white base coat and more coats than regular colors—minimum 45 minutes
❌ Frequent swimming (pool or ocean) strips polish in 3–5 days regardless of formula
❌ Removing dark summer colors like black or deep teal can temporarily stain nails yellow or blue
Real Wear Test
I wore a bright coral (OPI Cajun Shrimp with Seche Vite top coat) for a week during a beach trip. Here’s what actually happened.
Days 1–2: Perfect. Glossy, no chips, multiple compliments. The double-cap technique I’d done on the tips held.
Days 3–4: First chip appeared on my right thumb tip on Day 3—always the thumbnail. I reapplied a thin coat of color plus top coat over just the tip and it blended almost invisibly.
Days 5–6: The color started pulling away slightly from the cuticle edge—regrowth wasn’t visible yet but the edge looked thin. Tips still held except for one corner chip on my index finger.
Day 7: One full nail (left middle finger) peeled off in a sheet after spending two hours in the pool. The rest looked acceptable but dull—the Seche Vite gloss was gone.
Verdict: Realistically, seven days is the lifespan for regular polish in summer beach conditions. For any trip longer than a week, I’d switch to gel or dip powder. Days 1–5 looked salon-fresh; days 6–7 required touch-ups to stay presentable.
Maintenance Tips
Week 1: Protection Phase
Apply a thin layer of Seche Vite top coat every 2–3 days—not every day, which causes buildup and peeling. I keep a bottle in my bathroom and do it Sunday and Wednesday.
Use CND SolarOil ($10 at Ulta) on cuticles every night before bed. Dry cuticles crack and physically pull polish up from the nail edge. This one habit extended my manicure from 5 days to 8.
Wear gloves when washing dishes or cleaning. Hot water and soap are the top two polish destroyers. I keep a pair of yellow rubber gloves under the kitchen sink.
Week 2: Preservation Phase
If you notice tip wear, apply a thin layer of matching polish to the tip only, followed by top coat. Let it dry completely—rushing causes the layers to shift and lift.
Avoid picking at any chips. A chip becomes a peel, and a peel becomes a completely stripped nail. File the chipped edge smooth and seal with top coat instead.
Apply sunscreen before you do your nails, never after. Sunscreen sitting on top of polish—even under top coat—causes yellowing on light shades.
Week 3: Decision Phase
At three weeks, even gel starts showing regrowth and tip wear. Make an honest call: is this still looking good enough to keep, or is it time to remove?
If removing regular polish: soak a cotton pad in pure acetone, hold it on each nail for 20 seconds, then wipe off. Don’t scrub—let the acetone do the work.
Immediately after removal: apply a layer of OPI Nail Envy ($20) and let your nails breathe for at least 48 hours before the next manicure.
General (All Phases)
Don’t use your nails as tools—not to open cans, peel stickers, or type hard. This is the number-one cause of tip chips and I still have to remind myself constantly.
Why Read This Article?
Most summer nail roundups are just image dumps—pretty pictures with zero practical help. This guide is different. I’ve organized 40+ ideas by color family, given you honest time estimates and difficulty ratings, and included actual product names and prices so you can recreate every single look at home. I also share what actually failed when I tried these, because that’s the part nobody else tells you.
Essential Tools & Products
The Basics (Under $35 Total)
Orly Bonder Base Coat ($9 at Sally Beauty) — Creates a rubberized layer that flexes with your nail instead of cracking under summer heat. I used to skip this and lost 3–4 days of wear every single time. Don’t skip it.
OPI Nail Envy Strengthener ($20 at Ulta) — Summer is rough on nails. Pool chemicals, salt water, and constant handwashing weaken them fast. This adds a protein layer that genuinely prevents breakage. I noticed the difference within two weeks of consistent use.
Seche Vite Dry Fast Top Coat ($9 on Amazon) — Dries to a glass-hard finish in under 60 seconds. Summer humidity normally wrecks polish drying time; this cuts through it. Don’t shake the bottle—roll it to avoid bubbles.
Pure acetone ($4 at CVS) — Removes gel and regular polish cleanly without the shredding that cheaper removers cause. Cheap nail polish remover left my nails weak and peeling. Pure acetone with a drop of cuticle oil added works better.
The Game-Changers
Kiara Sky Dip Powder ($14 per color on Amazon) — If you want summer nails that survive a beach trip, dip powder outlasts regular polish by 10–12 days. The application is messier to learn, but the payoff is real.
CND SolarOil Cuticle Oil ($10 at Ulta) — Summer air conditioning is dehydrating. Dry cuticles crack and lift polish at the edges. I keep a bottle in my bag and apply it every night before bed. This one habit extended my manicure life by nearly a week.
Don’t Cheap Out Here: Top Coat
A good top coat is more important than the color itself. Cheap top coats yellow in summer UV light (ruining your white and pastel shades) and peel within days. Invest in either Seche Vite or Sally Hansen Insta-Dri ($7 at Target). Both seal color with actual staying power.
Common Mistakes
Mistake #1: Painting Over Dry Skin and Unprepared Cuticles
What it looks like: Polish peels up from the edges within 24 hours, often in one clean piece.
Why it happens: Dead skin and dry cuticle edge around the nail means polish is adhering to skin, not nail—and skin sheds.
The fix:
- Soak nails in warm water for 5 minutes
- Push back cuticles gently with a silicone cuticle pusher ($5 on Amazon)
- Apply Orly Bonder base coat immediately while the nail surface is still clean
- Begin color within 5 minutes
How well it works: Fully fixes the problem when done consistently. Skipping it even once causes noticeably faster peeling.
Mistake #2: Thick Coats
What it looks like: Polish looks perfect going on but peels off in full-nail sheets 3–4 days later.
Why it happens: The top of thick coats dries fast but the interior stays wet. When it finally contracts, it pulls the whole layer up.
The fix:
- Pour excess polish off the brush before applying
- Three thin coats, 2 minutes between each
- If you can see brush strokes after a coat dries, the coat was too thick
How well it works: Completely solves the problem. The patience requirement is the only hard part.
Mistake #3: Skipping Base Coat with Dark Colors
What it looks like: Nails are stained yellow, green, or grey after removing dark polish.
Why it happens: Pigment molecules in dark polish are small enough to penetrate the nail plate directly. A barrier coat prevents this.
The fix:
- Apply two thin coats of Orly Bonder ($9) before any dark color
- If staining already happened: buff lightly and apply a whitening polish remover ($7 at Sally Beauty)
- Time plus a nail strengthener usually resolves mild staining within 1–2 weeks
How well it works: Prevention works 100%. Removal of existing stain takes time—it won’t fix overnight.
Mistake #4: Peeling Off Polish Instead of Removing It
What it looks like: Nails look thin, peel in layers, and break constantly for weeks after.
Why it happens: When you peel polish, you peel the top layers of the actual nail plate with it. Each time you do this, the nail gets thinner.
The fix:
- Keep acetone and cotton pads in an accessible spot so removal is easy
- If you genuinely can’t stop peeling, try peel-off base coat for guilt-free removal
- After damage: apply OPI Nail Envy ($20) daily for 2–3 weeks
How well it works: Complete behavioral fix—the damage reverses over 4–6 weeks of using strengthener.
Mistake #5: Applying Sunscreen Over Finished Nails
What it looks like: Light and pastel shades turn slightly yellow or cloudy after a day in the sun.
Why it happens: Chemical sunscreens react with the pigments in light polishes. This is especially common with whites, light pinks, and yellows.
The fix:
- Apply sunscreen before your nail polish session, let it absorb for 20 minutes, then do nails
- If already yellowed: remove and redo—it won’t reverse
- On beach days, use mineral sunscreen (zinc oxide) which is less reactive
How well it works: Prevention is the only solution. This is not fixable without a fresh manicure.
Mistake #6: Not Capping the Free Edge
What it looks like: Chips appear at the tips first, usually within 2–3 days.
Why it happens: Polish applied across the face of the nail doesn’t fully seal the tip edge, leaving it exposed to impact and water infiltration.
The fix:
- At every coat (color and top coat), drag the brush deliberately over the tip
- It should feel like you’re painting the very edge, not just approaching it
- If you see white streaks on the tip after top coat, that’s where the polymer sealed—proof it worked
How well it works: This single technique added 3–4 days to my regular polish wear time.
Summer Nail FAQ
How do I keep my nail polish from bubbling in summer heat? Polish bubbles when it’s applied too thick or in a humid environment. Always apply thin coats and work in an air-conditioned room. If you’re somewhere hot and humid, let each coat dry for 3–4 minutes (not 2) before the next, and use Seche Vite as your top coat—it seals before humidity can affect it.
Can I wear summer nail colors with short nails? Absolutely—short nails actually look best in bold, single colors rather than nail art. Bright orange, cobalt blue, and true red are particularly flattering on short nails because the saturation draws attention without needing length. Avoid pale nudes, which can make short nails look more square than intentional.
Why do my red and dark nails keep staining my nail bed? You’re skipping base coat, or your base coat isn’t pigment-blocking. Use Orly Bonder ($9) specifically—it creates a physical rubber barrier that dark pigments can’t penetrate. If staining already happened, give it 2–3 weeks with a strengthening base coat and the discoloration will fade as your nail grows out.
What’s the easiest summer nail art for beginners? Daisy nail art using a dotting tool—it’s just dots arranged in a circle with a yellow dot in the center. Takes 10 minutes of practice to look good and requires zero painting skill. Start on your non-dominant hand.
How long should I wait between summer manicures? At minimum, 48 hours of bare-nail time between manicures. Your nail plate is permeable and needs time to rehydrate after being under polish. If you’re doing weekly manicures, apply OPI Nail Envy ($20) during those 48 hours to strengthen between applications.
Do summer nail colors last as long as regular nail colors? Yes—the formula doesn’t change seasonally. What affects longevity is your activity level (swimming, outdoor work) and temperature, which impacts drying time. Summer-specific tip: let each coat dry fully before the next rather than rushing—humidity slows drying and a partially-wet underlayer is the top cause of peeling.
Conclusion
Summer nail colors ideas range from beginner-friendly (coral creme, sky blue, butter yellow) to genuinely advanced (negative space, chrome powder, floral nail art)—there’s a look here for every skill level and personality.
If you’re starting out, I’d suggest trying a single bright shade like Essie Bananagram or OPI Cajun Shrimp using the thin-coat and double-cap technique, and getting that process right before adding any nail art.
Once solid application feels natural, layer in accent nails with decals or simple daisy dot art. My first five attempts at any nail technique looked rough—that’s normal, and each one teaches you something the next one benefits from.