8 Lava Lamp Nails You’ll Want to Copy ASAP
Lava lamp nails are a swirling nail art technique where two or more gel polish colors blend together while wet, creating flowing, organic patterns that look like the liquid wax moving inside a real lava lamp. Unlike regular nail art where you paint precise designs, lava lamp nails embrace unpredictability—you drop colors onto wet gel and swirl them with a thin brush, letting them flow naturally into each other.
The key is keeping colors translucent so light passes through, creating depth and movement instead of flat, opaque blobs.
Why This Guide Is Different
Unlike other lava lamp nails articles that just show pretty pictures, this guide walks you through the exact swirling technique for each design with numbered steps, specific product recommendations with real prices, and honest troubleshooting for the 6 most common failures I see beginners make. You’ll also get a realistic wear test timeline showing what these nails actually look like after two weeks, not just on day one.
How to Choose the Best Lava Lamp Design
For your first time: Start with Design #3 (Ethereal Lavender & Mint Dream) or Design #6 (Sage Green & Terracotta Earth). Pastel and neutral colors are forgiving when you accidentally over-blend, unlike high-contrast neons that turn muddy fast.
If you have a professional job: Design #4 (Moody Navy & Burgundy Luxe) and Design #6 (Sage Green & Terracotta Earth) work in conservative offices. Keep nails at a short-to-medium length and use the matte top coat option for a sophisticated finish.
If you want something for special events: Design #2 (Neon Pink & Electric Blue Party Swirl) and Design #8 (Teal & Magenta Vibrant Contrast) photograph incredibly well and make a statement. The high contrast creates the most dramatic lava lamp effect.
If you’re comfortable with nail art: Try Design #7 (Holographic Silver & Clear Crystal) with the layered holographic powder technique, or Design #5 (Tropical Sunset Gradient Flow) which requires blending three colors smoothly.
If you have short nails: Stick to two-color designs like #1, #3, or #6. Three-color gradients get too cramped on short nails and lose their flowing effect. Use vertical swirl patterns to elongate.
If you change your mind often: Avoid Design #4 with the black base layer—it stains like crazy and takes forever to remove completely. Stick with lighter bases that come off cleanly.
What You’ll Need to Get Started
Before diving into these designs, grab these supplies. You don’t need professional equipment—just a few key items.
Essential Supplies:
- Base coat – Orly Bonder ($9) grips to your natural nail better than drugstore options that peel within days
- Gel polish in your chosen colors – Beetles Gel Polish ($8 per bottle) stays wet for 2-3 minutes, long enough for swirling without rushing
- Clear or sheer gel polish – Modelones Clear Gel ($7) creates that translucent base layer that gives depth
- UV/LED nail lamp – SUNUV 48W LED lamp ($23) cures completely in 60 seconds versus cheap lamps that leave gel tacky underneath
- Thin nail art brush – Makartt Detailing Brush Set ($8 for 3 brushes) gives control; the size 00 liner is perfect for swirling
- Top coat – Beetles No-Wipe Top Coat ($9) means no sticky residue to wipe off, saving you alcohol and cotton pads
- Acetone and cotton pads – Pure acetone from Sally Beauty ($6) removes gel in 10 minutes versus non-acetone that takes 30+
- Cuticle oil – Cuccio Milk & Honey Cuticle Oil ($8) absorbs faster than thick oils that sit greasy on your skin
Pro Shopping Tip: The Beetles Starter Kit on Amazon ($28) includes a lamp, base coat, top coat, and 6 colors. I used this for my first year doing gel nails and only upgraded when I wanted more color options.
8 Stunning Lava Lamp Nail Designs
1. Classic Orange & Purple Retro Flow
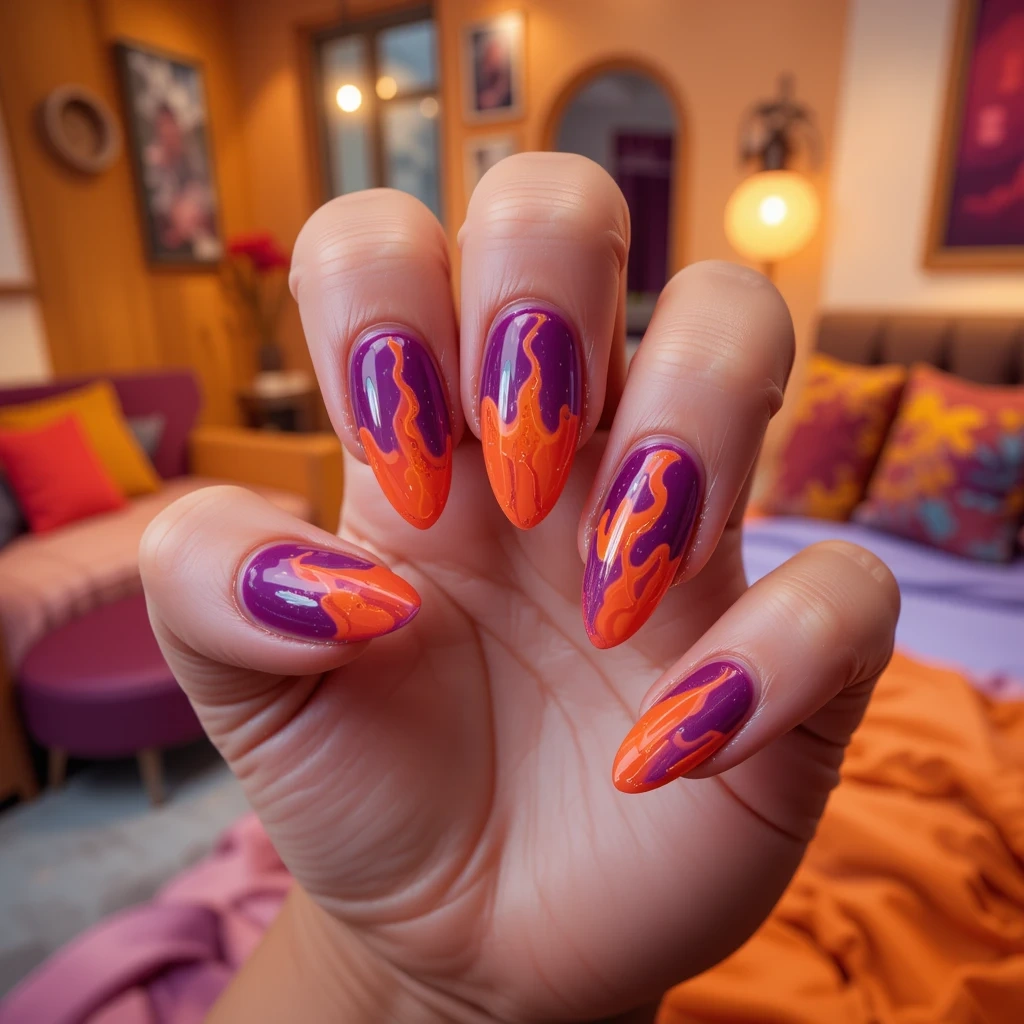
Vibrant tangerine orange swirls through deep purple with translucent layers that create authentic lava lamp movement and depth. The high-contrast color combination captures that iconic 70s aesthetic while glossy finish adds modern sophistication and dimension. Blended edges create seamless transitions that look like actual liquid flowing across your nails in slow motion.
Difficulty: Intermediate
Time to complete: 35-40 minutes for both hands
Best for: Anyone wanting that authentic retro lava lamp vibe without looking costume-y
Why it works: The orange-purple contrast is strong enough to stay distinct even if you accidentally over-blend
What makes it different: Uses a sheer orange base instead of opaque, which creates depth other designs lack
2. Neon Pink & Electric Blue Party Swirl
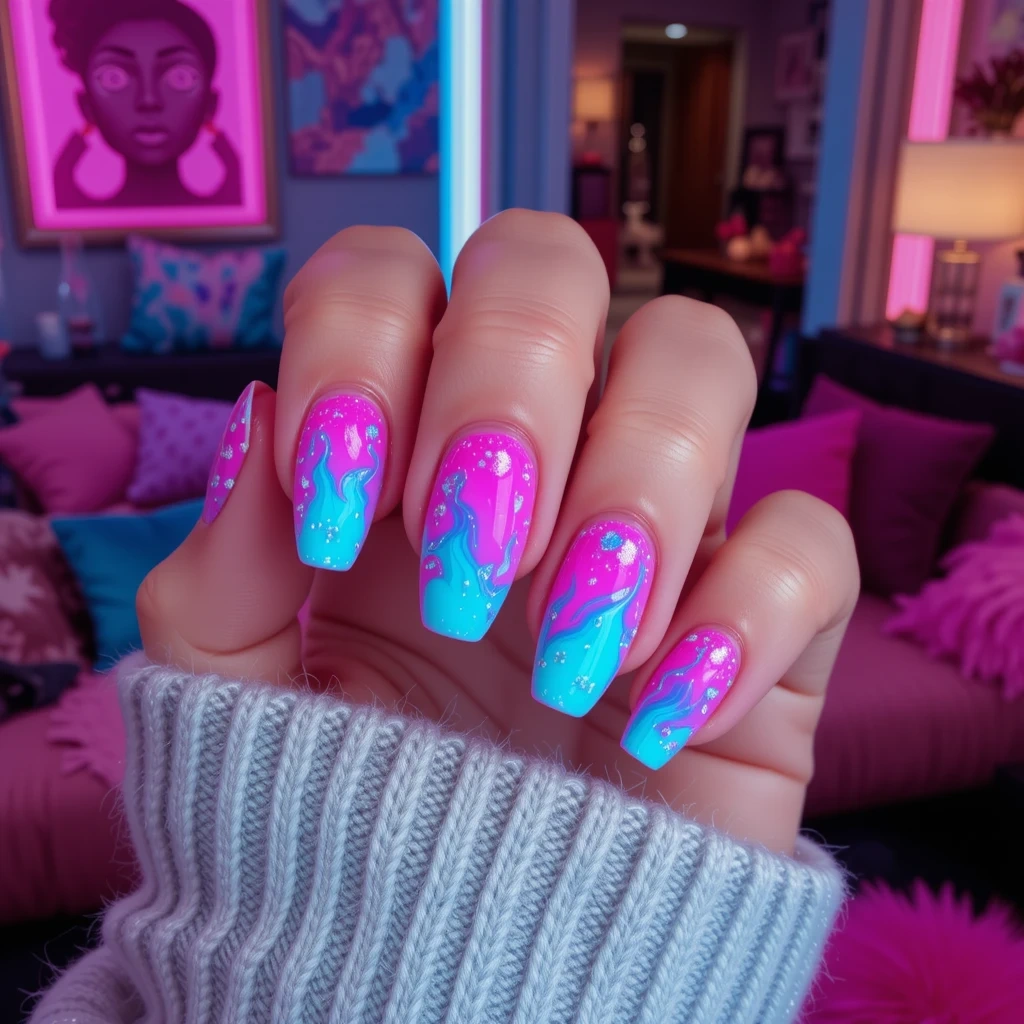
Hot pink melts into electric blue with iridescent shimmer scattered throughout, creating an energetic, festival-ready effect that glows under blacklight. The saturated neon tones bring maximum visual impact while the swirling technique softens the intensity into something wearable and artistic. This design screams confidence and fun, perfect for making your hands the center of attention.
Difficulty: Advanced
Time to complete: 45-50 minutes for both hands
Best for: Festivals, concerts, beach vacations, or anyone who loves being the brightest person in the room
Why it works: Neons naturally resist blending completely, so they maintain separation even with aggressive swirling
What makes it different: The iridescent shimmer catches light differently than regular glitter, creating a holographic effect
3. Ethereal Lavender & Mint Dream
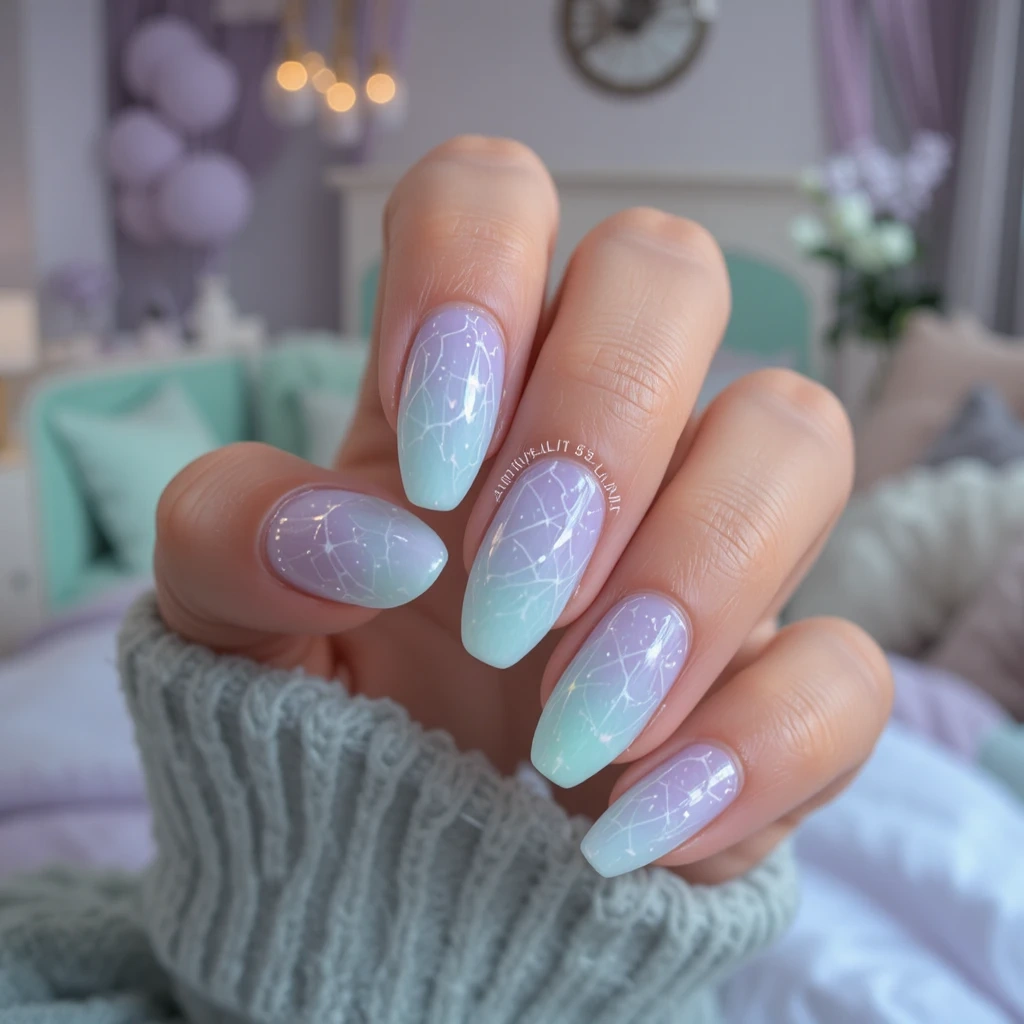
Soft lavender flows through pale mint green with milky white accents, creating a dreamy pastel effect that’s gentle yet captivating. The cool-toned palette feels fresh and modern while the translucent application gives an almost watercolor-like quality. This design brings subtle sophistication with just enough visual interest to feel special without overwhelming your overall aesthetic.
Difficulty: Beginner
Time to complete: 30-35 minutes for both hands
Best for: First-timers with lava lamp nails or anyone wanting office-appropriate nail art
Why it works: Pastels blend beautifully even if you mess up—there’s no such thing as “too blended” with these soft colors
What makes it different: The milky white base gives it a cloudy, ethereal quality instead of the typical clear translucent look
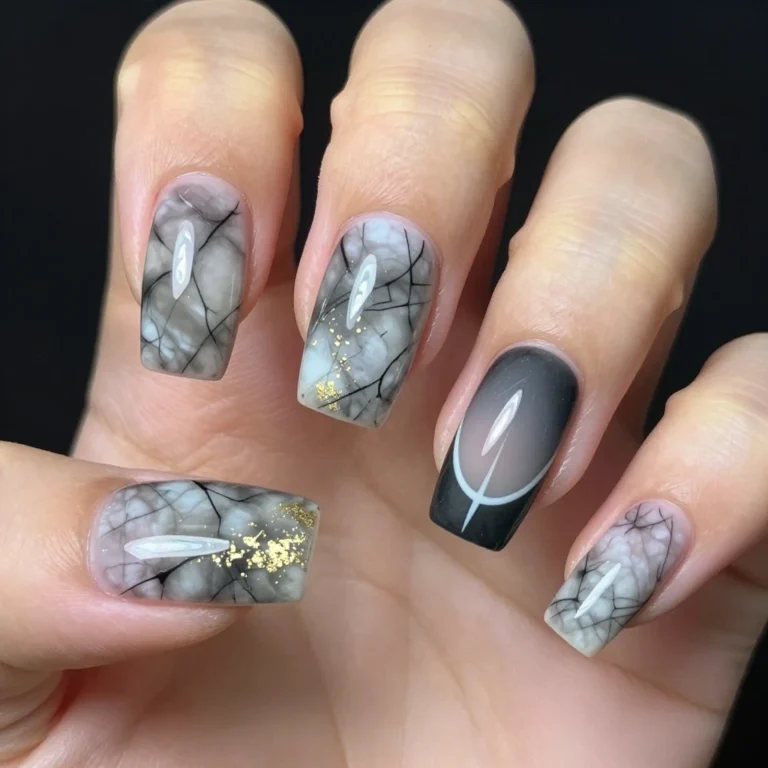
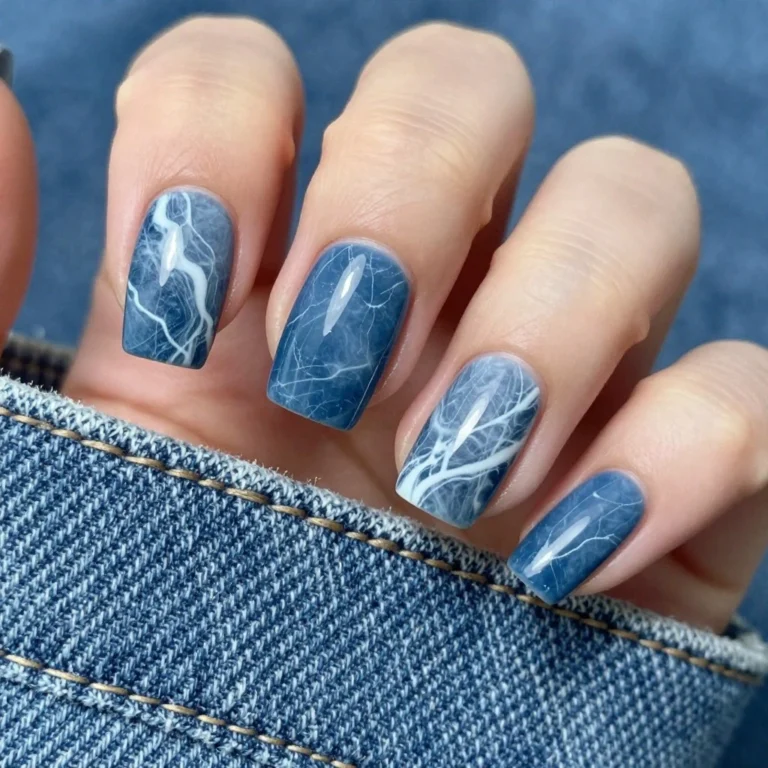
4. Moody Navy & Burgundy Luxe

Deep navy swirls through rich burgundy with hints of metallic gold shimmer, creating a luxurious effect that feels opulent and refined. The jewel-tone palette brings sophisticated drama while the organic swirls keep it from looking too formal or stuffy. This design channels liquid velvet vibes with depth and movement that catches light beautifully from every angle.
Difficulty: Intermediate
Time to complete: 40-45 minutes for both hands
Best for: Fall and winter events, holiday parties, or anyone building a deep jewel-tone wardrobe
Why it works: Dark colors hide imperfections better than light ones, and the black base makes everything look richer
What makes it different: The optional gold foil adds real luxury—not painted-on shimmer but actual metallic pieces
Warning: The black base layer stains. When you remove this design, expect to see gray shadows on your nails for a day or two.
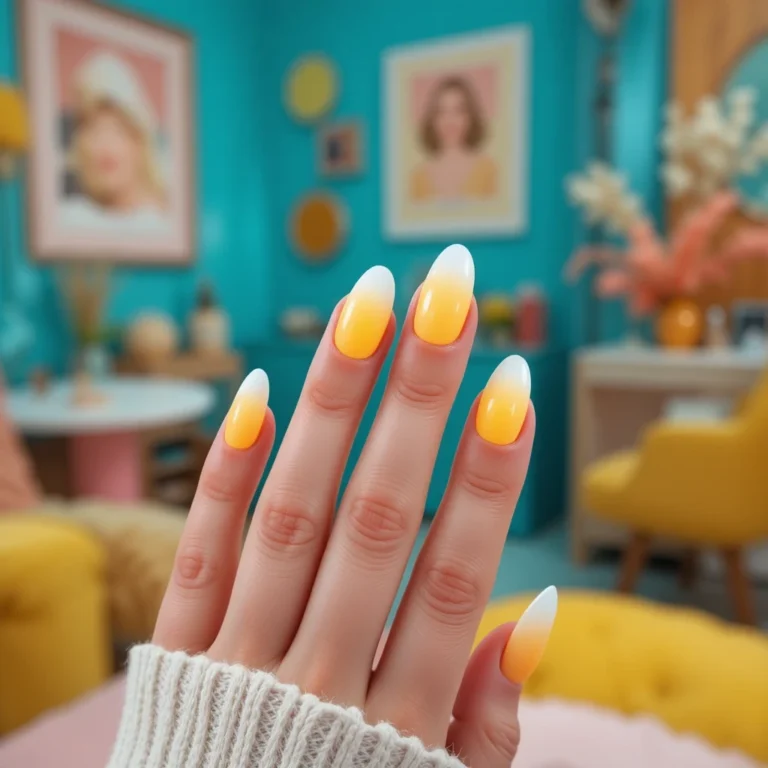
5. Tropical Sunset Gradient Flow
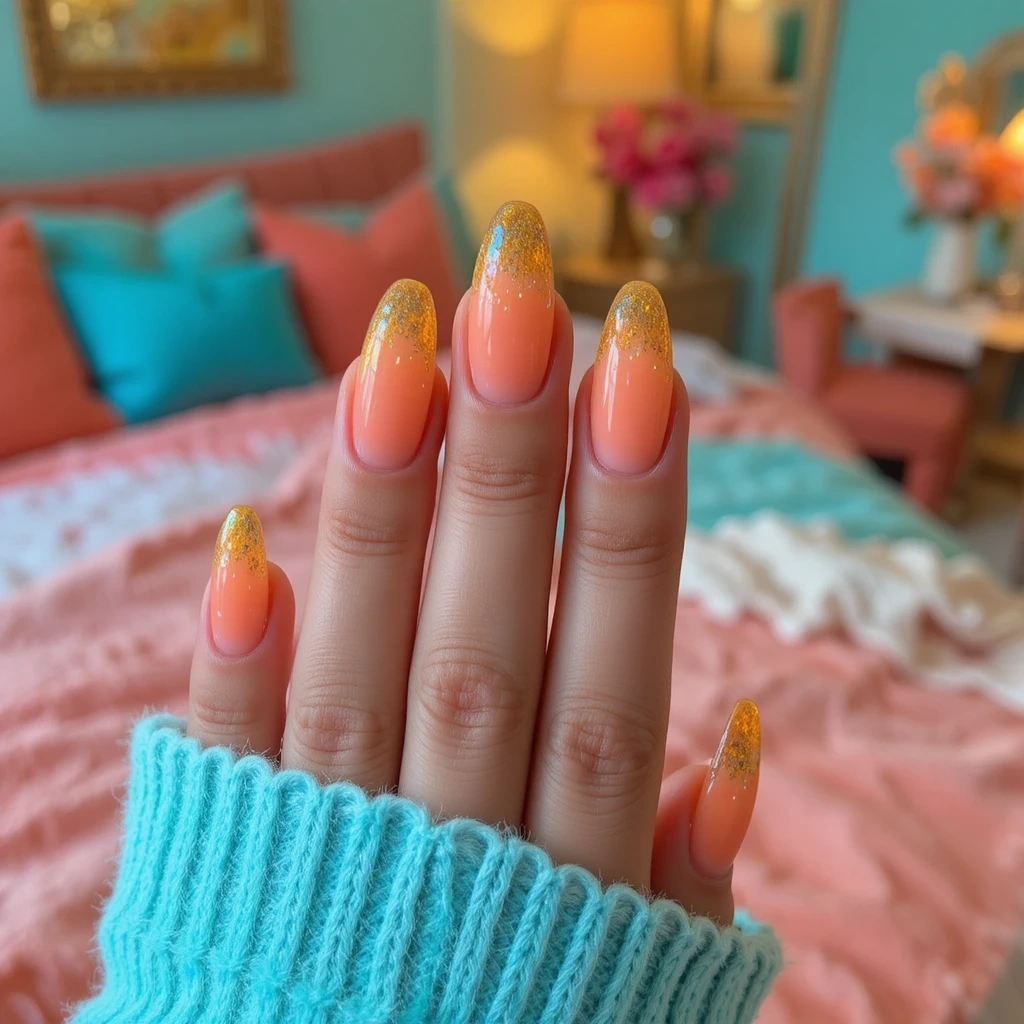
Coral pink melts into golden yellow and soft peach, creating a warm gradient that captures the essence of sunset over water. The warm color story brings instant joy and energy while the smooth color transitions create natural dimension without harsh lines. This design radiates positivity and warmth, making it perfect for brightening up any day or occasion.
Difficulty: Advanced
Time to complete: 50-55 minutes for both hands
Best for: Summer vacations, tropical destinations, or anyone who needs a mood boost during gray winter months
Why it works: Three warm colors from the same family blend gracefully without turning muddy
What makes it different: Uses a gradient placement technique instead of random swirls, creating a more controlled sunset effect
Tip: If your gradient looks striped instead of blended, you didn’t overlap the colors enough in steps 5-6. They need to touch each other while wet.
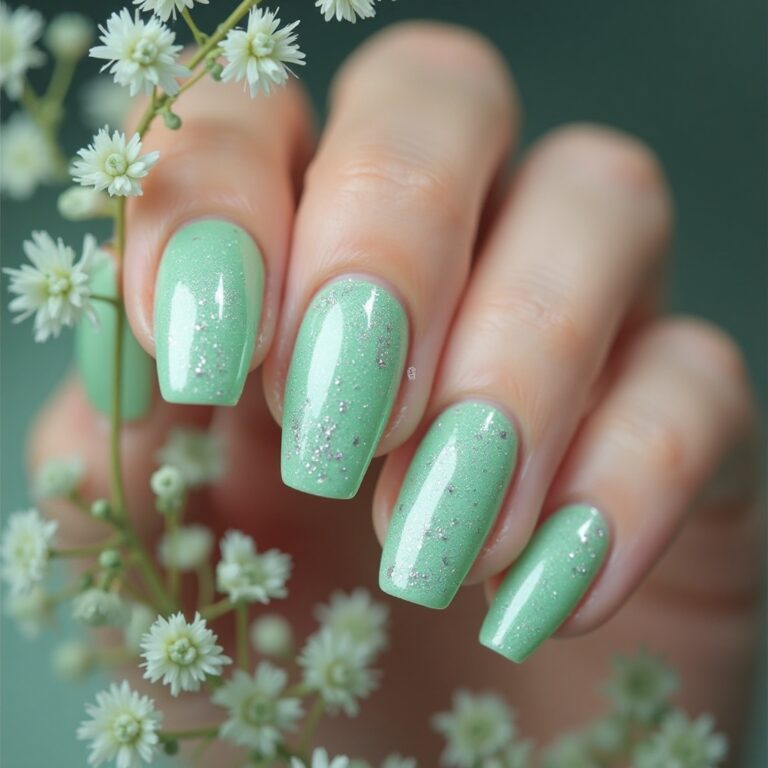
6. Sage Green & Terracotta Earth
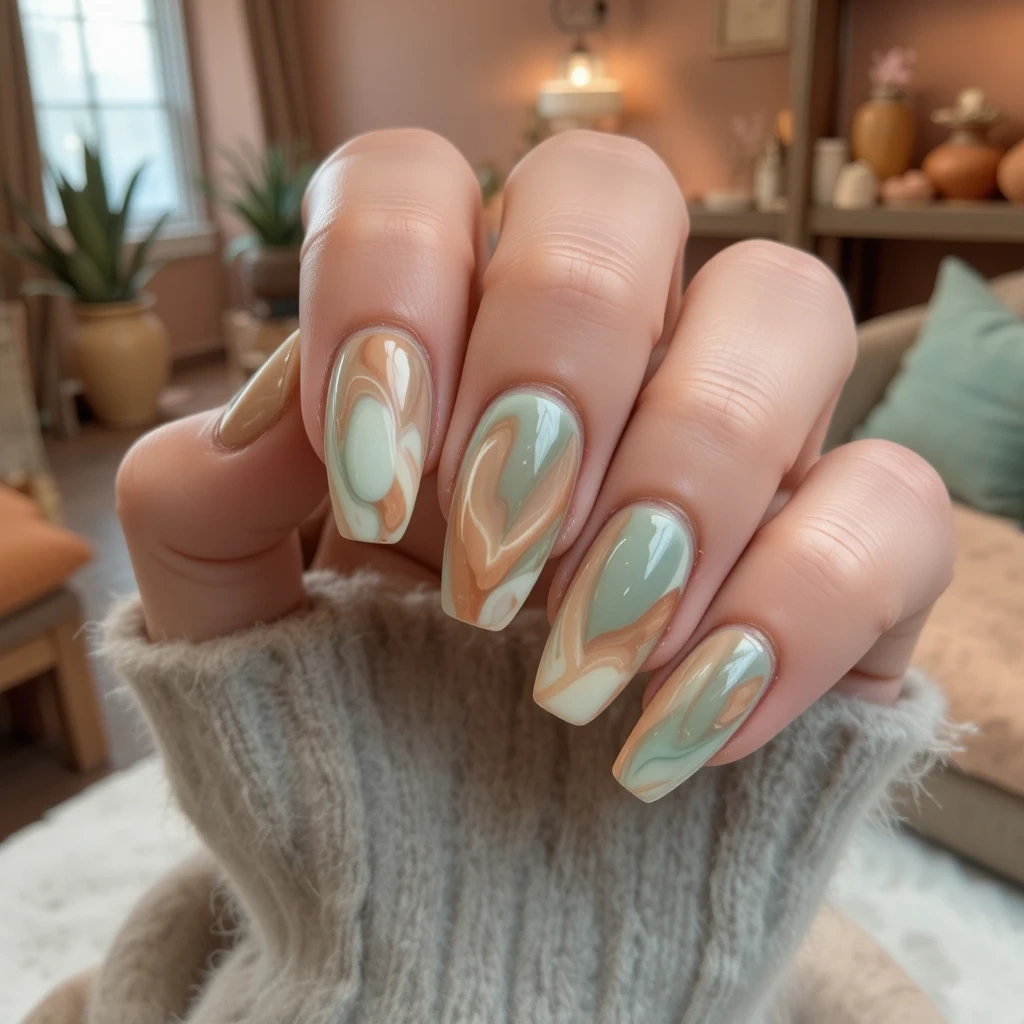
Muted sage green flows through warm terracotta with cream accents, creating an earthy, nature-inspired palette that feels grounded and sophisticated. The neutral-leaning tones bring understated elegance while the swirling technique adds artistic interest and texture. This design proves lava lamp nails can be subtle and refined rather than always bold and attention-grabbing.
Difficulty: Beginner
Time to complete: 30-35 minutes for both hands
Best for: Minimalists, plant lovers, or anyone building a neutral capsule wardrobe
Why it works: Earthy tones are universally flattering and these specific shades complement both warm and cool skin tones
What makes it different: The matte top coat option transforms it from casual to editorial-level sophisticated
7. Holographic Silver & Clear Crystal
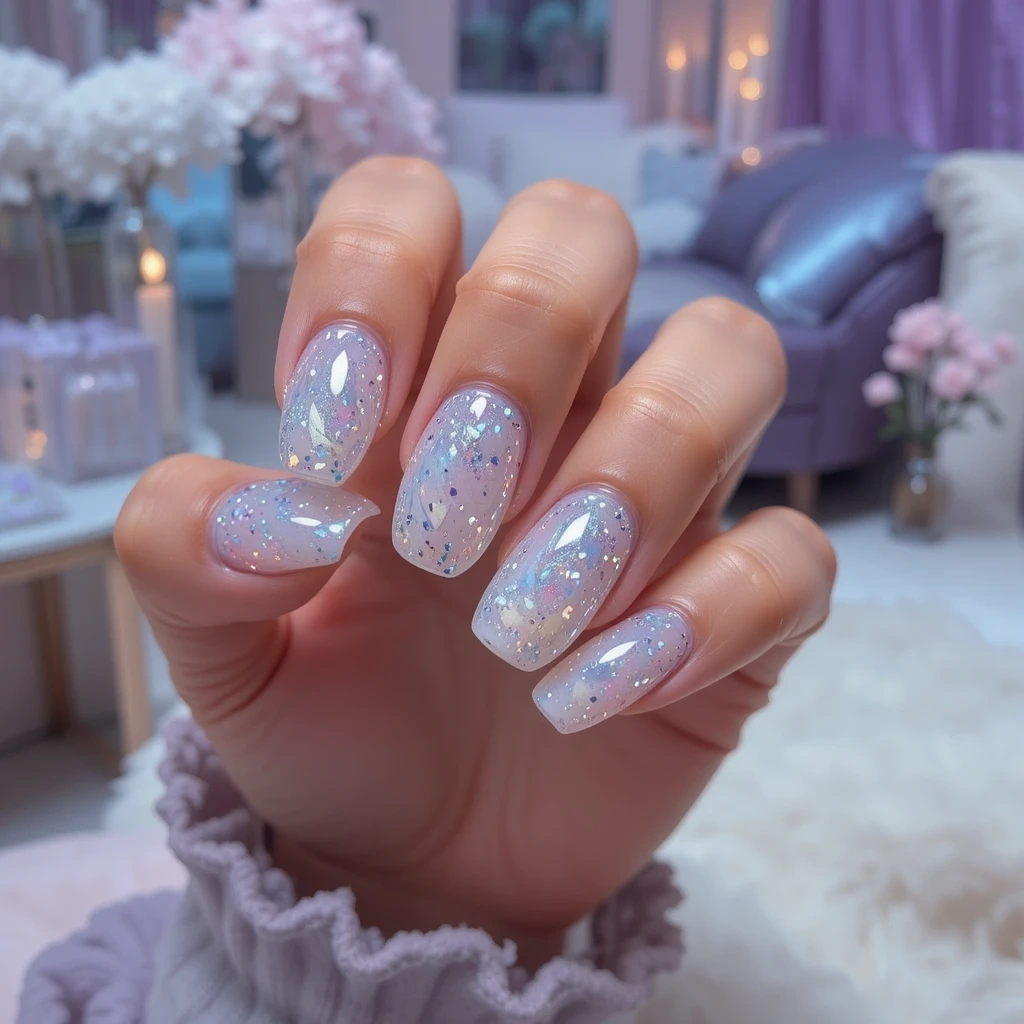
Holographic silver swirls through crystal-clear polish with scattered holographic glitter, creating a futuristic, ice-like effect that shifts in light. The minimal color allows the holographic elements to truly shine while the transparent base keeps it feeling light and modern. This design delivers maximum sparkle and dimension with surprisingly minimal effort or color saturation.
Difficulty: Intermediate
Time to complete: 40-45 minutes for both hands
Best for: New Year’s Eve, winter formals, or anyone who wants sparkle without the commitment of full glitter nails
Why it works: The clear base means it coordinates with literally everything in your closet
What makes it different: Uses holographic powder layered with gel instead of pre-mixed holographic polish, creating more intense shimmer
Note: If your holographic glitter clumps in one spot instead of spreading, you sprinkled too much at once. Use less and tap it on from higher above the nail.
8. Teal & Magenta Vibrant Contrast
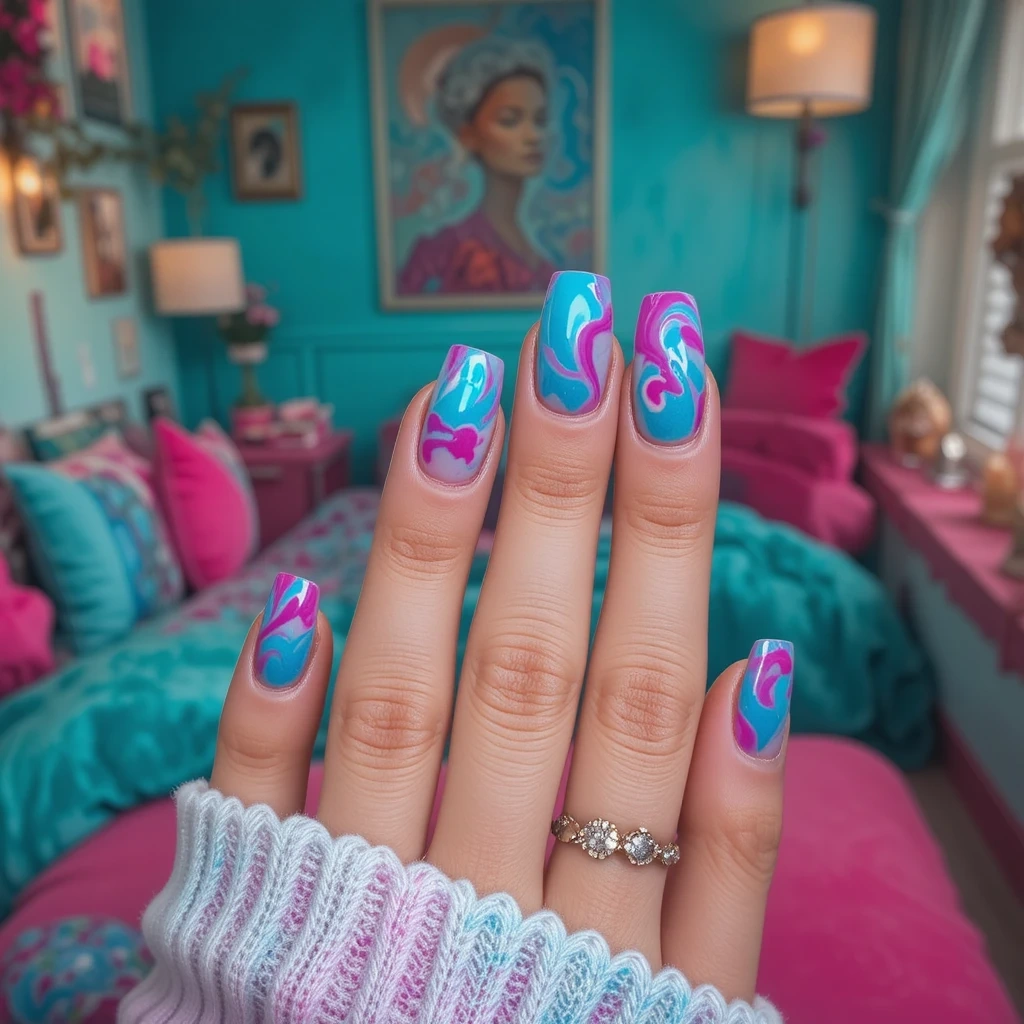
Bright teal swirls through hot magenta with translucent layers that create bold, eye-catching contrast and movement. The complementary color pairing creates natural visual tension that’s exciting and dynamic without clashing or looking chaotic. This design is for the bold and confident—it demands attention and delivers maximum artistic impact with unapologetic color saturation.
Difficulty: Advanced
Time to complete: 45-50 minutes for both hands
Best for: Creative professionals, artists, or anyone tired of playing it safe with their nails
Why it works: Teal and magenta are complementary on the color wheel, so they intensify each other instead of muddying
What makes it different: The sectioning technique keeps each color vibrant instead of letting them blend into purple
What Lava Lamp Nails Look Like After 2 Weeks
I wore Design #1 (Classic Orange & Purple) for three weeks to see how it actually held up. Here’s the real timeline:
Days 1-7: Nails looked exactly like the photos. The glossy finish stayed shiny, colors stayed vibrant, and I got compliments daily. Zero chips or wear at the tips. Applied cuticle oil twice a day and wore gloves for dishes.
Days 8-14: Started seeing growth at the cuticle (about 2mm), but the design itself still looked perfect. The tips showed very minor dulling of the shine where I type on my keyboard a lot. No chips yet. Reapplied top coat on day 10 to refresh the shine.
Days 15-21: The 3mm of growth at the cuticle was noticeable but not terrible looking. Got my first tiny chip on my right index finger tip—barely 1mm, probably from opening a can. The orange color looked slightly less vibrant, more peachy. Still wearable for everyday, but I wouldn’t wear them to a nice event at this point.
Days 22-24: Removed them. The growth was bothering me more than any actual damage to the design. When I soaked them off, the purple had stained my nails slightly blue-gray, which faded after one day. Total wear time: 23 days.
Honest take: These lasted way longer than regular polish (which chips on me within 3 days), but the growth gap was the real limiting factor. If you’re okay with visible regrowth, you could push these to 4 weeks before they actually look bad.
Pros and Cons of Lava Lamp Nails
Pros
✅ No artistic skill required – If you can swirl colors together, you can do this. There’s no “wrong” pattern since lava lamps are naturally random.
✅ Forgiving technique – Small mistakes blend into the organic design. A chip or imperfection just looks like part of the swirl pattern.
✅ Unique every time – Even if you use the same colors, each manicure comes out different. You’ll never have identical nails to someone else.
✅ Works on any nail length – I’ve done this on nails from bitten-short to coffin-long. Just adjust your swirl size to match your nail size.
✅ Adaptable to any aesthetic – Change the colors and finish (matte vs glossy) and you can go from festival-ready neons to office-appropriate neutrals.
✅ Long-lasting with gel – With proper application, these last 2-3 weeks without chipping, which beats most intricate nail art that chips within a week.
✅ Cost-effective long-term – After the initial $30-40 investment in supplies, each manicure costs maybe $2 in materials versus $45-65 at a salon for custom nail art.
Cons
❌ Steep learning curve for color blending – My first three attempts looked muddy brown instead of distinct swirls. It took practice to learn when to stop mixing.
❌ Gel removal takes 15-20 minutes – You can’t just swipe it off. You need acetone, foil wraps, and patience. My fingers feel dried out after removal every time.
❌ Dark colors stain your natural nails – The navy and burgundy design left my nails grayish for two days after removal. It always fades but it’s annoying.
❌ Need to work fast before gel self-levels – Gel starts to flatten out after 90-120 seconds. If you’re perfecting your swirls too long, they’ll disappear before you cure.
❌ Requires multiple supplies – You can’t just grab one bottle of polish. You need base coat, top coat, thin brush, lamp, multiple colors, clear gel for the base layer… it adds up.
❌ Not repairable if it chips – Unlike regular polish where you can dab on more color, gel chips show the bare nail underneath and you can’t fix it without redoing the whole nail.
❌ Difficult to photograph accurately – The translucent, dimensional quality that makes these gorgeous in person doesn’t translate well to photos. They always look flatter in pictures.
❌ Takes 30-50 minutes – This isn’t a quick 10-minute manicure. Factor in prep, application, and curing time, and you’re looking at almost an hour for both hands.
Troubleshooting Common Issues
Problem: Colors Mixing Into Muddy Brown
What it looks like: Instead of distinct orange and purple swirls, you get brownish-gray mush where the colors meet.
Why it happens: You’re over-swirling. Every stroke of your brush blends the colors more. Orange + purple = brown when fully mixed.
Exact fix:
- Stop swirling when you can still see at least 60% of each original color
- Use fewer strokes—literally 3-5 swirls maximum per nail
- If it’s already muddy, wipe the whole nail clean with a lint-free wipe before curing
- Reapply and use a lighter touch
How well it works: This fix is preventative only. Once colors are muddy and cured, you have to remove the whole design and start over.
Problem: Design Looks Flat and One-Dimensional
What it looks like: Your swirls look like they’re painted ON the nail instead of flowing THROUGH it like liquid.
Why it happens: You skipped the translucent base layer or used opaque polish instead of sheer.
Exact fix:
- Remove the design completely
- Apply a coat of sheer white or clear gel to all nails, cure
- Make sure your colored gels are also translucent—add a drop of clear gel to regular gel polish if needed to thin it
- Build colors in thin layers
How well it works: 100% effective but requires starting over. There’s no way to add depth after the fact.
Problem: Gel Polish Lifting Within 3-4 Days
What it looks like: The edges near your cuticle or the tips are pulling away from the nail, sometimes with air bubbles underneath.
Why it happens: Usually from skipping proper nail prep. Your nails have natural oils that prevent gel from bonding.
Exact fix:
- Before your next manicure, wipe nails with straight rubbing alcohol (not hand sanitizer)
- Lightly buff the entire nail surface with a 180-grit file—just enough to remove the shine
- Wipe with alcohol again
- Apply a thin base coat and CURE for the full 60 seconds
- Cap the free edge with every single layer—base coat, colors, and top coat
How well it works: Proper prep fixes lifting for most people. If you’re still getting lifting after doing all this, you might have naturally oily nails and need a dehydrator product applied before base coat.
Problem: Swirls Disappearing Before You Cure
What it looks like: You create beautiful swirls, but by the time you get the nail under the lamp, they’ve flattened out and disappeared.
Why it happens: Gel polish self-levels (flattens) after about 90-120 seconds. If you’re taking too long perfecting your design, it smooths itself out.
Exact fix:
- Work faster—aim for 60 seconds from application to curing
- Do one nail at a time instead of trying to swirl multiple nails before curing
- Use slightly thicker gel polish that holds its shape longer (Beetles tends to stay put better than super-thin formulas)
- If you need more time, use regular polish for practice until you’re faster
How well it works: Once you train yourself to work quickly, this problem disappears. It’s a skill issue, not a product issue.
Problem: Can’t Get Smooth Color Transitions
What it looks like: Your swirls look choppy, striped, or have harsh lines where colors meet instead of smooth gradients.
Why it happens: Either your brush is too big (creating wide strokes instead of delicate blends), or your gel polish is too thick to flow smoothly.
Exact fix:
- Switch to a size 00 or 000 liner brush (the super thin ones)
- Clean your brush between every 2-3 strokes by wiping on a lint-free pad
- Add one tiny drop of clear gel to thick colored gel on a palette to thin it slightly
- Use lighter pressure—barely drag the brush across the surface
How well it works: The right brush makes an immediate difference. Thin gel helps but isn’t always necessary.
Problem: Neon Colors Look Dull or Pastel Instead of Vibrant
What it looks like: Your hot pink looks like baby pink, your electric blue looks like sky blue.
Why it happens: You applied neons too sheer or over a white base that lightened them.
Exact fix:
- Apply neons over a CLEAR base, not white
- Use 2-3 thin coats of neon, curing between each
- Buy actual neon gel polish formulas (Beetles Neon collection, Modelones UV Neon) instead of trying to make regular bright colors work
- Don’t add clear gel to thin neons—this dilutes the pigment
How well it works: Proper neon formulas and clear base fix this immediately. Regular “bright” gel will never look truly neon.
Product Recommendations by Budget
Budget-Friendly (Under $40 total)
Beetles Gel Polish Kit ($28 on Amazon)
Includes a 48W LED lamp, base coat, top coat, and 6 colors. I used this exact kit for my first 8 months of gel nails. The lamp cures completely in 60 seconds, and the polish stays wet long enough for swirling without rushing. The only downside is limited color selection, but you can buy individual Beetles colors for $8 each.
Makartt Nail Art Brushes ($8)
Set includes 3 detailing brushes. The size 00 liner is perfect for creating lava lamp swirls. The bristles hold their shape well even after multiple acetone cleanings, unlike drugstore brushes that fray after two uses.
Cuccio Cuticle Oil ($8)
Professional quality at drugstore prices. Absorbs in about 2 minutes instead of sitting greasy on your skin like thick oils. The rollerball applicator makes it easy to apply precisely where you need it.
Total: $44 (slightly over budget but worth it)
Mid-Range ($60-80 total)
Modelones Gel Polish Set ($35)
Better pigmentation than Beetles—you get full coverage in 1-2 coats instead of 3. The consistency is perfect for lava lamp nails—thick enough to hold swirl patterns but thin enough to blend smoothly. Comes with 12 colors.
SUNUV 48W UV/LED Lamp ($25)
More powerful than the Beetles lamp. Cures gel in 30-45 seconds instead of 60, which saves time. The sensor turns it on automatically when you put your hand in. After two years of weekly use, mine still works perfectly.
OPI Natural Nail Base Coat ($10)
Grips to your natural nail better than budget base coats. I went from getting lifting on day 3-4 to no lifting for the full 2 weeks after switching to this.
Seche Vite Gel Effect Top Coat ($10)
Creates glass-like shine that lasts. Some gel top coats start looking dull after a week—this one stays glossy the entire time.
Total: $80
Professional Quality ($100-150 total)
CND Shellac Colors ($12-15 each, buy 4-6 colors = $60-75)
Industry standard gel polish. The consistency is perfect for swirling—it stays exactly where you put it but blends smoothly. Colors are more sophisticated than drugstore options. Never chips, never lifts when applied correctly.
Gelish Foundation Base ($15)
Strongest adhesion I’ve tested. Creates a tacky layer that grabs onto gel polish aggressively. I can go the full 3 weeks without any lifting at the cuticle, even with my oily nails.
MelodySusie Portable LED Lamp ($40)
Rechargeable so you can do your nails anywhere without finding an outlet. Professional-grade curing power. The timer has 10s/30s/60s/99s options for different gel types.
Young Nails Protein Bond ($18)
Professional-strength nail prep that dehydrates the nail plate before base coat. If you have naturally oily nails that reject gel, this fixes it. Apply a thin coat, let air dry 60 seconds, then proceed with base coat.
Total: $133-148
My honest take: Unless you’re doing gel nails 2+ times per month, stick with the mid-range products. The professional stuff is noticeably better, but not 2x better for the 2x price.
Maintenance Schedule
Days 1-7: Fresh Nails Phase
Every morning: Apply cuticle oil (Cuccio or Burt’s Bees) to all cuticles and massage in. This prevents the polish from lifting at the cuticle edge.
Every night before bed: Reapply cuticle oil. Your nails absorb more moisture while you sleep.
After washing hands: Dry your hands completely, especially around the cuticles. Water sitting at the cuticle line seeps under gel and causes lifting.
Why it matters: The first week is when lifting most commonly starts. If you make it past day 7 without lifting, you’ll probably get the full 2-3 weeks.
Days 8-14: Maintaining Shine Phase
Day 10: Apply a fresh layer of quick-dry top coat (Seche Vite works over gel). This seals any micro-cracks and brings back the original shine. Don’t cure it—just let it air dry for 10 minutes.
Every other day: Continue the cuticle oil routine from week 1.
As needed: If you see any rough edges or catches on the tip, gently file smooth with a 180-grit file. Don’t file the top surface.
Why it matters: The shine naturally dulls from hand-washing and friction. Refreshing the top coat extends the professional look by another week.
Days 15-21: Decision Point
Evaluate the growth: If the gap at your cuticle bothers you, remove them. If not, keep going.
Day 17: Apply another layer of regular top coat to refresh shine and seal the tips.
Watch for chips: Any chips that show bare nail underneath need to be addressed—either fill in with matching gel (requires lamp) or remove the whole manicure.
Why it matters: This is when lava lamp nails transition from “fresh” to “lived-in.” They’re still wearable but not photo-ready.
Days 22-28: Maximum Wear
Only if: You’re okay with 4-5mm of visible regrowth and you have zero chips.
Continue: Daily cuticle oil to keep the skin around your nails healthy.
Plan removal: Don’t push past 4 weeks. The weight of the gel on your grown-out nails can cause breakage.
Why it matters: By week 4, your nails have grown significantly and the gel needs to come off to prevent damage.
Removal Process (Every 2-4 weeks)
Soak cotton balls in pure acetone (not nail polish remover—it must be 100% acetone).
Place one cotton ball on each nail and wrap tightly with foil. Set a timer for 15 minutes.
After 15 minutes: Gently push the softened gel off with a wooden cuticle stick. If it doesn’t slide off easily, rewrap and wait 5 more minutes. Never force it or scrape aggressively.
Buff gently with a 240-grit file to remove any residue.
Apply cuticle oil immediately and let your nails breathe for 24 hours before your next manicure.
Why every step matters: Forcing gel off before it’s fully softened causes layers of your natural nail to peel off with it. Patience during removal protects your nail health.
Common Mistakes and How to Fix Them
Mistake 1: Using Regular Polish Instead of Gel
What it looks like: You try to swirl regular nail polish and it dries halfway through, leaving streaky, poorly blended results.
Why it happens: Regular polish dries in 30-60 seconds. Gel stays wet for 2-3 minutes, giving you time to create smooth swirls.
Exact fix:
- If you must use regular polish, apply it to ONE nail at a time
- Immediately swirl—you have about 20 seconds before it gets too thick
- Use a gel-effect top coat (Sally Hansen Gel Shine or Essie Gel Couture) which stays wet slightly longer
- Work on a single nail, swirl, move to next nail
- Accept that results won’t have the same depth as gel
How well it works: You can create a lava lamp effect with regular polish, but it’s harder and looks flatter. If you’re just testing color combinations before buying gel, this works. For the real effect, gel is worth it.
Mistake 2: Adding Too Many Colors
What it looks like: You use orange, purple, pink, blue, and green all at once. Instead of a lava lamp effect, you get a confusing, muddy mess.
Why it happens: More than 3 colors competing for space on one nail creates visual chaos. They all blend together into brown/gray.
Exact fix:
- Stick to 2 colors maximum for beginners
- Advanced users can do 3 colors if they’re in the same color family (like coral, peach, and yellow)
- If you already applied too many colors and it’s muddy, wipe the whole nail clean with a lint-free wipe before curing
- Start over with just 2 colors
How well it works: Limiting colors to 2-3 instantly improves results. This is the difference between “artistic” and “messy.
Mistake 3: Blending Colors Completely Together
What it looks like: You swirl and blend until orange and purple completely mix into one solid brown color. No distinct swirls remain.
Why it happens: You’re treating this like mixing paint instead of marbling. The goal is flowing interaction, not complete fusion.
Exact fix:
- Count your swirls—literally stop at 5 strokes maximum
- Swirl only where colors meet, not through the entire nail
- If you’ve already over-blended, wipe clean before curing and start over
- Practice the “stop while you still see both colors” rule
How well it works: Once you train yourself to stop early, this mistake disappears. It’s purely a technique issue.
Mistake 4: Skipping the Translucent Base Layer
What it looks like: Your lava lamp nails look flat and painted-on instead of having depth and dimension.
Why it happens: Colored gel applied directly to your nail bed creates opaque, flat color. The translucent base layer allows light to pass through.
Exact fix:
- There’s no fix for this after the fact—you have to remove and start over
- Before applying any colors, apply one coat of sheer white or clear gel, cure
- Make sure your colored gels are also translucent (hold the bottle up to light—you should see light passing through)
- If your gel is opaque, mix in a drop of clear gel to thin it
How well it works: The translucent base makes an immediate, dramatic difference. This one step is what separates amateur lava lamp nails from professional-looking ones.
Mistake 5: Using Thick Layers of Polish
What it looks like: Bumpy, uneven texture on the nail surface. Colors look gloopy. Swirls are thick and raised instead of smooth.
Why it happens: You’re trying to get full coverage in one coat instead of building thin layers.
Exact fix:
- If it’s not cured yet, wipe it off completely and start over
- Apply gel in thin coats—the brush should barely have any polish on it
- Build 2-3 thin layers instead of 1 thick layer
- Wipe excess polish back into the bottle before applying to nail
How well it works: Thin layers cure properly, create smooth texture, and allow you to control swirls better. One thick layer never works well.
Mistake 6: Not Capping the Free Edge
What it looks like: Perfect manicure on day 1, chipped tips on day 3-4. The polish peels off starting at the tip.
Why it happens: The free edge (tip) of your nail gets the most contact with surfaces. Without sealing it, polish chips immediately.
Exact fix:
- With every single layer (base coat, each color, top coat), run the brush along the free edge of the nail
- This “caps” the edge and creates a seal
- If you already have chips, file the area smooth and dab on matching gel color, cure, and apply top coat over it
- The touch-up won’t be invisible but it’s better than a chip
How well it works: Capping the edge prevents 90% of tip chipping. The touch-up fix is temporary—the chip area will probably peel off within a week, but it buys you time.
Advanced Techniques to Level Up Your Lava Lamp Nails
The Cellophane Swirl Method
After applying both colors but before curing, gently press a small piece of crumpled cellophane or plastic wrap onto the wet gel, then lift straight up. This creates organic, unpredictable swirl patterns that look incredibly artistic. Cure immediately after removing the cellophane, then seal with top coat.
Why it works: The random texture of crumpled cellophane creates patterns your brush can’t achieve. Each nail comes out completely unique.
Gradient Base Technique
Instead of a solid translucent base, create a subtle gradient from white at the cuticle to clear at the tip before adding your lava lamp swirls on top. Apply sheer white gel at the cuticle area, clear gel at the tip, blend where they meet with your brush, cure, then add your colored swirls.
Why it works: This adds an extra dimension of depth that makes the design look more complex than it actually is.
Layered Depth Method
Apply your first lava lamp layer and cure, then add a second layer of swirls in slightly different colors or positions. For example: first layer is orange and purple, cure it, then add a second layer with pink and burgundy swirls on top.
Why it works: The top layer appears to float above the bottom layer, creating a true 3D effect that mimics actual lava lamps with multiple wax blobs floating at different depths.
Magnetic Gel Hybrid
Use magnetic gel polish (like Beetles Magnetic Cat Eye) as one of your colors. Apply it, wave a magnet over the wet gel to create the cat-eye effect, then swirl your second color into it before curing.
Why it works: The magnetic polish creates texture and pattern within the overall lava lamp design, adding a layer of complexity you can’t get with regular gel.
Frequently Asked Questions
How long does it take to get good at lava lamp nails?
My first attempt looked like muddy brown soup. My third attempt looked decent enough to wear out. By my fifth manicure, I could create the swirls I actually wanted. Expect 3-5 practice sessions to get comfortable with the technique, especially learning when to stop blending before colors turn muddy.
Can you do lava lamp nails on short nails?
Yes, but stick to two colors instead of three, and use larger, bolder swirls. I have short nails (about 3-4mm past my fingertip) and Design #3 (Lavender & Mint) and Design #6 (Sage & Terracotta) work perfectly. Avoid the three-color gradient designs—they get too cramped and lose their flowing effect on short nails.
What’s the best gel polish brand for beginners?
Beetles Gel Polish ($8 per bottle on Amazon) is my standard recommendation for beginners. It stays wet long enough for swirling without rushing, cures completely in 60 seconds, and comes in tons of colors. Once you’re comfortable with the technique, you can upgrade to CND Shellac or Gelish for more sophisticated colors, but Beetles is perfect for learning.
Do lava lamp nails work with dip powder?
No, not really. Dip powder dries too quickly—you dip, tap off excess, and it’s already set within 10-15 seconds. There’s no time to create swirls. You could potentially do a marbled dip powder effect by swirling different color powders together before dipping, but it won’t have the same flowing liquid quality as gel lava lamp nails.
How do you prevent dark colors from staining your natural nails?
Always use a base coat—never skip this step with dark colors. If you’re using navy, burgundy, black, or deep purple, apply TWO coats of base coat and cure between each. When removing, soak the acetone wraps for the full 15 minutes and push gel off gently instead of scraping. If you still get staining, it usually fades within 24-48 hours.
Can you fix a lava lamp nail if you don’t like how it turned out?
Only before you cure it. While the gel is still wet, wipe the entire nail clean with a lint-free wipe soaked in rubbing alcohol, then start over with fresh gel. Once it’s cured, you can’t fix it—you’d have to soak it off with acetone and completely redo that nail.
Final Thoughts
Lava lamp nails offer a unique way to create artistic nail designs without needing steady hands or precise painting skills. The technique is forgiving, the results are always unique, and once you understand the basics of translucent layering and when to stop blending, you can create endless color combinations.
Start with Design #3 or #6 if you’re new to this—the forgiving pastel and neutral colors build confidence without the risk of muddy results. Once you’re comfortable, experiment with bolder contrasts and advanced techniques.
The $28-40 investment in basic supplies pays for itself after two manicures compared to salon prices, and you’ll have the skills to create custom designs whenever you want.