15+ Pink and Yellow Nails Ideas You’ll Actually Want to Try
Let’s be real—there are a million nail articles out there. Most of them just throw pretty pictures at you and call it a day. You’re left squinting at a photo, trying to figure out how they actually got that effect, what products they used, or if it’s even possible on your nail length.
I wrote this guide because I got tired of that. I’ve been doing my own nails for years, messing up plenty along the way, and I wanted to create something different. This isn’t just a gallery. Every single design here comes with a full step-by-step tutorial, honest notes on difficulty, and specific product recommendations with real prices.
Whether you’re a beginner who’s never held a dotting tool or someone who can freehand a French tip in their sleep, you’ll find something here you can actually do. And if something goes wrong? I’ve included the fixes for the five most common failures I’ve personally dealt with.
So grab your favorite pink and yellow Nails polishes, and let’s get into it.
15+ Pink and Yellow Nail Ideas
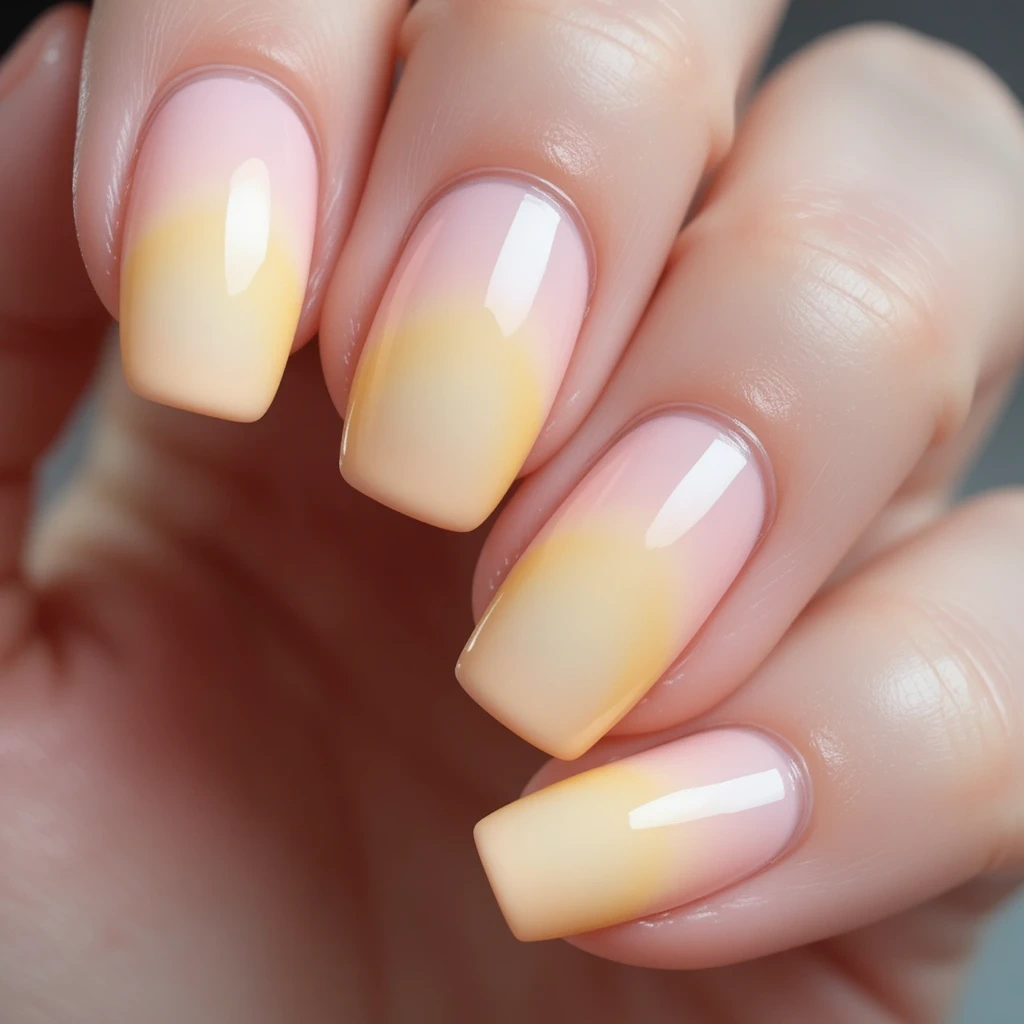
1. Pastel Ombre Gradient
- Difficulty: Intermediate
- Time to complete: 45-60 minutes
- Best for: Someone who loves a soft, dreamy look and has a little patience for blending.
- Why it works: The gradient blurs the line between the two colors, making the transition feel seamless and ethereal.
- What makes it different: Unlike a sharp line, the ombre effect is forgiving and looks intentionally soft, even if your blend isn’t perfect.
A soft, airbrushed fade where pale baby pink melts seamlessly into a creamy butter yellow. The colors blend in the middle to create a subtle peachy transition zone. The finish is smooth and glossy with no visible brush strokes or harsh color lines. It looks like a watercolor painting on your nails—delicate, romantic, and effortlessly pretty.
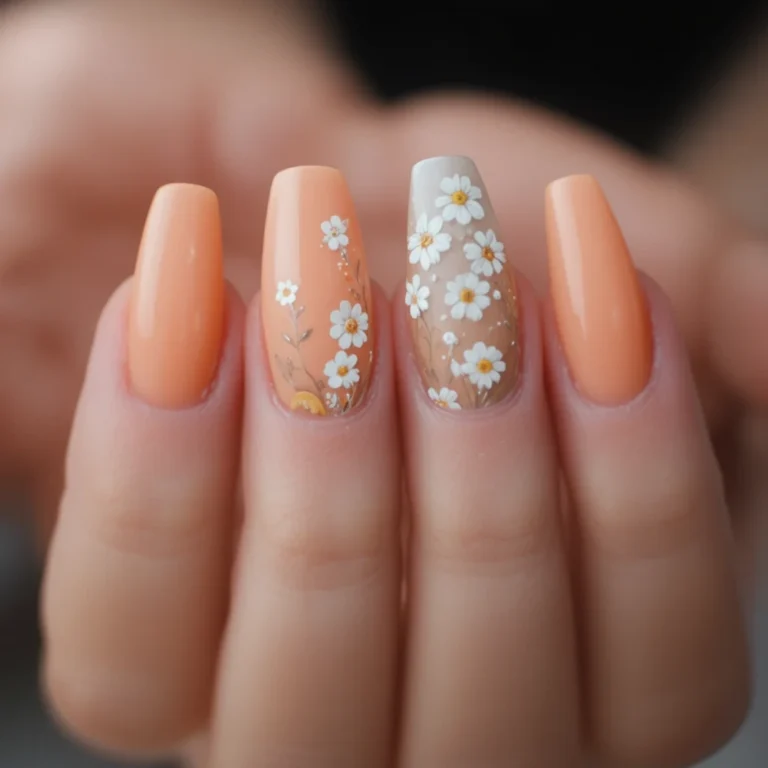
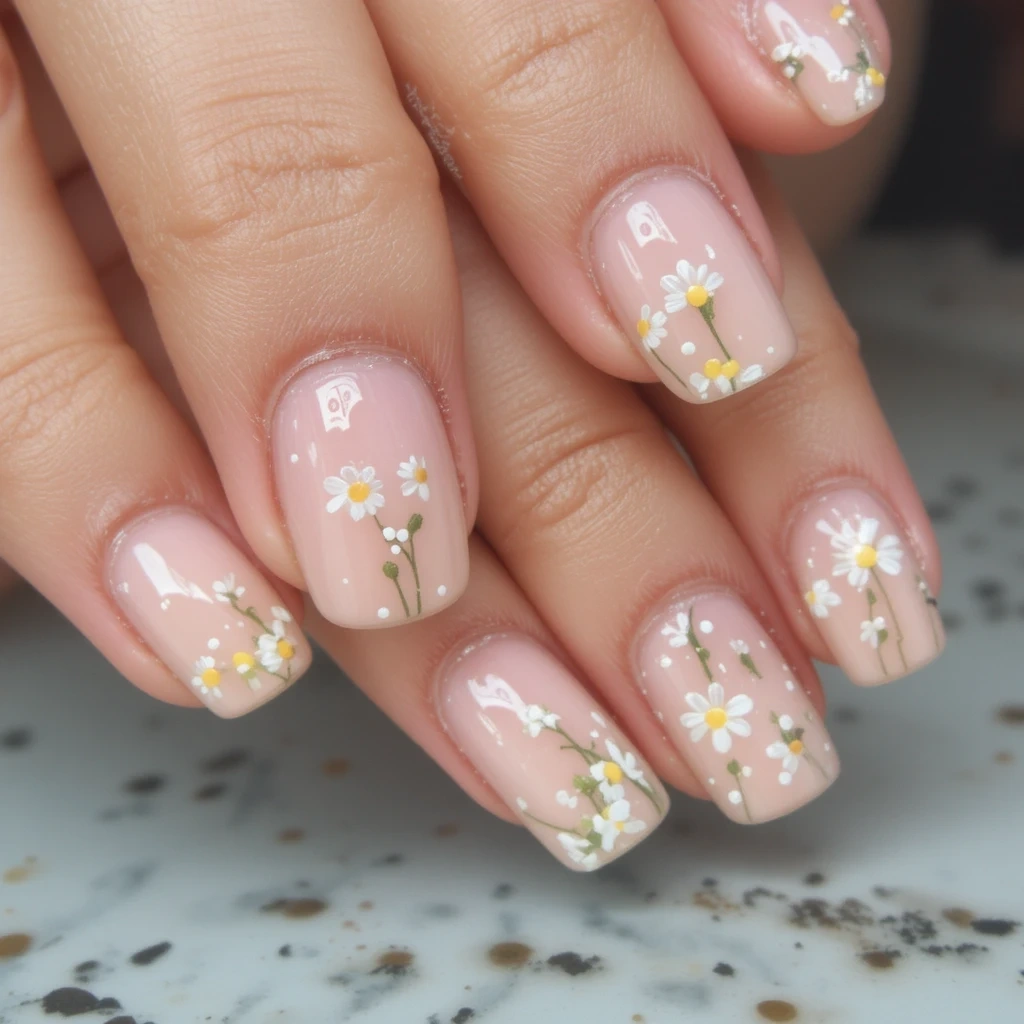
2. Retro Floral Accent Nails
- Difficulty: Beginner
- Time to complete: 30-40 minutes
- Best for: Someone who wants a vintage vibe without covering every single nail in art.
- Why it works: The accent nail draws the eye without overwhelming the simple base colors.
- What makes it different: The slightly imperfect, hand-painted look adds charm and character that stickers just can’t match.
A clean, minimalist base of soft pastel pink on most nails, with one or two accent nails featuring hand-painted daisies in sunny yellow with tiny white dots for the petals. The flowers are simple and slightly abstract—just five or six rounded petals around a small yellow center. The stems are thin, wispy green lines. It has a cheerful, 1970s kitchen-core aesthetic that’s both nostalgic and fresh.
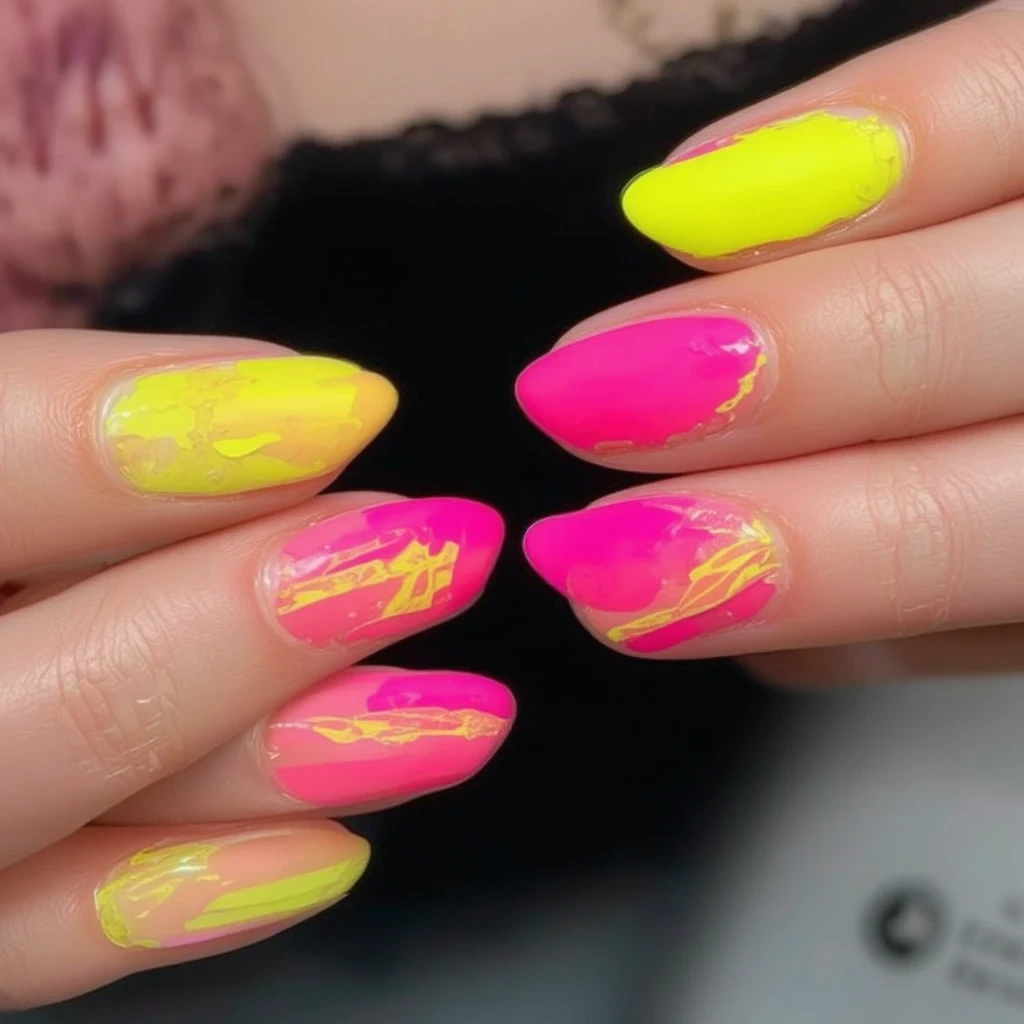
3. Hot Pink and Neon Yellow Color Block
- Difficulty: Beginner
- Time to complete: 25-30 minutes
- Best for: Someone who wants a bold, modern look with clean lines.
- Why it works: The high-contrast colors create visual impact, and the geometric split is instantly eye-catching.
- What makes it different: The asymmetry—not every nail has the split in the same place—makes it feel custom and artistic rather than matchy-matchy.
Bold, unapologetic blocks of color. Half the nail is painted in electric hot pink, the other half in highlighter-bright neon yellow. The dividing line is razor-sharp and can be diagonal, vertical, or even a zigzag. Some nails might be 70% pink and 30% yellow, others the opposite. It’s graphic, modern, and demands attention.
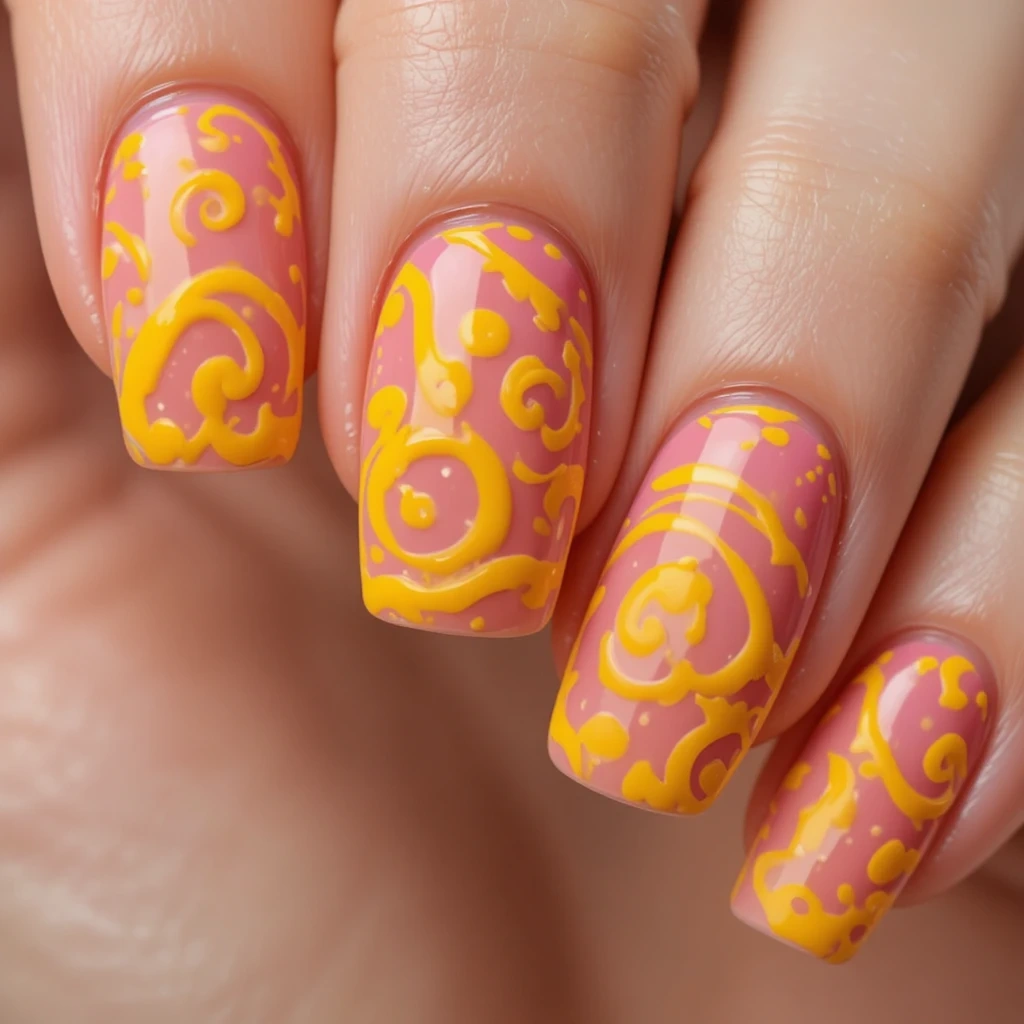
4. Pink Base with Yellow Swirls
- Difficulty: Intermediate
- Time to complete: 35-45 minutes
- Best for: Someone who loves abstract, artsy designs that don’t require perfect symmetry.
- Why it works: The fluid lines contrast beautifully with the solid pink base, creating movement and energy.
- What makes it different: Swirls are more organic and modern than traditional stripes or dots. They feel current and slightly edgy.
A smooth, glossy medium-pink base covered in freehand yellow swirls. The swirls are thick and fluid—think 1990s postmodern decor or abstract art. They curve and loop around the nail, sometimes overlapping themselves, with varying thickness throughout. Some nails have just one or two bold swirls; others are more densely packed. The effect is playful, artistic, and totally unique.
5. Pink and Yellow French Tips
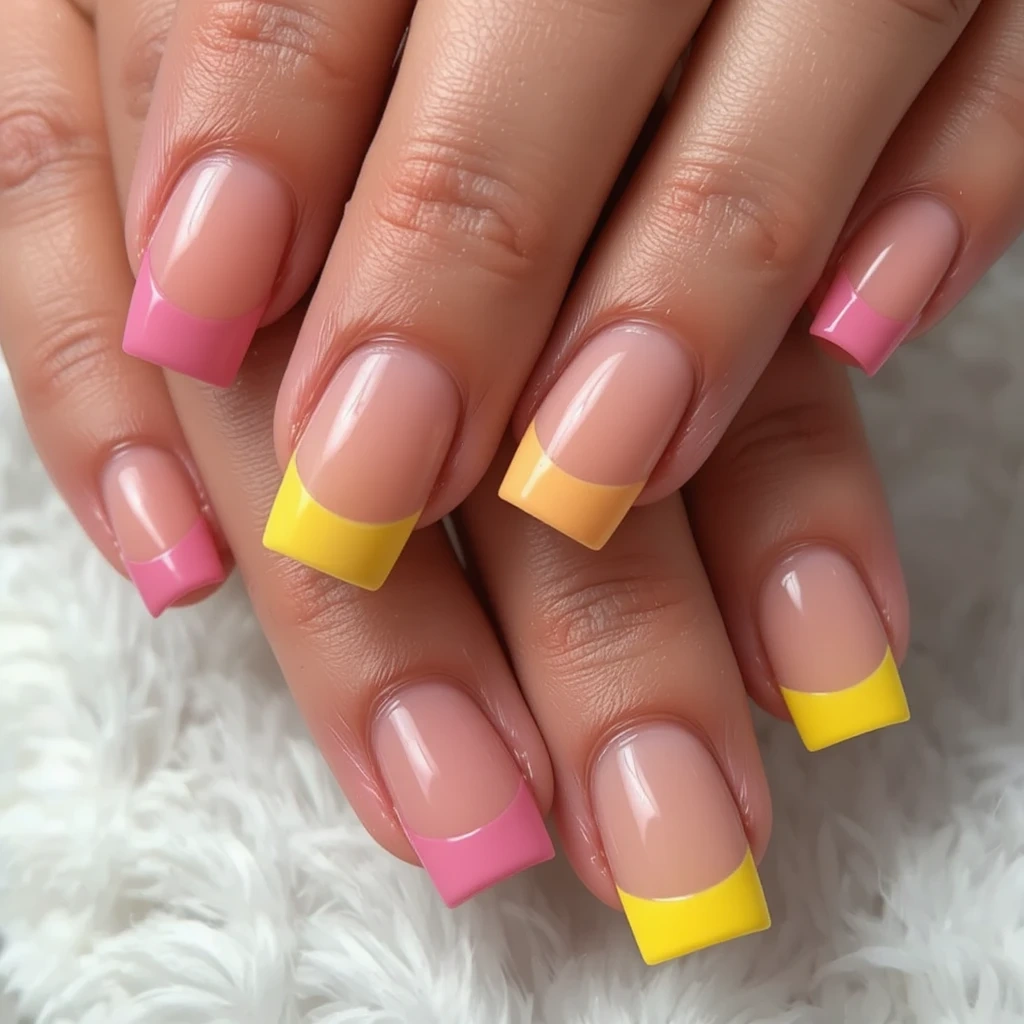
- Difficulty: Beginner
- Time to complete: 20-25 minutes
- Best for: Someone who wants a classic shape with a fun, colorful twist.
- Why it works: It takes the familiar French manicure and makes it fresh and playful.
- What makes it different: Alternating the tip colors (pink tip on yellow base, yellow tip on pink base) adds a surprise element that makes the design more interesting.
A fresh take on the classic French manicure. The nail bed is painted in a soft, sheer pink or a pale yellow, and the tips are bold and bright in the opposite color. Some nails have pink tips on yellow bases; others have yellow tips on pink bases. The tips can be thin and delicate for a subtle look or thick and dramatic for more impact. The smile line is clean and curved.
6. Gingham Check Pattern
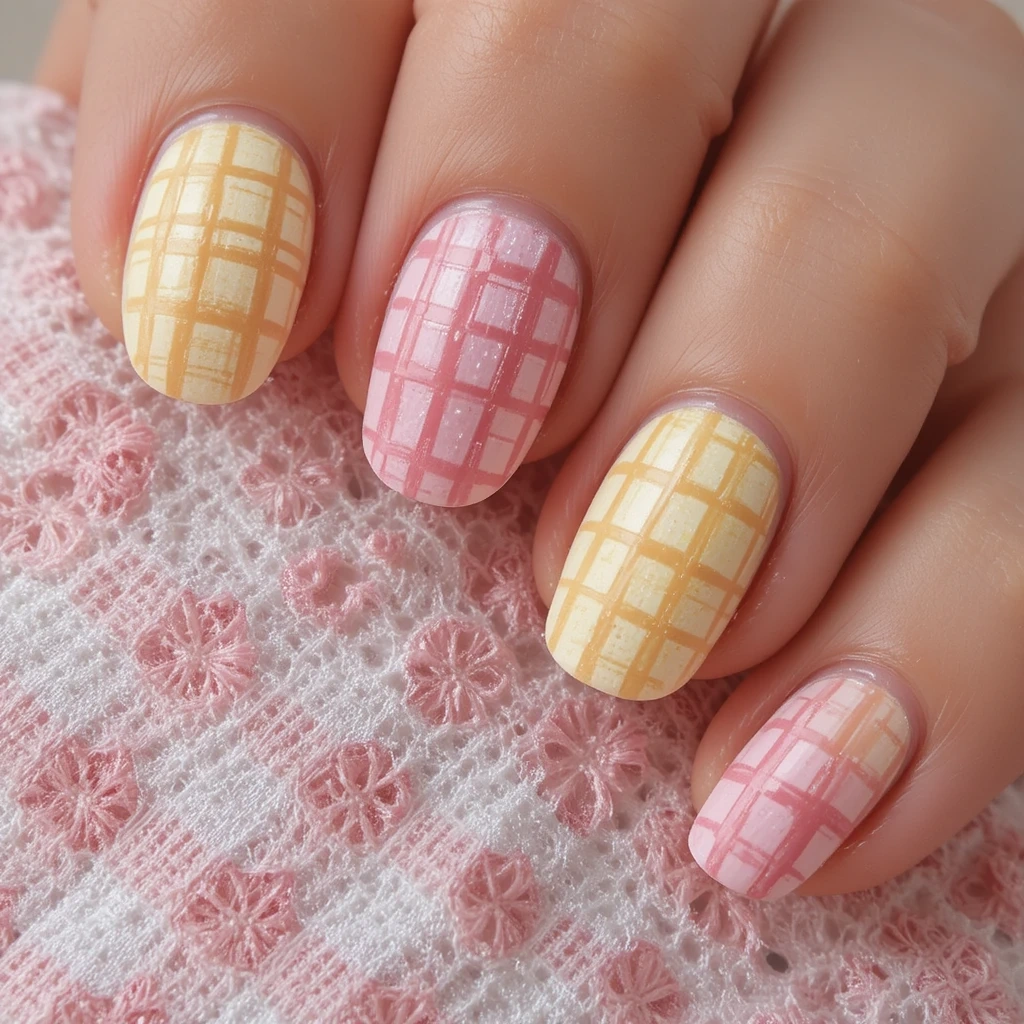
- Difficulty: Intermediate
- Time to complete: 50-60 minutes
- Best for: Someone who loves farmhouse chic, picnic vibes, and has decent patience for detail work.
- Why it works: Gingham is a classic pattern that feels cozy and timeless in any color combination.
- What makes it different: The hand-painted nature means your lines won’t be perfectly computer-generated, which actually adds to the homespun charm of the pattern.
Sweet and simple gingham in soft pink and pale yellow. The pattern looks like a cozy picnic blanket—tiny overlapping checks created by painting thin vertical and horizontal lines over a solid base. The lines are slightly uneven and hand-drawn, which adds to the handmade, charming feel. It’s subtle from a distance but delightfully detailed up close.
7. Abstract Pink and Yellow Brush Strokes
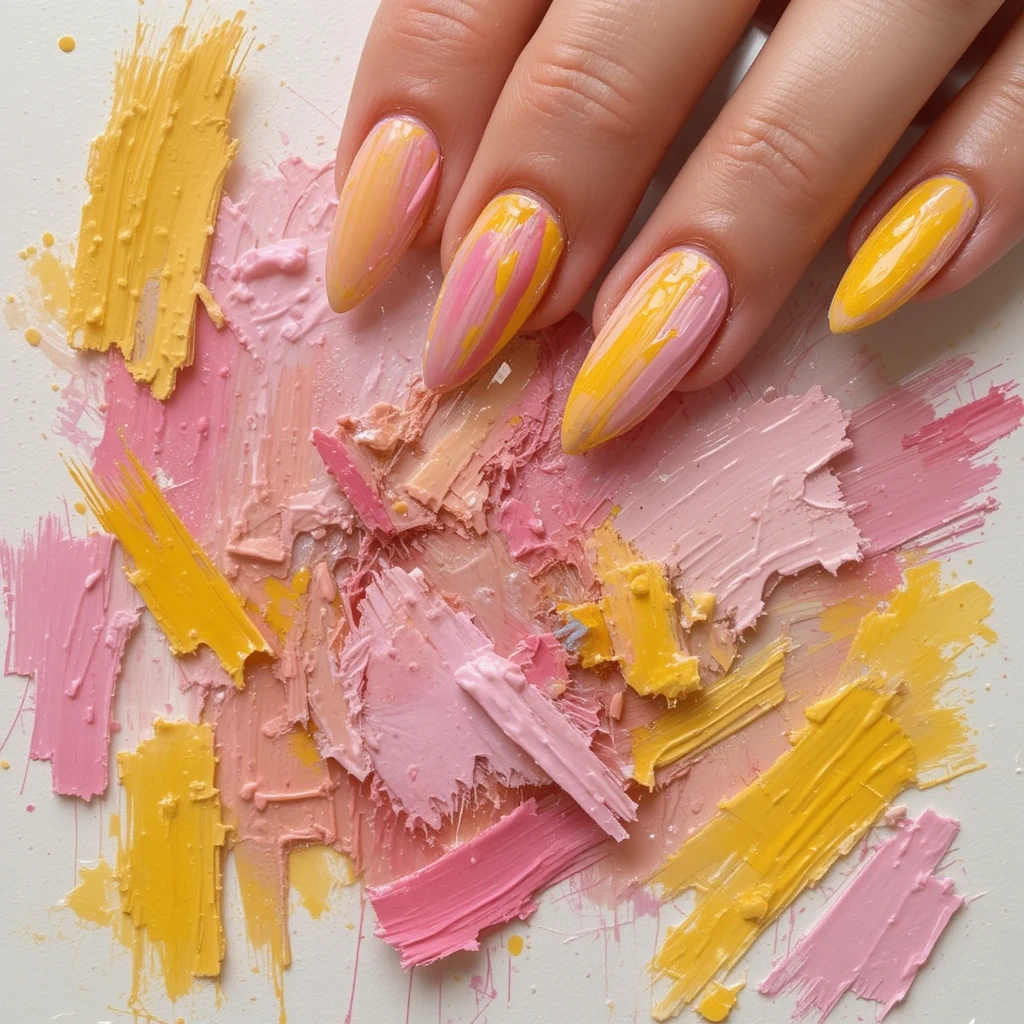
- Difficulty: Beginner
- Time to complete: 20-30 minutes
- Best for: Someone who wants an artistic, modern look but doesn’t have a steady hand for detailed patterns.
- Why it works: The design is intentionally imperfect, so mistakes just become part of the art.
- What makes it different: It mimics the look of an artist’s canvas, with visible brush texture and spontaneous strokes.
Bold, confident brush strokes of pink and yellow layered over a neutral base. Think abstract expressionist painting—wide, visible brush marks that start thick and fade into feathery edges. Some strokes are solid, others are dragged so the underlying color peeks through. The placement is random and spontaneous, with strokes going in different directions and occasionally overlapping. It’s messy in the best way.
8. Hot Pink with Yellow Polka Dots
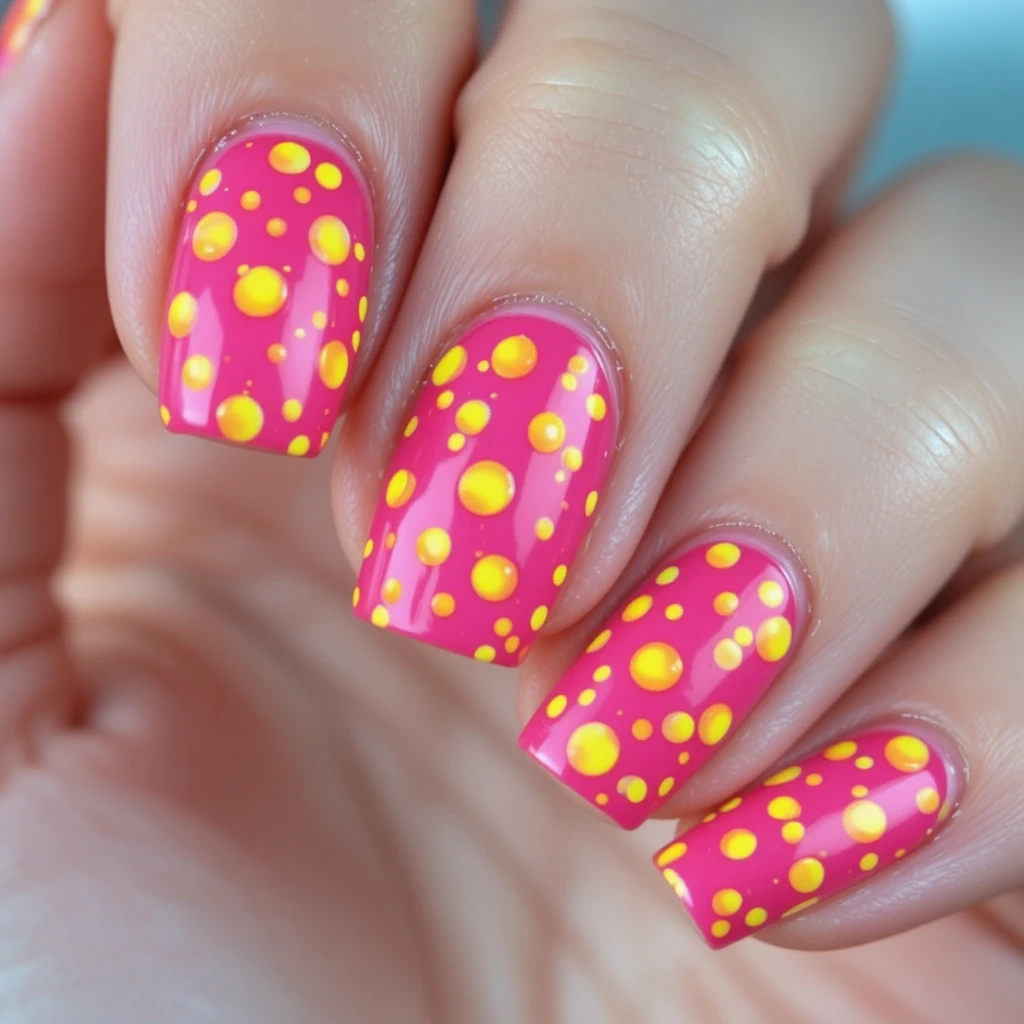
- Difficulty: Beginner
- Time to complete: 25-30 minutes
- Best for: Someone who wants a playful, cheerful design that’s incredibly easy to execute.
- Why it works: The contrast between the bold pink and the bright yellow dots is fun and energetic without being complicated.
- What makes it different: Varying the dot sizes—tiny dots next to medium dots—adds visual interest and keeps it from looking like a child’s craft project.
A vibrant hot pink base covered in sunny yellow polka dots. The dots vary in size from tiny pinpricks to medium spots, scattered randomly across the nail. Some dots might cluster near the cuticle or the tip, while others are spaced evenly. The glossy finish makes the dots look like little drops of sunshine on a bright pink background.
9. Pink and Yellow Marble Effect
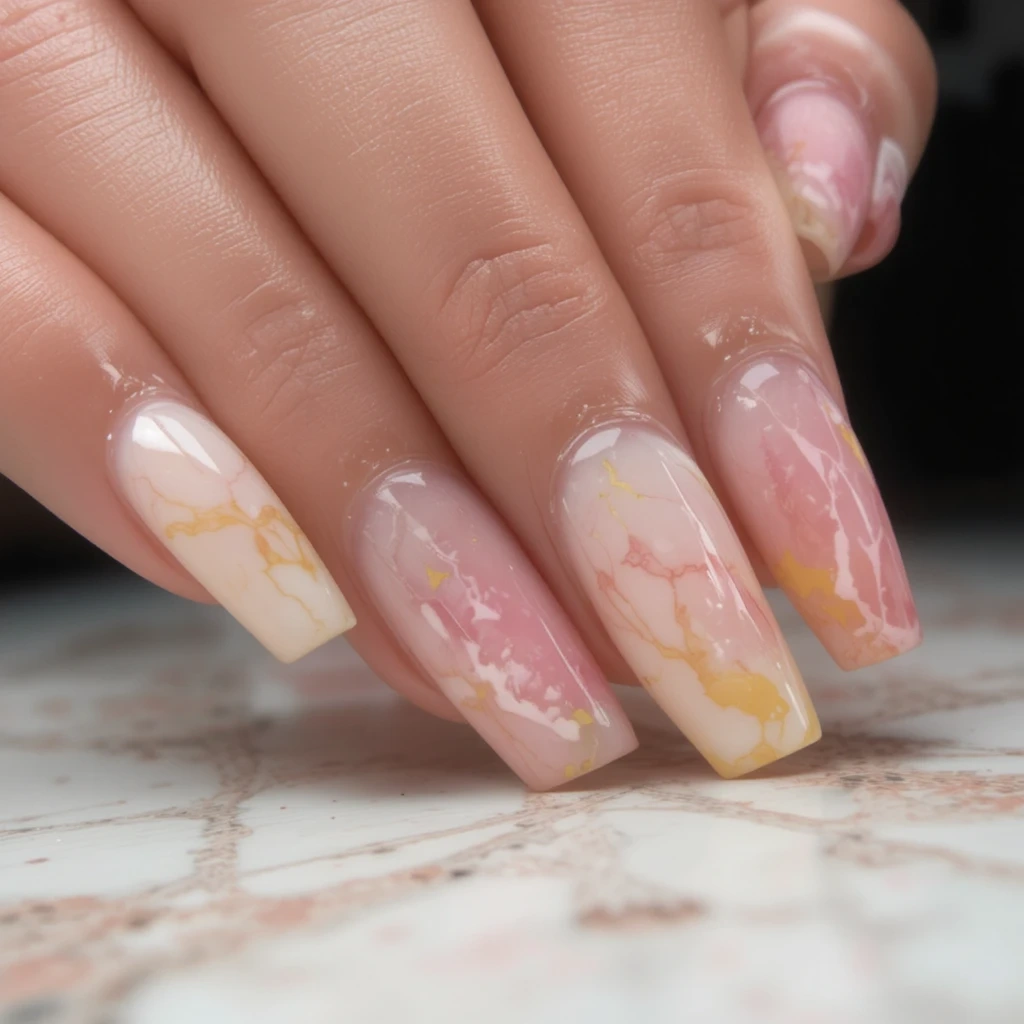
- Difficulty: Intermediate/Advanced
- Time to complete: 45-60 minutes
- Best for: Someone who loves elegant, sophisticated designs and has some experience with water marbles or vein techniques.
- Why it works: Marble looks luxurious and high-end, especially in soft, veined colors.
- What makes it different: The pink and yellow combination is unexpected for marble (which is usually white and gray), making it feel fresh and modern.
Delicate veins of soft pink and buttery yellow swirling through a milky white or clear base. The effect mimics natural stone—soft, cloudy color patches with fine, wispy lines running through them. Some areas are more pink-heavy, others more yellow, creating a unique pattern on each nail. The finish is high-gloss, making the marble look polished and smooth like a stone countertop.
10. Pink and Yellow Glitter Fade
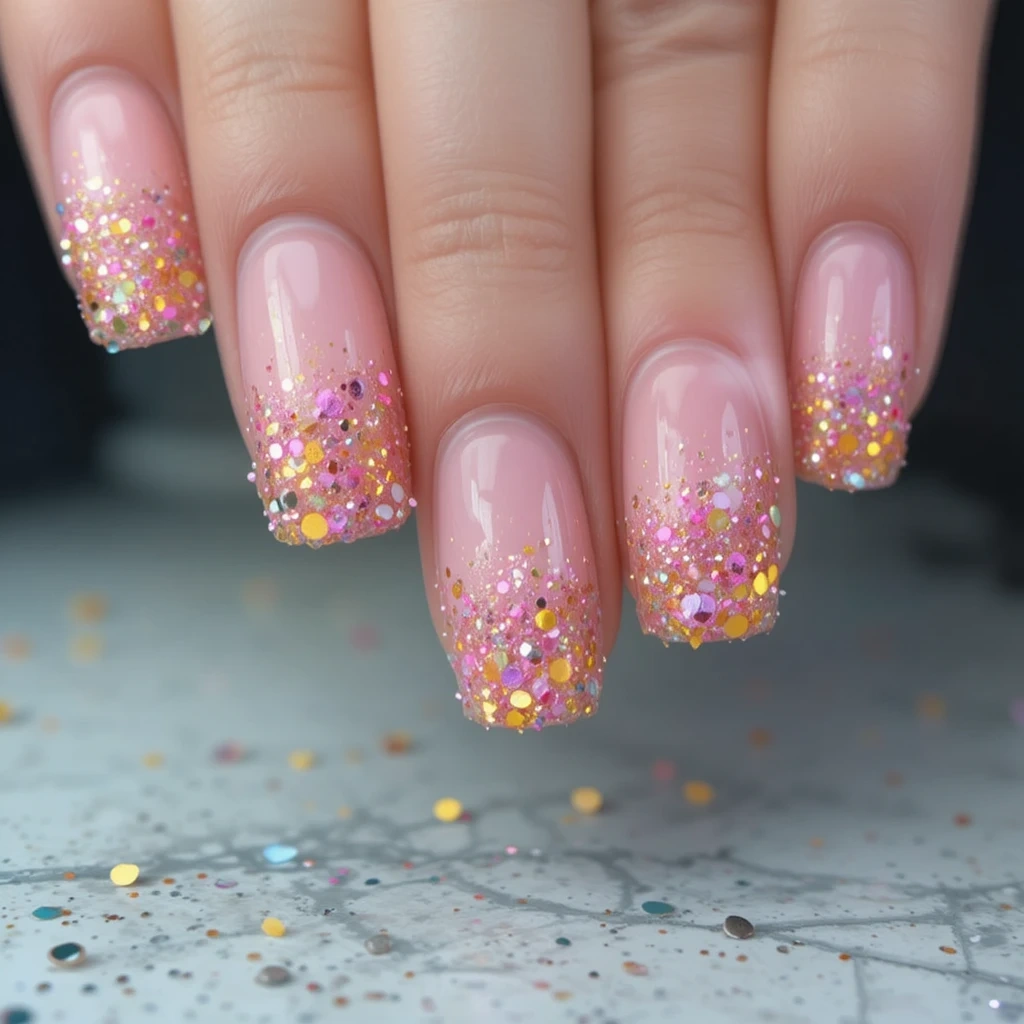
- Difficulty: Beginner
- Time to complete: 25-30 minutes
- Best for: Someone who wants sparkle for a party or event without the commitment of full-on glitter bombs.
- Why it works: The fade concentrates the sparkle at the tips, which catches light beautifully when you move your hands.
- What makes it different: Using two colors of glitter (pink and yellow) creates a multidimensional sparkle that’s more interesting than a single color.
A soft pink base that gradually transitions into a dense cluster of pink and yellow glitter at the tips. The glitter is a mix of fine shimmer and larger hex pieces in both colors, creating a sparkling, confetti-like effect. The fade is smooth, with glitter density increasing as you move toward the free edge, like sunset fading into a starry night.
11. Pink and Yellow Checkerboard
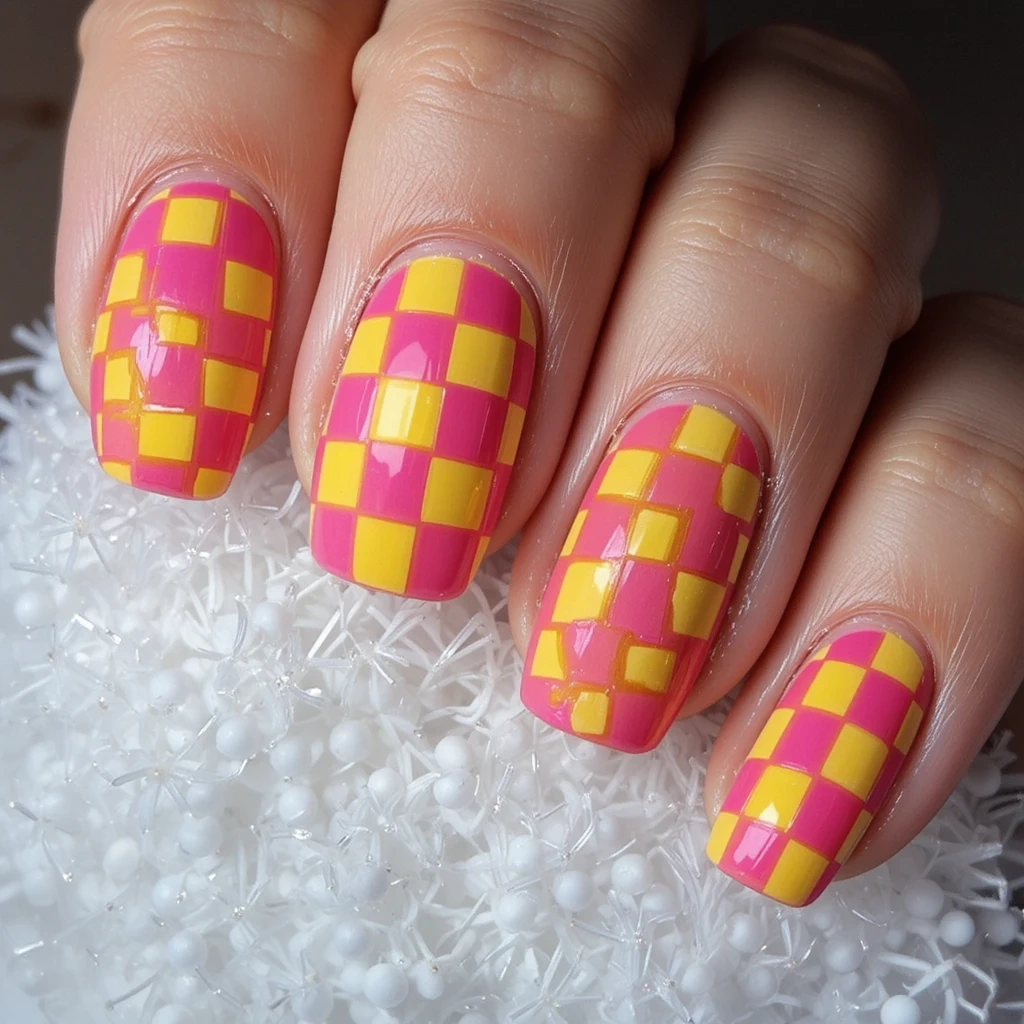
- Difficulty: Advanced
- Time to complete: 60-75 minutes
- Best for: Someone who loves precise, graphic designs and has a very steady hand or good stamping skills.
- Why it works: The checkerboard pattern is bold, graphic, and instantly recognizable as a fashion-forward choice.
- What makes it different: The scale of the checks matters. Smaller, more numerous checks look delicate and intricate; larger checks look bold and graphic.
A perfect grid of alternating pink and yellow squares covering the entire nail. The checks are small and precise, like a miniature chessboard or a 1960s mod dress. The lines between the squares are crisp and clean, with no bleeding between colors. It’s a bold, graphic look that requires patience and precision.
12. Pink Base with Yellow Abstract Lines
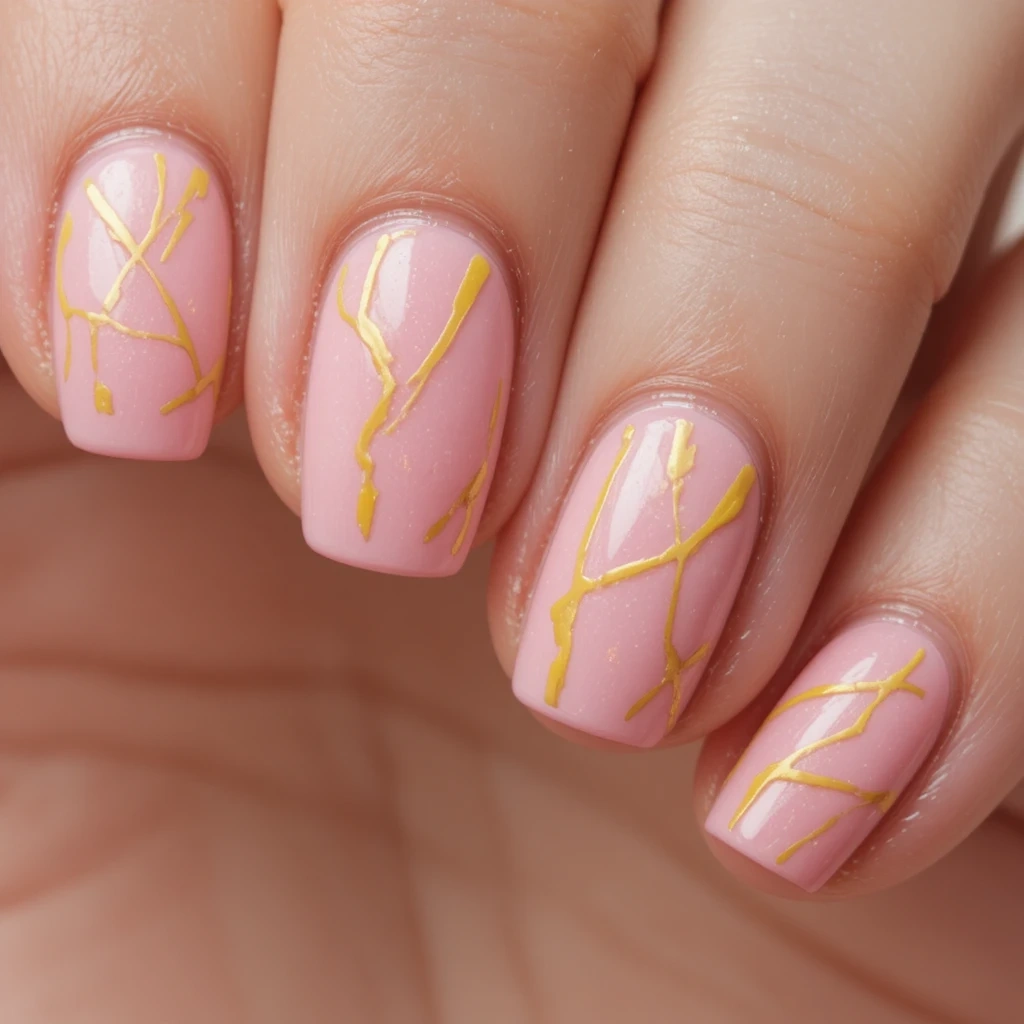
- Difficulty: Beginner
- Time to complete: 20-25 minutes
- Best for: Someone who wants a modern, minimalist design that takes almost no time to create.
- Why it works: The simple lines add structure and interest to the plain pink base without overwhelming it.
- What makes it different: The lines are abstract—not geometric or perfectly straight—which gives the design an effortless, artistic feel.
A smooth, medium-pink base decorated with thin, abstract yellow lines. The lines aren’t perfectly straight—they curve slightly, vary in length, and are placed randomly across the nail. Some are horizontal, some vertical, some diagonal. A few nails might have just one line; others might have three or four. It’s simple, modern, and understated.
13. Pink and Yellow Hearts
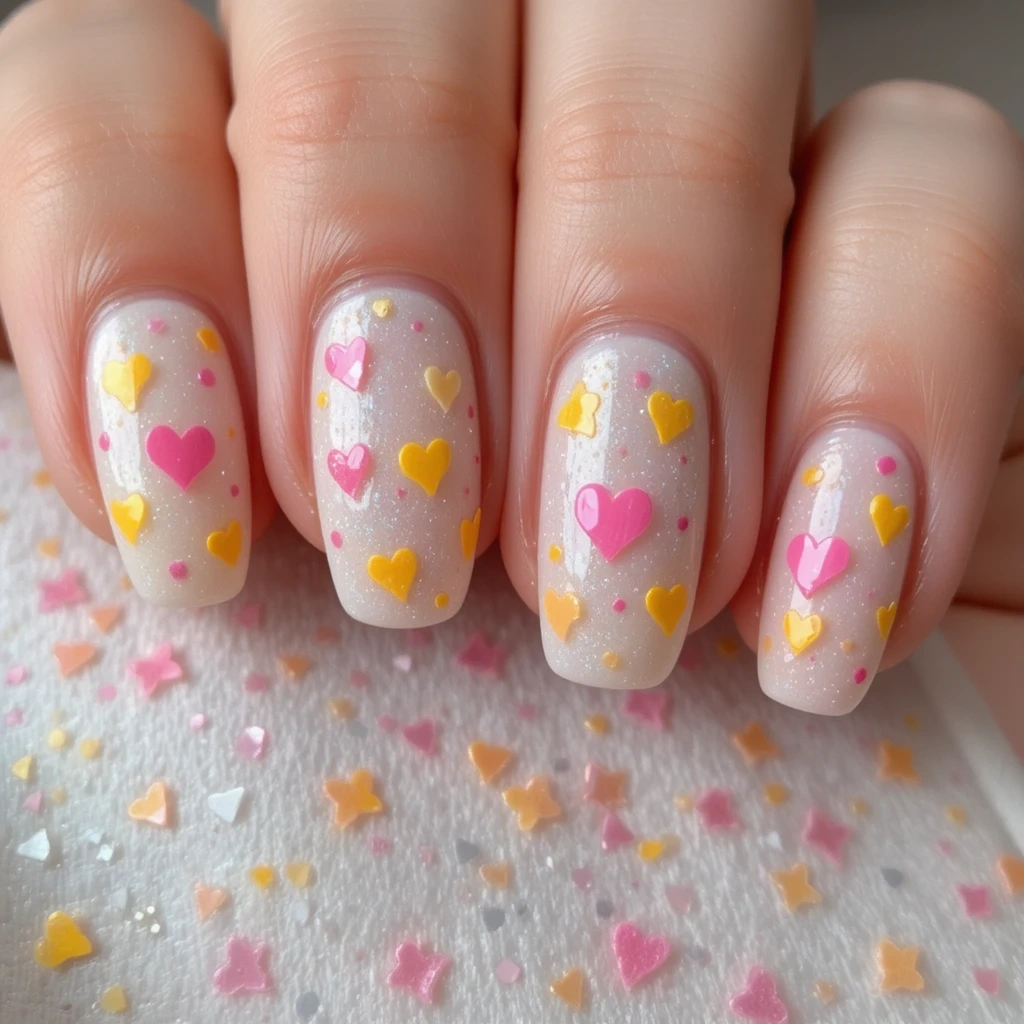
- Difficulty: Beginner/Intermediate
- Time to complete: 30-40 minutes
- Best for: Someone who wants a romantic, Valentine’s-adjacent look that works year-round.
- Why it works: Hearts are universally loved and read as sweet and affectionate rather than seasonal.
- What makes it different: Using both colors for the hearts (pink hearts on yellow base, yellow hearts on pink base) and varying the sizes keeps it from looking too cutesy or themed.
Tiny, hand-painted hearts in pink and yellow scattered across a neutral or matching base. Some nails feature pink hearts on a yellow background, others yellow hearts on a pink background. The hearts vary in size—some are tiny and delicate, others are slightly larger and more pronounced. A few might be solid, while others are just an outline. It’s sweet without being overly childish.
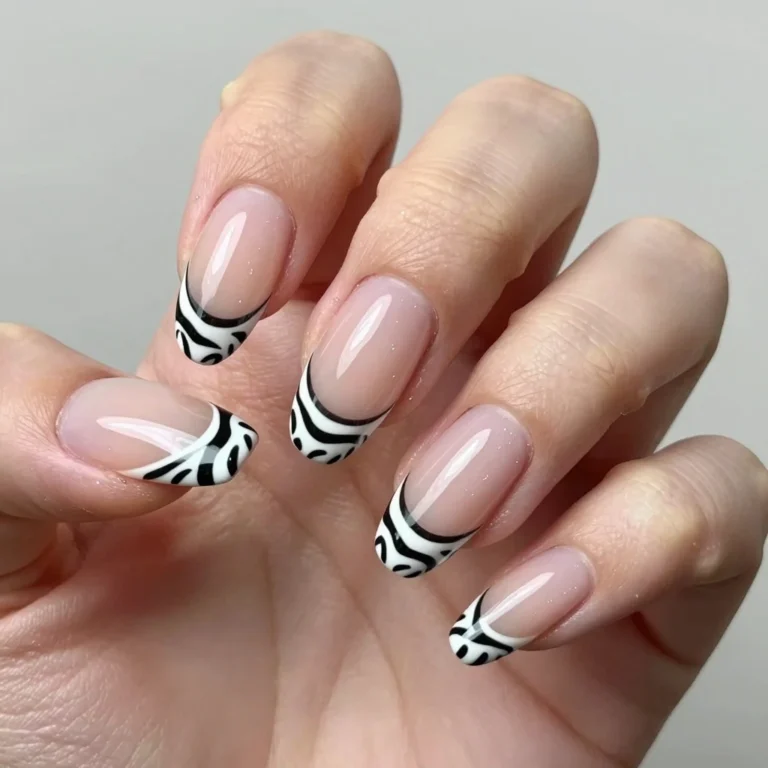
14. Pink and Yellow Snake Print
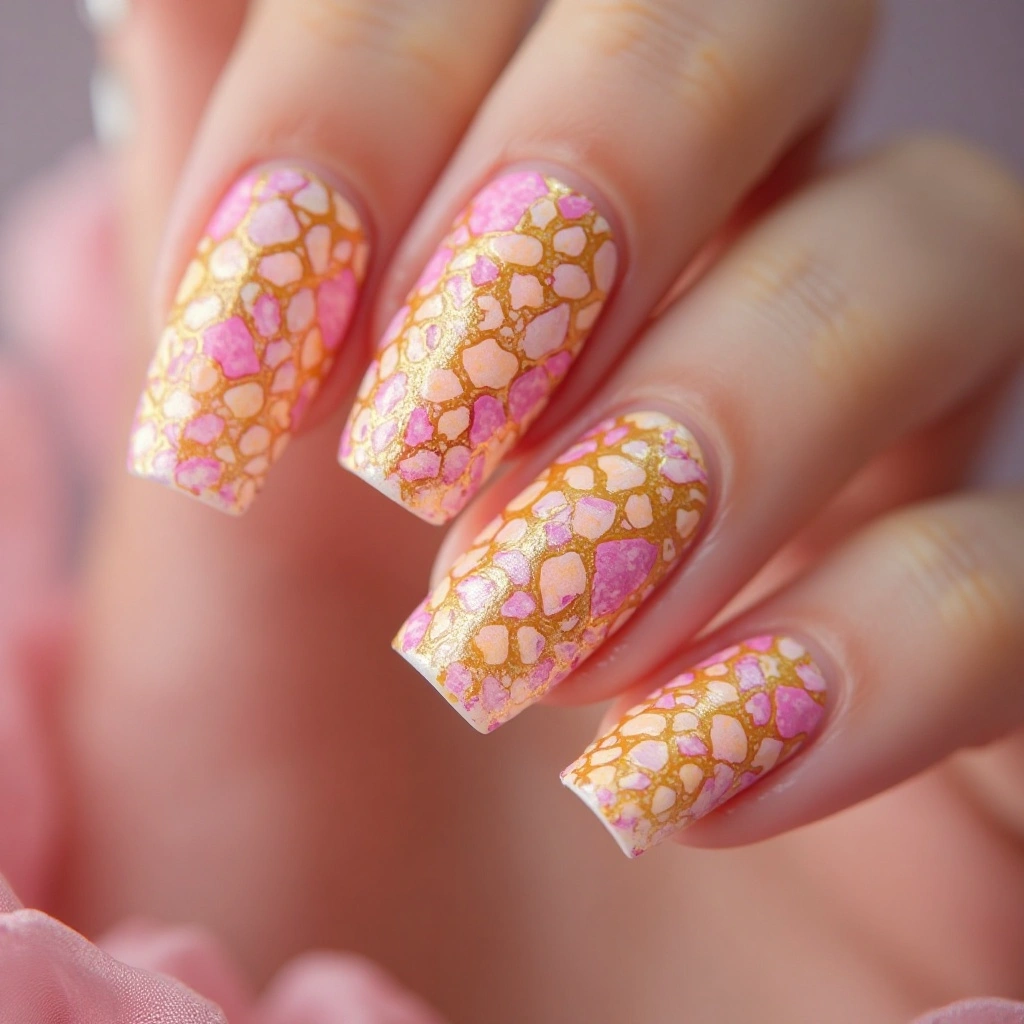
- Difficulty: Advanced
- Time to complete: 60-75 minutes
- Best for: Someone who loves animal prints and wants to try a non-traditional color combination.
- Why it works: Snake print in soft colors feels unexpected and fashion-forward, not tacky or costumey.
- What makes it different: The pink and yellow palette softens the edgy reptile pattern, creating a look that’s both fierce and feminine.
A delicate snake skin pattern in shades of pink and yellow. The scale shapes are irregular ovals and rounded polygons, each outlined in a slightly darker shade. Some scales are filled with pale pink, others with soft yellow, creating a patchwork effect across the nail. The pattern looks organic and textured, like actual reptile skin but in dreamy pastel colors.
15. Pink and Yellow Tie-Dye
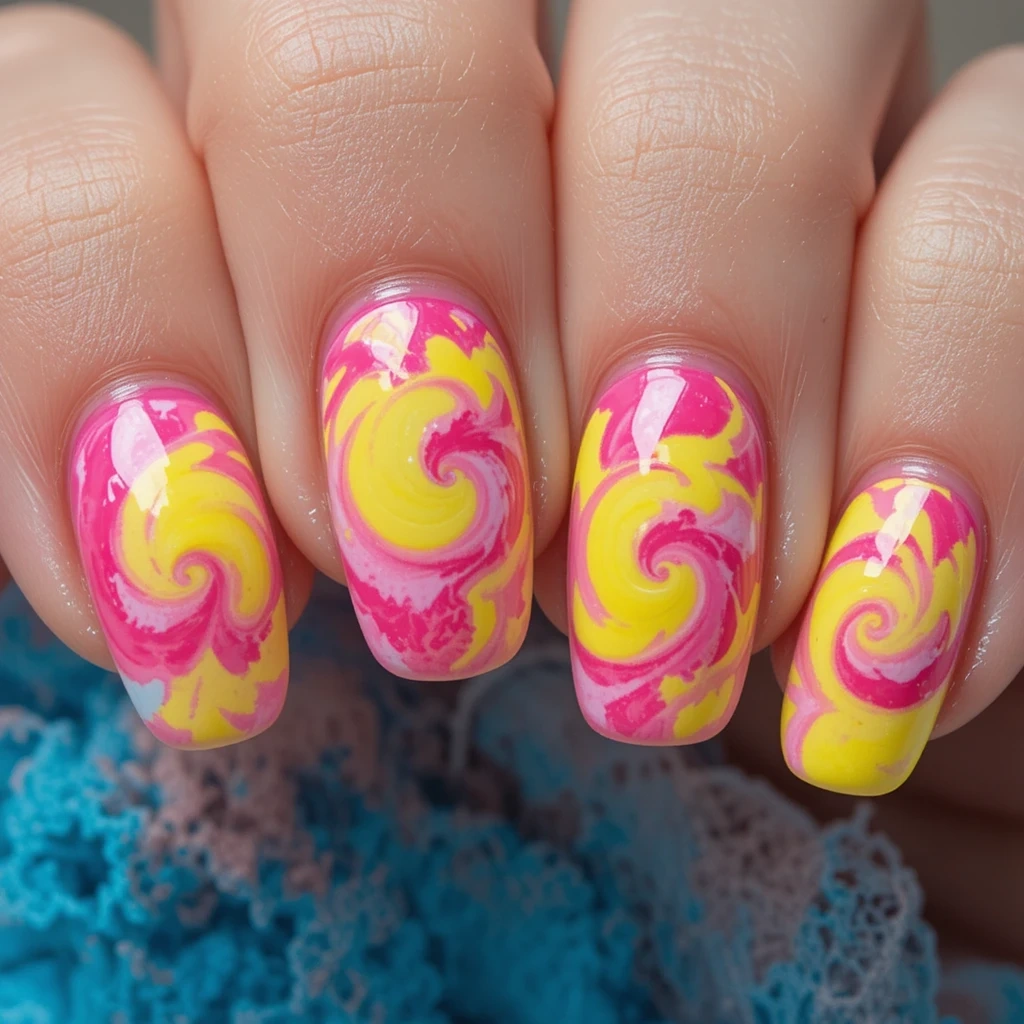
- Difficulty: Intermediate
- Time to complete: 45-55 minutes
- Best for: Someone who loves 1960s and 70s vibes and wants a groovy, colorful manicure.
- Why it works: Tie-dye is inherently fun and nostalgic, and the pink and yellow color scheme keeps it bright and cheerful.
- What makes it different: The marbled, swirled effect is more organic and freeform than other patterns, making each nail truly unique.
Groovy, swirling tie-dye patterns in hot pink, soft pink, neon yellow, and buttery yellow. The colors swirl and blend into each other, creating psychedelic spiral patterns and cloud-like color pockets. It looks like a miniature version of a 1960s t-shirt—bright, bold, and full of movement. The finish is glossy, making the colors look almost wet.
16. Pink and Yellow Chrome
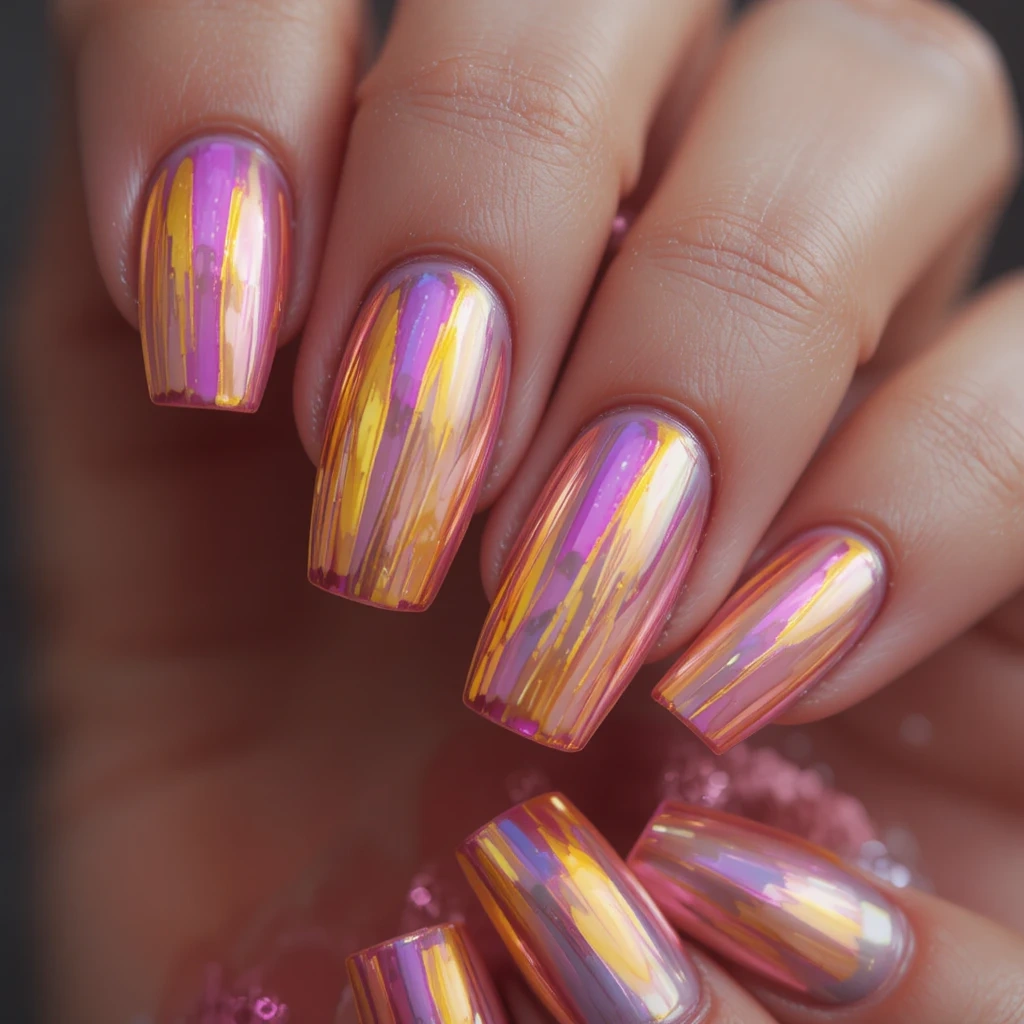
- Difficulty: Intermediate
- Time to complete: 40-50 minutes
- Best for: Someone who wants a high-fashion, mirror-finish look in soft, unexpected colors.
- Why it works: Chrome powder reflects light intensely, making even pastel colors look edgy and modern.
- What makes it different: Most chrome nails are silver or holographic. Pink and yellow chrome is rare and immediately stands out.
Ultra-reflective, mirror-finish nails in pink and yellow. These aren’t just shimmery—they’re literally reflective, like liquid metal in soft pastel hues. The surface is perfectly smooth and glass-like, with no visible texture. Under light, they cast a pink or yellow reflection onto nearby surfaces. It’s a high-fashion, editorial look that photographs beautifully.
Pros and Cons of Pink and Yellow Nails
I love this color combo, but I’m not going to pretend it’s perfect for everyone or every situation. Here’s the real list.
Pros:
✅ Cheerful and uplifting. Every time I look down at these colors, I smile. They genuinely boost my mood.
✅ Versatile. Works for spring, summer, and even early fall. Pastels for spring, neons for summer, mustard and dusty rose for autumn.
✅ Pairs with everything. Surprisingly, pink and yellow go with more of my wardrobe than I expected. They’re statement colors that complement neutrals.
✅ Endless design options. From simple to complex, there’s a pink and yellow design for every skill level.
✅ Photographs beautifully. These colors pop on camera, especially in natural light.
✅ Can be subtle or bold. Sheer pinks with pale yellow tips are office-appropriate; hot pink and neon yellow are party-ready.
Cons:
❌ Shows imperfections. Light pinks and yellows are unforgiving. Any bump, bubble, or uneven layer is visible. I learned this the hard way.
❌ Staining risk. Yellow pigment, especially in cheap polishes, can stain your natural nails. Always use a good base coat.
❌ Not universally flattering. Some yellow tones can wash out certain skin tones. It took me a few tries to find the right shade of yellow for me.
❌ Requires more coats. Sheer yellows and pinks often need three or even four coats for full opacity. That’s more drying time or more curing time.
❌ Can look childish. If the design is too cutesy (think cartoonish flowers or bubblegum pink with baby chick yellow), it can skew young. Choosing sophisticated designs helps.
❌ Neons fade fast. If you use neon yellow, it can lose its brightness within a week, even under top coat. It’s just the nature of neon pigment.
Common Mistakes and How to Fix Them
I’ve made all of these mistakes myself. Here’s how to avoid them or fix them when they happen.
Mistake 1: Sheer, Streaky Coverage
- What it looks like: Your pink or yellow polish is patchy, with visible brush strokes and uneven color.
- Why it happens: Light colors have less pigment. Applying thick coats to compensate makes it worse—it pools at the cuticles and never dries right.
- Exact fix: Use thin coats. I mean really thin. It feels counterintuitive, but three or four thin coats will be smoother and more opaque than two thick ones. Let each coat dry fully (wait 3-4 minutes) before adding the next.
- How well it works: This works 100% of the time. It just requires patience.
Mistake 2: Yellow Staining After Removal
- What it looks like: You remove your polish, and your nails have a faint yellow tint.
- Why it happens: Highly pigmented yellow polish, especially if you skipped base coat or used a cheap one, can stain the keratin in your nails.
- Exact fix: Prevention is best—always use a high-quality base coat. If staining happens, gently buff the nail surface with a fine-grit buffer. Just a few swipes—don’t overdo it. Then rub a mixture of lemon juice and baking soda on your nails for 5 minutes.
- How well it works: Buffing removes surface stains immediately. The lemon juice trick lightens deeper stains over a few days.
Mistake 3: Glitter That’s Rough and Catches on Hair
- What it looks like: Your glitter nails feel like sandpaper and are snagging on everything.
- Why it happens: You didn’t seal the glitter properly. Glitter has edges that need to be smoothed over.
- Exact fix: After your glitter layer dries, apply a generous coat of top coat. Don’t wipe the brush—float it on. Let it dry, then apply a second thick coat. The goal is to create a thick, smooth layer that encases the glitter completely.
- How well it works: Two thick top coats will make any glitter smooth. It might add a little bulk, but it’s worth not snagging your sweater.
Mistake 4: Ombre That Looks Muddy Instead of Blended
- What it looks like: The area where pink and yellow meet is brownish or grayish instead of a clean blend.
- Why it happens: You over-sponged. Too many dabs, and the colors mix together on the nail instead of layering.
- Exact fix: Use less polish on your sponge. Really dab it off on a paper towel first. Then use a light dabbing motion—don’t press and drag. Two or three light layers are better than one heavy one.
- How well it works: This takes practice, but once you get the feel for light dabbing, your gradients will be clean every time.
Maintenance Tips for Longer-Lasting Manicures
If you’re using gel, here’s how I stretch my manicures to the full three weeks.
Days 1-3: The Cure Period
- Wrap those tips! On every single color and top coat layer, run the brush along the free edge of your nail. This seals the tip and prevents peeling. I do this without fail.
- Avoid hot water for 24 hours. Gel continues to harden slightly after curing. Long hot showers on day one can weaken it. I do dishes with gloves on for the first few days.
Days 4-10: The Wear Period
- Apply cuticle oil every single night. I keep CND SolarOil ($12-15, Amazon or Ulta) by my bed. It keeps the gel flexible so it bends with your nail instead of lifting. Dry cuticles lead to lifting edges.
- No prying. If something gets under your nail, don’t use it as a tool. I’ve popped off a perfect manicure by opening a soda can tab. Use a knuckle or a tool instead.
Days 11-21: The Fade and Fill
- Add a fresh top coat at day 10. Lightly buff the shine off your nails, wipe with alcohol, and apply a fresh layer of top coat. This removes microscratches and restores the gloss. It buys you another week easily.
- Watch for lifting. If you see a small pocket of air at the cuticle, don’t pick at it. Seal it with a tiny drop of gel and cure it if you can. If it’s spreading, it’s time to remove—don’t wait, or you risk trapping moisture and getting greenies (bacterial growth).
What Happens After 4 Weeks? A Real Wear Test
I wore a set of pink and yellow gel nails (the Pastel Ombre design) for a full month to see what really happens. Here’s the honest timeline.
- Week 1: Perfect. The colors were bright, the gradient was smooth, and the shine was mirror-like. I got compliments everywhere. No chips, no lifting. I felt great about them.
- Week 2: Still good, but I noticed the tips starting to wear down just slightly. The shine wasn’t as intense. I applied a fresh layer of top coat on day 12, and they looked almost new again. No lifting yet.
- Week 3: Growth is obvious now. There’s a noticeable gap at the cuticle—about 1/8 inch of natural nail. The ombre effect is still pretty, but the proportion is off. The pink part is now mostly grown out, and the yellow tip area is smaller. No chips, but one nail has a tiny chip at the very corner near the cuticle.
- Week 4: They’re hanging on, but honestly, they look rough. The growth is significant—about 1/4 inch. The balance of the design is completely gone. The top coat has dulled despite my reapplication. One nail lifted at the sidewall, and I had to resist picking at it. They need to come off. Removal took a full 20 minutes of soaking.
Verdict: Two to three weeks is the sweet spot for this design. By week four, they look dated and grown out, not fresh.
Frequently Asked Questions
Do pink and yellow nails look good on short nails?
Yes, absolutely. Bold designs like color blocking or polka dots actually look great on short nails because they don’t require a long canvas. Just avoid very detailed scenes (like tiny flowers) that need space to read clearly.
How do I stop yellow polish from staining my nails?
Always use a high-quality base coat. I like Orly Bonder ($10, Ulta) because it’s sticky and creates a thick barrier. Apply it carefully, making sure to cover the entire nail plate, especially the edges.
Can I do these designs with regular drugstore polish?
For most of these, yes. The ombre, florals, and polka dots work fine with regular polish. The chrome and some of the precise geometric patterns are much easier with gel because it stays wet until you’re ready. If you try the checkerboard with regular polish, work fast and expect some frustration.
What skin tones do pink and yellow look best on?
It’s more about the specific shade than the colors themselves. Fair skin tends to look great with pastel pinks and buttery yellows. Medium and olive skin tones pop with hot pink and golden yellows. Dark skin looks incredible with neon pink and highlighter yellow—the contrast is stunning. My best advice is to hold the bottle up to your hand in natural light before you buy.
Final Thoughts
Pink and yellow is one of those color combinations that just makes me happy. Whether you go for a soft, romantic gradient or a bold, graphic checkerboard, there’s a version of this trend for everyone.
A good place to start is the Retro Floral Accent Nails or the Pink and Yellow Polka Dots. They’re beginner-friendly, forgiving, and give you that instant color payoff without requiring a ton of tools or experience. Grab a couple of bottles, invite a friend over, and just play around with it. The worst that happens is you wipe it off and try again. That’s half the fun.