24+ January Dip Nails Ideas Fresh Winter Manicure Designs
Most January nail articles are just photo roundups. This one is different: every design includes a complete step-by-step tutorial, specific product names with prices, difficulty ratings, and honest notes on how each color holds up over 3–4 weeks of real winter wear.
I’ve included the details that most guides skip — like which shades hide regrowth gracefully, which finishes look flat under office lighting, and which designs are worth the extra effort for your specific lifestyle.
How to Choose the Right Design for You
Before picking a color, narrow down based on your actual situation — not just what looks good in photos.
| Your situation | Best starting point |
|---|---|
| First time doing dip nails | Vanilla Latte Nude or Soft Gray — solid, forgiving, single-color |
| Professional work environment | Almond Cream, Milky Glass, or Cloud Gray |
| Special events or photos | Glazed Sheer Pink, Nude with Silver Chrome, or Frosted Lavender |
| Comfortable with nail art | Icy Blue with Chrome Tips, Gray Ombré, or Navy with Pearl Chrome |
| Short nails | Smoky Charcoal, Mushroom Beige, or Milky Glass |
| You change your mind mid-wear | Avoid high-contrast French tips and bright chromes — they show regrowth fastest |
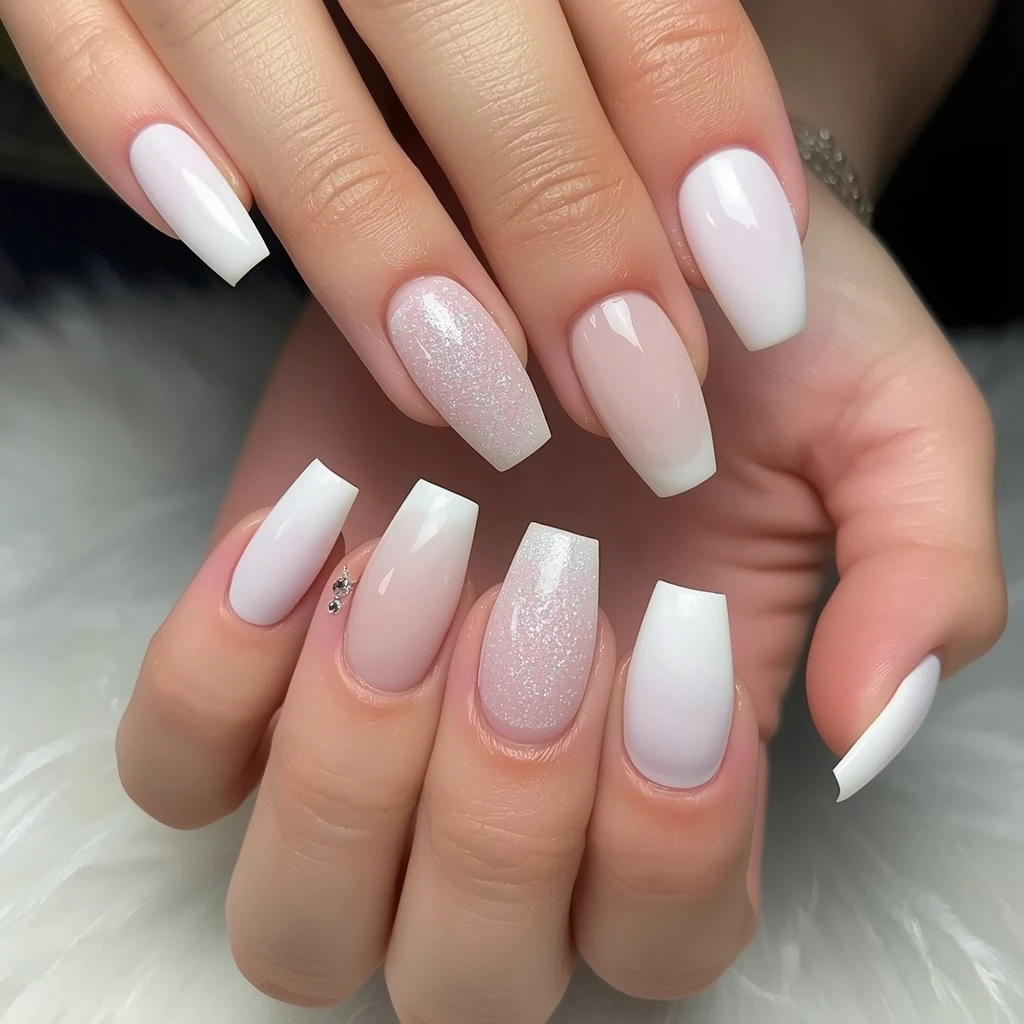
This month is all about clean elegance, subtle shimmer, and colors that complement winter’s muted palette. From barely-there nudes to moody jewel tones, these 24+ January dip nail ideas will keep your fingertips looking polished and intentional all month long.
Minimalist & Nude January Dip Nails Ideas
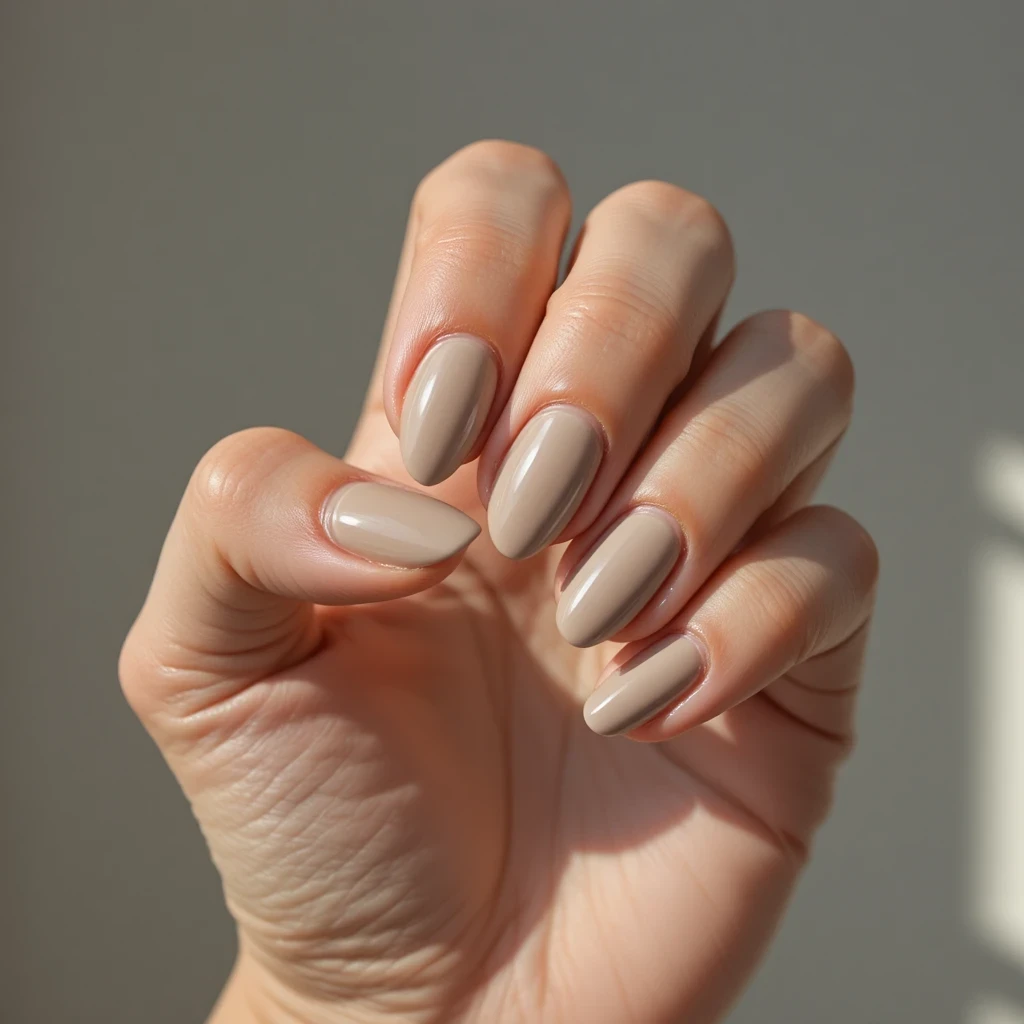
1. Vanilla Latte Nude
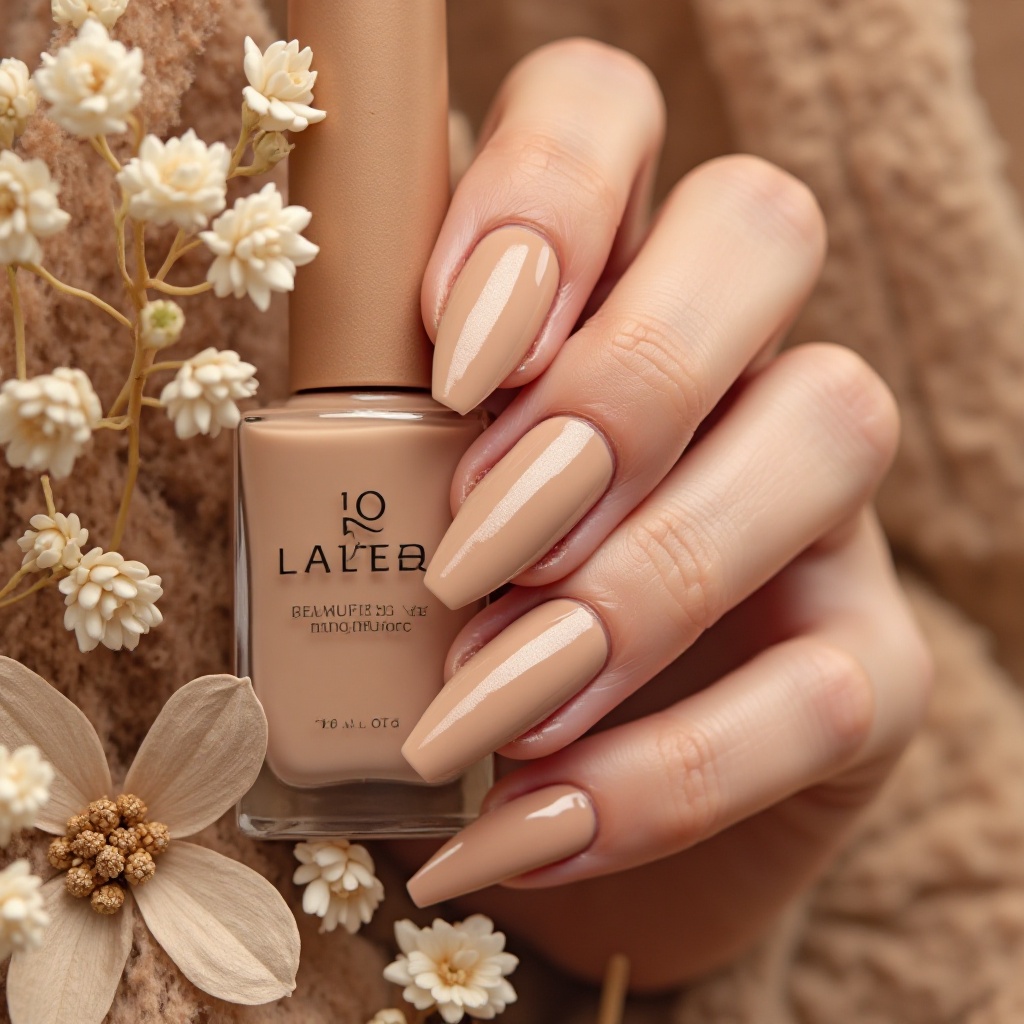
Warm beige with creamy undertones that mimics your favorite coffee order. This shade flatters every skin tone and delivers that expensive, understated elegance January craves. The neutral base works as the perfect canvas for everyday wear while still looking intentional and polished.
Difficulty: Beginner
Time: 45–55 min
Best for: Anyone wanting a polished everyday look with zero fuss.
What makes it different: Unlike basic beige, this shade has warm coffee undertones that keep it from looking flat or clinical under office lighting.
Why it works: Flatters every skin tone, pairs with any winter outfit, and disguises minor chips or wear better than darker shades.
Steps:
- Push back cuticles, file to almond or oval shape, buff to remove shine.
- Wipe with rubbing alcohol or nail dehydrator — no oils on the surface.
- Apply a thin base coat to one nail, leaving a 1mm gap at the cuticle.
- Dip the nail at a 45-degree angle into vanilla/beige powder. Tap off excess.
- Repeat steps 3–4 for a second coat until fully opaque.
- Brush away loose powder. Apply activator generously and wait 2 minutes.
- File edges, buff the surface smooth.
- Wipe clean with alcohol, apply a second activator coat, wait 2 more minutes.
- Apply two thin coats of glossy top coat, capping the free edge each time.
- Finish with cuticle oil massaged into the nail beds.
Products: Beetles Gel “Latte” ($9–12) — reliable pigmentation that doesn’t look muddy. Revel Nail D125 Toffee ($13–15) for a slightly richer finish. OPI Powder Perfection “Tiramisu for Two” ($17) for the longest wear. Use Kiara Sky Glossy Top Coat ($11) — it adds more shine than cheaper options and that shine matters with nudes.
2. Milky Glass Finish
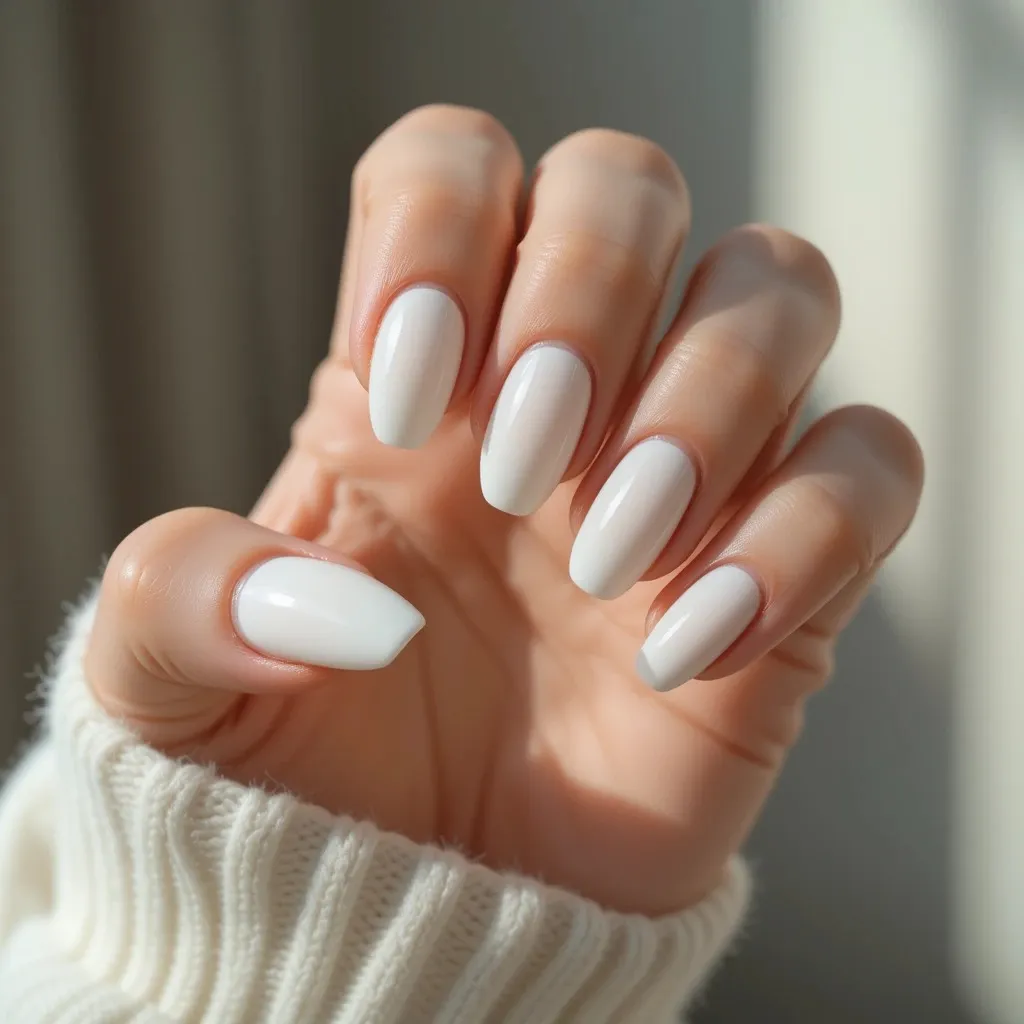
Sheer milky white that lets your natural nail peek through with a translucent, glass-like effect. This shade creates that coveted glazed look that’s been dominating social media. The opacity is buildable, so you control whether you want barely-there coverage or something more substantial.
Difficulty: Beginner
Time: 40–50 min
Best for: Clean aesthetic lovers who want the “glazed donut” look without heavy product.
What makes it different: The translucency is the whole point — two coats give you the right sheer without looking unfinished.
Why it works: Fresh without being stark. Works in every setting from gym to boardroom.
Steps:
- Prep nails — push cuticles, file to square or squoval, buff, wipe with alcohol.
- Apply base coat and dip into milky/sheer white powder. First coat will be very transparent — that’s correct.
- Apply second coat for more coverage while keeping natural nail visible.
- For glazed effect: stop at 2 coats. For more opacity: add a third thin coat.
- Brush away powder, apply activator, wait 2 minutes.
- File and buff smooth — this step determines the glass finish quality.
- Wipe clean, second activator, wait 2 minutes.
- Apply 2–3 coats of a high-gloss top coat. The shine is everything here.
Products: Beetles Gel “Milky White” ($9) is surprisingly good for the price. Kiara Sky D401 Milk Bath ($14) gives a more refined sheer. For the top coat, Kiara Sky Beyond Gloss ($13) is worth it — regular dip top coats don’t achieve the same mirror finish.
3. Soft Taupe Matte
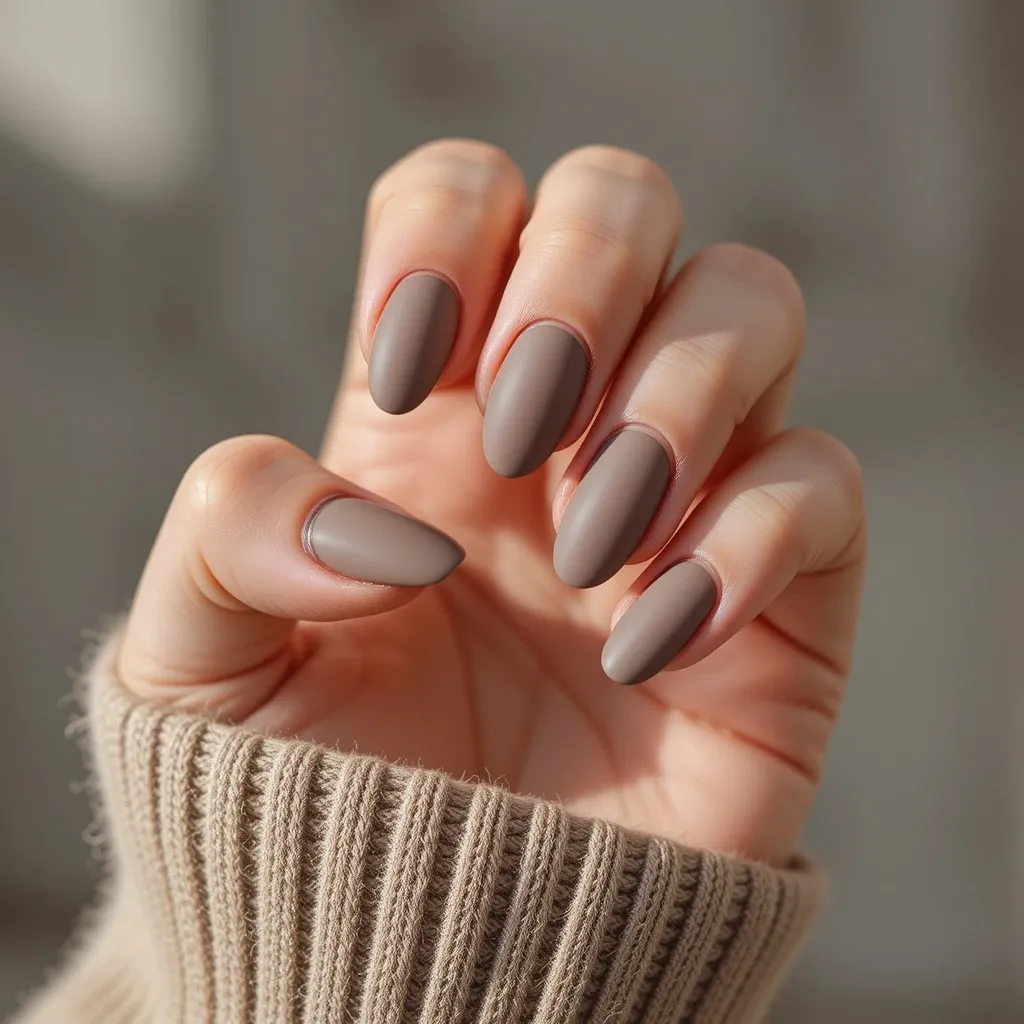
Medium taupe in a velvety matte finish that feels cozy and refined. The earthy tone grounds any outfit and transitions seamlessly from office to evening. This shade has enough depth to avoid looking washed out but stays neutral enough to be a true everyday color.
Difficulty: Beginner–Intermediate
Time: 50–60 min
Best for: Anyone who wants a cozy, elevated neutral that photographs well.
What makes it different: The matte finish completely changes the feel of a taupe — it goes from basic to intentionally editorial. Most people don’t think to matte a neutral, which is exactly why it stands out.
Why it works: Matte finishes feel seasonally appropriate, and taupe is winter’s most versatile neutral.
Steps:
- Prep nails with extra smooth buffing — matte shows surface texture more than glossy.
- Clean with alcohol. Make sure nails are completely dry before applying base.
- Apply base coat, dip into taupe powder. Usually needs 2–3 coats.
- Repeat dipping until even and opaque.
- Brush powder, apply activator, wait 2 minutes.
- File edges and buff surface until completely smooth — spend extra time here.
- Wipe clean, second activator, wait 2 minutes.
- Apply matte top coat in one thin, even pass. Don’t go over the same area twice — it causes streaks.
- Let dry 3–5 minutes. Apply cuticle oil around the edges only, not on the nail surface (it will ruin the matte).
Products: Revel Nail D38 Stella ($13–15) is one of the best taupe tones at this price range. Kiara Sky Matte Top Coat ($12) seals cleanly without going chalky — cheaper matte coats often do. OPI Powder Perfection “Taupe-less Beach” ($17) has slightly cooler undertones that look stunning under warm lighting.
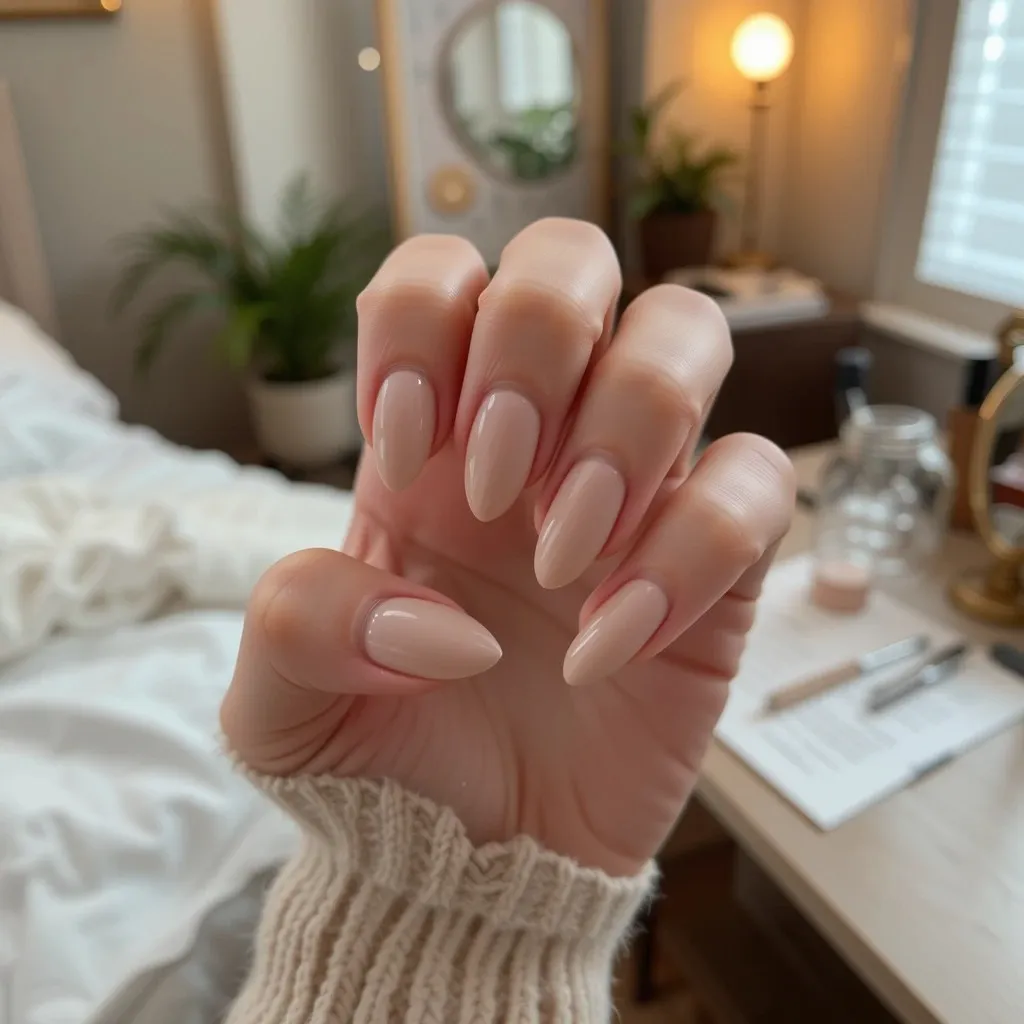
4. Almond Cream
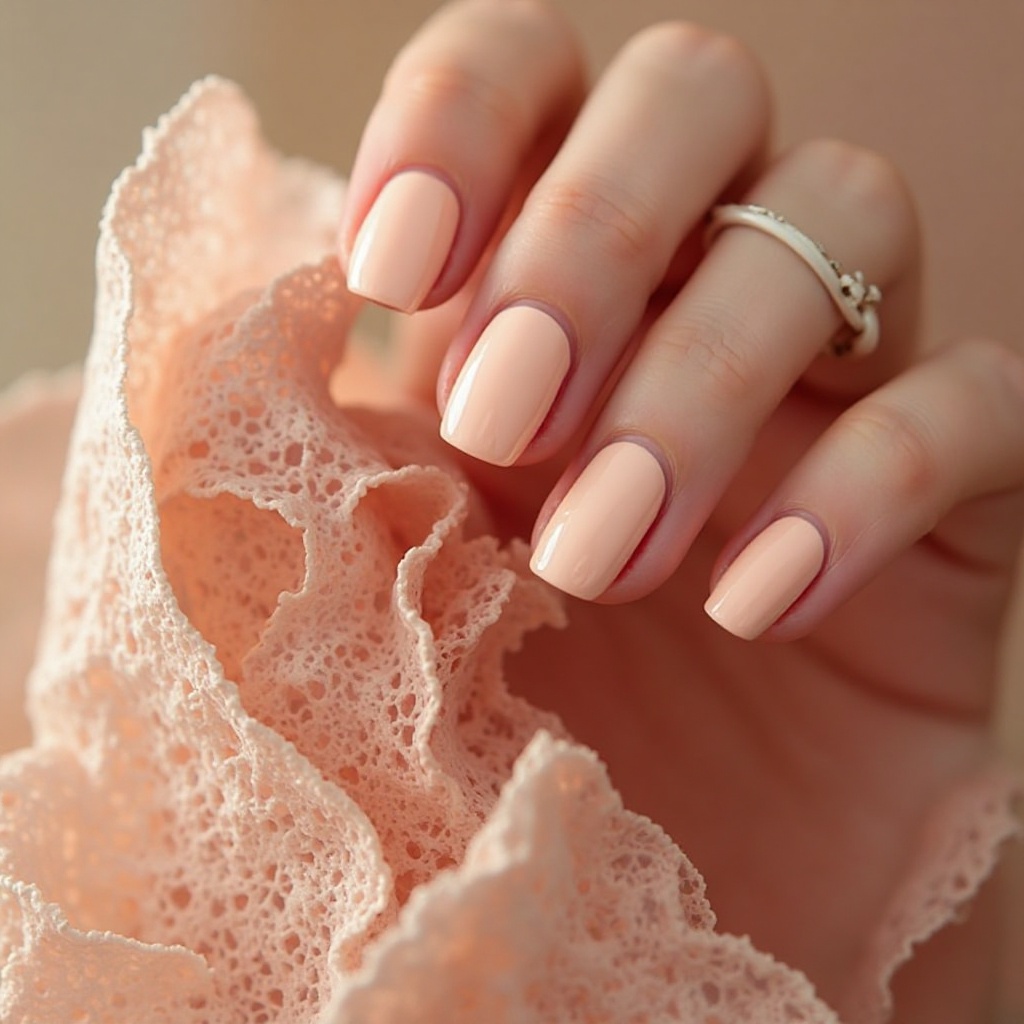
Pale peachy-nude that adds just a whisper of warmth without going orange. This shade makes nails look naturally healthy and well-maintained, like you just got a professional hand treatment. It has enough pigment to even out your natural nail bed while maintaining that “your nails but better” effect.
Difficulty: Beginner
Time: 45–55 min
Best for: Returning to work in January and wanting polished-but-effortless nails.
What makes it different: The peachy-nude tone adds warmth that plain beige misses, creating a “your nails but healthier” effect rather than an obvious manicure.
Why it works: Enough pigment to even out the natural nail bed while staying completely wearable every day.
Steps:
- File nails into almond shape — rounded tip that comes to a soft point.
- Push cuticles back cleanly. This color shows cuticle work clearly.
- Buff and clean with alcohol.
- Apply base coat, dip into peachy-nude powder. First coat looks sheer.
- Apply 2–3 coats until coverage looks natural and even.
- Brush powder, activator, wait 2 minutes.
- File and refine the almond shape symmetrically on both sides.
- Buff smooth, wipe clean, second activator.
- Two thin coats of glossy top coat, capping the pointed tip each time.
- Apply cuticle oil daily — this shade genuinely benefits from hydrated cuticles.
Products: OPI Powder Perfection “Bubble Bath” ($17) is the gold standard peachy nude — the pigmentation is perfectly sheer. Revel Nail D12 Carla ($13) is a solid budget alternative. CND SolarOil ($9) for daily cuticle care — it absorbs fast and doesn’t leave residue.
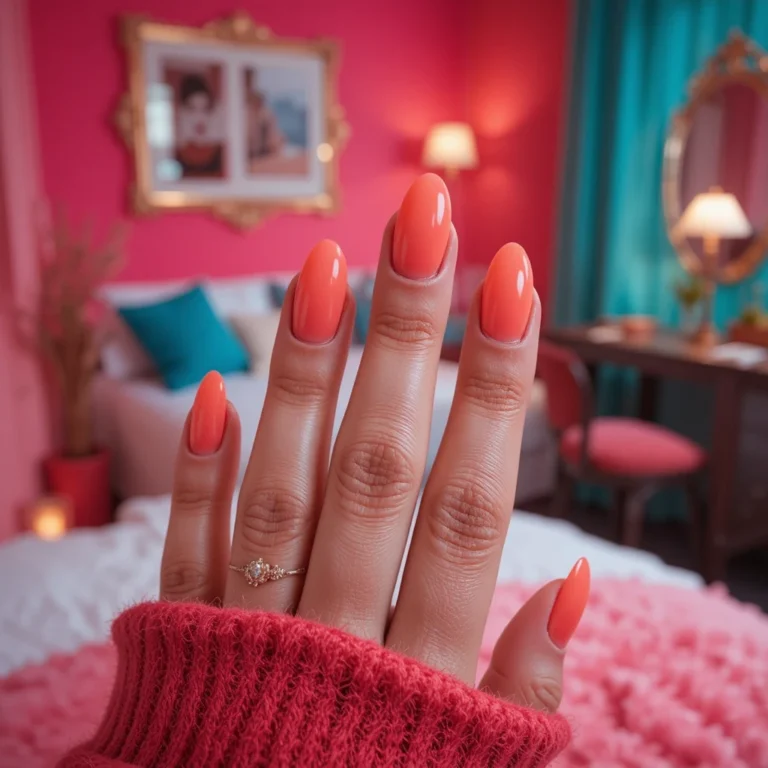
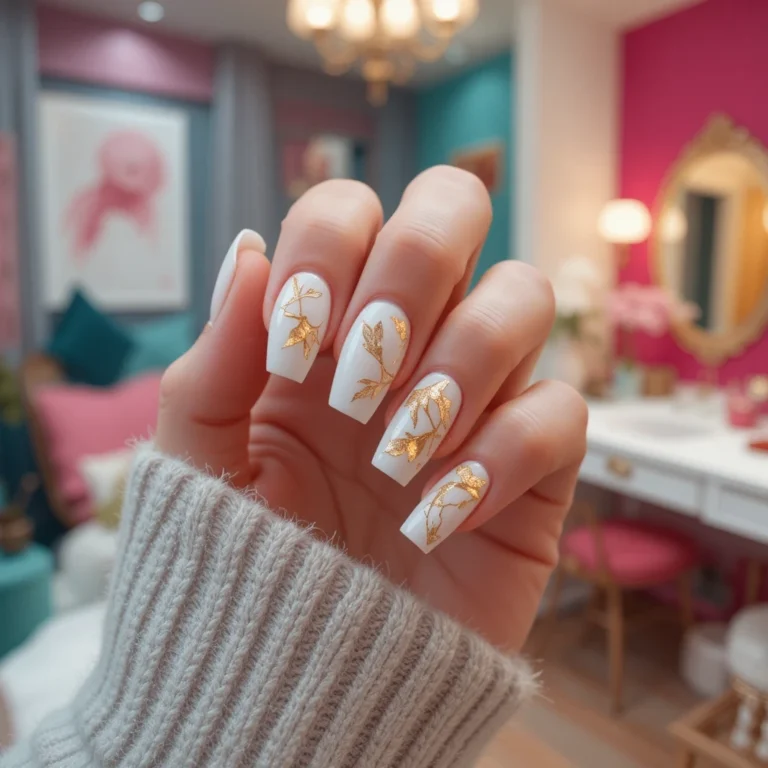
5. Glazed Sheer Pink
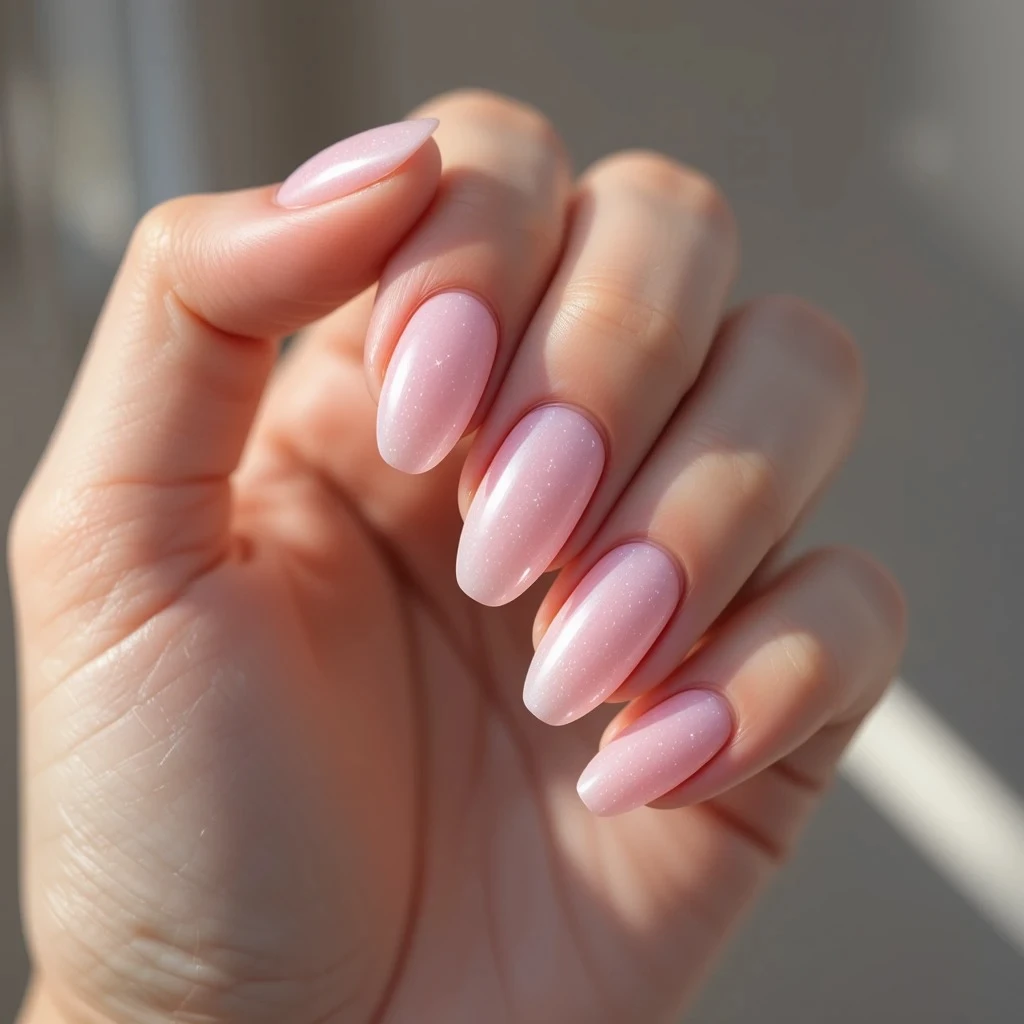
Translucent pink with subtle pearl shimmer that catches light like morning frost on glass. This gives the glazed donut effect without the commitment. The pink tone adds just enough color to brighten your complexion while the shimmer creates dimension and movement.
Difficulty: Beginner
Time: 45–55 min
Best for: Anyone who wants subtle shimmer without anything that reads “party nails.”
What makes it different: Fine pearl shimmer catches light in a way that looks dimensional, not glittery. It reads like light on water, not chunky glitter.
Why it works: Adds visual interest while staying completely office-appropriate.
Steps:
- Prep nails, file to round or oval shape for best glazed effect.
- Optional: apply one coat of nude/beige dip as a base for more opacity.
- Apply base coat, dip into sheer pink shimmer powder at 45-degree angle.
- Apply 2–3 thin coats. Build gradually — thick layers make shimmer look chunky.
- Tap off excess gently so shimmer particles stay intact.
- Apply activator carefully, wait 2 minutes.
- File edges, buff lightly — over-buffing removes shimmer particles.
- Second activator, wait 2 minutes.
- Apply 2–3 coats of super-glossy top coat. More shine = more glazed effect.
Products: Revel Nail D9 Priscilla ($14–16) has fine shimmer that doesn’t look chunky. Kiara Sky Beyond Gloss ($13) is the top coat that makes or breaks this look — it creates significantly more shine than standard dip top coats.
6. Mushroom Beige
Cool-toned greige that sits perfectly between gray and beige. This sophisticated neutral works as a chameleon, adapting to whatever you pair it with. The cool undertones prevent it from reading too warm or looking like a sad beige that washes you out.
Difficulty: Beginner
Time: 45–55 min
Best for: Anyone who looks washed out by warm beiges but still wants a neutral.
What makes it different: Cool gray undertones make this shade adapt to what you’re wearing rather than pulling everything warm.
Why it works: Cool-toned greige complements winter’s muted palette better than warmer neutrals, and photographs beautifully.
Steps:
- File to squoval shape — square with softly rounded corners.
- Buff surface and clean thoroughly with alcohol.
- Apply base coat, dip into mushroom/greige powder. Usually needs only 2 coats.
- Second coat for full, even coverage.
- Brush powder, activator, wait 2 minutes.
- File, buff smooth.
- Wipe clean, second activator, wait 2 minutes.
- Apply 2 coats of glossy top coat.
Products: Kiara Sky D407 “The Simple Life” ($14) has the most accurate cool-greige tone — it doesn’t shift warm under artificial light the way some greiges do. OPI “Berlin There Done That” ($17) if you want a more saturated version.
Cool-Toned January Dip Nails
7. Soft Gray Elegance
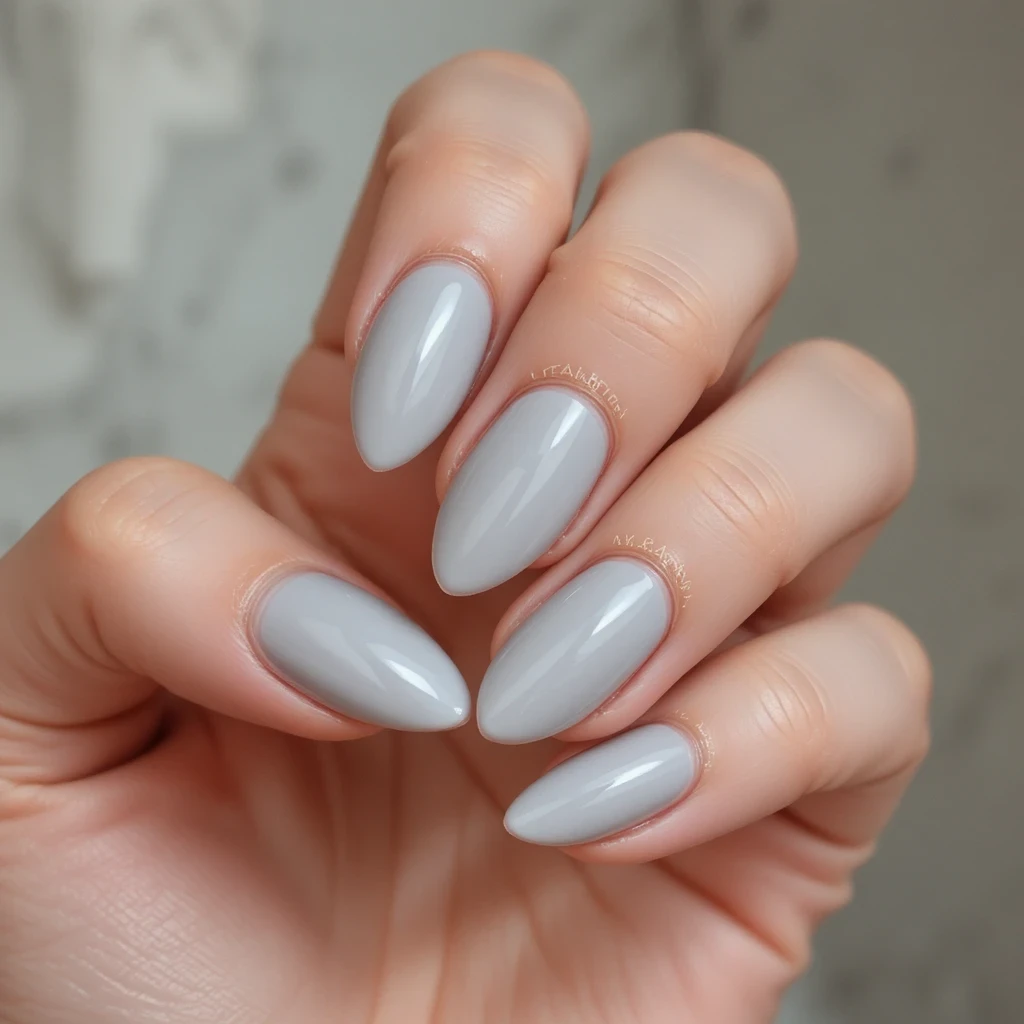
Light dove gray with neutral undertones that reads sophisticated and modern. This shade walks the line between edgy and elegant perfectly. It’s gray enough to feel current but soft enough to work in professional settings without raising eyebrows.
Difficulty: Beginner
Time: 45–55 min
Best for: People who wear a lot of monochrome or black-and-white outfits.
What makes it different: Light enough to avoid feeling moody, distinct enough to be a real color choice. The satin finish option is particularly flattering.
Why it works: Gray coordinates effortlessly without competing with your wardrobe.
Steps:
- Standard nail prep with extra smooth buffing.
- Apply base coat, dip into light gray powder. Usually needs 2–3 coats for solid coverage.
- Activator, 2 minutes, file and buff smooth.
- Wipe clean, second activator, wait 2 minutes.
- For satin finish: one coat glossy, then one coat matte on top. Creates a soft sheen more forgiving than pure matte.
- For sleek finish: two coats glossy only.
Products: Revel Nail D180 Sweet Gray ($13) reads true gray without going blue or purple. For the satin finish, layer Kiara Sky Glossy ($11) and Kiara Sky Matte ($12) — both together are worth using.
8. Icy Blue Shimmer
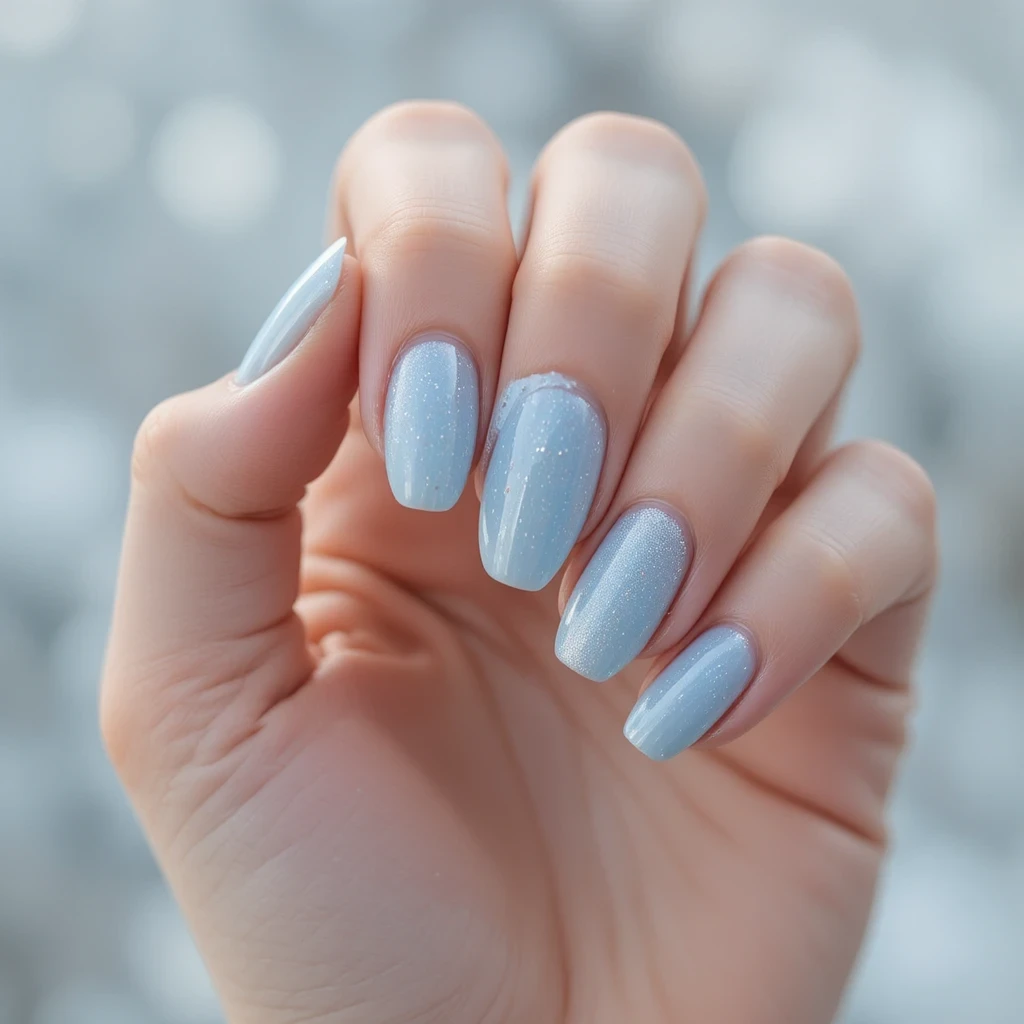
Pale blue with silver micro-shimmer that mimics frozen winter mornings. Delicate enough to wear anywhere but interesting enough to get compliments. The shimmer particles are fine enough that they don’t look chunky or juvenile, creating a sophisticated frosty effect.
Difficulty: Beginner
Time: 45–55 min
Best for: People who want a winter-appropriate pop of color that still reads professional.
What makes it different: The silver micro-shimmer is fine enough to look sophisticated rather than festive. Under natural light it looks frosty; under fluorescent office light it still reads as a clean blue.
Why it works: Captures winter without looking costume-y or holiday-themed.
Steps:
- Prep nails, file to short or medium squoval shape.
- Apply base coat, dip into icy blue shimmer powder.
- Tap off excess gently — shimmer needs light tapping to preserve sparkle.
- Apply 2–3 thin coats. Thin layers prevent chunky buildup.
- Activator, 2 minutes.
- File edges, buff lightly. Go gentle to preserve shimmer.
- Second activator, wait 2 minutes.
- Two coats of glossy top coat to enhance shimmer.
Products: Revel Nail D239 Frost ($14–16) has a fine shimmer particle size that doesn’t clump. Beetles Gel “Ice Blue Shimmer” ($10–12) is a solid budget option, though the shimmer is slightly chunkier.
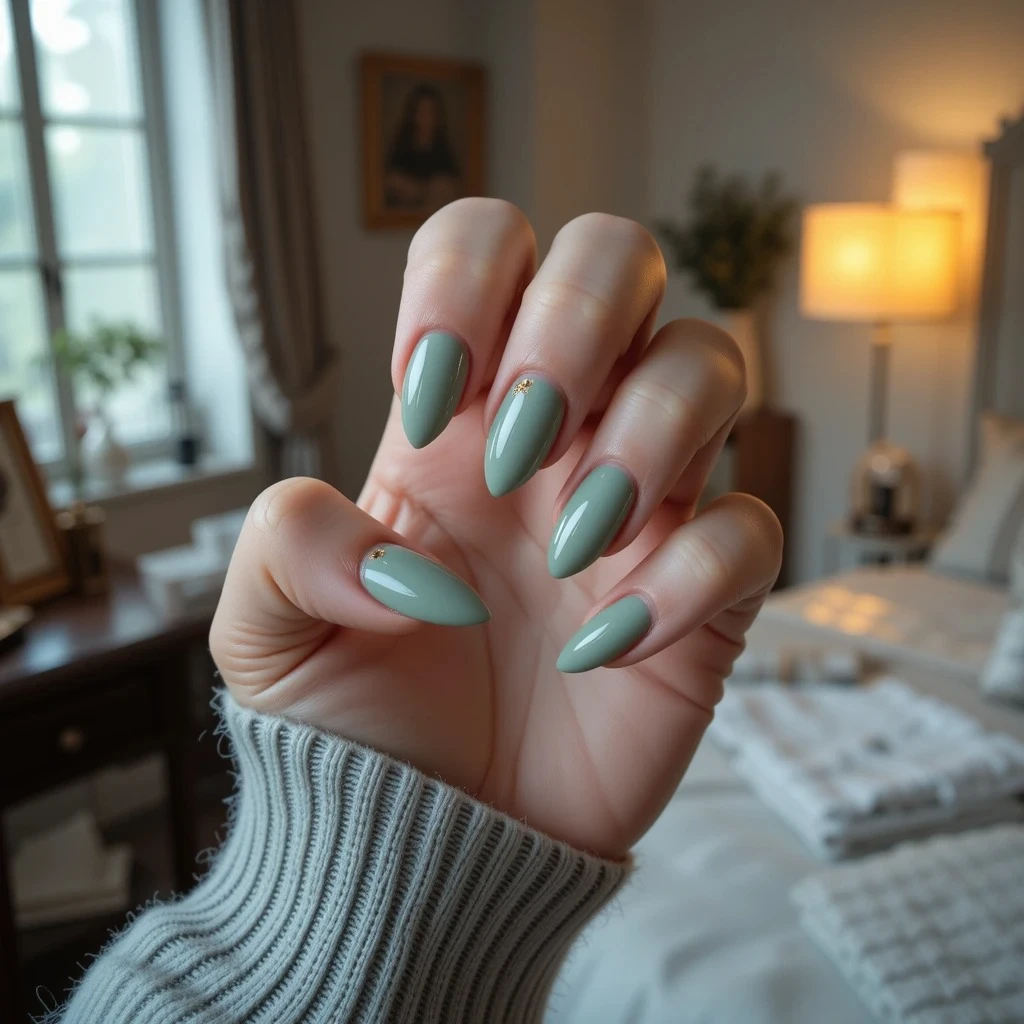
9. Dusty Sage Green
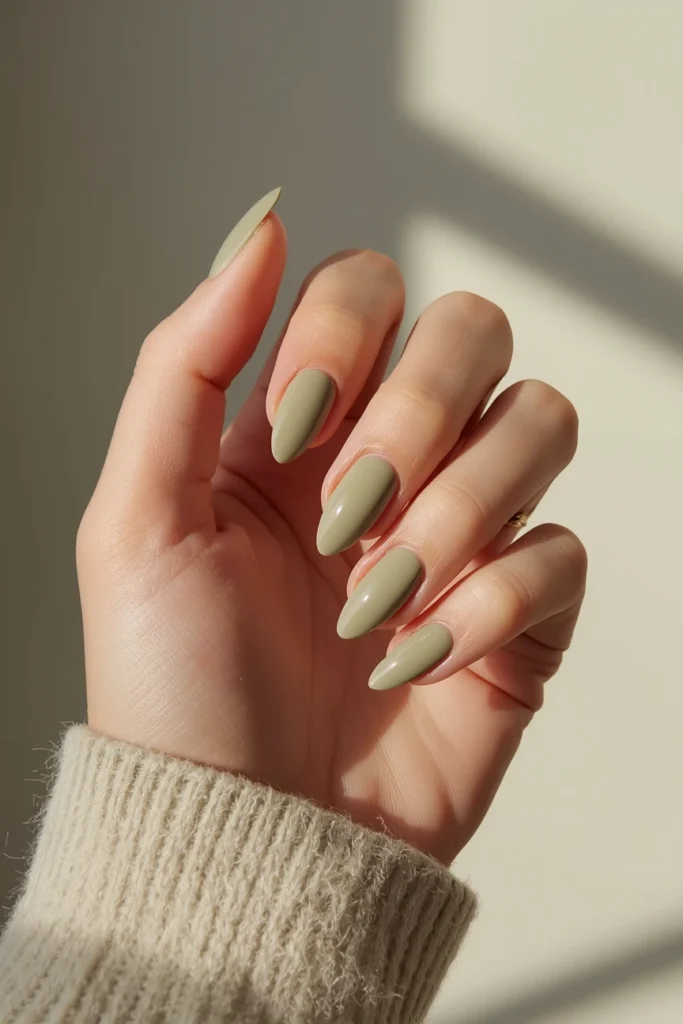
Muted olive-sage that brings an earthy, organic vibe to your nails. This shade feels grounding and calming during hectic January schedules. The dusty quality keeps it from looking too bright or summery, making it perfect for winter’s subdued palette.
Difficulty: Beginner
Time: 45–55 min
Best for: People wanting something unexpected that still feels low-key.
What makes it different: The dusty quality keeps this from looking like a spring shade — it sits firmly in the earthy, muted winter palette.
Why it works: Green tones complement the burgundies and navies of winter wardrobes without competing.
Steps:
- Prep nails, file to oval for an elongating effect.
- Apply base coat, dip into dusty sage/olive powder.
- Two coats for full, even coverage.
- Brush powder, activator, 2 minutes.
- File and buff smooth.
- Second activator, 2 minutes.
- For modern look: matte top coat. For classic: glossy top coat.
Products: Kiara Sky D606 “Olive You” ($14) is the most accurate dusty sage available at this price — other brands tend to read more yellow. Kiara Sky Matte Top Coat ($12) transforms this into something genuinely different from anything else in the lineup.
10. Steel Blue Chrome
Medium steel blue with a reflective chrome finish that shifts in different lighting. Bold enough to stand out, cool enough to stay wearable. The chrome creates a mirror-like effect that’s eye-catching but still feels polished and intentional rather than flashy.
Difficulty: Advanced
Time: 70–90 min
Best for: Experienced DIYers who want maximum visual impact.
What makes it different: The reflective chrome creates a mirror-like effect that shifts in different lighting — unlike any standard dip color.
Why it works: Chrome is having a major moment, and blue-gray tones are the most winter-appropriate version of the trend.
Steps:
- Prep nails with extra attention — chrome shows every surface flaw.
- Apply base coat, dip into steel blue powder. Two coats for solid base.
- Activator, 2 minutes, then buff surface perfectly smooth. This is critical.
- Wipe clean, second activator, 2 minutes.
- Apply no-wipe gel top coat (must be gel, not regular dip top coat).
- While the gel is still tacky, use a silicone applicator to rub chrome powder onto the nail in small circular motions.
- Buff until mirror-like shine appears.
- Brush away excess chrome gently.
- Seal with another layer of no-wipe gel top coat. Let cure fully.
Products: Beetles Gel “Steel Blue” ($9–11) for the base — gives a neutral gray-blue that lets the chrome pop. Kiara Sky Chrome Powder in Blue ($10) — Born Pretty Mirror Powder ($7–9) is cheaper but the chrome effect is less mirror-like. You must use Kiara Sky No-Wipe Top Coat ($13) or similar no-wipe gel — regular dip top coat won’t work for chrome application.
11. Cloud Gray Cream
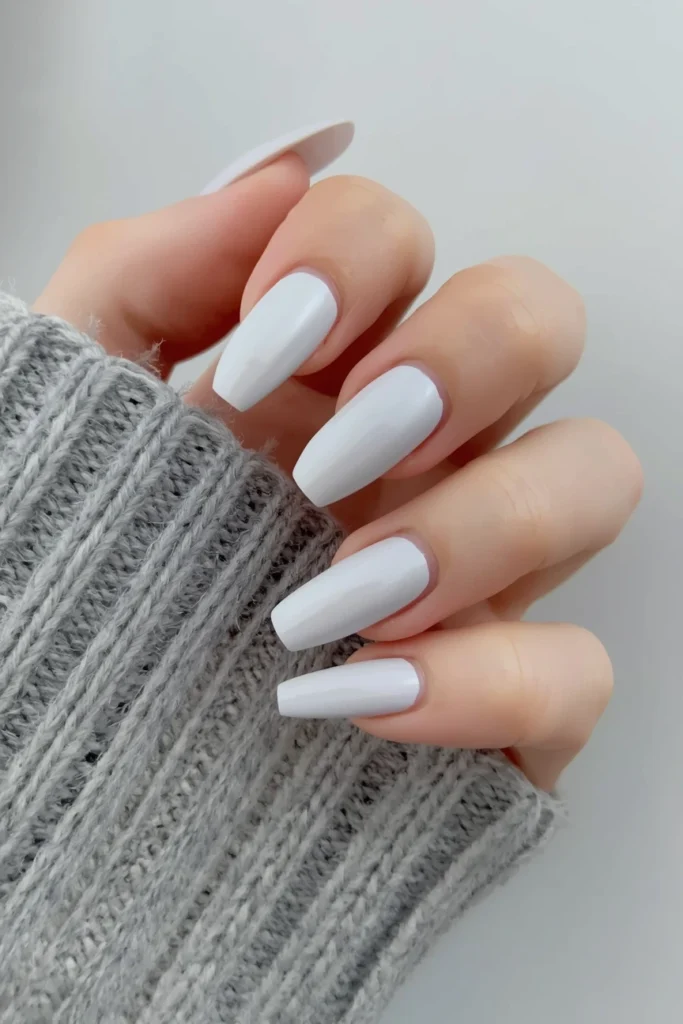
Pale gray-white that looks like winter clouds. Soft, neutral, and endlessly versatile for mixing and matching with any outfit. This shade has enough gray to feel intentional but stays light enough to keep your hands looking bright and fresh.
Difficulty: Beginner
Time: 45–55 min
Best for: Those who want white-adjacent nails with more depth than stark white.
What makes it different: Enough gray to look intentional, light enough to keep hands looking bright. The perfect compromise.
Why it works: More visual interest than white while staying just as clean and minimal.
Steps:
- Push cuticles back cleanly. Clean with alcohol, let dry.
- Apply base coat, dip into pale gray powder — may need 3 coats for full opacity.
- Repeat dipping until even and opaque.
- Brush powder, activator, 2 minutes. File and buff smooth.
- Second activator, 2 minutes.
- Two coats of glossy top coat for a creamy, polished finish.
Products: Revel Nail D180 Sweet Gray ($13) — same shade doubles as the base for gray ombré. OPI “Engage-meant to Be” ($17) for a more refined undertone that avoids any blue cast under cool lighting.
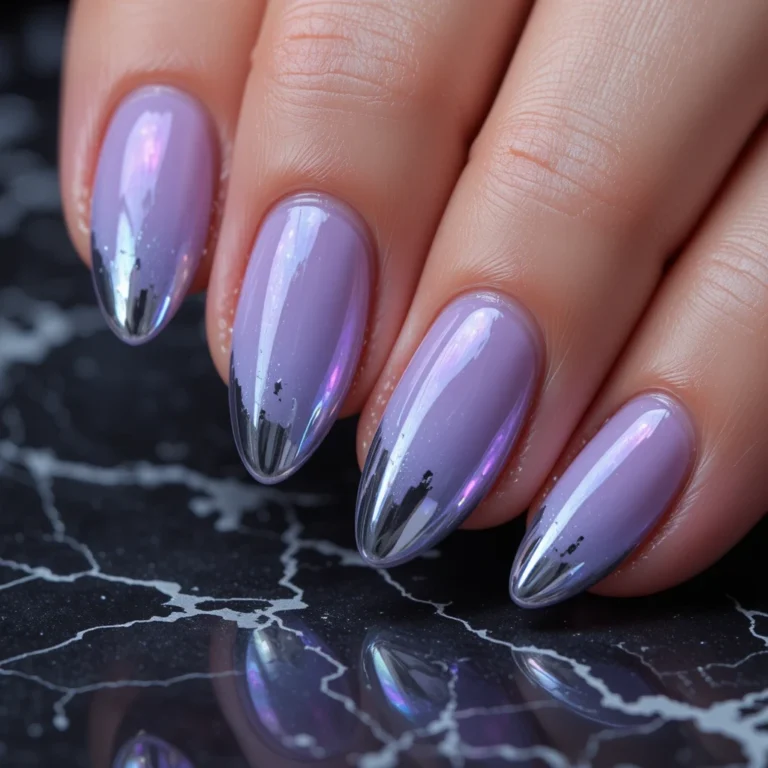
12. Frosted Lavender
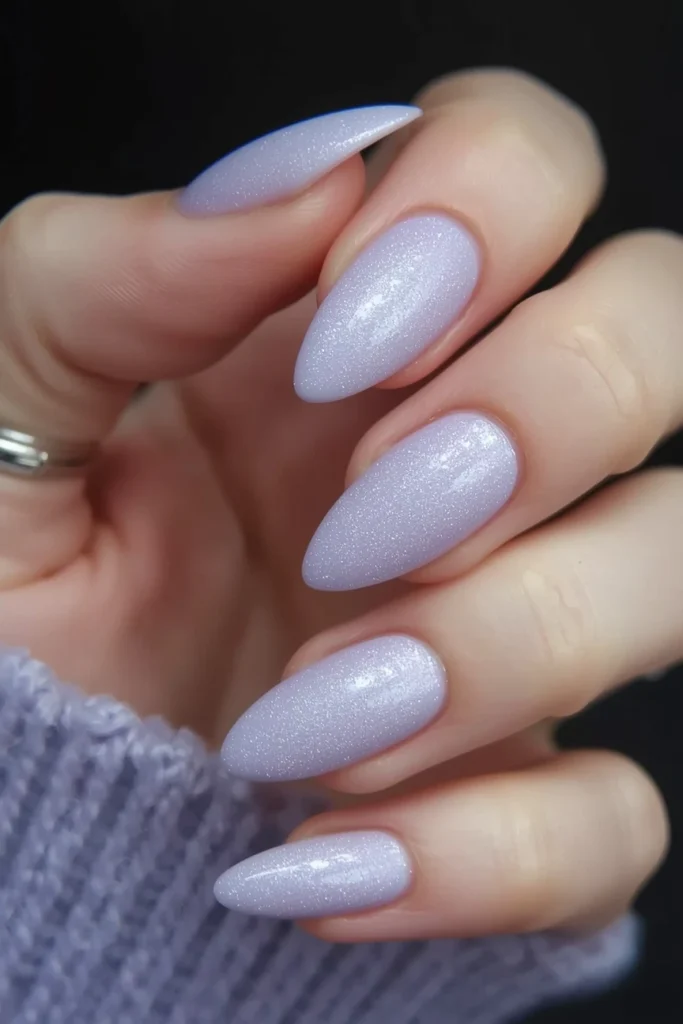
Pale lavender with a subtle silver shimmer that feels ethereal and romantic. This unexpected pastel works surprisingly well in winter when applied in dip powder. The cool undertones and shimmer prevent it from reading too spring-like or juvenile.
Difficulty: Beginner
Time: 45–55 min
Best for: People who want something soft and unexpected without going into bold color territory.
What makes it different: Cool undertones and silver shimmer prevent this from reading too spring-like — it genuinely works in winter.
Why it works: A soft alternative to traditional winter colors that still feels seasonally grounded.
Steps:
- Prep and file to medium or longer length for best effect.
- Apply base coat, dip into frosted lavender shimmer powder.
- Apply 2–3 thin coats — lavender can look patchy with thick application.
- Tap off excess gently to preserve shimmer.
- Activator, 2 minutes. File, buff lightly.
- Second activator, 2 minutes.
- Two coats of high-gloss top coat — shine prevents lavender from looking chalky.
Products: Revel Nail D261 Lavender ($14) has a silver shimmer base that keeps the tone cool and flattering. Keep the finish glossy — matte lavender reads chalky and faded almost immediately.
Deep & Moody January Dip Nails
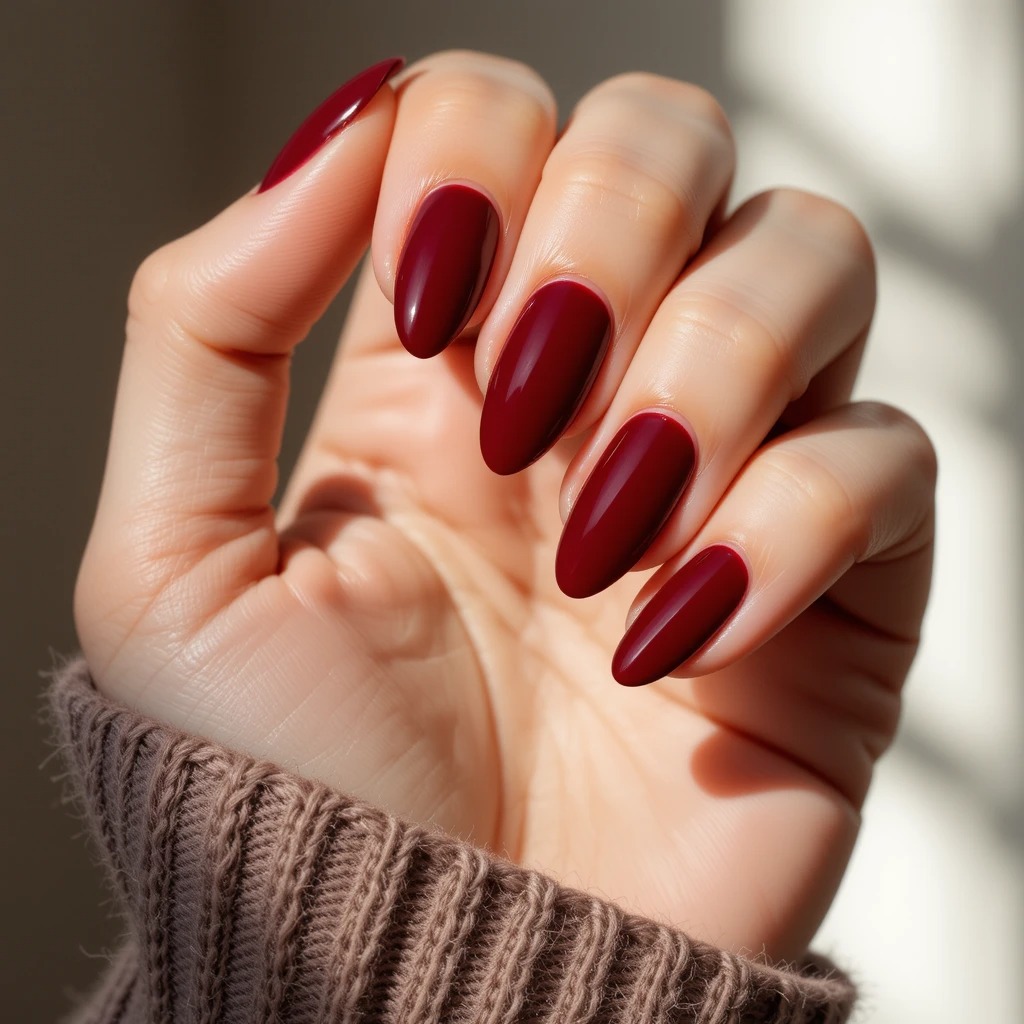
13. Deep Plum
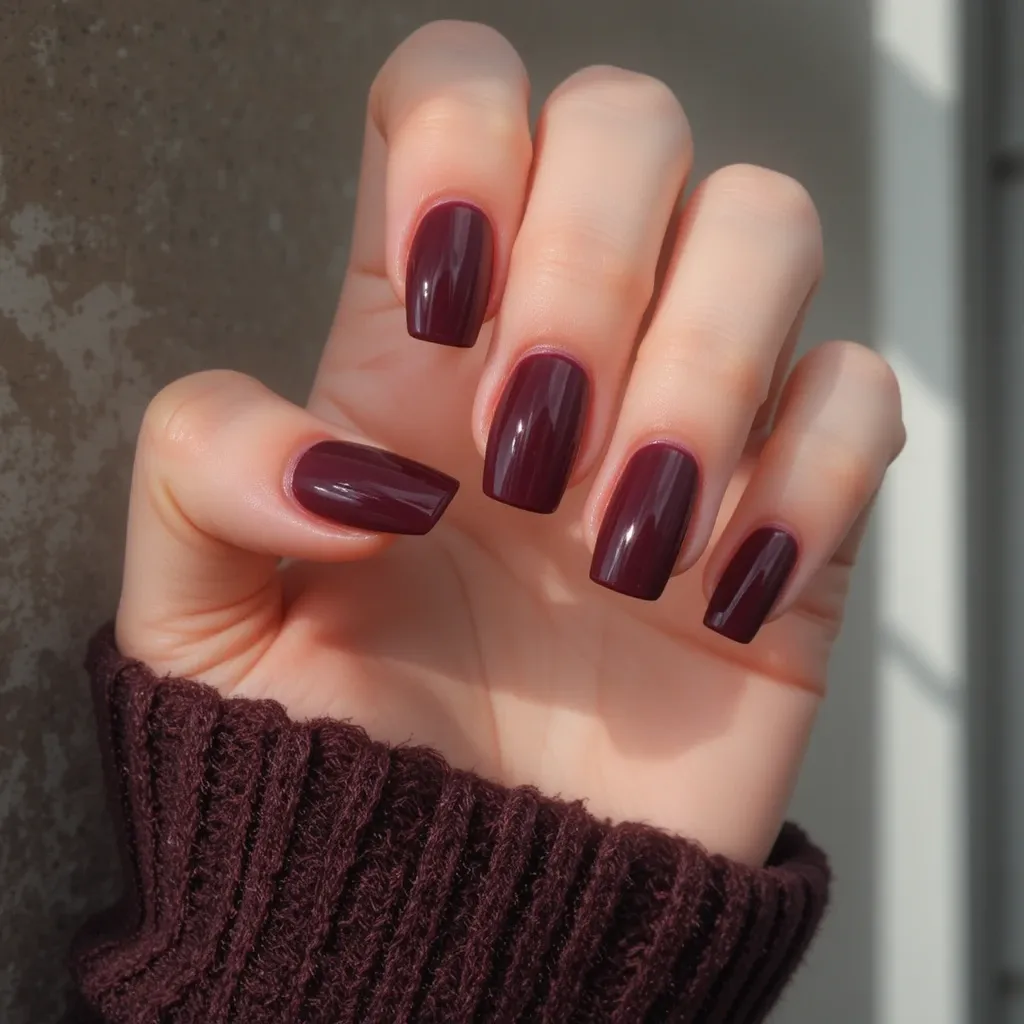
Rich burgundy-plum that feels luxurious and vampy without going full gothic. This shade has enough warmth to avoid looking harsh against winter skin tones. The depth makes it feel expensive and intentional, like you planned this manicure specifically for your winter aesthetic.
Difficulty: Beginner
Time: 50–60 min
Best for: People who want a vampy color that stays wearable for work.
What makes it different: Has enough warmth to avoid looking harsh on winter skin. The red undertone keeps it from feeling gothic.
Why it works: Dark jewel tones feel cozy and elegant during winter months, and plum is more wearable than black for everyday situations.
Steps:
- Prep nails thoroughly — dark colors show application mistakes more clearly.
- Clean with alcohol, let dry completely.
- Apply base coat carefully, 1mm gap at cuticle.
- Dip into deep plum powder at 45 degrees, hold 2–3 seconds. Repeat 2–3 coats.
- Brush excess powder thoroughly — any loose powder will show in the finish.
- Activator, full 2 minutes.
- File and buff completely smooth. Dark colors show texture.
- Wipe clean, second activator, 2 minutes.
- Two coats of glossy top coat for maximum depth.
Products: Revel Nail D52 Anna ($13–15) is consistently pigmented across batches. OPI “Lincoln Park After Dark” ($17) has deeper, more complex undertones worth the price bump.
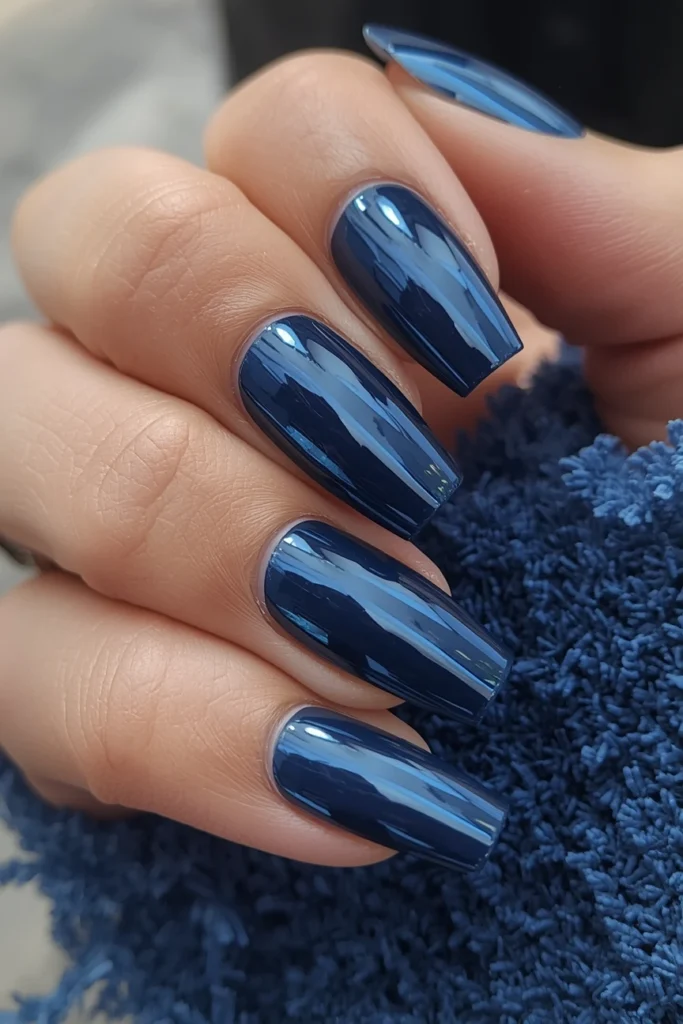
14. Midnight Navy
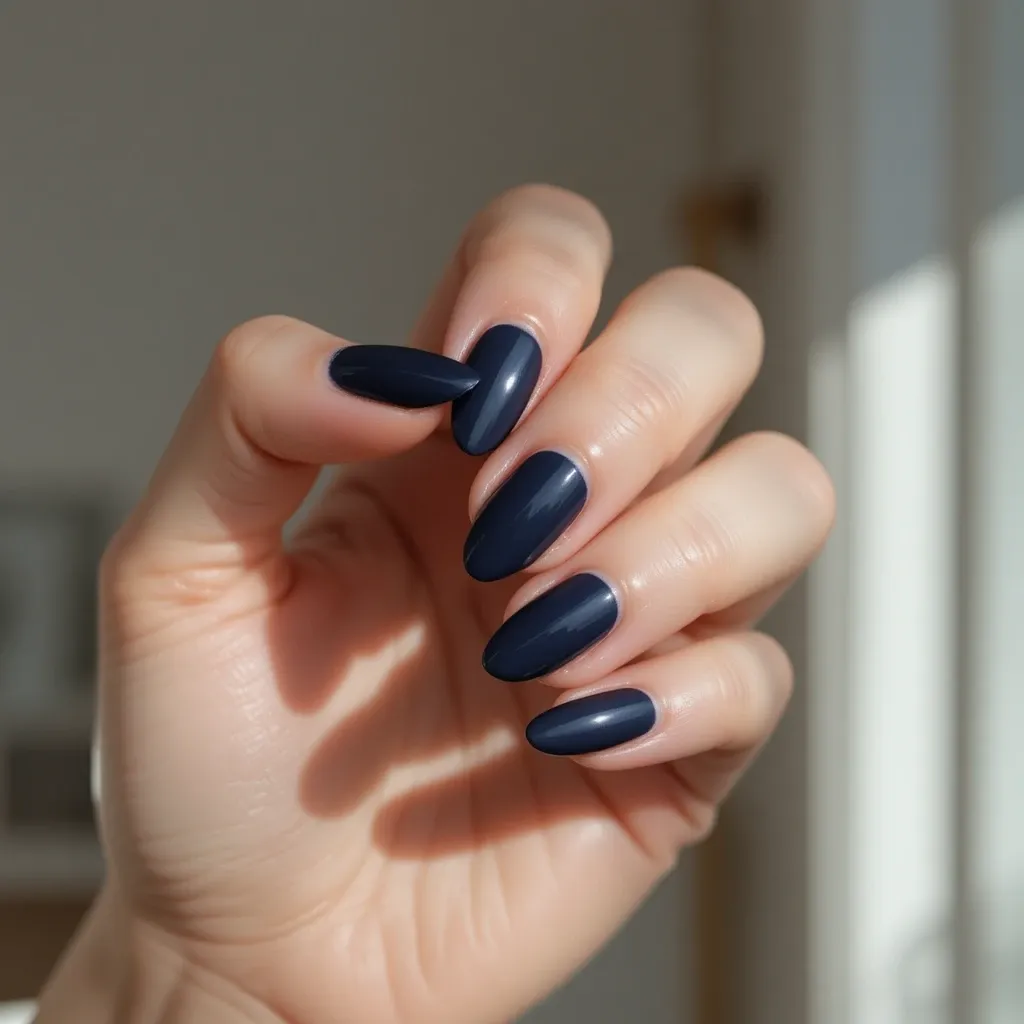
Deep navy blue that reads almost black in low light but shows rich blue undertones in sunlight. Classic and unexpectedly versatile for both casual and formal settings. The depth gives it sophistication while the blue keeps it from feeling as severe as true black.
Difficulty: Beginner
Time: 50–60 min
Best for: People who find black too stark but want a dark, polished manicure.
What makes it different: Reads almost black indoors, reveals rich blue in sunlight. That shift makes it feel more sophisticated than a flat dark shade.
Why it works: Navy is winter’s sophisticated alternative to black — just as polished but more interesting.
Steps:
- Prep nails meticulously — dark colors show every mistake.
- Apply base coat carefully to sidewalls and free edge to prevent chipping.
- Dip into midnight navy, 2–3 coats for deep rich color.
- Make sure powder reaches all edges and sidewalls.
- Brush excess, activator, 2 full minutes.
- File, buff smooth.
- Second activator, 2 minutes.
- Two coats glossy top coat, cap the free edge thoroughly.
- Daily cuticle oil to maintain appearance.
Products: OPI “Russian Navy” ($17) is the benchmark — the best version of this shade. Kiara Sky D502 Navy Blue ($14) is a close second at a lower price.
15. Chocolate Truffle
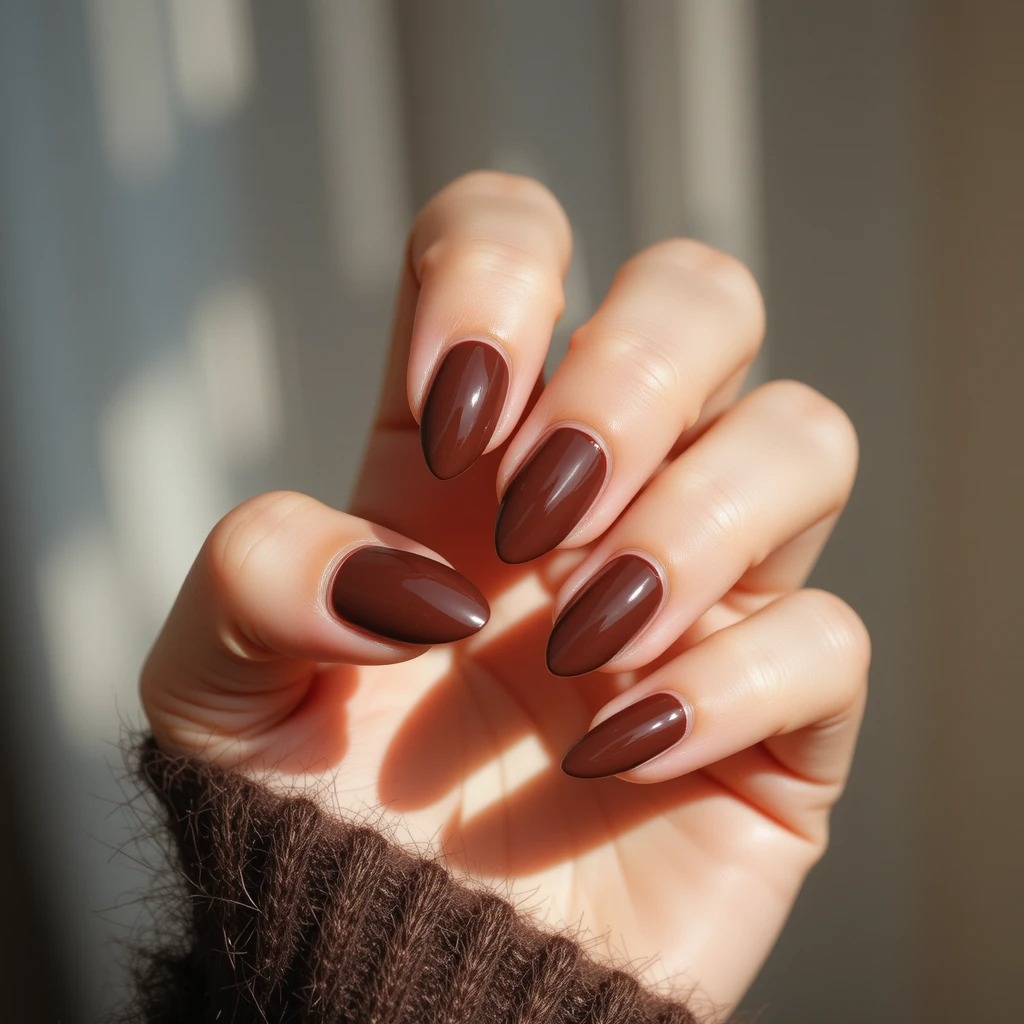
Warm deep brown with subtle red undertones. This shade looks expensive and goes with literally everything in your winter closet. The richness feels indulgent while the brown keeps it grounded and wearable for daily life.
Difficulty: Beginner | Time: 50–60 min Best for: Anyone who wants something unexpected that goes with literally everything in their winter wardrobe. What makes it different: The red undertones prevent this from reading flat or muddy — it has genuine warmth and depth. Why it works: Brown tones are having a major resurgence, and this rich version feels modern and elevated.
Steps:
- File to round or oval for a softer look with warm colors.
- Buff and clean thoroughly with alcohol.
- Apply base coat, dip into chocolate brown, 2–3 coats.
- Brush powder, activator, 2 minutes.
- File and buff until completely smooth.
- Second activator, 2 minutes.
- 2–3 coats of high-gloss top coat — the shine is what separates this from looking dull.
Products: OPI “Espresso Your Style” ($17) has red-brown undertones that look significantly warmer and richer than generic “brown.” Pair with gold jewelry — this color looks like it cost three times what you paid.
16. Oxblood Red
Deep brick-red that’s darker than classic red but not as purple as burgundy. Striking without screaming for attention at every meeting. This shade has enough depth to feel moody and winter-appropriate but maintains that red warmth that makes it feel bold.
Difficulty: Beginner
Time: 50–60 min
Best for: People who love red nails but find classic red too bright for January.
What makes it different: Sits between classic red and deep burgundy — bold with enough depth to feel seasonally appropriate and work-safe.
Why it works: Red tones carry over from the holiday season but this deeper version feels appropriate for the new year.
Steps:
- Prep nails, file to squoval or almond shape.
- Push cuticles back cleanly — this color shows sloppy work.
- Buff, clean with alcohol.
- Apply base coat with precision, 1mm cuticle gap.
- Dip into oxblood/brick red, 2–3 coats for rich depth.
- Brush excess, activator, 2 minutes.
- File edges carefully. Buff smooth.
- Second activator, 2 minutes.
- Two coats of glossy top coat.
Products: Revel Nail D71 Ruby ($13–15) pulls more brick than blue — exactly what oxblood needs to avoid reading purple. Kiara Sky D504 Red Haute ($14) has warmer undertones if you want it to lean slightly redder.
17. Smoky Charcoal
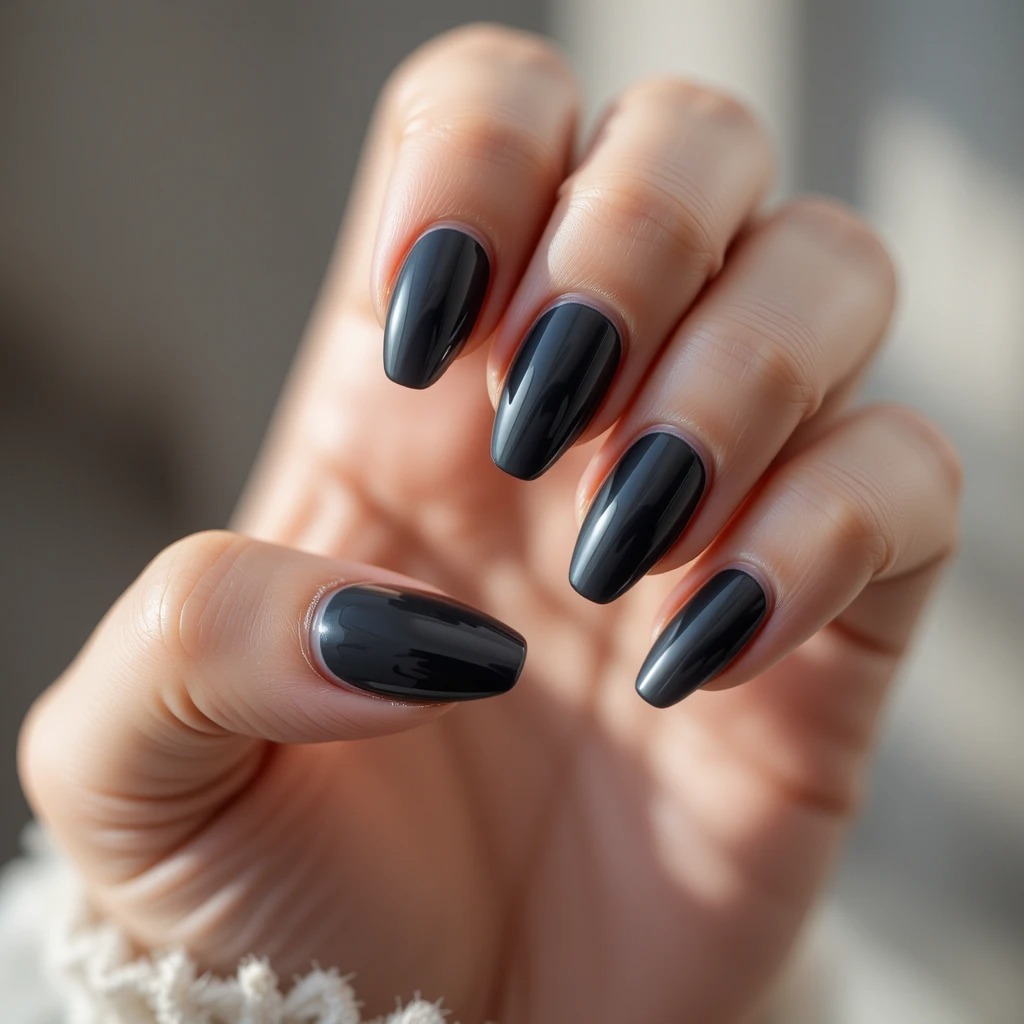
Dark charcoal gray that’s softer than black but just as dramatic. Edgy meets elegant in this versatile winter shade. The gray undertones make it less harsh than black while still delivering that moody, sophisticated vibe you want from a dark manicure.
Difficulty: Beginner | Time: 50–60 min Best for: Anyone who loves dark nails but finds black too severe for daily wear. What makes it different: Gray undertones soften the impact while keeping the moody vibe. Especially chic on short nails. Why it works: When you want impact without the commitment of jet black, charcoal delivers that moody winter vibe perfectly.
Steps:
- Prep nails. Charcoal looks great on short nails — don’t feel pressure to add length.
- Extra smooth buffing if doing matte finish.
- Apply base coat, dip into charcoal gray, 2–3 coats.
- Brush powder, activator, 2 minutes.
- File, buff completely smooth — dark colors show texture.
- Second activator, 2 minutes.
- For matte: one even coat of matte top coat. For glossy: two coats glossy.
Products: Revel Nail D144 Charcoal ($13) is consistent and true-tone gray. Kiara Sky Matte Top Coat ($12) — apply in a single direction without going back over areas you’ve already coated.
18. Forest Green Velvet

Deep emerald-forest green that feels rich and jewel-toned. This shade brings unexpected sophistication and pairs beautifully with gold jewelry. The depth keeps it from looking too bright or summery, making it feel grounded and luxurious for winter.
Difficulty: Beginner | Time: 50–60 min Best for: People bored of burgundy and navy who want a jewel tone with personality. What makes it different: Deep enough to feel rich and cozy rather than bright or summery. The satin finish option genuinely looks like velvet. Why it works: Green is a refreshing alternative to typical winter darks, and this deep version feels cozy rather than bright.
Steps:
- Prep nails, file to medium or longer length to show off the richness.
- Apply base coat, dip into deep forest/emerald green, 2–3 coats.
- Brush powder, activator, 2 minutes.
- File, buff smooth.
- Second activator, 2 minutes.
- For velvet effect: one coat glossy + one coat matte (satin).
- For classic: two coats glossy.
Products: Kiara Sky D608 “In the Tropics” ($14) is the deepest, most saturated forest green at this price range. Pair with gold jewelry — the contrast between deep green and warm gold is genuinely striking.
Elegant Accent & Chrome January Dip Nails
19. Nude with Silver Chrome Accent
Creamy nude base on most nails with one chrome silver accent nail per hand. The contrast is eye-catching without being overwhelming or unprofessional. This design gives you the versatility of nude nails with just enough sparkle to keep things interesting and visually dynamic.
Difficulty: Beginner | Time: 50–60 min
Best for: People bored of burgundy and navy who want a jewel tone with personality.
What makes it different: Deep enough to feel rich and cozy rather than bright or summery. The satin finish option genuinely looks like velvet.
Why it works: Green is a refreshing alternative to typical winter darks, and this deep version feels cozy rather than bright.
Steps:
- Prep nails, file to medium or longer length to show off the richness.
- Apply base coat, dip into deep forest/emerald green, 2–3 coats.
- Brush powder, activator, 2 minutes.
- File, buff smooth.
- Second activator, 2 minutes.
- For velvet effect: one coat glossy + one coat matte (satin).
- For classic: two coats glossy.
Products: Kiara Sky D608 “In the Tropics” ($14) is the deepest, most saturated forest green at this price range. Pair with gold jewelry — the contrast between deep green and warm gold is genuinely striking.
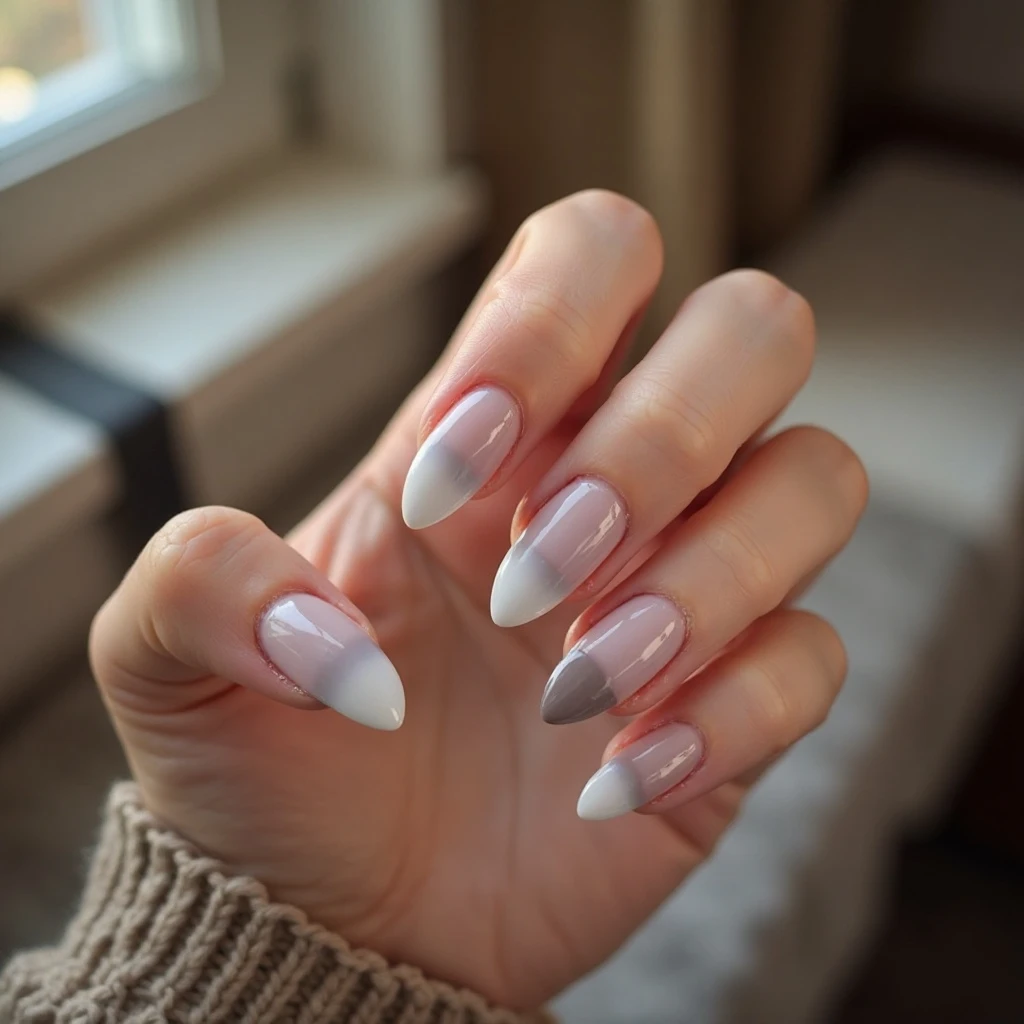
20. French Tips with Gray Twist
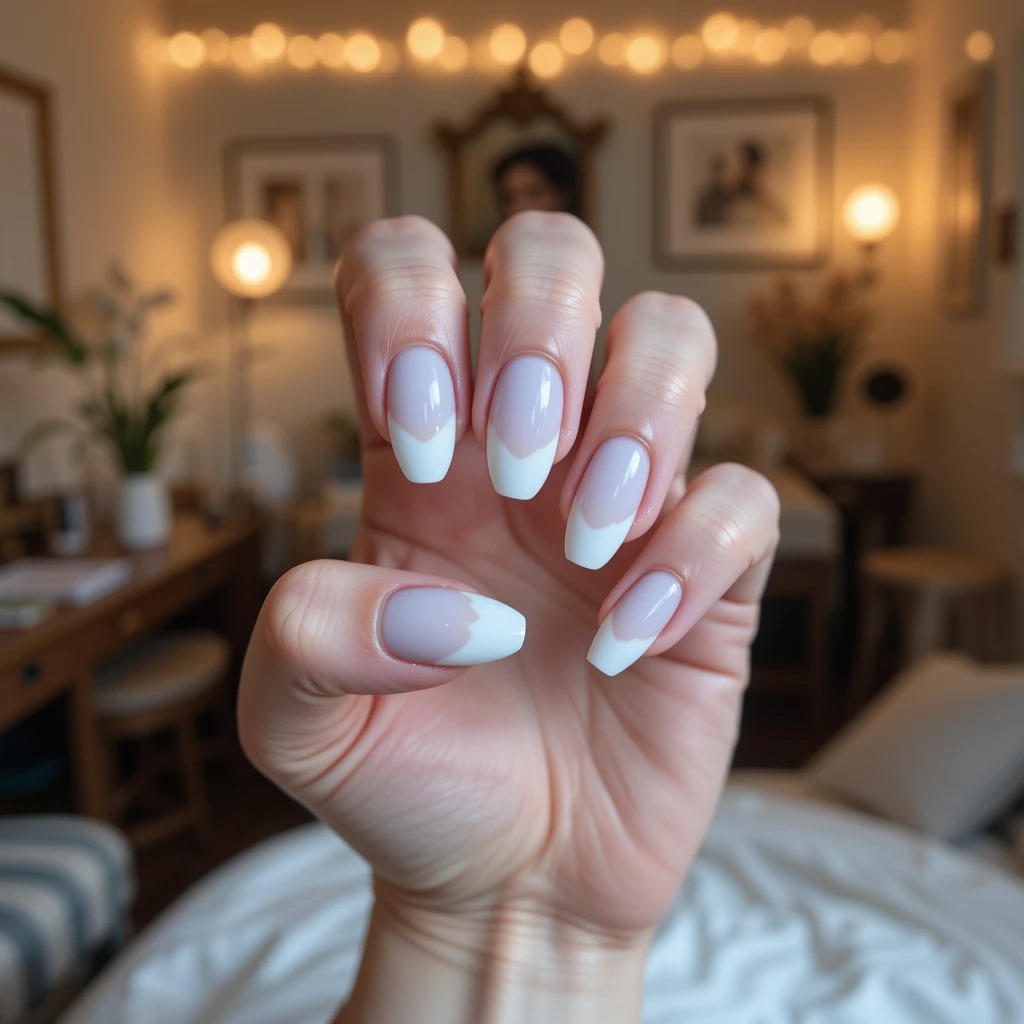
Milky white base with soft gray tips instead of traditional white. Modern and clean with a subtle edge that updates the classic French manicure. The gray tips feel fresh and current while maintaining the timeless elegance that makes French manicures so popular.
Difficulty: Intermediate | Time: 65–80 min
Best for: Anyone who wants something interesting but doesn’t want a full chrome manicure.
What makes it different: Chrome on one nail looks intentional and editorial in a way that adds dimension without overwhelming neutrals.
Why it works: Gives you the best of both worlds — wearable neutrals for daily life plus a touch of winter sparkle.
Steps:
- Prep all nails.
- Apply creamy nude dip to all 10 nails, 2–3 coats.
- Activator, file, buff all nails. Second activator.
- Apply regular glossy top coat to 8 nails. Set aside.
- For accent nails (one per hand, ring or middle finger): apply no-wipe gel top coat instead.
- While tacky, rub silver chrome powder with silicone tool in small circular motions.
- Buff to mirror shine. Brush away excess.
- Seal accent nails with another layer of no-wipe gel top coat.
- Cuticle oil when fully dry.
Products: Kiara Sky Silver Chrome Powder ($10) gives a cleaner mirror finish than Born Pretty ($7) — worth the extra $3. Modelones No-Wipe Gel ($9) is a reliable budget option for the gel top coat step.
21. Matte Nude with Glossy Accent
Soft matte nude on all nails except one glossy accent nail per hand. The texture contrast creates visual interest without adding color. This is perfect for anyone who loves minimalism but wants something more than a simple solid color.
Difficulty: Beginner | Time: 55–65 min
Best for: Minimalists who want texture contrast without adding color.
What makes it different: Using the exact same color in two different finishes creates surprising dimension — subtle enough that people notice without being able to identify why it looks good.
Why it works: Perfect for minimalists who want something interesting but not loud.
Steps:
- Prep all nails with extra smooth buffing.
- Apply same nude dip to all 10 nails, 2–3 coats.
- Activator, file, buff all nails perfectly smooth. Second activator, 2 minutes.
- Apply matte top coat to 8 nails.
- Apply glossy top coat to 2 accent nails (one per hand).
- Let matte dry fully (3–5 min) before applying cuticle oil — and apply oil only around edges, never on the matte surface.
Products: Use the same nude base powder for both — Kiara Sky D403 Bare Elegance ($14) works well. Kiara Sky Matte Top Coat ($12) for the matte nails; cheaper matte coats sometimes look dusty rather than velvety.
22. Icy Blue with Chrome Tips
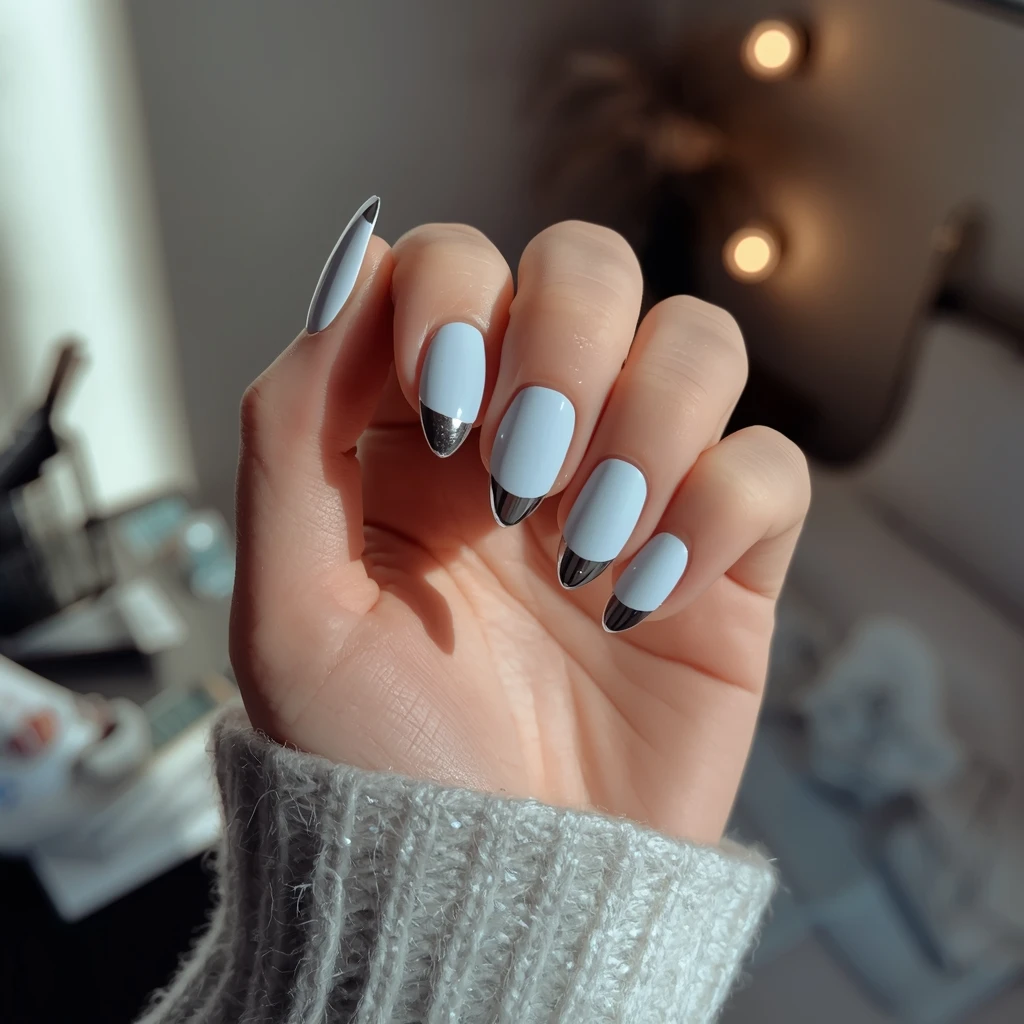
Pale icy blue base with chrome silver tips on each nail. This creates a frozen, winter wonderland effect that’s surprisingly wearable. The chrome tips catch light beautifully and add just enough drama to elevate a simple pale blue into something special.
Difficulty: Advanced | Time: 75–90 min Best for: Experienced DIYers who love nail art that photographs exceptionally well. What makes it different: Chrome tips on an already interesting base create a two-zone look that’s more complex than most at-home designs. Why it works: The frozen blue-to-chrome gradient is genuinely striking and captures winter’s essence.
Steps:
- Prep nails thoroughly — chrome shows flaws.
- Apply icy blue dip to all nails, 2–3 coats for solid base.
- Activator, file, buff smooth, second activator.
- Apply no-wipe gel top coat to entire nail.
- While tacky, apply silver chrome powder to just the tips (1/4 of nail) with silicone tool.
- Buff chrome on tips to mirror shine, creating a gradient from blue to chrome.
- Use a small brush to soften the transition line.
- Brush away excess.
- Seal entire nail with another layer of no-wipe gel top coat. Let cure fully.
Products: Revel Nail D239 Frost ($14) for the icy blue base — the fine shimmer in the base makes the chrome tip contrast even more dramatic. Born Pretty Mirror Silver ($7) works for tips since you’re only covering a small area.
23. Sage Green with Gold Accent
Muted sage green on most nails with one gold chrome accent nail. The warm-cool combination feels balanced and sophisticated. The gold adds warmth that prevents the look from feeling too cool-toned or sterile.
Difficulty: Intermediate | Time: 65–80 min Best for: Anyone who wants warmth and earthiness without going full neutral. What makes it different: The warm-cool combination of dusty sage and gold chrome feels balanced in a way that silver-plus-cool-tone combinations don’t. Why it works: The earthy sage keeps things grounded while the gold adds warmth and luxury without looking holiday-themed.
Steps:
- Prep all nails.
- Apply dusty sage dip to all 10 nails, 2 coats.
- Activator, file, buff, second activator for all nails.
- Apply regular glossy top coat to 8 nails.
- For accent nails: no-wipe gel top coat.
- While tacky, rub gold chrome with silicone tool.
- Buff to mirror shine, brush away excess.
- Seal accent nails with second layer of no-wipe gel top coat.
Products: Kiara Sky D606 Olive You ($14) is the most accurate dusty sage available at this price. Kiara Sky Gold Chrome Powder ($10) — gold chrome shows color variation between brands more than silver, and this one stays warm rather than going brassy.
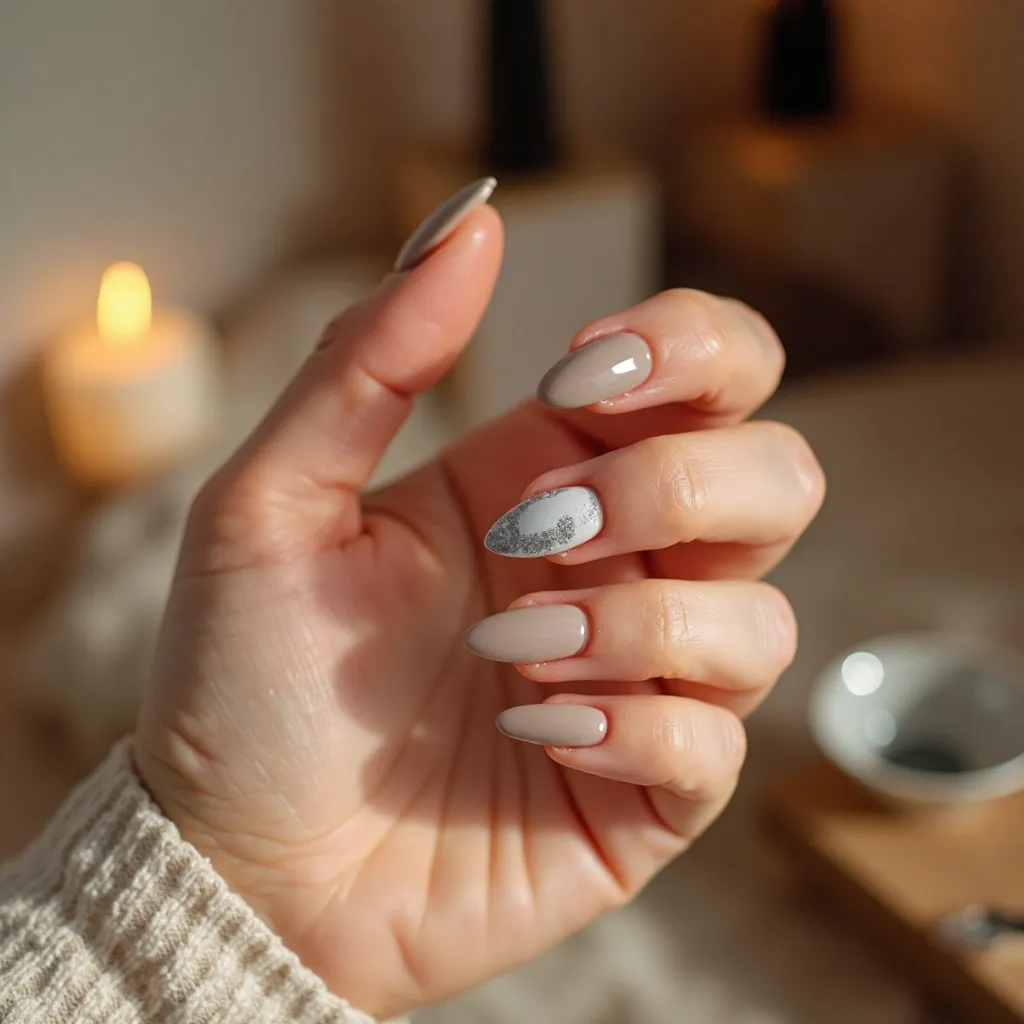
24. Soft Gray Ombré
Light gray fading into white from cuticle to tip. The gradient effect is subtle and creates a soft, dimensional look. This gives you the interest of nail art without requiring any special skills or precision—just smooth blending.
Difficulty: Intermediate | Time: 65–80 min
Best for: People who want nail art-adjacent results without requiring precision tools.
What makes it different: Ombré created through layered dip (rather than sponge blending) is more even and lasts significantly longer than gel or polish ombré methods.
Why it works: Ombré feels polished without being too trendy, and the gray-to-white palette is perfectly winter-appropriate.
Steps:
- Prep nails — ombré shows best on medium to long lengths.
- Apply base coat, dip entire nail in light gray. First coat.
- Second coat: apply base to 3/4 of nail, dip just that portion in light gray.
- Third coat: base coat on tip only (1/3 of nail), dip tip into white powder.
- Use a soft brush to gently blend transition zones in small circular motions while powder is still loose.
- Brush excess, activator, 2 minutes.
- File and buff — blend the gradient smooth during this step.
- Second activator, 2 minutes.
- Two coats glossy top coat for a seamless finish.
Products: Revel Nail D180 Sweet Gray ($13) for gray, Revel D1 Snow ($13) for white — staying in the same brand family ensures compatible powder particle sizes, which makes blending smoother. A clean soft makeup brush works better than stiff nail brushes for blending.
25. Milky White with Nude Accent
Sheer milky white on most nails with one nude accent nail per hand. The tonal variation is subtle but adds depth and interest. This is ideal for anyone who wants the clean look of white nails but craves just a touch more dimension.
Difficulty: Beginner | Time: 50–60 min
Best for: People who love clean white nails but want just a touch more dimension.
What makes it different: The tonal contrast is barely there — which is exactly the point. The nude accent looks expensive precisely because it’s subtle enough to make people look twice.
Why it works: Keeps the clean, fresh vibe of an all-white manicure but adds depth through the nude accent.
Steps:
- Prep all nails.
- Apply milky white dip to 8 nails, 3 thin coats for buildable sheer coverage.
- Apply warm nude to 2 accent nails (one per hand), 2–3 coats.
- Activator all nails, 2 minutes.
- File and buff all nails smooth.
- Second activator, all nails, 2 minutes.
- Glossy top coat to all nails.
Products: Kiara Sky D401 Milk Bath ($14) for white and D403 Bare Elegance ($14) for the nude — these two shades sit in the same tonal family, which creates that barely-there, intentional contrast.
26. Navy with Pearl Chrome
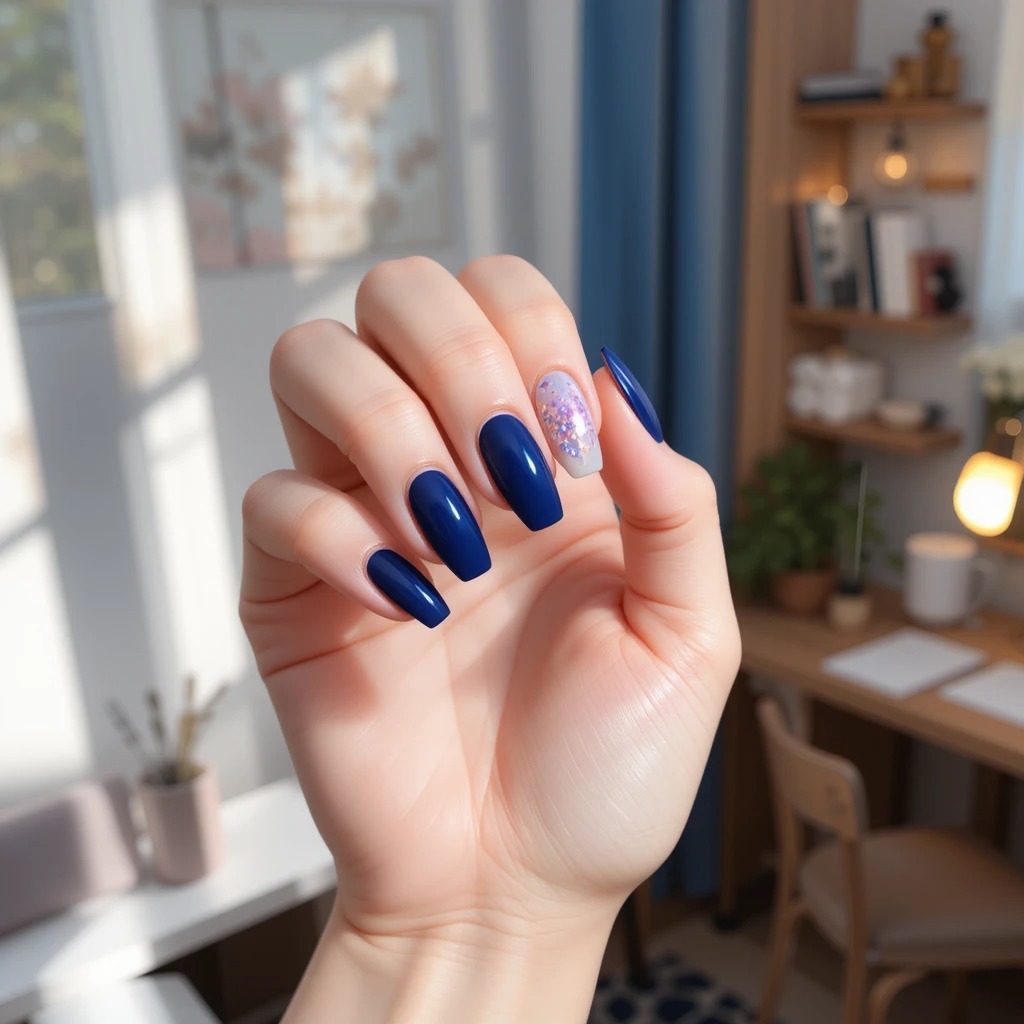
Deep navy base with a pearl chrome accent nail that shifts between white, pink, and blue. The iridescent effect is mesmerizing. The pearl chrome adds a magical, light-catching quality that elevates the deep navy into something truly special.
Difficulty: Advanced | Time: 75–90 min
Best for: Special occasions or anyone who wants something genuinely hard to replicate at a salon.
What makes it different: Pearl chrome shifts between white, pink, and blue depending on the angle — against deep navy this color-shift is especially visible and striking.
Why it works: Combines winter’s dark moody tones with a magical shimmer that catches light beautifully during gray winter days.
Steps:
- Prep all nails with extra smooth buffing — pearl chrome shows every flaw.
- Apply deep navy dip to all nails, 2–3 coats.
- Activator, file, buff extra smooth, second activator for all nails.
- Regular glossy top coat to 8 nails.
- For accent nails: no-wipe gel top coat.
- While tacky, rub pearl chrome with silicone applicator in circular motions.
- Buff until you can see the iridescent color-shift from multiple angles.
- Brush away excess gently.
- Seal with another layer of no-wipe gel top coat. View in natural light for the full effect.
Products: Kiara Sky Pearl Chrome / Unicorn Chrome ($12) — this genuinely color-shifts. Born Pretty Chameleon Powder ($8–10) also works but the shift between colors is less dramatic. Use Kiara Sky No-Wipe Top Coat ($13) — this step is where most failures happen if the top coat isn’t specifically no-wipe gel.
Pros and Cons
Pros ✅
- Lasts 3–4 weeks without chipping in normal wear conditions
- No UV lamp required — cures with liquid activator
- Adds structural strength to thin or brittle natural nails
- Wide color range including shimmer, chrome, and matte options
- Handles cold weather and hand-washing better than regular polish
- Odor is generally lower than acrylic systems
Cons ❌
- Removal takes 15–20 minutes of acetone soaking — you can’t just peel it off
- Application has a learning curve; first attempts are often uneven
- Chrome and two-finish looks require additional products (no-wipe gel top coat, chrome powders)
- Dark shades show regrowth visibly after 2 weeks — plan your timing
- Not repairable if a nail breaks mid-wear; you’ll need to redo that nail
- Requires 8–10 distinct steps — roughly 45–90 minutes for beginners
- The powder can look chunky if applied too thick or without adequate buffing
What to Expect Week by Week
I wore a vanilla latte nude dip manicure through a full January dip nails — here’s an honest account of how it held up.
Days 1–7 Nails look exactly as applied. The glossy finish is intact, cuticles look clean, and there’s no visible wear at all. This is the honeymoon period where dip really earns its reputation.
Days 8–14 Slight visible gap at the cuticle line as nails grow — about 1mm on most nails. On a nude shade this was nearly undetectable. Gloss still looks good, no chipping. One nail on my dominant hand had a very small surface scratch near the tip, probably from typing.
Days 15–21 Regrowth is now clearly visible (about 2–3mm). On the nude this still looked intentional rather than neglected. One edge chip on the index finger of my dominant hand. I applied a fresh layer of glossy top coat to all nails which bought another several days of shine. The overall shape had softened slightly from daily activity.
Days 22–28 Definitely time to remove. The regrowth gap was distracting, and a second edge chip appeared. The product itself was still adhering well — I didn’t have any full nail breaks — but the look felt overdue. Removal took about 18 minutes using acetone-soaked cotton pads and foil wraps.
Note: Dark shades like navy or charcoal show regrowth much faster — by day 10 you’ll notice a visible contrast line that lighter shades hide for another week.
Maintenance Tips
Days 1–7: Set It Up Right
- Apply cuticle oil every night before bed (not morning). CND SolarOil ($9) absorbs fast enough that it won’t leave residue by morning. Hydrated skin around the nails reduces the lifting that starts at the edges.
- Wear gloves for any cleaning or prolonged water exposure. Dip is water-resistant, not waterproof — long dish sessions without gloves accelerate edge lifting noticeably by week two.
Days 8–14: Protect the Edges
- Reapply a thin coat of glossy top coat every 5–7 days, focusing on the free edge where chipping starts. One layer takes about 3 minutes and extends the life of the shine significantly.
- Avoid using your nails as tools — opening cans, peeling stickers, etc. Edge chips almost always start from impact at the free edge tip.
Days 15–21: Decide Whether to Refresh or Remove
- A fresh top coat application can buy another 5–7 days on light shades where regrowth isn’t visible. On darker shades, it’s usually better to remove and restart.
- Watch for stress lines near the cuticle — a thin crack or white stress mark means the product is separating from your natural nail and removal is overdue, even if it still looks acceptable.
At Removal
- Don’t skip the buffing step before acetone soak. Lightly breaking the top coat surface before wrapping with acetone cuts soak time from 20 minutes down to about 12–15 and reduces how much scraping you need to do after.
- Apply a hydrating treatment immediately after removal. CND SolarOil or Aquaphor applied right after soaking helps nails rehydrate before your next application.
Common Mistakes
Mistake 1: Applying Base Coat Too Close to the Cuticle
What it looks like: Skin around the cuticle gets coated in powder, lifting begins within days at the edge.
Why it happens: The base coat wicks toward the skin via capillary action when applied too close — once the skin lifts, the dip product goes with it.
Fix: Leave a 1mm gap — it looks like a gap during application but disappears visually once the product is on. If you’ve flooded the cuticle, use a small orangewood stick to remove product from the skin before it sets.
Honest note: If lifting has already begun, you can’t repair it. Remove and reapply that nail.
Mistake 2: Skipping or Rushing the Buffing Step
What it looks like: Lumpy, uneven surface that doesn’t smooth out with top coat; the texture shows through the finish.
Why it happens: Each dip layer leaves minor surface irregularities. Buffing removes them — skipping this leaves them locked under the top coat.
Fix: Before your second activator coat, buff the surface smooth using a 180-grit file. It should feel completely flat before you apply top coat. Re-buffing and reapplying top coat can improve the surface somewhat, but won’t fully correct thick lumping.
Mistake 3: Using Too Much Powder Per Dip
What it looks like: Nails look thick and clunky rather than natural and thin.
Why it happens: Holding the nail in the powder too long, or not tapping off excess — the powder piles up faster than expected.
Fix: Dip at a 45-degree angle and immediately tap the finger several times to remove loose powder. Two thin coats look better than one thick coat. If the nail is already too thick, the only real fix is soaking off and starting over.
Mistake 4: Applying Matte Top Coat Over a Tacky Surface
What it looks like: Matte finish looks streaky, patchy, or has visible brush marks.
Why it happens: Matte top coats are less forgiving than glossy. Going back over a section you’ve already coated causes the surface to drag.
Fix: Apply matte top coat in a single, confident pass in one direction. No going back. If it looks streaky, let it cure fully (5 minutes), then apply one more thin coat in a single pass.
FAQ
Can I do dip nails at home without a full kit? You need at minimum: base coat, activator, dip powder, and top coat. A complete beginner kit from Beetles or Modelones runs $25–35 and includes everything. Skipping the activator and trying to substitute with hairspray or another product won’t cure the powder correctly.
How do I remove dip powder nails without damaging natural nails? Buff the top coat surface lightly with a 180-grit file first, then soak cotton pads in pure acetone and wrap each fingertip with foil for 15–18 minutes. The product should slide off without scraping — if it’s not releasing, soak for another 5 minutes rather than forcing it. Scraping when the product is still adhered is what causes thinning and damage.
Why does my dip powder manicure bubble or look uneven? Bubbling usually happens because the base coat was applied too thick, or because you dipped while the base coat was still too wet or too dry — there’s a narrow window of tackiness that works best. Uneven color usually comes from inconsistent dipping angle or not tapping off enough excess powder between coats.
How soon can I get dip nails wet after application? The product is technically set by the time you apply top coat. That said, giving it a full hour before extended water exposure (like a shower or dishes) lets the top coat fully harden and reduces early-wear edge lifting. The first 24 hours are when the seal is most vulnerable.
Final Thought
If you’re just starting out, the cleanest path is picking one shade from the minimalist section and doing a straightforward two-coat solid color before attempting chrome or ombré effects.
Vanilla Latte Nude or Milky Glass are both forgiving of minor technique variations, grow out gracefully, and give you results that look genuinely polished even if the application isn’t perfect.