86 Spring Nails Inspo for March You Haven’t Tried Yet
Spring nails are just what they sound like—manicures that fit the season. Think softer colors than winter’s deep burgundies, but not as bright as summer neons. The best ones have a light, fresh feel without screaming “look at me, it’s spring!”
Most spring nail articles just show you pretty pictures. This one includes step-by-step tutorials for each design, tells you exactly which products to buy and where, and gives you the real timeline of how these nails will look week by week (because let’s be honest, they don’t stay perfect forever).
How to Choose the Best Spring Nail Design
Not every spring design works for every person or situation. Here’s how to pick what actually fits your life:
For your first time trying spring nails:
Stick with one solid color in a soft pastel or nude. Try Essie’s “Ballet Slippers” or OPI’s “Bubble Bath” on short squoval nails. Solid colors are forgiving, and if you mess up, you can fix it easily. Avoid anything with multiple colors or nail art until you’re comfortable with basic application.
If you have a professional job:
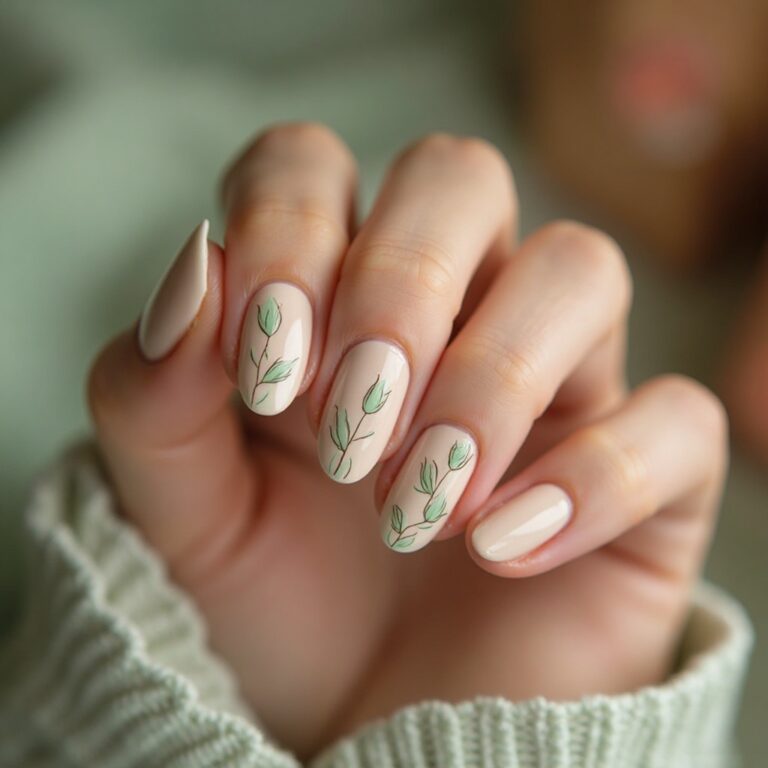
Go for muted tones like dusty mauve, sage gray-green, or slate blue. These read as polished and intentional without distracting in meetings. Skip anything with glitter, rhinestones, or high-contrast patterns. A single accent nail with subtle line art (like the Garden Lines design) usually passes as professional if kept minimal.
If you want something for special events (weddings, graduations, garden parties):
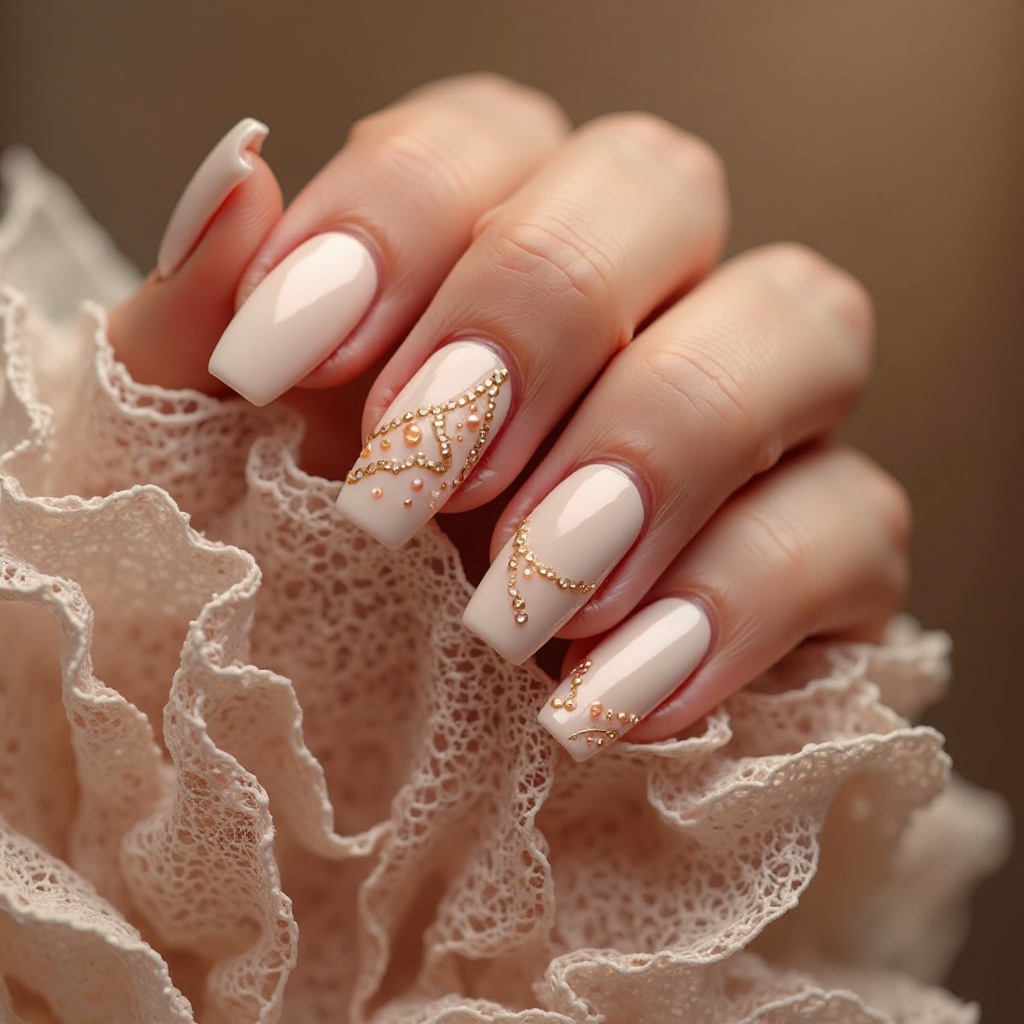
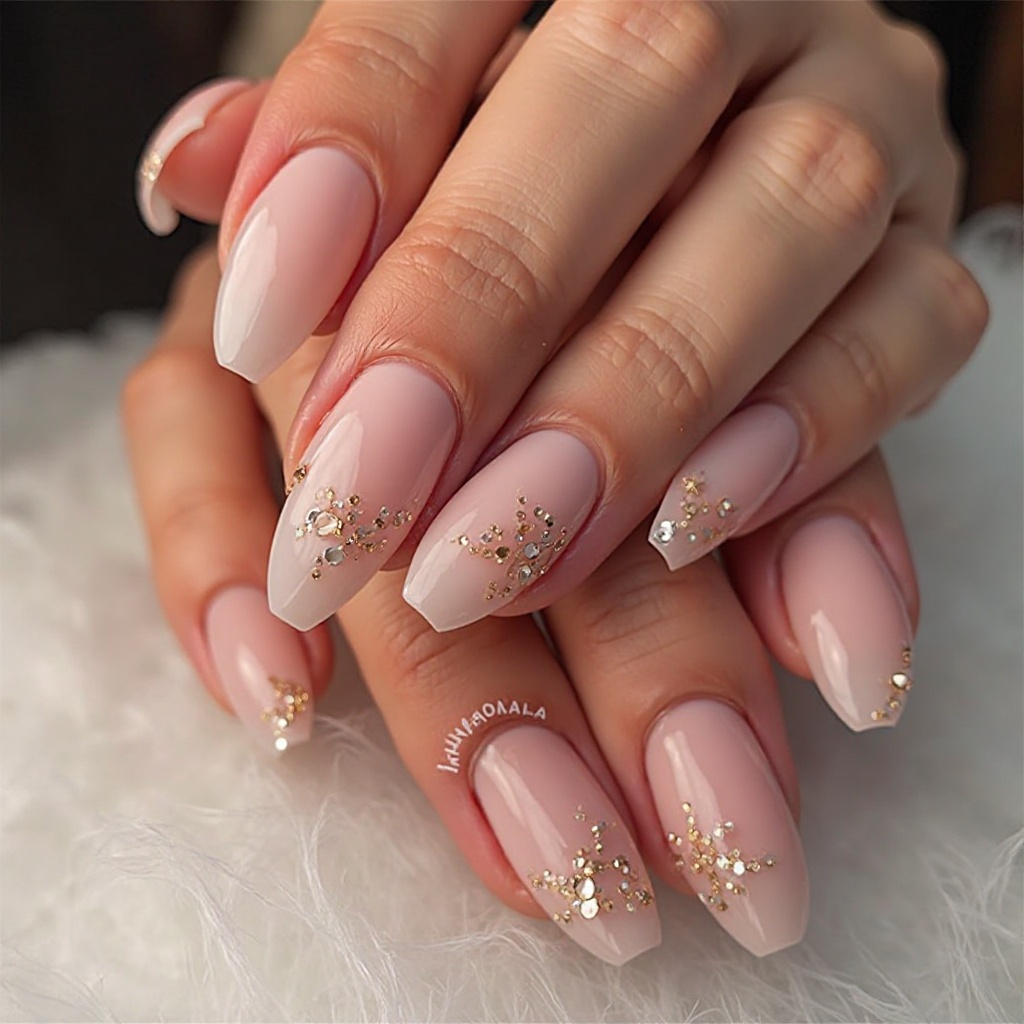
This is where you can have fun. Rose gold chrome, butterfly accents, or ombre acrylics photograph beautifully and feel special-occasion worthy. Just test them a few days before your event in case you need adjustments—especially with chrome powder, which has a learning curve.
If you’re comfortable with nail art:
Try the abstract watercolor technique or negative space florals. These designs look complicated but are actually forgiving because imperfections blend into the artistic effect. They also let you use multiple spring colors in one cohesive look.
If you have short nails:
You’ve got more options than you think. Bright colors actually pop on short nails without overwhelming. Try “Pop of Color Short” with a vibrant coral or cobalt blue. French tips adapted for short nails (with very thin white lines) look classic. Stay away from designs with lots of tiny details—they’ll look cramped and get lost.
If you change your mind often:
Stick with regular polish instead of gel or acrylics. You’ll get 5-7 days of wear, then you can switch to something new. Avoid chrome powders and encapsulated designs (like flowers suspended in clear acrylic)—those are expensive and permanent until they grow out or get filed off.
Green Spring Nails
Mint Mojito
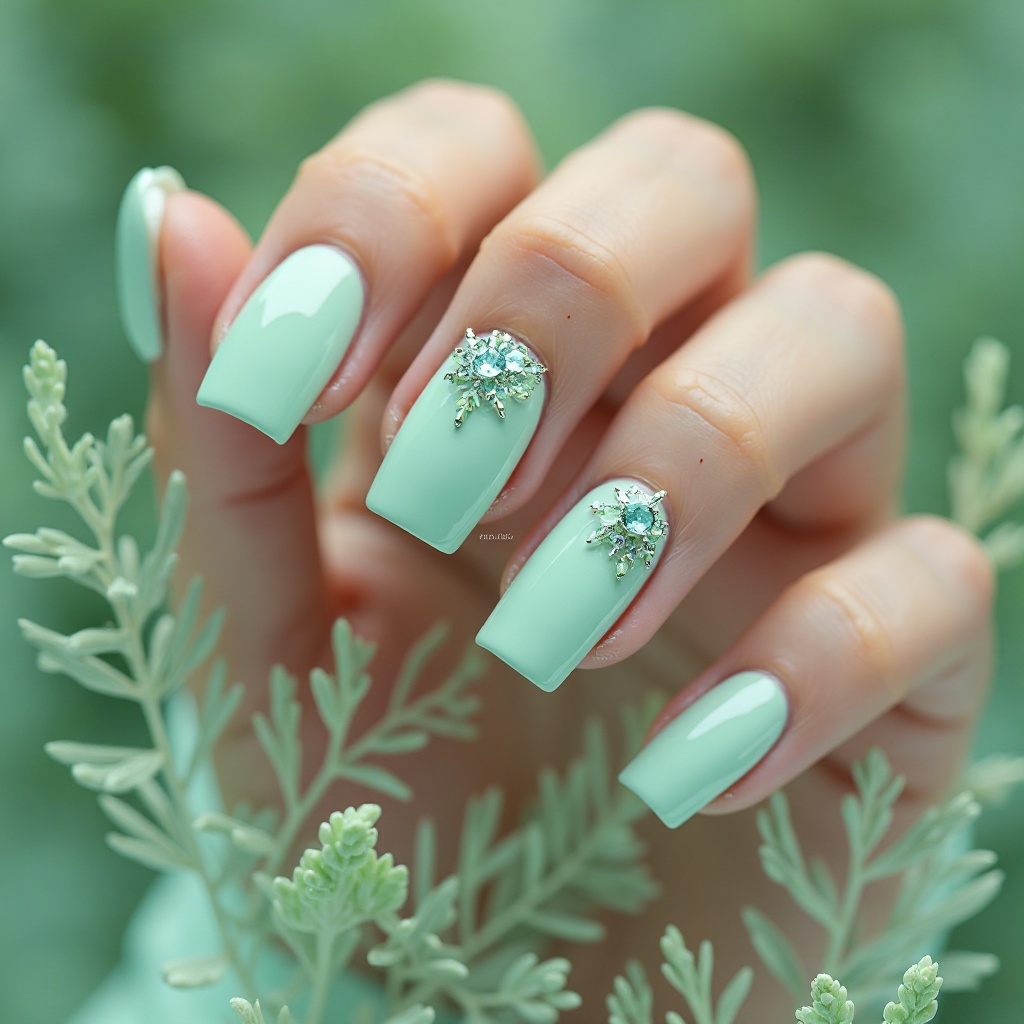
A soft, pale mint green with cool undertones that resembles fresh mojito cocktails and early spring mint leaves. This refreshing shade feels clean and modern without being too bold or overwhelming. The cool-toned base makes it universally flattering across most skin tones.
- Difficulty: Beginner
- Time to complete: 25-30 minutes
- Best for: Someone who wants color that’s noticeable but not loud
- Why it works: Mint captures that fresh spring morning feeling while staying soft enough for everyday wear
- What makes it different: Most greens go too yellow or too blue—this one sits right in the middle
Step-by-step:
- Buff nails smooth and apply ridge-filling base coat (OPI Natural Base Coat, $11-13 at Ulta). Mint shows every imperfection.
- Apply one coat of white polish (Essie’s “Blanc,” $9 at drugstores) and let dry 5 minutes. This is non-negotiable—mint over clear looks streaky.
- Apply first thin coat of mint (Essie’s “Mint Candy Apple” or OPI’s “This Cost Me a Mint,” $10-12). It will look terrible and sheer. Wait 3 minutes.
- Apply second thin coat. Still patchy? Good. Wait 3 minutes.
- Apply third thin coat. You should have full coverage now. If not, add a fourth thin coat rather than making any coat thick.
- Wait 5 minutes, then apply quick-dry top coat (Seche Vite, $9 at Sally Beauty), making sure to wrap the tips.
Forest Emerald
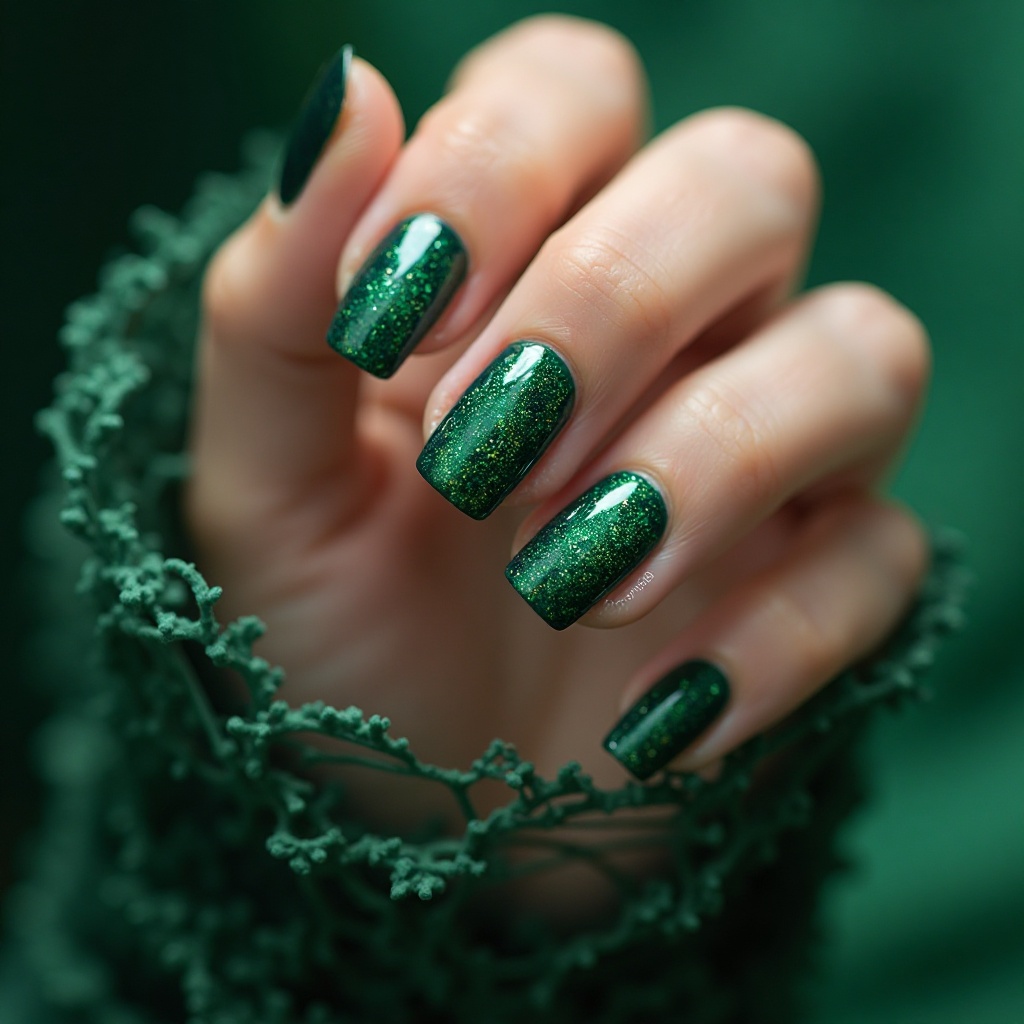
A rich, deep emerald green with subtle shimmer that brings luxurious depth while maintaining spring-appropriate freshness. This jewel tone feels sophisticated and elegant without being too dark or wintery. The hint of shimmer adds dimension and catches light beautifully.
- Difficulty: Beginner
- Time to complete: 20 minutes
- Best for: Evening events or when you want your nails to look expensive
- Why it works: The depth reads as sophisticated while the green keeps it connected to spring
- What makes it different: Most emeralds are flat—this one has dimension from the built-in shimmer
Step-by-step:
- Apply base coat and let dry completely.
- Optional but worth it: Apply one coat black gel polish (if using gel) or regular black (Beetles Black Gel, $8 for set on Amazon). This deepens the emerald dramatically. Skip for regular wear.
- Apply first coat of emerald (OPI’s “Envy the Adventure” or China Glaze’s “Emerald Sparkle,” $8-12). Don’t worry about perfection—the shimmer hides mistakes.
- Wait 2-3 minutes, apply second coat. The color should be fully opaque now.
- For extra sophistication, add gold accent on ring finger using gold metallic polish (Sally Hansen “Golden-I,” $5 at drugstores).
- Seal with glossy top coat, wrapping tips.
Olive Army
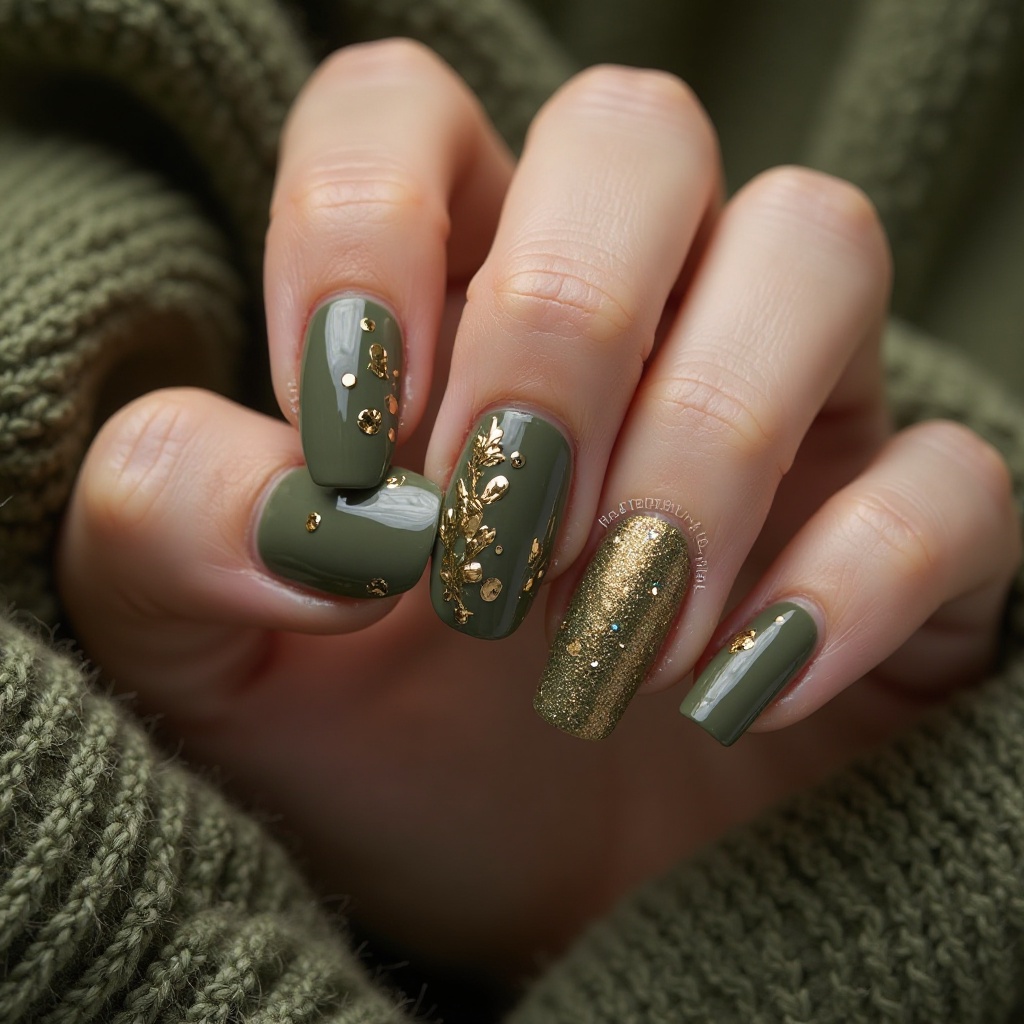
A muted, earthy olive green with brown undertones that feels grounded and sophisticated, offering an unexpected neutral alternative. This understated shade works as an everyday color while still providing visual interest and connection to nature. The complexity makes it endlessly versatile.
- Difficulty: Beginner
- Time to complete: 15-18 minutes
- Best for: Everyday wear when you want something different from nude
- Why it works: Olive connects to spring’s earthy side without screaming “spring”
- What makes it different: Most spring greens are bright—this one is grounded and sophisticated
Step-by-step:
- Apply base coat (CND Stickey, $12 at salons). Olive can stain, so don’t skip this.
- Apply first coat of olive (OPI’s “Suzi—The First Lady of Nails” or Zoya’s “Dree,” $10-12). Olive is forgiving—uneven application isn’t visible.
- Wait 2 minutes, apply second coat. Check coverage—most olives are opaque in two coats.
- For matte finish (recommended), wait 15 minutes for polish to fully dry, then apply matte top coat (Essie Matte About You, $9). The matte finish makes olive look like expensive suede.
- Apply cuticle oil (CND Solar Oil, $12) after drying—matte shows dry cuticles more than glossy.
Lime Zest
A vibrant, citrus-bright lime green that brings energy and playfulness without being neon, offering bold color that still feels wearable. This cheerful shade makes a statement while remaining distinctly spring-appropriate through its botanical connection. The yellow undertones make it surprisingly flattering and warm
Difficulty: Intermediate (bright colors require precision)
Time to complete: 25 minutes
Best for: Weekends, vacations, or when you need a mood boost
Why it works: The warmth makes hands look tan and healthy
What makes it different: Most lime greens lean yellow and look harsh—this one balances yellow and green
Step-by-step:
Apply thick glossy top coat, wrapping tips thoroughly.
Prep meticulously. Bright colors show every mistake. Push cuticles back, buff ridges, wipe with alcohol.
Apply white base coat (Essie “Blanc”). Let dry 5 minutes. Without white, lime looks dull and greenish.
Apply first thin coat of lime (China Glaze “Lime After Lime” or Essie “The More the Merrier,” $8-10). It will look streaky. Wait 3 minutes.
Apply second thin coat. Better, but maybe still patchy. Wait 3 minutes.
Apply third thin coat. You should have opacity now.
Clean up immediately with a small brush dipped in acetone—lime stains skin within minutes.
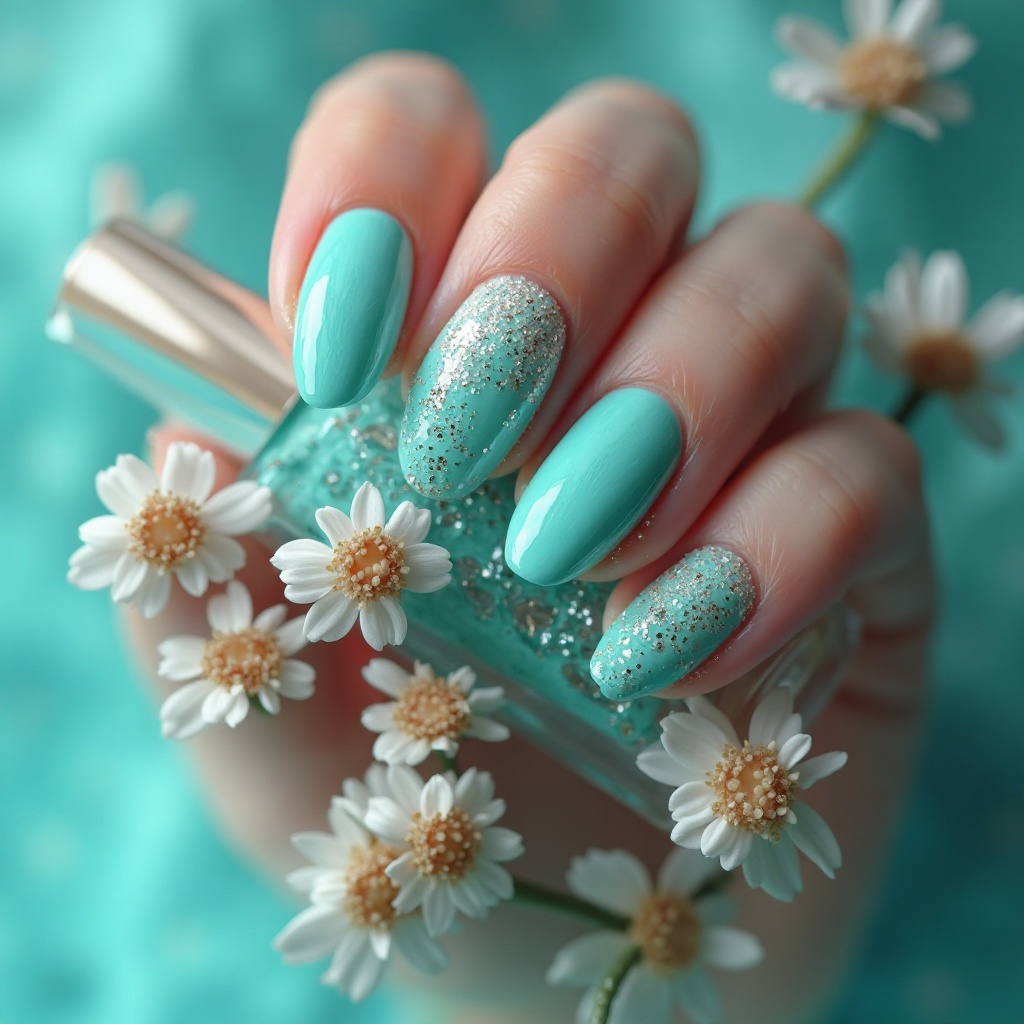
Seafoam Shimmer
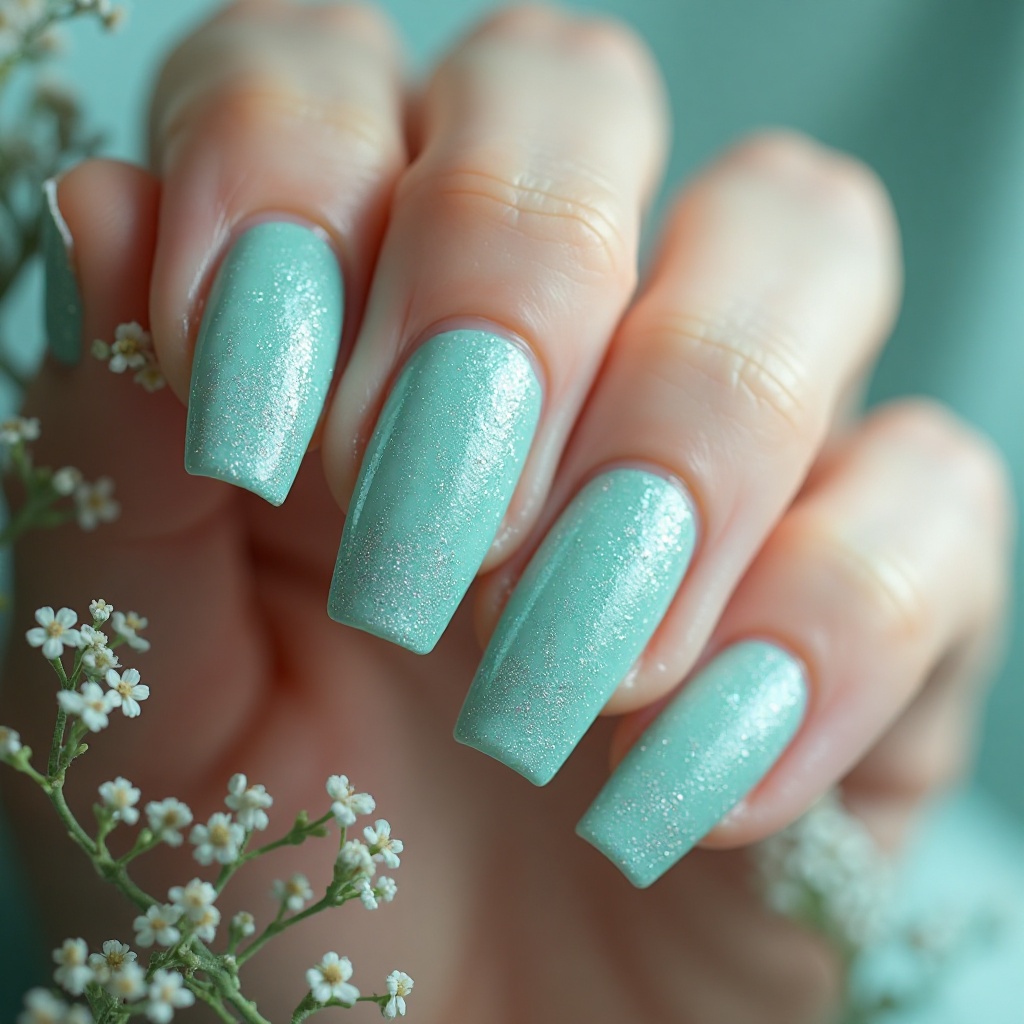
A pale green-blue hybrid with iridescent shimmer that resembles ocean foam and spring coastal waters. This unique shade sits between green and aqua, offering color that feels fresh and unexpected. The shimmer adds dimensional interest without requiring glitter or nail art.
- Difficulty: Beginner
- Time to complete: 20 minutes
- Best for: Beach trips or coastal spring vacations
- Why it works: The shimmer catches spring light without needing nail art
- What makes it different: Built-in shimmer means you don’t need a separate glitter top coat
Step-by-step:
- Apply base coat, let dry.
- Apply white or pale blue base coat (optional but enhances shimmer). Let dry.
- Apply first coat of seafoam (Essie “Where’s My Chauffeur?” or OPI “Mermaids & Sailors,” $10-12). Apply thin—shimmer formulas get chunky if thick.
- Wait 3 minutes, apply second coat. The shimmer should be building.
- Wait 3 minutes, apply third coat for maximum shimmer effect.
- Seal with glossy top coat. Don’t use matte—it kills the shimmer effect.
- For extra dimension, add a layer of iridescent top coat (Sally Hansen “Hidden Treasure,” $6) over the seafoam.
Blue Spring Nails
Powder Blue
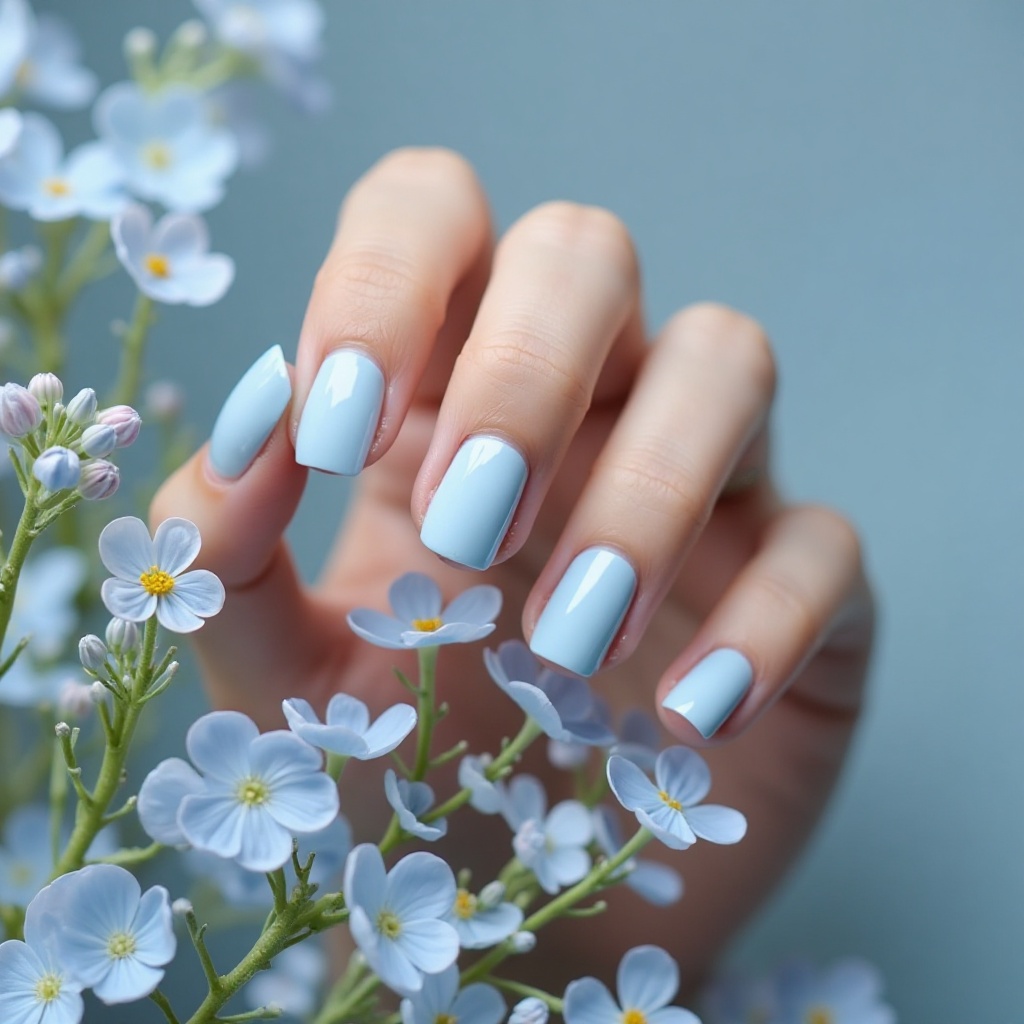
A soft, dusty blue with gray undertones that feels vintage and romantic, like forget-me-nots and heirloom china. This gentle shade offers color without boldness, perfect for those who want subtle spring style. The muted quality prevents it from looking juvenile or too sweet.
- Difficulty: Beginner
- Time to complete: 25 minutes
- Best for: Anyone who wants color but finds pastels too sweet
- Why it works: The gray undertones keep it sophisticated
- What makes it different: Most baby blues are too bright—this one is muted and grown-up
Step-by-step:
- Apply ridge-filling base coat. Powder blue shows ridges.
- Apply white base coat (Essie “Blanc”). Let dry 5 minutes.
- Apply first thin coat of powder blue (Essie “Bikini So Teeny” or OPI “It’s a Boy,” $10-12). Thin means thin—you should almost see through it.
- Wait 3 minutes, apply second thin coat.
- Wait 3 minutes, assess coverage. You’ll likely need a third coat.
- For vintage vibe, pair with rounded nail shape and glossy top coat.
- Apply cuticle oil after drying—the soft color needs moisturized framing.
Navy Sophistication
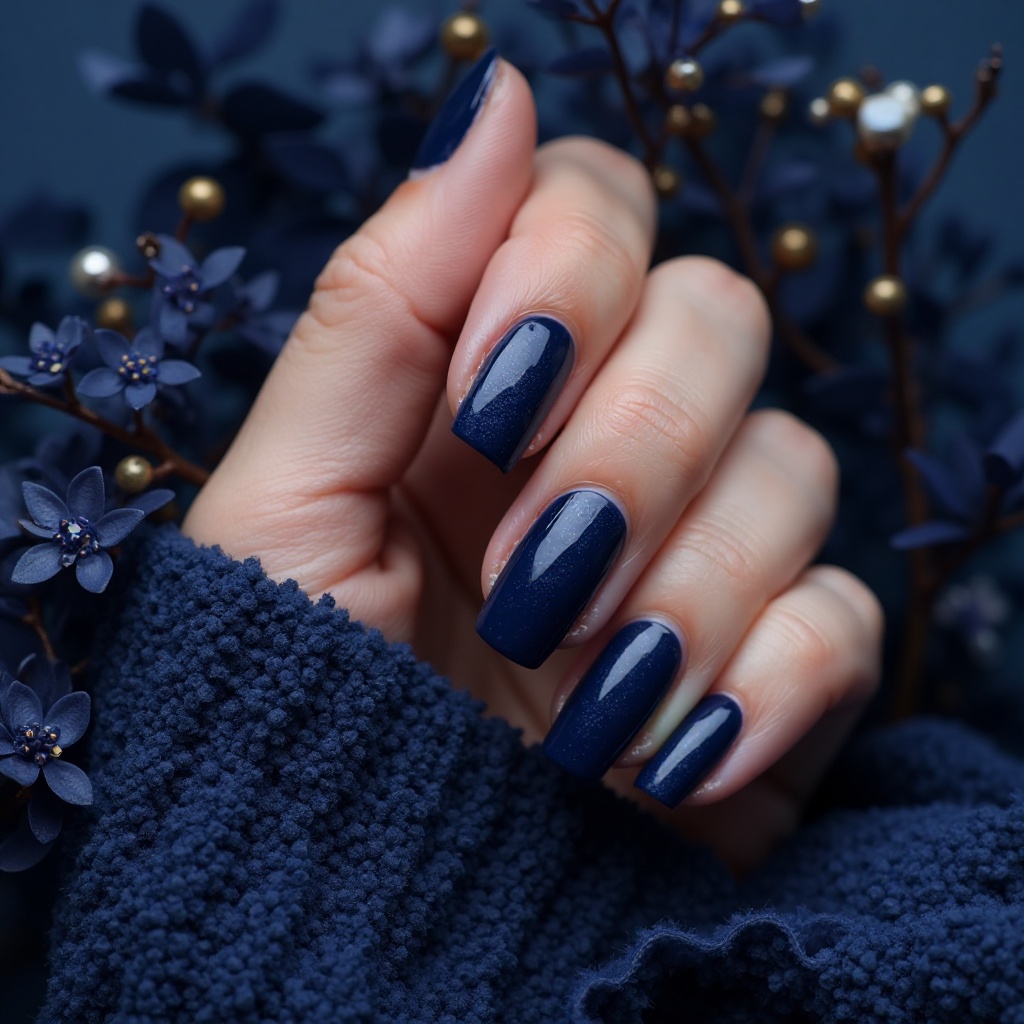
A deep, rich navy blue that borders on midnight blue, offering elegance and depth while remaining spring-appropriate through its blue tones. This classic shade works for any occasion, from office to evening, providing versatility and polish. The darkness creates striking contrast against spring’s lighter wardrobe.
- Difficulty: Beginner
- Time to complete: 15 minutes
- Best for: Professional settings where you want polish without distraction
- Why it works: Navy coordinates with everything in a spring wardrobe
- What makes it different: Most navy polishes look flat—good ones have depth that catches light
Step-by-step:
- Apply base coat. Navy stains, so don’t skip.
- Apply first coat of navy (Essie “After School Boy Blazer” or OPI “Russian Navy,” $10-12). Navy is pigmented—one coat might almost cover.
- Wait 2-3 minutes, apply second coat. Full coverage achieved.
- Clean up immediately with acetone brush—navy stains skin badly.
- For classic nautical look, add white accent on ring finger (Essie “Blanc”).
- Seal with glossy top coat, wrapping tips thoroughly.
Periwinkle Dream
A soft blue-purple that leans more blue than purple, creating a dreamy, ethereal quality that feels romantic and vintage-inspired. This underrated shade offers uniqueness without being bold or attention-seeking. The gentle tone flatters most skin tones and coordinates with diverse wardrobes.
- Difficulty: Beginner
- Time to complete: 25 minutes
- Best for: People who want something different from standard pastels
- Why it works: The ambiguity makes it interesting—people can’t quite place the color
- What makes it different: Most purple-blues pick a side; this one balances both
Step-by-step:
- Apply white base coat (essential for periwinkle). Let dry 5 minutes.
- Apply first thin coat of periwinkle (Essie “Bikini So Teeny” or OPI “You’re Such a Budapest,” $10-12).
- Wait 3 minutes, apply second thin coat.
- Wait 3 minutes, apply third coat if needed.
- For dreamy effect, add silver shimmer top coat on one accent nail.
- Seal with glossy top coat—periwinkle looks flat without shine.
Turquoise Waters
A bright, clear turquoise that resembles tropical waters and spring swimming pools, bringing vacation vibes and energetic color. This vibrant shade makes a statement while remaining distinctly spring through its aquatic connection. The blue-green balance creates universal appeal.
- Difficulty: Beginner
- Time to complete: 18 minutes
- Best for: Spring break or any vacation where you’ll photograph your hands
- Why it works: Turquoise photographs beautifully and pops against skin
- What makes it different: The balance of blue and green is perfect—not too much of either
Step-by-step:
- Apply base coat.
- Apply first coat of turquoise (China Glaze “For Audrey” or Essie “Turquoise & Caicos,” $8-10). These formulas are usually good—one coat may be enough.
- Wait 2 minutes, assess coverage. Apply second coat if needed.
- For tropical vibe, add coral on ring and middle fingers (Essie “Haute as Hello”).
- Seal with glossy top coat.
Steel Blue Chrome
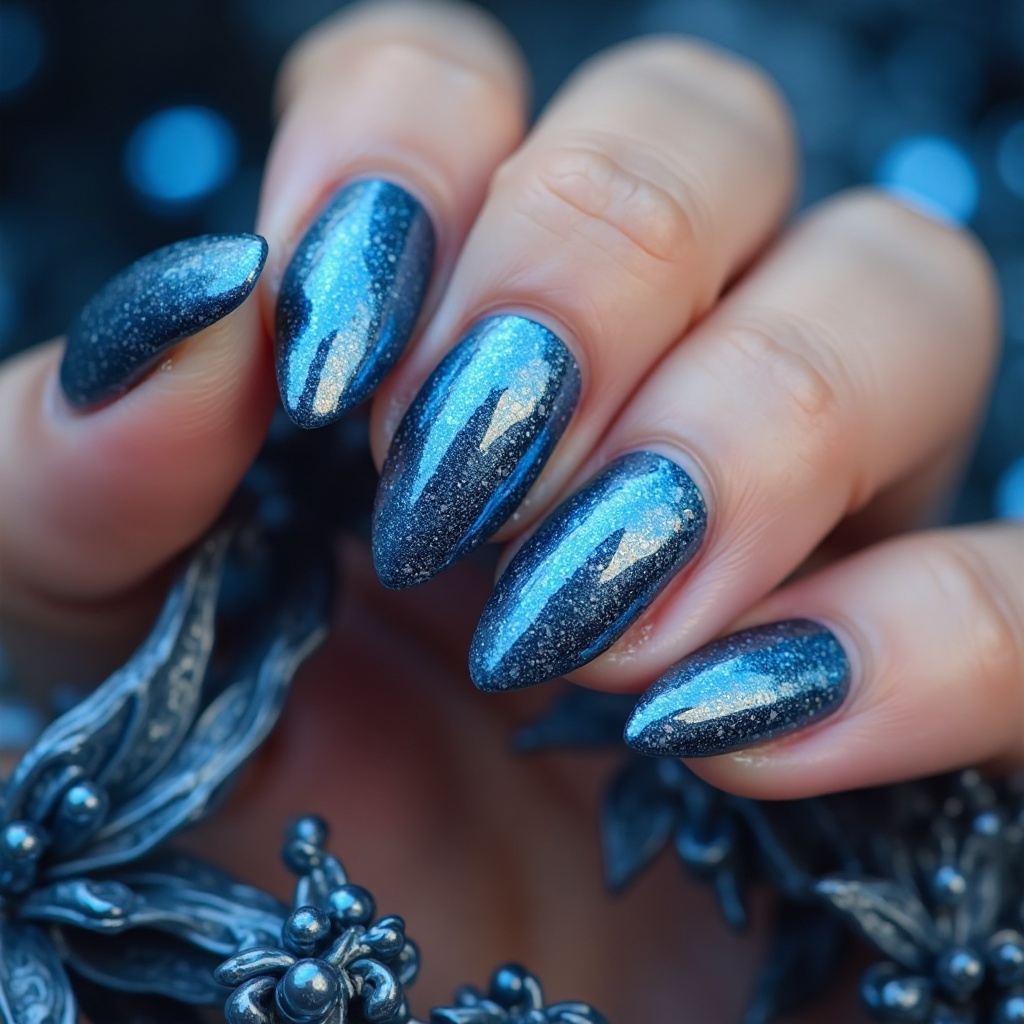
A metallic, cool-toned blue with chrome finish that looks futuristic and modern, offering edge and sophistication simultaneously. This high-impact shade reflects light beautifully and creates dimensional color that shifts in different lighting. The metallic quality elevates it beyond standard blue polish.
- Difficulty: Advanced (requires gel and chrome powder)
- Time to complete: 45 minutes
- Best for: Special events or when you want Instagram-worthy nails
- Why it works: The chrome finish reflects spring sunshine dramatically
- What makes it different: Regular metallic polish can’t match the mirror finish of real chrome powder
Step-by-step (Gel Method):
- Prep nails, apply gel base coat (Beetles Base Coat, $8 on Amazon). Cure 60 seconds under LED lamp.
- Apply dark blue gel polish (any brand—color underneath affects chrome tone). Cure 60 seconds.
- Apply second coat of dark blue if needed. Cure.
- Apply no-wipe gel top coat (crucial—wipe top coats won’t work). DO NOT CURE.
- Using silicone applicator, rub silver-blue chrome powder (Born Pretty Chrome Powder, $6) onto wet top coat in circular motions. Keep rubbing until mirror effect appears.
- Dust off excess powder with soft brush.
- Cure top coat with embedded powder for 60 seconds.
- Apply another layer of gel top coat to seal. Cure.
- Wipe with alcohol to remove tacky layer.
Square Spring Nails
Clean White Square
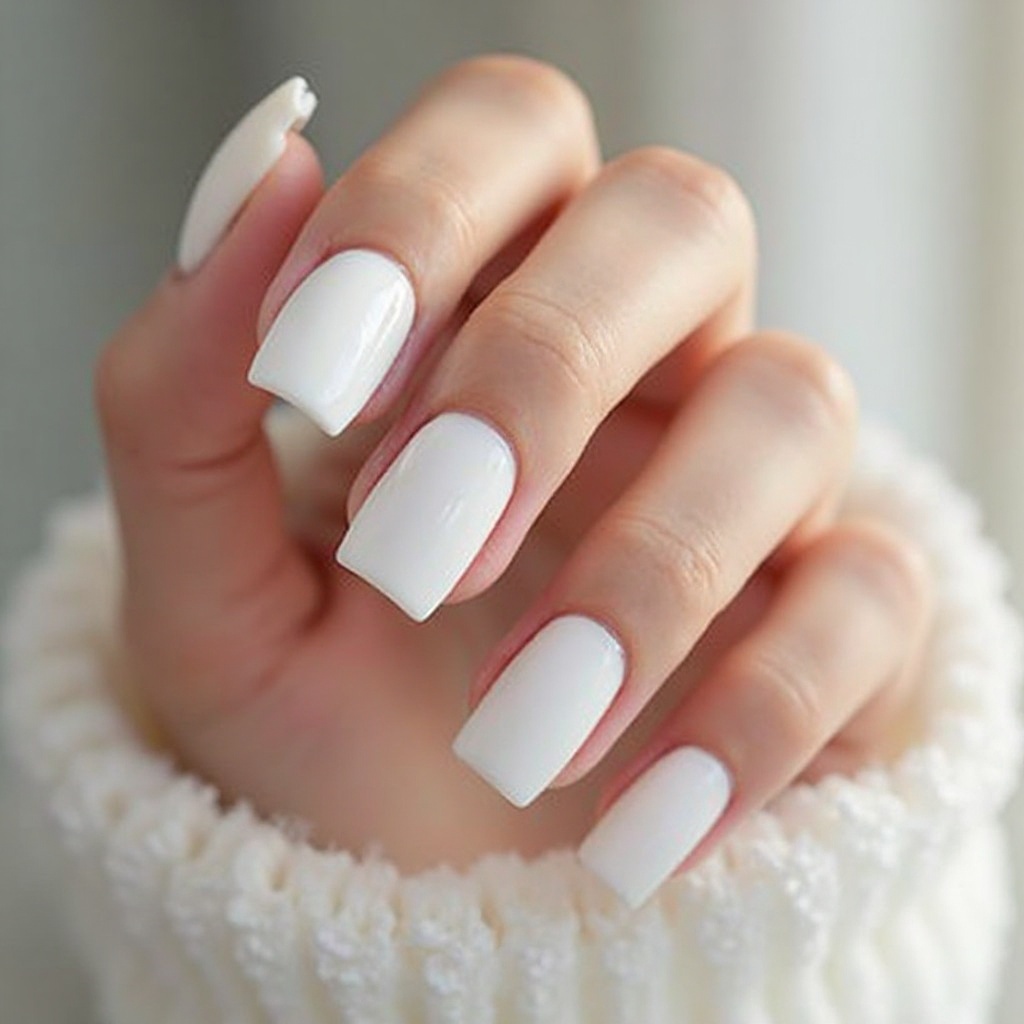
Crisp, pure white on classic square-shaped nails for minimalist perfection that feels modern and editorial. This no-nonsense combination creates a blank canvas aesthetic that’s surprisingly bold through its simplicity. The geometric shape emphasizes the clean lines.
- Difficulty: Intermediate (white is unforgiving)
- Time to complete: 30 minutes
- Best for: Anyone who wants their nails to look intentional and polished
- Why it works: White captures spring’s fresh-start energy better than any color
- What makes it different: Square shape adds structure that prevents white from looking boring
Step-by-step:
- File nails into perfect squares: file straight across the top, then use 1-2 gentle strokes to soften sharp corners (prevents snagging).
- Apply ridge-filling base coat (OPI Ridge Filler, $12). White shows every imperfection.
- Apply first thin coat of white (Essie “Blanc” or OPI “Alpine Snow,” $10-12). It will look terrible and streaky. This is normal.
- Wait 3 minutes, apply second thin coat. Better but probably still patchy.
- Wait 3 minutes, apply third thin coat. You should have opacity now.
- Wait 5 minutes, then apply quick-dry top coat, wrapping tips thoroughly.
- Apply cuticle oil after drying—white looks harsh against dry cuticles.
Nude Square Elegance
Your-perfect-nude shade on square nails for understated sophistication that works for literally any occasion or outfit. This versatile combination provides polish without personality, letting you and your style be the focus. The neutral color on geometric shape creates modern elegance.
- Difficulty: Beginner
- Time to complete: 15 minutes
- Best for: Literally everyone, every occasion
- Why it works: Nude elongates fingers and doesn’t compete with your outfit
- What makes it different: Square shape keeps nude from looking boring or forgettable
Step-by-step:
- Find your perfect nude by testing shades against your wrist in natural light. Look for subtle pink or peach undertones—gray undertones can look corpse-like.
- File nails into squares with softened corners.
- Apply ridge-filling base coat (Essie Fill the Gap, $9). Nudes show texture.
- Apply first coat of nude (OPI “Samoan Sand” or Essie “Au Natural,” $10-12). Let dry 2 minutes.
- Apply second coat. Most nudes need two coats; some need three.
- Seal with high-gloss top coat—shine makes nude look expensive.
- Apply cuticle oil—well-moisturized cuticles frame nude nails perfectly.
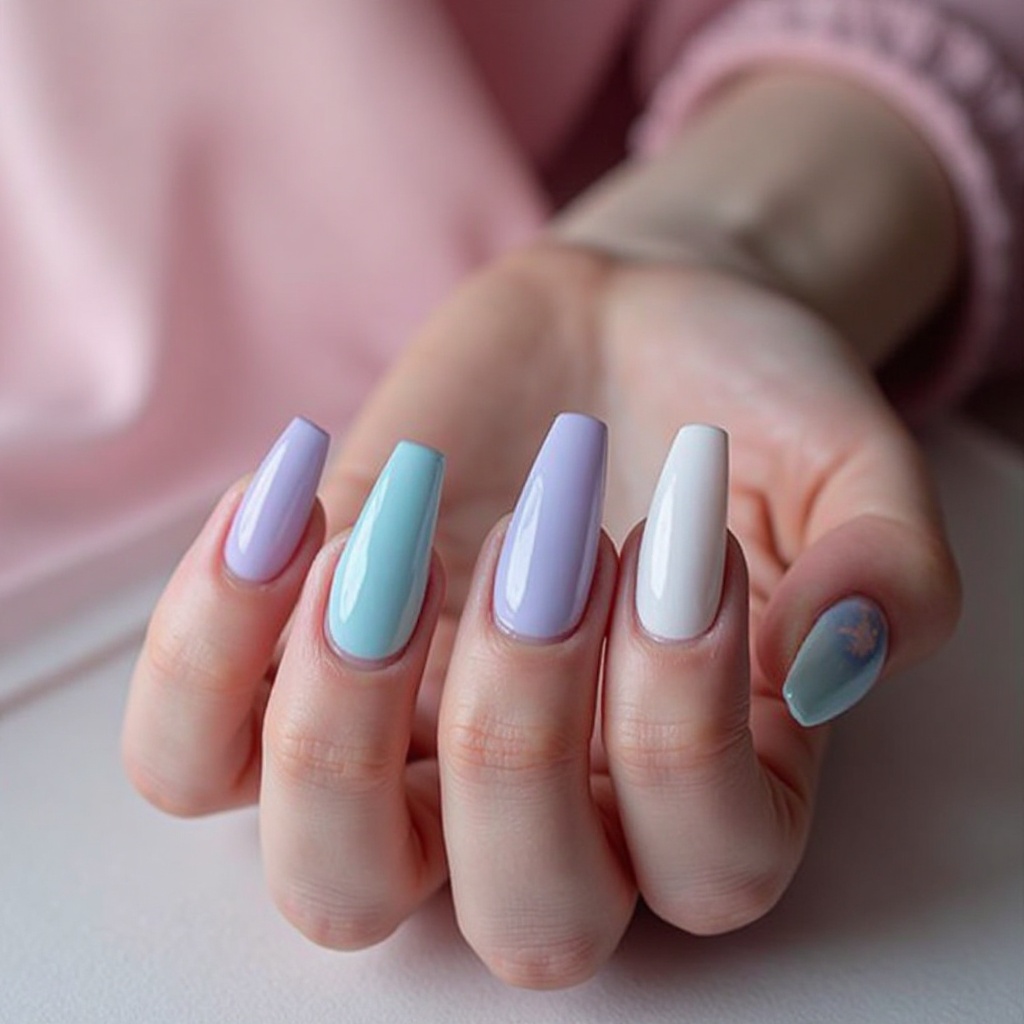
Pastel Square Perfection
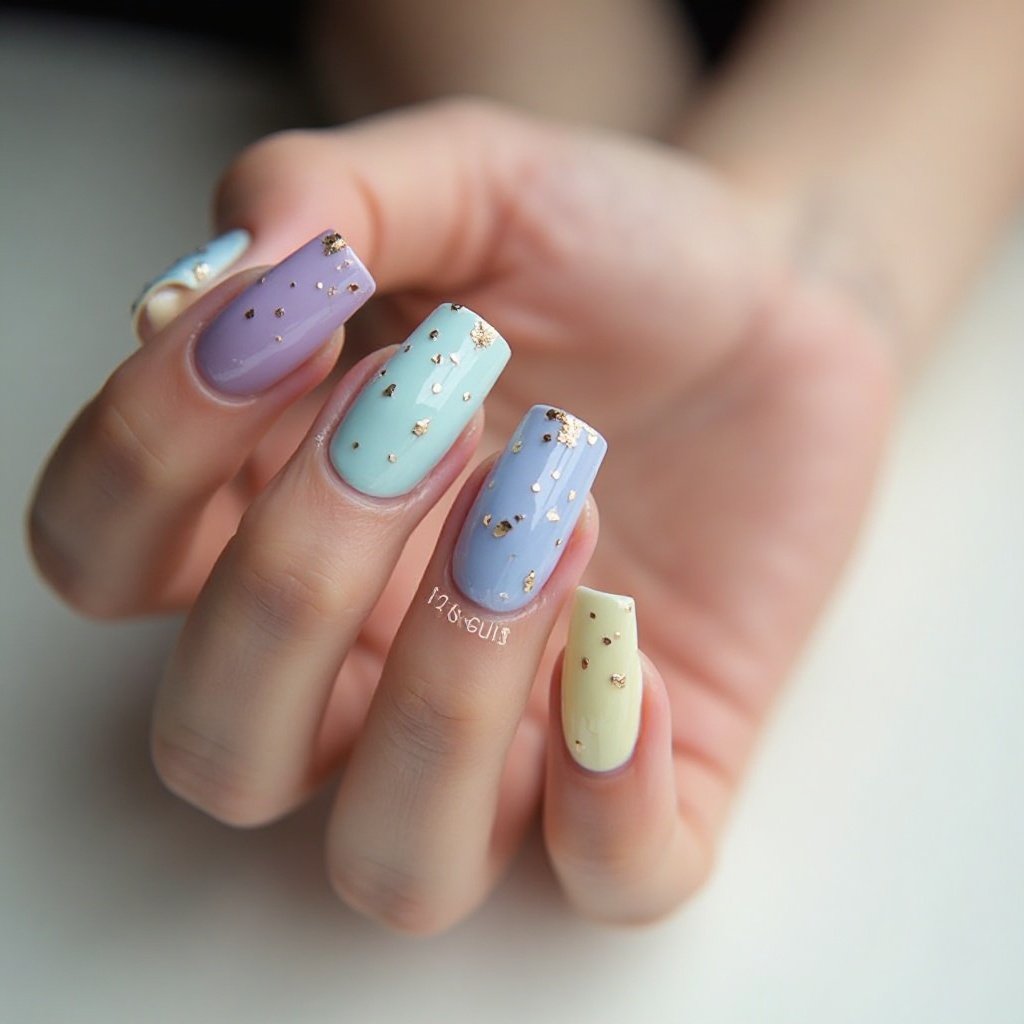
Any spring pastel (lavender, mint, baby blue, butter yellow) on square nails for playful color with modern structure. This combination balances soft, romantic color with geometric, contemporary shape for unexpected sophistication. The contrast creates visual interest without requiring nail art.
- Difficulty: Beginner-Intermediate
- Time to complete: 25-30 minutes
- Best for: Adults who want pastels without looking like they’re wearing kid’s nail polish
- Why it works: Square shape adds grown-up structure to soft colors
- What makes it different: Most pastel manicures use rounded shapes—square makes them modern
Step-by-step:
- File nails into squares, keeping them short to medium. Long square pastels can look costume-like.
- Choose one pastel (not multiple). Stick with one color for maximum sophistication.
- Apply white base coat, let dry 5 minutes.
- Apply chosen pastel in 3-4 thin coats, waiting 3 minutes between each.
- Seal with glossy top coat.
- Apply cuticle oil daily—pastels need polished framing.
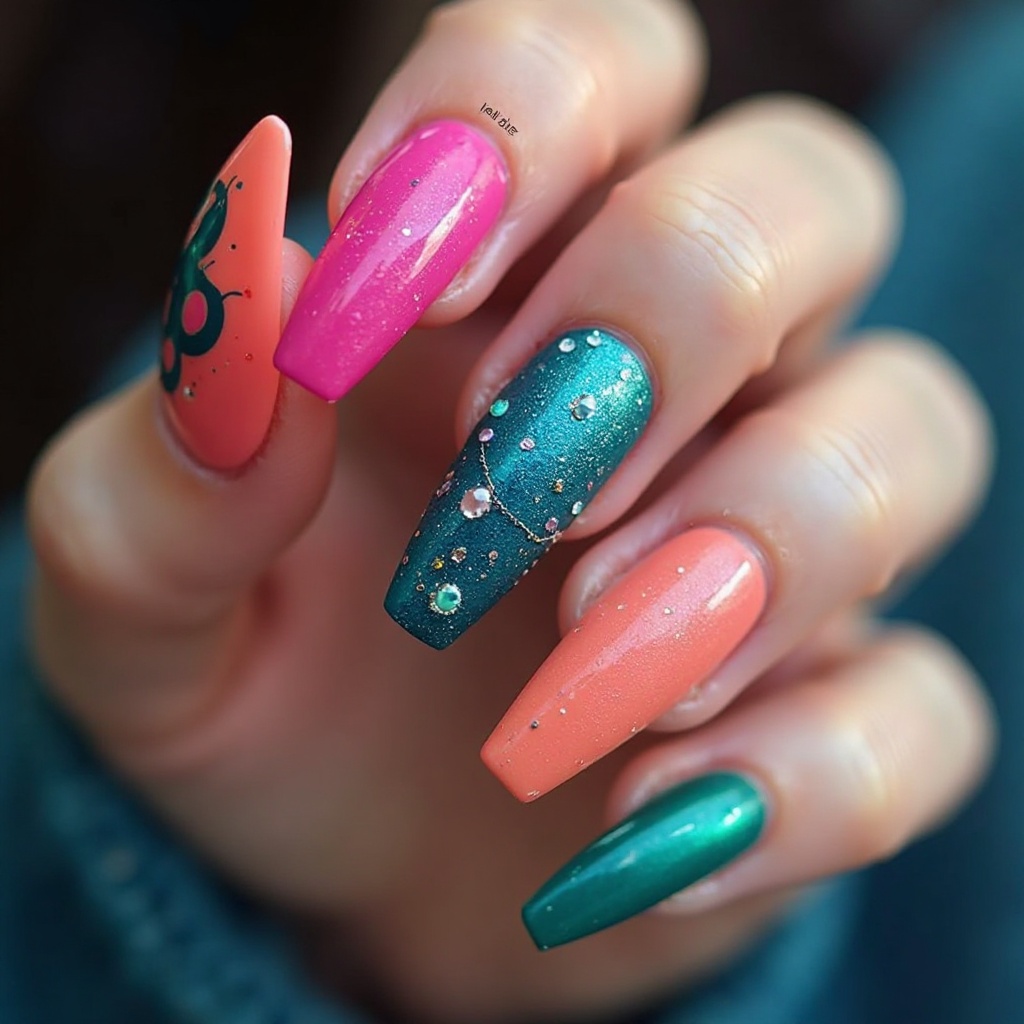
Bold Square Statement
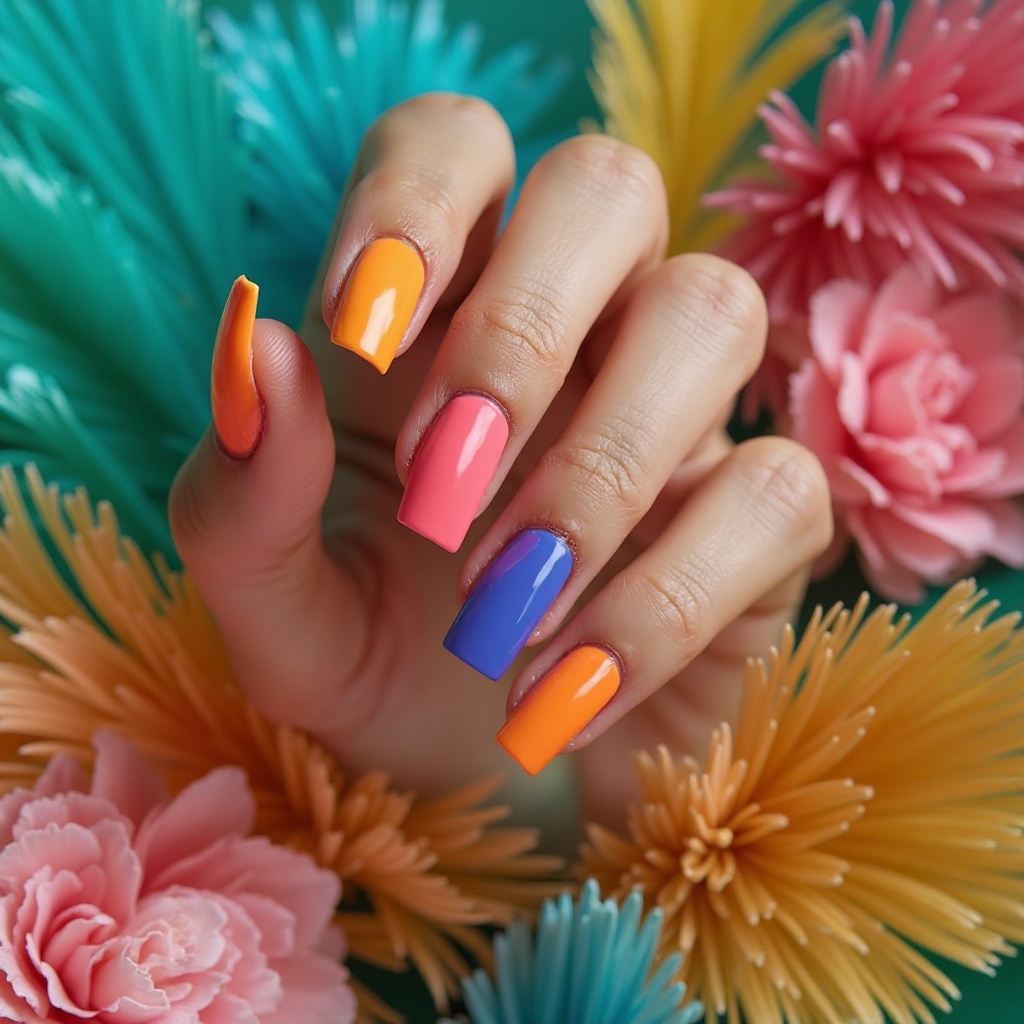
A vivid spring color (hot pink, cobalt blue, grass green, or tangerine orange) on square nails for maximum impact and modern confidence. This high-energy combination creates a bold, unapologetic look that commands attention. The saturated color on geometric shape feels fashion-forward and intentional.
- Difficulty: Beginner
- Time to complete: 18 minutes
- Best for: Making a statement without nail art
- Why it works: Bold color on geometric shape feels intentional, not accidental
- What makes it different: The square shape tones down the boldness just enough
Step-by-step:
- File perfect square shapes first—bold colors highlight shape imperfections.
- Prep nails meticulously (push cuticles, buff lightly, wipe with alcohol). Bold colors show flaws.
- Apply base coat, let dry.
- Apply first coat of bold color (OPI “Strawberry Margarita” for hot pink, Essie “Aruba Blue” for cobalt, $10-12).
- Wait 2-3 minutes, apply second coat. Bold colors usually cover in two coats.
- Clean up immediately—bright colors stain skin.
- Seal with top coat, wrapping tips. Reapply top coat every 2-3 days.
French Square Modernized
Classic French manicure on square nails with a modern twist: ultra-thin white tips or colored tips in spring pastels. This updated take on a timeless design feels fresh and contemporary while maintaining sophistication. The square shape modernizes what could otherwise feel dated.
- Difficulty: Intermediate
- Time to complete: 35 minutes
- Best for: Weddings, graduations, or any event where you want polished elegance
- Why it works: The thin tip (1-2mm max) looks modern, not dated
- What makes it different: Colored tips update the French for 2025
Step-by-step:
- Apply nude or sheer pink base (Essie “Mademoiselle” or OPI “Bubble Bath”). Let dry 10 minutes minimum.
- Place striping tape just below the tip, leaving only 1-2mm exposed. Press firmly to seal edges.
- Apply white or pastel color beyond the tape. Apply two thin coats, letting each dry 2 minutes.
- When second coat is dry to touch (not wet), remove tape slowly at 45-degree angle.
- Use cleanup brush dipped in acetone to perfect any imperfect lines.
- Wait 5 minutes, then apply top coat, wrapping tips thoroughly.
- For colored tips: use lavender (Essie “Lilacism”), sage (OPI “Suzi—The First Lady”), or butter yellow (Essie “Aim to Misbehave”).
Short Spring Nails
Short and Sweet Nude
Your perfect nude shade on short, well-groomed nails for effortless elegance that works everywhere. This low-maintenance combination provides polish without length requirements or time commitment. The shortness keeps it practical while the nude keeps it sophisticated.
- Difficulty: Beginner
- Time to complete: 15 minutes
- Best for: Active lifestyles, gardeners, healthcare workers, anyone who can’t have long nails
- Why it works: Short nudes are universally appropriate and low-maintenance
- What makes it different: Most articles ignore short nails—these tips actually work for them
Step-by-step:
- File all nails to uniform short length (just past fingertip—all the same length).
- Soak hands in warm water for 2 minutes, push cuticles back meticulously. Grooming is key for short nails to look intentional.
- Apply ridge-filling base coat.
- Apply two coats of nude (OPI “Samoan Sand” or Essie “Au Natural”), letting each dry 2 minutes.
- Apply high-gloss top coat—shine makes short nails look polished.
- Apply cuticle oil daily. This matters more for short nails—dry cuticles make them look neglected.
Pop of Color Short
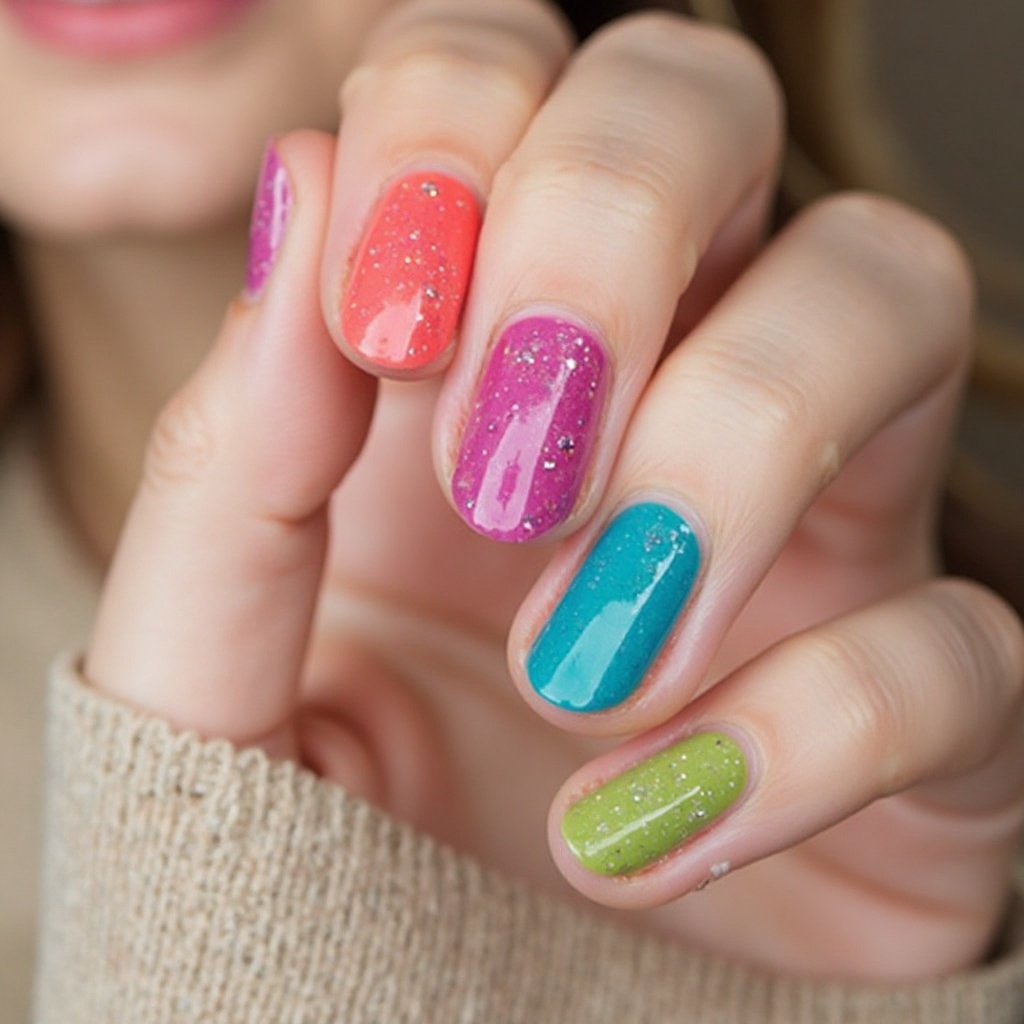
A vibrant spring color (coral, hot pink, cobalt blue, or grass green) on short nails for fun without commitment or maintenance burden. This playful combination brings personality while remaining practical and easy to maintain. The boldness compensates for the length, creating visual impact.
- Difficulty: Beginner
- Time to complete: 15 minutes
- Best for: Anyone who thinks short nails can’t be fun
- Why it works: Bright colors create visual impact regardless of length
- What makes it different: Most people save bold colors for long nails—they work better on short ones
Step-by-step:
- File to uniform short length.
- Choose a bold color (Essie “Haute as Hello” for coral, OPI “Strawberry Margarita” for hot pink, $10-12).
- Apply base coat, let dry.
- Apply two coats of bold color. Bold colors achieve opacity quickly—you won’t need 3-4 coats like pastels.
- Seal with quick-dry top coat, wrapping tips.
- Reapply top coat every 2-3 days for extended wear.
Short French Classic
Traditional French manicure adapted for short nails with thin white tips for timeless sophistication on practical length. This classic combination never goes out of style and works for absolutely any occasion. The shorter length makes it more wearable for active lifestyles.
- Difficulty: Intermediate
- Time to complete: 30 minutes
- Best for: Professional settings where you want polish without color
- Why it works: The thin tip (1mm) maintains proportion on short nails
- What makes it different: Most French tips on short nails look stubby—this technique fixes that
Step-by-step:
- File short nails into squoval or rounded shape.
- Apply sheer pink or nude base (Essie “Mademoiselle” or OPI “Bubble Bath”). Let dry 10 minutes.
- Place striping tape leaving only 1-2mm exposed at tip. Press firmly.
- Apply white polish (Essie “Blanc”) in two thin coats beyond tape. Let each dry 2 minutes.
- Remove tape when dry to touch.
- Clean up any imperfections with acetone brush.
- Seal with top coat, wrapping tips.
Short Pastel Simple
A single spring pastel (lavender, mint, baby blue, or blush) on short, rounded nails for sweet simplicity that’s easy to achieve and maintain. This gentle combination provides color without complexity or time commitment. The soft shade on short length feels youthful and fresh.
- Difficulty: Beginner
- Time to complete: 25 minutes
- Best for: First-time pastel users
- Why it works: Short nails make pastels feel casual and approachable
- What makes it different: Most pastel tutorials assume long nails—these steps work for short
Step-by-step:
- File short nails into rounded or oval shape to enhance the soft aesthetic.
- Apply white base coat, let dry 5 minutes.
- Apply chosen pastel in 3-4 thin coats, waiting 3 minutes between each.
- Seal with glossy top coat.
- Apply cuticle oil daily. Short nails with moisturized cuticles look intentional rather than neglected.
Short Nail Art
Short nails with simple nail art: single-color base with easy designs like dots, simple florals, or thin stripes on one accent nail. This creative combination proves you don’t need length for interesting nails. The shortness actually makes nail art easier to execute and maintain.
- Difficulty: Intermediate
- Time to complete: 35 minutes
- Best for: Anyone who thinks short nails can’t have nail art
- Why it works: Short nails actually make nail art easier—less surface to cover means less to mess up
- What makes it different: Designs scaled down to fit short nails (not just copied from long nail tutorials)
Step-by-step:
- Apply spring base color to all nails (pastel or nude). Let dry 15+ minutes.
- On 1-2 accent nails only (ring finger, or ring + middle), add simple designs:For Dots:
- Use dotting tool (5-piece set from Amazon, $6-8) dipped in contrasting color
- Place 3-5 dots scattered asymmetrically across nail
- Vary dot sizes by using different ends of tool
- Use dotting tool to place one dot for flower center
- Using smaller dotting end, place 5 dots in circle around center for petals
- Add tiny green dots or lines for leaves if desired
- Use striping brush or nail art pen (Beetles Liner Brush, $5 on Amazon)
- Create 2-3 thin lines, vertical or diagonal
- Keep lines simple—don’t overcomplicate
- Let art dry 10+ minutes before top coat.
- Seal with thick top coat, applying carefully to not smudge designs.
Yellow Spring Nails
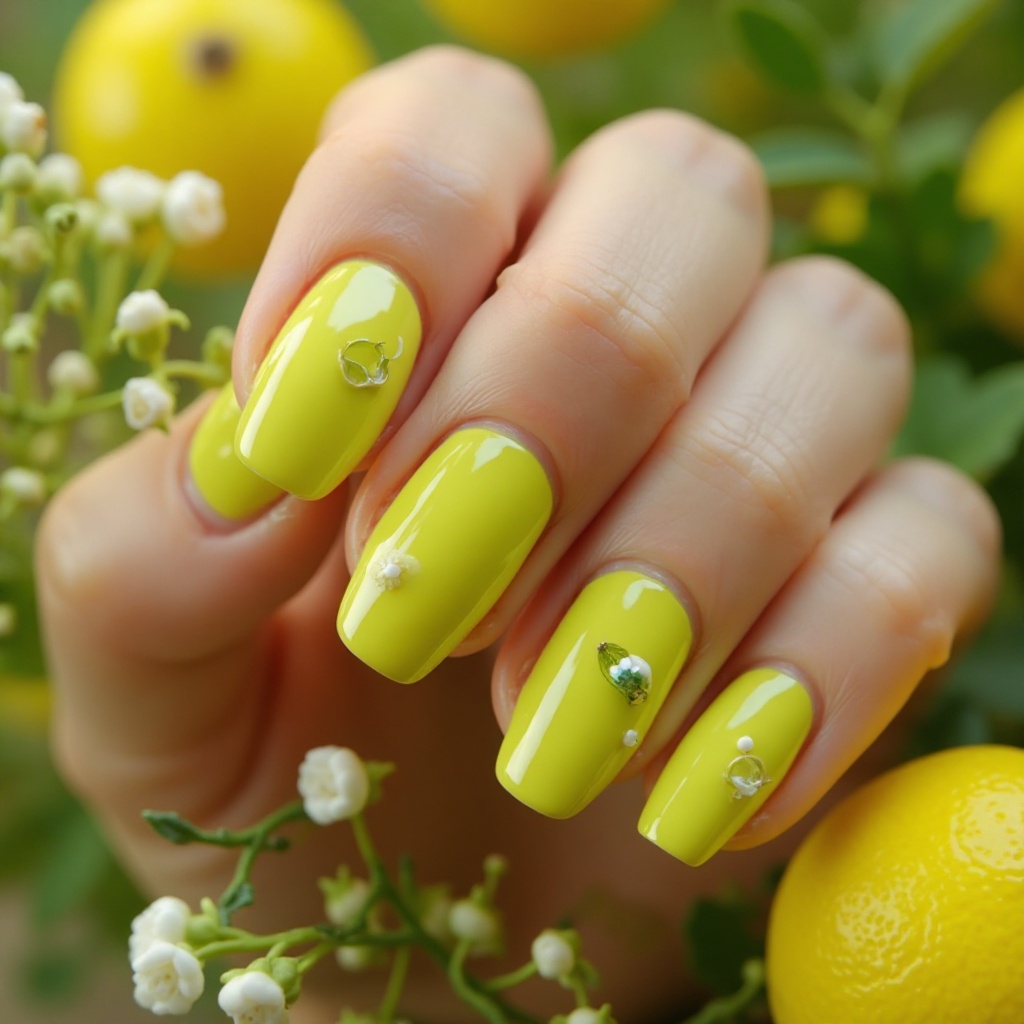
Daffodil Yellow

A true, cheerful yellow that resembles spring daffodils, bringing instant sunshine to your fingertips without being neon or harsh. This classic yellow captures spring’s optimism perfectly while remaining wearable and sophisticated. The warmth makes hands look healthy and glowing.
- Difficulty: Advanced (yellow is the hardest color to apply)
- Time to complete: 35 minutes
- Best for: When you need a mood boost or want to stand out
- Why it works: Yellow captures spring’s optimism better than any color
- What makes it different: Most yellow polishes are streaky—this method actually works
Step-by-step:
- Buff nails until completely smooth. Yellow shows every ridge, bump, and imperfection.
- Apply ridge-filling base coat (OPI Ridge Filler, $12). Let dry completely.
- Apply white base coat (Essie “Blanc”). Let dry 5 minutes. This is essential—yellow over clear looks greenish and patchy.
- Apply first coat of yellow (Essie “Aim to Misbehave” or Zoya “Pippa,” $10-12). Apply ultra-thin—it will look terrible.
- Wait 4 minutes (longer than usual—yellow needs extra drying time).
- Apply second ultra-thin coat. Still patchy? Good. Wait 4 minutes.
- Apply third ultra-thin coat. You should have opacity now. If not, add fourth coat.
- Keep cleanup brush dipped in acetone nearby—yellow stains skin within minutes.
- Seal with glossy top coat, wrapping tips thoroughly.
Soft Butter
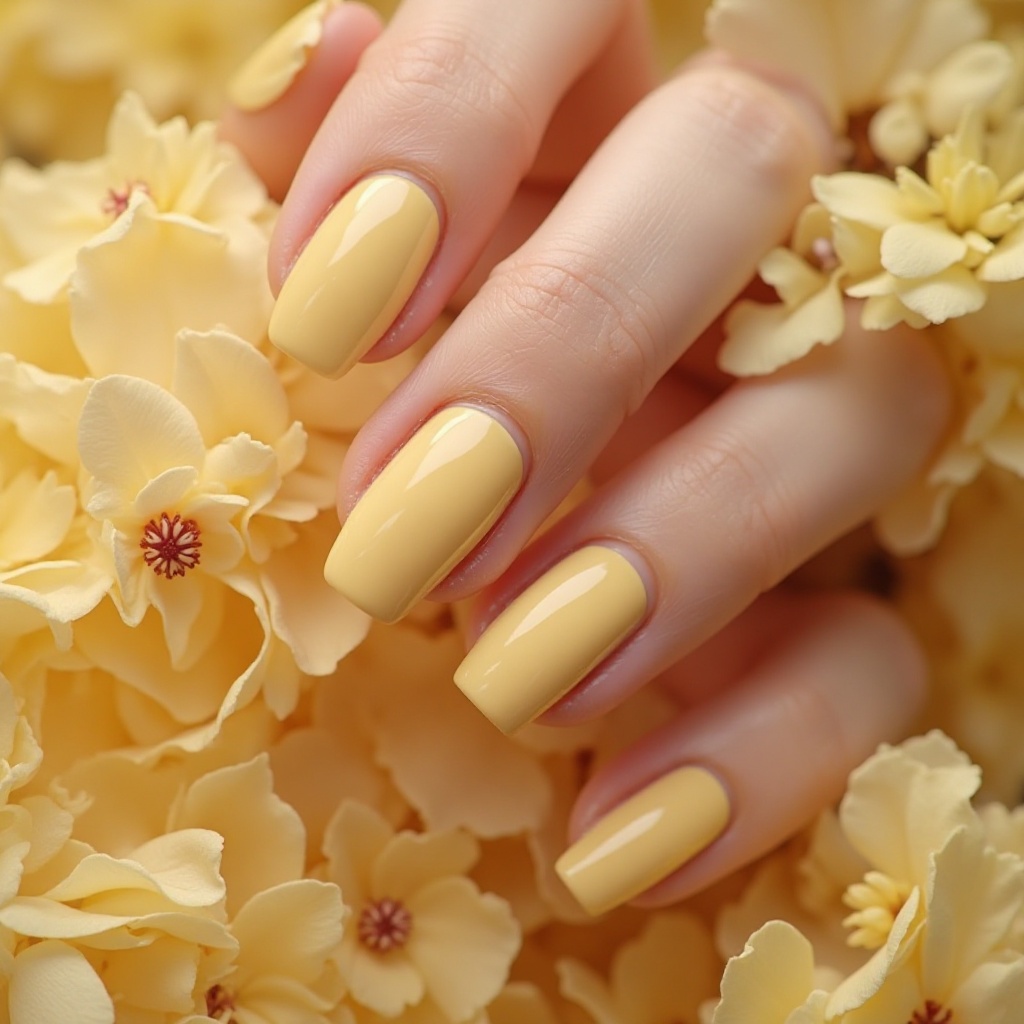
A muted, creamy yellow with slight beige undertones that feels softer and more sophisticated than bright yellow. This gentle shade offers yellow’s cheerfulness without the intensity, making it more wearable for conservative settings. The creaminess prevents it from looking harsh.
- Difficulty: Intermediate
- Time to complete: 25 minutes
- Best for: Someone who wants yellow but finds bright yellow intimidating
- Why it works: The creaminess tones down the boldness
- What makes it different: Most yellows are either bright or pastel—this one sits in between
Step-by-step:
- Apply white or nude base coat (nude base gives a different effect than white—test both).
- Apply first coat of butter yellow (Essie “Banan-e-r Oil Painting” or Zoya “Darcy,” $10-12).
- Wait 3 minutes, apply second coat. Softer yellows have better opacity than bright yellows.
- Assess coverage—you may need a third coat, but likely two is enough.
- Seal with glossy top coat. The shine makes the yellow look richer.
- Pair with gold jewelry—the warm tones complement each other.
Neon Yellow Pop
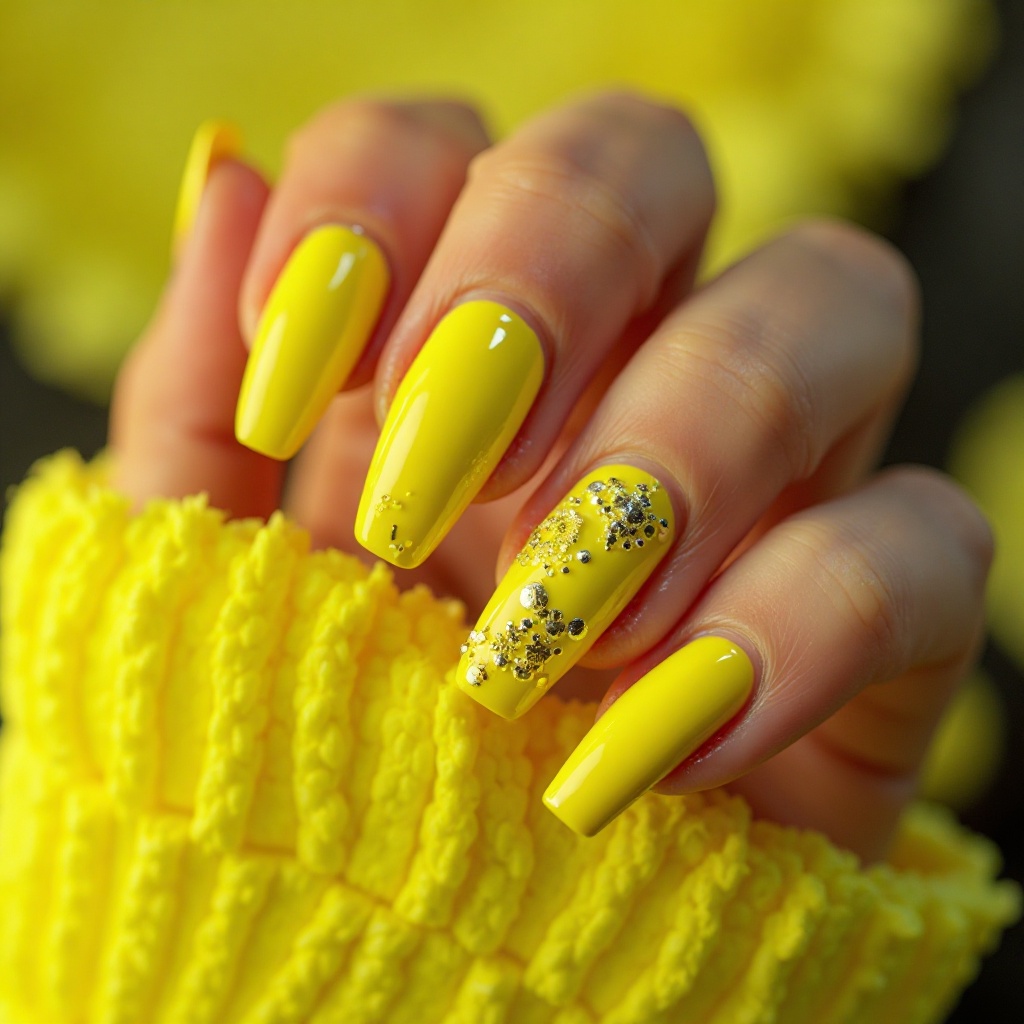
A vibrant, eye-catching neon yellow that borders on highlighter bright, bringing maximum energy and modern edge. This bold shade makes an unapologetic statement and captures attention instantly. The intensity feels playful and youthful without being juvenile.
- Difficulty: Intermediate
- Time to complete: 25 minutes
- Best for: Festivals, parties, or when you want your nails to be the conversation starter
- Why it works: Neon captures spring’s playful side perfectly
- What makes it different: Most neons fade fast—this method extends wear
Step-by-step:
- Apply white base coat (essential for neon vibrancy). Let dry 5 minutes.
- Apply first coat of neon yellow (OPI Neon Collection or China Glaze neons, $8-10). Neons have surprisingly good opacity.
- Wait 2-3 minutes, apply second coat. Coverage should be good.
- Seal with glossy top coat. Note: Neon fades faster than regular polish, so refresh top coat every 4-5 days.
- Keep nails shorter to balance intensity—long neon nails can be overwhelming.
- Pair with neutral outfits (white, black, beige) to let nails be the statement.
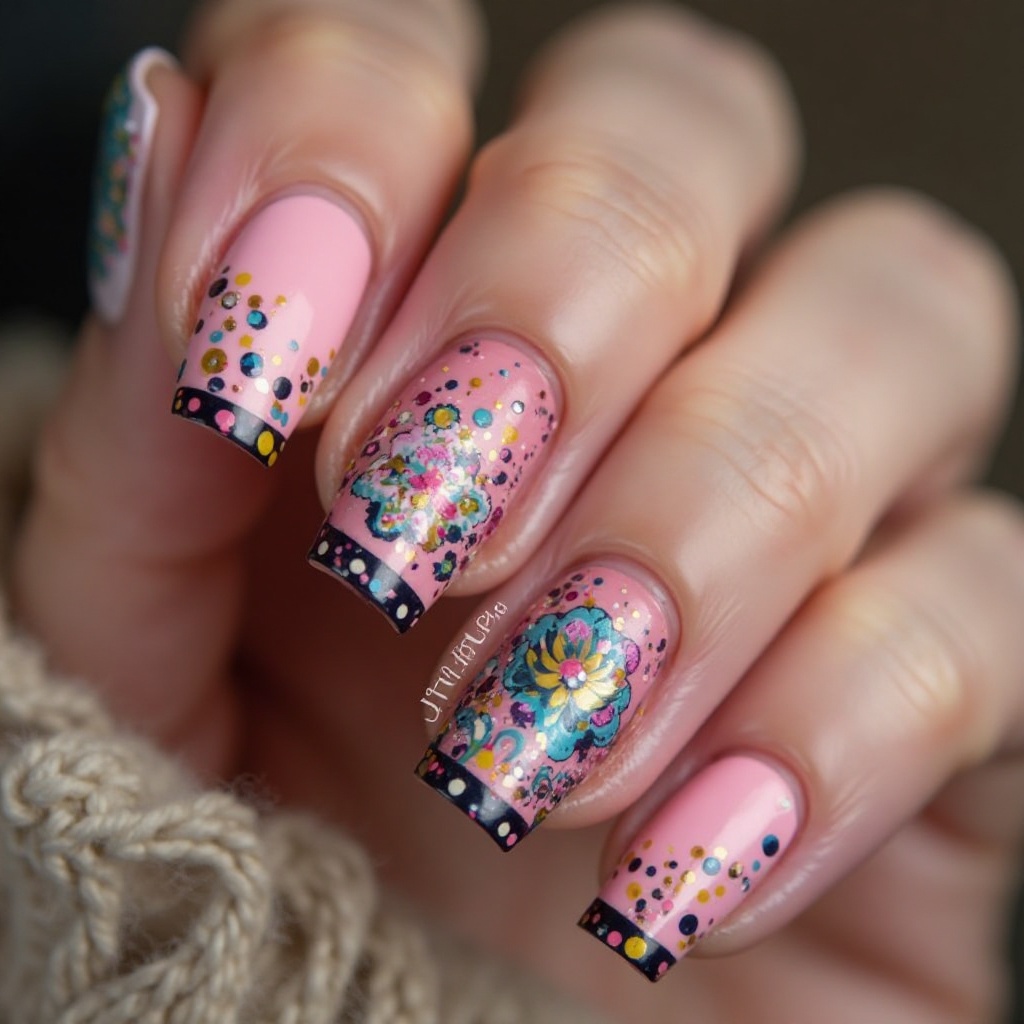
Yellow with White Accents
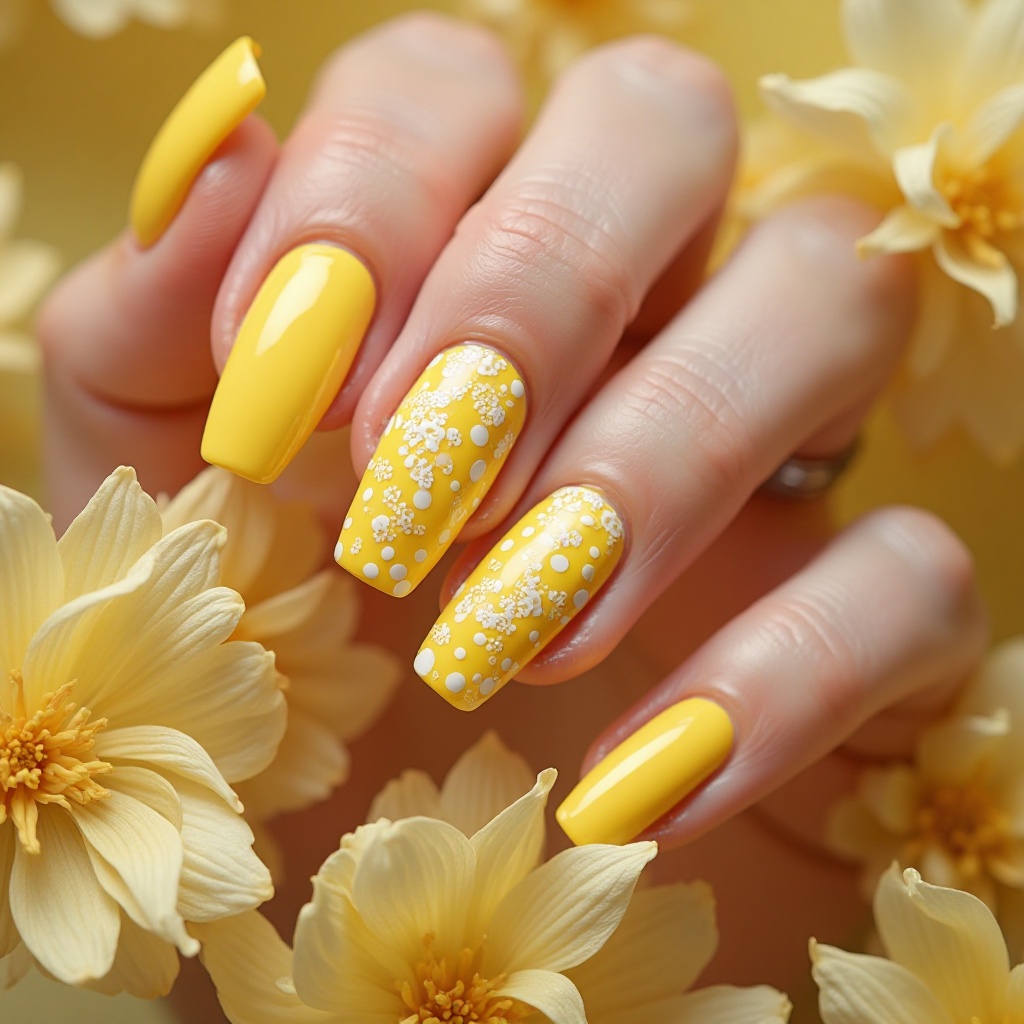
Soft or bright yellow base with white accent nail or white nail art (dots, stripes, florals) for fresh, spring-appropriate contrast. This combination feels cheerful and intentional while breaking up yellow’s intensity. The white adds breathing room and sophistication.
- Difficulty: Beginner
- Time to complete: 25 minutes
- Best for: First-time yellow users
- Why it works: White breaks up the intensity and adds sophistication
- What makes it different: The contrast makes both colors look brighter
Step-by-step (Method 1 – Solid Accent):
- Apply yellow to all nails except ring finger. Follow yellow application steps for your chosen shade.
- Let yellow dry completely (15 minutes).
- Apply white polish (Essie “Blanc”) to ring finger only. Apply 2 coats.
- Seal all nails with top coat.
Step-by-step (Method 2 – White Dots):
- Apply yellow to all nails. Let dry completely (15+ minutes).
- Using dotting tool dipped in white polish, add dots to 1-2 accent nails. Keep dots simple—3-5 scattered dots.
- Let dots dry 5 minutes.
- Seal with thick top coat.
Step-by-step (Method 3 – White Daisies):
- Apply yellow to all nails. Let dry completely.
- Using dotting tool, place small white dots for daisy petals (5-6 dots in circle).
- Add tiny yellow or white center dot.
- Add green stems with detail brush if desired.
- Seal with top coat.
Pale Lemon
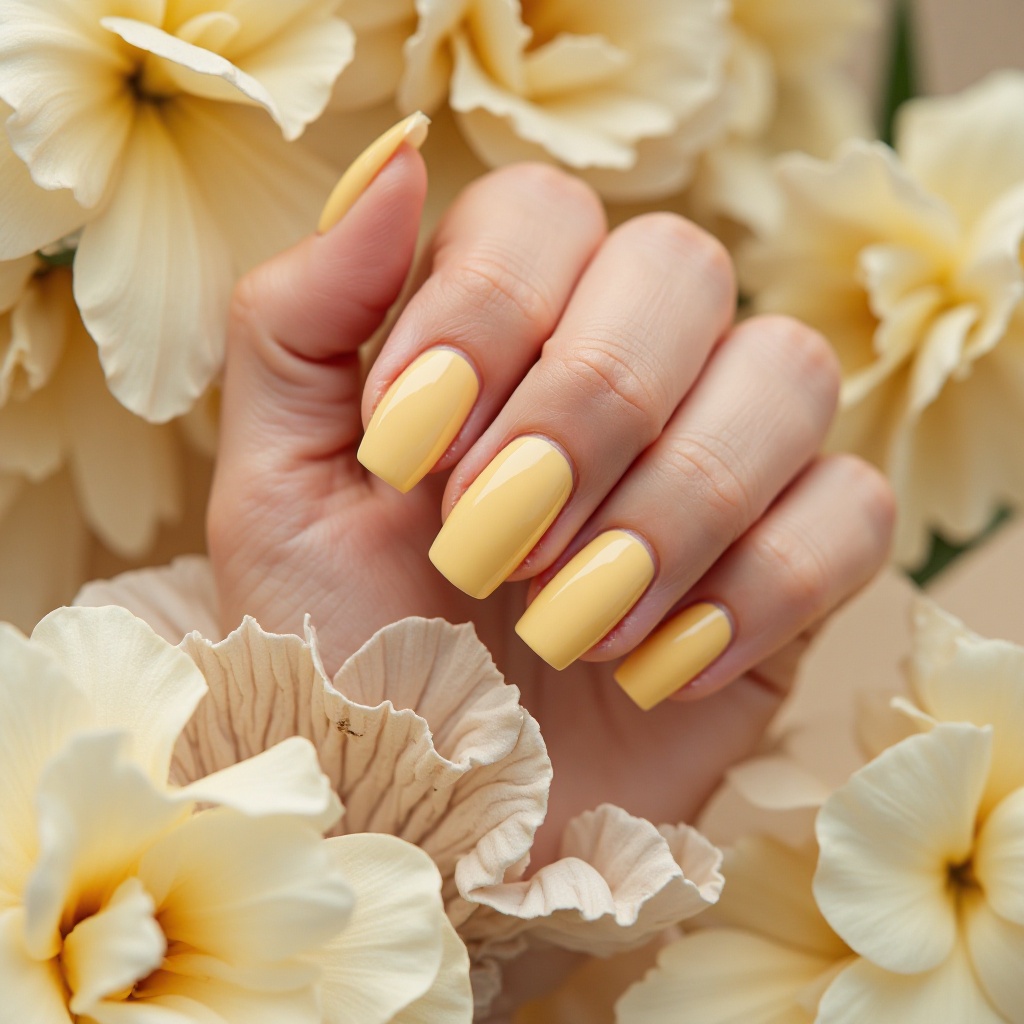
An ultra-soft, pale yellow that borders on cream, offering just a whisper of color for subtle spring style. This delicate shade provides warmth without boldness, perfect for those who want spring color that feels neutral. The gentleness makes it surprisingly versatile and wearable.
- Difficulty: Beginner
- Time to complete: 20 minutes
- Best for: Minimalists who want a hint of spring without obvious color
- Why it works: The sheerness makes it incredibly wearable and versatile
- What makes it different: Most pastels aim for opacity—this one embraces sheerness
Step-by-step:
- Apply ridge-filling base coat. Sheer shades show every imperfection.
- Apply first coat of pale lemon (Essie’s palest “Banan-e-r Oil Painting” or Butter London “Jasper,” $10-12). It will be very sheer.
- Wait 3 minutes, assess coverage. If you want barely-there wash of color, stop here.
- For more coverage, apply second thin coat. Wait 3 minutes.
- For opaque coverage, apply third coat. The sheerness can be a feature—some prefer the natural look.
- Seal with glossy top coat. The shine makes sheerness look intentional rather than cheap.
- Pair with warm-toned clothing to enhance the delicate warmth.
Dark Spring Nails
Deep Burgundy
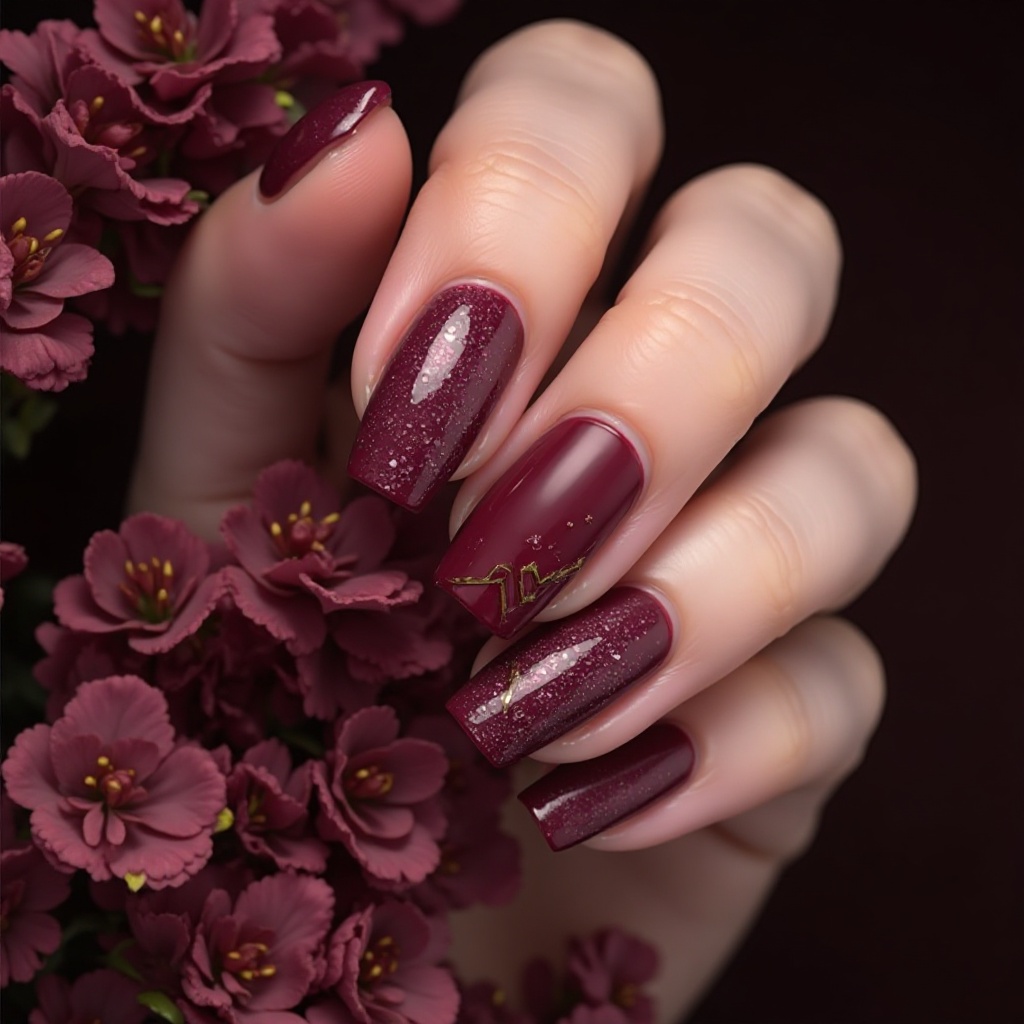
A rich, wine-toned burgundy with purple undertones that brings sophistication and depth while remaining spring-appropriate through berry tones. This elegant shade works for any occasion, from professional to evening, providing polish and refinement. The darkness creates striking contrast against spring’s lighter aesthetic.
- Difficulty: Beginner
- Time to complete: 15 minutes
- Best for: Evening events or when you want sophistication with edge
- Why it works: The purple undertones keep it from looking like winter burgundy
- What makes it different: Most dark spring colors are green or blue—this one leans warm
Step-by-step:
- Apply base coat. Burgundy stains, so don’t skip.
- Apply first coat of burgundy (Essie “Bahama Mama” or OPI “In the Cable Car-Pool Lane,” $10-12). Burgundy has excellent pigmentation.
- Wait 2-3 minutes, apply second coat. Full coverage achieved.
- Clean up immediately—burgundy stains skin badly.
- For luxury touch, add rose gold or gold accent on ring finger.
- Seal with top coat, wrapping tips.
Forest Green
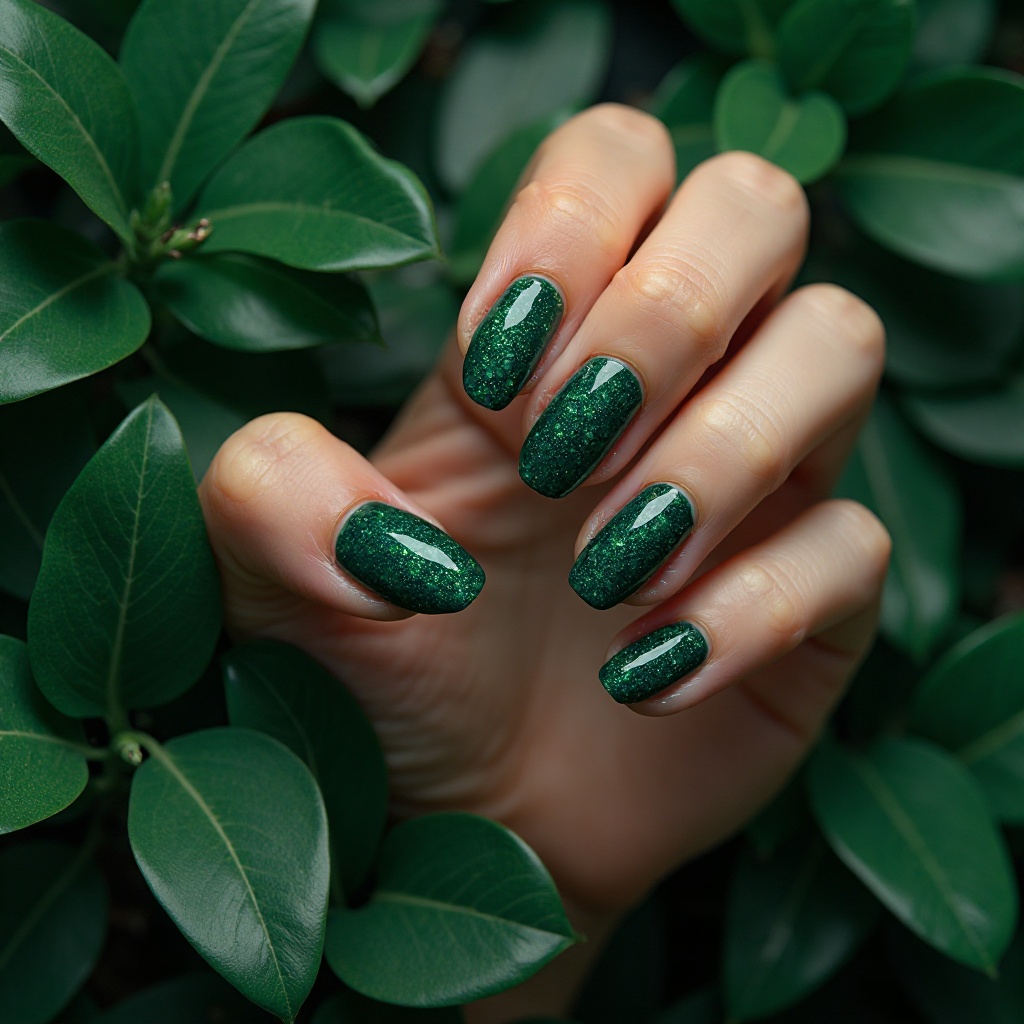
A deep, rich green that leans toward forest or hunter green, bringing botanical depth and nature-inspired sophistication. This earthy shade feels grounded and elegant while maintaining clear connection to spring’s natural themes. The darkness prevents it from reading as summery or tropical.
- Difficulty: Beginner
- Time to complete: 15 minutes
- Best for: Nature lovers who want spring connection without pastels
- Why it works: The depth feels grounded while the green keeps it botanical
- What makes it different: Most spring greens are light—this one is unexpected
Step-by-step:
- Apply base coat. Green can stain—use stain-blocking formula.
- Apply first coat of forest green (Essie “Off the Shoulder” or OPI “Envy the Adventure,” $10-12).
- Wait 2-3 minutes, apply second coat. Two coats should be fully opaque.
- Add gold accent on ring finger for elevated contrast:
- Gold metallic polish (Sally Hansen “Golden-I”)
- Gold striping tape in geometric patterns
- Gold foil pieces on one nail
- Seal with glossy top coat.
Navy Blue
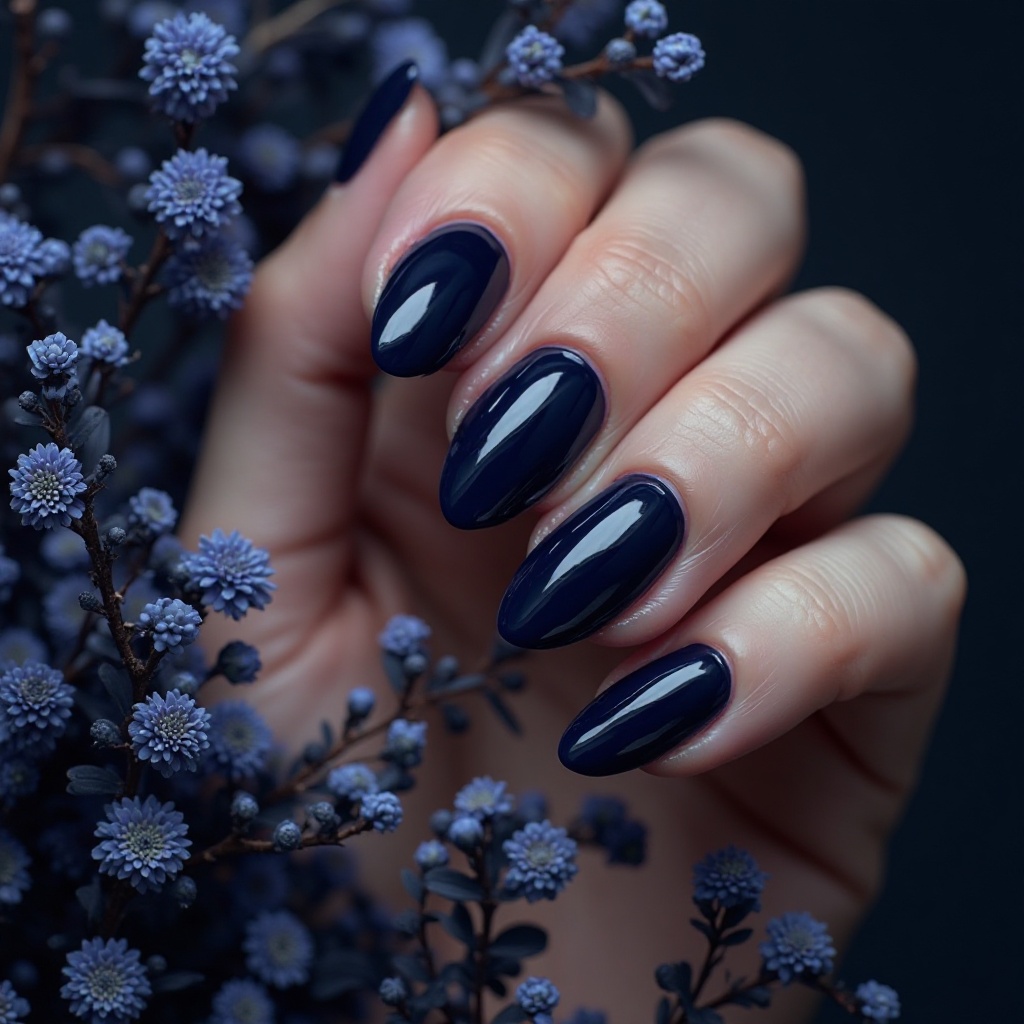
A classic, deep navy that borders on midnight blue, offering timeless sophistication and versatility while remaining distinctly spring through its blue tones. This professional shade works for literally any setting while providing color depth. The darkness feels grounded without being gothic.
- Difficulty: Beginner
- Time to complete: 15 minutes
- Best for: Anyone who wants one polish that does everything
- Why it works: Navy coordinates with spring’s nautical and denim trends
- What makes it different: The depth makes it more interesting than black
Step-by-step:
- Apply base coat. Navy stains—don’t skip.
- Apply first coat of navy (Essie “After School Boy Blazer” or Zoya “Natty,” $10-12).
- Wait 2-3 minutes, apply second coat.
- Clean up immediately—navy stains skin.
- Optional white accent: Apply navy to all except ring finger, add white to ring finger.
- Optional gold accent: Same but with gold for preppy style.
- Seal with top coat, wrapping tips.
Chocolate Brown
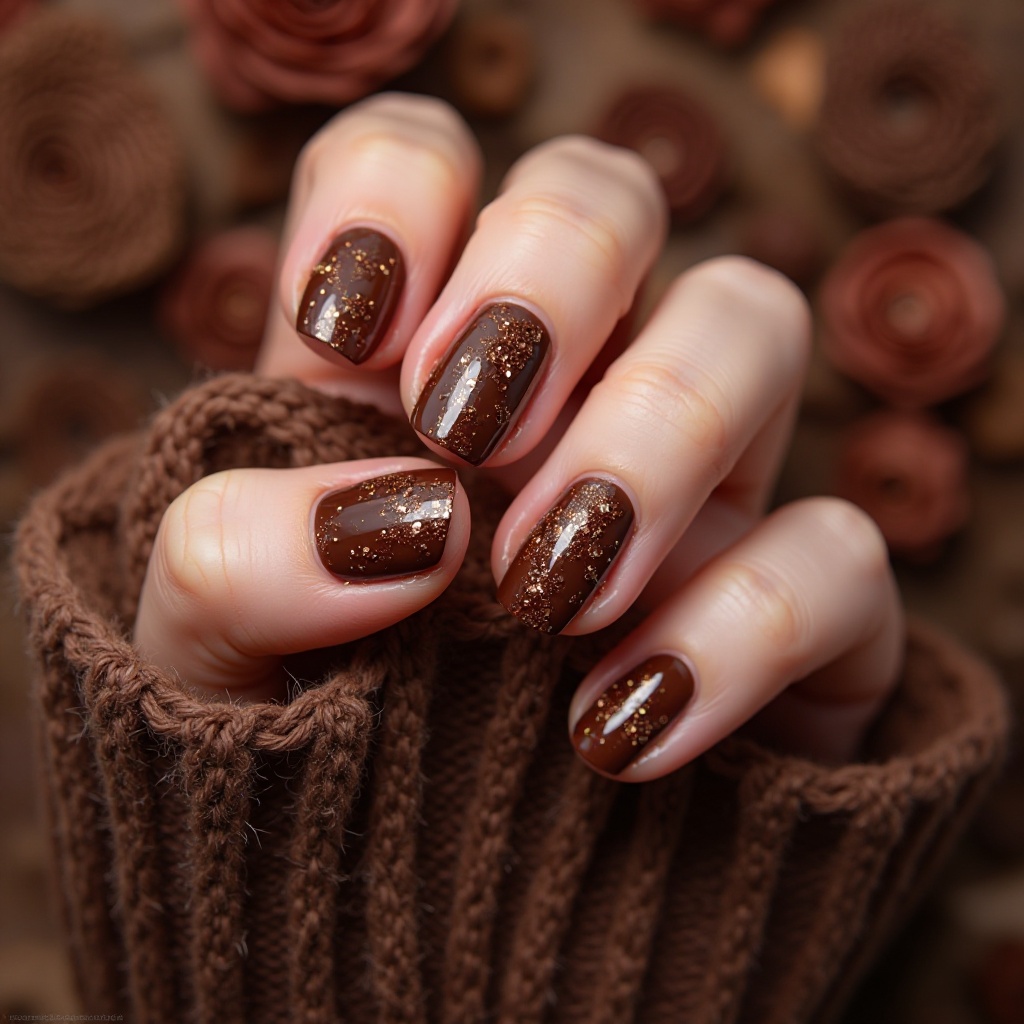
A rich, warm brown with slight red undertones that feels earthy and sophisticated, offering unexpected depth for spring. This grounding shade works as an alternative neutral while providing more visual interest than beige. The warmth prevents it from looking too heavy or wintery.
- Difficulty: Beginner
- Time to complete: 15 minutes
- Best for: Anyone tired of nudes but not ready for bright colors
- Why it works: Brown grounds spring’s typically light palette
- What makes it different: Most spring browns are cool-toned—this one has warmth
Step-by-step:
- Apply base coat. Browns don’t stain as badly as blues/purples, but still use base.
- Apply first coat of chocolate brown (Essie “Hot Coco” or Zoya “Louise,” $10-12). Browns have excellent opacity.
- Wait 2-3 minutes, apply second coat. Coverage should be perfect.
- Glossy top coat is essential—brown looks dull without shine.
- Add rose gold or copper metallic accent on ring finger for warm contrast.
- Apply cuticle oil—moisture makes brown look richer.
Charcoal Gray
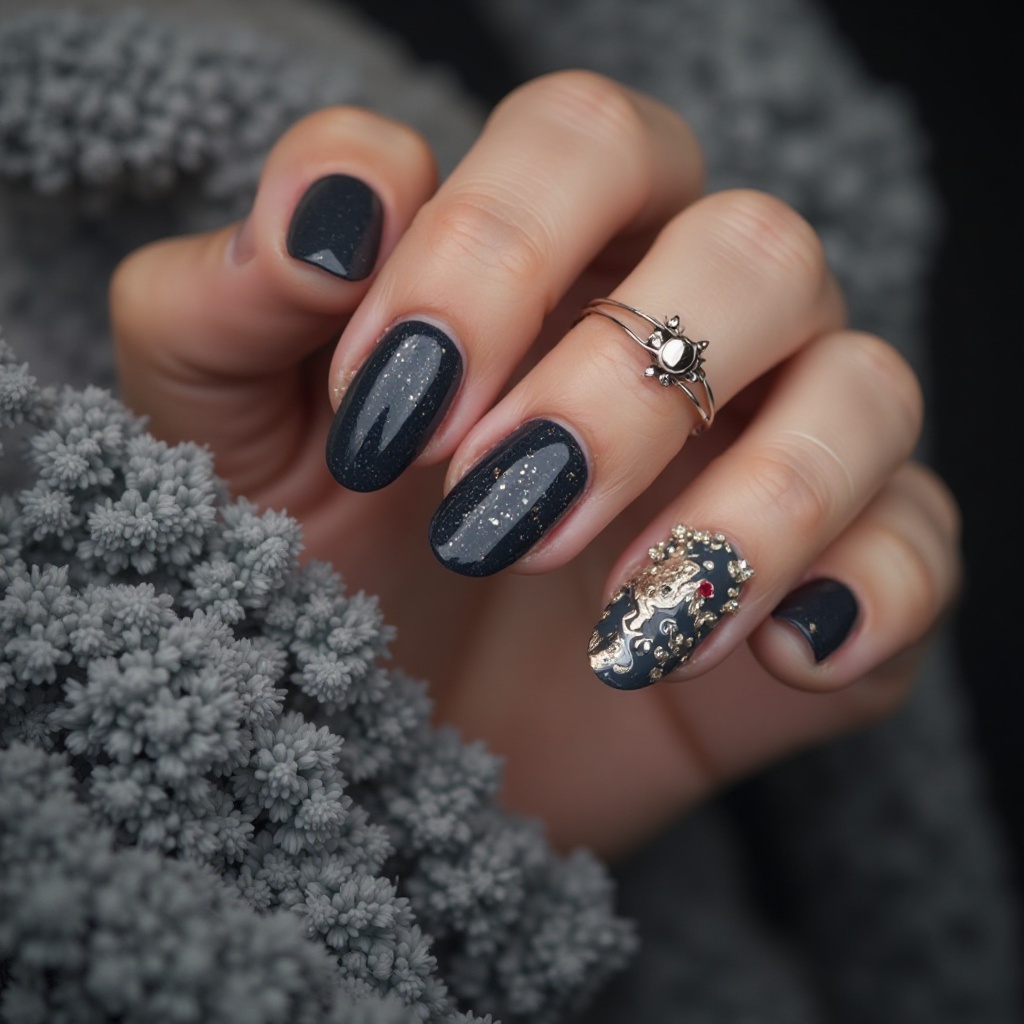
A deep, cool-toned gray that borders on slate, offering modern sophistication and versatility without being black. This neutral-dark shade works as an edgy alternative to traditional spring colors while remaining professional. The coolness feels fresh rather than heavy.
Why It Works for Spring: Charcoal gray provides depth and edge while remaining neutral enough to coordinate with spring’s full color spectrum, working particularly well with spring’s athletic and minimalist aesthetics.
Pro Tip: Add silver chrome or metallic silver accent nail for monochromatic sophistication, or pair with a single pastel accent for unexpected contrast.
How to Recreate at Home: Try Essie’s “Chinchilly” or OPI’s “Dark Side of the Mood.” Apply two coats. Silver accent: Add silver chrome/metallic to ring finger for sleek monochrome. Pastel accent: Add lavender, mint, or baby blue to ring finger for editorial contrast. Matte: Apply matte top coat for velvety sophistication.
Pink Spring Nails
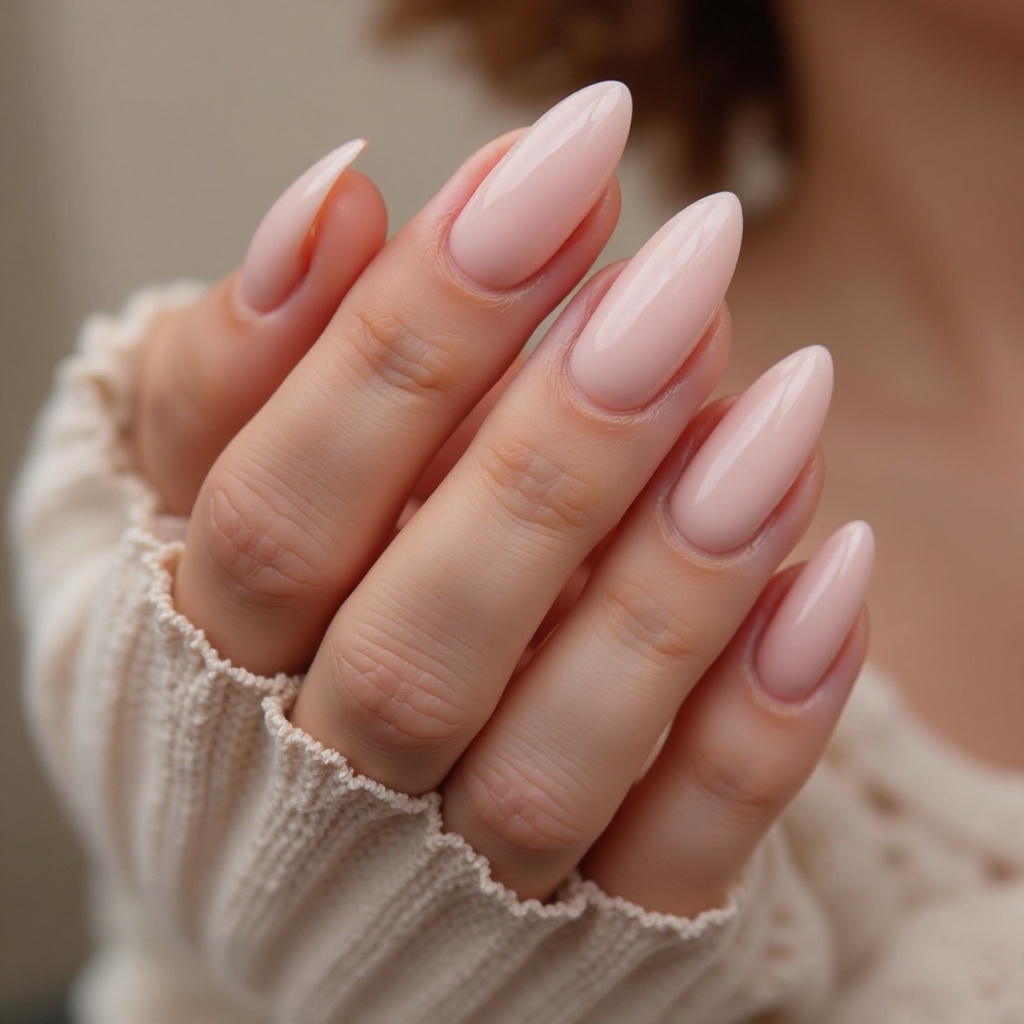
Ballet Slipper Pink

An ultra-soft, barely-there pink that resembles ballet slippers and feels delicate and romantic. This gentle shade offers just a whisper of color for subtle femininity without being bold. The sheerness makes it incredibly versatile and universally flattering.
- Difficulty: Beginner
- Time to complete: 18 minutes
- Best for: Brides, minimalists, or anyone who wants “my nails but better”
- Why it works: The sheerness lets your natural nail peek through for an effortless look
- What makes it different: Most pinks are either too bright or too opaque—this one hits the sweet spot
Step-by-step:
- Apply ridge-filling base coat (Essie Fill the Gap, $9). Sheer pinks show every imperfection.
- Apply first coat of ballet pink (Essie “Ballet Slippers” or OPI “Bubble Bath,” $10-12). Apply thin—sheer is the goal.
- Wait 2 minutes, assess coverage. For barely-there look, stop here.
- For more coverage, apply second thin coat. Wait 2 minutes.
- For opaque coverage (which defeats the “ballet slipper” look but your choice), apply third coat.
- File nails into rounded shape to enhance femininity.
- Seal with glossy top coat. Apply cuticle oil—this shade needs moisturized framing.
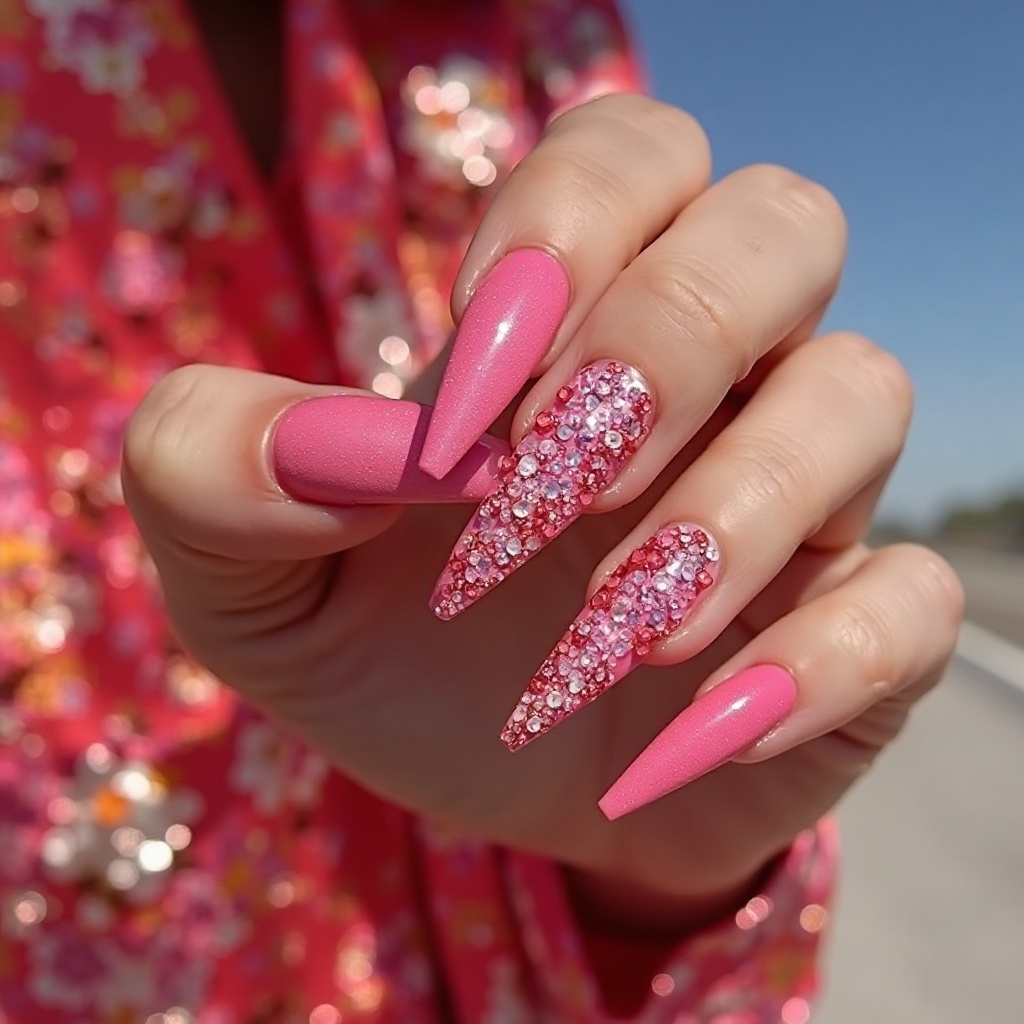
Hot Pink
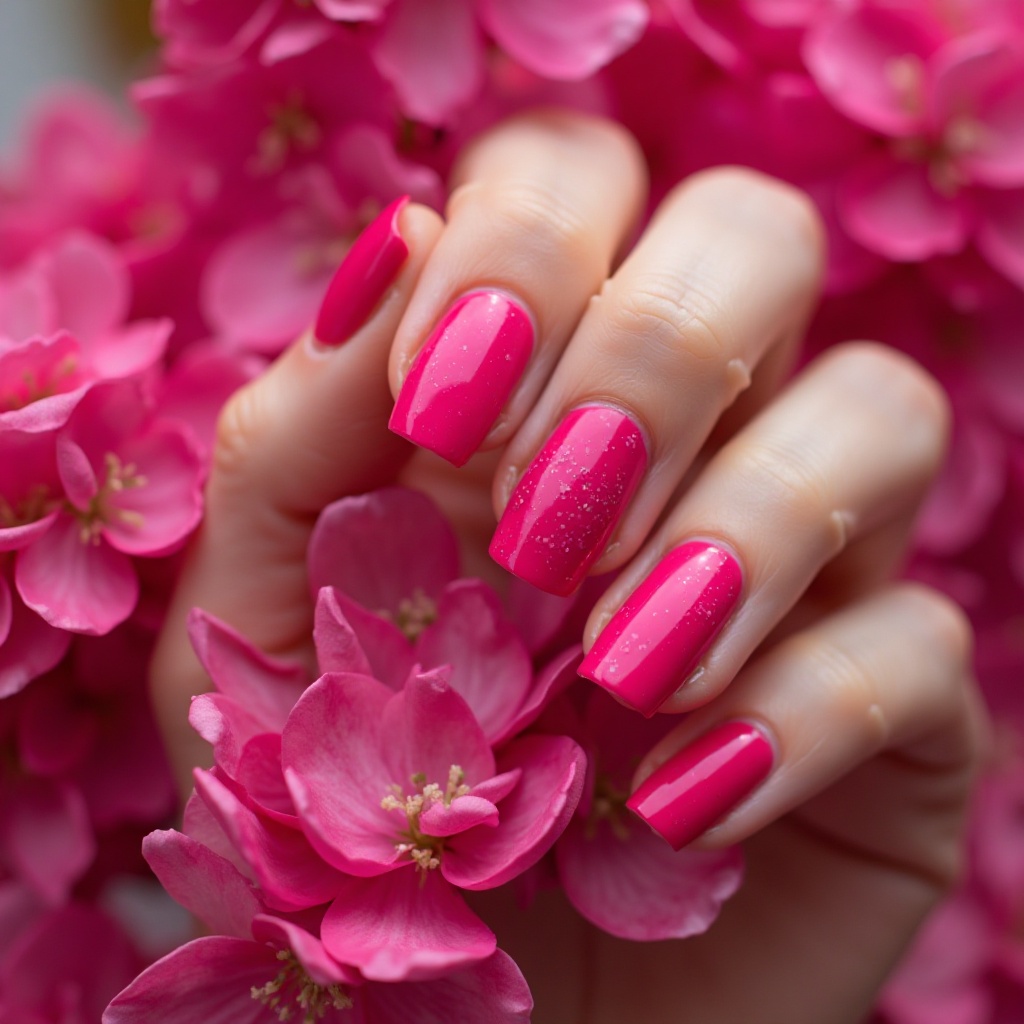
A vibrant, saturated pink that leans fuchsia, bringing bold color and unapologetic femininity with modern edge. This confident shade makes a statement while remaining distinctly spring-appropriate through its floral connection. The intensity feels playful and energetic.
- Difficulty: Beginner
- Time to complete: 15 minutes
- Best for: Making a statement without nail art
- Why it works: Hot pink works on any nail length—short nails can handle this boldness
- What makes it different: The fuchsia undertones keep it from looking cheap or bubblegum
Step-by-step:
- Apply base coat. Hot pink can stain lighter nails—use stain-blocking formula.
- Apply first coat of hot pink (OPI “Strawberry Margarita” or Essie “Watermelon,” $10-12). Hot pinks have excellent pigmentation.
- Wait 2-3 minutes, apply second coat. Coverage should be perfect.
- Clean up immediately—bright pink stains skin.
- Seal with glossy top coat for maximum vibrancy.
- Optional: Add white or silver accent on ring finger for extra interest.
Dusty Rose
A muted, sophisticated pink with gray or mauve undertones that feels vintage and refined rather than sweet. This complex shade offers pink’s femininity without boldness, working as an elevated neutral. The dustiness prevents it from reading as juvenile.
- Difficulty: Beginner
- Time to complete: 15 minutes
- Best for: Professional settings or when you want pink without sweetness
- Why it works: The dustiness makes it appropriate for adults
- What makes it different: Most pinks are either bright or pastel—this one is complex
Step-by-step:
- Apply base coat.
- Apply first coat of dusty rose (OPI “Tickle My France-y” or Essie “Lady Like,” $10-12). Dusty rose is forgiving.
- Wait 2-3 minutes, apply second coat. Two coats should be enough.
- For matte finish (recommended for modern look), wait 15 minutes, then apply matte top coat (Essie Matte About You, $9).
- For shimmer finish, add rose gold shimmer top coat for dimensional sparkle.
- Seal with top coat of your choice (matte or glossy).
Coral Pink
A warm pink with orange undertones that brings tropical energy and flattering warmth to fingertips. This lively shade sits between pink and orange, offering the best of both colors. The warmth makes hands look tan and healthy.
- Difficulty: Beginner
- Time to complete: 15 minutes
- Best for: Making hands look tan and healthy
- Why it works: The warmth complements both cool and warm skin undertones
- What makes it different: Coral sits perfectly between pink and orange—not too much of either
Step-by-step:
- Apply base coat.
- Apply first coat of coral (Essie “Haute as Hello” or Zoya “Wendy,” $10-12). Coral is forgiving and self-levels well.
- Wait 2-3 minutes, apply second coat. Coverage should be even.
- Seal with glossy top coat.
- For tropical contrast, add turquoise accent on ring finger (China Glaze “For Audrey”).
- Or add simple white dots or stripes on one accent nail.
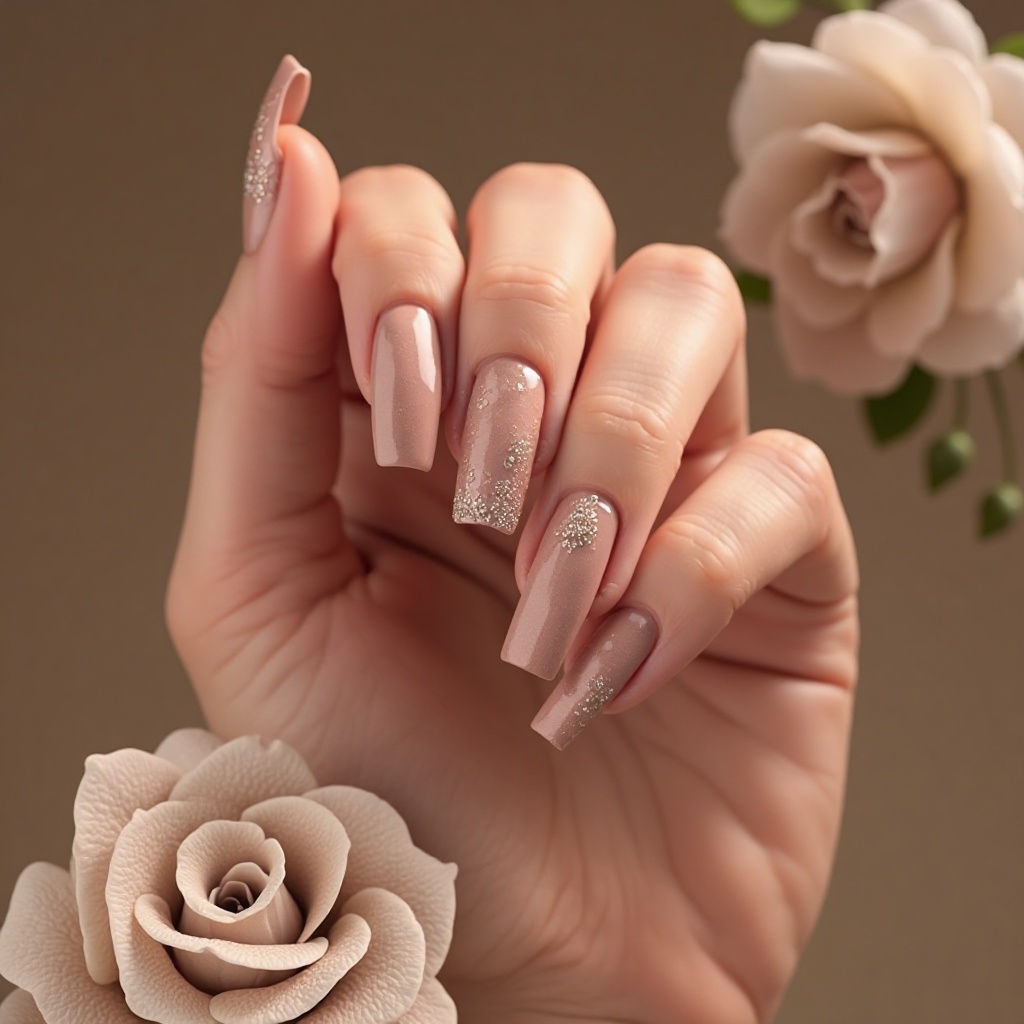
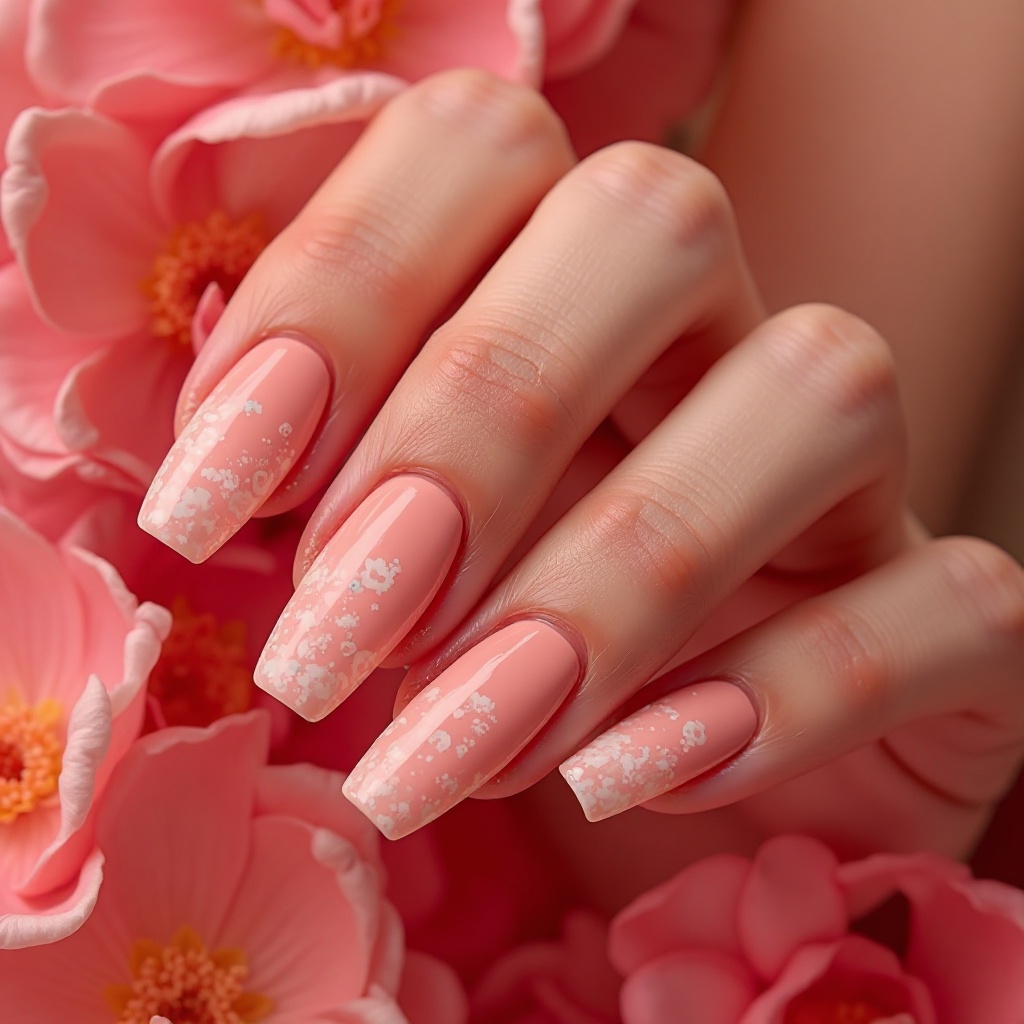
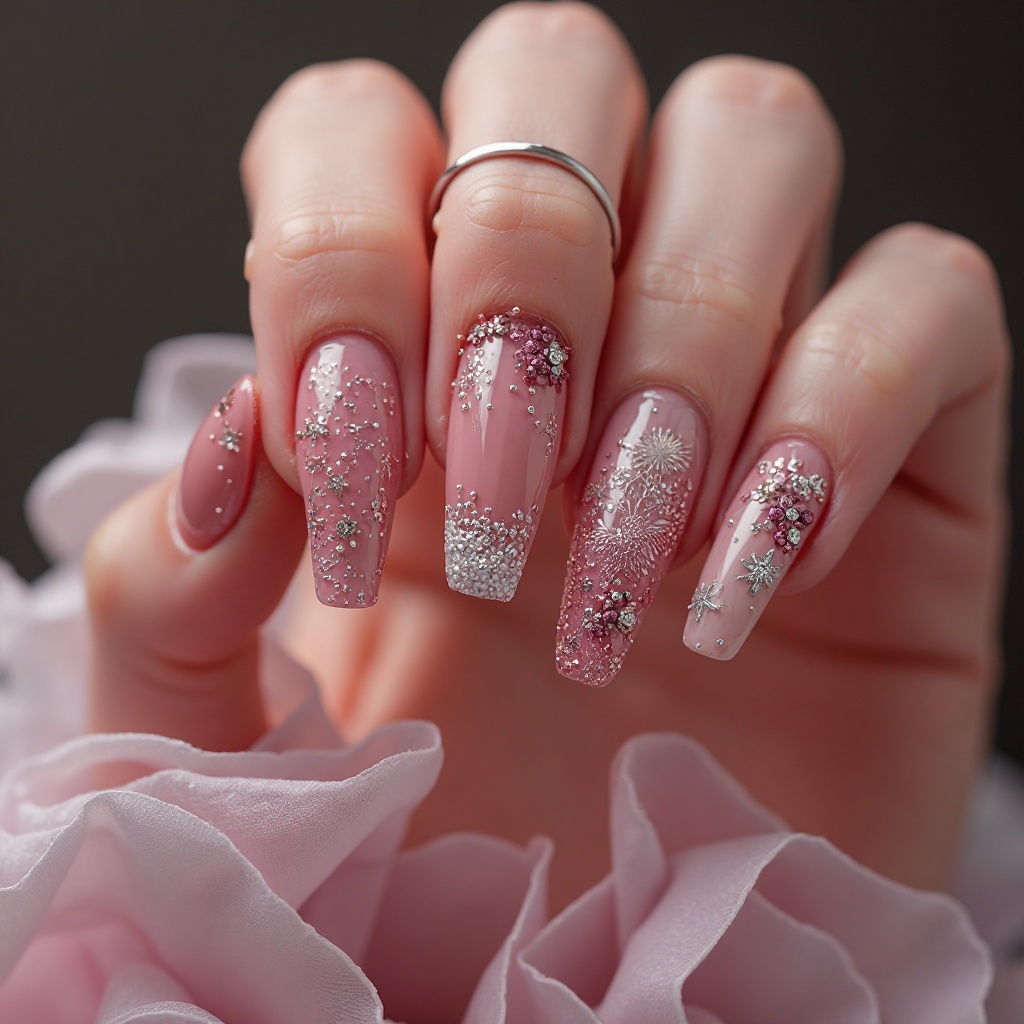
Rose Pink with Shimmer
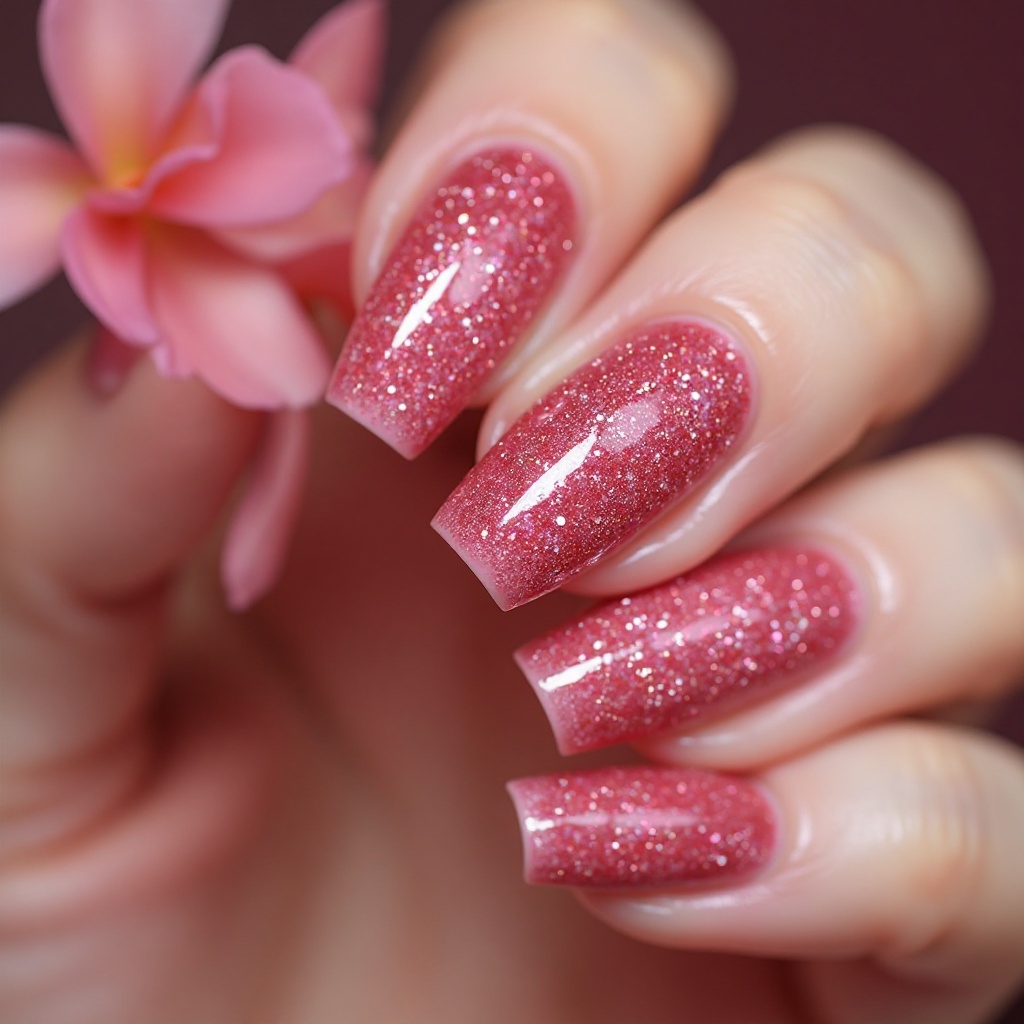
A medium pink with visible shimmer or pearl particles that add dimensional interest without being glittery. This enhanced shade offers pink’s femininity with built-in sparkle that catches light beautifully. The shimmer makes it feel special-occasion appropriate while remaining wearable.
- Difficulty: Beginner
- Time to complete: 18 minutes
- Best for: Weddings, dates, or any occasion where you want to feel fancy
- Why it works: The shimmer adds dimension without requiring glitter or nail art
- What makes it different: Built-in shimmer means one product does the work of two
Step-by-step:
- Apply base coat.
- Apply first coat of shimmer pink (Essie “A-List” or China Glaze “Spontaneous,” $8-10). Shimmer formulas are slightly thicker—apply thin anyway.
- Wait 3 minutes, apply second coat. The shimmer builds with each layer.
- Apply third coat if needed for opacity and maximum shimmer.
- Seal with thick glossy top coat (Seche Vite works best—smooths any texture).
- Apply 2-3 coats of top coat over 24 hours for smoothest finish.
Almond Spring Nails
Classic Nude Almond
A perfect nude shade on elegant almond-shaped nails for timeless sophistication that flatters and elongates fingers. This combination creates the ultimate elegant, versatile look that works everywhere. The shape adds femininity to the neutral color.
- Difficulty: Intermediate (shaping requires practice)
- Time to complete: 25 minutes (including shaping)
- Best for: Anyone who wants their hands to look longer and more elegant
- Why it works: Almond shape is universally flattering and elongates fingers
- What makes it different: The shape elevates nude from basic to editorial
Step-by-step:
- Shape nails into almonds: File sides from outer edge to center, creating gentle taper to soft rounded point. The tip should be rounded, not sharp.
- Test nude shades against your wrist in natural light to find perfect match.
- Apply ridge-filling base coat.
- Apply two coats of nude (OPI “Samoan Sand” or Essie “Au Natural”), letting each dry 2-3 minutes.
- Apply high-gloss top coat—shine makes almond shape look sculptural.
- Apply cuticle oil after drying. Moisturized cuticles frame almond nails beautifully.
Pastel Almond Elegance
Any spring pastel (lavender, mint, baby blue, blush) on almond nails for soft femininitywith elegant structure. This combination balances gentle color with sophisticated shape for romantic spring styling. The almond shape prevents pastels from looking juvenile.
- Difficulty: Intermediate
- Time to complete: 30 minutes
- Best for: Adults who love pastels but want them to look grown-up
- Why it works: Almond shape prevents pastels from looking juvenile
- What makes it different: The elongated shape shows off the color better than shorter shapes
Step-by-step:
- Create almond shapes (see #36 for shaping technique).
- Choose one pastel—stick with one color for maximum sophistication.
- Apply white base coat, let dry 5 minutes.
- Apply chosen pastel in 3-4 thin coats, waiting 3 minutes between each.
- The almond shape showcases color beautifully—keep designs minimal or absent.
- Seal with high-gloss top coat.
- This combination creates romantic, feminine nails perfect for spring events.
Bold Almond Statement
A vibrant spring color (hot pink, cobalt blue, grass green, coral) on almond nails for maximum impact and modern glamour. This dramatic combination creates show-stopping nails that command attention. The elegant shape balances the bold color beautifully.
- Difficulty: Intermediate
- Time to complete: 25 minutes
- Best for: Making a statement while keeping it sophisticated
- Why it works: The elegant shape balances the bold color
- What makes it different: Bold colors on almond shapes can handle length—don’t be afraid to grow them longer
Step-by-step:
- Create almond shapes with consistent length. Don’t rush this—shape matters.
- Apply two coats of bold color (OPI “Strawberry Margarita” or Essie “Aruba Blue,” $10-12).
- Use cleanup brush throughout application—mistakes show on dramatic shapes.
- Seal with glossy top coat, wrapping tips carefully.
- Reapply top coat every 2-3 days—bold colors show wear faster.
- Optional: Add neutral or metallic accent nail for contrast.
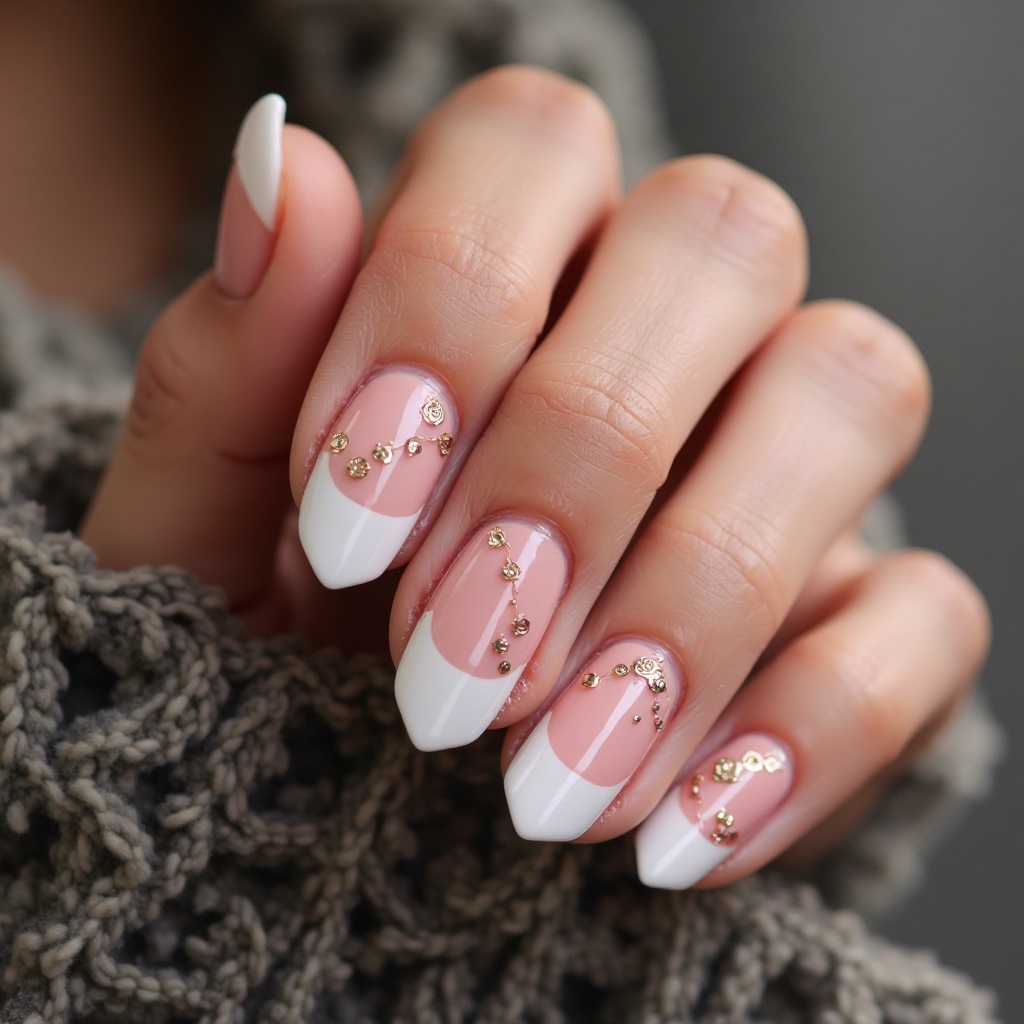
Almond French Manicure
Classic French tips on almond-shaped nails for timeless elegance with modern sophistication. This combination updates the traditional French by adding an elegant, tapered shape. The almond shape makes the French feel contemporary rather than dated.
- Difficulty: Advanced (requires precision)
- Time to complete: 40 minutes
- Best for: Weddings, graduations, or any event where you want perfect nails
- Why it works: Almond shape makes French feel contemporary rather than dated
- What makes it different: The tapered shape elongates the nail and makes tips look naturally elegant
Step-by-step:
- Create smooth almond shapes. This is critical—uneven shapes ruin French tips.
- Apply sheer pink or nude base (Essie “Mademoiselle” or OPI “Bubble Bath”). Let dry 10 minutes.
- Apply curved striping tape following natural nail curve. Press firmly.
- Keep white tips very thin (2mm maximum) on almond nails for proper proportions.
- Apply white polish (Essie “Blanc”) in two thin coats beyond tape. Let each dry 2 minutes.
- Remove tape when dry to touch, pulling slowly at 45-degree angle.
- Clean up any imperfections with acetone brush.
- Seal with top coat, wrapping tips.
Almond with Accent Art
Almond-shaped nails in a spring base color with delicate nail art on 1-2 accent nails (florals, lines, geometric patterns). This creative combination showcases the elegant shape while adding artistic personality. The almond provides a beautiful canvas for detailed designs.
- Difficulty: Advanced
- Time to complete: 45 minutes
- Best for: Expressing creativity without committing to art on all nails
- Why it works: The elongated almond provides ideal space for detailed designs
- What makes it different: Art placed on almond shape enhances the elongation rather than fighting it
Step-by-step:
- Create almond shapes on all nails.
- Apply spring base color to all nails (choose from pastels, nudes, or bold colors). Let dry 15+ minutes.
- On 1-2 accent nails (ring finger, or ring + middle), add chosen art:Vertical Florals:
- Use detail brush with green polish to paint thin stem from cuticle to tip
- Add small flowers along stem using dotting tool
- Keep flowers simple—5-dot flowers work well
- Use striping tape or detail brush
- Create thin lines that run lengthwise (enhances almond shape)
- Try 2-3 parallel lines or intersecting lines
- Paint one larger flower or leaf
- Place off-center for artistic look
- Don’t overcrowd—negative space is part of design
- Let art dry 10+ minutes.
- Seal with thick top coat, applying 2-3 coats over 24 hours to protect art.
Purple Spring Nails
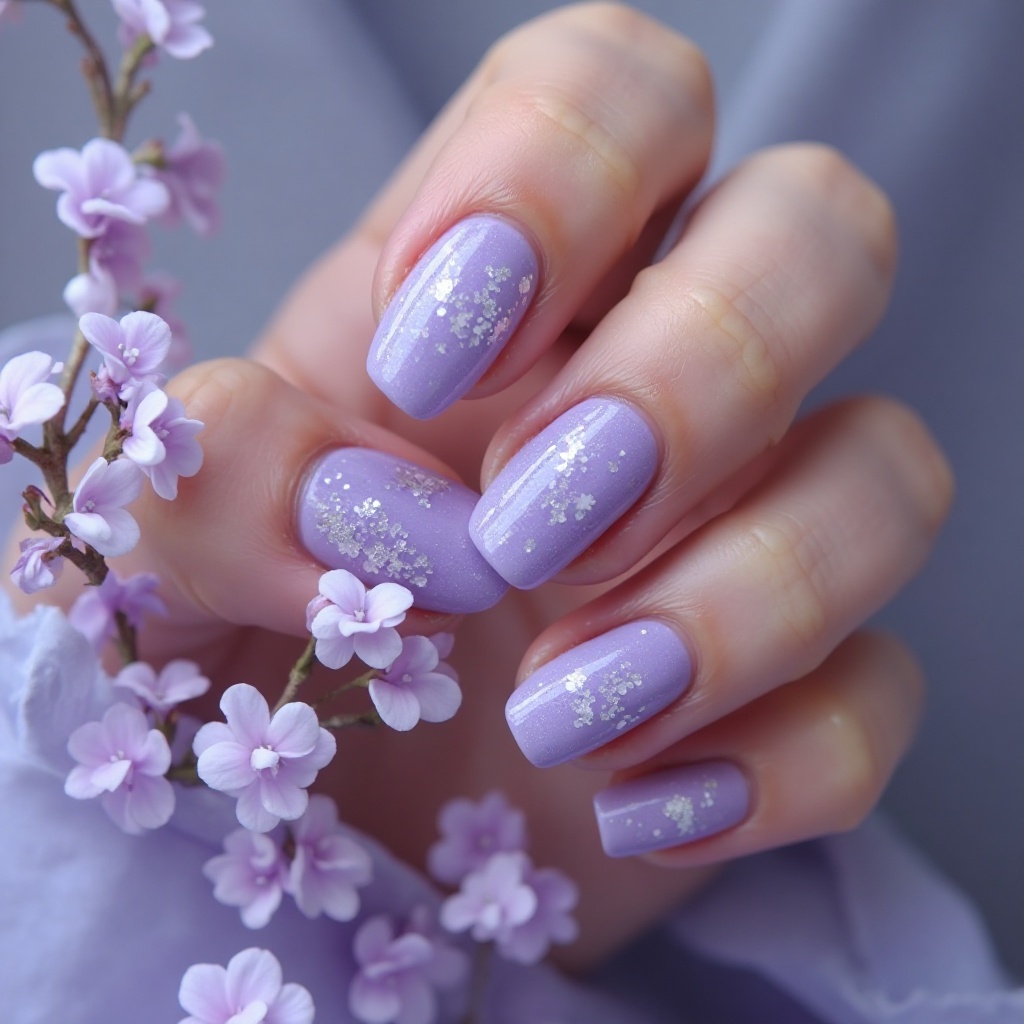
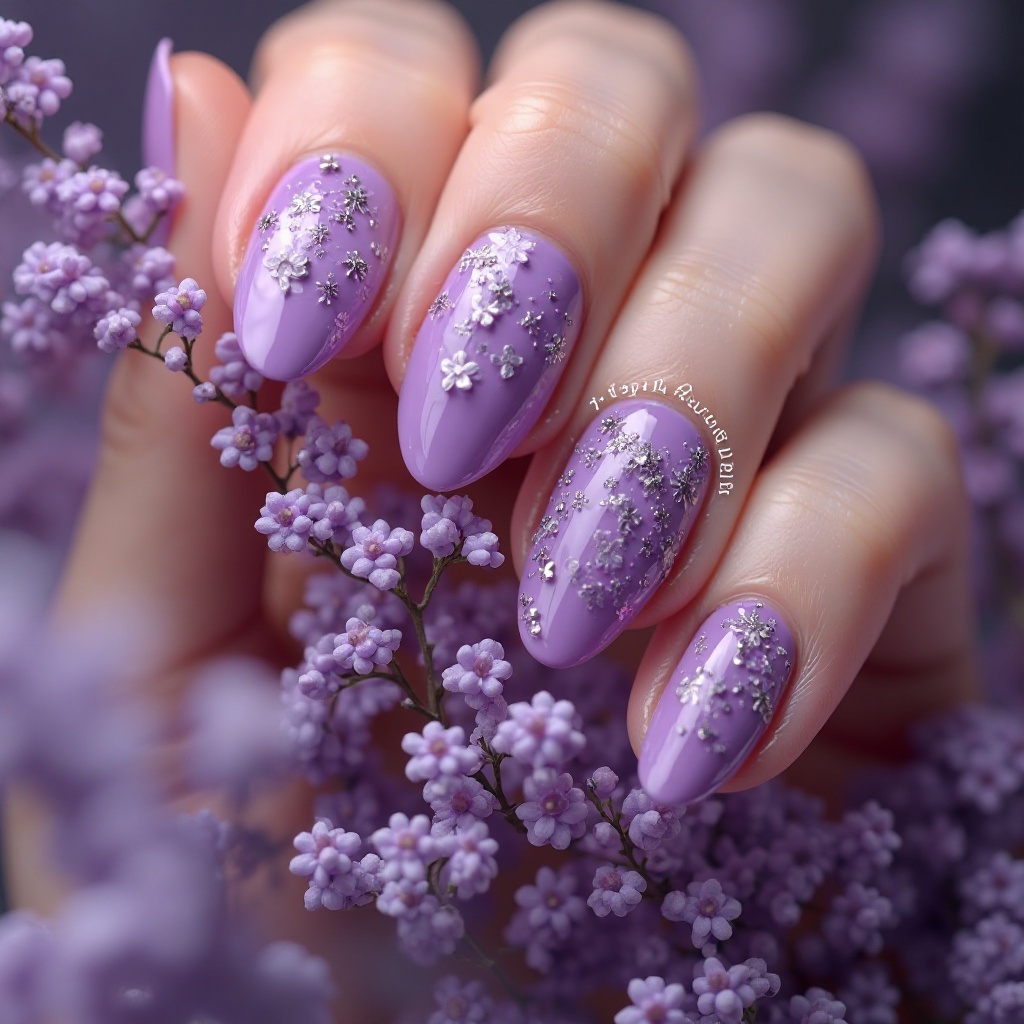
Lilac Dream
A soft, pastel purple with pink undertones that feels dreamy and romantic, capturing spring lilac blooms perfectly. This gentle shade offers color without boldness, ideal for subtle spring style. The dusty quality prevents it from looking too sweet or juvenile.
- Difficulty: Beginner-Intermediate
- Time to complete: 25-30 minutes
- Best for: Anyone who wants spring color without the boldness of brights
- Why it works: The dusty quality keeps it sophisticated—no one will mistake this for kid’s nail polish
- What makes it different: Most lilacs lean too blue or too pink—this one hits the sweet spot
Step-by-step:
- Apply ridge-filling base coat. Lilac shows texture.
- Apply white base coat (Essie “Blanc,” $9). Let dry 5 minutes. This is essential—lilac over clear looks washed out.
- Apply first thin coat of lilac (Essie “Lilacism” or OPI “Do You Lilac It?” $10-12). It will look patchy. This is normal.
- Wait 3 full minutes. Set a timer—don’t rush.
- Apply second thin coat. Better, but likely still needs more.
- Wait 3 minutes, apply third thin coat. You should have opacity now.
- If you still see through it, add a fourth thin coat rather than making any coat thick.
- Seal with high-gloss top coat—the shine makes lilac vibrate.
- Pair with silver jewelry—cool metals complement the purple tones.
Deep Plum
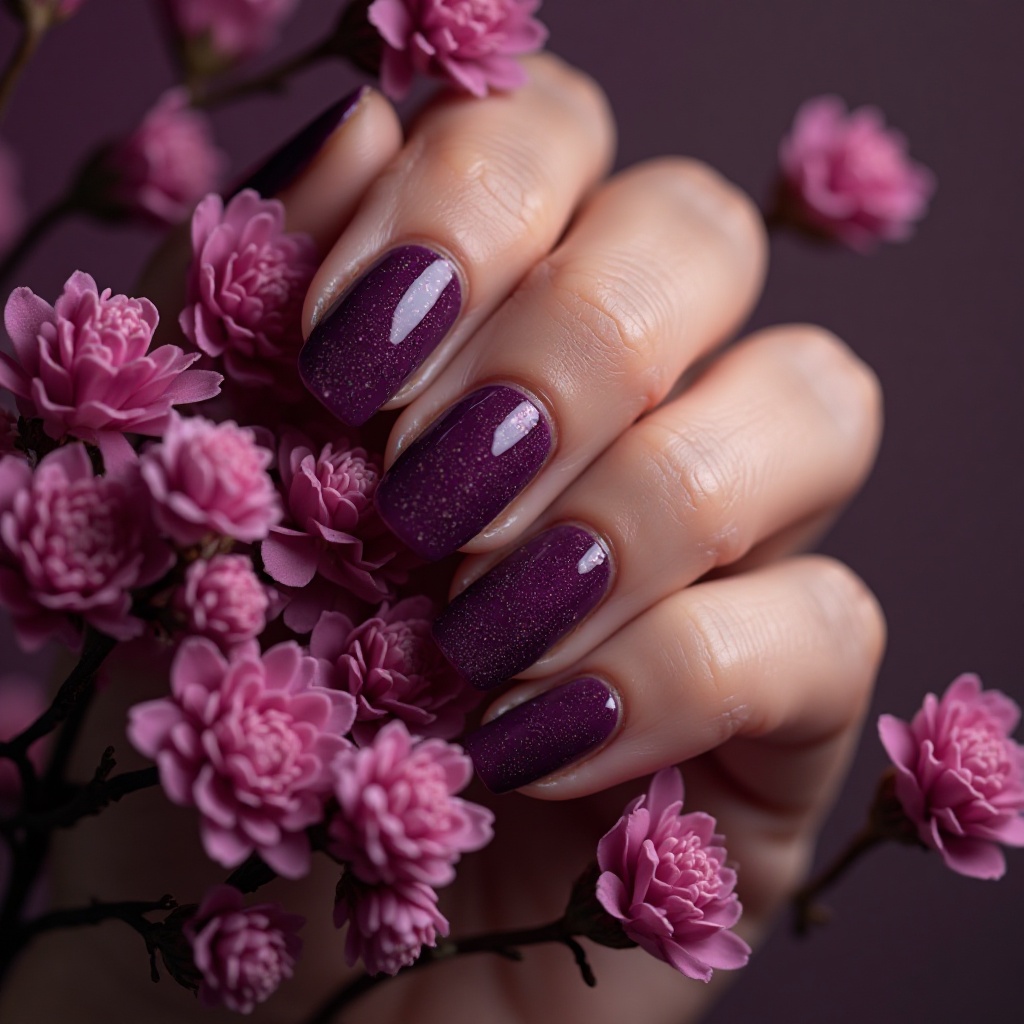
A rich, dark purple with wine-red undertones that brings sophistication and depth to spring nails. This jewel tone feels luxurious and elegant while maintaining purple’s connection to spring flowers. The darkness creates striking contrast against spring’s lighter aesthetic.
- Difficulty: Beginner
- Time to complete: 15 minutes
- Best for: Evening events or when you want purple but need it to look grown-up
- Why it works: The darkness creates striking contrast against spring’s lighter outfits
- What makes it different: Most dark purples lean blue—this one has warmth from red undertones
Step-by-step:
- Apply base coat. Deep purples stain—don’t skip this.
- Apply first coat of deep plum (Essie “Bahama Mama” or Zoya “Casey,” $10-12). Deep purples are forgiving—they hide imperfections.
- Wait 2-3 minutes, apply second coat. Coverage should be perfect.
- Clean up immediately—plum stains skin badly.
- Add gold or rose gold accent on ring finger for luxury contrast.
- Or add gold striping tape or foil pieces on one nail.
- Seal with glossy top coat, wrapping tips.
Lavender Haze
A medium-toned purple with gray undertones that sits between lilac and plum, offering the perfect balance of soft and saturated. This sophisticated shade provides purple without being too light or too dark. The gray prevents it from looking too vibrant or childish.
- Difficulty: Beginner
- Time to complete: 20 minutes
- Best for: Professional settings where you want color without distraction
- Why it works: The gray undertones make it appropriate for any setting
- What makes it different: Most lavenders are too sweet—this one has edge from the gray
Step-by-step:
- Apply white base coat (optional but recommended for true color). Let dry.
- Apply first coat of lavender (OPI “Do You Lilac It?” or Zoya “Hudson,” $10-12).
- Wait 2-3 minutes, apply second coat. Two coats may be enough.
- Assess coverage—add third coat if needed.
- For fresh contrast, add white accent on ring finger.
- Or add simple white dots or stripes using dotting tool/detail brush.
- Seal with glossy top coat.
Violet Shimmer
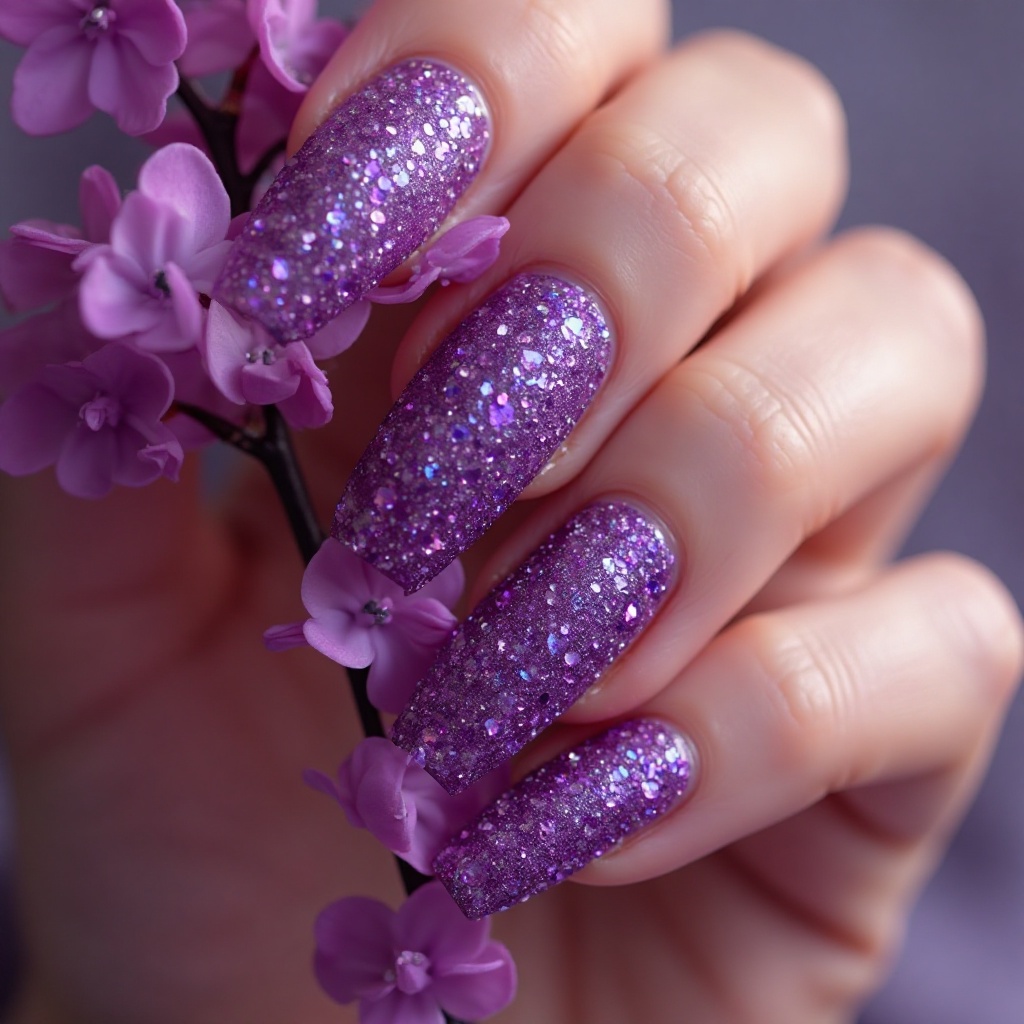
A vibrant purple with visible shimmer or pearl particles that add dimensional sparkle to the bold color. This enhanced shade offers purple’s richness with built-in sparkle that catches spring sunshine beautifully. The shimmer makes it feel special without requiring glitter.
- Difficulty: Beginner
- Time to complete: 18 minutes
- Best for: Spring events where you want to feel festive (graduations, parties, weddings)
- Why it works: The shimmer captures spring sunshine and adds celebration energy
- What makes it different: Built-in shimmer means you don’t need separate glitter products
Step-by-step:
- Apply base coat.
- Apply first coat of violet shimmer (OPI “Do You Have This Color in Stock-holm?” or China Glaze “Def Defying,” $8-10). Shimmer formulas are slightly thicker—apply thin anyway.
- Wait 3 minutes, apply second coat. The shimmer builds with each layer.
- Apply third coat if needed for opacity and maximum shimmer effect.
- Seal with thick glossy top coat (Seche Vite works best—it smooths the texture).
- Apply 2-3 coats of top coat over 24 hours for smoothest finish.
Periwinkle Blue-Purple

A soft color that sits perfectly between blue and purple, creating a unique, hard-to-define shade that feels vintage and dreamy. This gentle hybrid offers uniqueness without boldness, perfect for those who want something different from standard purples. The blue undertones keep it cool and fresh.
- Difficulty: Beginner
- Time to complete: 25 minutes
- Best for: Anyone who wants something different from standard purple or blue
- Why it works: The ambiguity makes it interesting—people can’t quite place the color
- What makes it different: Most blue-purples pick a side; this one balances both perfectly
Step-by-step:
- Apply ridge-filling base coat. Periwinkle shows texture.
- Apply white base coat (Essie “Blanc,” $9). Let dry 5 minutes. This is essential—periwinkle over clear looks muddy.
- Apply first thin coat of periwinkle (Essie “Bikini So Teeny” or Zoya “Hudson,” $10-12). It will look sheer and uneven. This is normal.
- Wait 3 full minutes. Don’t rush—periwinkle needs time between coats.
- Apply second thin coat. Better, but likely still needs another.
- Wait 3 minutes, apply third thin coat. You should have opacity now.
- For whimsical touch, add silver shimmer top coat (Sally Hansen “Hidden Treasure,” $6) on one accent nail.
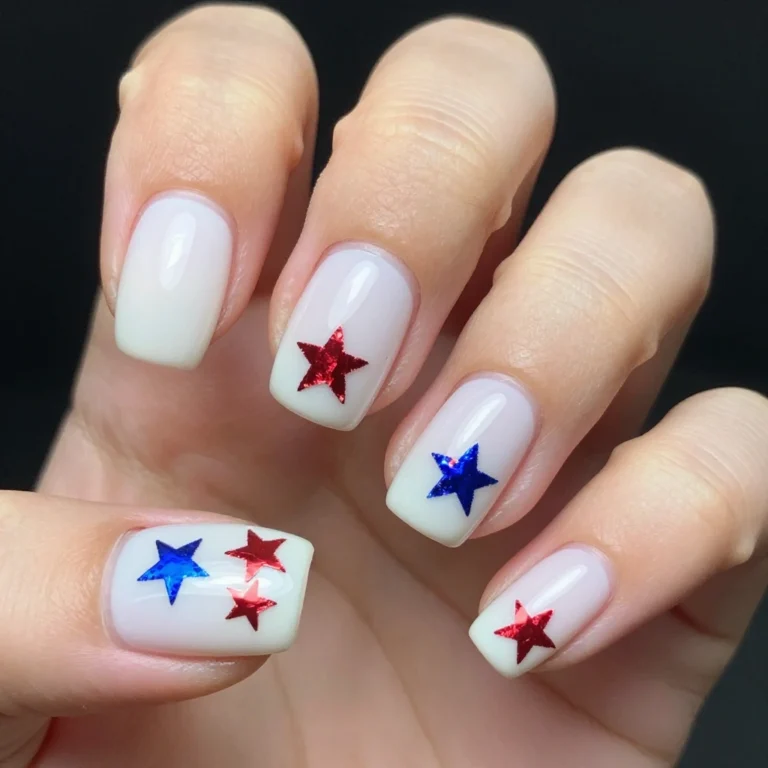
- Or add 3-5 tiny silver star decals on ring finger (Amazon nail art sets, $4-6).
- Seal with glossy top coat—periwinkle looks flat without shine.
Spring Nails Coffin
Nude Coffin Elegance
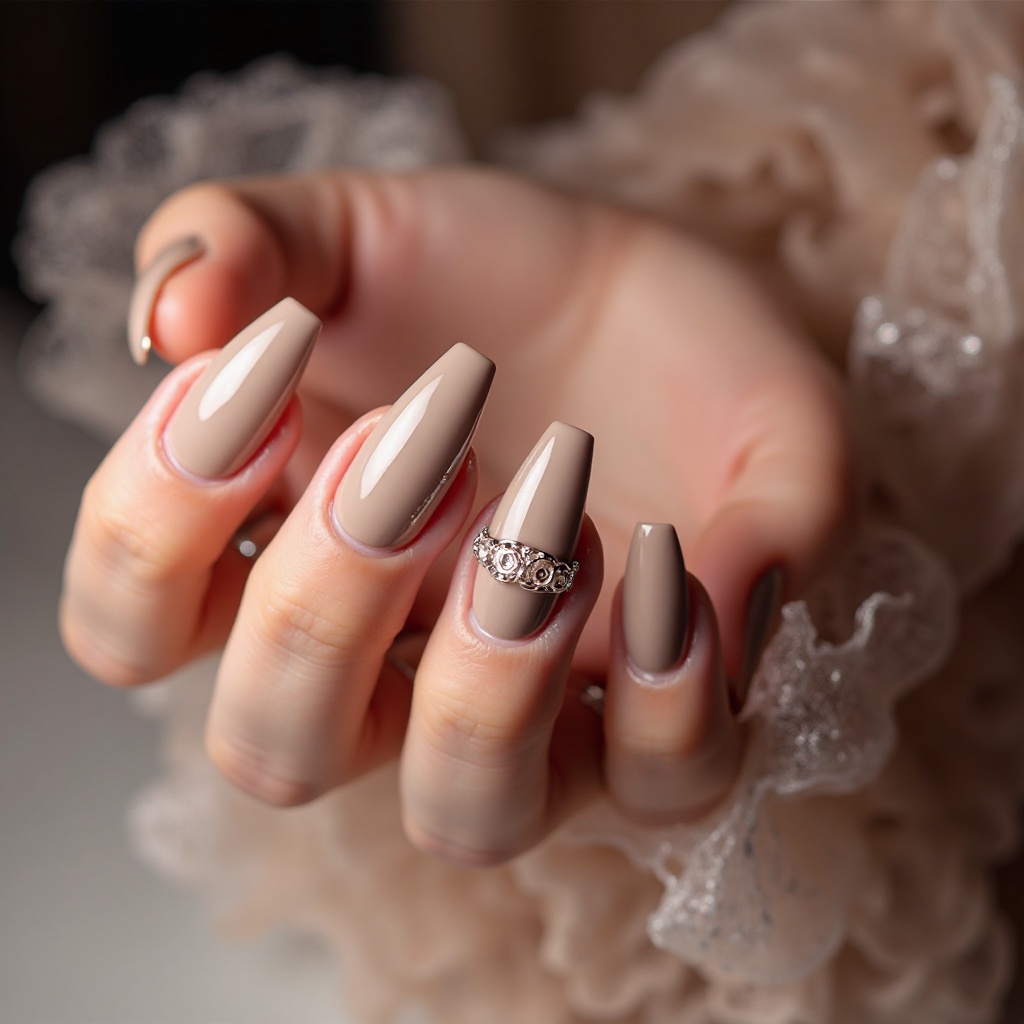
A perfect nude shade on dramatic coffin-shaped nails for modern sophistication with edge. This combination creates bold nail presence through shape while remaining versatile through neutral color. The coffin shape adds contemporary style to classic nude.
- Difficulty: Intermediate (shaping requires practice)
- Time to complete: 30 minutes (including shaping)
- Best for: Anyone who wants bold shape without bold color
- Why it works: Nude lets the dramatic shape be the focal point
- What makes it different: Most nudes are on basic shapes—coffin elevates them
Step-by-step:
- Shape nails into coffins: File sides straight and parallel toward the tip. File the top straight across. Gently angle the corners where sides meet the top—it should resemble a coffin shape from above.
- Coffin nails require length (at least 1/2 inch past fingertip). Shorter nails can’t form true coffins without looking stubby.
- Apply ridge-filling base coat (OPI Ridge Filler, $12).
- Apply first coat of nude (OPI “Samoan Sand” or Essie “Au Natural,” $10-12). Let dry 2-3 minutes.
- Apply second coat. Most nudes need two coats; some need three.
- Apply high-gloss top coat—the dramatic shape elevates neutral color.
- Apply cuticle oil after drying. The shape draws attention to cuticles, so keep them moisturized.
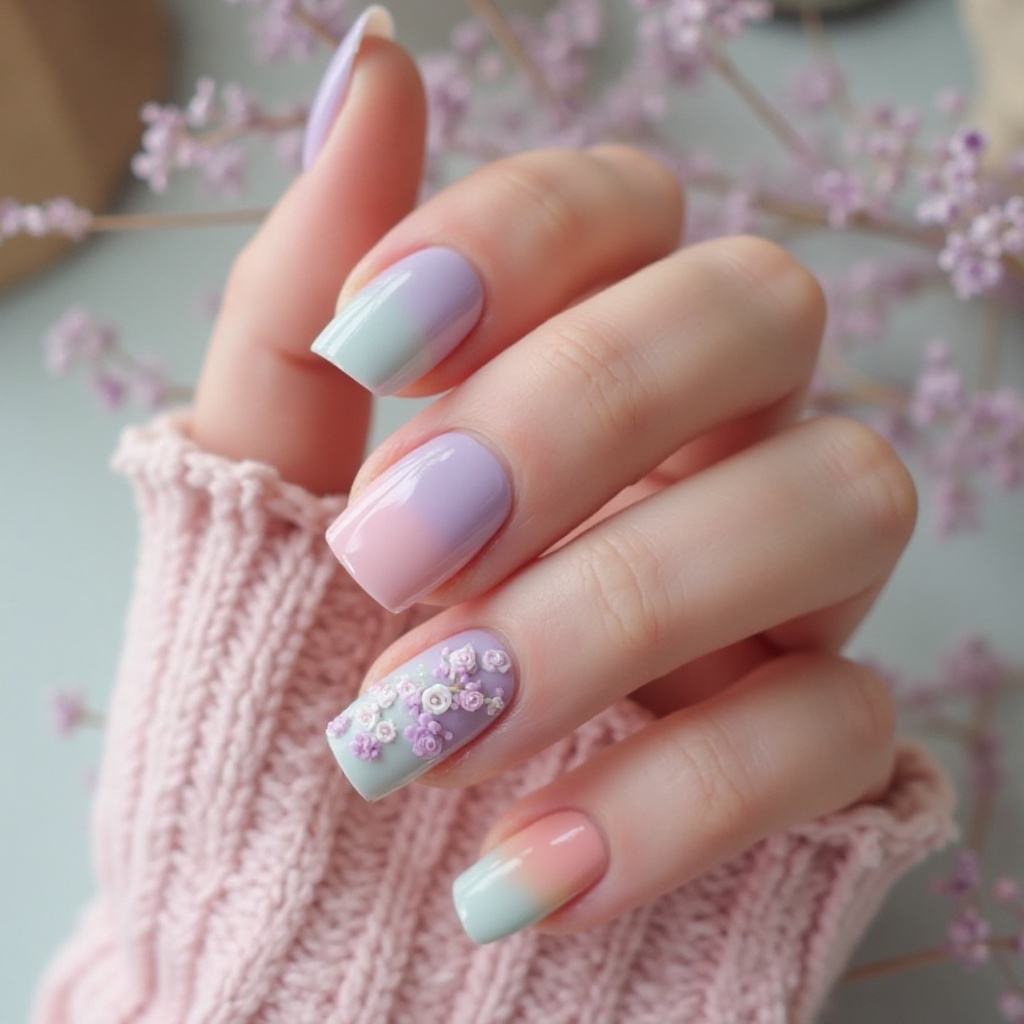
Pastel Coffin Pretty
Any spring pastel (lavender, mint, baby blue, blush) on coffin nails for dramatic shape with soft color. This combination balances bold structure with gentle femininity for unexpected sophistication. The coffin shape prevents pastels from looking juvenile.
- Difficulty: Intermediate
- Time to complete: 35 minutes
- Best for: Anyone who wants pastels to feel edgy instead of sweet
- Why it works: Coffin shape prevents pastels from looking juvenile
- What makes it different: The large surface area of coffin nails showcases color beautifully
Step-by-step:
- Create coffin shapes (see #31 for shaping technique).
- Apply white base coat (Essie “Blanc,” $9). Let dry 5 minutes.
- Apply first thin coat of chosen pastel. The large surface shows dragging and streaking—thin coats prevent this.
- Wait 3 minutes, apply second thin coat.
- Wait 3 minutes, apply third thin coat. Pastels need 3-4 coats for opacity.
- Seal with glossy top coat, wrapping the flat tips thoroughly (they’re prone to chipping).
- Choose one pastel per manicure—multiple colors on coffin can look busy.
Bold Coffin Drama
A vibrant spring color (hot pink, cobalt blue, grass green, coral) on coffin nails for maximum impact and modern glamour. This high-energy combination creates show-stopping nails that command every room. The dramatic shape amplifies the bold color beautifully.
- Difficulty: Intermediate
- Time to complete: 25 minutes
- Best for: Making a dramatic statement
- Why it works: The dramatic shape amplifies bold color
- What makes it different: Bold coffins can handle length—embrace longer nails to showcase both shape and color
Step-by-step:
- Create consistent coffin shapes. Imperfect shapes show more with bold colors.
- Apply base coat, let dry.
- Apply first coat of bold color (OPI “Strawberry Margarita” or Essie “Aruba Blue,” $10-12). Use cleanup brush throughout—large surface shows imperfections.
- Wait 2-3 minutes, apply second coat. Coverage should be perfect.
- Seal with glossy top coat, carefully coating flat tips and angled corners (these chip first).
- Reapply top coat every 2-3 days—bold colors show wear faster.
Coffin French Modern
Classic French manicure on coffin nails with ultra-thin white tips or colored tips for contemporary elegance. This updated combination makes French feel current and editorial. The coffin shape modernizes what could otherwise feel traditional.
- Difficulty: Advanced
- Time to complete: 45 minutes
- Best for: Weddings or events where you want modern sophistication
- Why it works: Coffin shape makes French feel current instead of dated
- What makes it different: Ultra-thin tips (2mm maximum) keep proportions modern
Step-by-step:
- Create coffin shapes. The flat top must be perfectly straight.
- Apply nude or sheer pink base (Essie “Mademoiselle” or OPI “Bubble Bath”). Let dry 10 minutes.
- Apply straight striping tape across the flat top, leaving only 1-2mm exposed. Press firmly.
- Apply white or pastel color (two thin coats) beyond the tape. Let each dry 2 minutes.
- Remove tape when dry to touch, pulling slowly at 45-degree angle.
- Clean up any imperfections with acetone brush.
- Seal with top coat, carefully wrapping all coffin edges (the angled corners and flat tip).
Coffin Nail Art Canvas
Coffin-shaped nails with spring nail art—florals, geometric designs, negative space patterns, or mixed media embellishments. This creative combination uses the coffin’s large surface area as an artistic canvas. The dramatic shape showcases intricate designs beautifully.
- Difficulty: Advanced
- Time to complete: 50-60 minutes
- Best for: Expressing creativity and artistic personality
- Why it works: The coffin’s elongated, flat surface provides ideal space for detailed designs
- What makes it different: Designs that feel cramped on other shapes have room to breathe on coffins
Step-by-step:
- Create coffin shapes on all nails.
- Apply spring base color (pastel, nude, or white). Let dry 15+ minutes.
- On chosen accent nails (1-3 maximum), add detailed art:Hand-painted botanicals:
- Use detail brush to paint stems running nail length
- Add flowers, leaves, or buds along stems
- Keep designs vertical to enhance coffin shape
- Use striping tape to create triangles, stripes, or color blocks
- Apply tape, paint over, remove carefully
- Try negative space techniques (leaving bare nail showing)
- Apply white base, let dry
- Dab diluted polish onto nail with sponge or brush
- Blend colors while wet for soft, artistic effect
- Combine chrome powder with matte sections
- Add foil accents in strategic placements
- Incorporate tiny gems or studs on 1-2 nails only
- Let art dry 15+ minutes.
- Seal with thick top coat, applying 2-3 coats over 24 hours to protect artwork.
Spring Nails Acrylic
Natural Nude Acrylics
Acrylic extensions in a perfect nude shade for elegant length with natural appearance. This combination provides the durability and length of acrylics while maintaining a sophisticated, understated aesthetic. The nude color makes length feel intentional rather than costume-like.
- Difficulty: Salon service
- Time to complete: 60-90 minutes at salon
- Best for: Anyone who wants practical length (gardening-proof, activity-proof) with sophisticated style
- Why it works: Nude color makes length feel intentional rather than costume-like
- What makes it different: Thin acrylic application can pass for natural nails with strength
What to Request at Salon:
- Request thin acrylic application specifically. Say: “I want them as thin as possible while still being strong.”
- Choose medium-length almond or coffin shape (these wear best).
- Select nude shade matching your skin undertone (test against wrist in natural light).
- Ensure technician properly preps natural nails: push cuticles, light buff, apply primer.
- Request high-gloss top coat for polished finish.
Aftercare:
- Return for fills every 2-3 weeks without exception.
- Apply cuticle oil 2-3 times daily.
- Wear gloves for dishes and cleaning.
- Never pick or peel lifting acrylics.
Pastel Acrylic Extensions
Acrylic extensions in spring pastels (lavender, mint, baby blue, blush) for colorful length that’s durable and chip-resistant. This combination provides the benefits of acrylics (strength, length retention) with seasonal spring color. The durability means pastels last weeks instead of days.
- Difficulty: Salon service
- Time to complete: 60-90 minutes at salon
- Best for: Anyone who wants pastels to last 2-3 weeks without chips
- Why it works: Acrylic application means pastel perfection lasts through daily life
- What makes it different: Regular pastel polish chips in days—acrylic pastels last until fills
What to Request at Salon:
- Bring inspiration photo of your chosen pastel shade.
- Request almond or coffin shape at desired length.
- Ask for thin acrylic application.
- Technician will: apply acrylic, file to shape, buff smooth, apply pastel color in 2-3 coats, seal with top coat.
- Request glossy finish—pastels need shine.
Ombre Acrylic Nails
Acrylic extensions with gradient color transition—nude to pastel, white to spring color, or pastel to pastel—for dimensional spring style. This artistic technique creates visual interest without requiring nail art skills. The ombre effect feels modern and sophisticated.
- Difficulty: Salon service
- Time to complete: 75-90 minutes at salon
- Best for: Special events where you want artistic nails without hand-painted art
- Why it works: Ombre captures spring’s transitional energy (winter to spring, light to bright)
- What makes it different: The gradient creates visual interest without requiring nail art skills
What to Request at Salon:
- Bring inspiration photos of ombre nails you like.
- Choose transition direction: vertical (cuticle to tip) or horizontal (side to side).
- Select color combinations:
- Nude to lavender
- White to baby blue
- Blush pink to coral
- Mint to seafoam
- Ask for subtle ombre for everyday wear, dramatic for special occasions.
- Technician will apply acrylic, file to shape, then blend colors using sponge or airbrush technique.
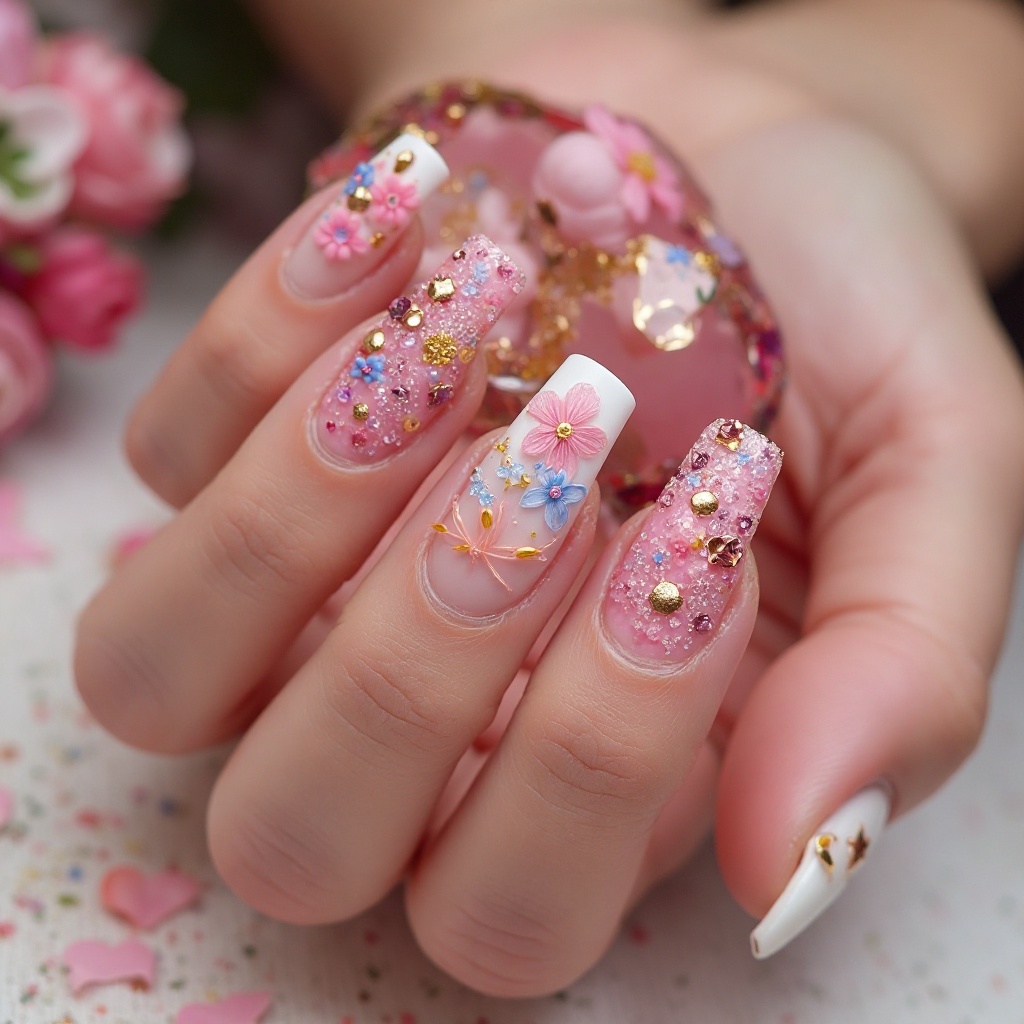
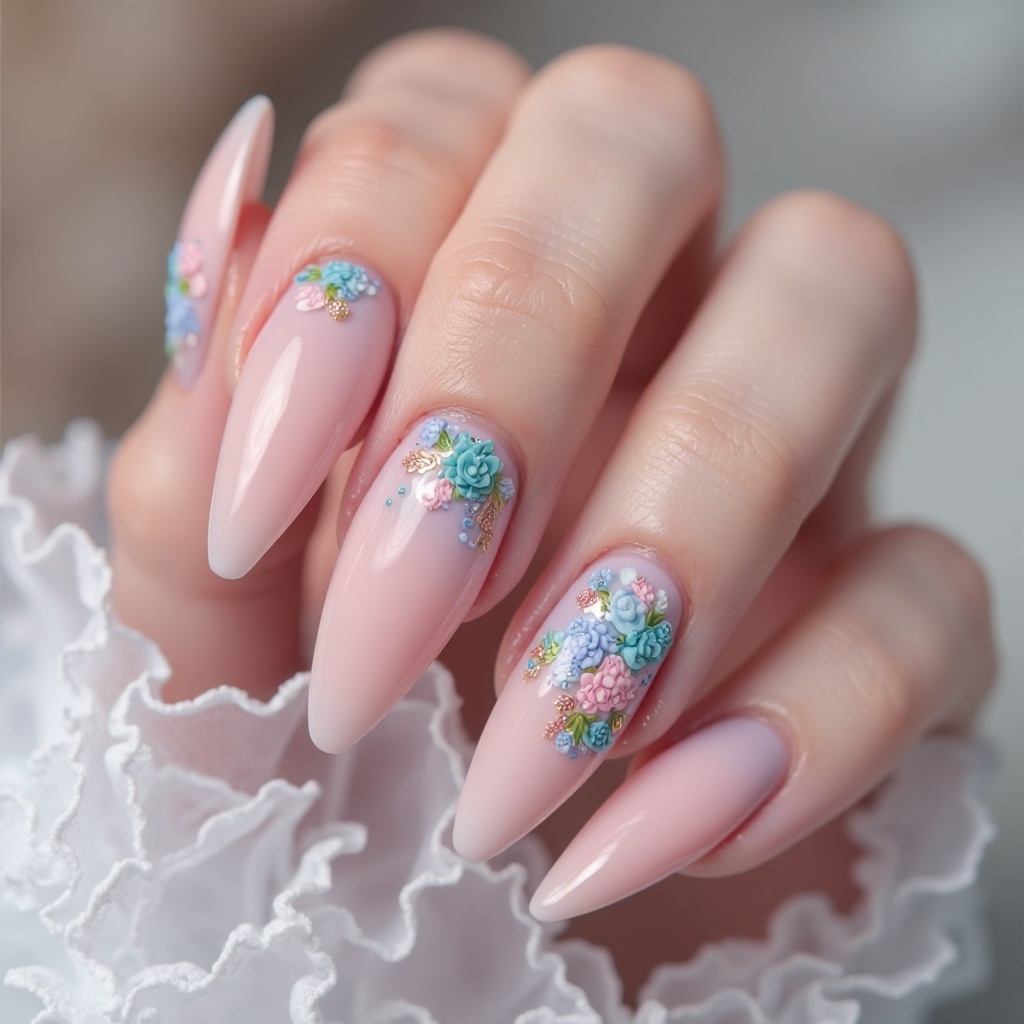
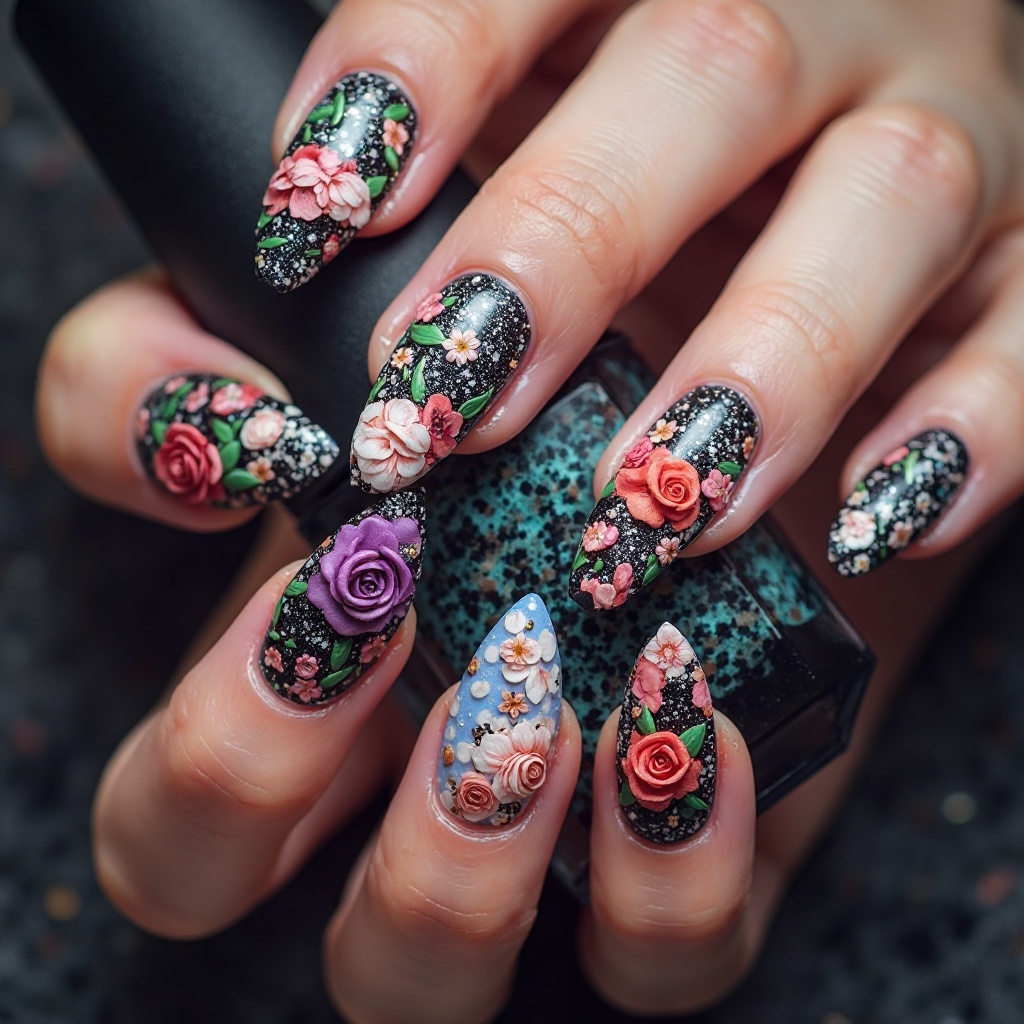
Acrylic with 3D Spring Art
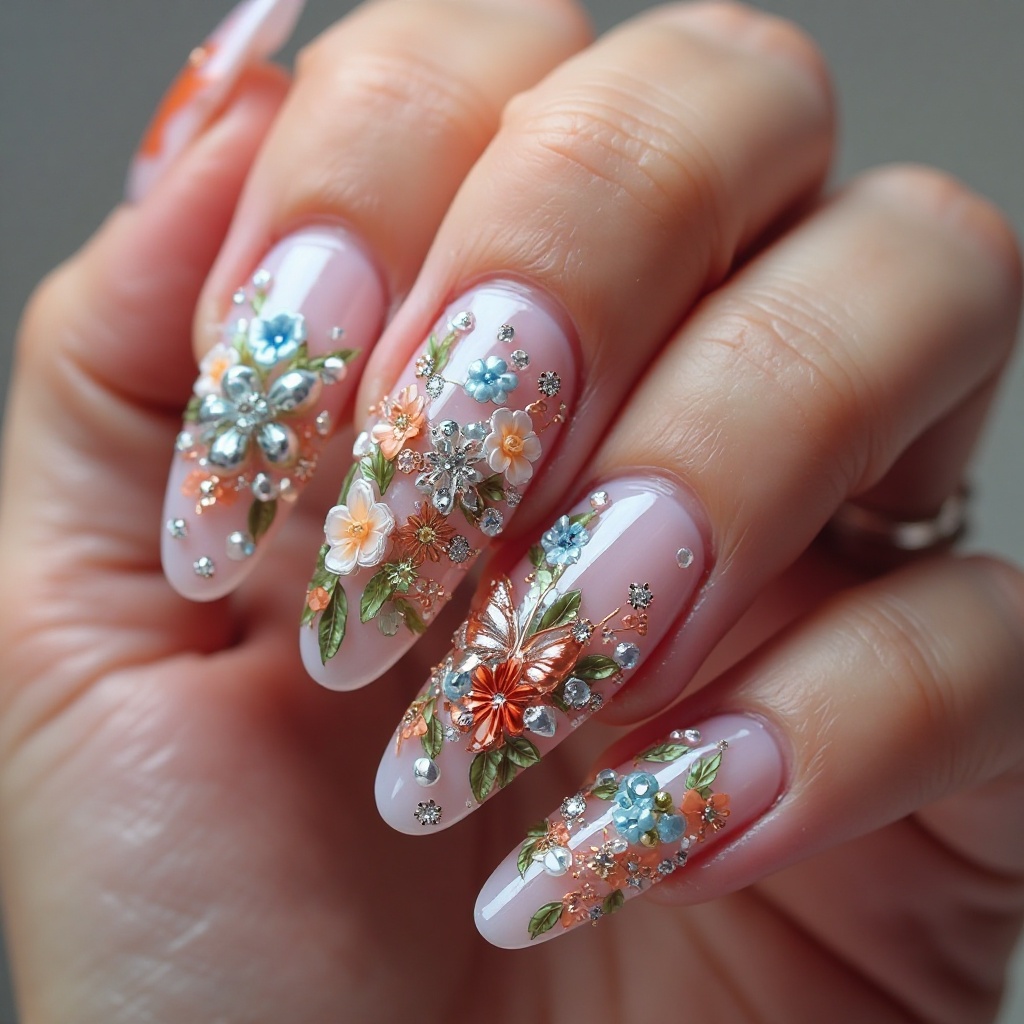
Acrylic extensions with dimensional spring designs—3D flowers, butterflies, gemstone embellishments, or textured elements. This elevated approach creates special-occasion nails with durability. The acrylic base provides stable foundation for heavy embellishments.
- Difficulty: Salon service
- Time to complete: 90-120 minutes at salon
- Best for: Weddings, proms, graduations
- Why it works: 3D elements capture spring’s botanical beauty with dimensional realism
- What makes it different: Acrylic base provides stable foundation for heavy embellishments
What to Request at Salon:
- Limit 3D elements to 1-3 accent nails (ring finger, or ring + middle). Full-hand 3D designs snag constantly.
- Choose base color (nude or pastel works best).
- Specify which nails get 3D art.
- Discuss design options:
- 3D acrylic flowers sculpted onto nail
- Butterfly wings from acrylic or foil
- Gemstone and pearl embellishments
- Mixed media combinations
Aftercare Warning:
- Avoid snagging on hair and clothing
- Wear gloves for any activity
- Return for fills every 2 weeks max
- Keep nail glue handy for fallen embellishments
Long Stiletto Spring Acrylics
Dramatic stiletto-shaped acrylic extensions in bold spring colors for maximum impact and glamour. This statement combination creates ultra-feminine, attention-commanding nails. The sharp point and length feel editorial and runway-inspired.
- Difficulty: Salon service
- Time to complete: 90 minutes at salon
- Best for: Photoshoots, festivals, or expressing dramatic personal style
- Why it works: The sharp point and length create editorial, runway-worthy nails
- What makes it different: Stiletto shape requires lifestyle commitment—it’s not for everyone
Before You Commit:
Stiletto shape is impractical for:
- Typing for work
- Caring for young children or pets
- Dressing yourself (buttons, zippers)
- Anyone who needs full hand function
If You Proceed:
- Request stiletto shape specifically—long, filed to sharp point.
- Choose bold spring color (hot pink, cobalt blue, grass green).
- Ask for thin acrylic application even with length.
- Prepare for maintenance every 2-3 weeks.
- Return to salon for removal—never attempt at home.
Minimalist & Nude Spring Nails
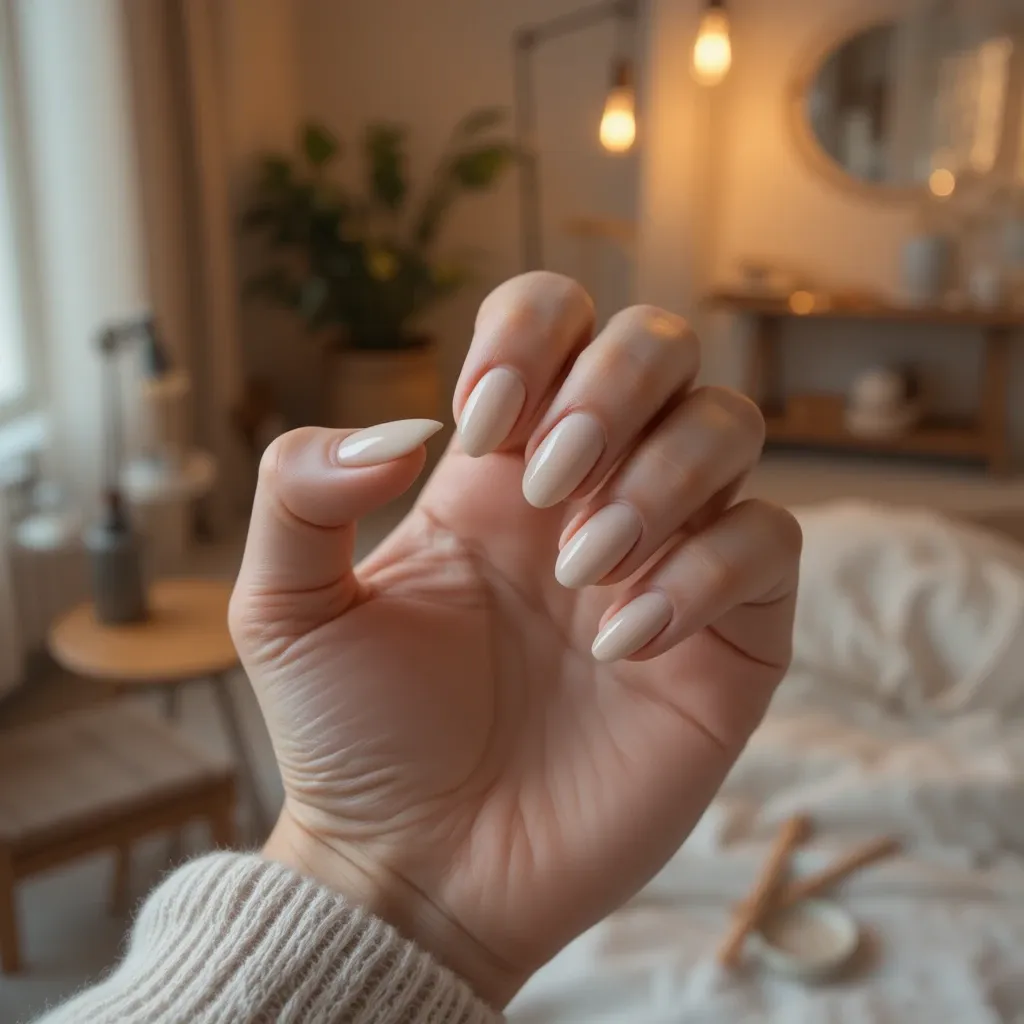
Vanilla Latte Nude
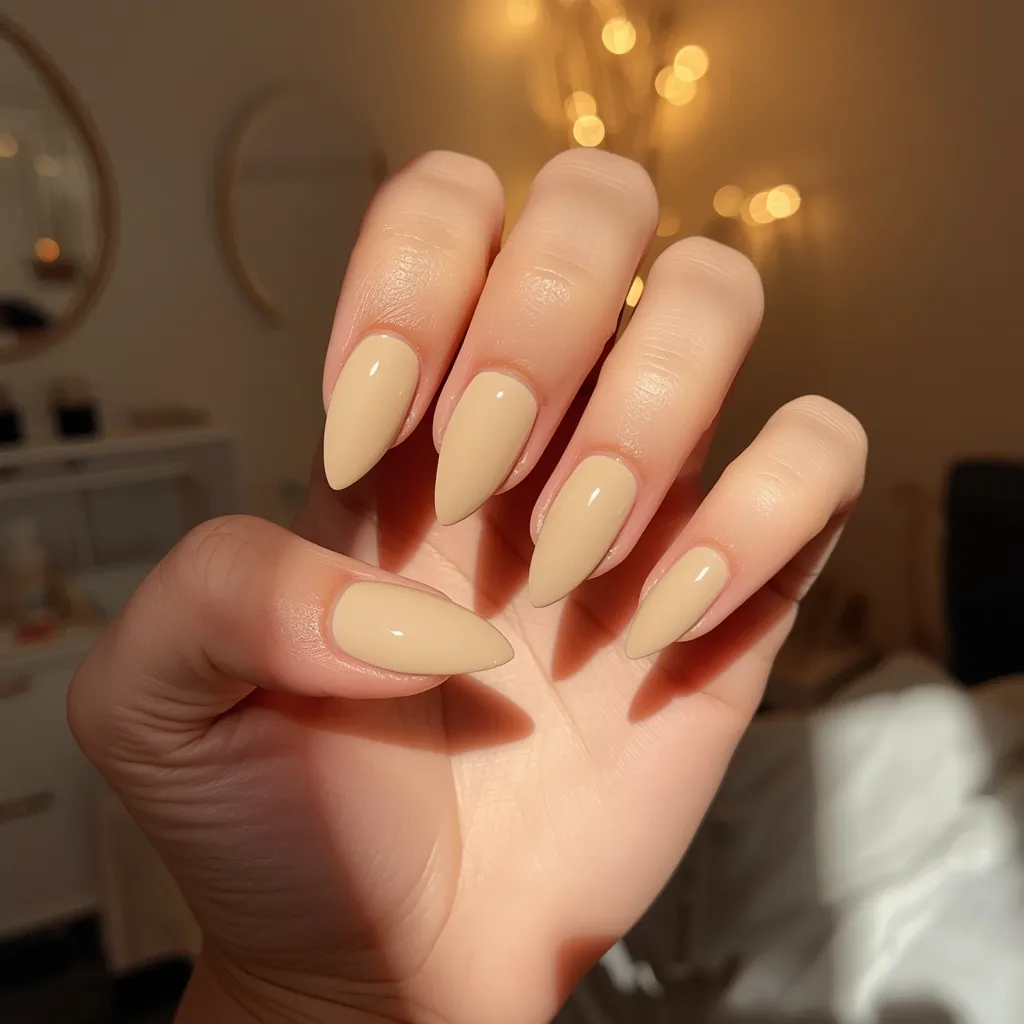
A warm, creamy beige with subtle yellow undertones that mimics your favorite morning coffee. This shade works beautifully in a glossy finish for a polished, natural look that enhances any skin tone. The neutral warmth feels cozy yet refined, making it perfect for transitional spring weather.
- Difficulty: Beginner
- Time to complete: 15 minutes
- Best for: Transitional weather when winter and spring are still deciding
- Why it works: The warmth feels cozy but the lightness says spring
- What makes it different: Most nudes are cool-toned—this one has warmth
Step-by-step:
- Apply base coat, let dry 2-3 minutes.
- Apply first coat of vanilla latte nude (OPI “Samoan Sand,” Essie “Au Natural,” or Sally Hansen “Barley There,” $8-12). Use three strokes: center, left, right.
- Wait 2 minutes, apply second coat. Most nudes need two coats.
- If needed, apply third thin coat rather than one thick coat.
- Seal with fast-dry top coat, wrapping tips.
- Pair with almond or oval shapes to elongate fingers.
Milky White Sheer
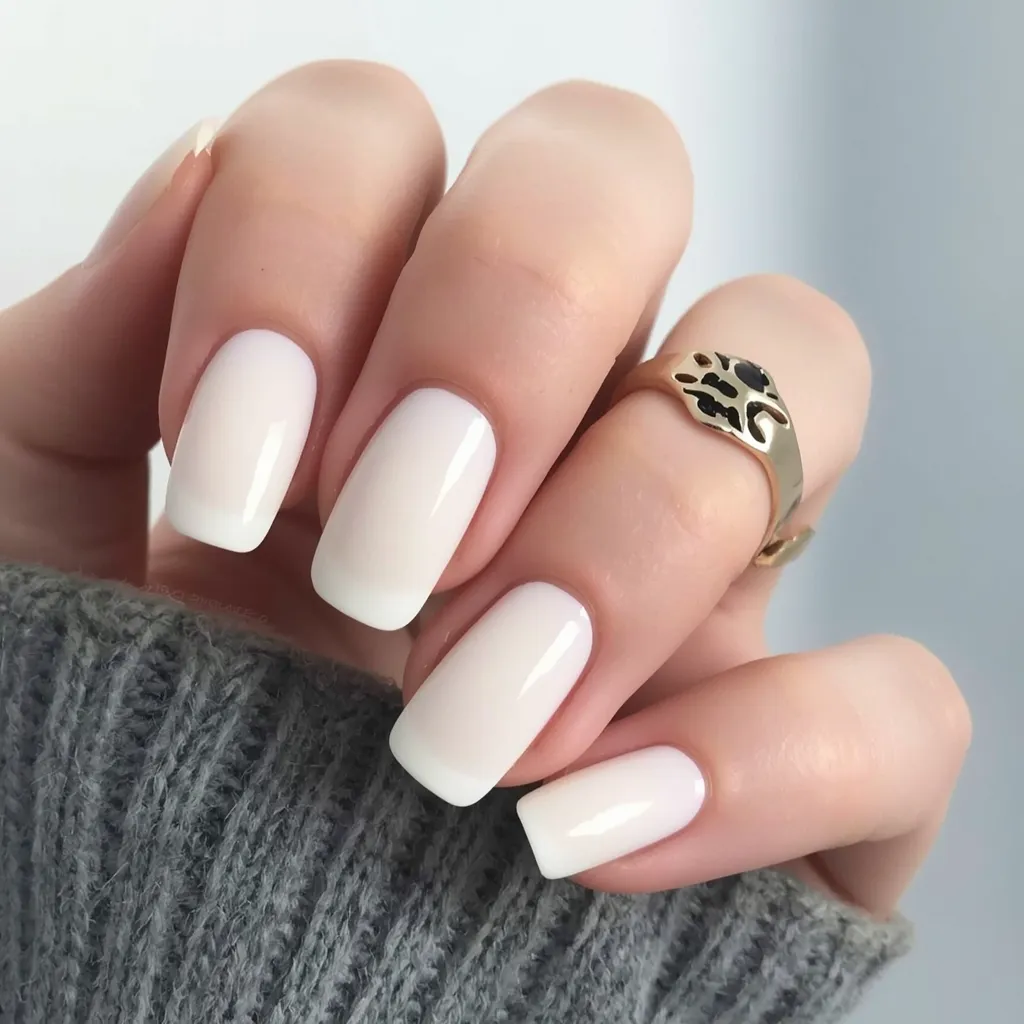
A translucent white with a milky, cloud-like quality that creates an ethereal, barely-there effect. This modern take on the French manicure feels fresh and contemporary without looking stark. The sheer coverage allows your natural nail to peek through for an effortlessly elegant vibe.
- Difficulty: Intermediate (sheer formulas show mistakes)
- Time to complete: 20 minutes
- Best for: Minimalists who want something different from nude
- Why it works: The airy quality captures spring’s fresh-start energy
- What makes it different: Sheer coverage lets natural nail peek through for effortless elegance
Step-by-step:
- Prep nails impeccably—buff away ridges, push cuticles back perfectly. Sheer shows everything.
- Apply base coat, let dry.
- Apply first ultra-thin coat of milky white (Essie “Marshmallow,” OPI “Funny Bunny,” or Olive & June “SB,” $8-10). Overload the brush and you’ll get streaks.
- Wait 3-4 minutes, apply second thin coat.
- For deeper coverage, add third thin coat rather than making any coat thicker.
- For matte finish (chic twist), wait 15 minutes, then apply matte top coat (Essie “Matte About You,” $9).
Soft Linen Beige
A neutral beige with gray undertones that resembles natural linen fabric, offering sophistication without being boring. The cool-toned base prevents this nude from looking washed out or dated. This shade creates a clean canvas that makes your hands look polished and professional.
- Difficulty: Beginner
- Time to complete: 15 minutes
- Best for: Professional settings where you want polish without distraction
- Why it works: The cool-toned base prevents looking washed out
- What makes it different: Gray undertones add modern edge to basic beige
Step-by-step:
- Apply base coat. Use white or nude-toned base to prevent natural nail discoloration showing through.
- Apply first coat of soft linen beige (Chanel “Particulière,” Essie “Lady Like,” or Zoya “Brittany,” $10-12). These nail the gray-beige balance.
- Wait 2-3 minutes, apply second coat. Cooler tones show mistakes more—keep cleanup brush handy.
- Seal with high-gloss top coat—shine elevates the neutral significantly.
- This shade looks incredible on shorter square nails with gold jewelry.
Peachy Cream
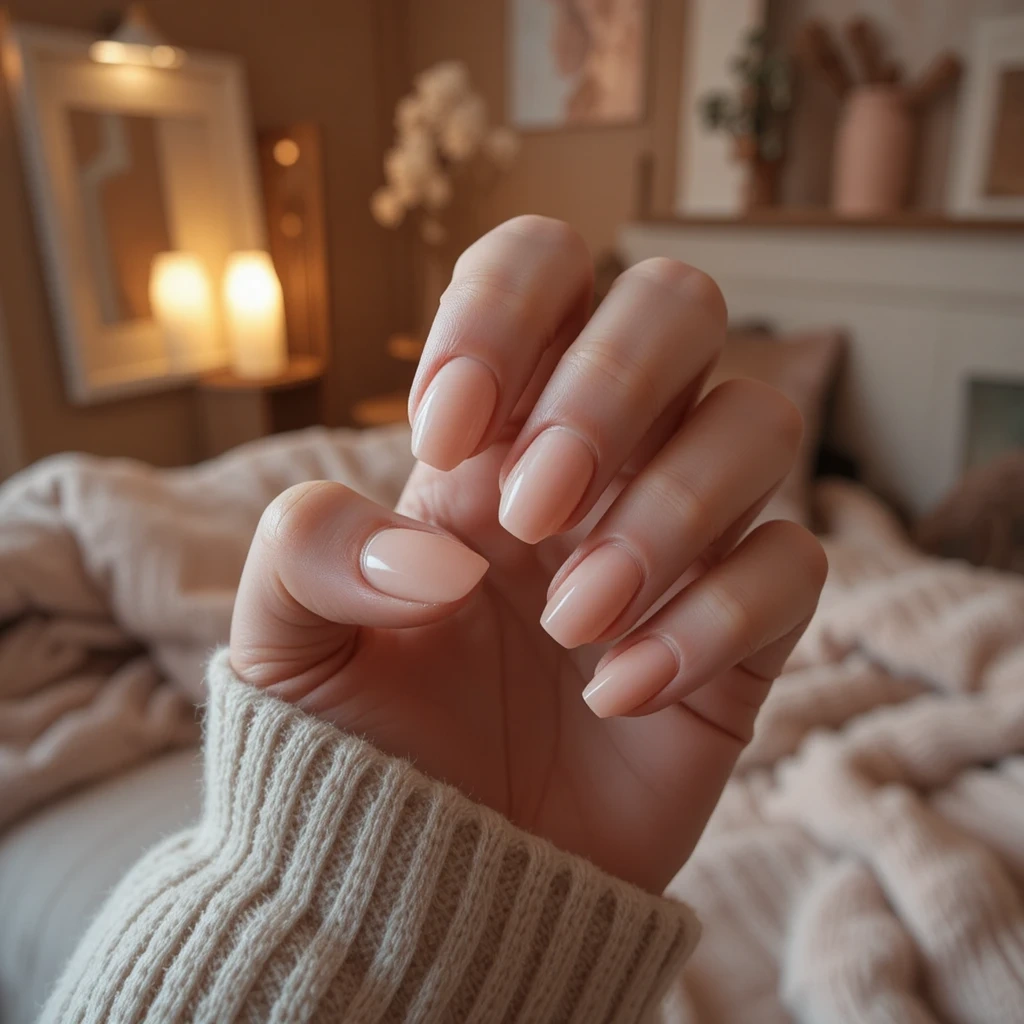
A warm nude with delicate peach undertones that adds a hint of color while maintaining that natural, your-nails-but-better aesthetic. The subtle warmth gives life to your fingertips without screaming for attention. This shade flatters most skin tones and photographs beautifully for social media.
- Difficulty: Beginner
- Time to complete: 15 minutes
- Best for: Anyone who finds nude too boring
- Why it works: The subtle peach gives life to fingertips without screaming for attention
- What makes it different: Most nudes are flat—this one has warmth that flatters most skin tones
Step-by-step:
- Apply stain-blocking base coat (CND Stickey or Orly Bonder, $8-10). Peach tones can stain.
- Apply first thin coat of peachy cream (OPI “Bubble Bath,” Essie “A Crewed Interest,” or Lights Lacquer “Peaches and Cream,” $10-12). These formulas are forgiving and self-leveling.
- Wait 2 minutes, apply second coat. The peach undertones become richer with each layer.
- For squoval shape (recommended): file straight across the top, gently round sharp corners.
- Seal with glossy top coat.
Glazed Donut Chrome
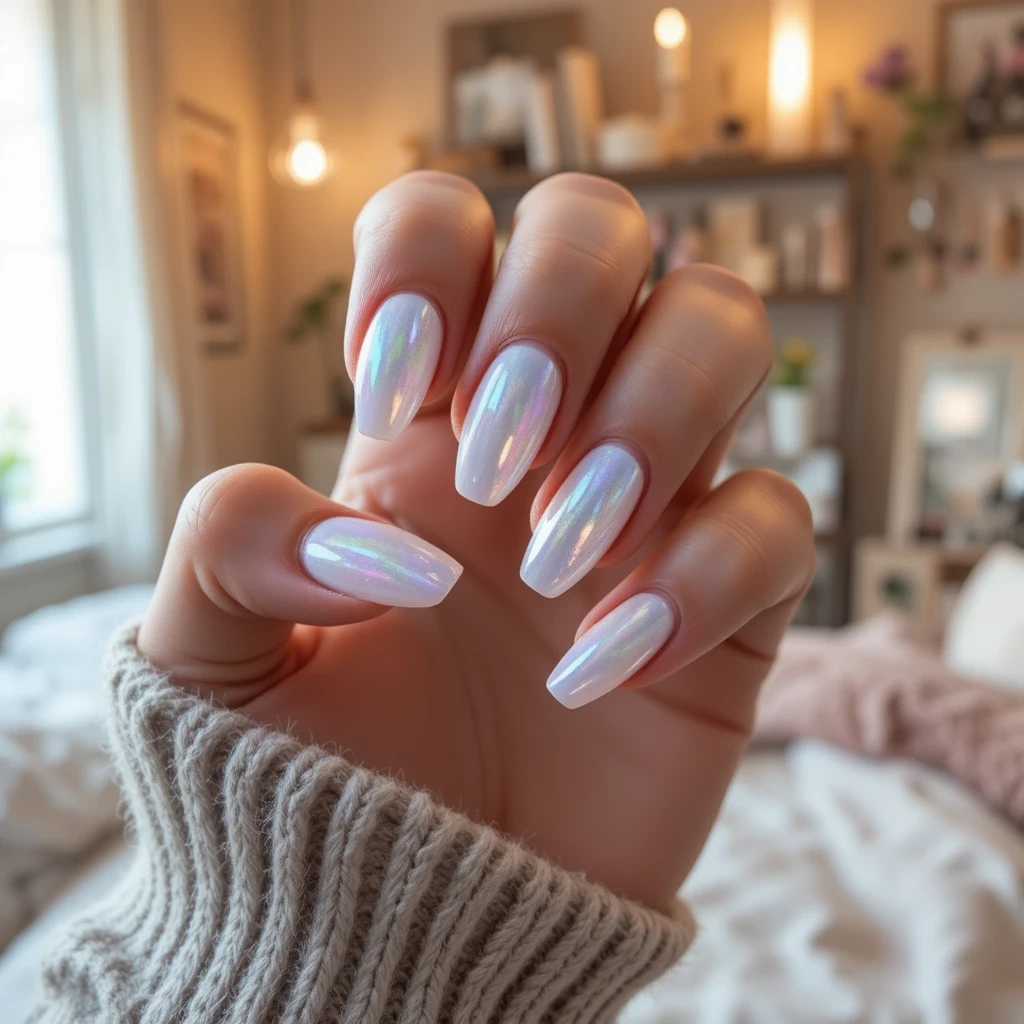
A pearlescent, iridescent finish that shifts between white, pink, and silver depending on the light, creating that viral glass-like effect. This high-shine look combines the minimalism of nude nails with the glamour of chrome finishes. The dimensional quality makes even short nails look expensive and editorial.
- Difficulty: Advanced (gel method) or Beginner (regular polish method)
- Time to complete: 45 minutes (gel) or 20 minutes (regular)
- Best for: Anyone who wants expensive-looking editorial nails
- Why it works: The light-reflective quality captures spring sunshine beautifully
- What makes it different: The dimensional quality makes even short nails look high-end
Step-by-step (Gel Method for True Mirror Finish):
- Apply gel base coat (Beetles Base Coat, $8 on Amazon). Cure 60 seconds under LED lamp.
- Apply sheer milky white or pink gel polish (Beetles “Milky White” or Modelones “Sheer Pink”). Cure fully.
- Apply no-wipe gel top coat. DO NOT CURE.
- Using silicone eyeshadow applicator, rub chrome powder (Pearl Chrome or Aurora powder, $6-8) onto wet top coat in circular motions until mirror effect appears.
- Dust off excess powder with soft brush.
- Cure top coat with embedded powder for 60 seconds.
- Apply another layer of gel top coat to seal. Cure.
- Wipe with alcohol to remove tacky layer.
Step-by-step (Regular Polish Method for Easier Application):
- Apply base coat, let dry.
- Apply white or nude base color, let dry completely.
- Apply specialized chrome polish (Essie “Gel Couture Encrusted Treasures” collection or Sally Hansen Chrome Nail Makeup, $8-10) in 2-3 thin coats.
- Seal with high-gloss top coat for maximum reflection.
- Regular polish chrome won’t be as mirror-like as gel, but creates beautiful dimensional shine without special equipment.
Soft Pastel Spring Nails
Baby Blue Sky
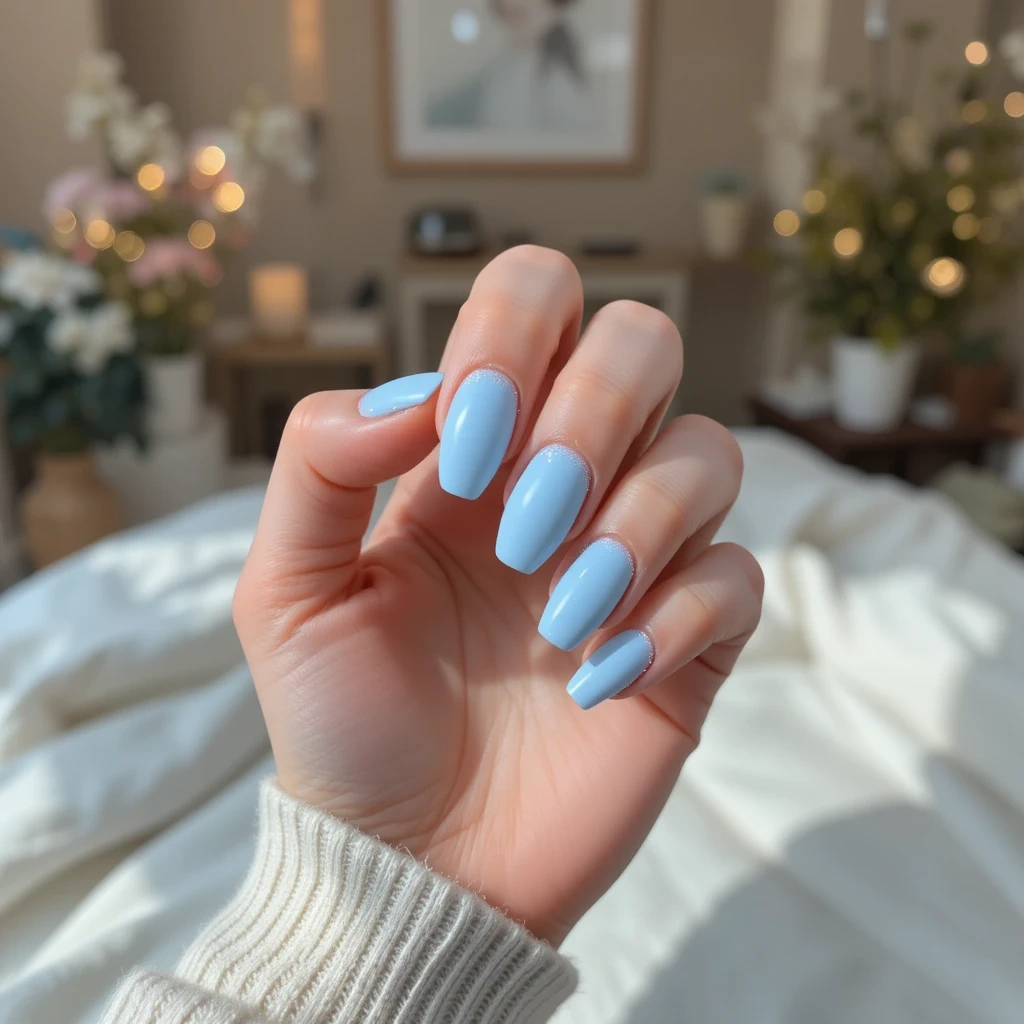
A soft, powdery blue that evokes clear spring skies and forget-me-not flowers, bringing instant serenity to your fingertips. The chalky, matte-leaning quality prevents this pastel from looking juvenile or overly sweet. This shade pairs beautifully with both silver and gold jewelry for unexpected versatility.
- Difficulty: Intermediate (pastels require patience)
- Time to complete: 25-30 minutes
- Best for: Anyone who wants spring color without the predictable pinks and purples
- Why it works: Light blue captures spring’s airy, optimistic mood perfectly
- What makes it different: The chalky quality prevents it from looking like baby shower decor
Step-by-step:
- Buff nails smooth and apply ridge-filling base coat (OPI Ridge Filler, $12). Pastels show every imperfection.
- Apply white base coat (Essie “Blanc,” $9). Let dry 5 minutes. This is non-negotiable for baby blue.
- Load your brush with enough polish—too little causes patchiness, too much causes flooding.
- Apply first thin coat of baby blue (Essie “Borrowed & Blue,” OPI “It’s a Boy,” or Cirque Colors “Memento Mori,” $10-12). Use smooth, even strokes without going back over areas.
- Wait 3 full minutes. Set a timer—rushing causes dragging.
- Apply second thin coat. It will look better but might still be patchy.
- Wait 3 minutes, apply third thin coat. Most pastels need 3 coats, some need 4.
- For satin finish (recommended modern look), apply regular glossy top coat, let dry 5 minutes, then lightly buff surface with fine-grit buffer (400-grit) for soft sheen.
- Or skip buffing and use glossy top coat for traditional finish.
Pistachio Green
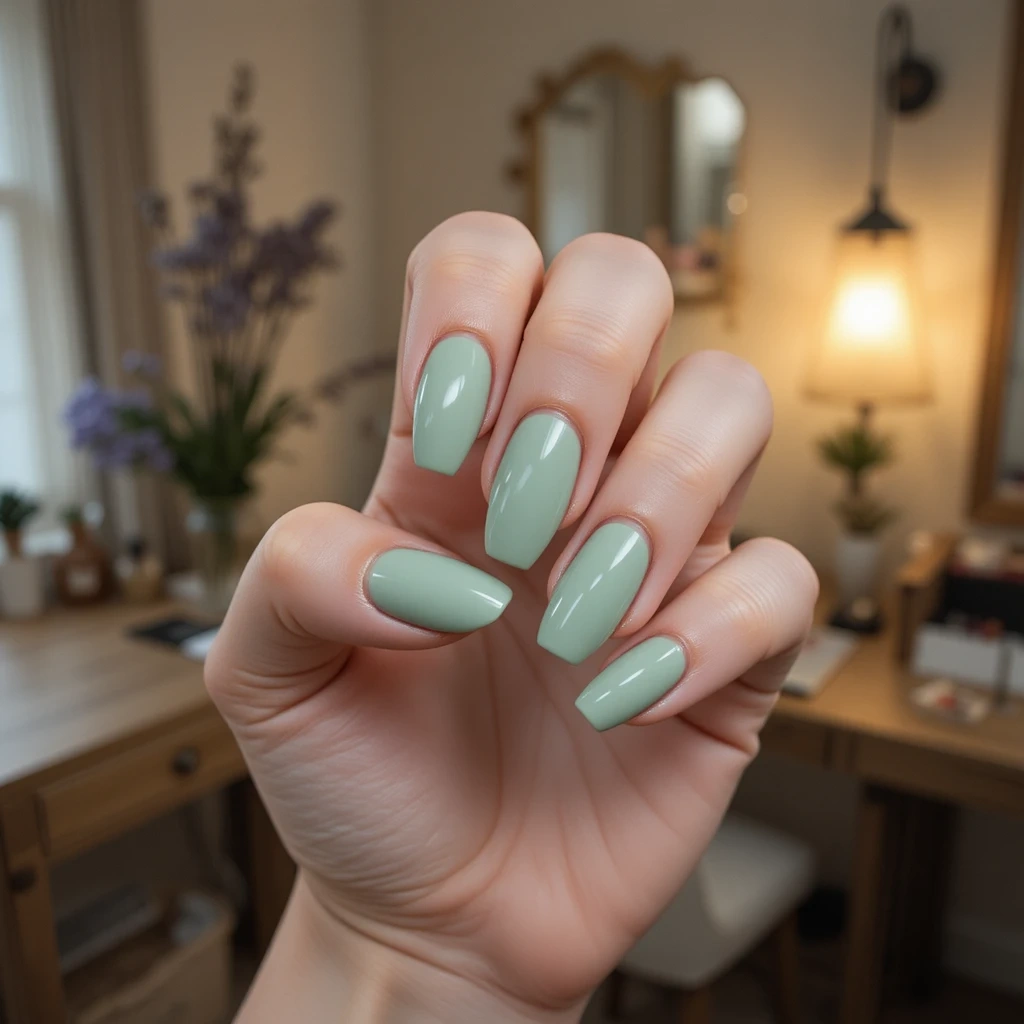
A muted, dusty green with gray undertones that feels fresh yet grounded, like new leaves just emerging in early spring. This unexpected neutral works as an everyday shade while still making a subtle style statement. The earthy quality keeps it wearable even for conservative settings.
- Difficulty: Beginner
- Time to complete: 18 minutes
- Best for: Everyday wear when you want something different from nude
- Why it works: The earthy quality keeps it wearable even for conservative settings
- What makes it different: Most spring greens are bright—this one works as an unexpected neutral
Step-by-step:
- Apply base coat (CND Stickey, $12). Greens and blues can stain—don’t skip.
- Test the shade first—muted greens read differently on various skin tones. Apply one coat to a single nail and check in natural light.
- Apply first coat of pistachio (Essie “Turquoise & Caicos,” OPI “This Cost Me a Mint,” or Cirque Colors “Tavern on the Green,” $10-12). Use three-stroke method.
- Wait 2-3 minutes, apply second coat. Most pistachio shades are opaque in two coats.
- For gold accent (optional but recommended), wait until pistachio is completely dry (20+ minutes).
- Apply base coat to ring finger only, let dry, then apply two coats of gold metallic polish (Sally Hansen “Golden-I” or Essie “Good as Gold,” $5-8).
- Seal all nails with glossy top coat.
Lavender Haze

A dreamy purple with pink undertones that leans romantic without being overly girly, striking the perfect balance between soft and statement-making. The dusty quality prevents it from looking too vibrant or childish. This shade photographs beautifully and adds a touch of whimsy to spring wardrobes.
- Difficulty: Beginner
- Time to complete: 20 minutes
- Best for: Adults who want playful elegance without looking childish
- Why it works: The dusty quality prevents it from looking too vibrant or sweet
- What makes it different: Lavender connects to spring blooms while offering more sophistication than bubblegum pink
Step-by-step:
- Apply white base coat (Essie “Blanc,” $9). Let dry 5 minutes. This is crucial for lavender—without it, you’ll need 4+ coats.
- Apply first thin coat of lavender (OPI “Do You Lilac It?” or Essie “Lilacism,” $10-12). Lavender formulas drag if overworked—commit to your stroke and don’t go back.
- Wait 2-3 minutes, apply second thin coat. Assess coverage.
- Apply third coat if needed. Most lavenders need 2-3 coats.
- Seal with glossy top coat—the shine intensifies purple tones significantly. Without it, lavender looks washed out.
- Use thick, gel-like top coat such as Seche Vite ($9) for maximum color enhancement.
Butter Yellow
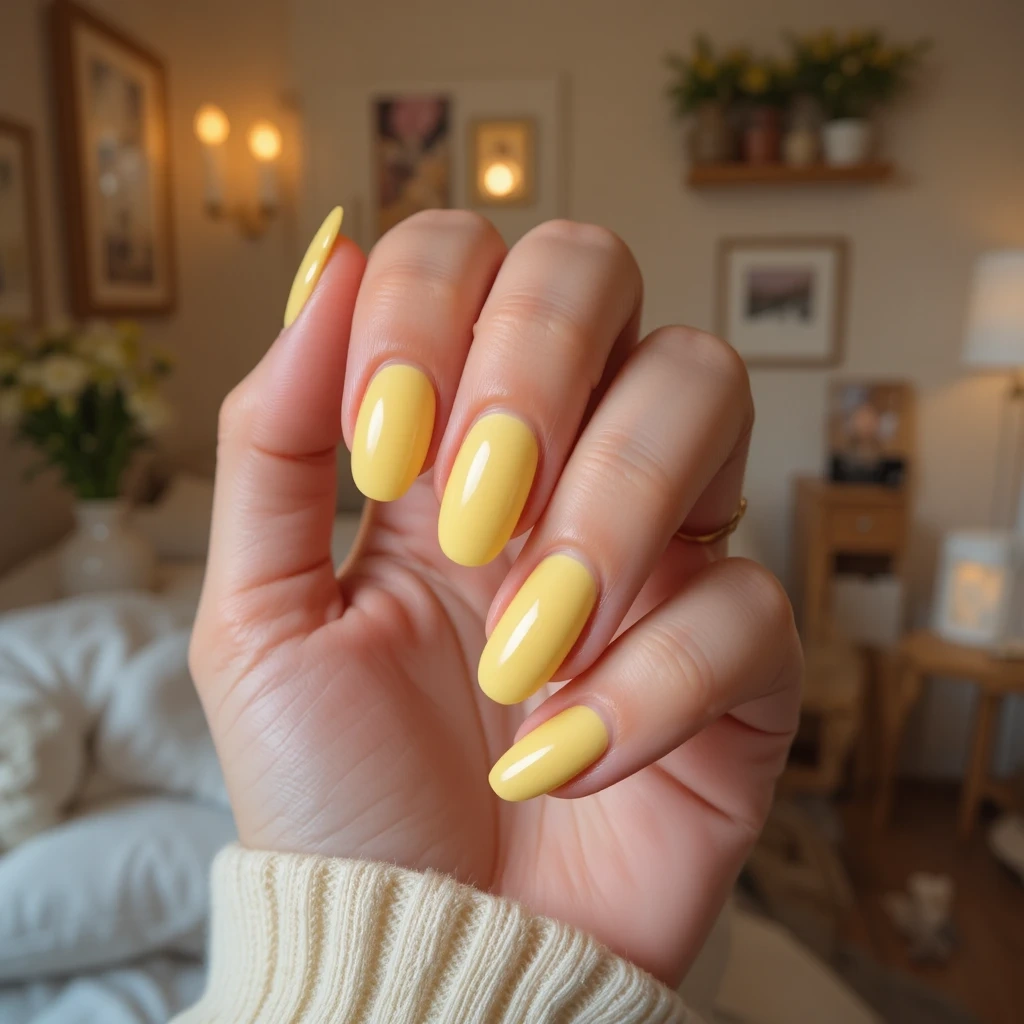
A soft, creamy yellow that resembles springtime butter or daffodils, bringing instant sunshine to your manicure without looking neon or overwhelming. The muted quality makes this bold color surprisingly wearable and versatile. This cheerful shade instantly lifts your mood and brightens any outfit.
- Difficulty: Advanced (yellow is the hardest color)
- Time to complete: 30-35 minutes
- Best for: When you need a mood boost or want to stand out from pink manicures
- Why it works: Yellow captures spring’s optimistic energy better than any color
- What makes it different: The muted quality makes this bold color surprisingly wearable
Step-by-step:
- Buff nails until completely smooth. Yellow shows every ridge, bump, and imperfection.
- Apply ridge-filling base coat. Let dry completely.
- Apply white base coat (Essie “Blanc,” $9). Let dry 5 minutes. Essential for opacity and to prevent yellow from looking green.
- Apply first coat of butter yellow (Essie “Aim to Misbehave,” OPI “Never a Dulles Moment,” or Zoya “Darcy,” $10-12). Apply ultra-thin—it will look terrible and patchy.
- Wait 5 minutes (longer than usual—yellow needs extra drying time).
- Apply second ultra-thin coat. Still patchy? Good. Wait 5 minutes.
- Apply third ultra-thin coat. You should have opacity now. If not, add fourth coat.
- Keep cleanup brush dipped in acetone nearby—yellow stains skin within minutes.
- Seal with top coat, wrapping tips thoroughly. Yellow shows chips more visibly than other colors.
Blush Pink
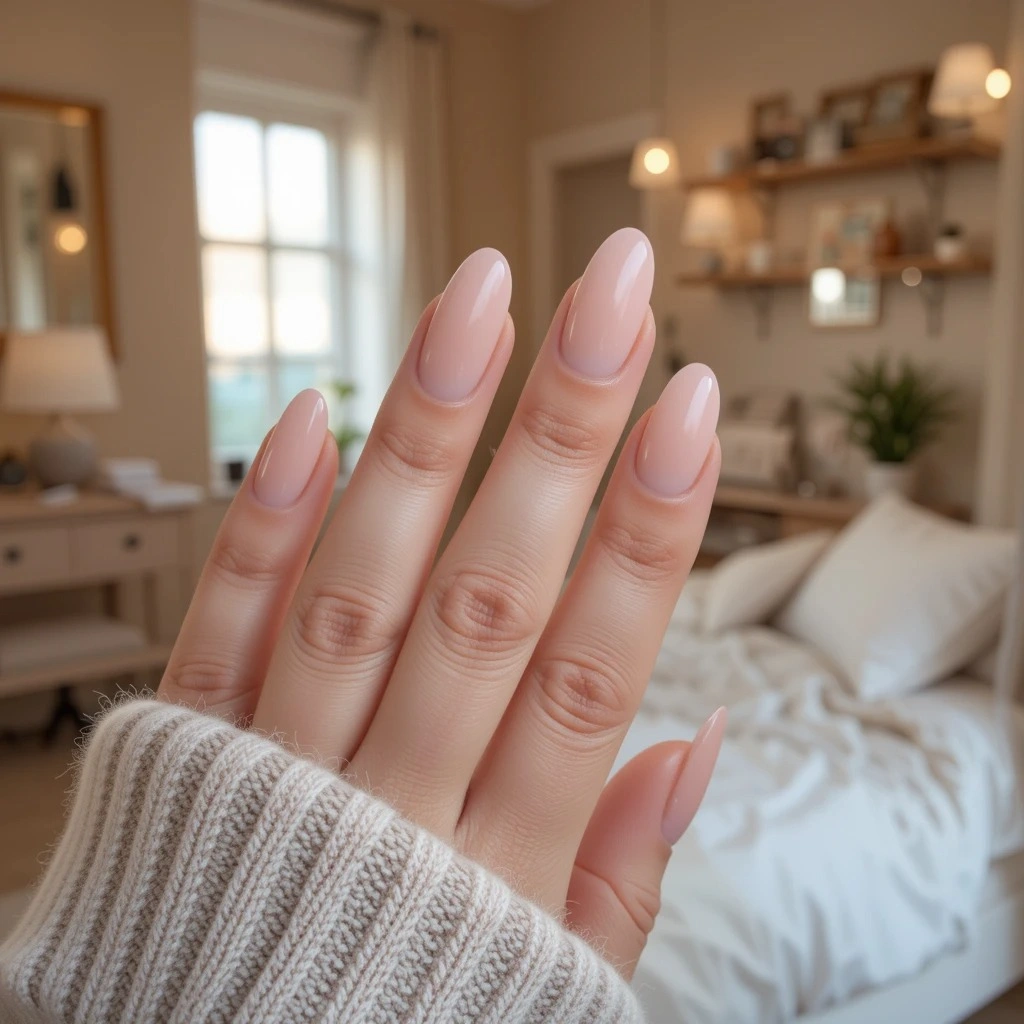
A barely-there pink with neutral undertones that walks the line between nude and pastel, offering subtle femininity without feeling precious. The sophisticated rose tone works for any age and any occasion. This timeless shade never looks dated and always photographs as fresh and polished.
- Difficulty: Beginner
- Time to complete: 15 minutes
- Best for: Literally everyone, every occasion
- Why it works: The sophisticated rose tone works for any age and any setting
- What makes it different: Blush pinks are the most universally flattering nail color family
Step-by-step:
- Apply ridge-filling base coat (OPI Ridge Filler or Essie “Fill the Gap,” $9-12). Sheer shades show every imperfection.
- Apply first coat of blush pink (OPI “Bubble Bath,” Essie “Fiji,” or Deborah Lippmann “Sheer tints in English Rose,” $10-12). These formulas are forgiving with good self-leveling properties.
- Wait 2 minutes, apply second coat. Blush pinks typically need two coats; some need three for deeper color.
- For oval shape (recommended): file from outer edge toward center in one direction, creating soft rounded point.
- Seal with glossy top coat.
- Apply cuticle oil—the combination of soft blush and moisturized cuticles creates elegant, classic look.
Bold & Bright Spring Nails
Poppy Red
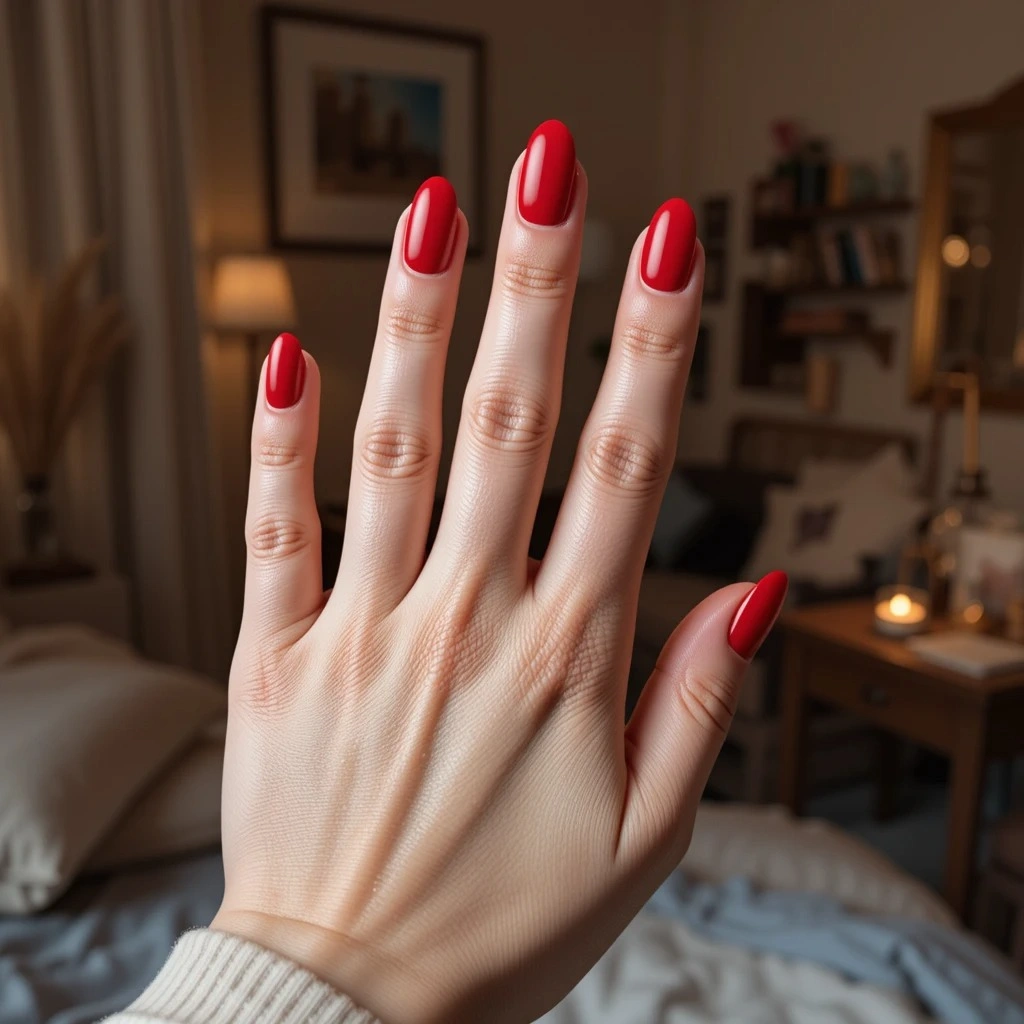
A true, vibrant red with blue undertones that commands attention without leaning orange or too cool-toned, offering classic glamour with modern edge. This confident shade works equally well for date nights and power meetings. The richness prevents it from looking flat or one-dimensional on the nail.
- Difficulty: Intermediate (red requires precision)
- Time to complete: 20 minutes
- Best for: Date nights, power meetings, or when you want to feel confident
- Why it works: Red poppies are iconic spring flowers—this shade brings bold botanical energy
- What makes it different: Blue undertones prevent it from looking orange or flat
Step-by-step:
- Prep meticulously—push cuticles back, ensure no hangnails or dry skin. Red highlights every flaw.
- Apply white base coat (optional but makes red brighter). Let dry.
- Apply first coat of poppy red (OPI “Big Apple Red,” Essie “Really Red,” or Chanel “Pirate,” $10-12). Use slightly more pressure than with pastels—red formulas self-level with proper pressure.
- Work quickly—reds dry fast and drag if you overwork. Use three strokes and stop.
- Wait 3-4 minutes, apply second coat.
- Keep cleanup brush handy—red stains skin immediately. Clean any flooding right away.
- Slightly underpaint (leave hair-width gap between polish and cuticle) rather than risk flooding.
- Seal with quick-dry top coat, wrapping tips thoroughly.
Hot Pink Magenta
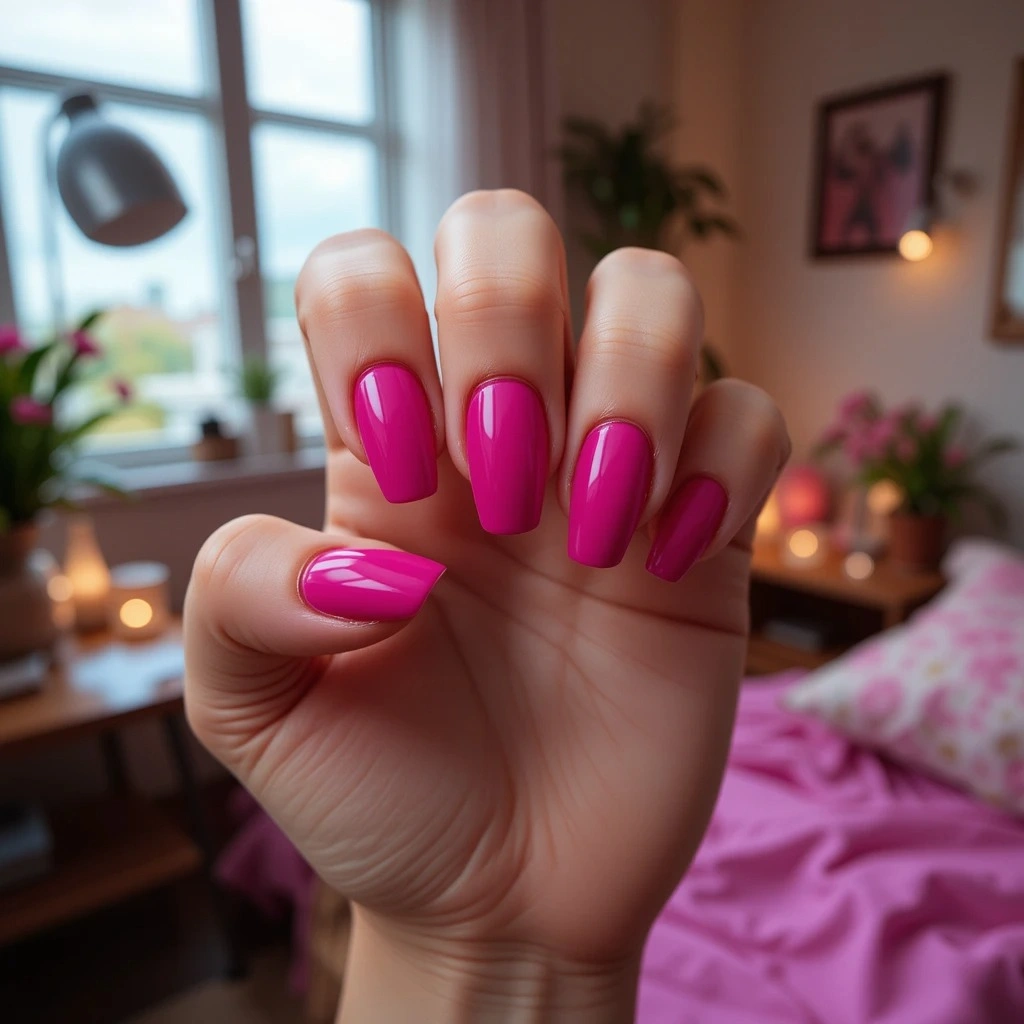
An electric, eye-catching pink that sits between fuchsia and magenta, delivering maximum impact and unapologetic femininity with a modern edge. The cool undertones prevent it from looking childish or costume-like. This statement shade pairs surprisingly well with unexpected colors like orange and red.
- Difficulty: Beginner
- Time to complete: 15 minutes
- Best for: Making hands look tan and healthy
- Why it works: The energizing shade captures spring’s excitement
- What makes it different: Cool undertones prevent it from looking childish
Step-by-step:
- Apply base coat. Hot pink can stain—use stain-blocking formula.
- Apply first coat of hot pink (OPI “Strawberry Margarita,” Essie “Watermelon,” or Lights Lacquer “Fuchsia Shock,” $10-12). High pigmentation means good coverage.
- Wait 2 minutes, apply second coat. Most hot pinks are opaque in two coats.
- For neutral accent (recommended to balance intensity), apply hot pink to all nails except ring finger. Let dry.
- Apply nude or white to ring finger (Essie “Blanc” or OPI “Samoan Sand”).
- Seal with glossy top coat.
Tangerine Orange
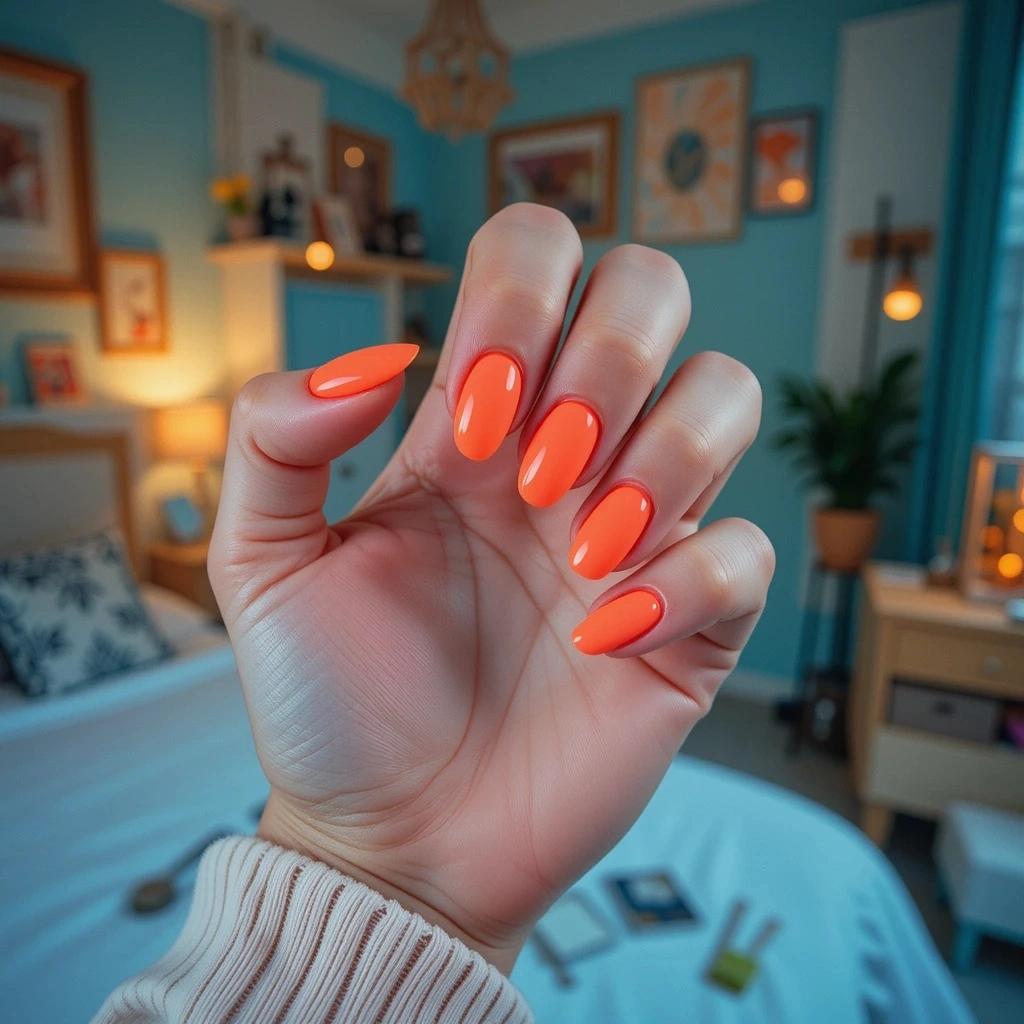
A warm, citrus-inspired orange that leans slightly coral, bringing tropical vacation vibes to your everyday manicure without looking dated or retro. The balanced saturation makes it bold yet surprisingly versatile. This cheerful shade instantly makes skin look sun-kissed and glowing.
- Difficulty: Intermediate
- Time to complete: 18 minutes
- Best for: Making skin look sun-kissed and glowing
- Why it works: Orange captures the warmth of longer spring days
- What makes it different: Balanced saturation makes it bold yet wearable
Step-by-step:
- Test the shade first—orange can clash with certain skin tones. Apply one coat to a single nail and check in natural light.
- If it clashes, try a coral-leaning option instead.
- Apply base coat.
- Apply first coat of tangerine (Essie “Braziliant,” OPI “Crawfishin’ for a Compliment,” or Zoya “Arizona,” $10-12). Orange formulas vary widely in opacity.
- Wait 2-3 minutes, apply second coat. Assess coverage—some need three coats.
- For sheer application (more universally flattering), apply just one thin coat, let dry, seal with top coat.
- Seal with glossy top coat.
Grass Green
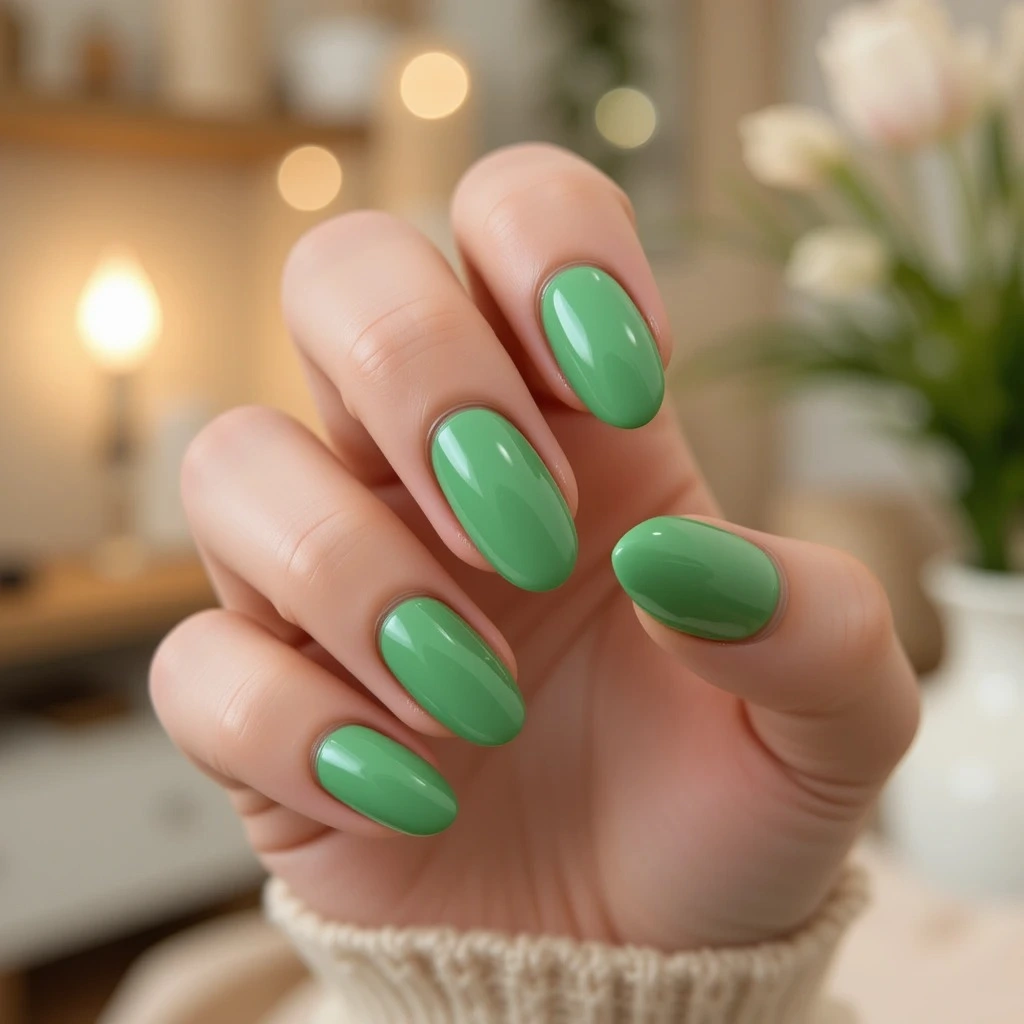
A vibrant, true green that resembles fresh spring grass, bringing nature directly to your fingertips with botanical accuracy and surprising sophistication. The balanced tone prevents it from looking too neon or too dark. This fresh shade coordinates beautifully with gold jewelry and neutral wardrobes.
- Difficulty: Beginner
- Time to complete: 15 minutes
- Best for: Nature lovers who want spring connection
- Why it works: Nothing says spring like the return of green grass
- What makes it different: Balanced tone prevents it from looking too neon or too dark
Step-by-step:
- Apply stain-blocking base coat (Orly Bonder or CND Stickey, $8-10). Green stains nails badly.
- Apply first coat of grass green (China Glaze “Starboard,” Essie “Off the Shoulder,” or OPI “I’m Sooo Swamped!” $8-10). Use smooth, even strokes.
- Green shows brushstrokes—avoid going back over areas once you’ve made your stroke.
- Wait 2-3 minutes, apply second coat. Coverage should be good.
- Apply cuticle oil generously to surrounding skin (avoiding nail plate). Well-moisturized cuticles frame bold colors and prevent harsh contrast.
- Seal with high-gloss top coat—shine softens the boldness and makes green look more expensive.
Cobalt Blue
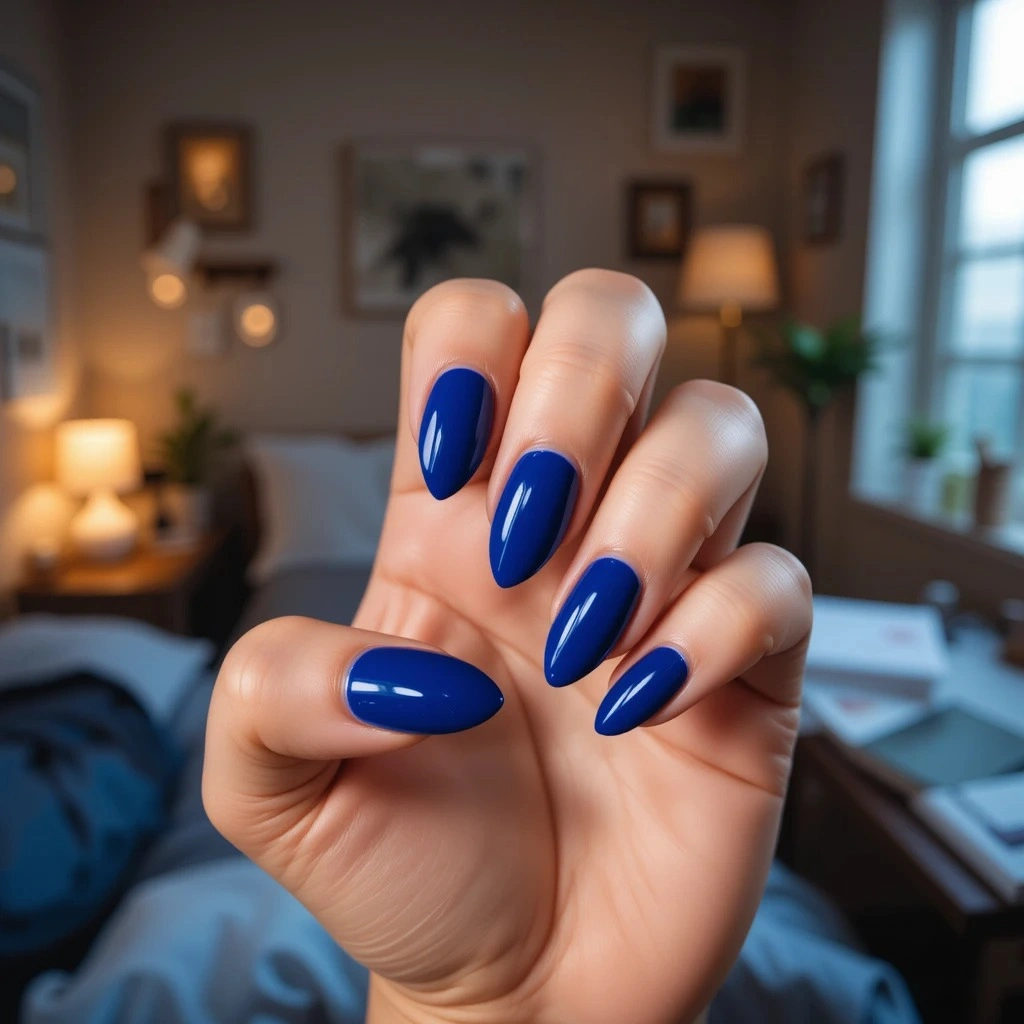
A rich, saturated blue that walks the line between navy and royal blue, offering depth and drama while remaining distinctly spring-appropriate. The intensity creates visual impact without needing nail art or embellishments. This sophisticated shade elevates even the simplest outfits instantly.
- Difficulty: Beginner
- Time to complete: 15 minutes
- Best for: Elevating even the simplest outfits instantly
- Why it works: Cobalt provides refreshing alternative to pastels
- What makes it different: Intensity creates visual impact without needing nail art
Step-by-step:
- Apply base coat. Cobalt stains—don’t skip.
- Apply first coat of cobalt blue (Essie “Aruba Blue,” OPI “Tile Art to Warm Your Heart,” or Zoya “Song,” $10-12). High pigmentation means good coverage.
- Wait 2 minutes, apply second coat. Most cobalt blues achieve full opacity in two coats.
- For white or gold accents (optional), wait until cobalt is completely dry (15+ minutes).
- Add white dots, stripes, or geometric patterns using white polish and detail brush.
- Or apply gold striping tape, gold foil pieces, or hand-paint gold lines.
- Seal with top coat.
Elegant Accent & Chrome Spring Nails
French Tip Reimagined

Classic nude base with unexpected colored tips—think lavender, sage, or butter yellow instead of traditional white—for a modern twist on the timeless design. The familiar structure keeps it wearable while the color swap adds personality. This style works for any nail length and shape.
- Difficulty: Intermediate
- Time to complete: 35-40 minutes
- Best for: Anyone who loves French manicures but wants them to feel current
- Why it works: The clean lines feel fresh and polished while the color swap adds personality
- What makes it different: Colored tips update the classic for 2025 without losing its sophisticated appeal
Step-by-step:
Materials Needed:
- Base coat
- Nude polish (OPI “Samoan Sand” or Essie “Au Natural,” $10-12)
- Spring color for tips (lavender, sage, or butter yellow)
- Striping tape or reinforcement stickers
- Cleanup brush
- Top coat
Instructions:
- Prep nails and apply base coat. Let dry completely.
- Apply two coats of nude base color to all nails, waiting 3+ minutes between coats. Let final coat dry 10 minutes minimum.
- Apply striping tape across each nail where you want the colored tip to begin:
- For classic French: place tape just above natural smile line (where pink meets white)
- For modern French: place tape anywhere from mid-nail to just at the tip
- Press tape firmly to seal edges—this prevents polish bleeding underneath
- Paint the tip beyond the tape with your spring color. Apply two thin coats, letting each dry 2 minutes.
- When second coat is dry to touch (not fully dry, just not wet), carefully peel away tape at 45-degree angle. Pull slowly to avoid pulling off polish.
- Use cleanup brush dipped in acetone to perfect any imperfect lines.
- Wait 5 minutes for everything to dry fully.
- Apply top coat to all nails, sealing the edge where colors meet and wrapping free edges.
Troubleshooting:
- If polish bled under tape: your base color wasn’t dry enough or tape wasn’t pressed firmly
- If line is bumpy where colors meet: apply second layer of top coat to smooth transition
Rose Gold Chrome
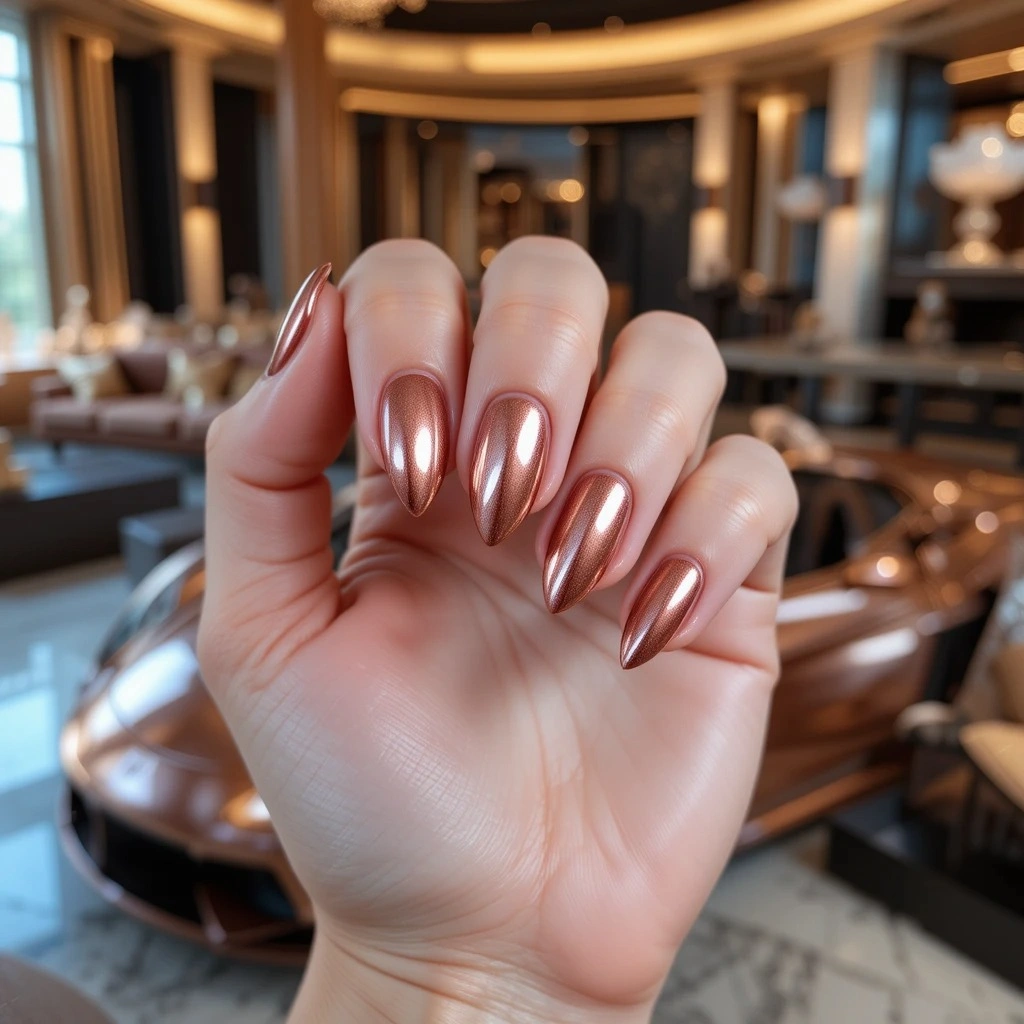
A warm, metallic finish that shifts between copper, pink, and gold depending on lighting, creating a luxurious, dimensional effect without looking gaudy. The chrome reflects light beautifully for eye-catching shine. This glamorous finish elevates any outfit from casual to cocktail-ready.
- Difficulty: Advanced (gel method) or Beginner (regular polish method)
- Time to complete: 45 minutes (gel) or 20 minutes (regular)
- Best for: Special events or when you want Instagram-worthy nails
- Why it works: Rose gold’s warmth complements spring’s golden light
- What makes it different: Chrome finish reflects light beautifully for high-impact shine
Step-by-step (Gel Method for True Mirror Finish):
Materials Needed:
- Gel base coat (Beetles Base Coat, $8 on Amazon)
- Black or brown gel polish (dark bases make chrome more vibrant)
- No-wipe gel top coat
- Rose gold chrome powder (Born Pretty or similar, $6-8)
- Silicone eyeshadow applicator
- UV/LED lamp
- Rubbing alcohol
Instructions:
- Prep nails, apply gel base coat, cure 60 seconds under lamp.
- Apply one thin coat of black or brown gel polish (Beetles “Black” or “Chocolate Brown”). Cure fully.
- Apply second coat if needed for full opacity. Cure.
- Apply no-wipe gel top coat. DO NOT CURE.
- While top coat is still wet, use silicone applicator to scoop small amount of rose gold chrome powder and rub onto wet top coat in circular motions.
- Keep rubbing until you achieve full, even coverage and see mirror effect developing.
- Use soft brush to dust off excess powder from nail and surrounding skin.
- Apply another layer of gel top coat over chrome to seal permanently. Cure.
- Wipe nails with rubbing alcohol to remove remaining tacky layer.
Step-by-step (Regular Polish Method for Easier Application):
Materials Needed:
- Base coat
- Rose gold chrome polish (Sally Hansen Chrome Nail Makeup in “Rose Chrome” or Essie “Penny Talk,” $8-10)
- Top coat
Instructions:
- Prep nails and apply base coat. Let dry completely.
- Apply rose gold chrome polish in two to three thin coats. Chrome polishes are typically sheer—multiple thin coats build the effect.
- Wait 2-3 minutes between each coat.
- Seal with high-gloss, thick top coat (Seche Vite or Sally Hansen Insta-Dri) to enhance chrome effect and extend wear.
- Note: Regular polish chrome won’t be as mirror-like as gel powder chrome, but creates beautiful dimensional shine without special equipment.
Single Accent Gemstone
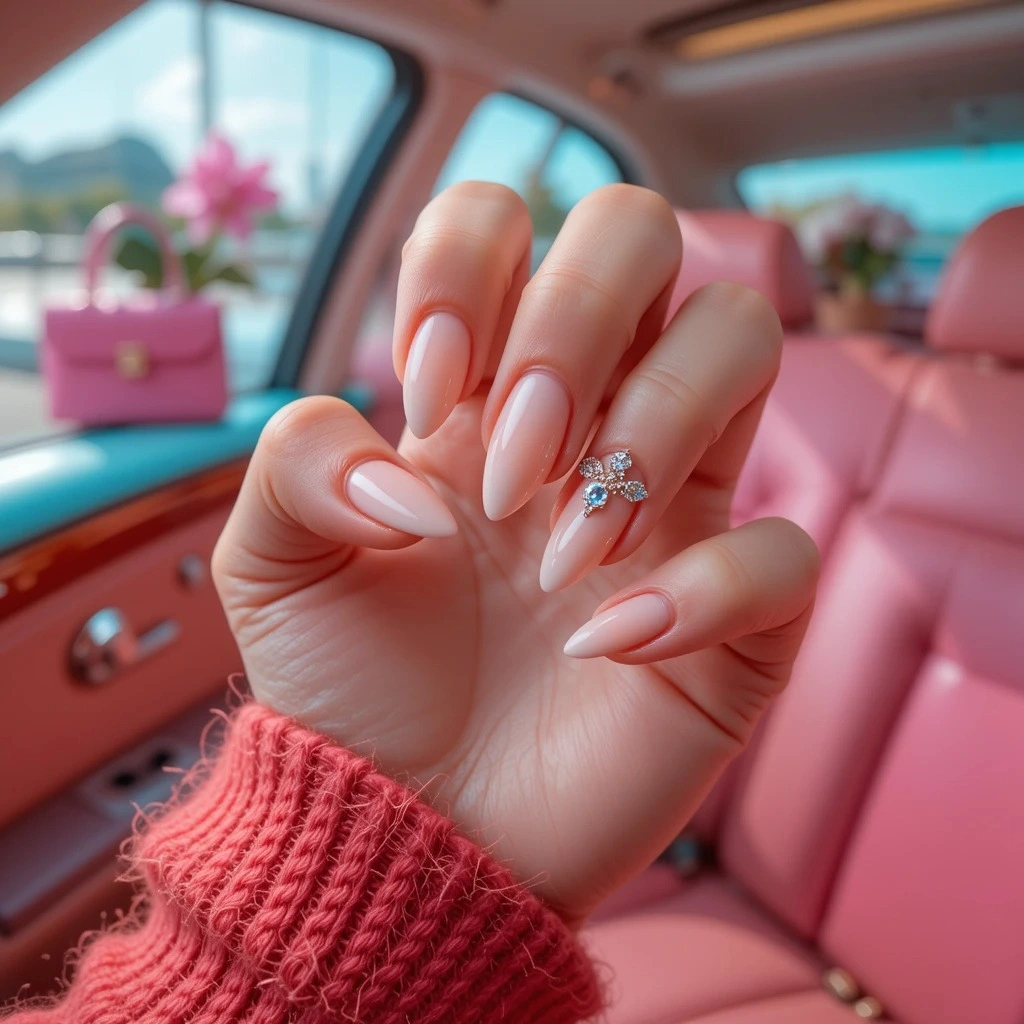
A neutral base color with one statement nail featuring delicate crystal or pearl embellishments arranged in minimalist patterns or single-stone placements. The restraint prevents it from looking overdone or prom-like. This approach adds luxury without requiring full-hand commitment.
- Difficulty: Intermediate
- Time to complete: 30 minutes
- Best for: Adding elegance without committing to full-hand embellishments
- Why it works: The restraint prevents it from looking overdone or prom-like
- What makes it different: Single-nail approach keeps it sophisticated rather than excessive
Step-by-step:
Materials Needed:
- Base coat
- Neutral polish (nude, blush, or milky white)
- Flat-back rhinestones or pearls (2-4mm size)
- Tweezers or dotting tool
- Clear nail glue or thick top coat
- Regular top coat
Instructions:
- Complete full manicure with neutral base color on all nails. Let dry completely (15+ minutes).
- Plan gemstone placement on accent nail (ring finger is classic choice):
- For beginners: simple vertical line of 3-5 stones down center of nail
- Or single larger stone near cuticle area
- Or small cluster in bottom third of nail
- Apply tiny drop of clear nail glue or thick top coat where first stone will go.
- Use tweezers or dampened dotting tool to pick up rhinestone and place precisely in glue. Press gently.
- Repeat for remaining stones, working quickly before glue dries.
- Let glue dry completely (5-10 minutes). Gently tap stones to check security—if any move, add tiny dot of glue underneath.
- Carefully apply top coat to entire nail, including around stones. For flat-back stones, apply around bases to seal. For crystal-cut stones, you may leave tops uncoated for maximum sparkle.
- Apply 2-3 coats of top coat around stone bases over next 24 hours to lock them in place.
Pro Tip: Buy mixed-size rhinestone set from Amazon ($8-12) to experiment with different arrangements. If a stone falls off, clean area with alcohol, apply new glue, and replace—easy fix.
Silver Foil Accent
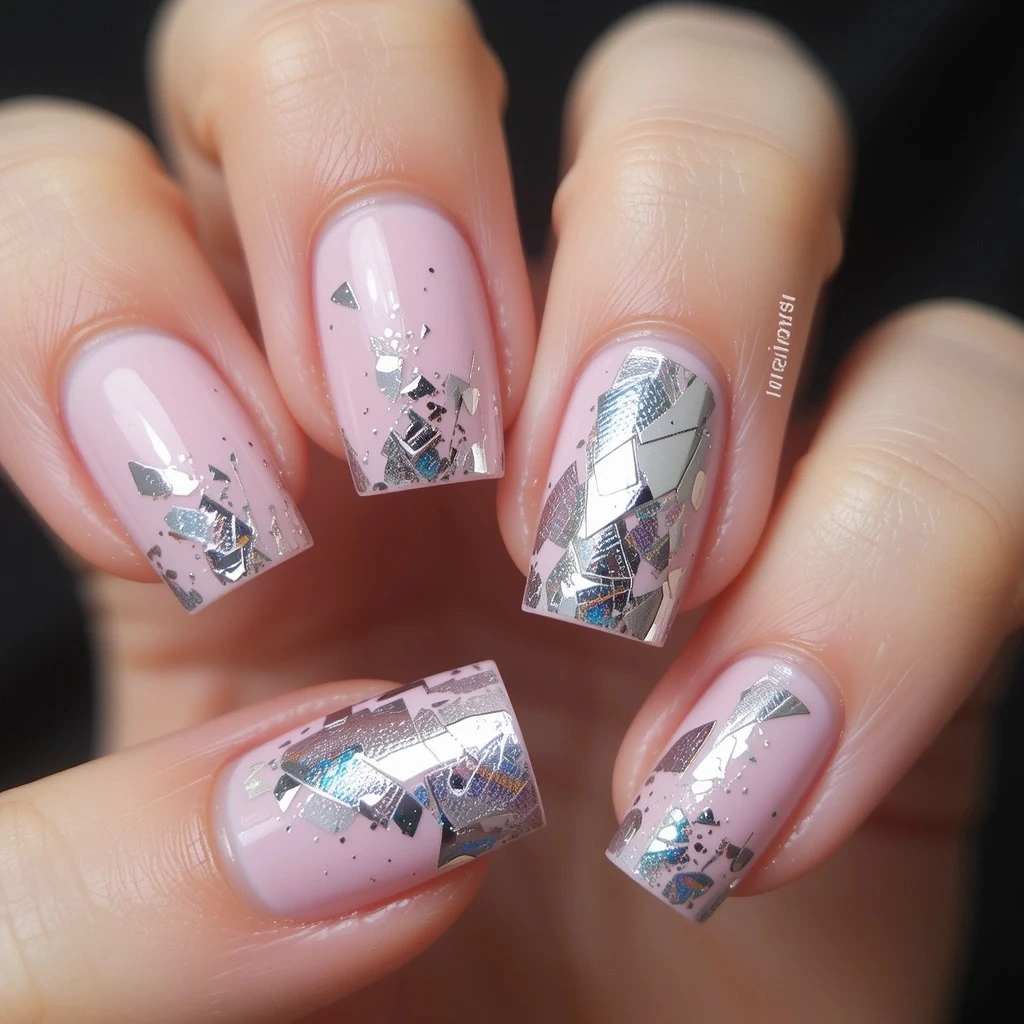
A soft spring base color with strategically placed silver foil fragments creating an abstract, artistic effect on one or two nails for modern edge. The irregular foil application looks intentionally artistic rather than messy. This technique adds texture and visual interest without overwhelming.
- Difficulty: Intermediate
- Time to complete: 35 minutes
- Best for: Adding contemporary art vibes to simple manicures
- Why it works: The reflective quality mimics spring rain and morning dew
- What makes it different: Irregular foil application looks intentionally artistic, not messy
Step-by-step:
Materials Needed:
- Base coat
- Spring color base (baby blue, lavender, or blush)
- Foil transfer sheets or foil flakes (Amazon, $6-10)
- Tweezers or orange wood stick
- Thick top coat or gel top coat
Instructions:
- Complete full manicure with spring base color on all nails. Let dry completely.
- On chosen accent nail(s), apply fresh coat of base color or clear coat.
- Wait 30-60 seconds until polish is tacky but not wet—should feel slightly sticky but not move when tapped.
- Using tweezers, press pieces of foil onto tacky polish:
- For abstract look: tear irregular pieces and place randomly
- For geometric look: cut small squares or strips
- Press firmly for 3-5 seconds, then peel away backing if using transfer foil. Foil should stick to tacky polish.
- If using foil flakes, sprinkle over tacky polish and press gently. Shake off excess.
- Wait 5 minutes for everything to settle.
- Apply thick top coat generously over entire nail, sealing all edges of foil pieces so they don’t catch and peel.
- Apply 2-3 coats of top coat over 24 hours for maximum security. Gel top coat provides best seal.
Design Ideas:
- Irregular torn pieces scattered across nail for abstract art vibes
- Gradient effect with more foil at tips fading toward cuticle
- Larger foil pieces in geometric patterns
- Mix silver with one or two rose gold pieces for dimensional interest
Negative Space Florals
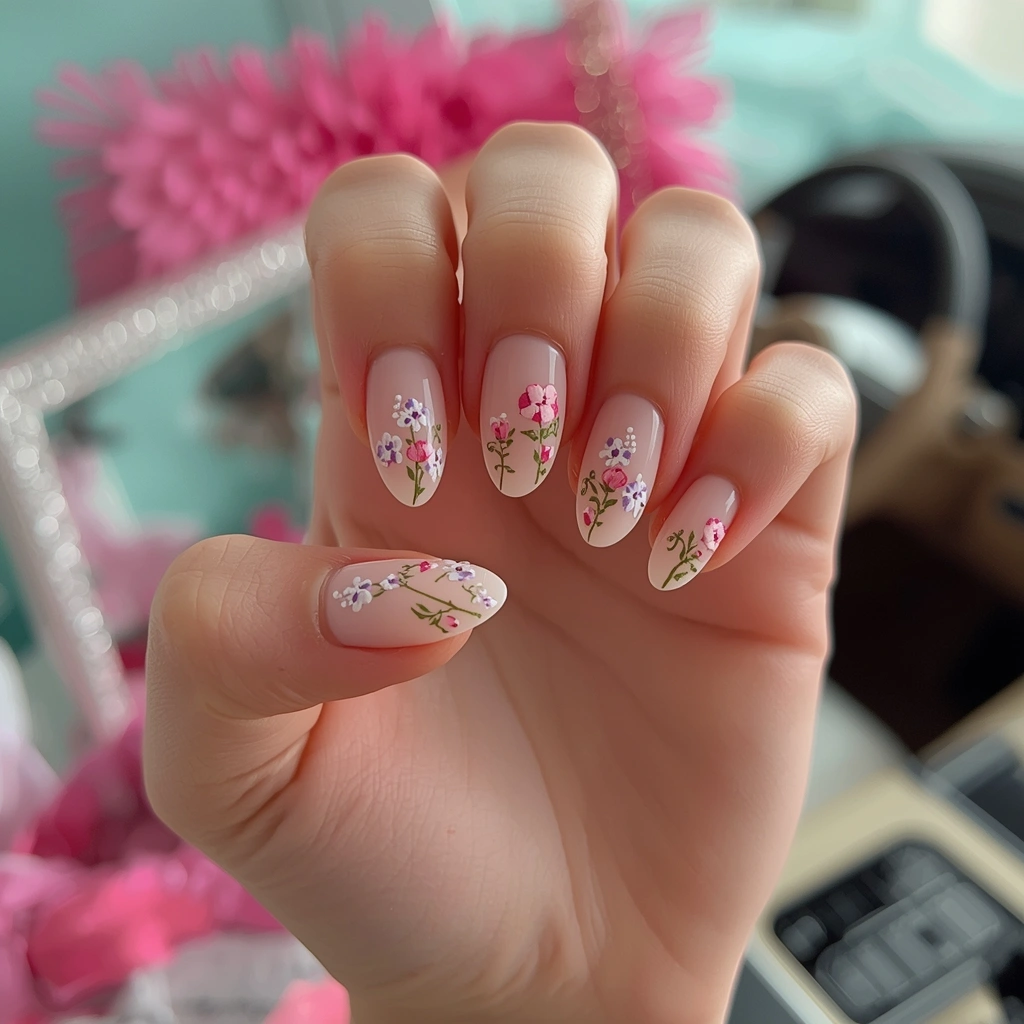
Bare nail showing through with delicate hand-painted flowers in spring colors, creating an airy, botanical design that doesn’t feel heavy or opaque. The exposed natural nail keeps the look fresh and breathable. This artistic approach works beautifully on both short and long nails.
- Difficulty: Advanced
- Time to complete: 45-50 minutes
- Best for: Artistic personalities who want unique, handcrafted nails
- Why it works: Exposed natural nail keeps the look fresh and breathable
- What makes it different: Directly references spring’s botanical beauty without heavy, opaque designs
Step-by-step:
Materials Needed:
- Base coat
- 2-3 spring colors (pink, white, yellow for cherry blossoms; lavender, white, green for generic florals)
- Fine detail nail art brush (size 0 or 00)
- Dotting tool
- Top coat
Instructions:
- Prep nails and apply clear base coat only. Let dry completely. Natural nail is your canvas—ensure it’s clean and smooth.
- Plan flower placement. For beginners, try 2-3 small flowers placed asymmetrically (bottom left corner, top right, middle left side) rather than centered.
- Start with petals:
- Dip detail brush in first color (like pink)
- Wipe off excess
- Create small curved petal shapes (comma strokes work well)
- For cherry blossoms: 5 petals radiating from central point
- For daisies: 6-8 elongated petals
- Let natural nail show between and around flowers—this is key to negative space design
- Using dotting tool, add flower centers in contrasting color (yellow or white). Small dot in center of each flower cluster.
- Optional: Add simple stem or leaf elements using green polish and detail brush. Keep minimal—2-3 simple lines or leaves maximum.
- Let artwork dry completely (10+ minutes).
- Apply thick, glossy top coat to seal and protect design. The top coat makes colors pop against natural nail.
Beginner Modification:
Use floral nail decals or stickers instead. Apply base coat, let dry, place decals on bare nail following package directions, seal with top coat. Creates same negative-space effect with zero artistic skill.
Cool-Toned Spring Nails
Icy Blue
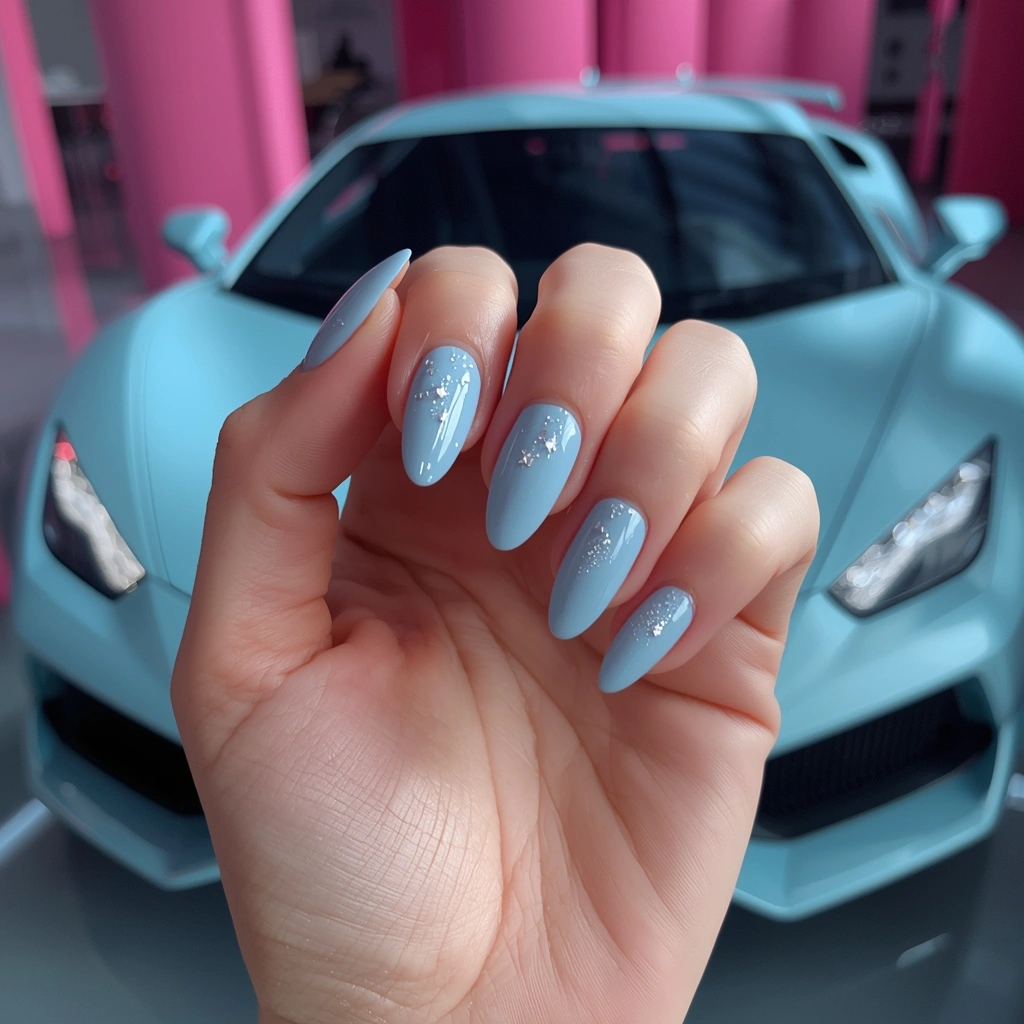
A pale, frosty blue with silver undertones that resembles ice crystals melting into spring water, offering unexpected coolness that still feels seasonally appropriate. The subtle gray prevents it from looking too juvenile or candy-like. This sophisticated shade pairs beautifully with silver jewelry and cool-toned wardrobes.
- Difficulty: Intermediate
- Time to complete: 25-30 minutes
- Best for: Early spring when weather is still unpredictable
- Why it works: Bridges winter’s chill with spring’s freshness
- What makes it different: The subtle gray undertones prevent it from looking like a winter holiday color
Step-by-step:
- Apply ridge-filling base coat. Icy blues show every imperfection.
- Apply white base coat (Essie “Blanc,” $9). Let dry 5 minutes. This helps the icy tone appear true-to-bottle and more opaque.
- Apply first thin coat of icy blue (Essie “Borrowed & Blue,” China Glaze “Crystal Lake,” or OPI “It’s a Boy!” $8-10). Use smooth, even strokes.
- Wait 3 minutes. Set a timer—rushing causes dragging and patchiness.
- Apply second thin coat. Still patchy? Good. Wait 3 minutes.
- Apply third thin coat. You should have even coverage now.
- For shimmer top coat (recommended), apply iridescent or pearl shimmer top coat (Essie “Set in Stones” or Sally Hansen “Hidden Treasure,” $6-8) as final layer.
- The shimmer particles catch light and enhance the icy, crystalline effect beautifully—especially in natural sunlight.
Sage Gray-Green
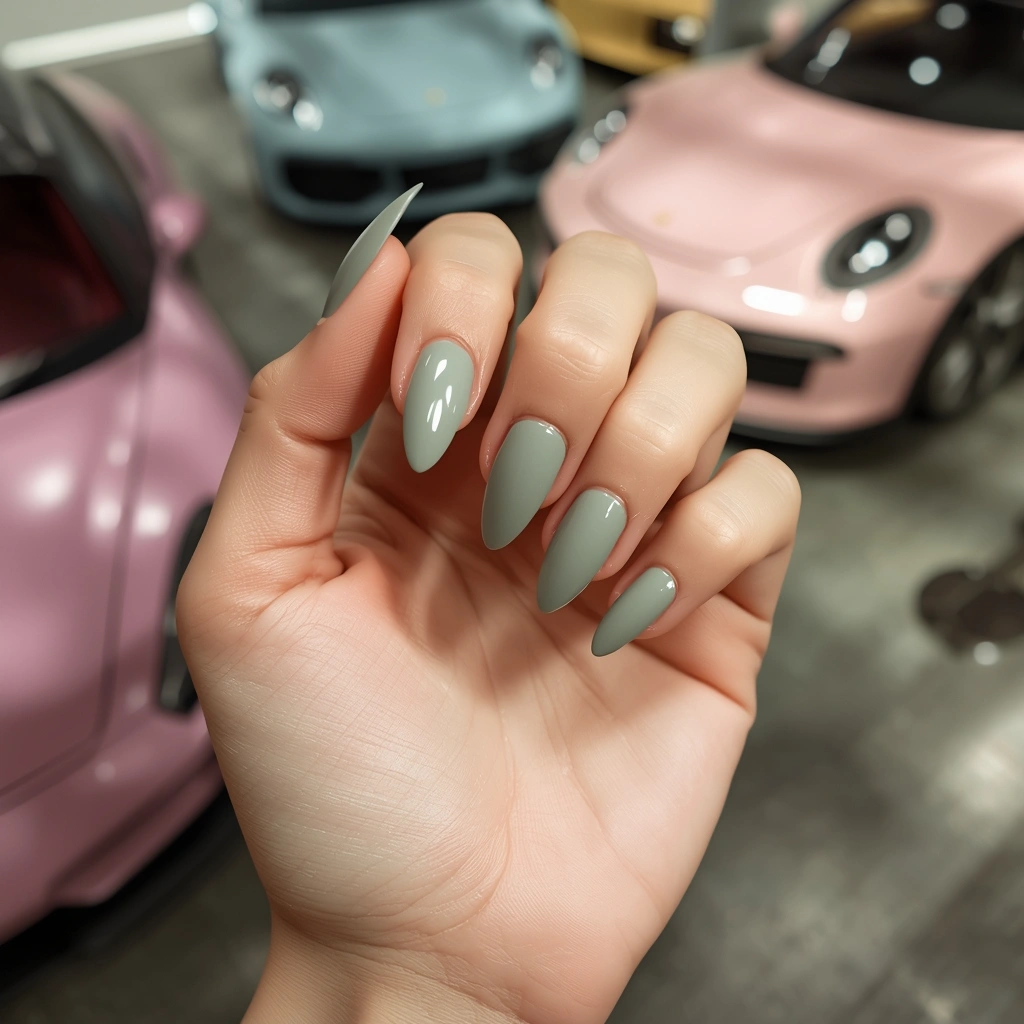
A muted green-gray hybrid that feels effortlessly chic and surprisingly neutral, offering botanical undertones without looking overtly colorful or loud. This sophisticated shade works as easily as a nude while providing more visual interest. The complexity makes it endlessly versatile across different outfits and occasions.
- Difficulty: Beginner
- Time to complete: 15-18 minutes
- Best for: Adults seeking subtle seasonal style without obvious “spring” colors
- Why it works: Sage references spring herbs and new foliage while maintaining gray’s sophistication
- What makes it different: The complexity makes it endlessly versatile across different outfits
Step-by-step:
- Apply base coat. Sage has good opacity—standard clear base works fine.
- Apply first coat of sage (Essie “Sew Psyched,” OPI “Suzi—The First Lady of Nails,” or Zoya “Sage,” $10-12). Use even pressure and smooth strokes.
- Wait 2-3 minutes, apply second coat. The muted tone hides minor mistakes—very forgiving.
- For matte finish (modern look), let color coats dry completely (15+ minutes).
- Apply matte top coat (Essie “Matte About You” or OPI Matte Top Coat, $9) in thin, even strokes.
- Let matte top coat dry without touching for at least 5 minutes—matte shows fingerprints.
- For almond shape (recommended), file from outer edges toward center, creating tapered soft point.
Periwinkle
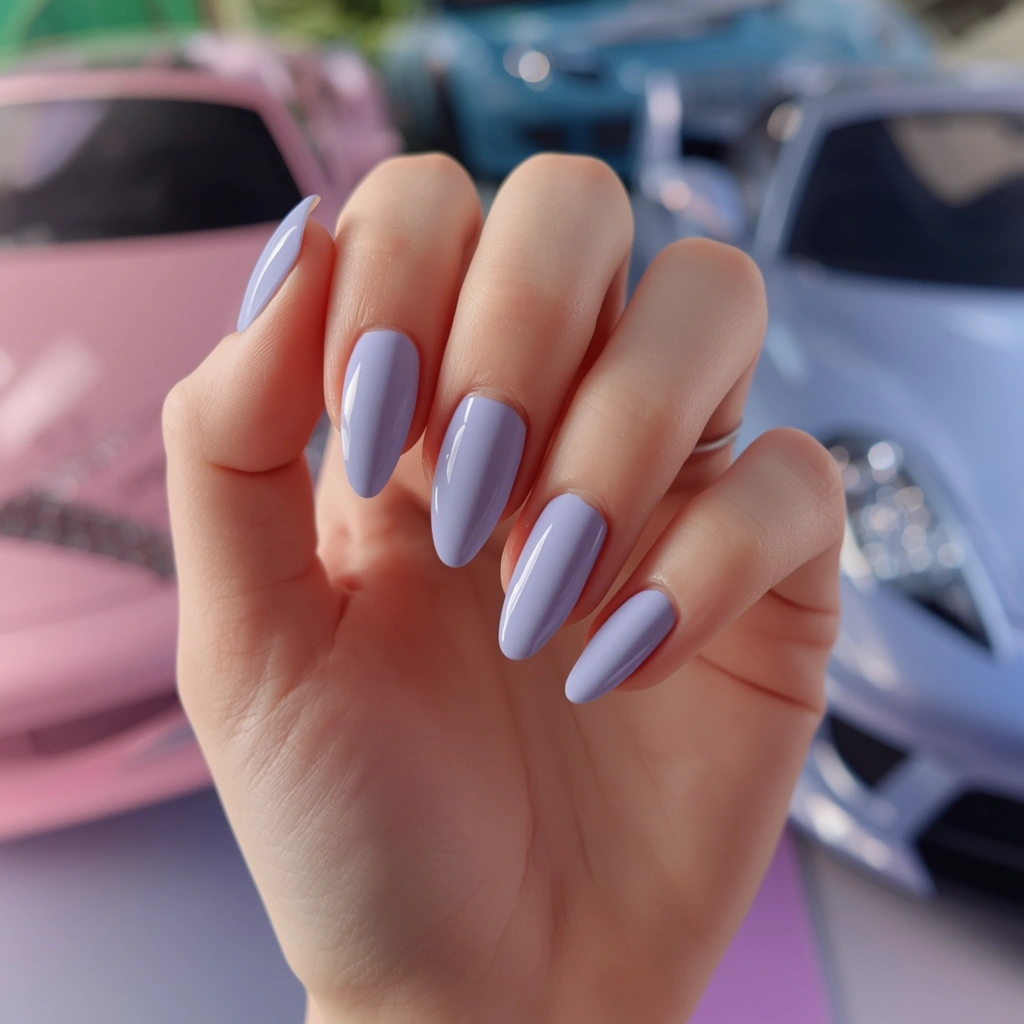
A soft blue-purple hybrid that leans slightly gray, creating a dreamy, vintage-inspired look that feels romantic without being overly sweet or precious. The dusty quality adds sophistication to this playful pastel. This underrated shade coordinates beautifully with both warm and cool-toned wardrobes.
- Difficulty: Beginner
- Time to complete: 20-25 minutes
- Best for: Anyone who wants something different from standard pastels
- Why it works: The dusty quality adds sophistication to this playful color
- What makes it different: Coordinates with both warm and cool-toned wardrobes
Step-by-step:
- Apply white base coat (Essie “Blanc,” $9). This is crucial—periwinkle over clear looks washed-out gray-blue.
- Apply first thin coat of periwinkle (Essie “Bikini So Teeny,” OPI “You’re Such a Budapest,” or Zoya “Hudson,” $10-12). Periwinkle formulas vary widely in opacity.
- Wait 3 minutes, apply second thin coat. Assess coverage.
- Apply third coat if needed. Some periwinkles are very sheer and need three coats.
- Glossy top coat is essential—periwinkle looks dusty and flat without shine.
- Use thick, gel-effect top coat for maximum shine (Seche Vite, $9).
- For rounded shape (recommended), file to create soft, gentle curve that follows natural cuticle curve.
Slate Blue
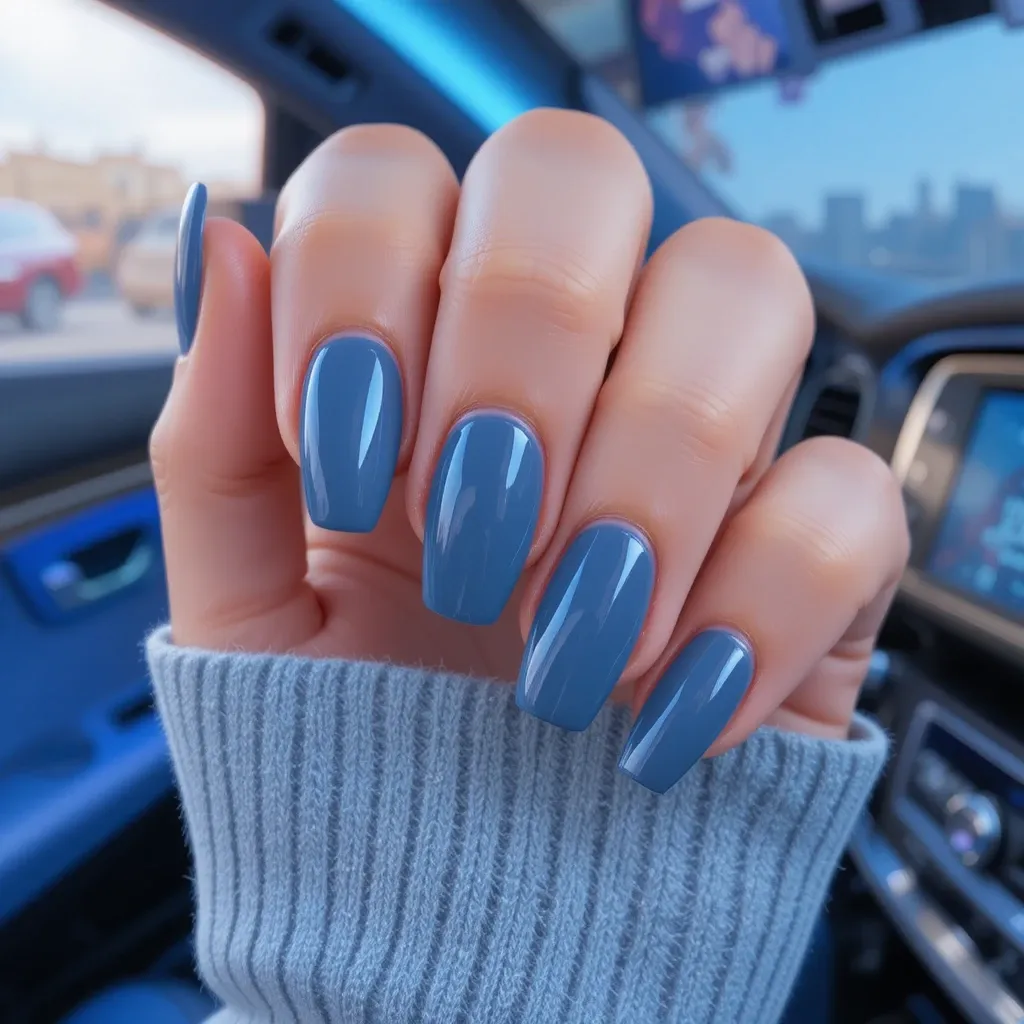
A medium-toned blue with significant gray influence that reads as refined and modern, offering color without feeling juvenile or overly bright. This sophisticated shade works seamlessly from office to evening. The depth prevents it from looking washed out while remaining distinctly spring-appropriate.
- Difficulty: Beginner
- Time to complete: 15 minutes
- Best for: Professional settings where you want color without distraction
- Why it works: The depth prevents it from looking washed out while remaining distinctly spring-appropriate
- What makes it different: Gray undertones make it more sophisticated than standard blues
Step-by-step:
- Apply base coat.
- Apply first coat of slate blue (Essie “Petal Pushers,” OPI “Less is Norse,” or Zoya “Natty,” $10-12). These formulas have excellent opacity.
- Wait 2-3 minutes, apply second coat. Gray undertones make this shade forgiving—minor streaking is less visible.
- For square shape (recommended), file straight across top, then very slightly round sharp corners to prevent snagging.
- For silver accents (optional), add:
- Single coat of silver chrome on ring finger
- Silver striping tape in geometric patterns on one nail
- Silver foil pieces on one accent nail
- Seal with glossy top coat.
Dusty Mauve
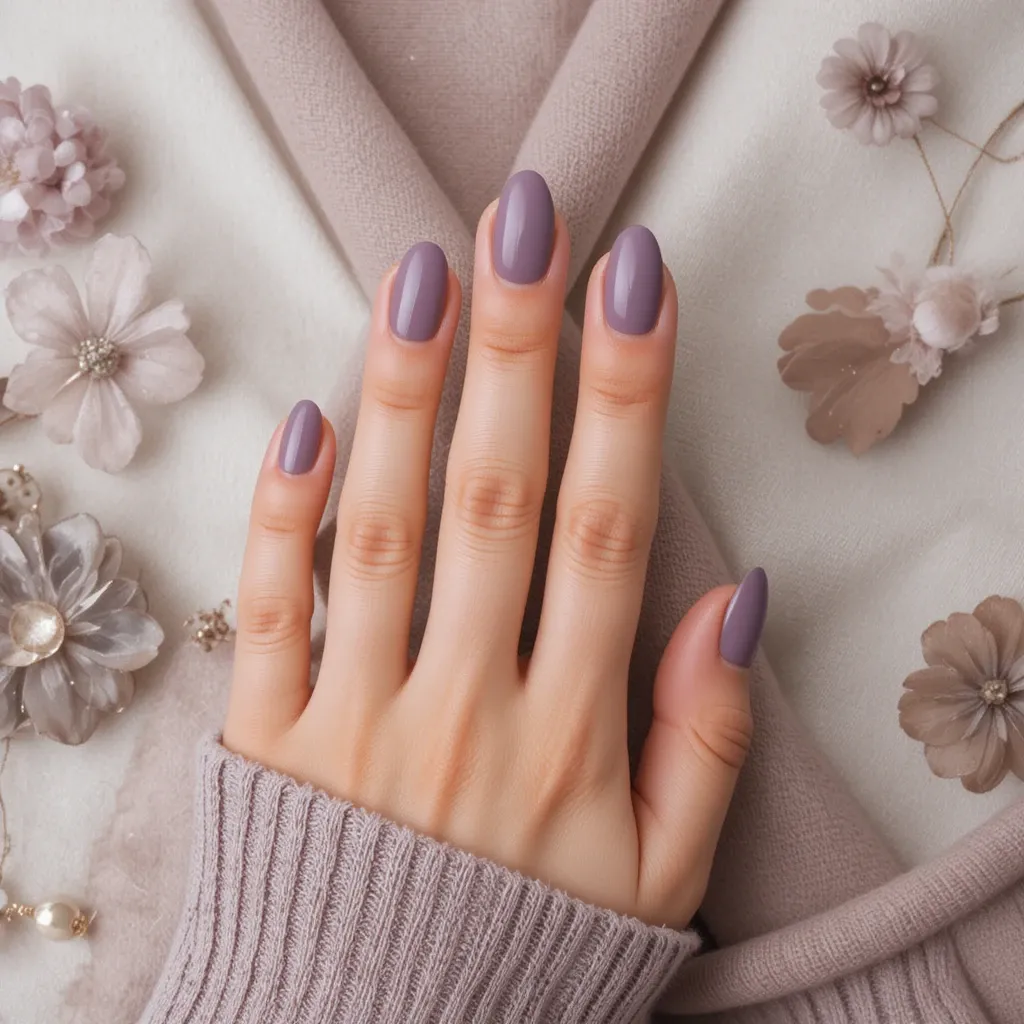
A muted purple-pink with brown undertones that creates a vintage, nostalgic feeling while remaining contemporary and wearable for modern style sensibilities. The complexity prevents it from reading as one-dimensional or flat. This sophisticated shade bridges multiple color families for maximum versatility.
- Difficulty: Beginner
- Time to complete: 15-18 minutes
- Best for: Anyone who wants romantic spring style without committing to full pink or purple
- Why it works: Mauve references spring blooms while maintaining neutral versatility
- What makes it different: The complexity bridges multiple color families for maximum wearability
Step-by-step:
- Apply base coat. No white base needed—mauve has good opacity.
- Apply first coat of dusty mauve (OPI “Tickle My France-y,” Essie “Lady Like,” or Zoya “Odette,” $10-12). Apply at medium thickness—too thin causes streaking.
- Wait 2-3 minutes, apply second coat. Assess coverage—add third thin coat if needed.
- For oval shape (recommended), file from outer edge toward center, creating elongated elegant oval.
- For satin finish (elegant option), apply standard glossy top coat, let dry 5 minutes, then lightly buff surface with 400-grit buffer in gentle circular motions.
- Or use satin-finish top coat if available.
Floral & Artistic Spring Nails
Cherry Blossom Petals
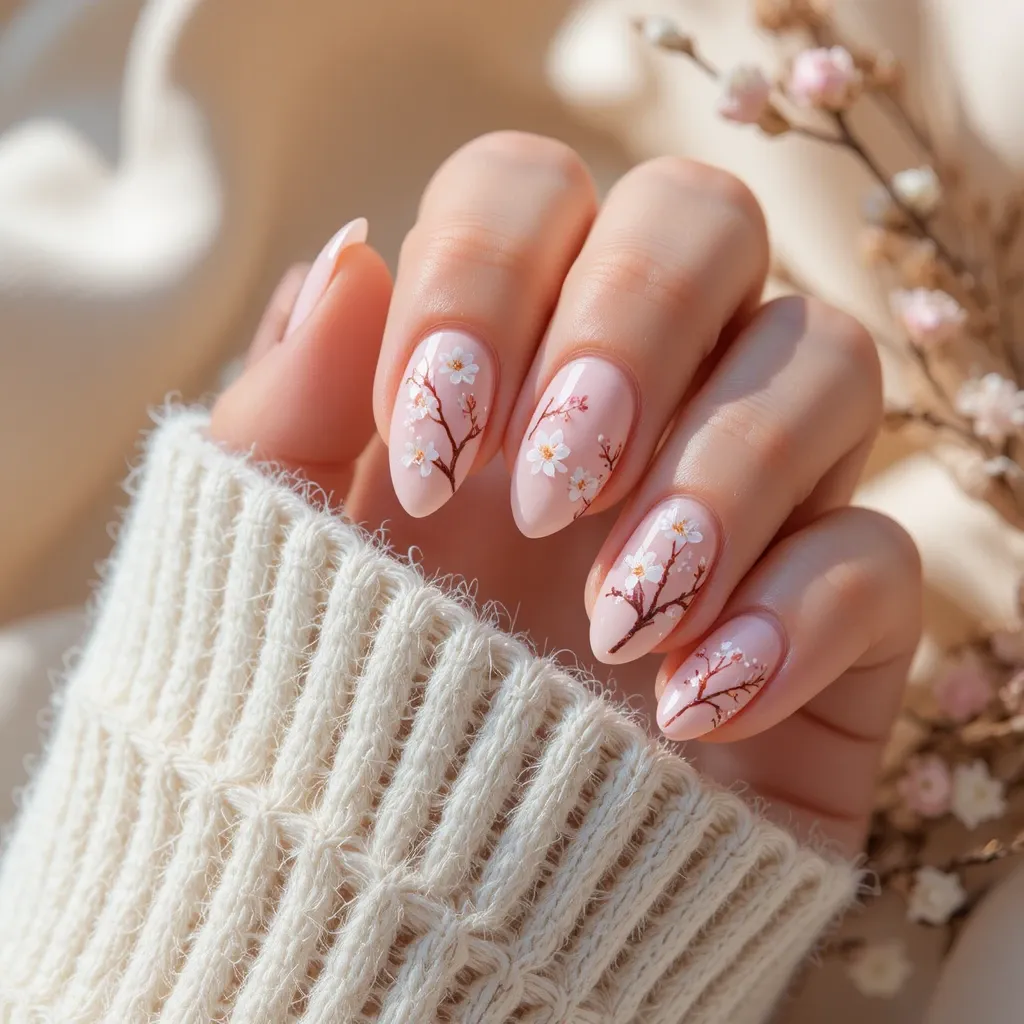
Soft pink base with delicate hand-painted white and blush flowers creating romantic, botanical nail art that directly references spring’s iconic blooms. The subtle color palette keeps it sophisticated rather than cartoonish. This design works beautifully across all nail lengths and brings instant spring energy.
- Difficulty: Advanced
- Time to complete: 50-60 minutes
- Best for: Special occasions where you want artistic, meaningful nail art
- Why it works: Cherry blossoms are the ultimate symbol of spring renewal
- What makes it different: Subtle color palette keeps it sophisticated rather than cartoonish
Step-by-step:
Materials Needed:
- Base coat
- Soft pink base polish (Essie “Fiji” or OPI “Bubble Bath”)
- White polish for petals (Essie “Blanc”)
- Blush or deeper pink for details
- Brown polish for branches (optional)
- Fine detail brush (size 00)
- Dotting tool
- Top coat
Instructions:
- Apply base coat, let dry.
- Apply two coats of soft pink to all nails. Let dry completely (15+ minutes).
- On accent nails (1-2 maximum), use brown polish and detail brush to paint thin branch lines. Keep them simple—curved lines extending from one side.
- Using dotting tool or detail brush, create flowers:
- Dip tool in white polish
- Create 5 small dots in circle formation for each flower
- Place flowers along branches, some clustered, some单独
- Vary flower sizes using different dotting tool ends
- Using smaller dotting tool or detail brush tip, add tiny blush or deeper pink centers to some flowers.
- Add a few individual petals floating near branches for fallen blossom effect.
- Let artwork dry completely (10-15 minutes).
- Seal with thick top coat, applying carefully to avoid smudging. Apply 2-3 coats over 24 hours.
Abstract Watercolor

Soft washes of multiple spring colors—lavender, sage, butter yellow, and blush—blended together in an artistic, painterly effect that looks like watercolor art. The blended edges create seamless color transitions without harsh lines. This artistic approach feels unique and personal rather than cookie-cutter.
- Difficulty: Intermediate
- Time to complete: 40 minutes
- Best for: Artistic personalities who want one-of-a-kind nails
- Why it works: The light, airy blending captures spring’s soft aesthetic
- What makes it different: Allows you to incorporate multiple trending colors in one cohesive design
Step-by-step:
Materials Needed:
- Base coat
- White base color
- 3-4 spring colors (lavender, sage, butter yellow, blush)
- Makeup sponge (cut into small pieces)
- Aluminum foil or plastic sheet
- Toothpick or dotting tool
- Top coat
Instructions:
- Apply base coat, let dry. Apply one coat of white polish to all nails. Let dry completely. This creates your watercolor “paper.”
- On aluminum foil, place small puddles of chosen colors close together but not touching.
- Dampen makeup sponge piece slightly (barely damp, not wet).
- Dab sponge into first color, then lightly dab/roll onto nail, focusing on one area (upper left). Use light, rolling dabs—don’t press hard.
- Immediately (while first color is wet), dab sponge into second color and apply to different area (lower right), letting colors meet and blend.
- Repeat with third and fourth colors, working quickly before anything dries.
- Use toothpick or dotting tool to gently swirl colors where they meet, creating soft blends.
- Let dry completely (10+ minutes). You’ll likely have polish on surrounding skin—use cleanup brush dipped in acetone to remove.
- Apply thick top coat to seal and smooth texture. Apply 2-3 coats over 24 hours.
Variation – Wet-on-Wet Technique:
- Apply dots of different colors directly onto wet white base using dotting tool
- Immediately swirl gently with toothpick before colors dry
- Creates similar watercolor effects with different tools
Daisy Details
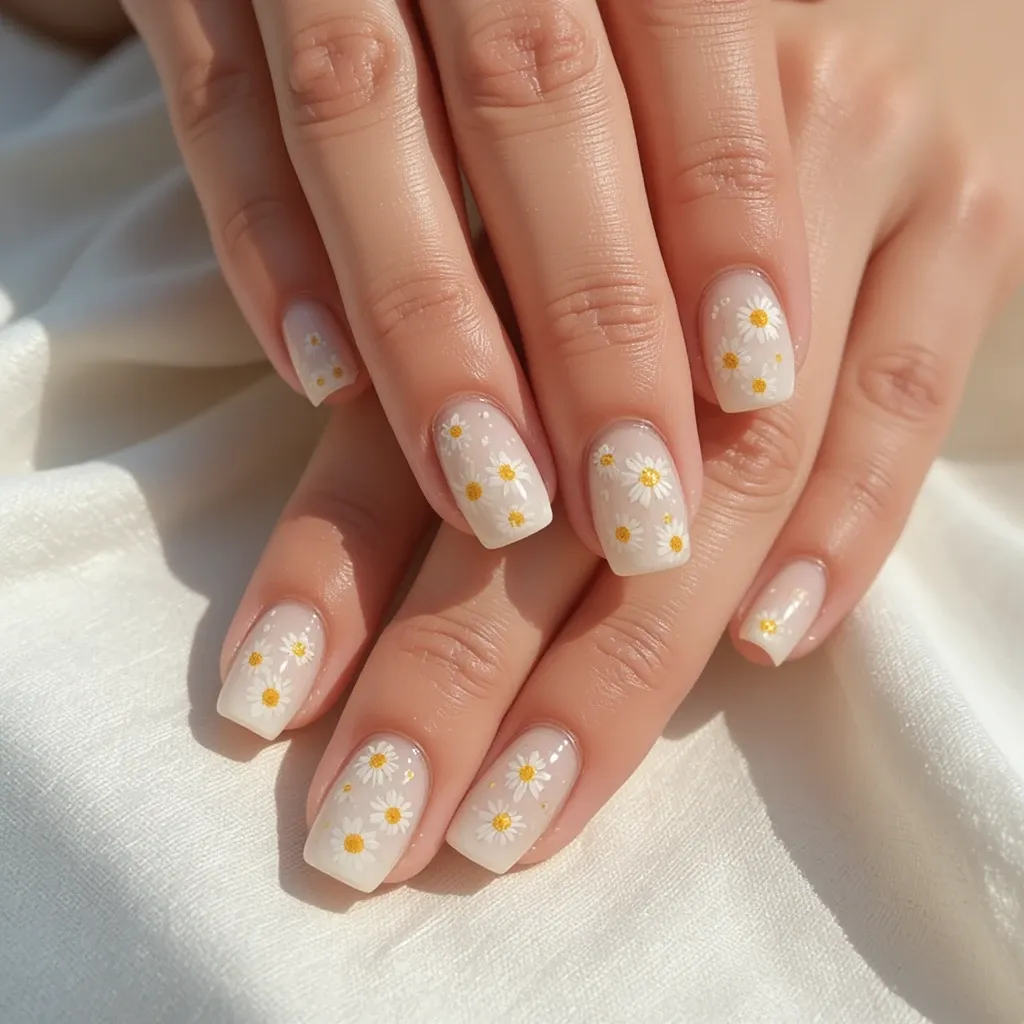
White or cream base with small painted daisies in yellow and white creating cheerful, retro-inspired nail art that feels both nostalgic and fresh. The simple flower shape keeps it achievable even for nail art beginners. This playful design instantly lifts mood and coordinates with spring’s cottage-core aesthetic.
- Difficulty: Intermediate
- Time to complete: 45 minutes
- Best for: Beginners to nail art who want achievable spring flowers
- Why it works: Daisies represent innocence and new beginnings—perfect for spring
- What makes it different: Simple flower shape keeps it achievable even for nail art beginners
Step-by-step:
Materials Needed:
- Base coat
- White or cream polish
- Yellow polish
- White polish (for petals)
- Detail brush
- Small dotting tool
- Top coat
Instructions:
- Apply base coat, let dry. Apply two coats of white or cream to all nails. Let dry completely.
- Choose 1-2 accent nails for detailed daisy art.
- Using small dotting tool, dip in yellow polish and place dots where you want daisy centers—2-3 daisies per nail in irregular spacing.
- Using fine detail brush dipped in white polish, paint small petals radiating from each yellow center:
- Daisies typically have 6-8 petals
- Make simple elongated petal shapes (like small teardrops)
- Petals don’t need to be perfect—irregular looks natural
- Optional: Add tiny green stems or leaves using detail brush and sage green polish.
- On non-accent nails, keep solid base, or add single daisy in corner for subtle coordination.
- Let dry completely (10 minutes).
- Seal with top coat. Apply 2-3 coats over 24 hours to protect artwork.
Simplified Version:
- Use dotting tool for entire design
- Place medium yellow dot for center
- Use smaller dotting tool to place white dots in circle around center
- Creates simple dotted daisies with zero brush skills
Butterfly Accent
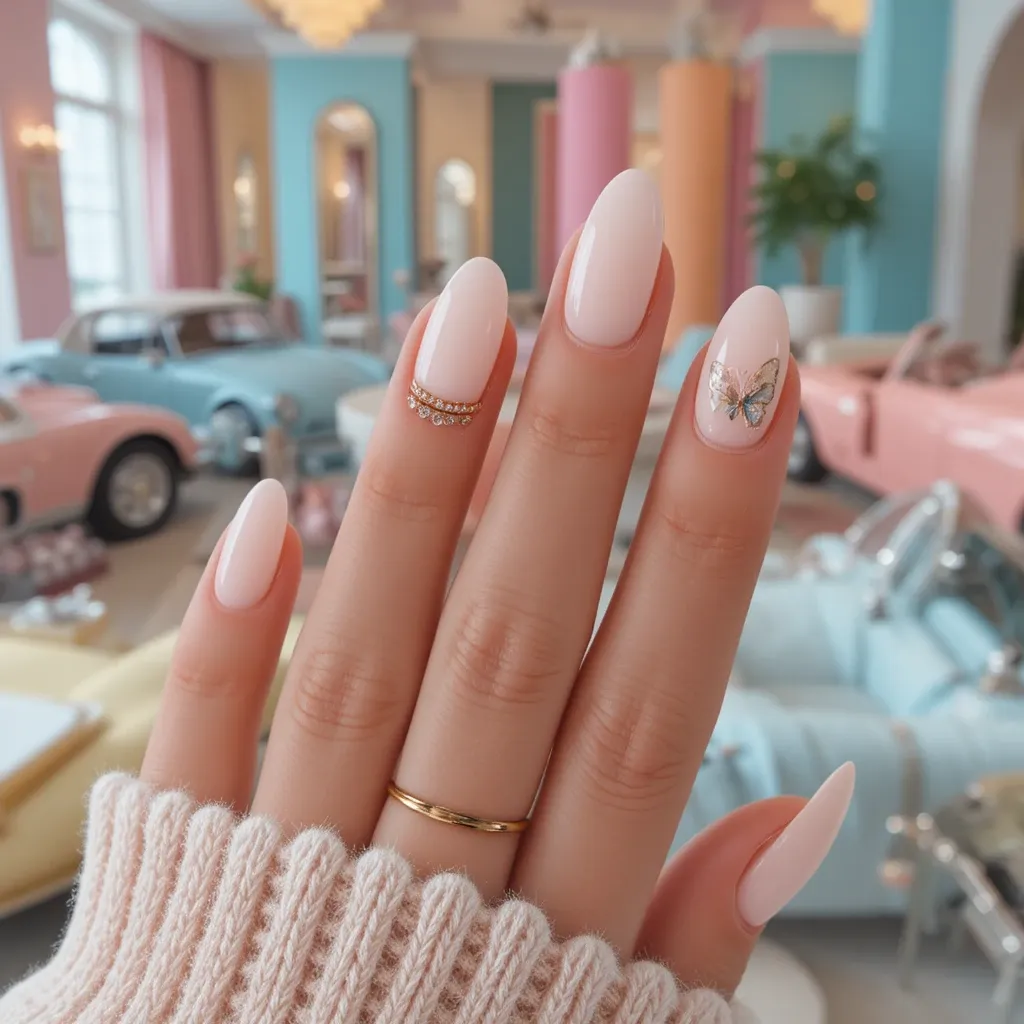
Neutral base with a single, detailed butterfly on one nail using spring colors and delicate line work for whimsical charm without childishness. The singular placement keeps it sophisticated rather than juvenile. This design adds personality while maintaining professional appropriateness.
- Difficulty: Advanced (hand-paint) or Beginner (decals)
- Time to complete: 45 minutes (decals) or 60 minutes (hand-paint)
- Best for: Adding personality while maintaining professional appropriateness
- Why it works: Butterflies symbolize transformation and renewal—spring’s core themes
- What makes it different: Singular placement keeps it sophisticated rather than juvenile
Step-by-step (Using Decals – Easiest Method):
Materials Needed:
- Base coat
- Neutral polish (nude, blush, or soft pink)
- Butterfly nail decals or water slide transfers
- Tweezers
- Top coat
Instructions:
- Complete full manicure with neutral base on all nails. Let dry completely (20+ minutes).
- Select butterfly decal. Cut around it closely with small scissors.
- If using water slide decals, submerge in room temperature water for 20-30 seconds until it slides off backing easily.
- Using tweezers, carefully place butterfly on ring finger nail. Position where desired (centered, diagonal, or off to side).
- Use dry paper towel or silicone tool to gently press out air bubbles, working from center outward.
- Ensure all edges are adhered smoothly.
- Let dry 5 minutes.
- Apply top coat over entire nail, including over decal, to seal permanently. Apply 2-3 coats over 24 hours.
Step-by-step (Hand-Painting – Advanced Method):
Materials Needed:
- Base coat
- Neutral polish
- Spring colors (2-3)
- Fine detail brush (size 00)
- Dotting tool
- Top coat
Instructions:
- Complete full manicure with neutral base. Let dry completely.
- On ring finger, use detail brush with first butterfly color to paint two connected triangular wing shapes—one large upper wing, one smaller lower wing. Repeat on opposite side for total of 4 wings.
- Using second color, add small dots or simple patterns inside wing shapes for detail.
- Use dark color (brown or black) and finest brush to add simple body line down center and two small curved lines for antennae.
- Let dry completely (10 minutes).
- Seal with multiple coats of top coat.
Stamping Method (Middle Ground):
- Purchase butterfly nail stamping plates ($5-10)
- Apply polish to design on plate, scrape excess, press stamper onto design, roll onto nail
- Creates perfectly detailed butterflies without hand-painting skills
Garden Lines

Minimalist line art depicting simple stems, leaves, or flower outlines in black or deep green on nude or pastel bases for modern botanical style. The abstract approach keeps it artistic rather than literal or expected. This design works beautifully for those who want spring themes without busy patterns.
- Difficulty: Intermediate
- Time to complete: 35 minutes
- Best for: Those who want spring themes without busy patterns
- Why it works: Abstract approach keeps it artistic rather than literal
- What makes it different: Simplified interpretation feels modern and intentional
Step-by-step:
Materials Needed:
- Base coat
- Nude or pastel base color
- Black or dark green polish
- Fine striping brush or nail art pen
- Top coat
Instructions:
- Complete full manicure with base color on all nails. Let dry completely (15+ minutes).
- Choose 1-2 accent nails.
- Using striping brush dipped in black or dark green (wipe off excess for finest line), create simple curved stem line starting from bottom of nail extending upward.
- From stem line, add 2-3 simple leaf shapes or small flower outlines:
- For leaves: two curved lines meeting at point
- For simple flower outlines: small circle with 4-5 small lines radiating out
- Keep design minimal—less is more. Just 1-2 simple botanical elements per nail.
- Optional: Add one or two fine line details or small dots to enhance botanical theme.
- Let dry completely (10 minutes).
- Seal with top coat. Apply 2-3 coats to protect delicate line work.
Using Nail Art Pen (Easier):
- Purchase fine-tip nail art pens in black or dark green ($8-12 for set)
- After base color is completely dry, simply draw botanical lines and shapes directly onto nail
- Let ink dry (2-3 minutes), seal with top coat
- Pens give much more control than brushes
Pros and Cons of Spring Nail Designs
I’ve been keeping notes on these for the past three seasons. Here’s the honest breakdown of what works and what doesn’t.
✅ Pros
Endless color variety – Spring shades range from barely-there nudes to bold cobalt blues. You’re not stuck with one type of look.
Matches the season’s wardrobe – Pastels and muted tones actually work with spring’s lighter fabrics and colors. Your nails won’t clash with what you’re wearing.
Hides minor imperfections – Sheer and milky finishes (like the Glazed Donut Chrome) are forgiving. They don’t show every tiny mistake the way dark winter colors do.
Works for any occasion – You can go subtle for the office or bold for a wedding. Spring nails scale up or down depending on the design.
Grows out gracefully – Lighter colors and placement techniques (color concentrated at tips, faded bases) make regrowth less obvious. You get an extra week before a fill or redo looks necessary.
Photographs well – Spring light is flattering, and so are these colors. Your nail pics will look good in natural daylight.
Beginner-friendly options exist – Solid pastels, nudes, and simple accent nails don’t require advanced skills. You can ease into spring nails without frustration.
❌ Cons
Pastels are streaky – I’m not going to sugarcoat this: light colors like butter yellow and baby blue need 3-4 thin coats. If you apply them thick, they bubble. If you rush, they streak. Patience is required.
Shows scratches easily – Glossy finishes on light colors show micro-scratches within days. You’ll see them in certain lighting, and there’s no fixing it without reapplying top coat.
Not repairable if it chips – Once a pastel chips, touching it up looks obvious. You either live with it or redo the whole nail.
Removal takes time – If you choose gel for durability, removal is 15-20 minutes of soaking. You can’t rush it without damaging your nails.
Expensive upfront if doing chrome – The gel lamp, chrome powders, and practice attempts add up. My first chrome manicure cost about $60 in supplies before I got it right.
Learning curve with nail art – Those delicate floral designs? They take practice. My first cherry blossoms looked like blobfish. Count on 3-4 tries before you’re happy with results.
Some designs limit activities – Long stiletto acrylics and 3D flowers will snag on everything. Gardening, typing, even putting on jeans becomes cautious. You adapt, but it’s real.
Fades faster than expected – Neon yellows and bright corals lose intensity after 4-5 days. You’ll notice they’re not as vibrant, even if the polish hasn’t chipped.
Staining risk with certain colors – Dark purples, blues, and reds can stain your natural nails. If you skip base coat even once, you’ll have discoloration for weeks.
Maintenance commitment – Acrylics and gels need fills every 2-3 weeks. If you let them go too long, they lift and trap moisture underneath, which can lead to issues.
Maintenance Tips for Spring Nails
I’ve killed plenty of manicures by not paying attention to maintenance. Here’s what actually helps them last.
Days 1-3: The Critical Window
Apply a second top coat after 24 hours
Use Seche Vite or Essie Gel Couture Top Coat. Apply it exactly 24 hours after your original manicure. This seals any microscopic gaps that formed as the polish settled. I started doing this after noticing my nails always chipped on day 4—now they make it to day 7.
Keep nails out of hot water for the first 2 hours
Hot showers right after painting soften the polish and make it peel later. If you must shower, keep water temperature warm (not hot) and don’t soak your hands.
Apply cuticle oil morning and night
Use CND Solar Oil or Sally Hansen Vitamin E Oil. Put it on before bed and right after washing hands. Dry cuticles pull away from the polish edge, creating gaps where water gets in and causes lifting. This matters more with gels than regular polish, but both benefit.
Days 4-7: The Wear-In Phase
Reapply top coat every 3 days
Not a thick coat—just a thin maintenance layer. Focus on the tips and edges where wear shows first. This single habit doubled my manicure life from 5 days to 10.
Wear gloves for dishes and cleaning
I know, nobody wants to hear this. But dish soap is brutal on nail polish. A $3 pair of rubber gloves from the grocery store saves $30 manicures. Keep them under the sink where you’ll actually use them.
File any snags immediately
If you catch a nail on something and feel a rough edge, file it right then. Don’t wait. That tiny snag will catch again and peel up the whole tip. Use a fine glass file (Czechia Crystal or Germanikure) which seals the edge as it files.
Days 8-14: If You’re Still Going
Watch for lifting at the cuticle
Once the polish starts separating at the cuticle line, water gets underneath. If you see lifting on more than 2 nails, it’s time to remove rather than push longer. Trying to stretch another week usually ends with peeled-off polish and damaged nails.
Add a strengthening base coat under refills
If you’re doing gel fills, ask your technician to use a rubber base coat (like Young Nails Protein Bond or Gelish pH Bond) on the new growth. This flexes with your nail instead of cracking.
Refresh matte finishes
Matte top coats wear down and become patchy glossy spots after 10 days. Apply a fresh matte top coat (Essie Matte About You or OPI Matte Top Coat) to restore the finish. Remove old top coat first with alcohol or you’ll get texture issues.
Removal Day
Never peel or pick
I’ve done this. Everyone has. It peels off layers of your natural nail, leaving thin spots that take 3-4 months to grow out. Soak off properly or accept that you’ll be dealing with weak nails through summer.
For regular polish: Use pure acetone
Non-acetone removers take forever and require excessive rubbing, which damages nails. Pure acetone (100%) removes polish in 30 seconds with minimal rubbing. Your nails won’t dry out if you wash hands after and reapply oil.
For gel: The tin foil method works
Soak cotton balls in acetone, place on nails, wrap each fingertip in foil, wait 15 minutes. The gel should slide off with gentle pushing. If it’s not moving, soak longer—don’t scrape.
Wash hands thoroughly after removal
Acetone residue continues drying nails if left on. Wash with soap and water immediately, then soak in cuticle oil for 5 minutes. Your nails will look dry and white after removal—the oil brings them back.
Common Mistakes with Spring Nails (And How to Fix Them)
I’ve made all of these mistakes so you don’t have to.
Mistake #1: Streaky Pastels
What it looks like: Patchy color with visible lines where your brush dragged. You can see your natural nail through parts of the polish.
Why it happens: Pastels have less pigment than darker colors. When you apply them too thick trying to cover faster, they drag and streak. When you apply them too thin, they don’t cover at all. It’s a Goldilocks situation.
The exact fix:
- Start with a white base coat (Essie’s “Blanc” or any drugstore white). Let it dry completely—5 minutes minimum.
- Apply your first pastel coat thinly. Like, embarrassingly thin. It will look terrible and patchy.
- Wait 3 full minutes. Not 2, not “when it feels dry.” Set a timer.
- Apply second thin coat. Still patchy? Good. Wait 3 minutes.
- Apply third thin coat. You should have opacity now.
- If you still see through it, add a fourth thin coat rather than making any coat thicker.
How well it works: This method works 100% of the time. The white base does most of the heavy lifting—the pastel just tints it. Your manicure takes longer (20 minutes vs 10), but it actually looks like the bottle color instead of a streaky mess.
Mistake #2: Chrome Powder That Won’t Stick
What it looks like: Patchy chrome with bald spots where the powder didn’t adhere. Or no chrome effect at all—just sparkly disappointment.
Why it happens: The top coat you applied before rubbing the powder wasn’t tacky enough, or you cured it before adding powder. Chrome powder needs an uncured, sticky surface to grab onto.
The exact fix:
- Apply your gel color and cure normally.
- Apply a no-wipe gel top coat (crucial—wipe top coats won’t work).
- DO NOT CURE. The top coat should be wet and tacky.
- Using a silicone eyeshadow applicator (not a brush—the powder sticks to brushes), scoop up a small amount of chrome powder.
- Rub it onto the wet top coat in firm circular motions. Keep rubbing until you see the mirror effect developing—this takes 30-60 seconds per nail.
- Dust off excess with a soft brush.
- Cure the top coat with powder embedded in it.
- Apply another layer of top coat to seal, then cure.
How well it works: This works every time if your top coat is no-wipe and uncured. The powder adheres only to the sticky layer—once cured, it won’t stick at all. If you accidentally cured it, wipe with alcohol to remove the inhibition layer and try again with fresh top coat.
Mistake #3: Bubbles in Your Polish
What it looks like: Tiny air pockets in the dried polish. Some look like small dots, others like the surface texture of an orange peel.
Why it happens: Three common causes—shaking the bottle before use (creates bubbles you then apply), applying thick coats (traps air that can’t escape), or using old polish that’s gotten thick and goopy.
The exact fix:
- Stop shaking your polish. Roll it between your palms to mix instead.
- For thick polish, add nail polish thinner (OPI or Seche Restore)—not acetone. 2-3 drops, roll gently, test consistency.
- Apply thinner coats than you think you need. Bubbles form when the top dries before bottom air can escape.
- Wait 2-3 minutes between coats minimum.
- If you see bubbles forming as you apply, stop and start over on that nail. You can’t fix bubbles once they’re there—they’ll dry into the finish.
How well it works: Prevention is 100% effective. Fixing bubbles after they’ve dried isn’t possible without removing and restarting. If you get one bubble on an otherwise good nail, you can sometimes pop it with a pin before it dries and very gently smooth the area, but this is risky and usually makes it worse.
Mistake #4: Cuticle Flooding
What it looks like: Polish that’s spread onto your skin around the nail. When it dries, it lifts away from the nail plate and creates a gap where water gets in, causing chipping within 2-3 days.
Why it happens: Too much polish on the brush, or starting your stroke too close to the cuticle. You’re trying to get full coverage, so you push the polish right up to the skin, but it spreads farther than expected.
The exact fix:
- Wipe one side of the brush on the bottle neck before each stroke. You want less polish than you think.
- Start your brush stroke in the middle of the nail, then push back toward the cuticle. This gives you control over exactly where the polish stops.
- Leave a tiny gap (hair-width) between polish and cuticle. This looks intentional and clean—flooded cuticles look sloppy even if the polish stays on.
- If you do flood, stop immediately. Use a thin cleanup brush (any angled eyebrow brush works) dipped in acetone to trace along the cuticle and remove the excess before it dries. Don’t wait until the end—it’s much harder to remove dried polish from skin.
How well it works: The cleanup brush trick removes 100% of flooding if you do it right away. Wait 30 seconds and it’s harder. Wait 2 minutes and you’re scraping dried polish off skin, which often pulls the edge of your manicure up. Fix it immediately or live with it.
Mistake #5: Top Coat That Shrinks Your Polish
What it looks like: After applying top coat, the color pulls back from the tips and edges, leaving a thin gap of exposed nail. Your manicure looks smaller than it was before top coat.
Why it happens: Some quick-dry top coats (especially Seche Vite) contain solvents that “shrink” as they dry. If your color underneath isn’t fully dry, the top coat shrinks and pulls the color with it.
The exact fix:
- Let your color dry longer than you think necessary—15 minutes minimum before quick-dry top coat.
- When applying top coat, “wrap the tips”—run the brush along the free edge of your nail so top coat seals the tip completely. This prevents shrinkage from pulling color away from the edge.
- If shrinkage happens anyway, apply another layer of top coat once the first is dry. This usually covers the exposed gap.
How well it works: Wrapping tips prevents about 80% of shrinkage issues. The extra top coat layer fixes the remaining 20%. The real solution is patience—letting color dry fully before quick-dry top coat eliminates the problem entirely.
What Happens After 4 Weeks? A Real Wear Timeline
I wore gel extensions with a soft pink spring color for four weeks straight to see what actually happens. Here’s the week-by-week reality.
Week 1: The Honeymoon Phase
Days 1-3: Perfect. Shiny, smooth, exactly what you paid for. The color looks vibrant, the shape is clean, and you catch yourself looking at your nails throughout the day.
Days 4-7: The first signs of wear appear. The high-gloss shine dulls slightly—you notice it in direct sunlight comparison photos. The tips might show micro-fine scratches if you look closely, especially if you type a lot or use your hands for detailed work. Cuticles start growing, leaving about 1mm of new nail at the base.
What you can do: Apply a fresh top coat on day 5 to restore shine and seal the tips. This buys you another 5-7 days before noticeable wear.
Week 2: The Comfort Zone
Days 8-10: Regrowth is obvious now—2-3mm of natural nail at the cuticle. If you used a light color, the contrast isn’t stark yet. If you used a dark or bright color, the new growth is visible from normal social distance. No chips yet if application was good, but the tips might show slight wear on the underside where they contact surfaces.
Days 11-14: This is when most people start thinking about fills. The cuticle area has 3-4mm of growth. The balance of the nail feels different—the center of gravity shifts forward as the new growth extends. You might catch yourself adjusting how you type or pick things up. No chips still, but the nail feels “older.”
What you can do: File and reshape if the free edge has grown unevenly. Apply cuticle oil 3-4 times daily—dry cuticles make grown-out nails look worse. If you have an event, this is the last week they’ll look intentional rather than overgrown.
Week 3: The “Should I Keep These?” Phase
Days 15-17: Growth is significant now—5-6mm of natural nail. The extensions look obviously grown out unless you’re going for that “Russian manicure” look (which requires fills every 7 days anyway). The nail plate balance is off; the extension feels heavier and more forward than it did week one.
Days 18-21: The first real problems appear. Lifting might start at the cuticle edge where moisture gets under the product. If you catch it early, you can seal with nail glue or top coat temporarily. If you ignore it, water gets in and you risk greenies (bacterial growth under the enhancement—it’s green and requires removal). The tips might show significant wear or small chips if you haven’t been maintaining top coat.
What you can do: If you’re trying to stretch to week four, seal any lifting immediately with nail glue applied with a toothpick. Keep nails dry—wear gloves for dishes and showers. Apply thick top coat every 2 days to protect tips. Accept that they don’t look fresh anymore and decide whether the extra week is worth the appearance.
Week 4: The “Why Did I Do This” Phase
Days 22-24: If you made it here, you’re either very committed or very busy. Growth is 7-8mm—more natural nail than enhancement at this point. The balance is completely off; the enhancement sits halfway down the nail plate and acts as a lever, increasing breakage risk. Lifting is likely present at the cuticle and possibly at side walls.
Days 25-28: Removal is urgent. The enhancement is now a liability. Every catch or bump transfers force directly to your natural nail plate. If you haven’t had breaks yet, you’re lucky. The lifted areas have probably trapped moisture and debris—your nails underneath may look white or soft. Color is likely faded, tips are chipped, and overall appearance is rough.
What you need to do: Remove immediately. Don’t try to fill at this stage—old product needs to come off completely before new application. After removal, your natural nails will be thin, flexible, and need 2-3 months of growth and care before another enhancement cycle. Soak them in cuticle oil daily for the next two weeks.
What I Learned From This Experiment
Week 2 is the sweet spot for fills. Pushing to week 3 is possible with maintenance, but week 4 is never worth it. The risk of nail damage outweighs the money saved by stretching one more week.
Light colors hide growth better than brights. The soft pink I used wasn’t noticeable until week 3. A hot pink or cobalt blue would have looked grown out by week 2.
Top coat maintenance makes a difference. The weeks I reapplied top coat every 3 days looked significantly better than the weeks I didn’t. It’s the single most effective extension strategy.
Your nails tell you when it’s time. By week 3, I could feel the difference typing and picking things up. By week 4, every catch hurt. Listen to that—it’s not just appearance, it’s physical feedback.
FAQs About Spring Nails
Short answers to questions people actually search for
Do pastel polishes really need a white base coat?
Yes, most do. Without white underneath, pastels look patchy and nothing like the bottle color. The white base does the actual covering—the pastel just tints it. Skip this step and you’ll need 5+ coats that still look uneven.
How do I stop my spring nails from chipping in the first week?
Two things help most: wrapping the tips (running top coat along the free edge) and reapplying top coat on day 3. Wrapping seals the most vulnerable part of the manicure. The day 3 refresh catches microscopic wear before it becomes a chip.
Can I garden with long spring nails?
You can, but you probably won’t enjoy it. Long nails dig into soil, catch on weeds, and trap dirt underneath. If gardening is regular for you, keep nails short to medium and wear gloves. Acrylics survive better than natural nails, but they still get dirty and can lift if soil gets underneath.
Why does my nail polish look different in spring sunlight?
Spring light has a different quality than winter or summer light—softer and more diffused. Sheer and milky finishes reflect this beautifully. Bright neons can look harsher. Nothing’s wrong with your polish; the light just changed.
How soon after removing gel can I apply new polish?
Wash your nails with soap and water first (acetone residue prevents adhesion), then apply cuticle oil and wait 30 minutes for it to absorb. Wipe nails with alcohol to remove oil just before new polish. Same-day reapplication works fine with this prep.
What nail shape lasts longest for active spring lifestyles?
Short almond or rounded squoval. These shapes have no sharp corners to catch and break. They also hide regrowth better than squares or coffins because the rounded edge follows the natural nail curve as it grows.
Do I need a UV lamp for chrome nails?
For the true mirror finish, yes—that requires gel. But Sally Hansen makes Chrome Nail Makeup and Essie has metallic collections that give a similar look with regular polish. They’re not as reflective, but they work without special equipment.
Why do my nails feel weak after removing spring gel polish?
Gel doesn’t weaken nails on its own, but removal often does. Filing, soaking, and scraping (even gentle scraping) removes layers of your natural nail surface. After removal, nails are thinner and need 2-3 months to grow out fully. Daily cuticle oil helps them flex without breaking during that time.
Can I mix different spring nail trends in one manicure?
Yes, and it often looks better than committing to one trend. Try chrome on one nail, a pastel on most nails, and one accent with negative space florals. The mix looks intentional and modern rather than “I couldn’t decide.”
How do I keep white spring nails from yellowing?
White polishes yellow from sun exposure and from dark colors underneath. Use a stain-blocking base coat (CND Stickey or Orly Bonder) and reapply top coat every few days. If yellowing happens, one day in direct sunlight actually reverses it—UV light bleaches the yellow out.
Making Spring Nails Work for You
Spring nails don’t have to be complicated or follow every trend you see on social media.
The designs that actually work are the ones that fit your life—not just your Pinterest board. If you garden, keep them short. If you type all day, skip the 3D flowers. If you’re new to nail art, start with a single accent nail instead of ten.
A good place to start is choosing one solid pastel or nude from this article and applying it with the white base coat technique. That one change—white underneath—will give you professional-looking results even if your application isn’t perfect. Once you’re comfortable with that, try adding a single accent nail with dots or simple line art.
The products I’ve recommended are ones I actually use and repurchase. The Beetles gel system ($25-30 on Amazon) works as well as salon brands. The chrome powders ($8-10) last through dozens of manicures. You don’t need a professional setup to get results—you just need the right technique and patience with the learning curve.
One last thing: Your nails will tell you when a design isn’t working. If you’re constantly avoiding activities or worrying about breaks, that style isn’t for you right now. There’s no shame in switching to something more practical. Spring is long enough to try several looks.
Save this article for when you need specific steps or troubleshooting. Come back to the maintenance tips when your manicure hits day 5 and you want to stretch it further. And when a design fails (they all do eventually), the common mistakes section will tell you why and how to fix it next time.
Consider beginning with the Ballet Slipper pink or Vanilla Latte nude—they’re forgiving, flattering, and work with absolutely everything you’ll wear this season.