15 Nashville Nails Ideas You’ll Love
Nashville Nails ideas blend Southern charm with modern sophistication—think warm metallics, earthy browns, and just the right amount of sparkle. These designs work whether you’re hitting Broadway bars, attending a rooftop concert, or just want nails that feel like Music City.
I’ve tested most of these looks myself (and messed up plenty along the way), so this guide includes the real-world tips I wish someone had given me. You’ll get complete step-by-steps for each design, specific product recommendations with actual prices, and honest talk about what’s tricky versus what’s truly beginner-friendly.
How to Choose the Best Nashville Nails ideas Design
For your first time: Start with solid creams like Whiskey Barrel Brown (#3) or Peach Sweet Tea Shimmer (#10). They look polished without requiring any nail art skills.
If you have a professional job: Go with Bluebird Café Blue (#7), Smoky Quartz Gray (#9), or a simple nude with one tiny accent nail. Nothing that clacks loudly on keyboards.
For special events: Honky Tonk Gold Chrome (#1) or Rhinestone Cowgirl Glam (#8) photograph beautifully and catch light on dance floors.
If you’re comfortable with nail art: Try the Music City Skyline (#4) or Guitar String accent (#11). Both need steady hands but look incredible when they work.
If you have short nails: Stick to lighter colors and skip busy designs. Hot Chicken Red (#5) and soft metallics actually make short nails look longer.
If you change your mind often: Avoid chrome powders and heavy rhinestones—they’re harder to remove and take forever to soak off.
15 Stunning Nashville Nail Ideas
1. Honky Tonk Gold Chrome
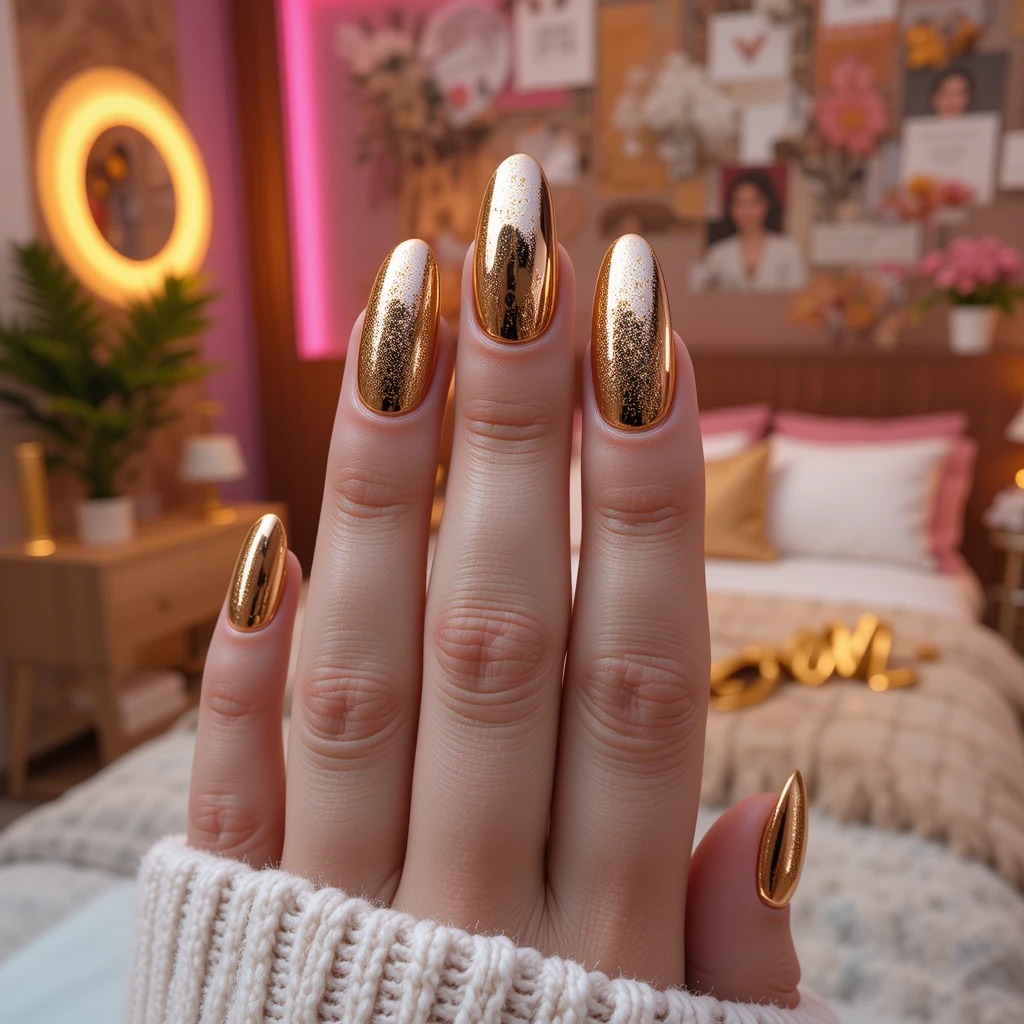
Warm champagne gold with a mirror-like chrome finish that catches light like the neon signs lining Lower Broadway at dusk. This liquid metal look delivers high-impact shine without feeling costume-y, creating an expensive, luxurious effect on your fingertips. The warm gold undertones complement virtually every skin tone while adding instant glamour to even the simplest outfits.
Difficulty: Intermediate
Time to complete: 45-60 minutes
Best for: Anyone with an event where they’ll take lots of photos—this photographs like jewelry
Why it works: The warm gold flatters every skin tone and transitions from day to night effortlessly
What makes it different: Unlike basic metallics, this has actual mirror reflectivity
Products you’ll need:
- Gelish Foundation Base Coat ($15-18 at Sally Beauty) – creates better adhesion than cheaper bases
- Beetles Black Gel Polish ($8-10 on Amazon) – affordable and opaque in two coats
- Makartt Champagne Gold Chrome Powder ($9 for set with applicator) – finer particles than drugstore versions
- Modelones No Wipe Top Coat ($10-12) – specifically formulated not to dull chrome
- UV/LED lamp ($25-40) – minimum 48W for proper curing
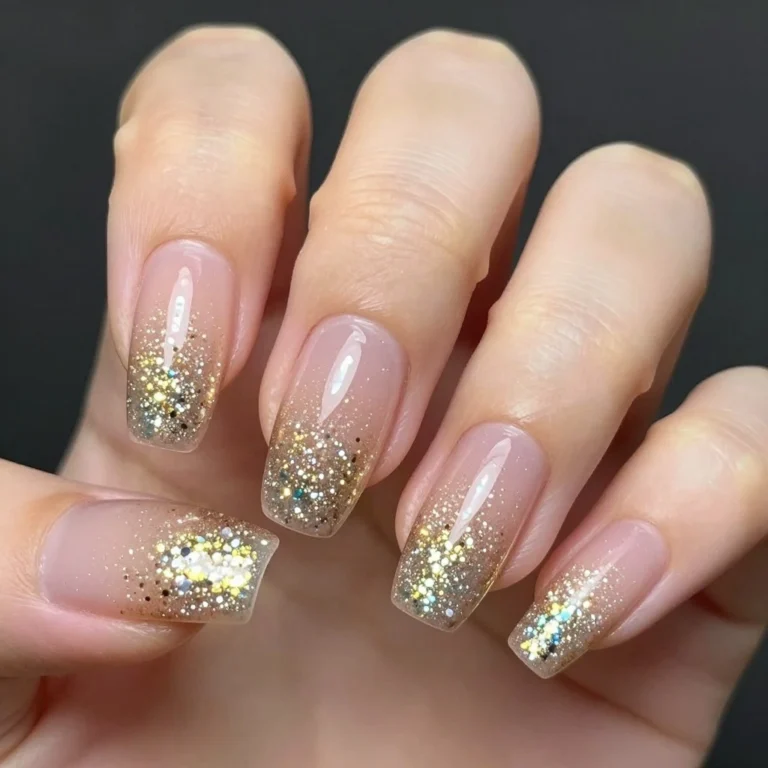
2. Broadway Lights Glitter Ombré
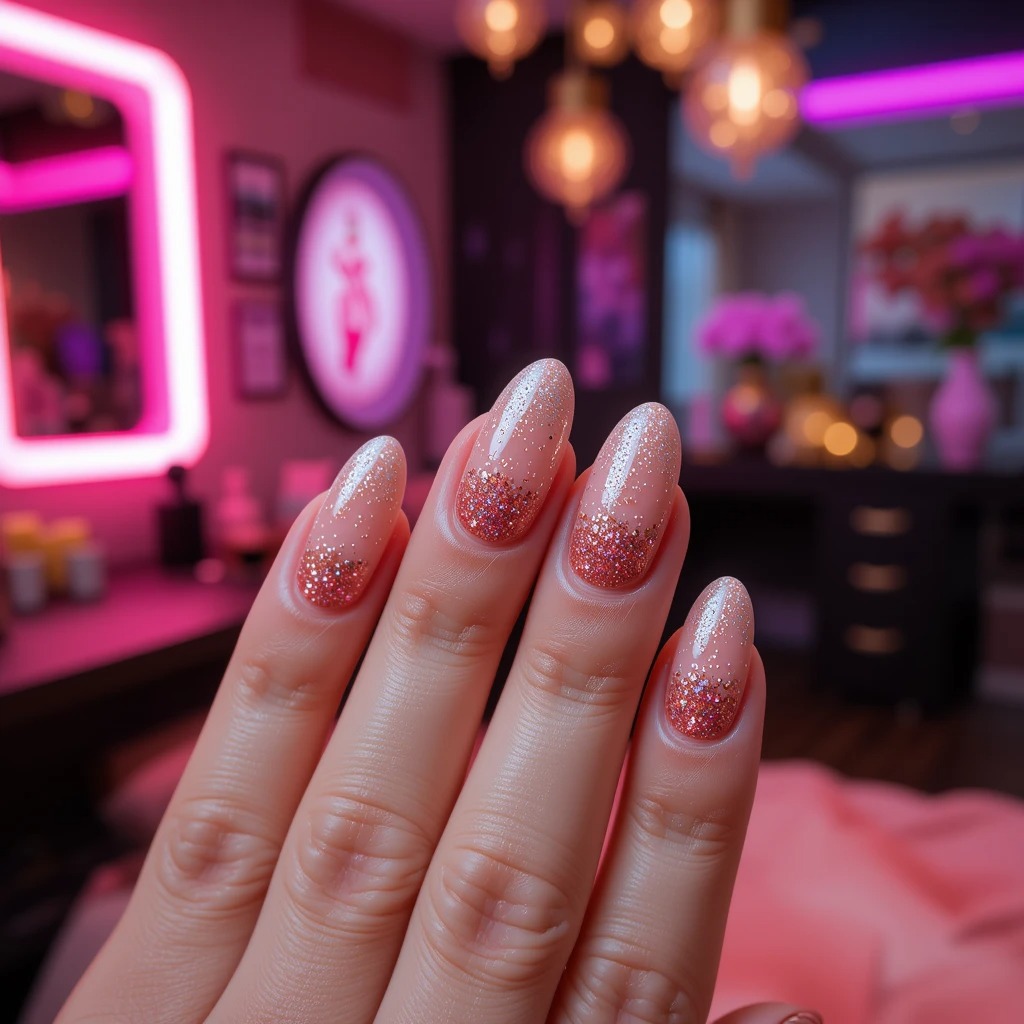
Transition from nude beige at the cuticle to densely packed rose gold glitter at the tips, mimicking the glow of Nashville Nails famous Broadway district. This gradient effect creates dimension and visual interest without requiring intricate nail art skills or precision application. The sparkling tips add festive energy while the nude base keeps the look grounded and wearable for everyday activities.
Difficulty: Beginner
Time to complete: 30-40 minutes
Best for: Someone who wants sparkle without full-coverage glitter commitment
Why it works: The nude base makes the glitter feel intentional rather than overwhelming
What makes it different: The gradient keeps it from looking like a child’s craft project
Products you’ll need:
- Essie First Base ($11 at Ulta) – prevents staining from glitter
- Essie “Ballet Slippers” ($10) – classic sheer nude that layers well
- China Glaze “Rose Gold Sparkle” ($8 at Sally) – fine particles blend smoothly
- Seche Vite Dry Fast Top Coat ($11) – two layers minimum for glitter
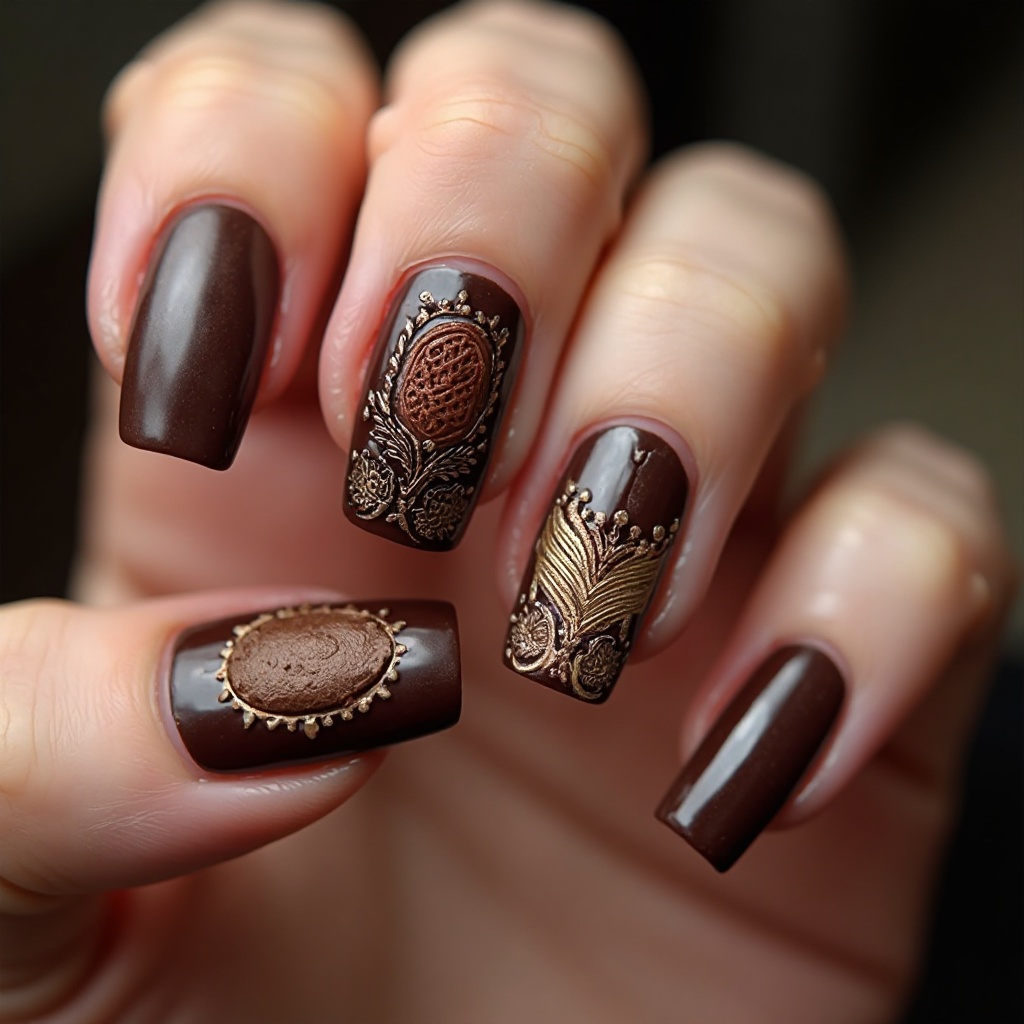
3. Whiskey Barrel Brown Matte
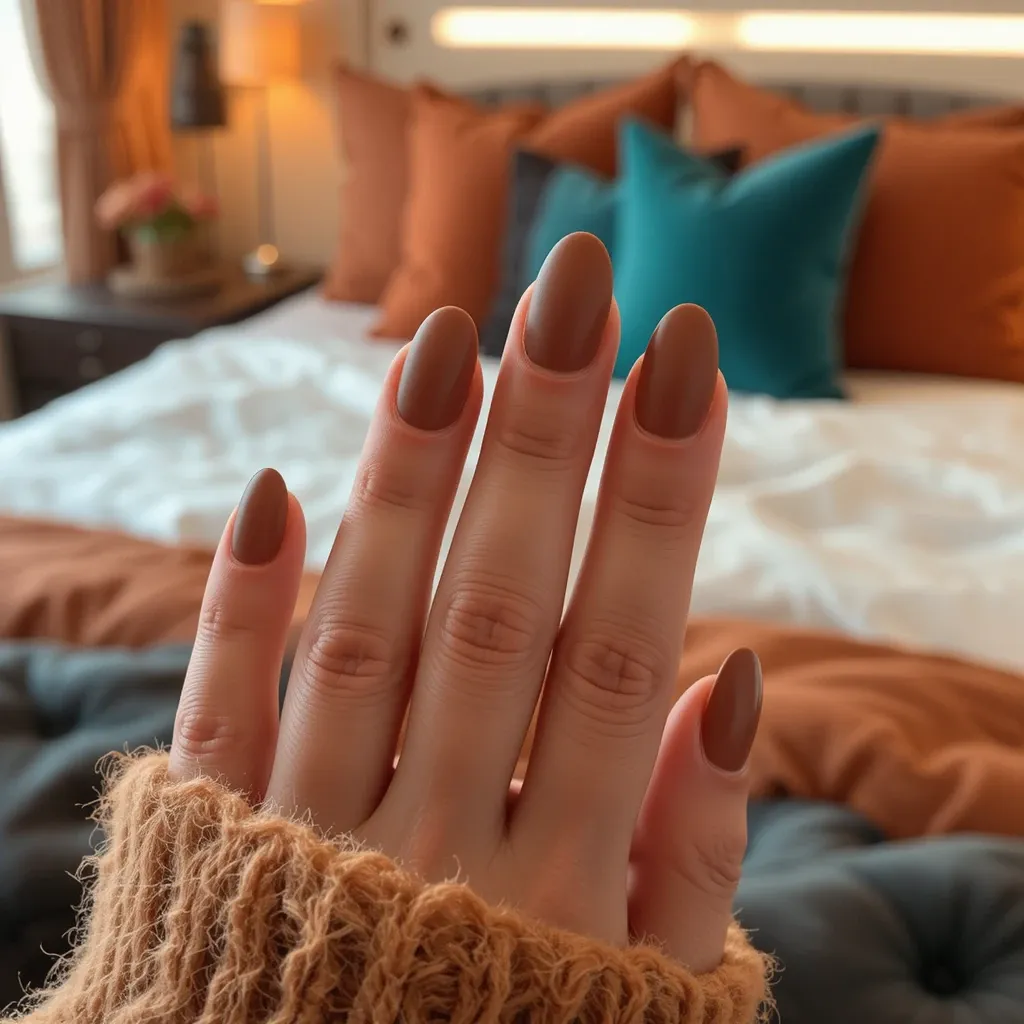
Rich cognac brown with warm caramel undertones and a velvety matte finish that evokes the aged oak barrels of Tennessee whiskey distilleries. This sophisticated earth tone delivers depth and richness without the heaviness of darker chocolates or blacks. The matte texture adds a contemporary, editorial quality that feels both grounded and fashion-forward.
Difficulty: Beginner
Time to complete: 25-35 minutes
Best for: Absolutely everyone—it’s the most versatile shade in this collection
Why it works: The warm brown flatters all skin tones and the matte finish hides minor imperfections
What makes it different: Most browns lean cool or orange; this hits the perfect warm-neutral sweet spot
Products you’ll need:
- OPI Natural Nail Base Coat ($13 at Ulta) – ridge-filling formula smooths imperfections
- Essie “Hot Coco” ($10) – perfect warm brown, not too dark
- Essie Matte About You ($11) – applies smoother than drugstore mattes
- Reapply cuticle oil after 24 hours—matte finish can look dry otherwise
4. Music City Skyline Accent

Soft gray base with one accent nail per hand featuring a delicate black line drawing of Nashville’s iconic skyline including the AT&T Building. The neutral gray base provides a modern, urban foundation while the skyline art adds personalized Nashville pride without being overly literal. The minimalist line work keeps the design clean and sophisticated rather than touristy or cartoonish.
Difficulty: Intermediate to Advanced
Time to complete: 40-50 minutes
Best for: Nashville locals who want subtle city pride without obvious tourist designs
Why it works: The minimalist line art feels artistic rather than literal
What makes it different: The Batman Building reference is instantly recognizable to locals
Products you’ll need:
- Essie “Chinchilly” ($10) – perfect soft gray, not too blue or warm
- Essie “Licorice” with fine brush ($10) – black that actually covers in one coat
- Ciate London Wonderpen in Black ($15 at Sephora) – easier than brush for beginners
- Size 00 liner brush ($5-8 on Amazon) – Kokoist brand has good control
- Practice paper—seriously, sketch 5-6 times first
5. Hot Chicken Red Cream
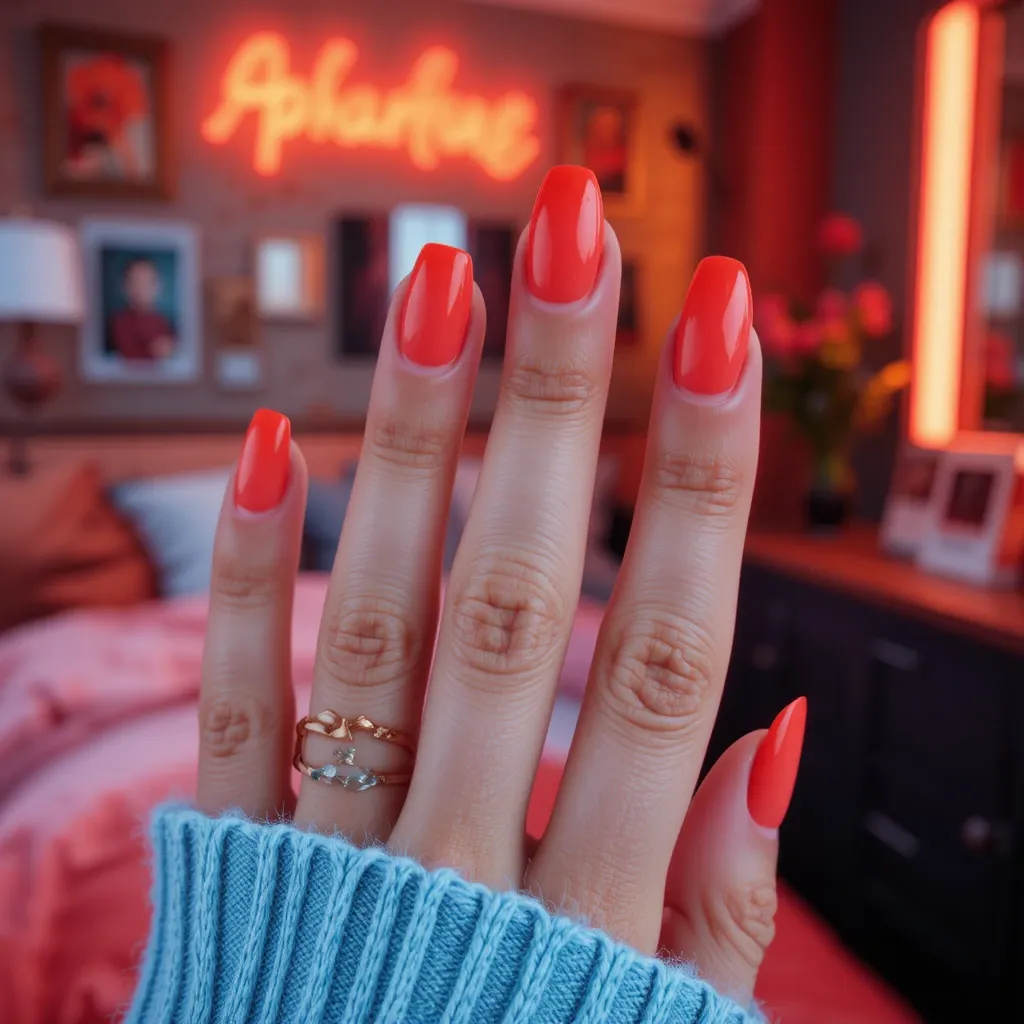
Vibrant red-orange with warm coral undertones and a creamy, opaque finish that channels the bold, spicy energy of Nashville’s legendary hot chicken. This fiery shade leans warm rather than cool, creating a universally flattering pop of color that energizes any look. The cream finish provides full coverage in two coats while maintaining a polished, salon-quality appearance.
Difficulty: Beginner
Time to complete: 25-30 minutes
Best for: Anyone who wants a bold pop of color that actually looks good on everyone
Why it works: The warm coral undertones make it universally flattering unlike blue-reds
What makes it different: Most reds are either too blue or too orange; this hits Nashville heat perfectly
Products you’ll need:
- CND Stickey Base Coat ($13 at Ulta) – extra sticky to prevent staining
- Essie “Meet Me at Sunset” ($10) – perfect hot chicken orange-red
- Seche Vite ($11) – high-shine finish makes color pop
- Cleanup brush with acetone—red stains skin instantly
6. Country Star White Tips

Classic French manicure reimagined with crisp white tips and tiny gold star decals placed randomly across the nail bed. This fresh take on the traditional French combines timeless elegance with playful Nashville personality through strategic star placement. The white tips stay clean and professional while the gold stars add just enough sparkle to reference Music City’s celebrity culture.
Difficulty: Intermediate
Time to complete: 35-45 minutes
Best for: Professionals who want personality without breaking dress codes
Why it works: The white tips keep it classic; stars add whimsy without overwhelming
What makes it different: Random star placement feels modern, not cutesy
Products you’ll need:
- OPI “Bubble Bath” ($13) – the perfect sheer pink base
- OPI “Alpine Snow” ($13) – opaque white that doesn’t streak
- Born Pretty Gold Star Decals ($3-5 on Amazon) – better adhesion than drugstore brands
- French tip guides ($3) – KISS brand has curved edges that actually fit
- Gel top coat—regular polish won’t secure stars as well
7. Bluebird Café Blue Cream

Soft dusty blue with subtle gray undertones and a smooth cream finish that captures the intimate, artistic atmosphere of Nashville’s legendary songwriter venue. This muted shade reads as sophisticated and calming without feeling cold or sterile like brighter blues. The gray notes add complexity that prevents this color from appearing juvenile or overly sweet.
Difficulty: Beginner
Time to complete: 25-30 minutes
Best for: Anyone who wants color that’s noticeable but still professional
Why it works: The gray undertones keep it from looking like a kid’s bedroom
What makes it different: Most blues are too bright; this has songwriter-venue sophistication
Products you’ll need:
- Essie “Pret-a-Surfer” ($10) – perfect dusty blue with gray undertones
- Essie Here to Stay Base Coat ($11) – ridge-filling formula helps this shade look smooth
- OPI Top Coat ($13) – adds glass-like shine
- Thin coats are non-negotiable with this color
8. Rhinestone Cowgirl Glam
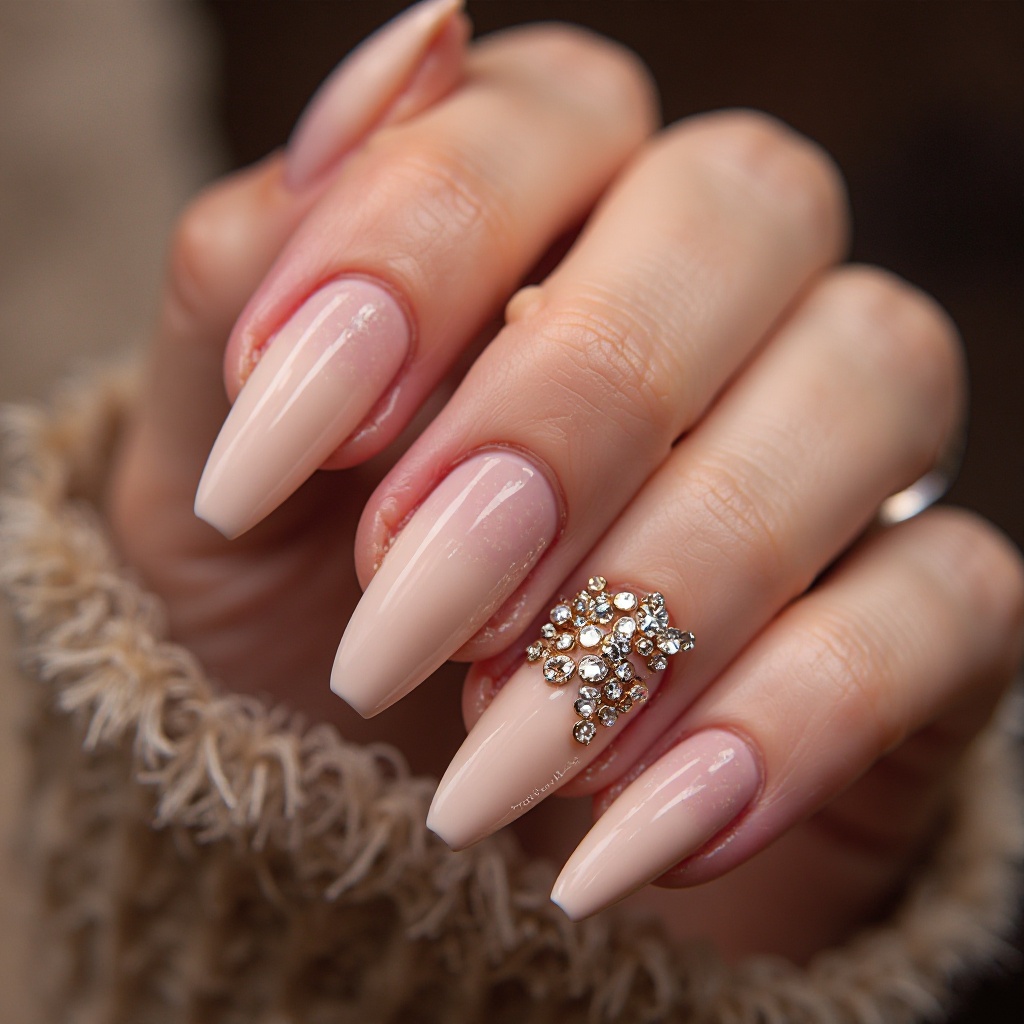
Nude pink base with a strategic rhinestone design featuring clear and gold crystals arranged in a delicate curved pattern on the ring finger only. The neutral base maintains wearability while the embellished accent nail delivers statement-making glamour worthy of Nashville’s rhinestone-studded country fashion heritage. The mixed crystal colors add dimension and catch light beautifully from every angle.\
Difficulty: Intermediate to Advanced
Time to complete: 45-60 minutes
Best for: Special occasions where you want sparkle that photographs well
Why it works: Single embellished nail keeps it wearable while still feeling fancy
What makes it different: Mixed crystal colors add dimension that single-color stones lack
Products you’ll need:
- Essie “Topless & Barefoot” ($10) – universally flattering nude
- Mixed rhinestone pack with clear and gold stones ($6-8 on Amazon) – get graduated sizes
- Nail glue or clear gel for adhesion
- Pointed tweezers ($5) – Winstonia brand has good precision
- Beetles Gel Top Coat ($8-10) – thick enough to encapsulate stones
9. Smoky Quartz Gray
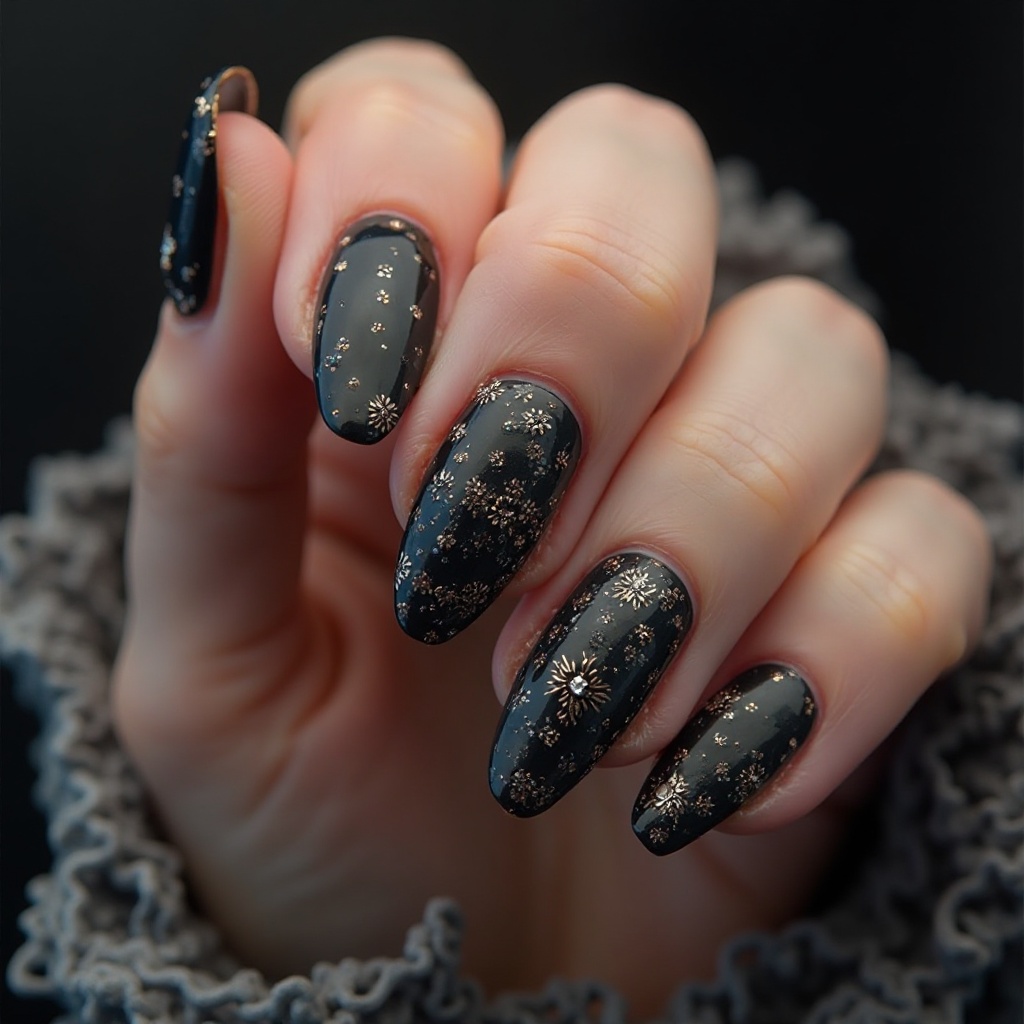
Deep charcoal gray with subtle brown undertones and a glossy finish that mimics the sophisticated, moody aesthetic of Nashville’s upscale rooftop bars. This near-black shade offers dramatic impact without the harshness of true black, creating depth that feels intentional and refined. The brown undertones warm up the gray, preventing it from reading as cold or severe against skin.
Difficulty: Beginner
Time to complete: 30-35 minutes
Best for: Anyone wanting dramatic impact without the harshness of black
Why it works: Brown undertones warm it up so it doesn’t look cold against skin
What makes it different: Most charcoal grays are blue-based; this one has Southern warmth
Products you’ll need:
- Orly Rubberized Bonder Base Coat ($12 at Ulta) – extra adhesion for dark colors
- Essie “Serene Slate” ($10) – perfect warm charcoal
- Sally Hansen Miracle Gel Top Coat ($9) – ultra-gloss finish
- Light application hand—dark colors streak easily
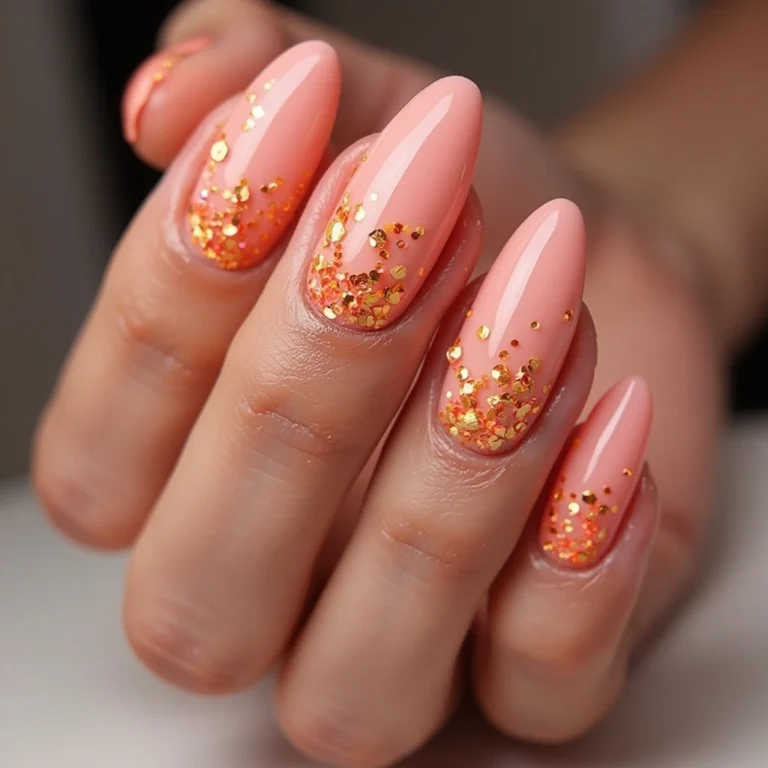
10. Peach Sweet Tea Shimmer
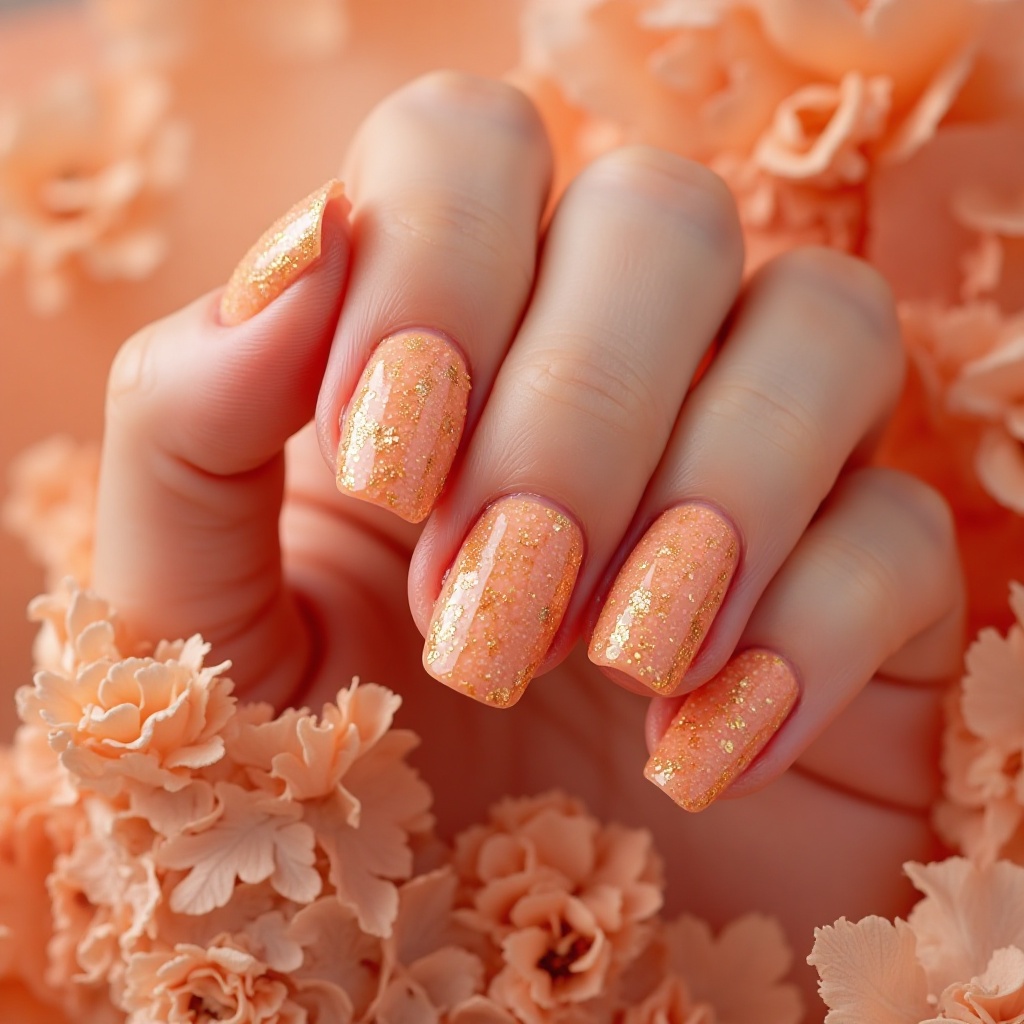
Soft peach with golden shimmer particles and a luminous finish that evokes the warm, welcoming essence of Southern sweet tea on a summer afternoon. This gentle shade offers just enough color to avoid looking bare while the shimmer adds subtle dimension and interest. The peachy-gold tone flatters all skin tones by enhancing natural warmth without appearing orange or artificial.
Difficulty: Beginner
Time to complete: 20-25 minutes
Best for: Job interviews, weddings, meeting parents—anything needing foolproof elegance
Why it works: The shimmer disguises minor application mistakes
What makes it different: Not too pink, not too orange—perfect peachy-gold balance
Products you’ll need:
- Sally Hansen Double Duty Base Coat ($5) – fine for this simple design
- Essie “A Crewed Interest” ($10) – perfect peachy-gold shimmer
- Essie Good to Go Top Coat ($11) – quick-drying with good shine
- Apply in natural light to see true shimmer effect
11. Guitar String Silver Accent
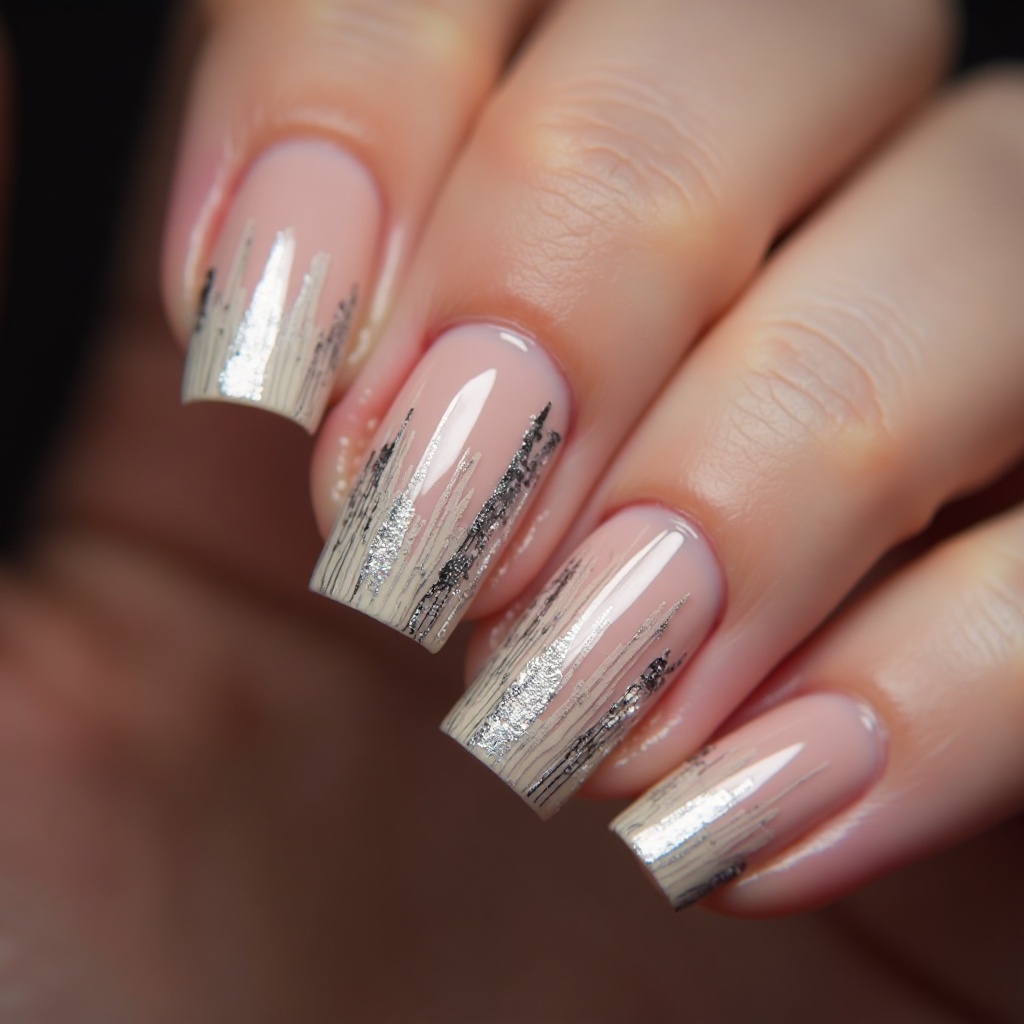
Clear or nude base with one accent nail featuring thin silver striping tape arranged to mimic guitar strings against the nail. This minimalist design celebrates Nashville’s musical heritage through subtle, artistic expression rather than literal imagery. The metallic stripes add linear interest and modern edge while the clear base keeps the overall look clean and sophisticated.
Difficulty: Intermediate
Time to complete: 30-40 minutes
Best for: Music lovers who want subtle references rather than obvious designs
Why it works: The minimalist approach feels artistic, not touristy
What makes it different: Most music nails use obvious notes; this one references actual instrument details
Products you’ll need:
- Born Pretty Silver Striping Tape ($3-4 on Amazon) – better adhesive than craft store brands
- Gel top coat—regular polish won’t secure tape
- Pointed tweezers for precise placement
- Small scissors for cutting tape
- Practice spacing on paper first
12. Tennessee Sunset Ombré
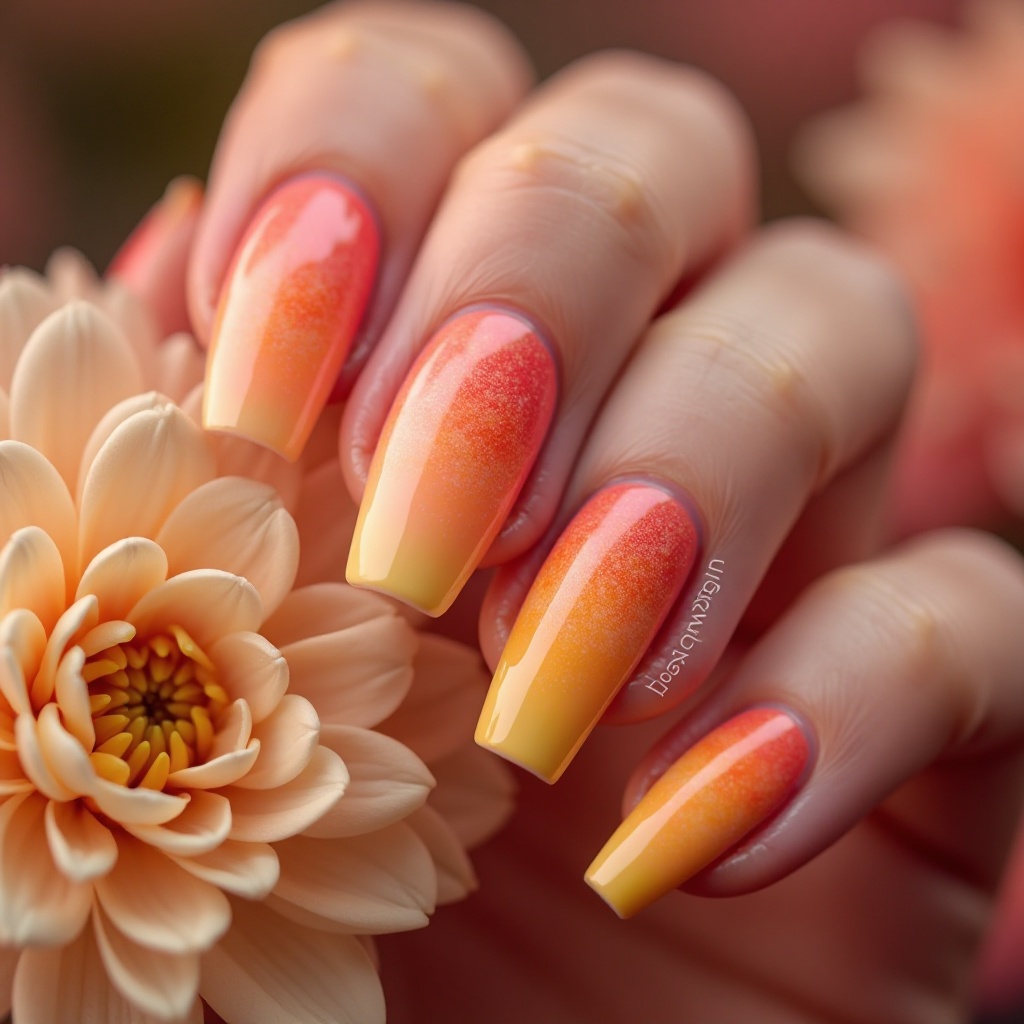
Gradient design transitioning from warm coral at the cuticle through peachy-pink to soft yellow at the tips, capturing the stunning color palette of Tennessee sunsets. This multi-tonal ombré creates a dreamy, romantic effect that feels artistic and intentional rather than trendy or temporary. The warm color family ensures the transition feels cohesive and natural rather than jarring or disconnected.
Difficulty: Intermediate
Time to complete: 45-60 minutes
Best for: Anyone wanting artistic, dreamy nails that spark conversation
Why it works: All warm colors mean the transition feels cohesive, not jarring
What makes it different: Most sunset ombrés use too many colors; this one keeps it simple
Products you’ll need:
- Essie “Tart Deco” ($10) – perfect warm coral
- Essie “A Crewed Interest” ($10) – peachy-pink
- Essie “Aim to Misbehave” ($10) – soft yellow
- Makeup sponge pieces—real cosmetic sponges work better than craft foam
- Multiple top coat layers required for smooth finish
13. Cowboy Boot Brown Leather
Medium brown with subtle texture created through strategic matte and glossy placement that mimics the rich, worn appearance of genuine leather cowboy boots. This creative finish combines a matte base with glossy top coat applied only to certain areas, creating dimensional interest. The brown shade feels organic and natural while the textured finish adds unique visual appeal.
Difficulty: Intermediate
Time to complete: 35-45 minutes
Best for: Anyone wanting Western vibes without literal boot imagery
Why it works: The texture play adds interest without color or pattern
What makes it different: Mixed finishes create dimension that photos don’t capture
Products you’ll need:
- Essie “Hot Coco” ($10) – perfect medium brown
- Essie Matte About You ($11)
- Seche Vite ($11) for glossy sections
- Small detail brush for precise glossy placement
- Reference photo of leather texture helpful
14. Grand Ole Opry Rose Gold
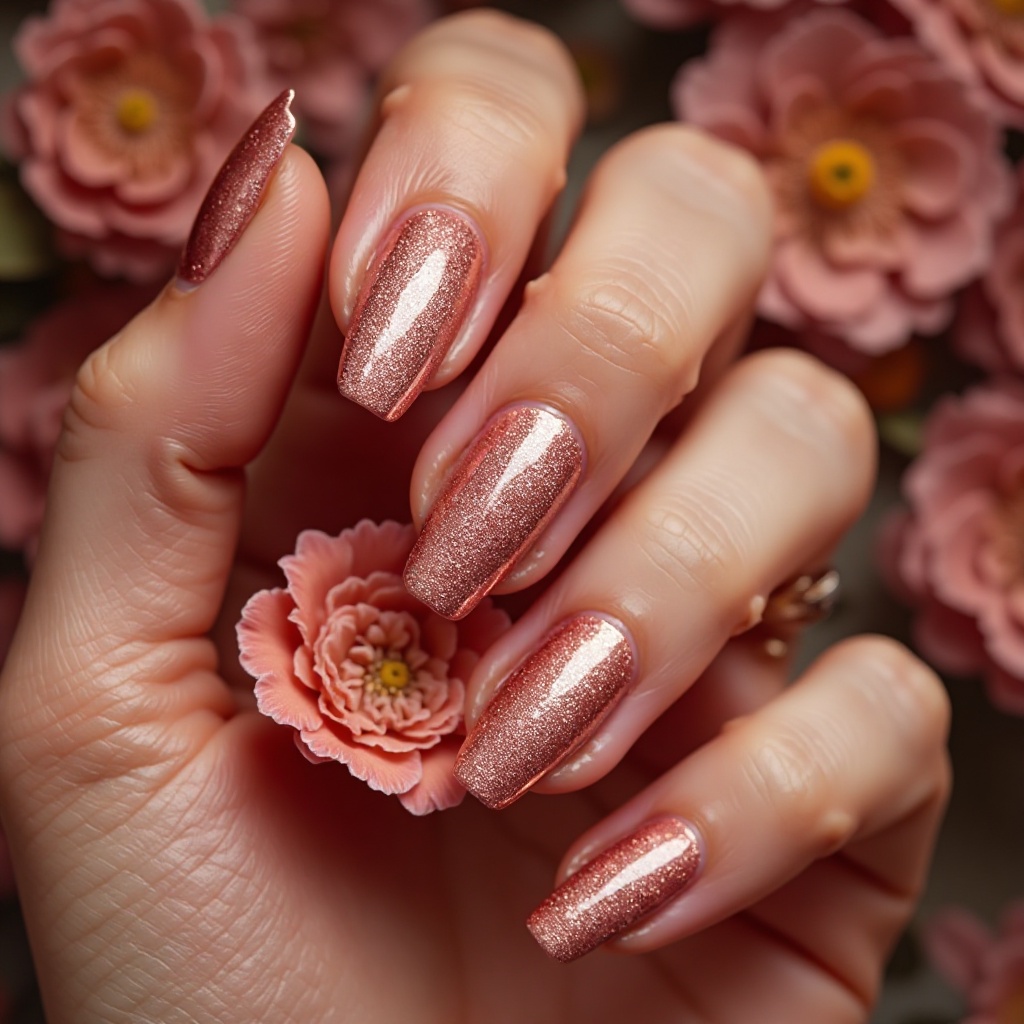
Warm rose gold metallic with fine shimmer particles and a brilliant shine finish that captures the glamorous, celebratory spirit of Nashville’s Grand Ole Opry. This feminine metallic strikes the perfect balance between gold and pink tones, creating universal flattery across all skin tones. The shimmer adds depth and movement while the metallic base delivers high-impact shine.
Difficulty: Beginner
Time to complete: 30-35 minutes
Best for: Anyone wanting metallic shine with feminine softness
Why it works: The rose tone makes it approachable, not flashy like yellow gold
What makes it different: Balanced between pink and gold—flatters all skin tones
Products you’ll need:
- Essie “Penny Talk” ($10) – rose gold that actually looks metallic
- White base coat underneath for extra pop
- Sally Hansen Insta-Dri ($9) for extra shine
- Lint-free wipes—metallics show dust and lint
15. Music Note Minimalist Art
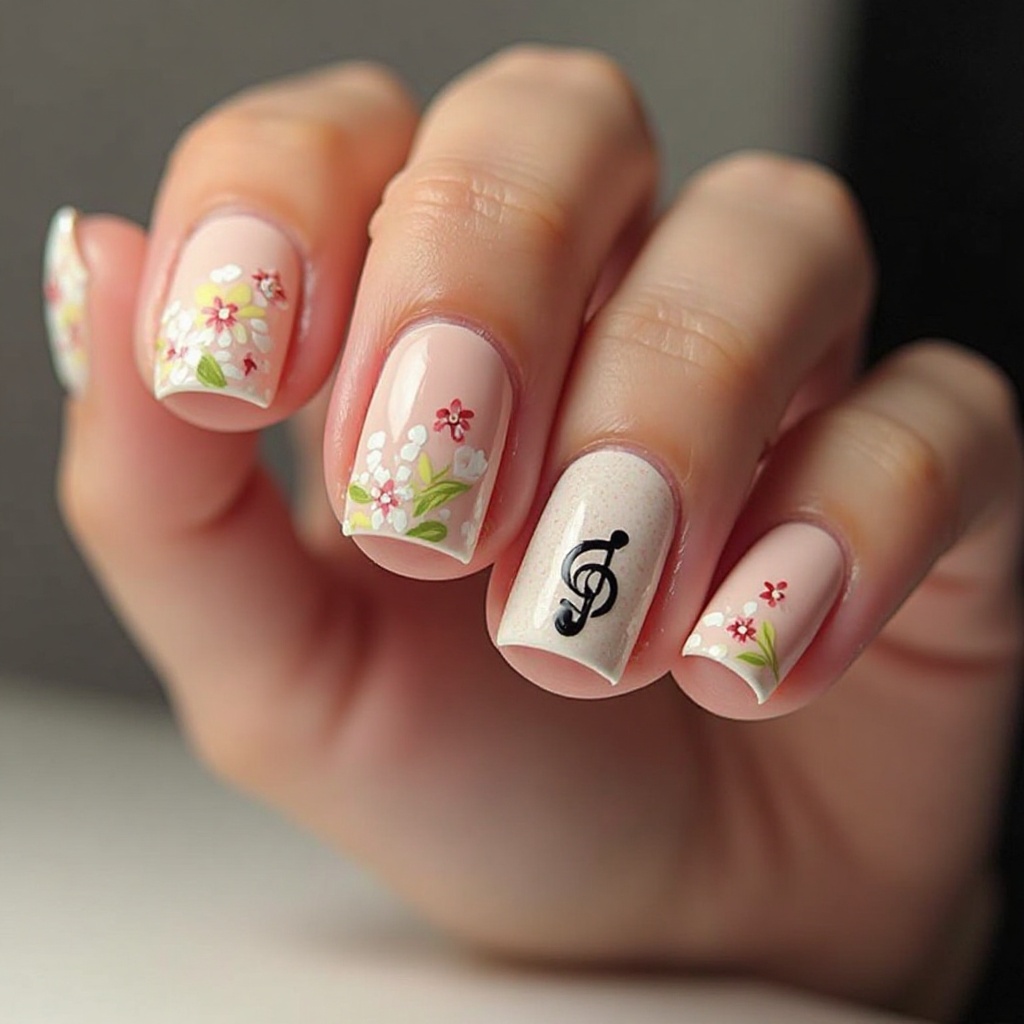
Soft beige nude base with a single black music note delicately hand-painted on one accent nail per hand. This understated design celebrates Nashville’s musical identity through refined, artistic expression rather than busy patterns or overwhelming imagery. The single note keeps the design intentional and sophisticated while the nude base maintains professional wearability.
Difficulty: Intermediate to Advanced
Time to complete: 35-45 minutes
Best for: Music lovers who want subtle expression that works anywhere
Why it works: One perfect note says more than busy patterns
What makes it different: Restraint—most music nails use too many symbols
Products you’ll need:
- OPI “Samoan Sand” ($13) – perfect beige nude
- Essie “Licorice” ($10) with fine brush
- Size 00 liner brush if using regular black polish
- Practice paper—trace actual music notes for reference
- Two top coat layers for longevity
Pros and Cons of Nashville Nail Styles
✅ Pros
- Warm earthy tones flatter all skin tones
- Designs range from beginner to advanced
- Most looks work in professional settings
- Minimalist options hide minor imperfections
- Metallics photograph beautifully for events
❌ Cons
- Chrome powders require gel and specific technique
- Rhinestones take 45-60 minutes to apply properly
- Dark colors show every application mistake
- Matte finishes show fingerprints when wet
- Removal takes 15-20 minutes for gel designs
- Some designs (skyline, music notes) need steady hands
- Not repairable if they chip—must redo entire nail
- Learning curve with first attempts can be frustrating
Maintenance Tips
Days 1-3
Apply cuticle oil morning and night. The Jojoba-based CND Solar Oil ($12 at Ulta) penetrates better than drugstore versions. This prevents the cuticle area from drying out and causing lifting.
Avoid hot water when possible. If you must shower hot, keep hands out of water stream. Wear rubber gloves for dishes—Palmolive dish soap actually breaks down polish formulas.
Days 4-7
Reapply top coat on day 4. Seche Vite works over existing polish without lifting. This adds protective layers and refreshes shine. Dark colors especially need this to maintain depth.
Check free edges daily. If you see any tip wear, re-cap with top coat immediately before water gets underneath.
Days 8-14 (Gel only)
By week two, gel may show slight lifting at cuticles. Don’t pick at it. Apply thin layer of cuticle oil along lifted edge to prevent moisture getting underneath.
If a rhinestone loosens, apply tiny dot of nail glue with a toothpick and press back down for 30 seconds.
Days 15-21
By week three, gel should be removed. Signs it’s time: visible lifting at cuticles, significant tip wear, or when you’ve had it on more than 3 weeks. Proper removal: soak cotton pads in pure acetone, place on nails, wrap each finger in foil for 10-15 minutes, then gently push off with wooden stick.
Never peel gel off—it removes layers of your natural nail.
Common Mistakes to Avoid
Applying Polish Too Thickly
What it looks like: Bubbles, wrinkling, takes forever to dry, chips next day
Why it happens: Thick coats trap solvents that can’t evaporate properly
The fix: Three to four thin coats instead of one or two thick ones. Wipe excess off brush against bottle neck before each stroke. Wait 2-3 minutes between coats. The extra 5-10 minutes creates results that last days longer.
Skipping Base Coat
What it looks like: Stained nails (especially under reds and browns), polish chips within 24 hours
Why it happens: Color bonds directly to nail plate, and stains penetrate
The fix: Always apply base coat, even when rushed. Ridge-filling bases if your nails have texture. Let it dry 60-90 seconds before color.
Not Sealing Free Edges
What it looks like: Chips starting at tips within 2 days
Why it happens: Water seeps underneath through exposed nail edge
The fix: After applying polish to surface, run brush horizontally along free edge with base coat, every color coat, and top coat. This creates waterproof seal. Takes 5 extra seconds per nail.
Peeling Off Gel Polish
What it looks like: Thin, weak, peeling nails with white spots
Why it happens: You’re removing layers of natural nail along with the gel
The fix: Soak off properly with acetone and foil for 10-15 minutes. If it doesn’t slide off easily with gentle pressure, soak longer. The 30 minutes for proper removal is less time than the 3 months needed for damaged nails to grow out.
Impatience Between Coats
What it looks like: Smudged, dragged, streaky polish
Why it happens: Applying next coat before previous is dry enough
The fix: Wait 3-4 minutes between color coats, 5-10 minutes before top coat. Set a timer. Use quick-dry drops if genuinely time-pressed.
Wear Test: What Happens After 4 Weeks with Nashville Nails
I wore Whiskey Barrel Brown matte gel for a full month to see what really happens.
Week 1: Perfect. The matte finish stayed smooth, no chips, color remained deep. Cuticles looked fresh. Got three compliments at a concert.
Week 2: Still looked good but slight wear at tips. No lifting at cuticles yet. Reapplied top coat on day 10 (matte top coat, not glossy) which refreshed the finish.
Week 3: By day 18, visible growth at cuticles—about 2mm of natural nail showing. Still no chips but the line between polish and new growth was obvious. Started wearing them less.
Week 4: Day 25—finally got a small chip on my dominant hand index finger. Cuticle growth at 4mm, looked unprofessional. Removed them on day 28. Nails underneath were slightly dehydrated but not damaged because I soaked off properly.
What I learned: Two weeks is the sweet spot for gel. By three weeks they look grown out. By four weeks you’re past due. Regular polish would have needed replacement by day 5-7.
Frequently Asked Questions
Will Nashville nail designs work on short nails?
Yes—solid colors actually look best on short nails. Hot Chicken Red, Peach Sweet Tea Shimmer, and Whiskey Barrel Brown create polished impact without needing length. Single accent nails with small stars or one music note work well. Skip busy designs and vertical stripes which need more canvas.
How long do Nashville-inspired nail designs typically last?
Gel versions: 2-3 weeks with proper care. Regular polish: 5-7 days. Chrome and glitter may show tip wear 1-2 days sooner because textured surfaces catch on things. Proper prep (alcohol wipe, capping edges) makes the biggest difference regardless of design.
Can I recreate these at home without professional training?
Most are achievable with practice. Solid colors: absolutely beginner-friendly. Ombré and simple rhinestones: doable after watching tutorials. Chrome and detailed line art: steeper learning curve—practice on fake nails first. There’s no shame in using nail stickers for complex designs while you learn.
What nail shape works best for Nashville designs?
Squoval and oval are most versatile—work for both minimalist solids and detailed accents. Almond shapes beautifully showcase metallics. Round suits classic, understated designs. Avoid extreme stiletto for everyday wear—they catch on everything and chip faster.
Are Nashville nails appropriate for professional offices?
Yes, if you choose wisely. Whiskey Barrel Brown, Bluebird Café Blue, Peach Sweet Tea Shimmer, and Smoky Quartz Gray work in conservative settings. Save full chrome, heavy rhinestones, and bold reds for weekends. The earthy, neutral palette means most options read as polished rather than attention-seeking.
What’s the best season for Nashville nail colors?
They work year-round because the palette is so versatile. Warm metallics and browns feel perfect for fall and winter. Dusty blues, soft peaches, and shimmer finishes shine in spring and summer. Hot chicken red adds energy any season. You won’t feel out of place wearing these regardless of weather.
Bring Music City to Your Fingertips
These Nashville nails ideas give you options whether you’re a beginner painting at your kitchen table or someone comfortable with advanced techniques. Start with solid colors to build confidence—Whiskey Barrel Brown Matte is genuinely foolproof and flatters everyone. Work your way up to ombré and simple rhinestones, then tackle chrome and detailed line art when you’re ready.
The beauty of this collection is there’s something for everyone, from conservative office looks to weekend concert glamour. Each design connects to some part of Nashville’s personality—the whiskey heritage, the songwriter intimacy, the Broadway sparkle, the rhinestone tradition. But they’re subtle enough that only people who know Nashville will catch the references.
A good place to start is picking one design that matches your current skill level. If you’re brand new, grab Essie “Hot Coco” and a matte top coat and try #3. Once you’ve mastered thin, even coats, move on to something with a single accent nail. Tag me in your recreations—I genuinely love seeing how these turn out for real people, not just in staged photos.
Whether you’re a Nashville native, a frequent visitor, or someone who just loves the city’s aesthetic, these designs let you carry a piece of Music City with you wherever you go.