15+ Cajun Shrimp Nails Ideas for a Bold and Trendy Look
If you’ve scrolled through nail art on Instagram lately, you’ve probably seen those spicy orange and red swirls that look good enough to eat. Cajun shrimp nails are having a moment—think bold oranges, deep reds, and just enough sparkle to mimic that buttery, seasoned coating on actual shrimp.
I’ve been wearing some version of these for about six months now, trying different color combos and techniques. The first time I attempted them, they looked more like a traffic cone than seafood. But after some trial and error (and a few manicures that didn’t survive a full week), I figured out what actually works.
This guide walks through over 15 designs, but unlike the picture-only lists you’ll find elsewhere, I’m including step-by-step for each one. You’ll also get product recommendations with real prices, maintenance schedules, and the five mistakes I made so you don’t have to.
What Are Cajun Shrimp Nails?
Cajun shrimp nails are a color palette more than a specific pattern. Think warm, spicy tones—burnt orange, cayenne red, paprika, and butter yellow—usually mixed together in swirls, marble effects, or gradient fades. Some versions add gold flakes or shimmer to mimic the glisten of melted butter. Others go full abstract with squiggly lines that look like shrimp tails curling up.
The name comes from the color scheme looking exactly like a plate of boiled crawfish or shrimp tossed in Cajun seasoning. It’s big in Southern states and coastal areas, but the trend has spread everywhere because the colors work for both summer and fall.
How to Choose the Best Cajun Shrimp Design
Not every design works for every person or situation. Here’s how to pick based on what matters to you.
For your first time: Start with the simple marble design or the classic swirl accent nail. Both are forgiving if your lines aren’t perfect, and they don’t require multiple tools. I tried the foil transfer design first and ended up with glitter everywhere—learn from me.
If you have a professional job: Go with the sheer base and subtle shimmer version or the matte with single accent. These read as “interesting” rather than “I’m heading to a crawfish boil” from across the room. The full-on orange-and-red combos can look intense in office lighting.
For special events: The chrome version or the 3D caviar beads photograph beautifully. I wore the chrome ones to a wedding and got four compliments before dinner. Just know that the 3D ones will snag on hair and fabric.
If you’re comfortable with nail art: Try the hand-painted shrimp or the negative space swirls. These require steady hands but give you that “I did this myself” flex. The hand-painted shrimp took me 45 minutes per hand the first time.
If you have short nails: Stick to vertical swirl designs or color blocking. Horizontal lines or large-scale marble patterns can make short nails look wider. Vertical elements create the illusion of length.
If you change your mind often: Avoid the encapsulated glitter designs. Removing them takes forever because you have to file through layers. Stick to regular polish versions you can soak off in 10 minutes.
15+ Cajun Shrimp Nail Designs
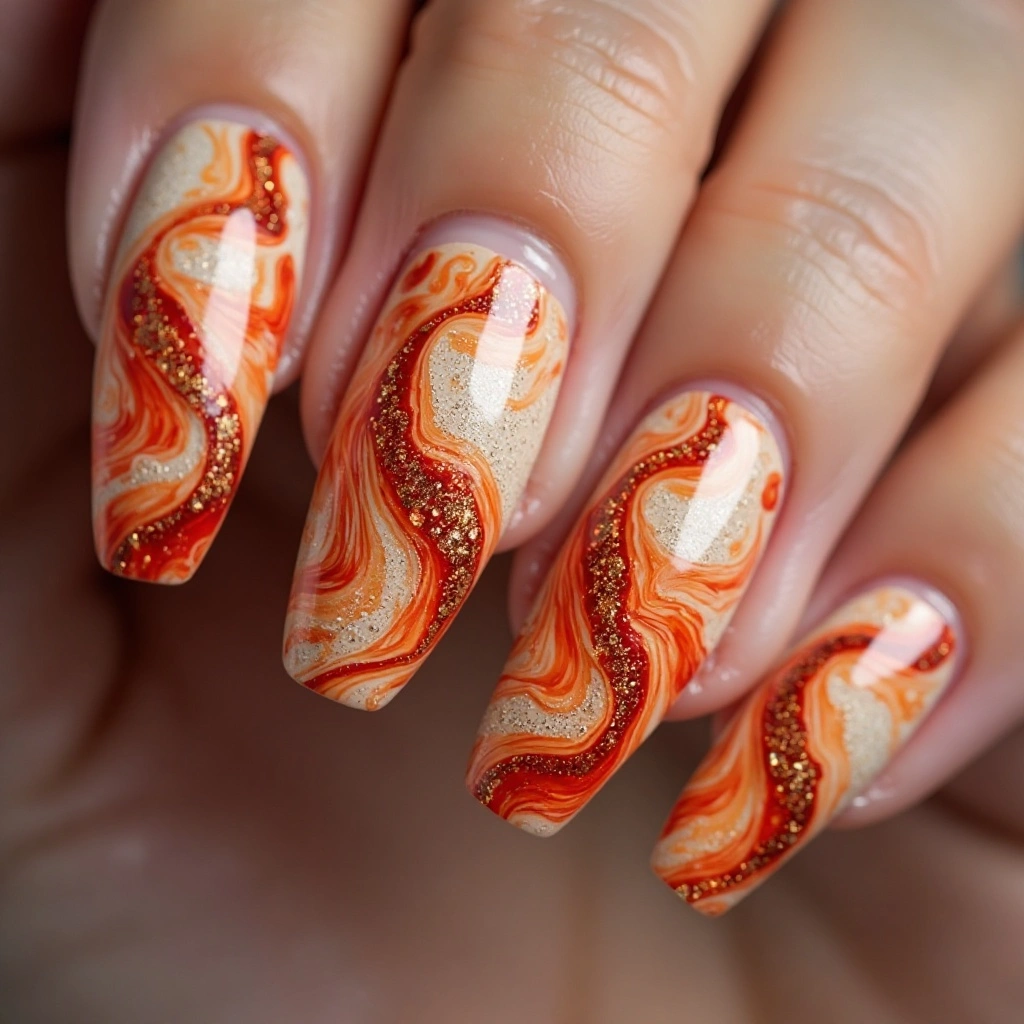
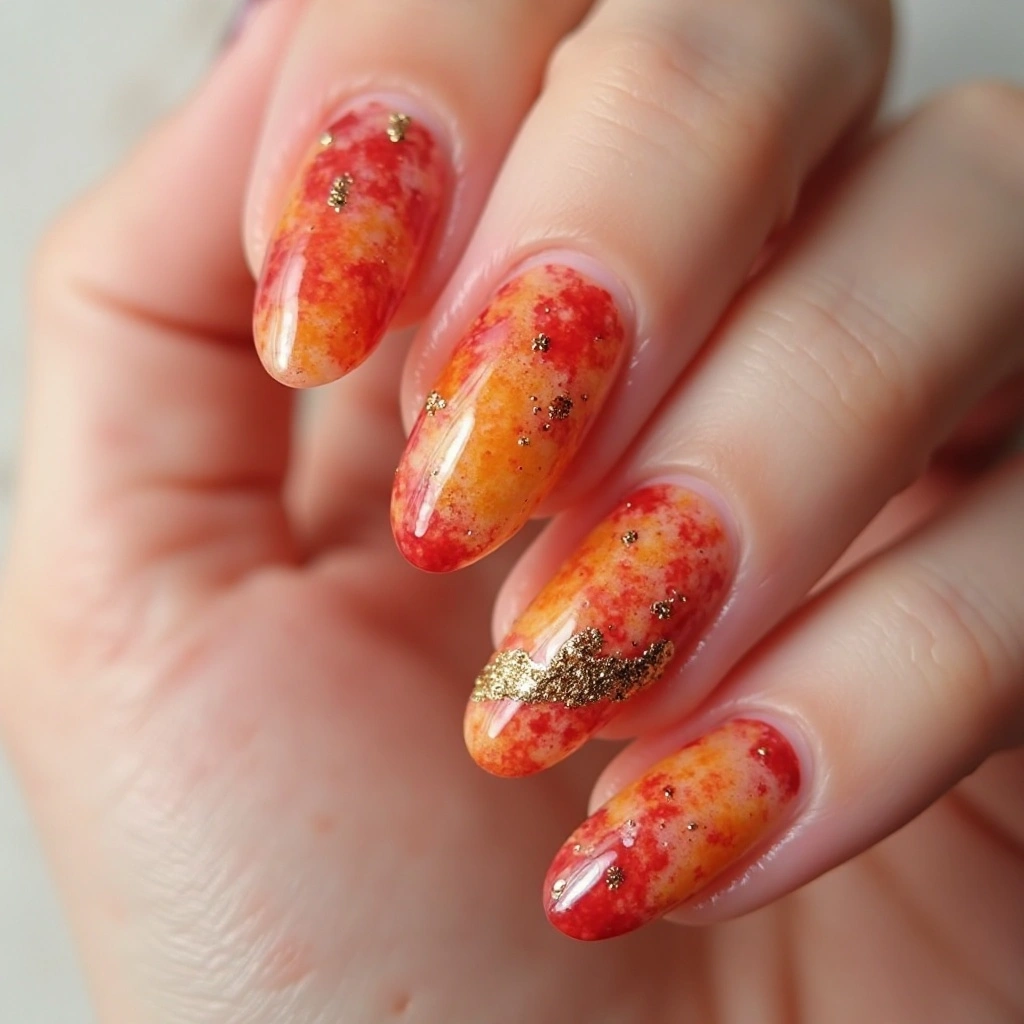
1. Classic Swirl Accent
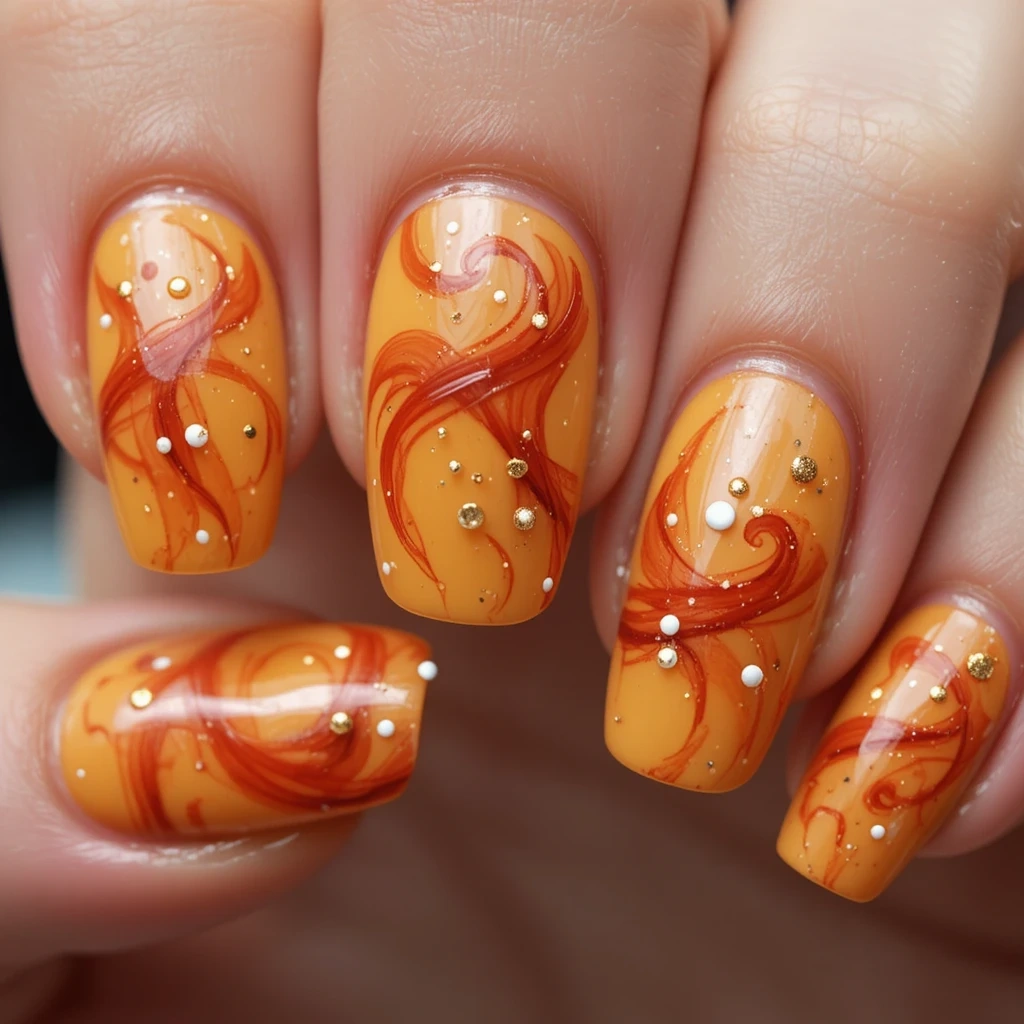
Picture warm butter-yellow base with ribbons of cayenne red and burnt orange curling across the nail like smoke. The swirls start thin at the cuticle and widen as they move toward the tip, with tiny gold dots scattered between them like specks of seasoning. The overall effect is spicy and warm without being overwhelming.
- Difficulty: Beginner
- Time to complete: 30 minutes
- Best for: Someone trying the trend for the first time without committing to a full hand of complex art
- Why it works: One accent nail lets you experiment while keeping nine nails simple, so mistakes matter less
- What makes it different: Most swirl tutorials use three colors; this one uses four to get that seasoned, layered look
Product recommendation: Modelones Detail Brush Set ($8-10 on Amazon) has five different sizes, but the smallest one gives you control without the bristles splaying out like cheaper brushes that cost $3.
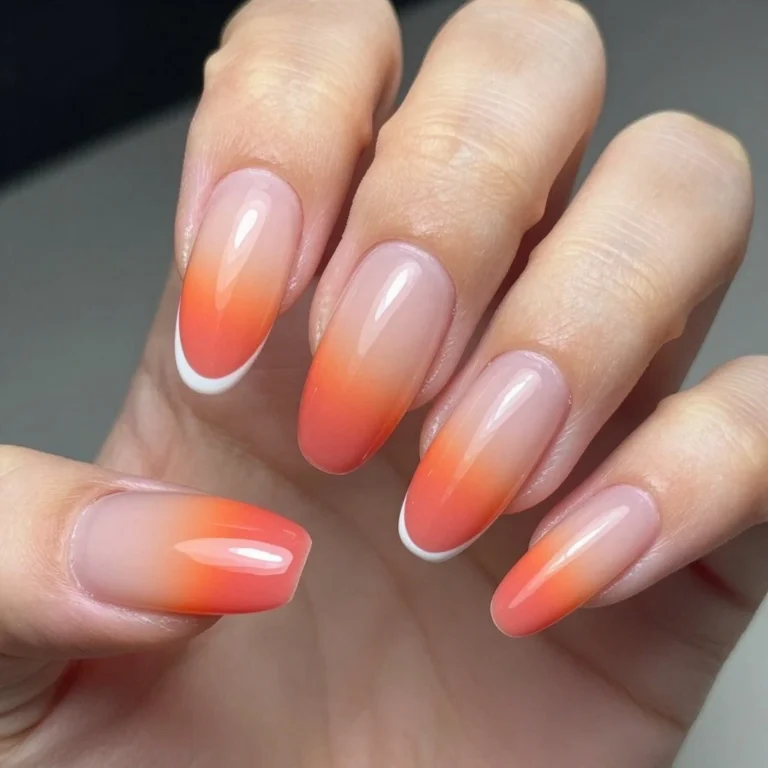
2. Gradient Sunset Fade
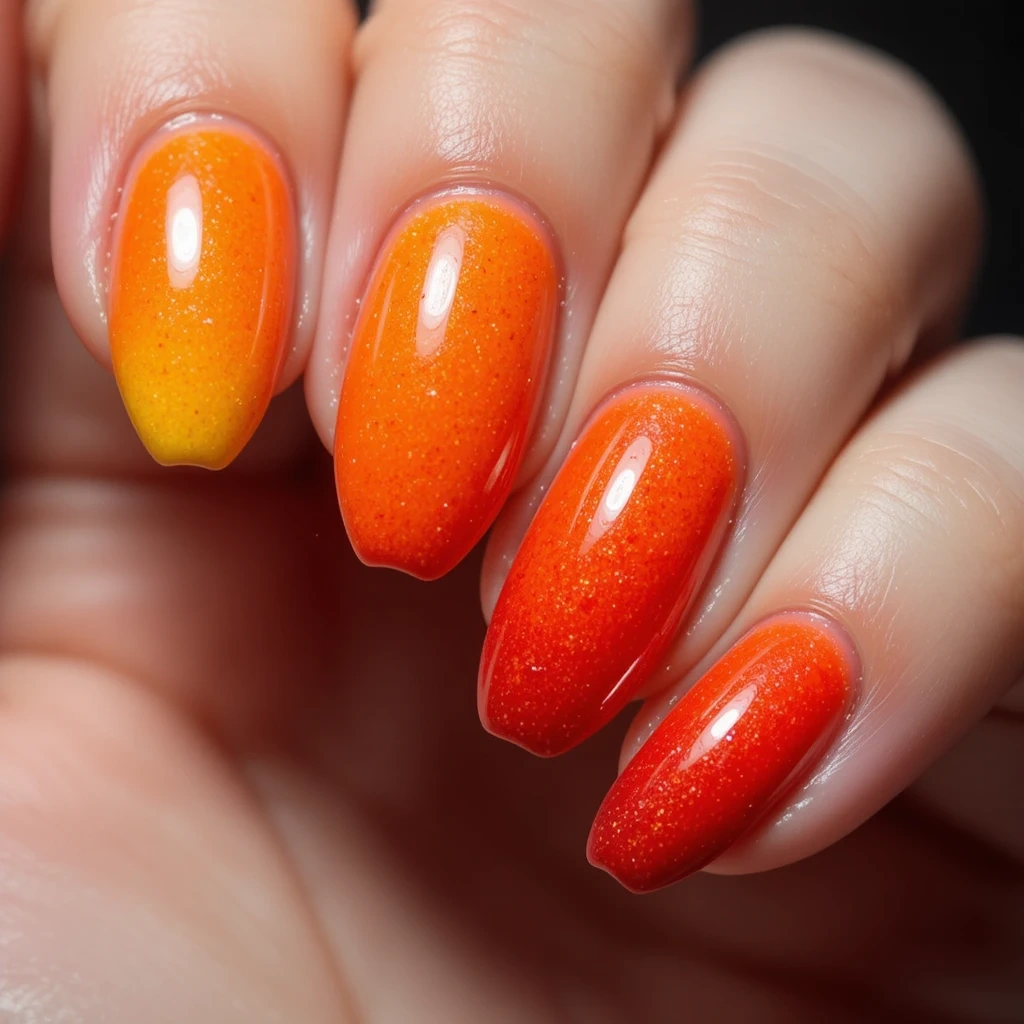
A seamless fade from soft butter yellow at the cuticle through warm orange in the middle to deep cayenne red at the tips. The colors melt into each other like a Louisiana sunset, with just a hint of gold shimmer catching the light. It looks exactly like the color transition on boiled shrimp from the thin tail to the thicker body.
- Difficulty: Intermediate
- Time to complete: 45 minutes
- Best for: People who want that “boiled shrimp” look without precise lines
- Why it works: The sponge blending hides imperfections and creates natural color transitions
- What makes it different: Most gradients use two colors; this uses four in specific order to mimic actual cooked seafood
Why this specific product: The W7 Eyeshadow Sponge Set ($5-7) comes in a triangle shape that fits nail curves better than flat craft sponges. The pores are also smaller, so you get less bubbling in the final finish.
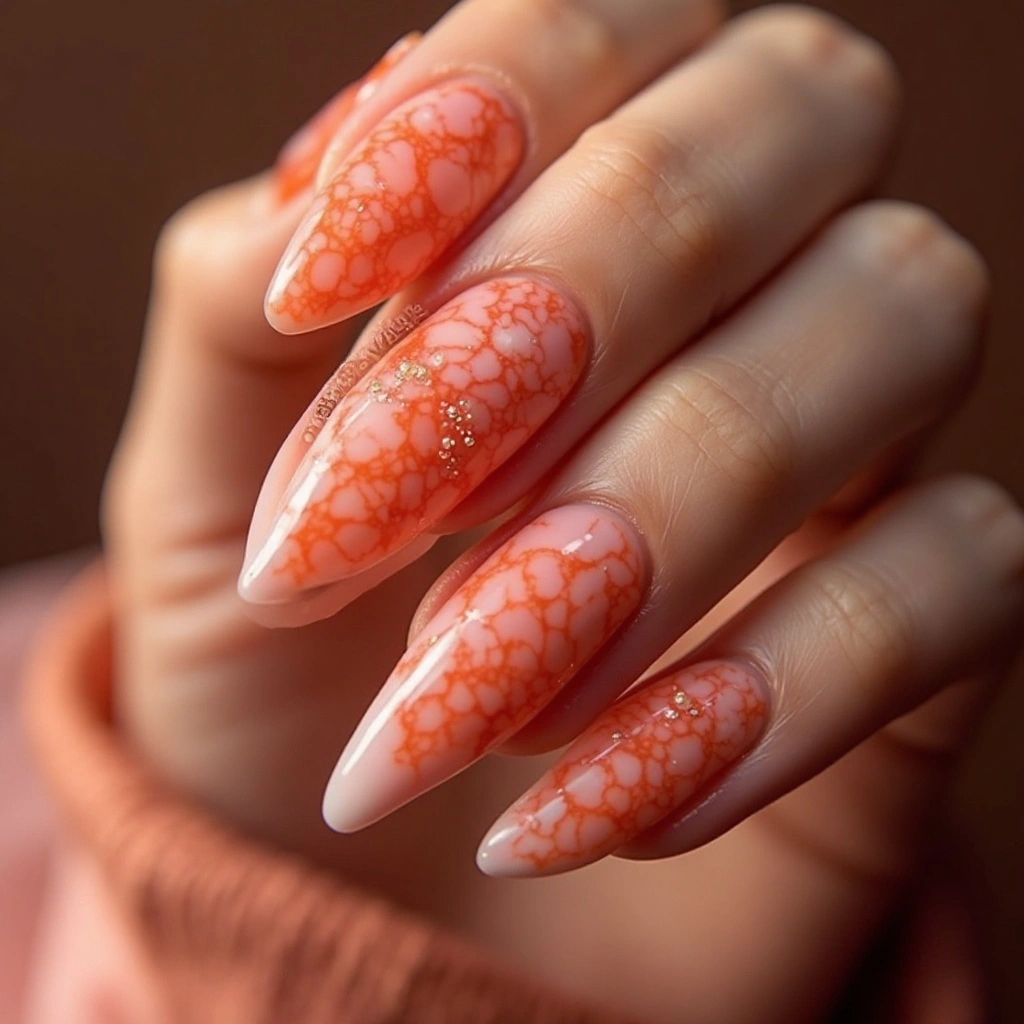
3. Marble Effect
Swirls of cream, burnt orange, and deep red twist together like ribbons of fat through crawfish meat. Tiny veins of dark brown run through like the lines you see in boiled seafood, with occasional flecks of gold catching the light. The effect is organic and random—no two nails look the same.
- Difficulty: Beginner
- Time to complete: 35 minutes
- Best for: People who want a sophisticated take on the trend without obvious food references
- Why it works: Marble patterns hide imperfections because they’re supposed to look random
- What makes it different: Adding a tiny amount of black or dark brown keeps it from looking like fruit punch
Product recommendation: Essie’s Playing Koi ($9) is the perfect base orange—not too bright, not too brown. It’s thinner than drugstore brands so it spreads evenly for marble work without clumping.
4. Vertical Swirl Lines
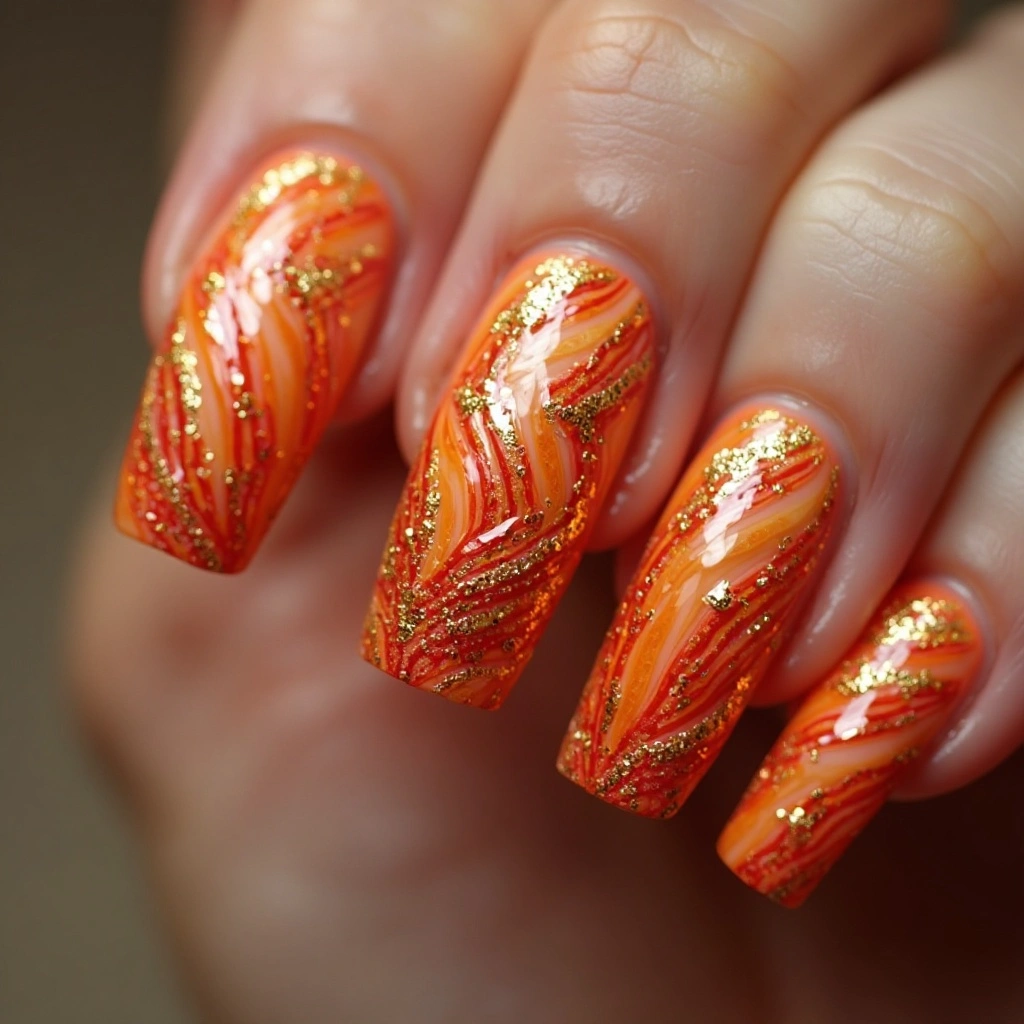
Thin ribbons of burnt orange and cayenne red run from cuticle to tip like shrimp tails uncurling. The lines start delicate at the base and gradually widen toward the free edge, creating a lengthening effect. A single thread of gold runs alongside each line, catching light like butter dripping down.
- Difficulty: Beginner
- Time to complete: 25 minutes
- Best for: Short nails or people with unsteady hands
- Why it works: Vertical lines draw the eye up and down, making nails appear longer
- What makes it different: The lines start thin at cuticle and widen toward tip, mimicking the shape of shrimp tails
Product recommendation: Sally Hansen Insta-Dri in Copper Mine ($6) dries fast enough that you can add second lines without smearing the first ones. Most metallics stay wet too long and drag.
5. Foil Transfer

Jagged patches of copper and gold foil catch the light like the shiny spots on boiled shrimp where the shell separates from the meat. The foil transfers unevenly, leaving some areas solid metallic and others with just a faint shimmer—exactly like the random patches of butter that cling to seafood. The effect changes constantly as you move your hands.
- Difficulty: Intermediate
- Time to complete: 50 minutes
- Best for: People who want maximum shimmer without hand-painting glitter
- Why it works: Foil catches light like butter on hot shrimp—it’s the closest visual match to the actual food inspiration
- What makes it different: Using two foil colors (copper and gold) instead of one creates depth
Product recommendation: Nail Art Foil Transfer Sheets by Born Pretty ($4 for 20 sheets) have better adhesive backing than the loose craft foils. The adhesive is already on the foil so you don’t need separate glue.
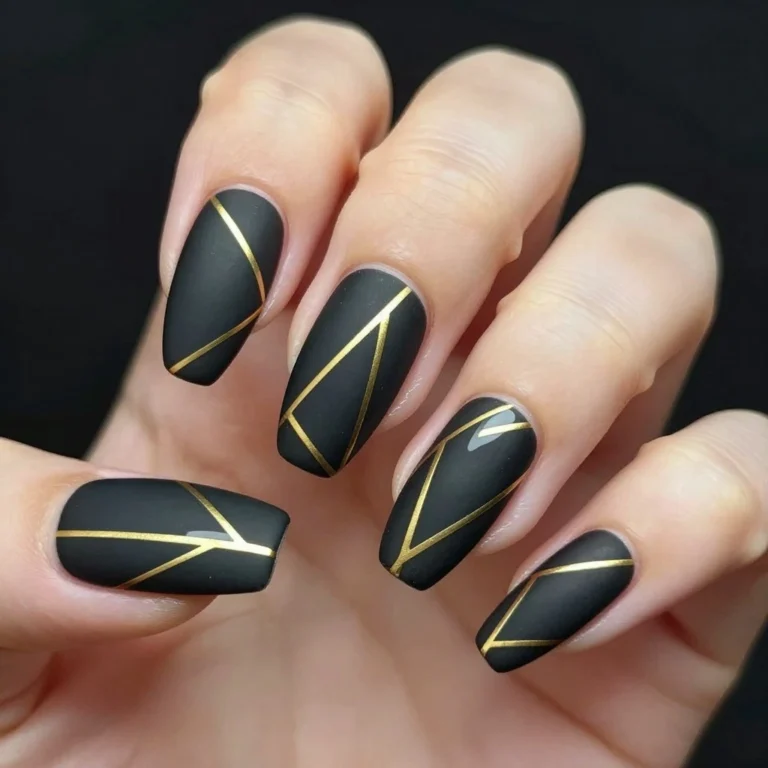
6. Color Block
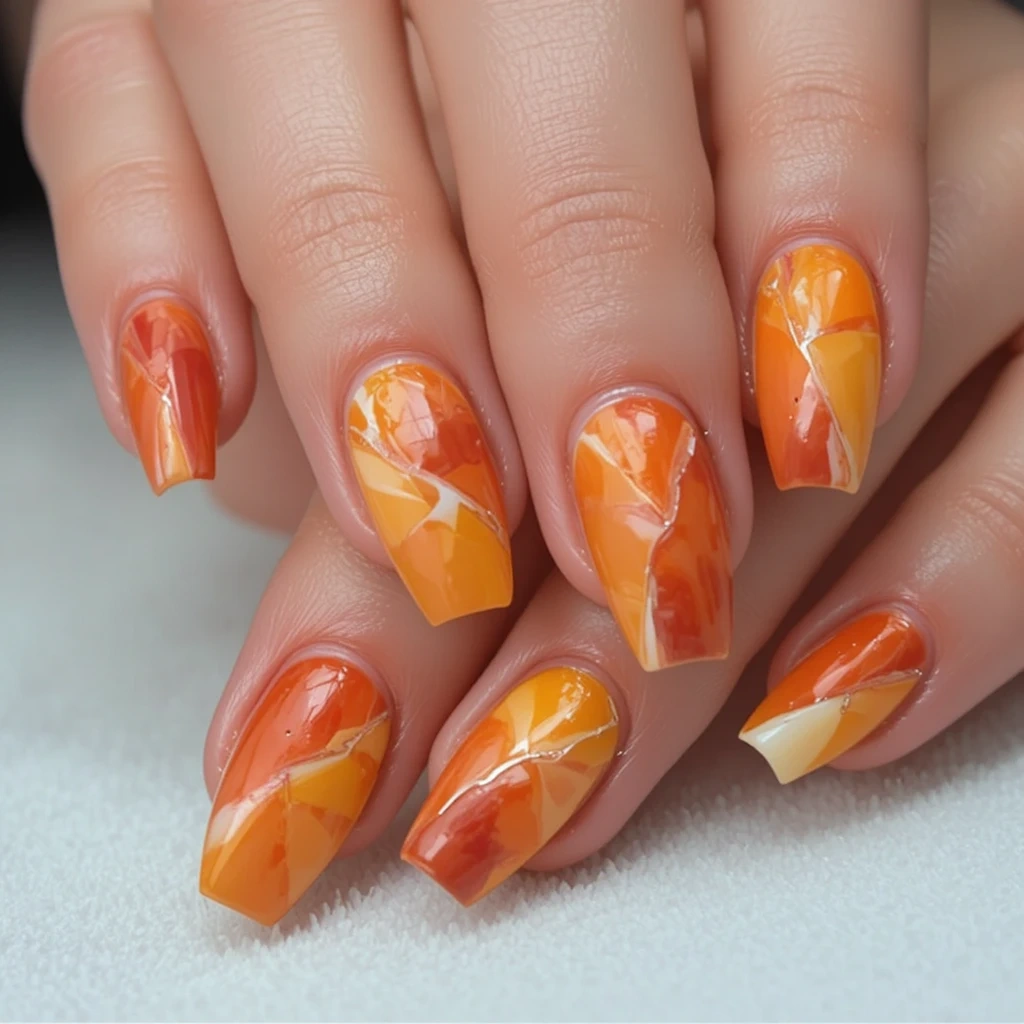
Clean diagonal sections of deep orange-red, mustard yellow, and burnt orange meet at sharp angles like pieces of broken shrimp shell. The edges are crisp and geometric, with no blending between colors. A thin strip of bare nail sometimes separates the blocks, creating negative space that keeps it modern and architectural.
- Difficulty: Beginner
- Time to complete: 40 minutes (includes drying time between blocks)
- Best for: People who like clean lines and geometric shapes
- Why it works: The hard edges contrast with the organic food inspiration, making it feel modern
- What makes it different: Diagonal blocking instead of horizontal mimics the angle of shrimp tails
Product recommendation: Twinkle Tapes Nail Art Striping Tape ($6) has stronger adhesive than washi tape alternatives. Cheap tape lifts while you paint and ruins the line.
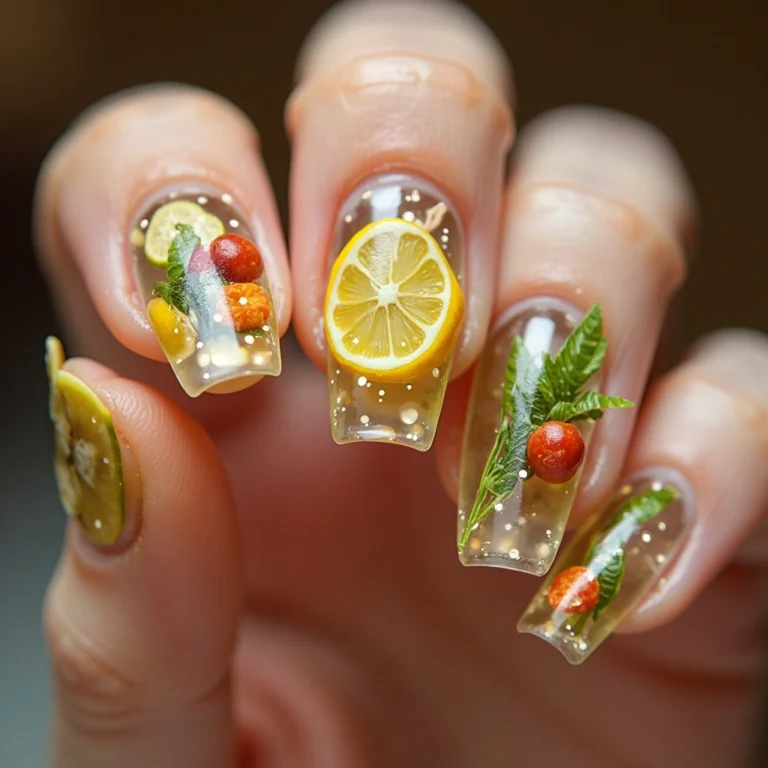
7. Hand-Painted Shrimp
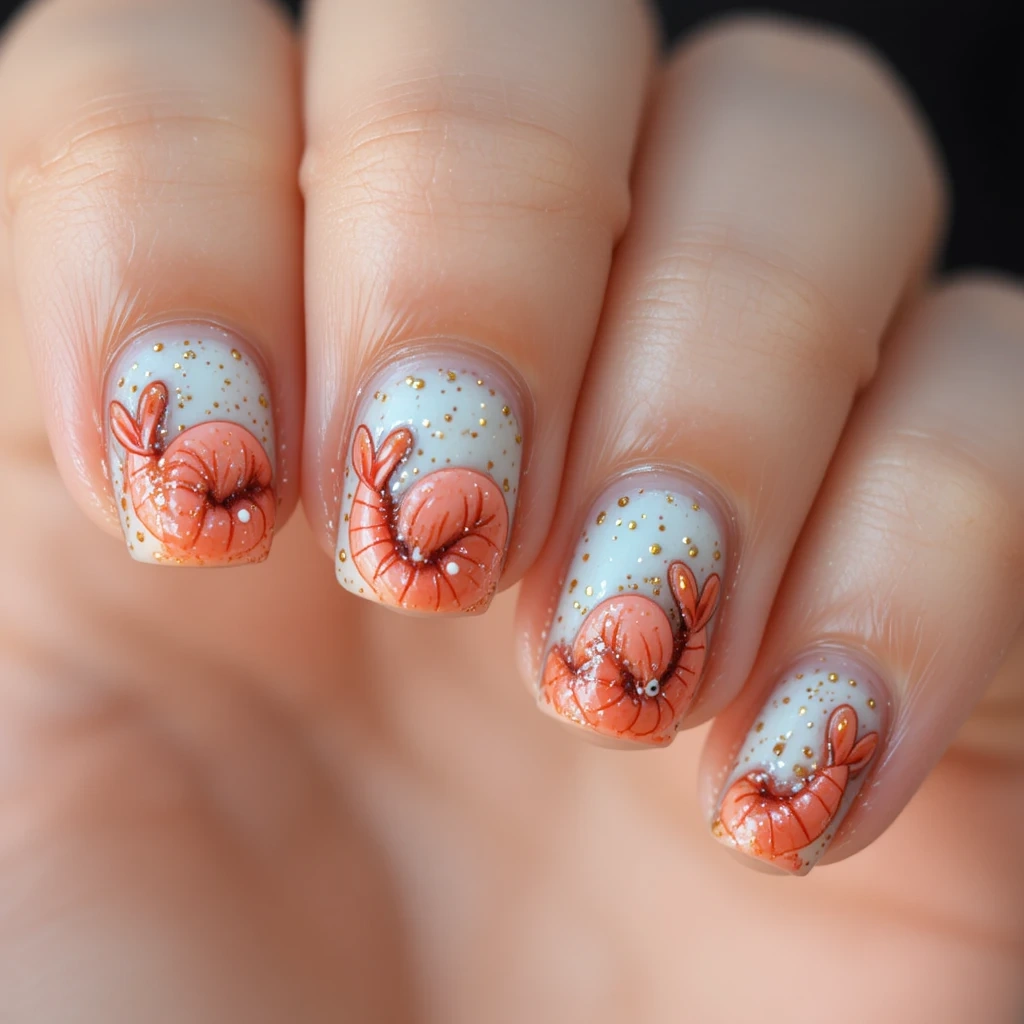
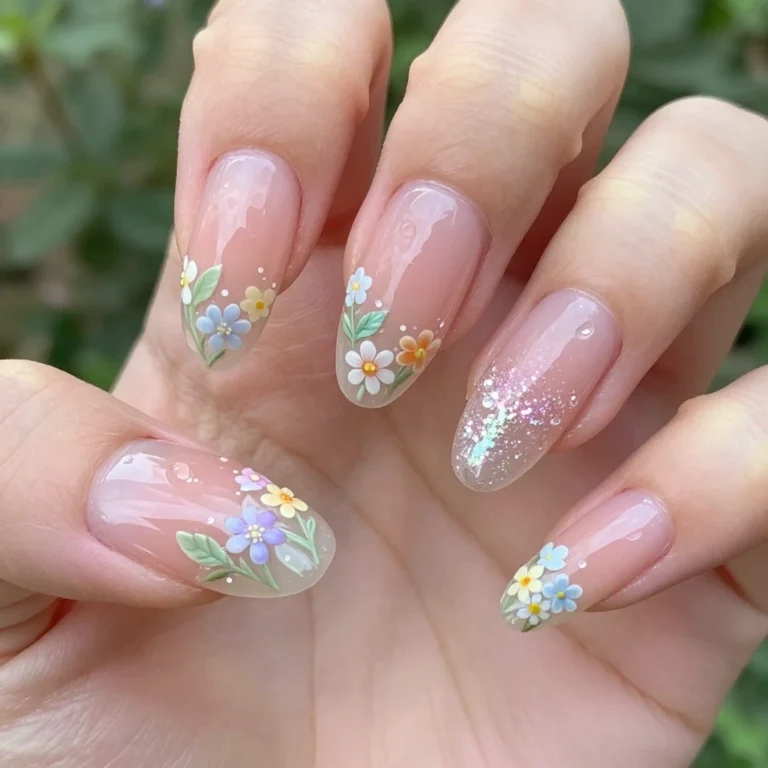
Tiny hand-painted shrimp curl across accent nails—their bodies curved into C-shapes, tails fanned out, antennae trailing behind. Each shrimp is detailed with segmentation lines and a tiny black eye with a white reflection dot. A few gold specks surround them like butter sauce. They’re cartoonish but realistic enough that people recognize them immediately.
- Difficulty: Advanced
- Time to complete: 1.5 hours
- Best for: People who want an obvious conversation starter
- Why it works: It’s literal enough that everyone gets it, artistic enough that it’s not tacky
- What makes it different: Using reference photos of actual boiled shrimp instead of cartoon versions
Product recommendation: Makartt Fine Liner Brush Set ($9) includes a brush with only 3-5 hairs at the tip. That’s what you need for the eye dots and segmentation lines. Regular detail brushes are too thick.
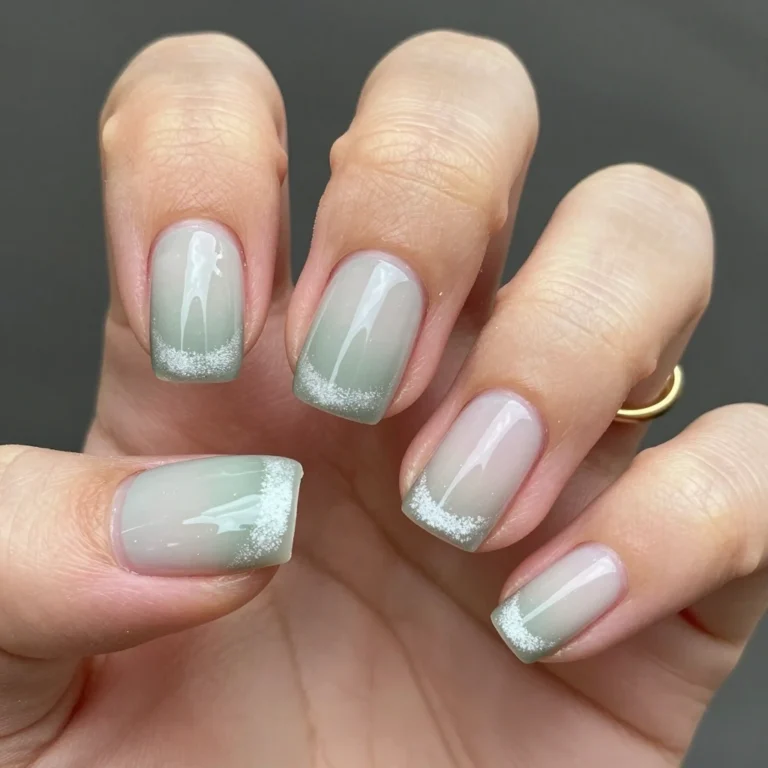
8. Sheer Base with Shimmer
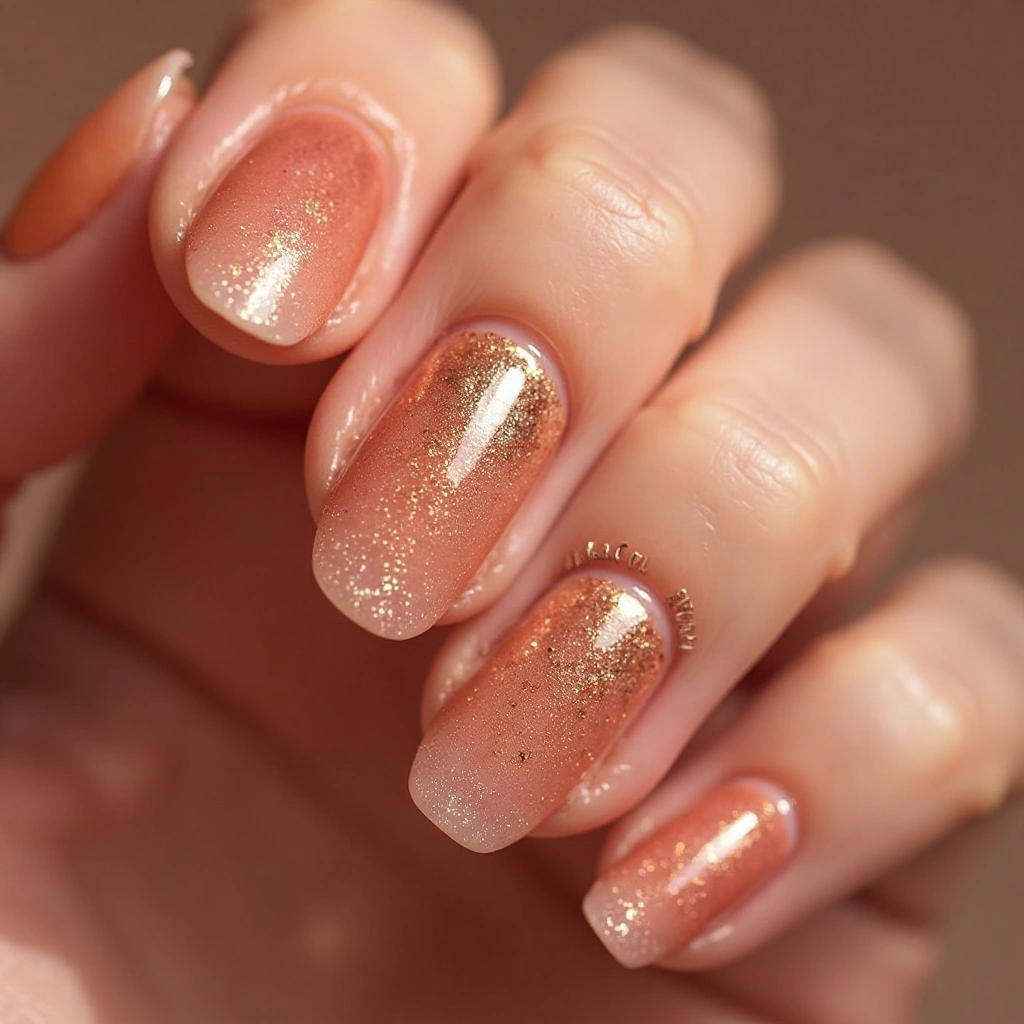
Your natural nail shows through a barely-there wash of peachy-pink, with concentrated shimmer at the cuticle fading toward the tip. The shimmer shifts between copper and gold as you move your hand, like light hitting the thinnest part of a shrimp tail. From across the room, it just looks like a healthy glow—up close, the complexity reveals itself.
- Difficulty: Beginner
- Time to complete: 20 minutes
- Best for: Professional settings or people who prefer subtle nail art
- Why it works: The sheer base lets natural nail show through, making it look more expensive and less costume-y
- What makes it different: Layering two different shimmer toppers (copper and gold) instead of one
Product recommendation: Cirque Colors’ Rothko Red ($14) is technically a jelly, but worn in one coat it gives that translucent base with orange undertones. Most sheers pull pink, which fights the shrimp palette.
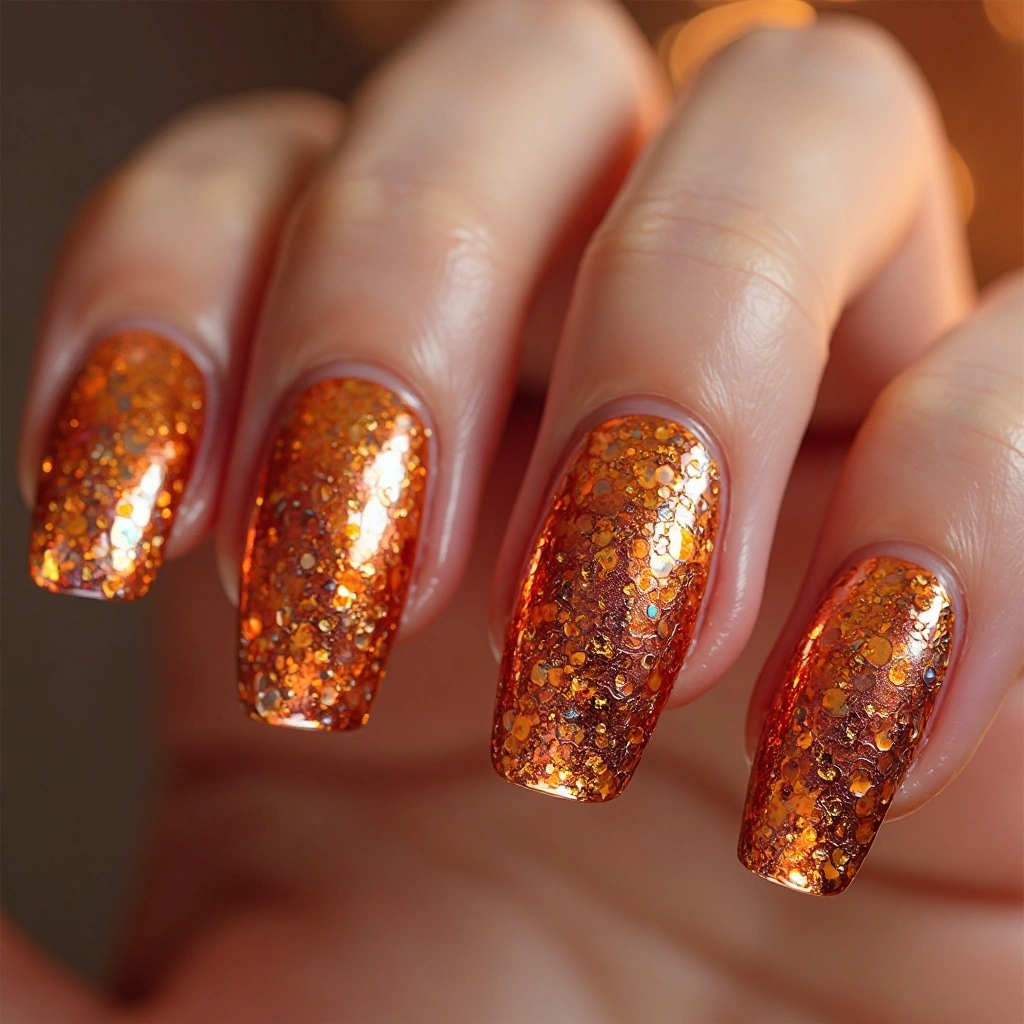
9. Encapsulated Glitter
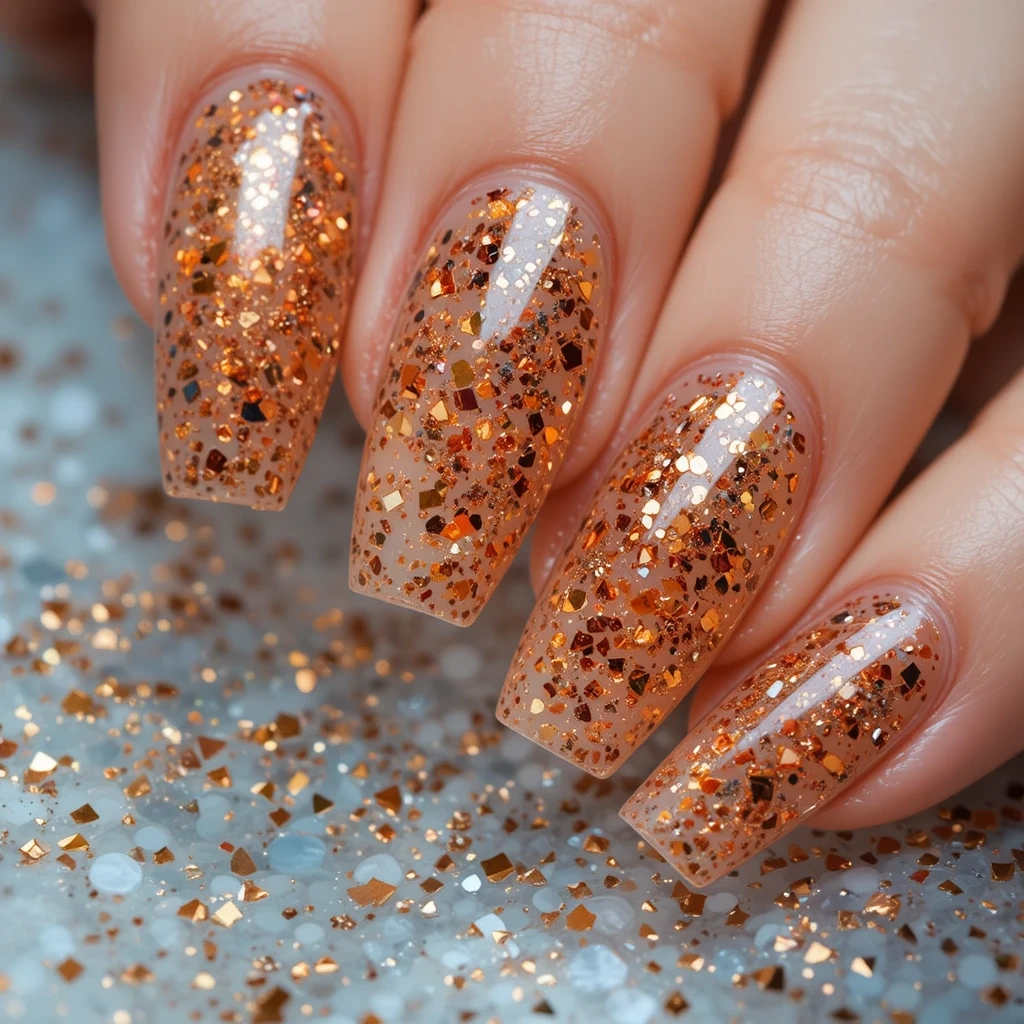
Tiny flecks of orange, copper, and gold glitter float suspended in clear layers like seasoning suspended in melted butter. The largest hex glitters catch the light brightest, while the fine micro-glitter creates a constant warm shimmer underneath. The surface is completely smooth despite the glitter inside—like sea glass with gold flecks frozen inside.
- Difficulty: Intermediate
- Time to complete: 1 hour (plus curing time if gel)
- Best for: People who want their manicure to last 3+ weeks
- Why it works: Glitter suspended in clear layers stays bright and doesn’t dull like top coat over glitter can
- What makes it different: Mixing three glitter sizes (fine, medium, chunk) gives that “seasoning” look
Product recommendation: Modelones Clear Builder Gel ($12) is thick enough to encapsulate chunky glitter in one layer. Thinner gels need 3-4 layers to cover the same texture.
10. Negative Space Swirls
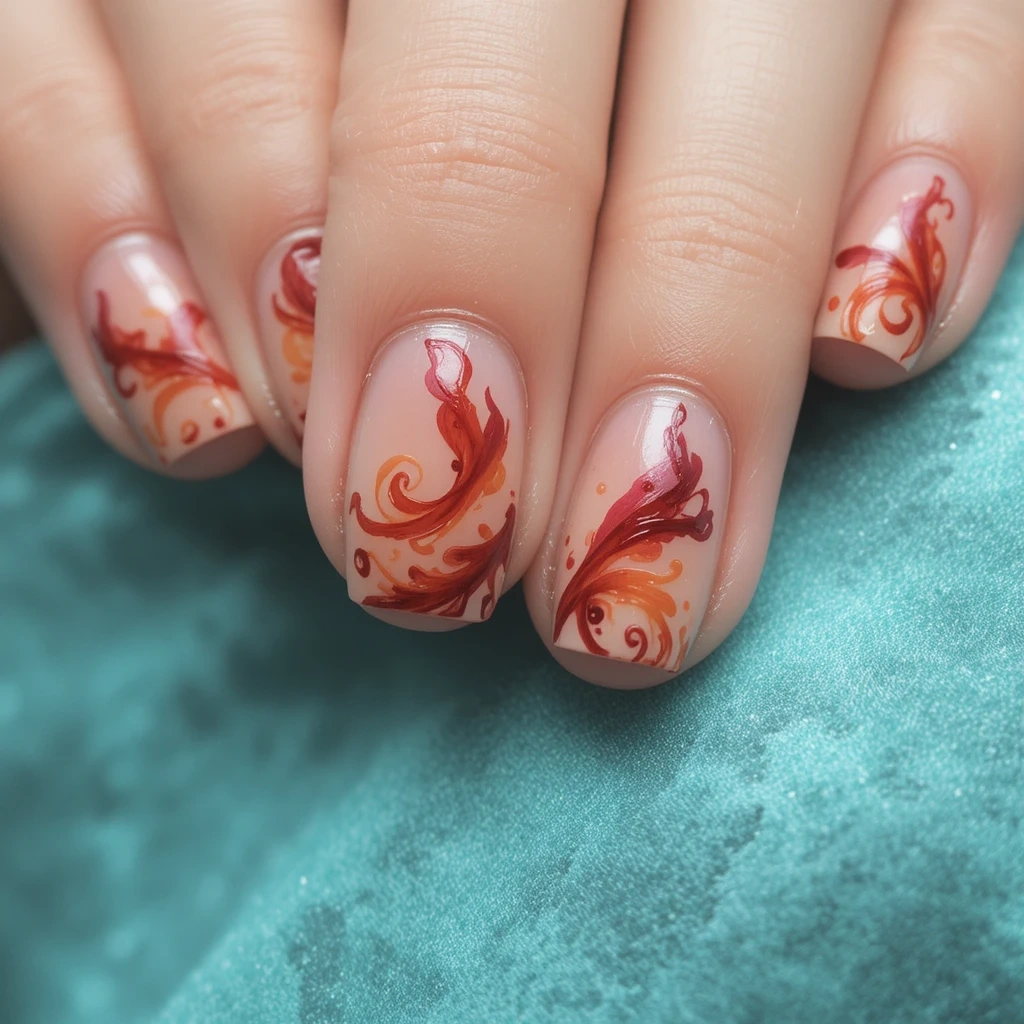
Bare nail shows through as the background while swirls of burnt orange and red curl across like ribbons painted on glass. The swirls don’t connect or fill the whole nail—they float independently, some thick and solid, others thin and sketchy. Your natural nail color becomes part of the design rather than something to cover up.
- Difficulty: Intermediate
- Time to complete: 45 minutes
- Best for: People who like modern, artsy nail designs
- Why it works: The bare nail showing through keeps it from looking like a solid block of color
- What makes it different: Swirls are painted ON TOP of bare nail instead of filled in
Product recommendation: Holo Taco’s One-Coat Black ($13) isn’t the color you need, but their brush is what matters. It’s wider at base and tapers to a fine point, so you can do the thick-to-thin swirls without switching brushes.
11. Splatter Effect
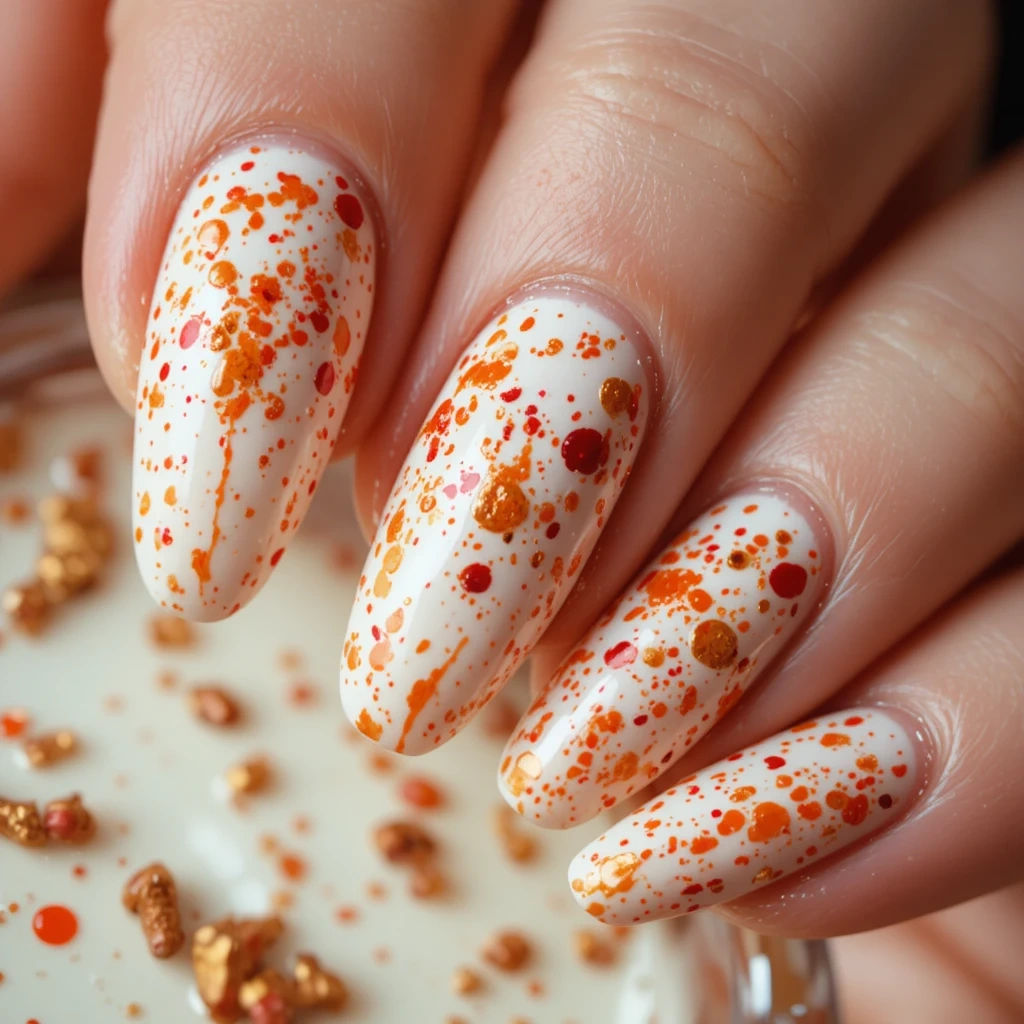
Tiny flecks and drips of orange, red, and gold are flicked across a creamy base like hot butter popping in a pan. The splatters vary in size—some are fine mist, others are distinct drops—and they overlap in places, creating accidental new colors where they mix. It’s chaotic but controlled, like an abstract expressionist painting scaled down to your fingertips.
- Difficulty: Beginner (but messy)
- Time to complete: 30 minutes plus cleanup
- Best for: People who want an abstract, artistic look without precision
- Why it works: Splatter is intentionally random, so every nail looks different
- What makes it different: Using three shades of the same color family instead of contrasting colors keeps it cohesive
Product recommendation: UNT Liquid Latex ($9) peels off cleanly without residue. The cheap versions from craft stores stick to your skin and hurt to remove.
12. Matte with Single Gloss Accent
Most nails have a velvety matte finish in warm shrimp-toned shades—maybe a burnt orange marble or a gradient fade. Then one nail per hand (usually the ring finger or thumb) gleams with high-shine gloss, catching all the light. The contrast between the soft matte and the wet-looking gloss makes both finishes look more intentional.
- Difficulty: Beginner
- Time to complete: 25 minutes
- Best for: People who want the trend without the shine
- Why it works: Matte finish tones down the brightness, making it wearable year-round
- What makes it different: The glossy accent nail is usually the ring finger, but placing it on the thumb creates unexpected visual interest
Product recommendation: OPI Matte Top Coat ($12) dries faster than drugstore options and doesn’t get that streaky look some mattes get. The cheap ones sometimes dry satin instead of true matte.
13. Tortoiseshell Variation
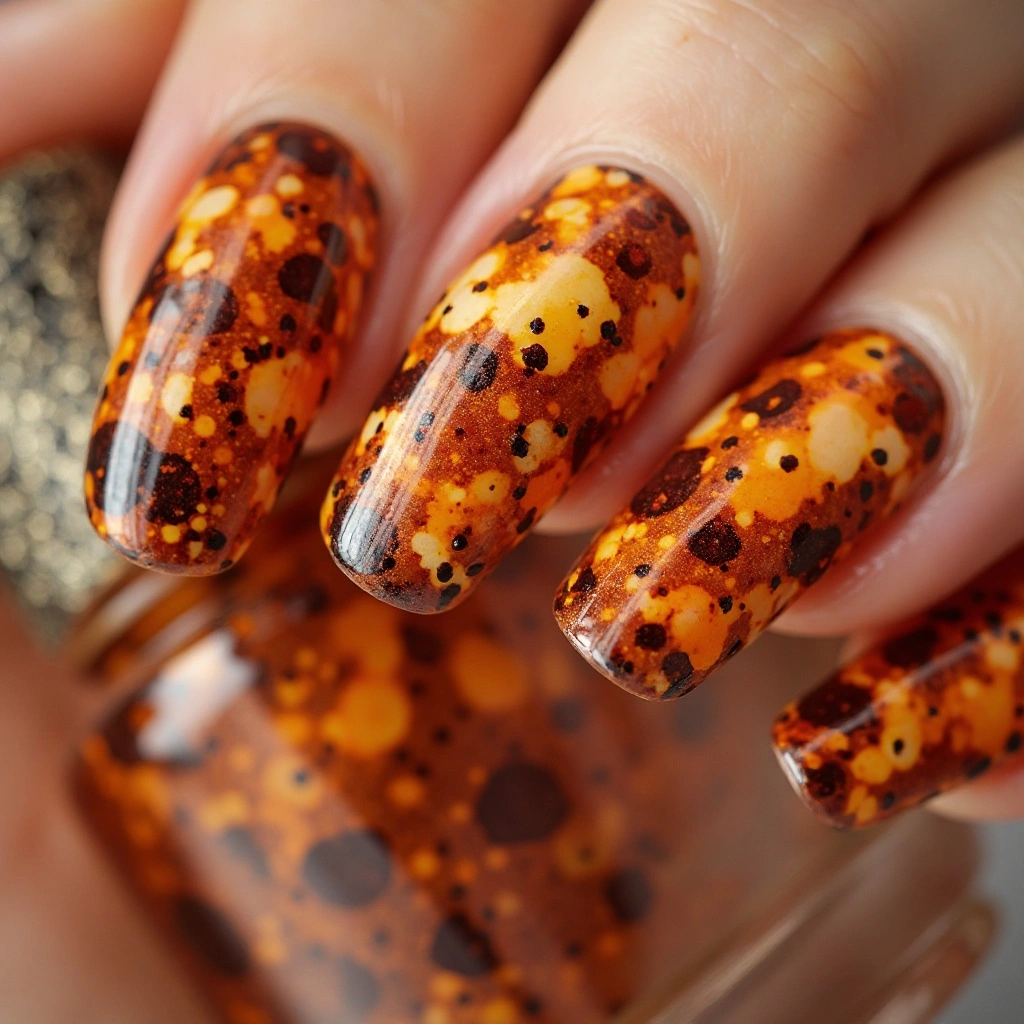
Warm amber and burnt orange blobs with dark brown edges float on a sheer base, exactly like real tortoiseshell material. Tiny black specks are stippled sparingly across some of the amber areas, mimicking the natural markings in shell. The effect is organic and rich, like holding actual tortoiseshell up to the light.
- Difficulty: Intermediate
- Time to complete: 50 minutes
- Best for: People who like the shrimp colors but want something that reads as “animal print” instead of “food”
- Why it works: Tortoiseshell uses the same amber, orange, and brown family but in a pattern people already recognize
- What makes it different: Adding tiny black specks like actual tortoiseshell instead of leaving it pure amber
Product recommendation: Depend’s Tortoiseshell Kit ($15) includes the exact amber, brown, and black shades that work together. Mixing brands for this design often results in chemical reactions that wrinkle.
14. Chrome Over Orange
A mirror-like metallic finish shifts between copper, rose gold, and warm bronze as light moves across it. The color isn’t a solid metallic—it has depth and movement, like looking at the inside of an abalone shell but in warm tones. From some angles it’s bright orange, from others it’s deep copper, and in direct light it flashes almost white-gold.
- Difficulty: Intermediate
- Time to complete: 40 minutes (gel only—chrome doesn’t work well with regular polish)
- Best for: People who want maximum shine and reflection
- Why it works: Chrome powder over orange shifts between copper and gold depending on light
- What makes it different: Using orange base instead of black (standard for chrome) gives warm reflections instead of cool
Product recommendation: Born Pretty Chrome Powder in Aurora ($6) shifts between pink and gold normally, but over orange it shifts between copper and red. The same powder over black gives a completely different look.
15. 3D Caviar Beads
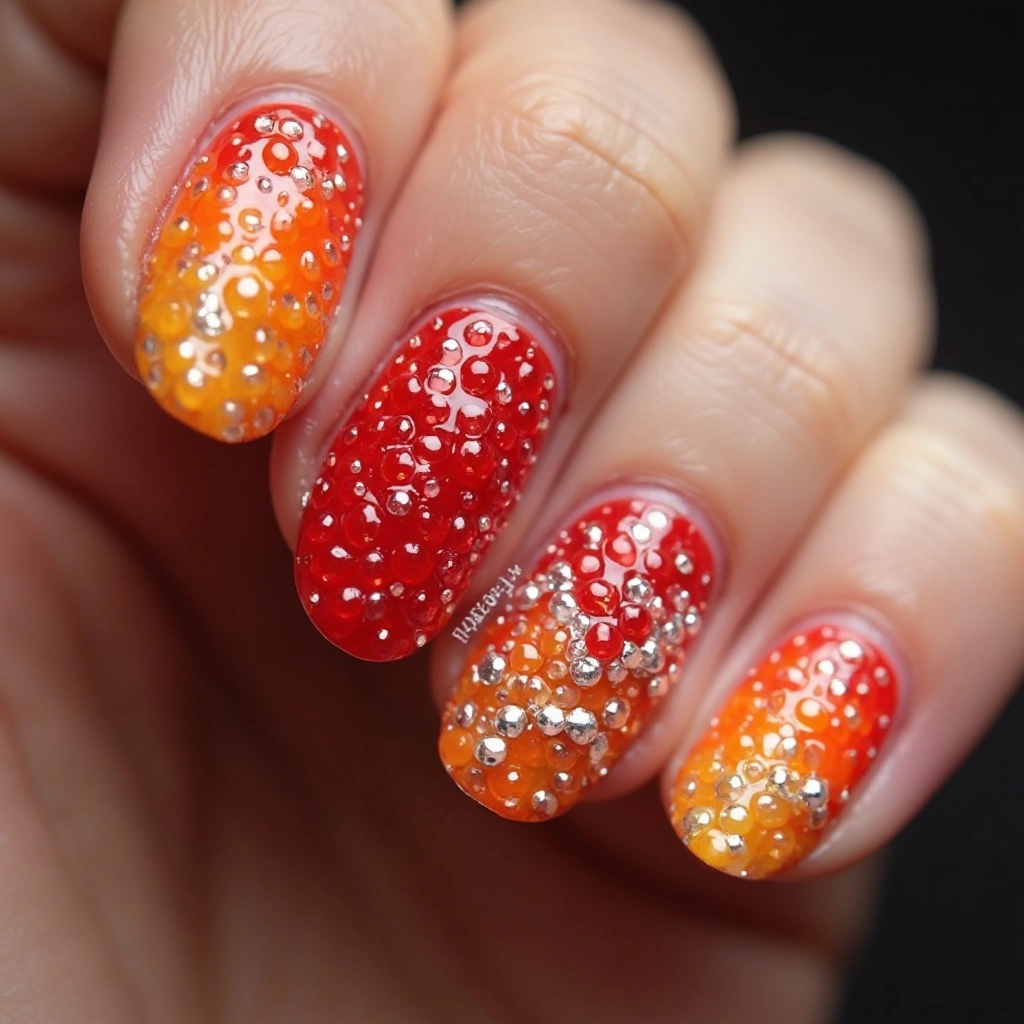
Tiny micro-beads in orange, red, and clear cluster on accent nails like roe or coarse seasoning. The beads create actual texture—you can feel them under your fingers. They’re concentrated in some areas, sparse in others, with the base color showing through between them. Light catches each bead individually, creating a sparkly, bumpy surface that’s completely different from smooth polish.
- Difficulty: Intermediate
- Time to complete: 1 hour
- Best for: Special events where you want texture and dimension
- Why it works: The tiny beads literally look like shrimp roe or seasoning granules
- What makes it different: Mixing orange, red, and clear beads instead of one color
Product recommendation: Nicole Diary 3D Caviar Beads Mix ($7) includes the right color ratio. Buying separate colors means you’ll have way too much of one shade.
16. Watercolor Washes
Soft, translucent layers of orange and red bleed into each other like watercolor paint on wet paper. There are no hard edges—just clouds of color that are darker in some spots and fade to nearly nothing in others. Gold flecks appear in the densest color areas like mica flakes in pigment. The effect is dreamy and artistic, like a painting rather than a manicure.
- Difficulty: Advanced
- Time to complete: 1 hour
- Best for: People who want soft, artistic results without hard lines
- Why it works: The translucent layers build depth like watercolor paint on paper
- What makes it different: Using isopropyl alcohol to thin polish instead of polish thinner creates more organic spread
Product recommendation: 91% Isopropyl Alcohol ($2 at drugstore) works better than 70% because it evaporates faster and spreads polish more evenly. The lower percentage leaves water spots.
17. Checkerboard Pattern
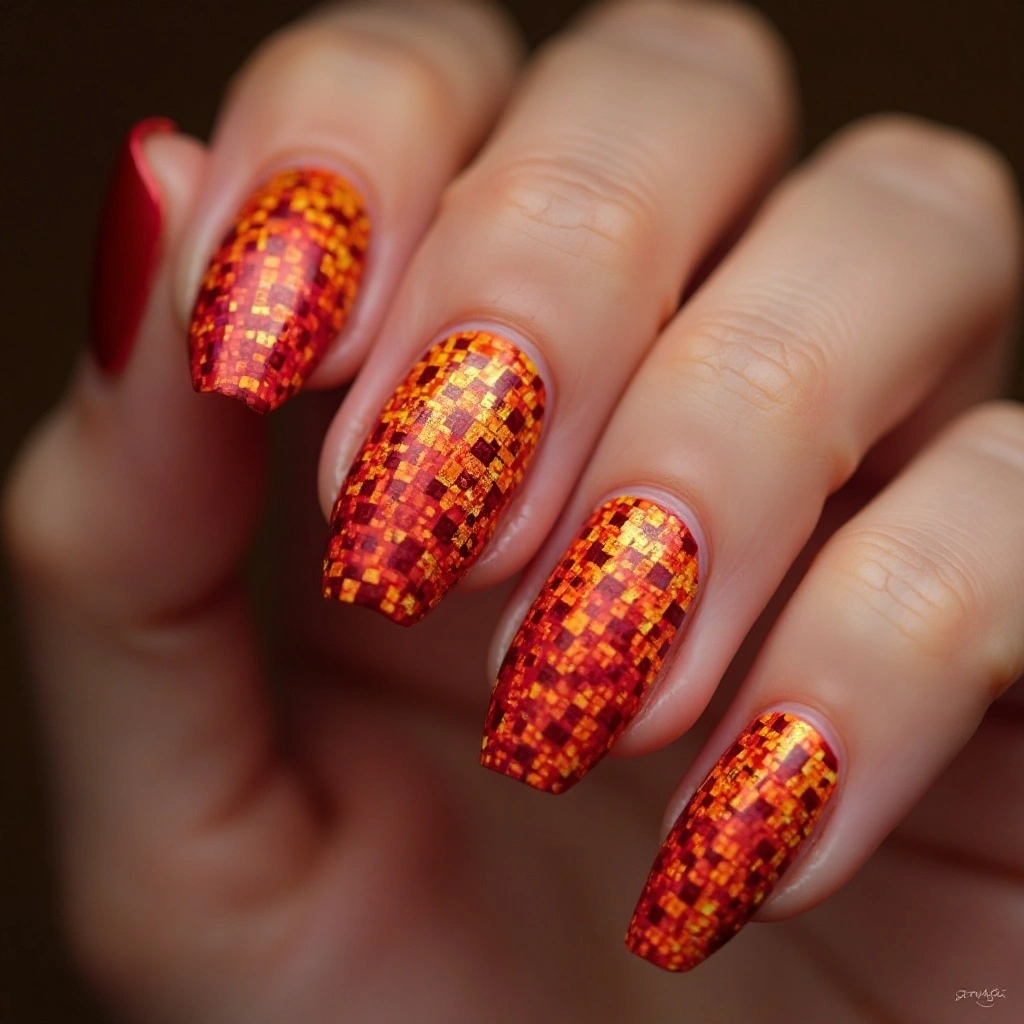
A grid of tiny squares in alternating burnt orange and deep red covers the nail like a warm-toned checkerboard. But half the squares are matte and half are glossy, so the pattern shifts as you move your hand. The color difference is subtle—it’s the texture difference that creates the visual interest. From far away it just looks textured; up close the pattern reveals itself.
- Difficulty: Intermediate
- Time to complete: 1 hour
- Best for: People who like structured patterns with the shrimp palette
- Why it works: The geometric pattern contrasts with the organic color theme
- What makes it different: Alternating matte and glossy squares within the checkerboard for texture contrast
Product recommendation: Liquid Palisade Tape Runner ($8) creates thinner lines than cut tape and adheres better to curved nail surfaces. The lines won’t bleed underneath.
Pros and Cons of Cajun Shrimp Nails
✅ Pros
- Color versatility – The orange-red-brown family works for summer and fall both
- Forgiving designs – Most patterns are abstract, so small mistakes blend in
- Photographs well – The warm tones pop in photos without filters
- Customizable intensity – Sheer versions exist for subtlety, bold versions for impact
- Matches existing wardrobe – These colors are in most people’s closets already
- Can be done at home – No special tools required for most designs
❌ Cons
- Staining risk – Orange and red pigments stain natural nails badly, especially cheap polishes
- Food comments – You will hear “nice shrimp nails” approximately 47 times in the first week
- Removal takes longer – Darker shades need extra soak time to lift completely
- Shows imperfections – Light boxes and ring lights reveal every bump and bubble
- Color matching frustration – “Burnt orange” varies wildly between brands
- Not office-friendly everywhere – Some workplaces still consider bold colors unprofessional
- Can look dated quickly – Trend-specific colors feel less exciting when the trend passes
- Yellow base coats required – Without a good base, orange turns nails yellow underneath
Maintenance Tips That Actually Work
Days 1-3: The Critical Window
Wrap your tips. Every single time you apply color, run the brush across the free edge of your nail. This seals the tip and prevents water getting underneath. I skipped this my first time and had peeling by day 4.
Reapply top coat on day 3. Even with gel, the shine starts dulling by day 3. Add a fresh layer of Seche Vite ($9) or your usual top coat. For gel, wipe the sticky layer off first, then add another gel top coat and cure.
Days 4-7: Watch for Lifting
Check cuticle edges daily. If you see a tiny gap where the polish has lifted from the nail, don’t pick at it. Apply a tiny drop of thin nail glue under the lifted edge using a toothpick, press down for 30 seconds, then add top coat over the spot. This buys another 3-4 days.
Wear gloves washing dishes. I know everyone says this, but here’s why specifically for these colors: hot water softens the orange pigments and they can actually bleed into your nail plate. I have two stained nails from ignoring this.
Days 8-14: Damage Control
File down any chips. If a tip chips, don’t try to patch the color—it’ll look bumpy. File the nail down to just below the chip, reshape, and add a layer of top coat to the whole nail. The design will be smaller but intact.
Cuticle oil every night. Jojoba-based oil penetrates the nail plate better than mineral oil. I use CND Solar Oil ($12) because it’s thin enough to soak in within 5 minutes. Thicker oils sit on top and don’t help flexibility.
Week 3 and Beyond
Know when to stop. If more than two nails have lifting near the cuticle, removal time has arrived. Trying to push these designs past 3 weeks (for gel) or 10 days (for regular polish) just means you’ll damage your nail surface during removal.
Common Mistakes (And How to Fix Them)
Mistake 1: The Colors Turned Muddy
What it looks like: Instead of distinct orange and red swirls, everything blended into a brownish mess.
Why it happens: Working with wet polish too long. When you keep dragging through colors that aren’t dry, they mix completely instead of just at the edges.
Exact fix: For your next attempt, let each color dry 2-3 minutes before adding the next. If you’re using gel, cure between each color—don’t just rely on the tacky layer. For current muddy nails, add a shimmer top coat over everything. The glitter distracts from the muddiness and ties it together intentionally.
How well it works: Shimmer saves about 70% of muddy manicures. The other 30% need removal and restart.
Mistake 2: Staining After Removal
What it looks like: Your natural nails are yellow-orange after you take the polish off.
Why it happens: Highly pigmented reds and oranges contain dyes that penetrate the nail plate, especially if you didn’t use a base coat or used a cheap one.
Exact fix: Mix one part lemon juice with two parts hydrogen peroxide. Soak nails for 5 minutes. Scrub gently with a soft toothbrush. Rinse. Apply cuticle oil heavily. Repeat every other day until staining fades. Do not use nail bleach products—they dry out nails and cause peeling.
How well it works: This removes about 80% of surface staining within a week. Deep staining that penetrated the whole nail plate has to grow out.
Mistake 3: Bubbles in Top Coat
What it looks like: Tiny air pockets scattered across the nail that appeared after drying.
Why it happens: Shaking the bottle before use introduces air bubbles. Also happens when you apply top coat too thick or over polish that isn’t fully dry.
Exact fix: If caught while wet, dip a brush in acetone and lightly go over the bubbles—they sometimes pop and self-level. If dry, file the top coat lightly with a fine buffer (gently!) and reapply a thin layer of fresh top coat. Don’t shake the bottle—roll it between palms to mix.
How well it works: Catching bubbles wet saves the manicure 90% of the time. Fixing them after drying works about 50% of the time; the other half need full removal.
Mistake 4: Swirls Look Like Worms
What it looks like: Instead of graceful curves, you have thick, uneven lines that don’t flow.
Why it happens: Using too much polish on the brush and pressing too hard. The bristles splay out and deposit more product than intended.
Exact fix: Dip brush in acetone, wipe almost dry, then carefully “erase” the thick sections by brushing over them with the damp brush. This thins them out. Let dry and re-paint only the problem areas. For future attempts, wipe most of the polish off the brush onto a paper towel before touching the nail. You want the brush almost dry, then build up slowly.
How well it works: The acetone trick saves wormy swirls about 60% of the time. Really thick ones need to be fully removed and restarted.
Two-Week Wear Test
I wore the Classic Swirl design with gel polish for two weeks to see how it actually holds up. Here’s the real timeline:
Week 1:
- Days 1-3: Perfect. High shine, swirls crisp, compliments from three people.
- Day 4: Noticed tiny tip wear on my dominant hand index finger. Added fresh top coat.
- Day 6: First small chip on my right thumb from opening a can. Filed it down slightly and sealed with top coat.
Week 2:
- Day 8: Shine has dulled noticeably even with the Day 4 top coat. Considered adding another layer but got lazy.
- Day 10: Left middle finger developed lifting at the cuticle edge. Caught it early and glued it down.
- Day 12: Right ring finger lifted badly after showering. Decided not to repair—just monitored it.
- Day 14: Three nails have obvious lifting, two have small chips, but from 3 feet away they still look decent. Could push to Day 16 if needed.
What I learned: The design itself held up fine. The issue was entirely tip wear and cuticle lifting, which happens with any gel manicure. Swirls stayed crisp because they’re under top coat, not on top of it.
FAQs
Do Cajun shrimp nails work on dark skin tones?
Yes, but you might need to adjust the color ratios. The standard bright orange can look chalky on deeper skin. Switch to deeper burnt oranges, terra cottas, and adding burgundy or wine tones creates contrast that pops. The sheer versions actually show the natural nail’s warmth through the color, which looks better than opaque brights.
How do I remove the glitter versions without destroying my nails?
The foil method works best: soak cotton pads in acetone, place on nails, wrap each finger in foil, wait 15 minutes. The glitter should slide off. Don’t scrape—if it doesn’t slide, soak 5 more minutes. For encapsulated glitter, you might need to file the top layer gently before soaking because the thick clear layer prevents acetone penetration.
Can I get these with dip powder instead of gel?
Yes, but the designs will be limited. Dip powder works best for solid colors or simple gradients. You can’t do detailed swirls or marble effects because the powder application is too thick and the activator makes brushwork impossible. Ask for a “dip manicure with hand-painted gel accents”—they do the dip on most nails, then add designs on accent nails with gel polish and cure separately.
Why do my nails smell like burning when I cure the orange gel?
Some orange and red pigments generate more heat during LED curing than other colors. It’s called “heat spike” and happens with certain formulations. To minimize, cure in short 10-second bursts instead of one long cure, and keep your hand farther from the lamp. If it genuinely burns, that gel line might be bad—discontinue use.
Where to Start
If you’re trying Cajun shrimp nails for the first time, consider beginning with the Classic Swirl design on one accent nail. It teaches you the color mixing without requiring perfection across ten fingers. You’ll learn how the oranges and reds interact, how much pressure to use with your brush, and whether the look actually suits your style.
The marble design is another solid starting point—it’s the most forgiving and still photographs beautifully.
Just remember that orange pigments stain, so use a quality base coat and don’t panic if your nails look slightly warm-toned after removal. A few days of cuticle oil and lemon soaks will sort it out.
Have you tried these yet? I’d love to know which design you pick and how it holds up for you.