7 Beach Nails Inspo – Coastal Designs for Your Perfect Summer Manicure
Beach nails need to work overtime—they’ve got to survive salt water, sand, chlorine, and intense sun while still looking good in all your vacation photos. These designs bring coastal vibes without the high maintenance, transitioning easily from beach days to sunset dinners.
Whether you’re planning a week at the shore or just want nails that scream “I’m on island time,” here are 7 beach-inspired looks that actually hold up to real beach life.
Here 7 Beach Nail Ideas
1. Ocean Wave Ombré
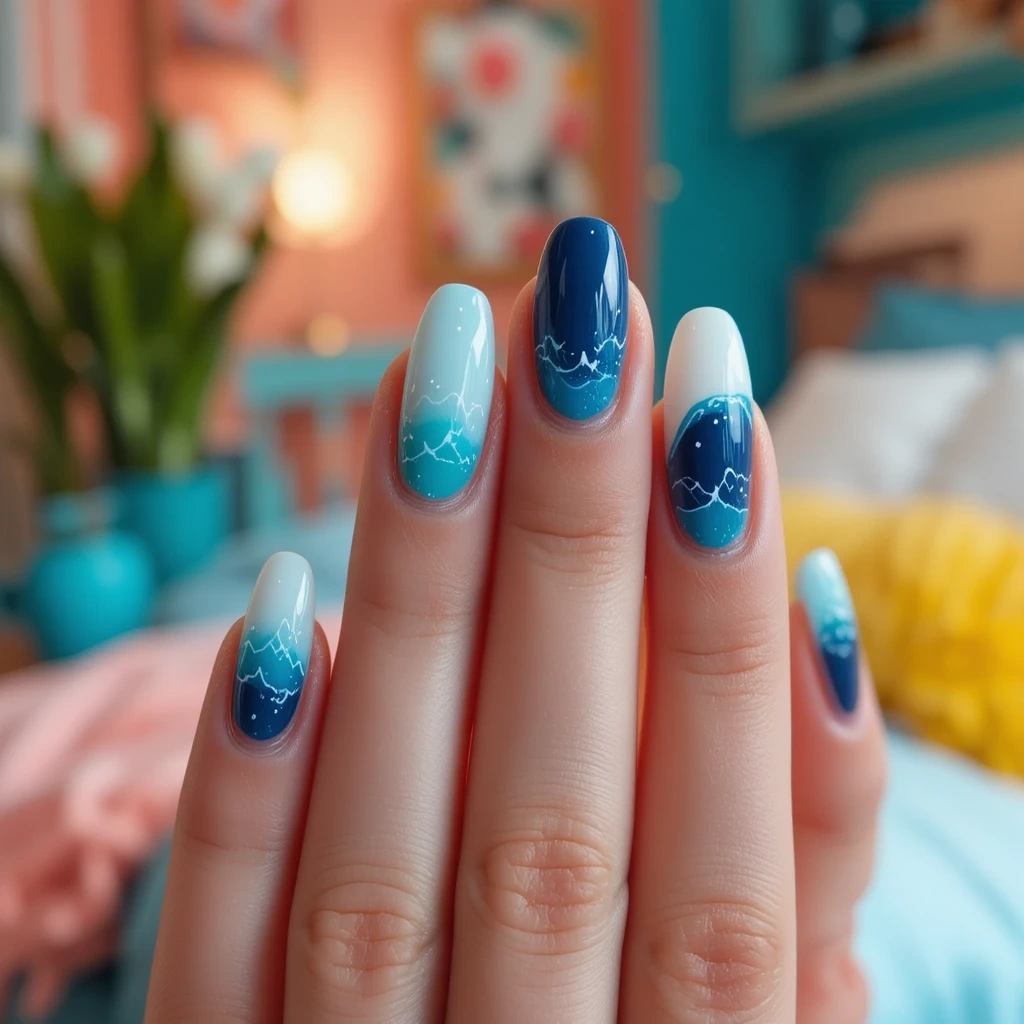
A gradient design that flows from deep navy blue at the base through turquoise to foamy white tips, mimicking actual ocean waves. The seamless color transition creates depth and movement, with optional white accent lines to enhance the wave effect. This stunning design works on any nail length and brings instant vacation vibes without being too literal or juvenile.
Why It Works: This design captures the essence of the sea with artistic sophistication while remaining wearable for everyday summer activities. The gradient technique flatters all nail shapes and skin tones, offering visual interest that never looks boring.
Pro Tip: Use a makeup sponge to create smooth color transitions, and seal with glossy topcoat to enhance the water-like shimmer and protect the detailed work.
How to Create This Look at Home:
Start with a white base coat to make colors pop more vibrantly. Apply your darkest color (navy blue) to the bottom third of a slightly damp makeup sponge, turquoise in the middle, and white at the top, creating distinct color zones. Gently dab the sponge onto your nail in a rolling motion, starting at the cuticle and moving toward the tip—repeat 2-3 times until you achieve smooth color blending.
Clean up excess polish around your cuticles using a small brush dipped in acetone or nail polish remover for crisp edges. Once completely dry, use a thin nail art brush to add optional white curved lines that mimic wave foam—simply draw loose “S” curves across the gradient. Finish with two coats of high-shine topcoat to blend everything seamlessly and add that glossy, water-like finish.
Recommended Products: Use OPI or Essie gel-like polishes for rich pigmentation (try OPI “Yoga-ta Get This Blue” for navy, “Teal Me More” for turquoise), beauty wedge sponges, and Seche Vite topcoat for professional shine.
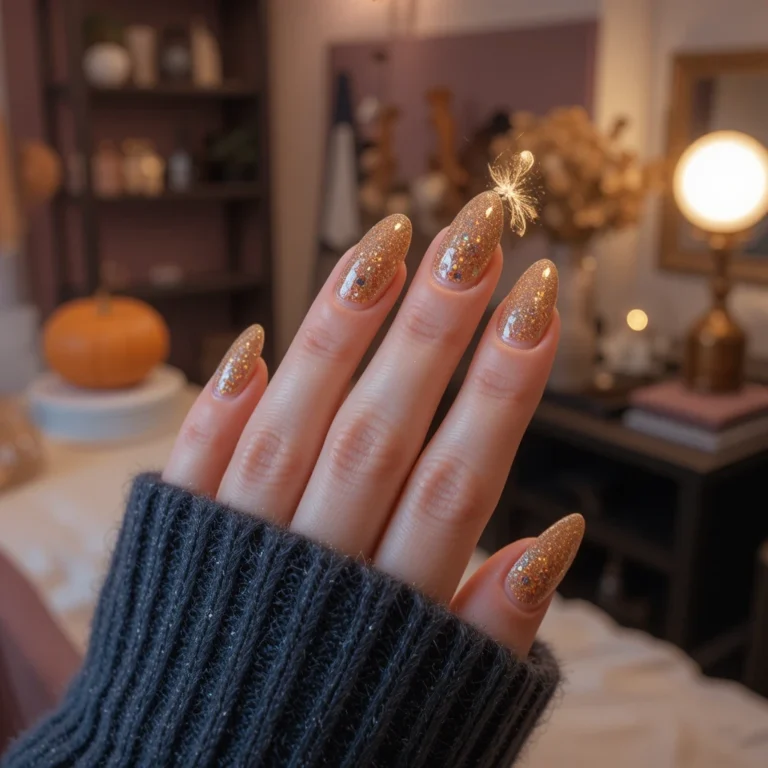
2. Sandy Nude with Gold Foil
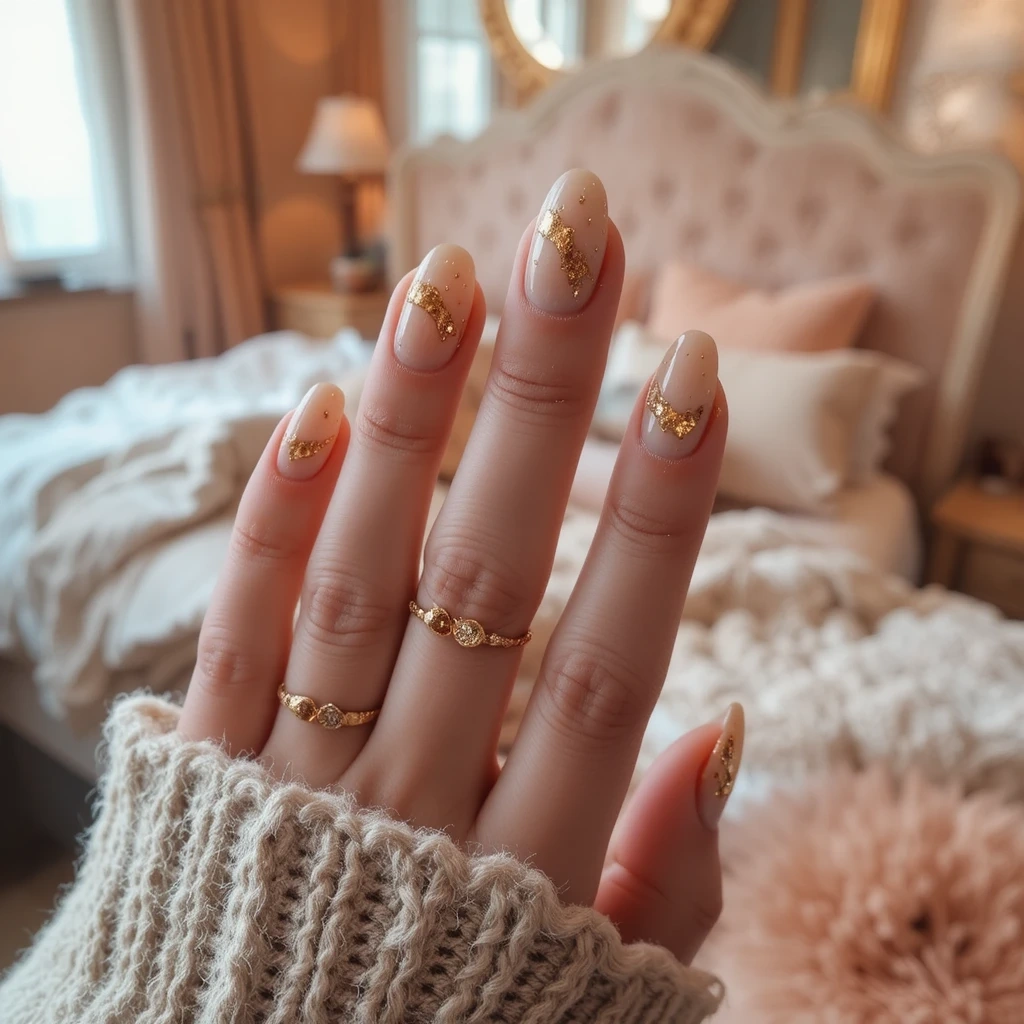
A warm sandy beige base adorned with irregular gold foil flakes that catch light like sun reflecting off beach sand. The neutral foundation keeps the look grounded while metallic accents add luxury and dimension without overwhelming the design. This combination feels both minimalist and special—perfect for those who want subtle glamour with coastal inspiration.
Why It Works: The nude base is universally flattering and office-appropriate while gold foil adds just enough sparkle for evening beach outings. This design photographs beautifully and complements every summer outfit from casual to dressy.
Pro Tip: Apply foil flakes randomly for an organic, natural look, and choose almond or oval shapes to elongate fingers and keep the aesthetic sophisticated.
How to Create This Look at Home:
Apply two coats of your sandy nude polish and let it dry almost completely but remain slightly tacky. Tear gold foil into small irregular pieces—don’t worry about perfect shapes since random placement looks more natural and beachy. Using tweezers or an orangewood stick, gently press foil pieces onto the nail wherever you want shimmer, focusing on tips and mid-nail areas.
Pat down the foil edges gently to ensure they adhere to the slightly tacky polish underneath. Wait 5-10 minutes for everything to set, then apply a generous layer of topcoat to seal the foil permanently and smooth out any raised edges. For best results, cap the free edge thoroughly with topcoat to prevent foil from catching and peeling off.
Recommended Products: Essie “Sand Tropez” or OPI “Samoan Sand” for the base, Sally Hansen Gold Foil Kit or Born Pretty nail foil flakes, and a thick topcoat like Essie Gel Couture Top Coat for maximum sealing.
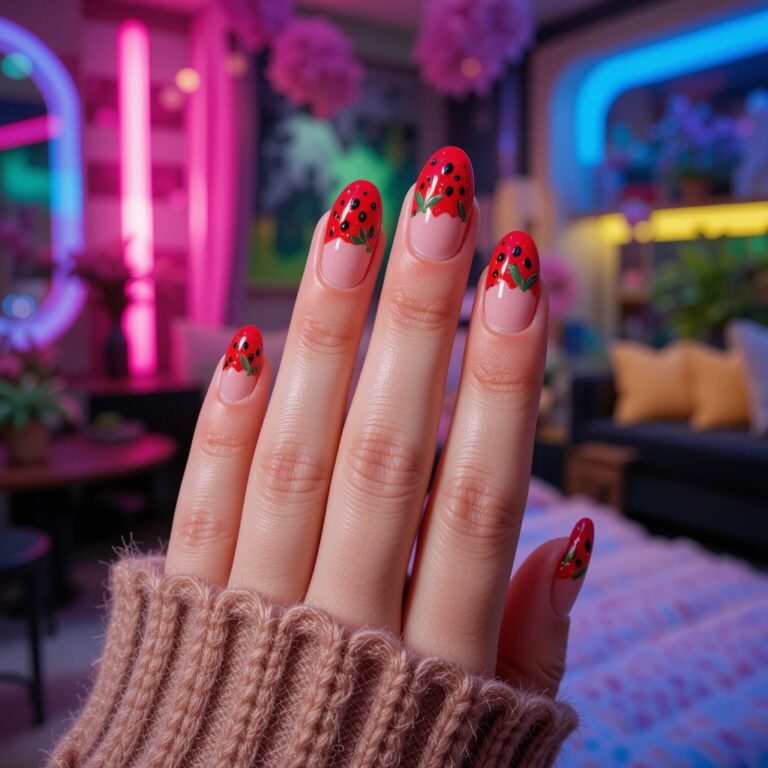
3. Turquoise Chrome with Shell Accents
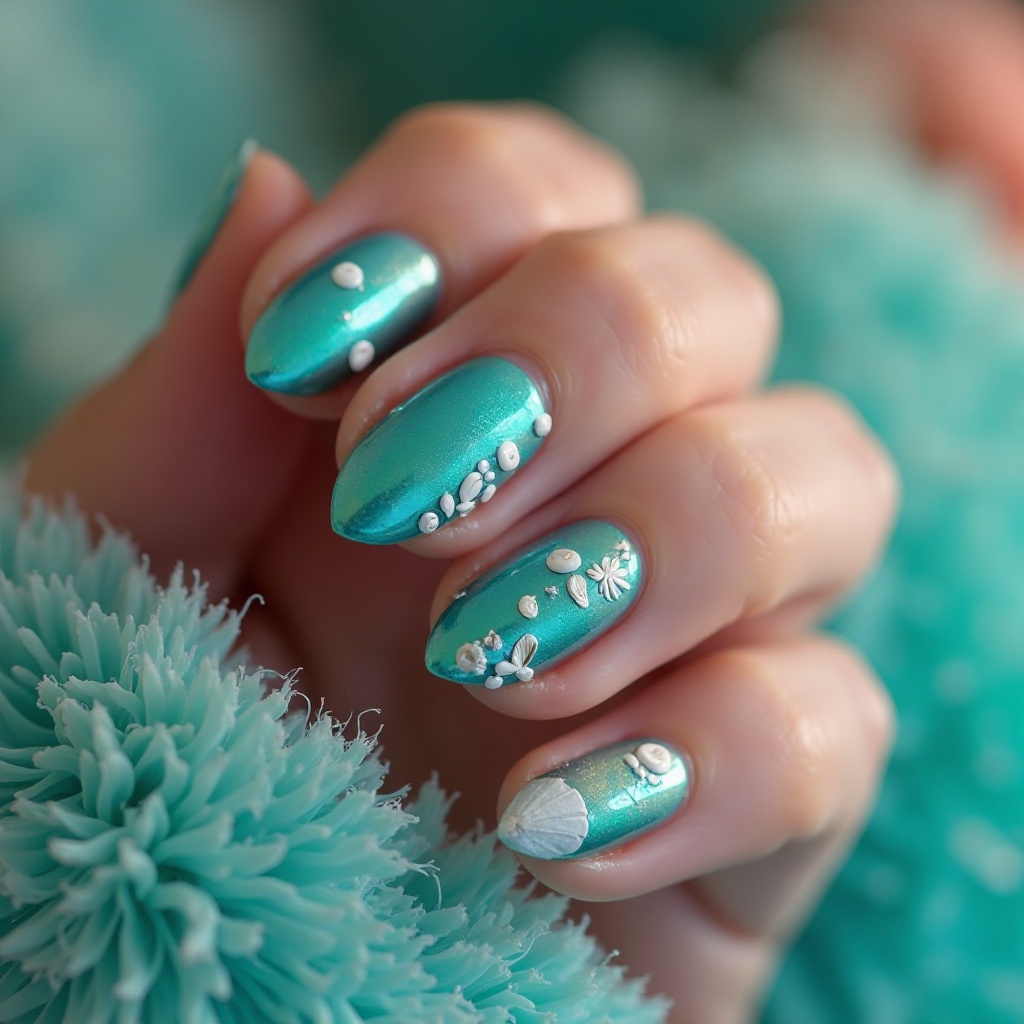
A vibrant turquoise chrome base that shimmers with iridescent, mirror-like finish, accented with tiny white shell details on one or two nails. The metallic finish shifts between blue and green depending on lighting, creating that magical mermaid effect. Delicate shell art adds whimsy without making the design feel childish or overly themed.
Why It Works: Chrome finish is incredibly eye-catching and trendy while turquoise evokes tropical waters that everyone associates with beach paradise. The combination of high-shine metallics and organic shell motifs balances modern edge with coastal charm.
Pro Tip: Keep shell accents minimal—one per hand maximum—to maintain sophistication, and opt for shorter nails in squoval shape to balance the bold chrome finish.
How to Create This Look at Home:
For the easiest home application, use a turquoise chrome nail polish (not powder) which gives great shine without needing gel curing equipment. Apply two thin coats of your chrome polish, allowing each coat to dry completely for the best mirror effect. On your accent nail only (typically the ring finger), wait until the chrome is completely dry before adding shell details.
Use white acrylic paint or white nail polish with a fine detail brush to create small shell shapes—start with simple clamshells (a curved “U” shape with radiating lines) or tiny starfish. Keep shell designs small (about 3-4mm) and place just one or two per accent nail for sophistication. Seal everything with a glossy topcoat, being careful not to smudge the white details—apply topcoat gently in thin layers rather than thick, brushy strokes.
Recommended Products: Sally Hansen Chrome Nail Polish in “Mermaid’s Tale” or Revlon ColorStay Gel Envy in “Cardshark,” white acrylic paint (Liquitex Basics) or LA Colors White Crème polish, fine detail nail art brushes (size 00 or 000), and Essie Gel Setter topcoat.
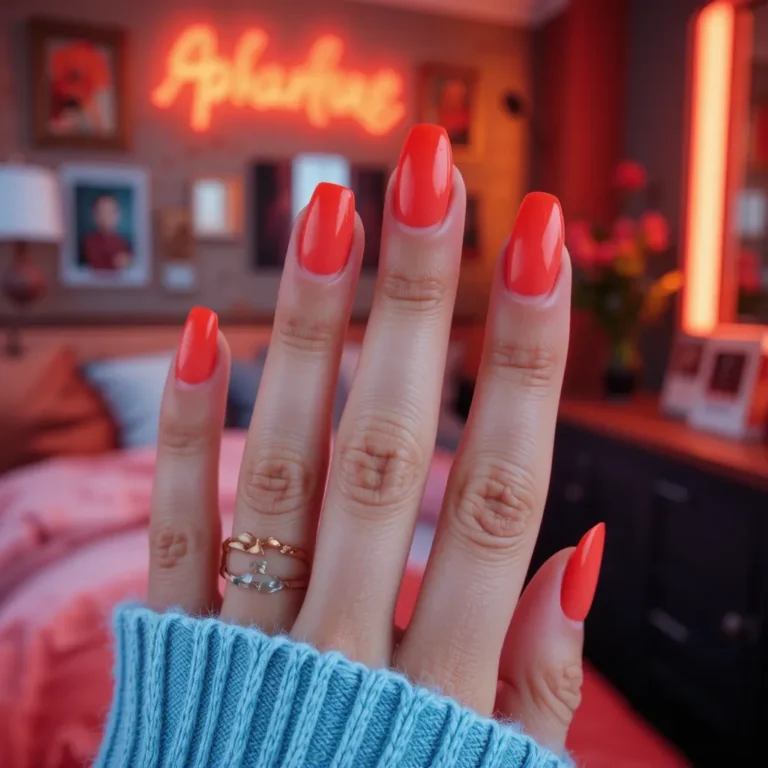
4. Milky White with Coral Swirls
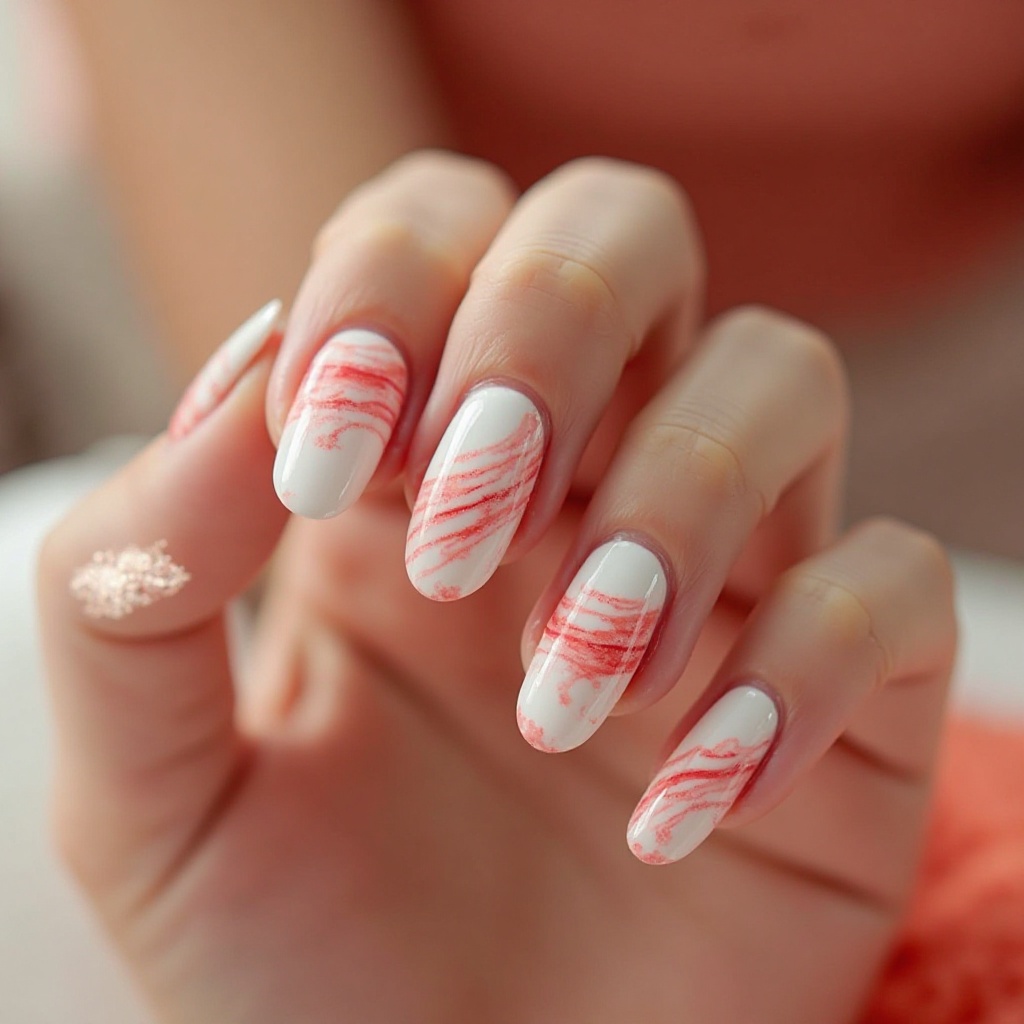
An opaque milky white base featuring freehand coral pink swirls that resemble ocean currents or watercolor brush strokes. The soft, organic lines create movement and artistry while keeping the overall look clean and fresh. This design feels contemporary and Instagram-worthy without requiring salon-level skills to recreate at home.
Why It Works: White is the quintessential beach color that makes tans pop and works with absolutely any outfit or accessory. The coral swirls add personality and warmth while maintaining an airy, breathable quality perfect for hot summer days.
Pro Tip: Use a thin nail art brush or dotting tool to create flowing swirl patterns, and finish with matte topcoat for an elevated, editorial beach aesthetic.
How to Create This Look at Home:
Apply two coats of opaque milky white polish and allow to dry completely so swirls won’t drag or smudge the base. Thin your coral polish slightly with 1-2 drops of clear topcoat on a palette or small dish—this makes the swirls more fluid and easier to manipulate. Using a thin striping brush or liner brush, pick up the thinned coral polish and create loose, flowing “S” shapes and curved lines across the nail randomly.
Don’t overthink the placement—organic, imperfect swirls look more artistic and beachy than perfectly controlled patterns. Work on one or two nails at a time so you can see the overall balance before the polish dries. Let everything dry for at least 10 minutes, then apply matte topcoat for that modern editorial finish, or use glossy topcoat if you prefer traditional shine.
Recommended Products: OPI “Alpine Snow” or Essie “Blanc” for milky white base, OPI “Coral-ing Your Spirit Animal” or Sally Hansen “Peach of Cake” for swirls, thin striping brushes (Winstonia or Makartt brand), and OPI Matte Top Coat or Essie Matte About You.
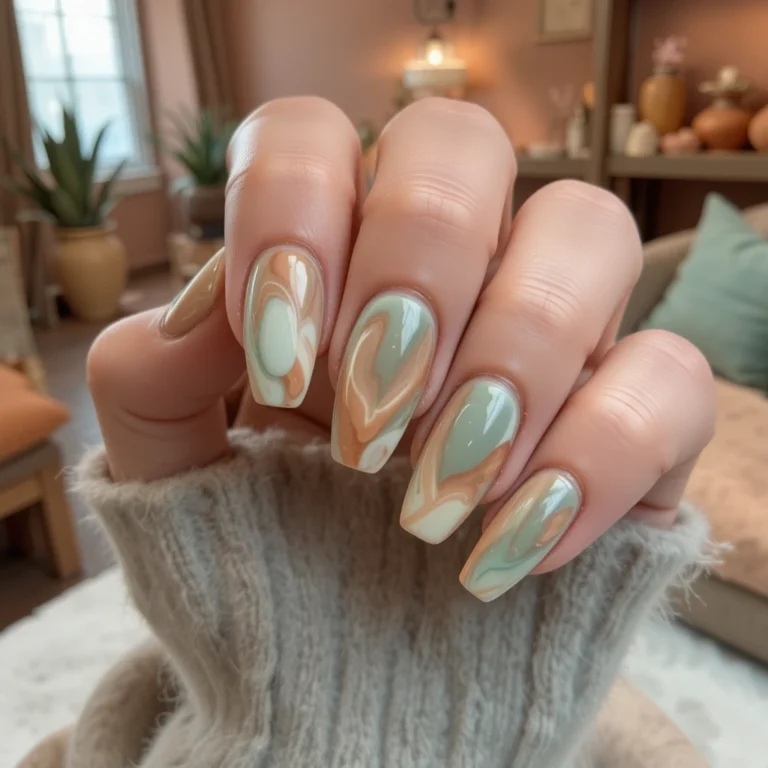
5. Seafoam Green Glazed
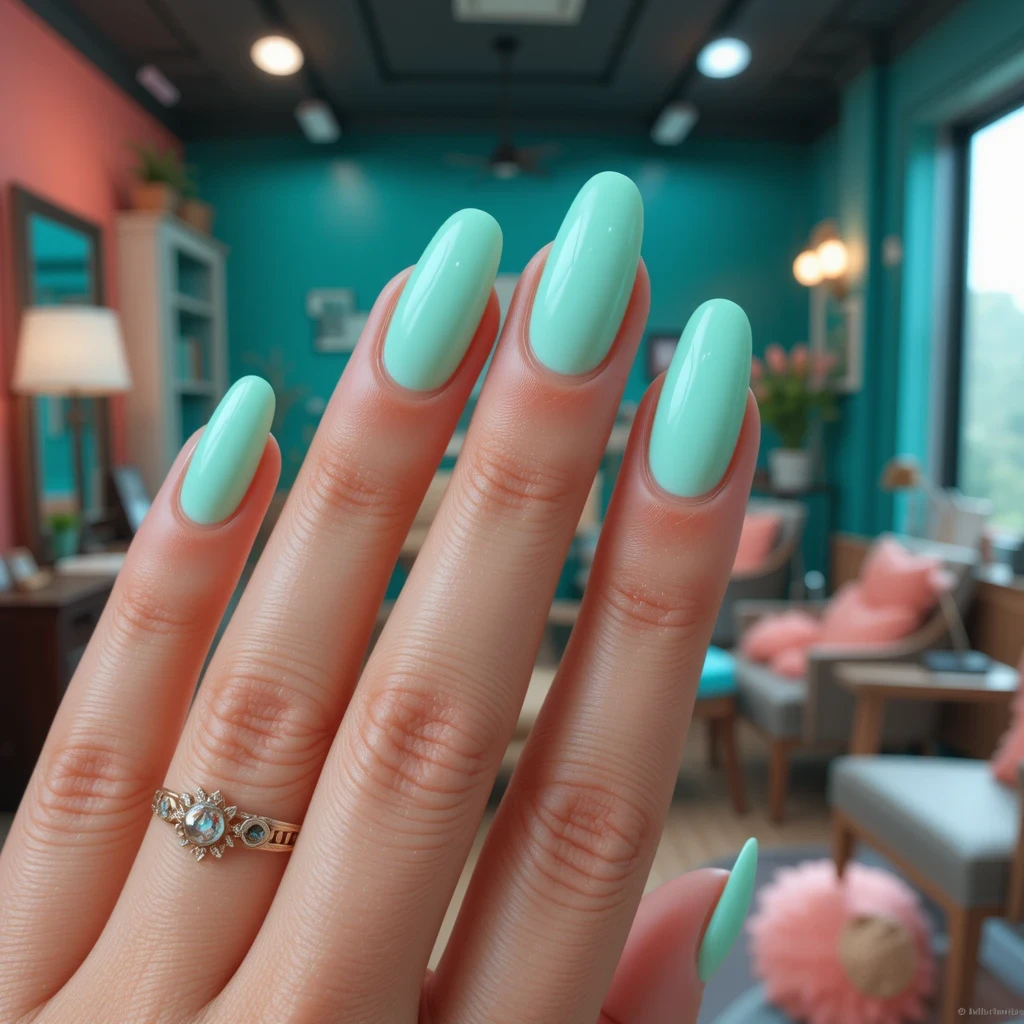
A pale minty seafoam green with a glossy glazed finish that creates a translucent, glass-like appearance reminiscent of sea glass. The jelly-like quality allows your natural nail to show through slightly, creating depth and dimension. This dreamy shade is calming and coastal without being too sweet or overpowering for everyday wear.
Why It Works: Seafoam is the perfect alternative neutral for summer, offering color without boldness and sophistication without being boring. The glazed finish adds modern appeal and disguises minor chips better than flat cream polishes.
Pro Tip: Apply 2-3 thin coats for buildable opacity, and choose medium-length nails in round or oval shapes to showcase the beautiful translucent quality.
How to Create This Look at Home:
Start with a clear base coat to create the smoothest foundation for the translucent effect. Apply your first coat of seafoam polish very thinly—it should look sheer and allow your natural nail to show through noticeably. Add a second thin coat after the first is completely dry, building color gradually rather than applying thick layers that lose the glazed, jelly-like quality.
For the signature glazed effect, apply a third coat if needed for your desired opacity level—some people prefer more coverage while others love the sheer look. The key to the glazed finish is using an ultra-glossy topcoat: apply one thick, generous layer while being careful not to flood cuticles. For extra dimension, you can add a second topcoat layer once the first is dry for that glass-like, wet-look finish.
Recommended Products: Essie “Mint Candy Apple,” OPI “This Cost Me a Mint,” or Olive & June “SG” for the seafoam shade, Essie Gel Couture Top Coat or Seche Vite for maximum gloss and that signature glazed effect.
6. Pearl White with Starfish Detail
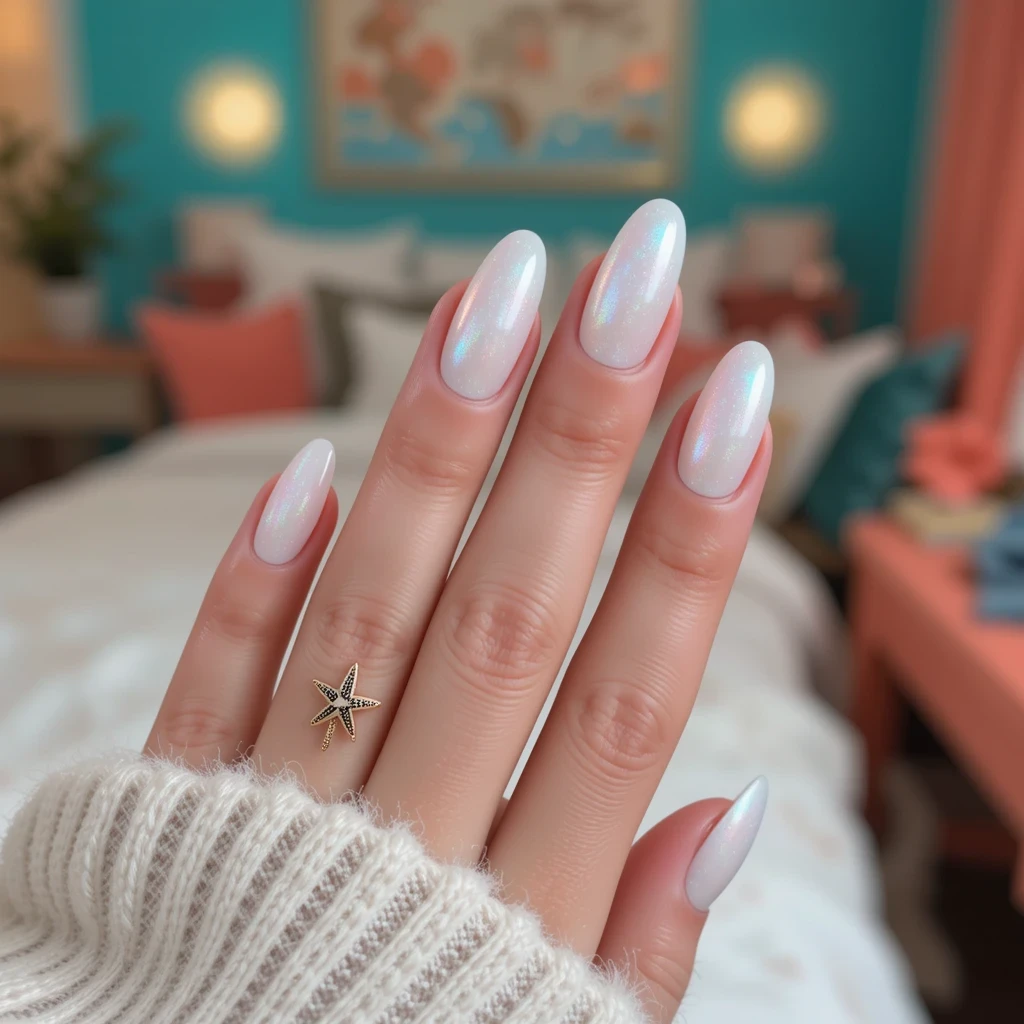
A shimmering pearl white base with subtle iridescence, featuring a small gold or rose gold starfish charm on the accent nail. The luminous white has delicate pink and blue undertones that shift in different lighting conditions. This elegant design balances beachy theme with refined taste—it’s celebratory without being costume-like.
Why It Works: Pearl finishes elevate any beach design from casual to sophisticated, making this appropriate for beach weddings or special occasions. The single starfish accent adds personality without overwhelming the elegant foundation or requiring maintenance-heavy nail art.
Pro Tip: Use a pre-made 3D starfish charm secured with gel or nail glue for durability, and keep other nails simple to let the accent nail shine.
How to Create This Look at Home:
Apply two coats of pearl white polish to all nails and let dry completely—this creates your elegant base that looks beautiful on its own. On your chosen accent nail (ring finger works best), decide where you want your starfish positioned—slightly off-center near the cuticle or at the tip looks most natural. Apply a tiny dot of nail glue or a small amount of clear polish exactly where you want the starfish to sit.
Using tweezers, carefully place a small metal starfish charm (5-6mm works best) onto the glue and press down gently for 10-15 seconds to secure. Wait at least 5 minutes for the glue to set before applying topcoat to avoid shifting the charm. Apply topcoat to all nails, being extra careful around the starfish—gently paint around it first, then lightly over it to seal the edges without flooding the charm with too much product.
Recommended Products: Essie “Pearly White” or OPI “Pearl of Wisdom” for the base, small metal starfish nail charms from Amazon or Born Pretty (5-6mm size), Modelones nail glue for 3D charms, and Seche Vite topcoat for sealing.
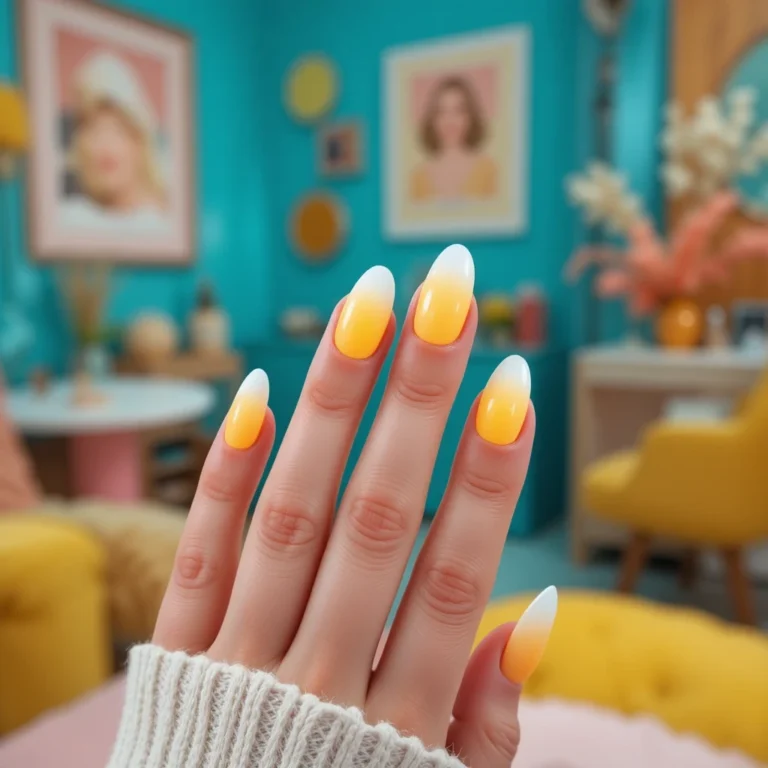
7. Sunset Gradient with Palm Silhouette
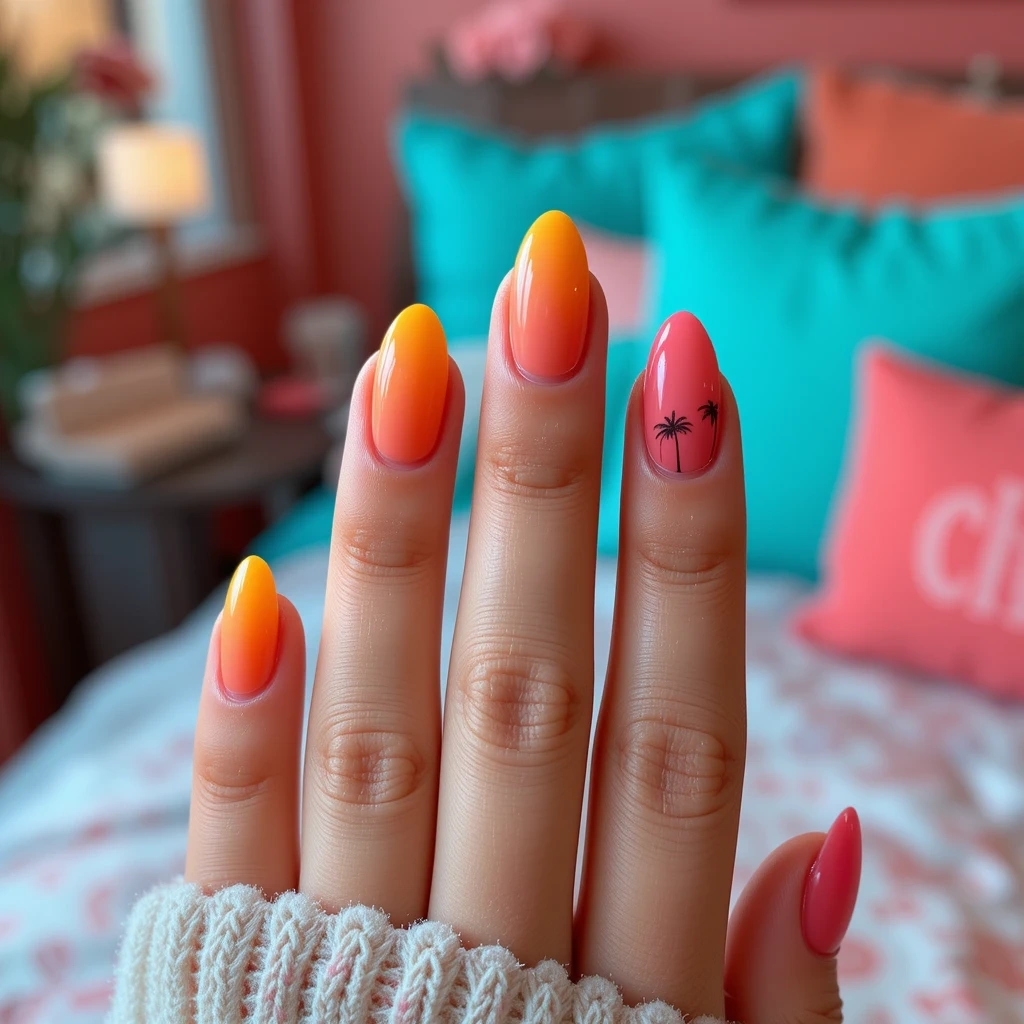
A warm gradient that transitions from golden yellow through peachy orange to deep pink, topped with a single black palm tree silhouette. The color blend mimics those breathtaking beach sunsets where the sky becomes a canvas of warm hues. The palm silhouette adds a graphic element that’s recognizable yet stylish—not tacky or overly tropical.
Why It Works: Sunset colors are universally beautiful and flattering on all skin tones while evoking strong emotional connections to beach memories. This design makes a statement without being too bold or difficult to coordinate with your wardrobe.
Pro Tip: Create the gradient with a makeup sponge, add the palm silhouette using a stamping plate for precision, and seal everything with glossy topcoat for longevity.
How to Create This Look at Home:
Apply a white base coat to make the sunset colors more vibrant and help them blend smoothly. On a makeup sponge, paint horizontal stripes of your three colors in order: golden yellow at the top, peachy orange in the middle, and deep pink at the bottom—make the stripes overlap slightly at the edges. Lightly mist the sponge with water or setting spray to keep it from absorbing too much polish, then dab it onto your nail in a gentle bouncing motion.
Rotate the sponge slightly with each dab to blend the colors naturally—repeat 2-3 times until you achieve a smooth gradient transition. Clean up the skin around your nails thoroughly with a brush dipped in acetone. For the palm tree, either use a palm tree stamping plate (easiest method) or hand-paint with a fine detail brush and black polish—create a simple curved trunk with 4-5 frond lines extending outward. Apply two coats of glossy topcoat to blend the gradient perfectly and seal the palm design.
Recommended Products: China Glaze “Sun Worshiper” (yellow), OPI “Crawfishin’ for a Compliment” (orange), Essie “Cute as a Button” (pink), nail stamping plate with palm tree designs (Maniology MXM033 or Born Pretty), black stamping polish or Essie “Licorice,” and Seche Vite topcoat.
What Actually Survives Beach Conditions
Water Is Your Manicure’s Worst Enemy
Let’s be real: constant water exposure ruins nail polish. Salt water is acidic and breaks down polish bonds. Chlorine is literally a chemical designed to break things down. Even fresh pool water makes your nails expand and contract, causing lifting. If you’re swimming multiple times a day, gel polish isn’t optional—it’s survival. Regular polish will chip by day two, guaranteed.
The 24-Hour Rule
Get your manicure at least 24 hours before hitting the beach. Even if gel polish feels dry immediately after curing, it needs time to fully bond to your nail. Jump in the ocean too soon and you’ll get that annoying lifting at the edges where water seeps underneath. Same goes for regular polish—it needs a full day to harden completely, not just dry to the touch.
Sand Is Secretly Abrasive
Beach sand acts like gentle sandpaper on your nail tips. If you’re digging in sand, building sandcastles, or walking barefoot and using your hands for balance, your tips will wear down fast. This is why capping the free edge (running polish over the tip) is non-negotiable for beach nails. That sealed edge is what stands between your manicure and total destruction by day three.
Sunscreen Breaks Down Polish
The oils in sunscreen soften nail polish, causing it to peel and lift, especially around cuticles. Apply sunscreen with gloves if possible, or at minimum wash your hands immediately after application. If you’re reapplying sunscreen every two hours (like you should be), that’s multiple daily opportunities for your manicure to break down. Plan accordingly.
Beach Nail Colors That Photograph Well
You’ll take 500 photos of your nails on vacation. Might as well make them look good in pictures.
Turquoise and White – This combo pops against blue water and sandy backgrounds. Turquoise looks vibrant without being neon, white makes your tan look darker. Both are Instagram gold.
Coral with Gold – Warm tones photograph beautifully during golden hour (which is when you’ll be taking sunset beach photos anyway). Gold catches light without looking too flashy.
Seafoam and Nude – If you’re going for that minimalist aesthetic, these soft tones look expensive and intentional in photos without competing with your surroundings.
Avoid All-Black – Unless you’re specifically going for a moody vibe, black nails can look harsh against bright beach backgrounds and tend to make hands look smaller in photos.
The Embellishment Question
3D Charms and Beach Activities Don’t Mix
Those cute little shell charms and pearl embellishments? They’ll last exactly until you grab your beach towel wrong or dig through your beach bag. If you’re doing water sports, forget it—they’re gone. Save elaborate 3D embellishments for resort vacations where you’re mostly lounging, not active beach weeks.
Flat Embellishments Have a Better Shot
Gold foil, flat shell fragments sealed under thick gel topcoat, or painted details survive much better than raised charms. They won’t catch on things, and they’re less likely to pop off when your hands get wet repeatedly.
One Accent Nail Maximum
Even if embellishments survive, having them on every nail is high-maintenance and looks busy in beach photos where there’s already lots going on visually. One accent nail per hand keeps it interesting without overwhelming.
Length and Shape for Active Beach Life
Short to Medium Wins
Long nails and beach activities are incompatible. You’ll break one opening a bottle, another applying sunscreen, maybe one more putting up a beach umbrella. Keep them short to medium (just past your fingertip) to avoid constant breakage and repair needs.
Squoval Is the Practical Choice
Round corners with a squared-off tip gives you enough nail to showcase designs without sharp corners that snag on everything. It’s durable for active beach stuff while still looking intentional and shaped, not just “grown out.”
Avoid Stilettos and Sharp Squares
Pointed nails are magnets for breakage. Sharp square corners catch on towels, bathing suits, and literally everything else. Save extreme shapes for when you’re not living in swimwear and flip flops.
The Touch-Up Reality
Bring Your Exact Colors
Small chips are inevitable. Having your exact polish colors means you can fix them in your hotel room instead of letting them progressively get worse. A mini bottle takes up almost no luggage space and can save your manicure halfway through the trip.
Pack These Essentials
- Your base color
- Topcoat
- Small nail file
- Cuticle oil
- Nail polish remover pen (for cleanup)
This tiny kit handles 90% of vacation manicure emergencies and fits in a makeup bag.
Know When to Surrender
If your manicure is genuinely destroyed by day 4 of a week-long trip, just remove it. Trying to patch increasingly damaged nails looks worse than clean, bare nails. Sometimes the best beach nail is the one you removed when it stopped looking good.
DIY vs. Salon for Beach Nails
DIY These:
- Solid colors with foil accents
- Simple gradients
- Glazed finishes
- Two-tone color blocking
Pay for These:
- Chrome finishes (requires specific technique and powder)
- Perfect palm tree silhouettes (stamping plates help but salon precision is better)
- Intricate wave art
- Anything with 3D embellishments you want to actually stay on
The Math: A salon gel manicure costs $40-60 and lasts your whole vacation. Two DIY attempts with regular polish that both chip = wasted vacation time and money on polish. Sometimes professional is actually more economical.
Frequently Asked Questions
How long do beach nail designs typically last with proper care?
Regular polish beach designs typically last 5-7 days with proper care, daily cuticle oil application, and topcoat reapplication every 2-3 days, though chlorine and saltwater exposure may shorten longevity to 3-5 days even with careful maintenance.
Gel polish offers superior durability for beach conditions, usually lasting 2-3 weeks even with daily swimming and sun exposure without chipping or fading significantly. For absolute maximum longevity during beach vacations, choose gel manicures, avoid extremely long nails that catch and break easily, and follow all maintenance protocols including protecting hands when applying sunscreen and reapplying topcoat every few days to refresh the protective seal.
What’s the best nail shape for beach designs and active vacations?
Oval and almond shapes are ideal for beach nails because they’re naturally strong with no sharp corners to catch or snag, they resist breakage during water activities, and they showcase gradients and nail art beautifully without looking dated.
Squoval (square with rounded corners) offers a nice compromise between classic square and oval, providing durability and a modern look that works with both bold colors and subtle designs while distributing pressure evenly to prevent cracking.
Avoid extremely pointed stiletto or sharp square shapes for active beach vacations as these are more prone to breaking during swimming and water activities—save dramatic shapes for occasions when you’re not constantly in water or doing physical activities that stress nails.
Can I do beach nail designs at home or do I need a salon?
Most beach nail designs are definitely achievable at home with basic tools like makeup sponges for gradients (regular beauty blenders work great), thin brushes for details, and stamping plates for precise images like palm trees.
Simpler designs like solid colors with foil accents, glazed finishes, or color blocking are especially beginner-friendly and don’t require professional skills—just patience, thin coats, and proper drying time between steps for successful results.
However, intricate designs like perfect palm silhouettes, complex wave art with multiple colors, or chrome powder application (as opposed to chrome polish) may benefit from salon expertise, especially if you want the design to last perfectly through an entire vacation without touch-ups or if you’re working with your non-dominant hand and struggle with precision.
What affordable products work best for beach nail designs at home?
Essie and OPI polishes offer excellent pigmentation and longevity for $9-12 per bottle and are worth the investment over $3 drugstore polishes that chip within days—the formula quality makes a huge difference in how long your manicure lasts. Seche Vite fast-dry topcoat ($10) is a game-changer for protecting beach designs and speeding drying time, while LA Colors polishes ($3-4) actually offer great quality for practice and less-used accent colors you won’t wear often.
For tools, Amazon basics like nail art brush sets ($8-15), nail foil kits ($6-10), and stamping plate sets ($10-20) provide everything you need for professional-looking designs without professional prices—these tools last years if cared for properly, making them excellent investments for regular at-home manicures.
How do I prevent my beach nails from chipping quickly?
Always apply base coat first to create adhesion, use 2-3 thin coats of color rather than thick layers that never fully dry, and cap the free edge by swiping polish across the nail tip with every single layer including base, color, and topcoat.
Reapply topcoat every 2-3 days to refresh the protective layer and seal micro-chips before they worsen, wear gloves when applying sunscreen since oils break down polish quickly, and moisturize cuticles daily to keep nails flexible and chip-resistant instead of brittle.
Avoid getting nails wet for at least 1-2 hours after application to allow proper curing through all polish layers, and consider gel polish for beach vacations since it’s significantly more durable than regular polish when exposed to constant water—the investment pays off in time saved on touch-ups and maintenance throughout your trip.
Are 3D embellishments practical for beach nails or will they fall off?
Small, securely attached embellishments like tiny shells (5-6mm), flat pearls, or small starfish charms can work for beach nails if applied with strong nail glue (not just topcoat) and sealed thoroughly with thick layers of topcoat around all edges to lock them down.
However, large 3D charms, multiple embellishments per nail, or anything that sticks up significantly are impractical for active beach activities involving swimming, water sports, or lots of sand exposure—they’ll catch on towels, clothing, and hair and fall off within 1-2 days of normal beach activities.
For best results that last your entire vacation, limit embellishments to one or two accent nails maximum using small, flat designs that won’t interfere with daily activities, and bring spare charms plus nail glue in your beach bag for quick reapplication if any do fall off during your trip.
Make Your Beach Nails Work
Beach nails aren’t complicated—they just need to match your actual beach plans. Lounging by the resort pool? Go for the elaborate gradient with embellishments. Surfing and beach volleyball? Solid gel color in a fun shade, short length, done.
Pick a design that fits how you actually vacation, not how vacation looks on Instagram. The best beach nails are the ones still looking good on your flight home.