8 Lava Lamp Nails You’ll Want to Copy ASAP
Lava lamp nails are that perfect mix of retro nostalgia and modern nail art—swirly, psychedelic, and surprisingly wearable once you find your vibe. The best part? No two lava lamp manicures ever look identical, so you’re guaranteed a one-of-a-kind look every time.
From subtle office-friendly swirls to bold festival-ready flows, here are 8 lava lamp nail designs that bring the groovy 70s aesthetic straight into today.
8 Stunning Lava Lamp Nail Designs
1. Classic Orange & Purple Retro Flow
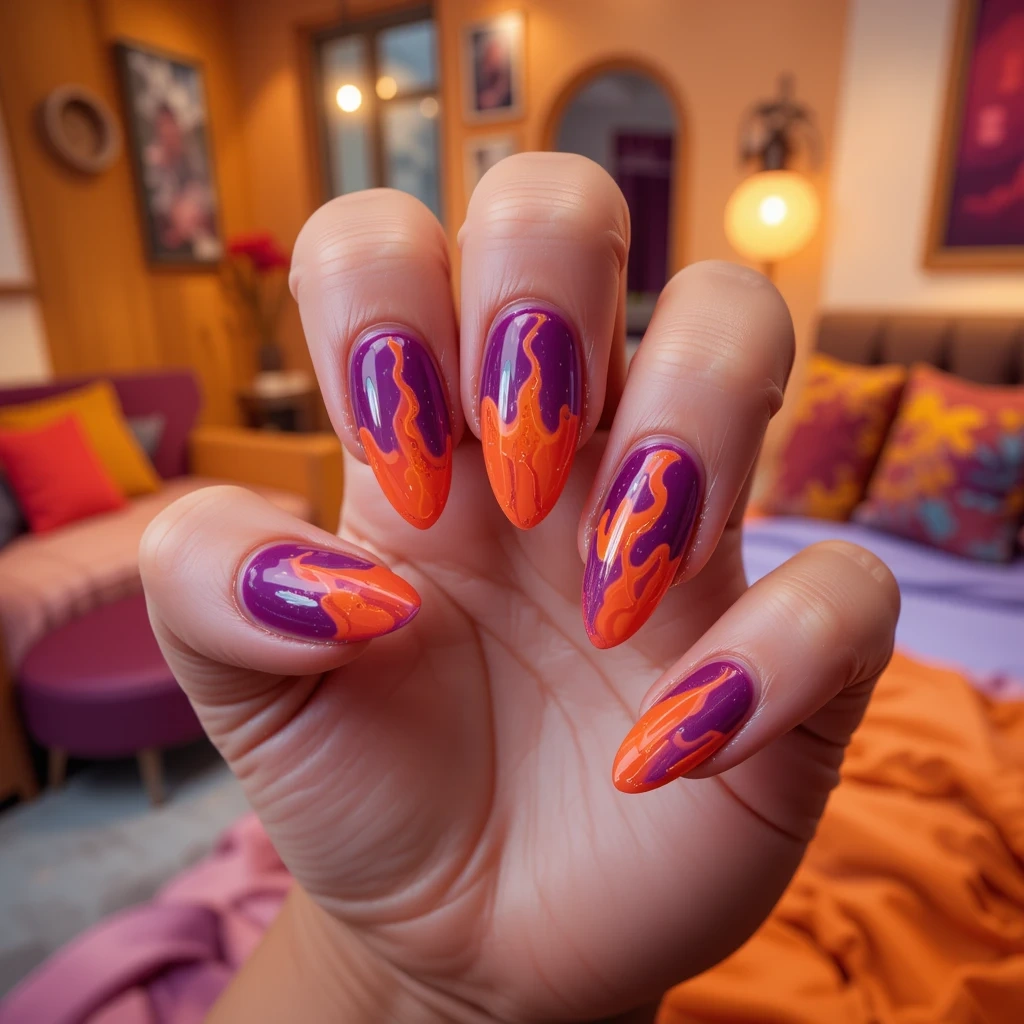
Vibrant tangerine orange swirls through deep purple with translucent layers that create authentic lava lamp movement and depth. The high-contrast color combination captures that iconic 70s aesthetic while glossy finish adds modern sophistication and dimension. Blended edges create seamless transitions that look like actual liquid flowing across your nails in slow motion.
Why It Works: This timeless color pairing instantly evokes nostalgic vibes while remaining bold enough to make a statement at any event. The translucent layering technique ensures the design looks expensive and salon-quality rather than flat or cartoonish.
Pro Tip: Apply sheer orange first, then drop purple gel in random spots and swirl with a thin brush while wet—works best on almond or coffin shapes.
Step-by-Step Tutorial:
- Prep your nails – Push back cuticles, lightly buff the nail surface with a 180-grit file, and wipe with rubbing alcohol to remove all oils.
- Apply base coat – Paint a thin layer of base coat on all nails and cure for 60 seconds under your LED lamp.
- Create translucent foundation – Apply one thin coat of sheer white or clear gel polish to all nails and cure for 60 seconds. This creates the depth you need.
- Apply orange layer – Paint a thin, even layer of sheer tangerine orange gel polish on one nail. Don’t cure yet—you need it wet for swirling.
- Add purple drops – Using your thin brush, place 3-5 small dots or short lines of deep purple gel randomly across the wet orange nail.
- Create the swirls – Immediately use your thin brush to swirl the purple into the orange using gentle S-shaped or circular motions. Stop when you can still see distinct ribbons of both colors—don’t over-mix.
- Cure immediately – Once you’re happy with the swirl pattern, cure for 60 seconds. Repeat steps 4-7 for each remaining nail.
- Assess and layer (optional) – If the effect feels too subtle, repeat steps 4-7 for a second layer of swirls to build more depth.
- Apply top coat – Paint a thin layer of gel top coat over all nails, making sure to cap the free edge. Cure for 60 seconds.
- Final cure and clean – Apply a second top coat layer for extra shine and durability, cure again for 60 seconds, then wipe off any sticky residue with alcohol.
2. Neon Pink & Electric Blue Party Swirl
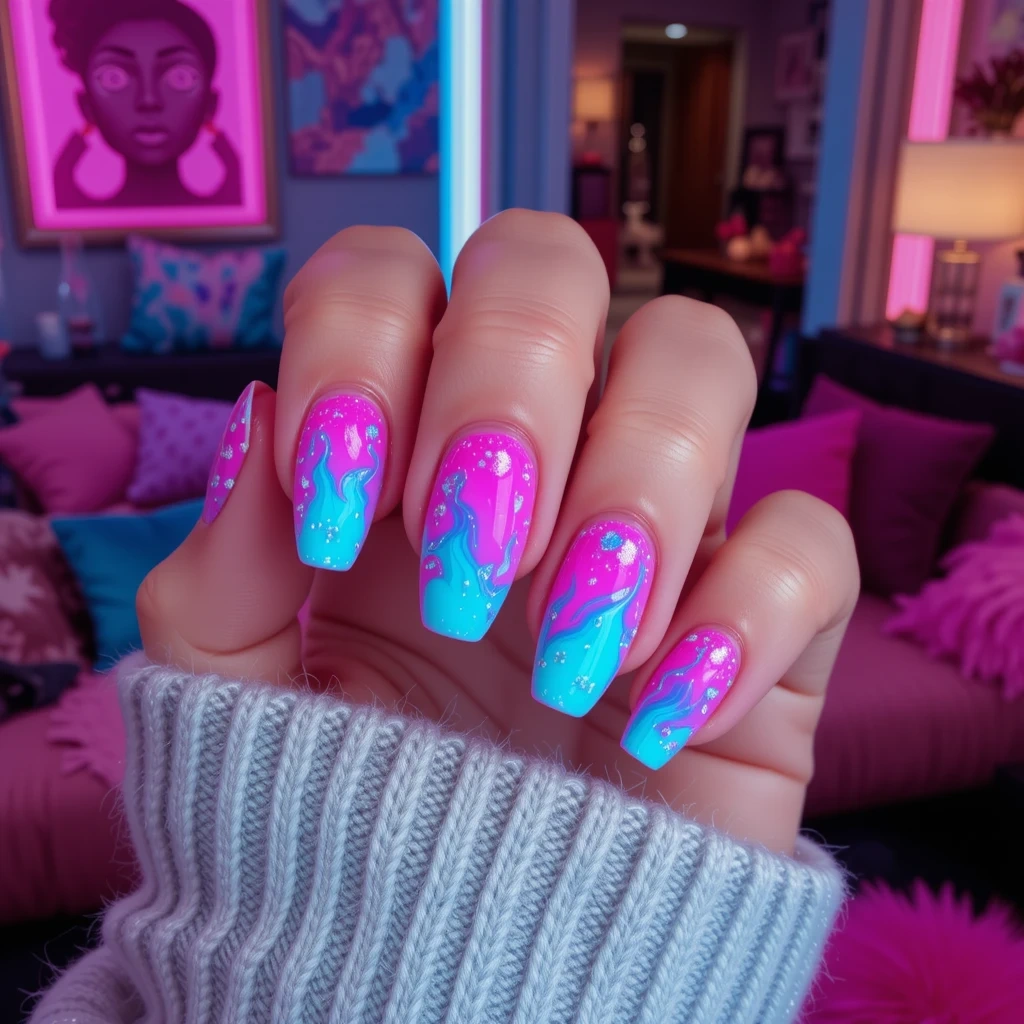
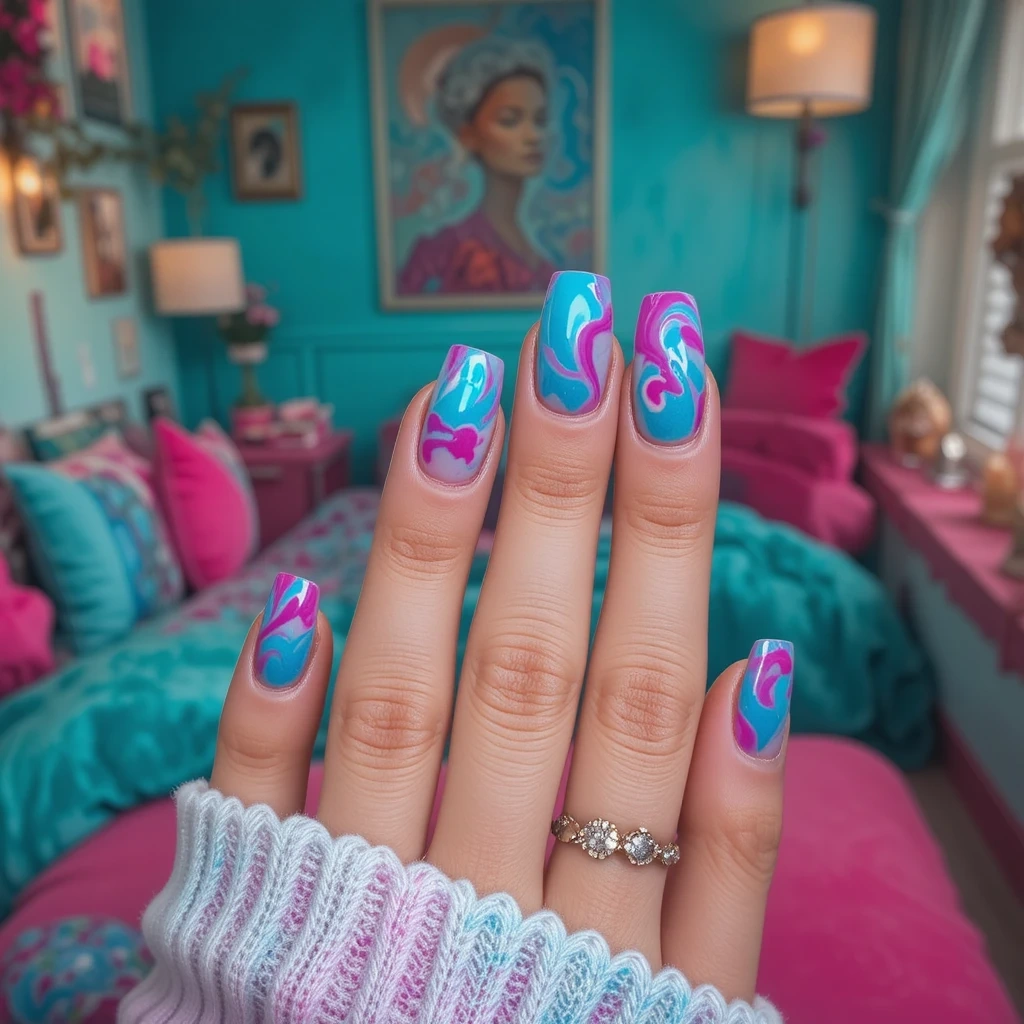
Hot pink melts into electric blue with iridescent shimmer scattered throughout, creating an energetic, festival-ready effect that glows under blacklight. The saturated neon tones bring maximum visual impact while the swirling technique softens the intensity into something wearable and artistic. This design screams confidence and fun, perfect for making your hands the center of attention.
Why It Works: Neon colors are having a major moment, and the lava lamp technique prevents them from looking too harsh or overwhelming. The dynamic color interaction creates natural dimension without requiring intricate detail work or steady hands.
Pro Tip: Use gel polish for neon intensity and cure between color applications to prevent muddying—pair with short to medium stiletto nails.
Step-by-Step Tutorial:
- Complete nail prep – Push back cuticles, buff nails gently to remove shine, and cleanse with rubbing alcohol.
- Apply and cure base coat – Paint base coat on all nails and cure for 60 seconds.
- Build your translucent base – Apply one thin coat of clear gel polish to all nails, cure for 60 seconds. This prevents neons from looking flat.
- Start with pink – Apply a thin layer of neon hot pink gel to one nail. Work quickly but don’t cure yet.
- Drop electric blue – Using a thin brush, add 4-6 small dots of electric blue gel scattered across the wet pink.
- Swirl carefully – Use light, quick strokes to blend the edges where colors meet, creating flowing swirls. Neons can muddy easily, so don’t over-work them.
- Add shimmer (optional) – While still wet, lightly tap iridescent glitter or shimmer onto the design with a small brush.
- Cure the design – Cure for 60 seconds. Repeat steps 4-8 on remaining nails.
- Build intensity – For more vibrant neons, apply a second thin layer following steps 4-7, then cure again.
- Seal with top coat – Apply gel top coat to all nails, cap the edges, cure 60 seconds. Add second top coat layer, cure, and wipe clean with alcohol.
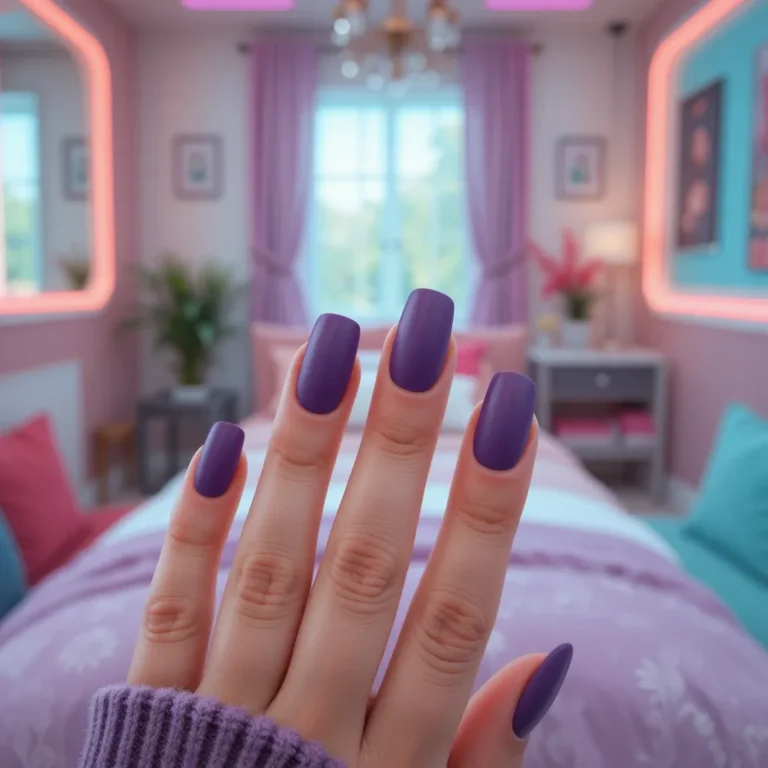
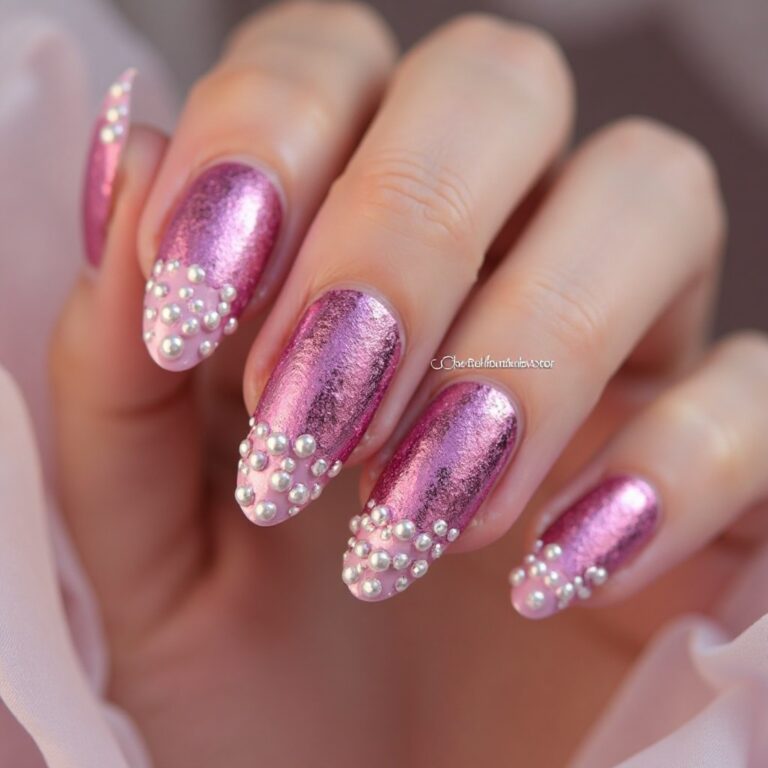
3. Ethereal Lavender & Mint Dream
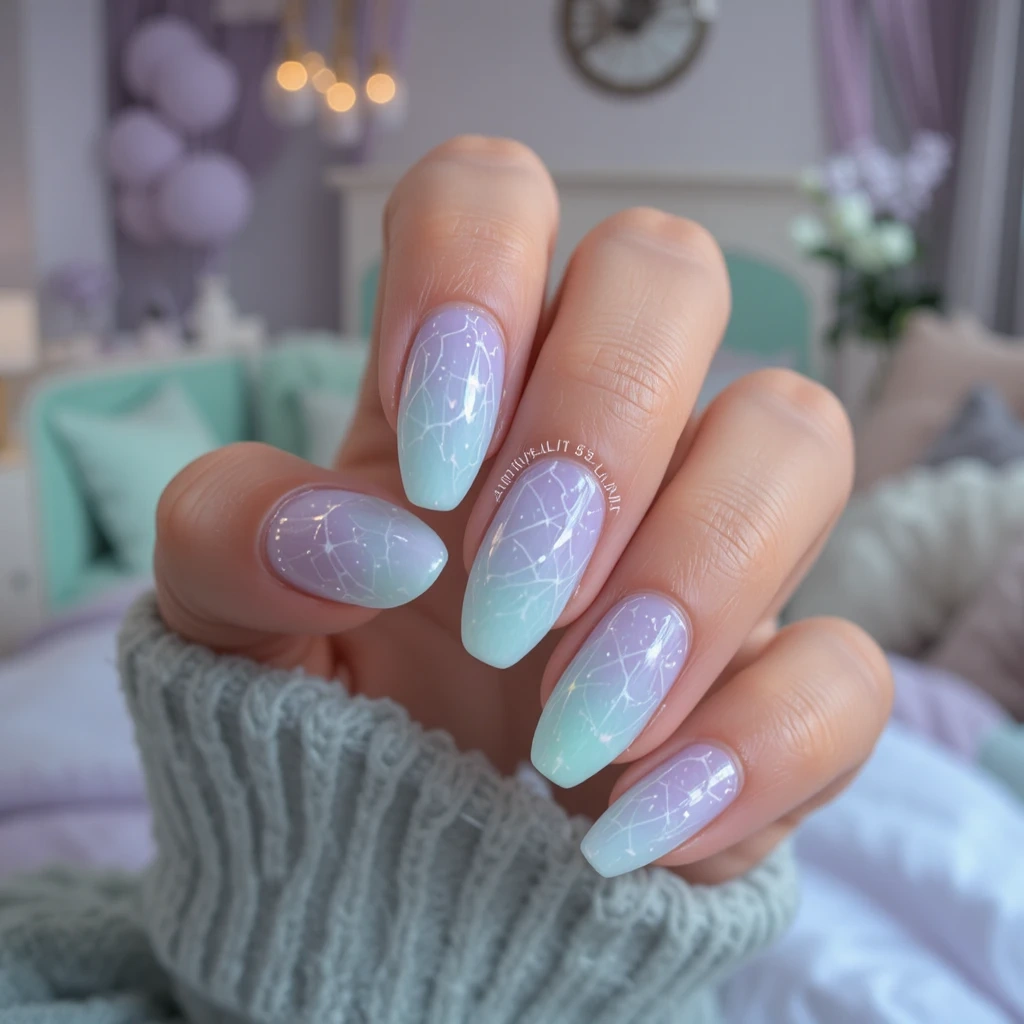
Soft lavender flows through pale mint green with milky white accents, creating a dreamy pastel effect that’s gentle yet captivating. The cool-toned palette feels fresh and modern while the translucent application gives an almost watercolor-like quality. This design brings subtle sophistication with just enough visual interest to feel special without overwhelming your overall aesthetic.
Why It Works: Pastel lava lamp nails offer all the artistic appeal of bold versions while remaining appropriate for professional settings and everyday wear. The soft color transitions create a calming, elegant effect that complements rather than competes with your wardrobe.
Pro Tip: Build colors gradually with sheer layers for the most ethereal effect—stunning on oval or round nail shapes.
Pro Tip: Build colors gradually with sheer layers for the most ethereal effect—stunning on oval or round nail shapes.
Step-by-Step Tutorial:
- Prepare nail surface – Gently push back cuticles, lightly buff the nail plate, and wipe clean with rubbing alcohol.
- Base coat application – Apply a thin, even layer of base coat to all nails and cure for 60 seconds.
- Create milky base – Apply sheer milky white gel polish in one thin coat to all nails, cure for 60 seconds. This gives pastels their dreamy quality.
- Apply lavender – Paint a very sheer, thin layer of soft lavender gel on one nail. The key with pastels is transparency—don’t cure yet.
- Add mint accents – Using your thin brush, paint 2-4 wispy lines or small pools of pale mint green across the wet lavender.
- Gentle watercolor swirls – Very lightly drag your brush through the colors with feather-light pressure, creating soft, diffused edges like watercolor paint.
- Add white wisps – Dip your brush in milky white gel and add 1-2 thin swirls for extra dimension and lightness.
- Cure the layer – Cure for 60 seconds. Repeat steps 4-8 on each nail.
- Build subtle depth – Apply a second sheer layer of just lavender and mint (skip the white) if you want more color saturation, then cure.
- Top coat finish – Apply gel top coat to all nails, ensuring you cap the free edges. Cure 60 seconds, apply second coat, cure again, and wipe with alcohol.
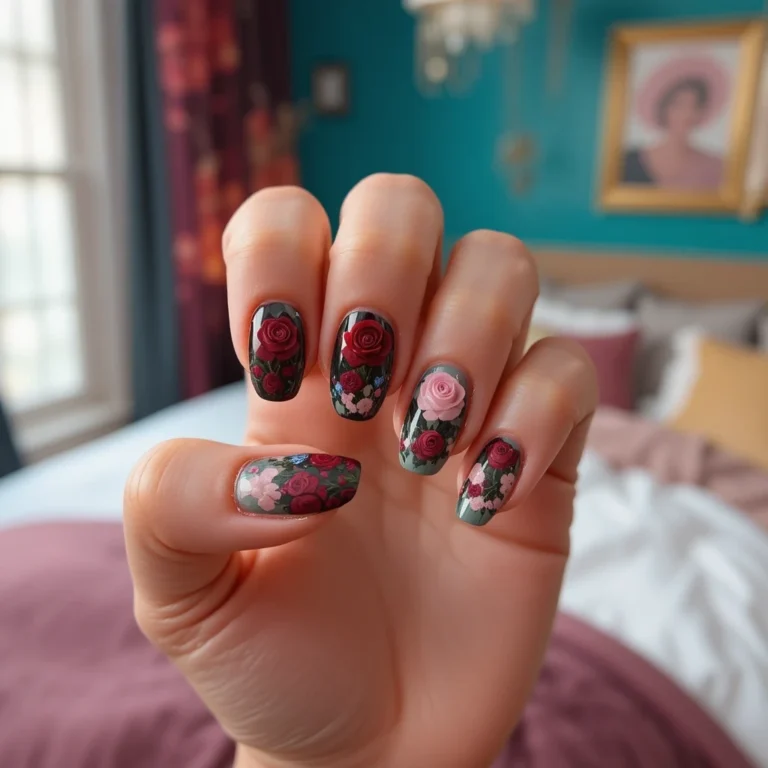
4. Moody Navy & Burgundy Luxe

Deep navy swirls through rich burgundy with hints of metallic gold shimmer, creating a luxurious effect that feels opulent and refined. The jewel-tone palette brings sophisticated drama while the organic swirls keep it from looking too formal or stuffy. This design channels liquid velvet vibes with depth and movement that catches light beautifully from every angle.
Why It Works: Dark, rich tones feel elegant and seasonally versatile, working equally well for autumn evenings and winter celebrations. The subtle gold shimmer adds just enough glamour without requiring separate accent nails or additional embellishments.
Pro Tip: Apply over a black base for deeper color saturation and add gold foil flecks along swirl edges for dimension.
Step-by-Step Tutorial:
- Nail prep – Push back cuticles, buff nails to remove shine, and cleanse thoroughly with rubbing alcohol.
- Apply base coat – Paint base coat on all nails, cure for 60 seconds under LED lamp.
- Create depth with black – Apply one very thin coat of sheer black gel to all nails and cure for 60 seconds. This deepens the jewel tones.
- Layer burgundy – Apply a thin coat of rich burgundy gel to one nail, working on one nail at a time. Don’t cure.
- Add navy swirls – Using a thin brush, paint curved lines or organic shapes of deep navy gel across the wet burgundy in 3-5 spots.
- Blend the edges – Gently swirl where navy meets burgundy, creating soft transitions while keeping both colors visible and distinct.
- Add gold shimmer – While still wet, use a very thin brush to add tiny amounts of gold shimmer gel along some swirl edges for subtle luxury.
- Cure the design – Cure for 60 seconds. Repeat steps 4-8 for remaining nails.
- Optional gold foil – For extra glamour, gently press small pieces of gold foil onto random areas, then seal with clear gel and cure.
- Seal with top coat – Apply gel top coat to all nails (cap those edges!), cure 60 seconds. Second top coat layer, cure, wipe clean.
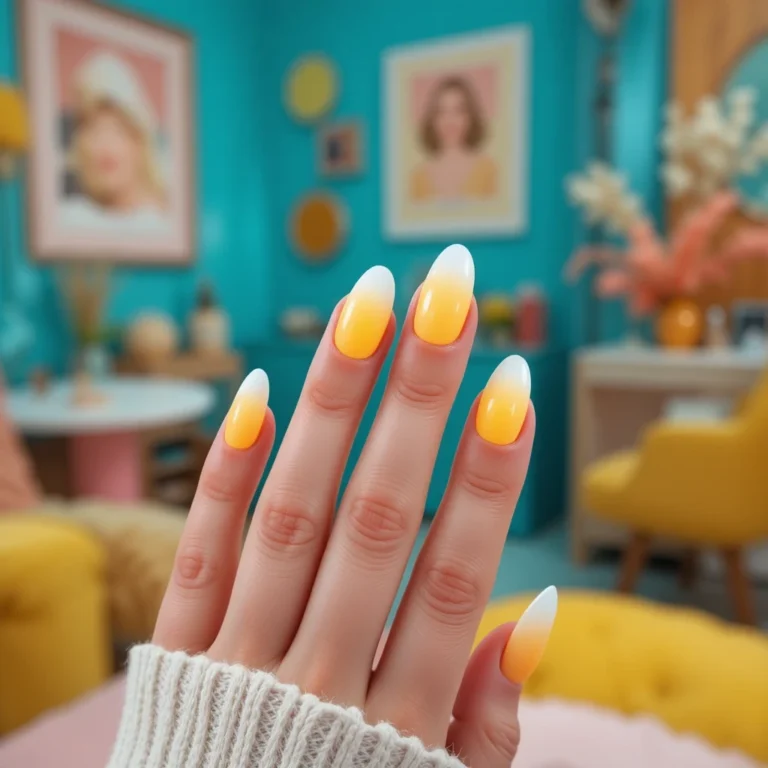
5. Tropical Sunset Gradient Flow
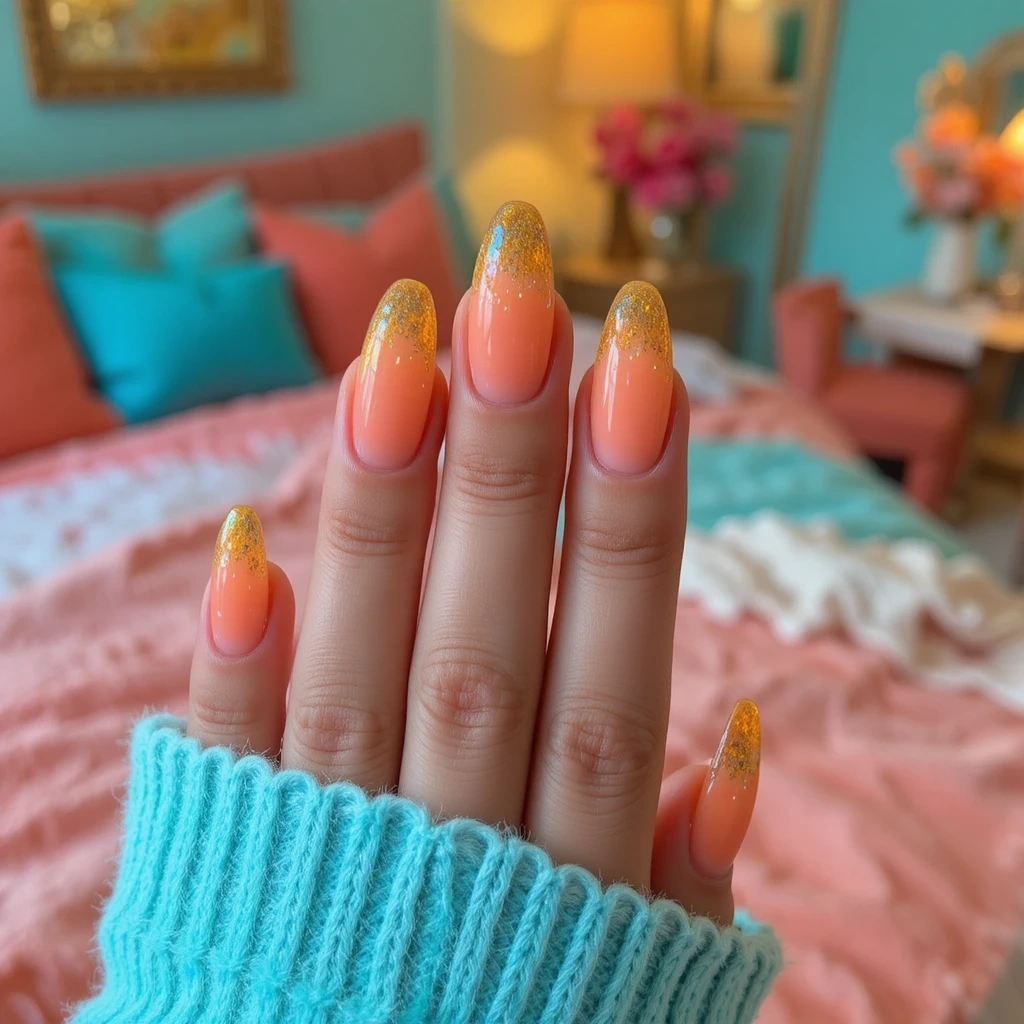
Coral pink melts into golden yellow and soft peach, creating a warm gradient that captures the essence of sunset over water. The warm color story brings instant joy and energy while the smooth color transitions create natural dimension without harsh lines. This design radiates positivity and warmth, making it perfect for brightening up any day or occasion.
Why It Works: Warm-toned lava lamp nails complement all skin tones and coordinate effortlessly with both casual and dressy summer wardrobes. The gradient effect feels current and artistic while remaining accessible and widely appealing to different style preferences.
Pro Tip: Blend colors in a curved motion from cuticle to tip for natural sunset flow—pair with tapered square nails.
Step-by-Step Tutorial:
- Prep your nails – Complete standard prep: push cuticles, buff surface, cleanse with alcohol.
- Base coat application – Apply thin base coat to all nails, cure 60 seconds.
- Translucent foundation – Apply one coat of sheer white or peachy-nude gel to all nails, cure 60 seconds.
- Start with yellow at base – Apply golden yellow gel to the cuticle area of one nail (about 1/3 of the nail). Don’t cure.
- Add peach to middle – Apply soft peach gel to the middle section of the nail, slightly overlapping the yellow.
- Finish with coral at tip – Apply coral pink gel to the tip area, overlapping slightly with the peach.
- Blend the gradient – Using your brush in gentle curved strokes from cuticle to tip, blend where colors meet to create smooth transitions like a sunset.
- Add flowing swirls – While wet, use your thin brush to create a few gentle S-curves through all three colors for added movement.
- Cure and repeat – Cure 60 seconds. Repeat steps 4-9 on remaining nails.
- Top coat application – Apply gel top coat with edge capping, cure 60 seconds. Apply second coat for glass-like finish, cure, and wipe clean.
6. Sage Green & Terracotta Earth
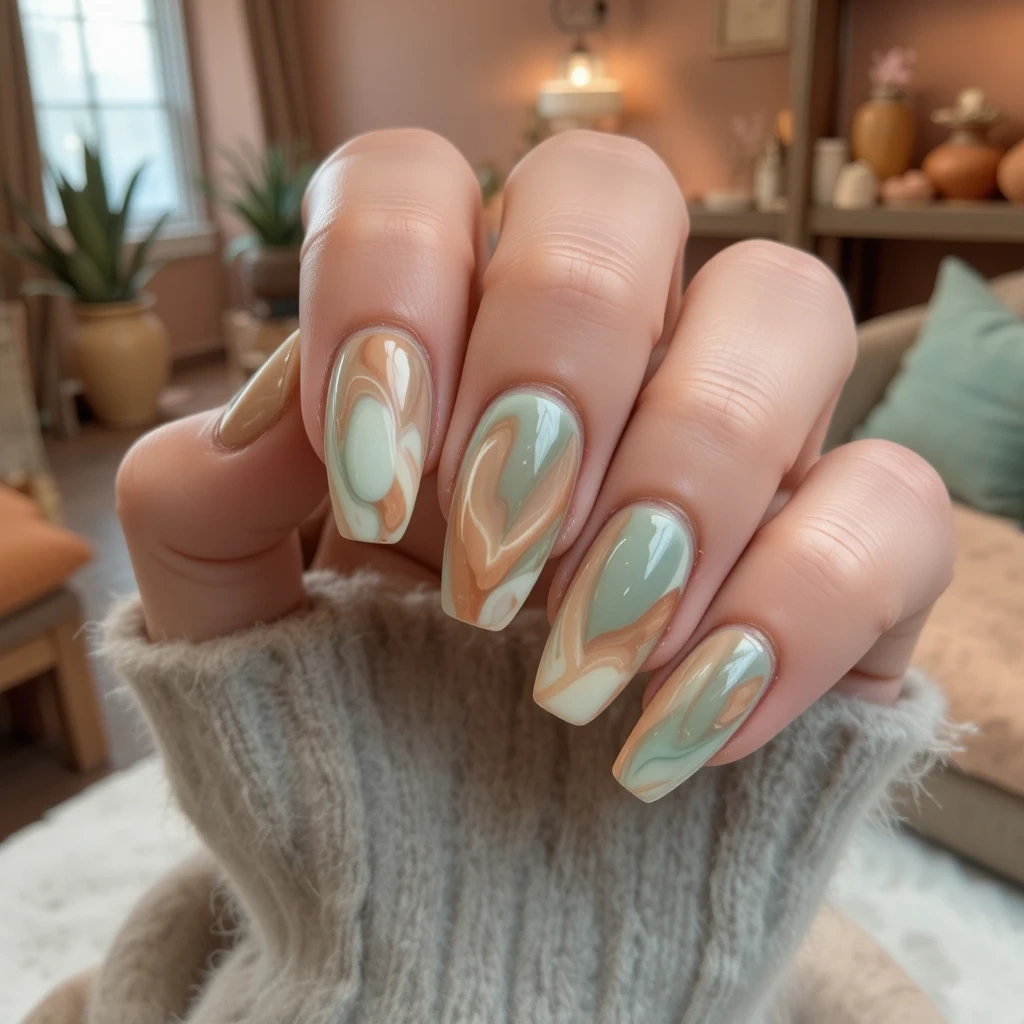
Muted sage green flows through warm terracotta with cream accents, creating an earthy, nature-inspired palette that feels grounded and sophisticated. The neutral-leaning tones bring understated elegance while the swirling technique adds artistic interest and texture. This design proves lava lamp nails can be subtle and refined rather than always bold and attention-grabbing.
Why It Works: Earthy neutrals are incredibly versatile and on-trend, working seamlessly with minimalist aesthetics and bohemian styles alike. The organic color palette and flowing design feel cohesive with nature-inspired fashion and wellness-focused lifestyles.
Pro Tip: Use matte top coat for an ultra-modern, sophisticated finish that enhances the earthy vibe—beautiful on any length.
Step-by-Step Tutorial:
- Complete nail prep – Standard prep routine: push cuticles, light buffing, alcohol cleanse.
- Apply base coat – Thin layer of base coat on all nails, cure 60 seconds.
- Neutral translucent base – Apply one coat of sheer cream or nude gel to all nails, cure 60 seconds.
- Sage green application – Paint a thin layer of muted sage green gel on one nail. Keep it sheer for that earthy, organic look. Don’t cure.
- Add terracotta pools – Using your brush, place 3-4 small amounts of warm terracotta gel in organic shapes across the wet sage.
- Create earthy swirls – Gently blend edges with natural, organic movements—think flowing like clay or earth rather than precise patterns.
- Add cream highlights – Dip your brush in cream gel and add 1-2 thin swirls for lightness and dimension.
- Cure the layer – Cure for 60 seconds. Repeat steps 4-8 on each remaining nail.
- Build depth (optional) – Add a second sheer layer of sage and terracotta for more color saturation if desired, then cure.
- Matte finish – Apply matte gel top coat to all nails (or use regular gel top coat then apply matte top coat over it), cure 60 seconds, wipe clean.
7. Holographic Silver & Clear Crystal
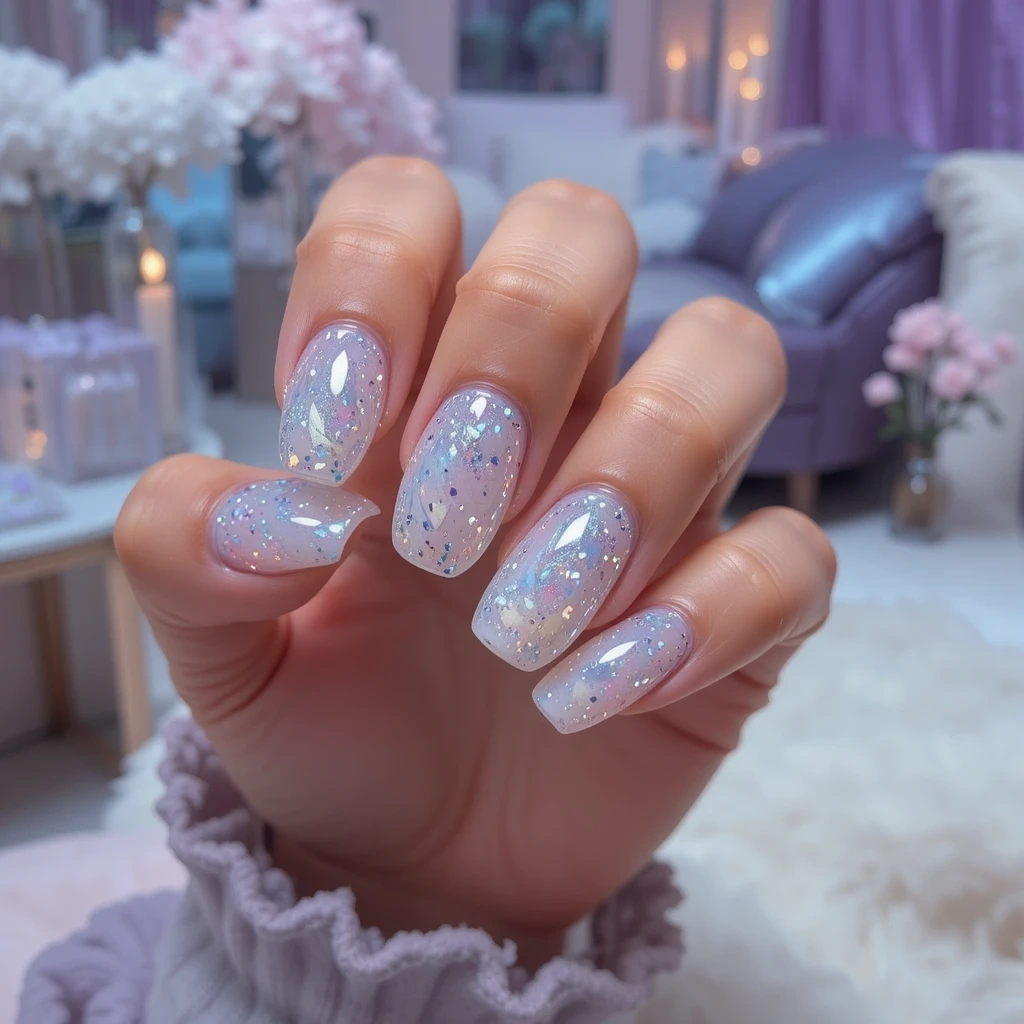
Holographic silver swirls through crystal-clear polish with scattered holographic glitter, creating a futuristic, ice-like effect that shifts in light. The minimal color allows the holographic elements to truly shine while the transparent base keeps it feeling light and modern. This design delivers maximum sparkle and dimension with surprisingly minimal effort or color saturation.
Why It Works: Holographic effects are universally flattering and work for any occasion from casual to formal events without feeling costume-y. The see-through base with metallic swirls creates an expensive, high-end look that photographs beautifully for social media.
Pro Tip: Layer holographic powder over clear gel, then add silver swirls on top for the most intense prismatic effect.
Step-by-Step Tutorial:
- Nail preparation – Push back cuticles, buff nail surface lightly, wipe clean with rubbing alcohol.
- Base coat – Apply thin base coat to all nails and cure 60 seconds.
- Clear base layer – Apply one coat of crystal-clear gel polish to all nails, cure 60 seconds.
- Add holographic element – Apply a second layer of clear gel to one nail but DON’T cure. While wet, sprinkle holographic glitter very lightly across the nail.
- Cure the glitter layer – Cure for 60 seconds to set the glitter in place.
- Apply clear gel again – Add another thin layer of clear gel to the same nail. Don’t cure yet.
- Create silver swirls – Using your thin brush, paint 3-5 flowing swirls of holographic silver gel across the wet clear polish.
- Gentle blending – Very lightly drag through the silver swirls to soften edges slightly while keeping them distinct and visible.
- Cure and repeat – Cure 60 seconds. Repeat steps 4-9 on remaining nails.
- Glossy top coat – Apply gel top coat to all nails with edge capping, cure 60 seconds. Second coat for maximum shine, cure, wipe with alcohol.
8. Teal & Magenta Vibrant Contrast
Bright teal swirls through hot magenta with translucent layers that create bold, eye-catching contrast and movement. The complementary color pairing creates natural visual tension that’s exciting and dynamic without clashing or looking chaotic. This design is for the bold and confident—it demands attention and delivers maximum artistic impact with unapologetic color saturation.
Why It Works: High-contrast color combinations create the most authentic lava lamp effect with clear visual separation and definition between hues. The vibrant palette works beautifully for creative professionals, festivals, vacations, or anyone who loves making a statement.
Pro Tip: Apply colors in separate sections first, then blend edges only—maintains color integrity while creating flow on coffin nails.
Step-by-Step Tutorial:
- Prep nails thoroughly – Push cuticles, buff surface to remove shine, cleanse with rubbing alcohol for best adhesion.
- Base coat application – Apply base coat to all nails, cure 60 seconds.
- Translucent white base – Apply one thin coat of sheer white gel to all nails, cure 60 seconds. This prevents colors from muddying.
- Section with teal – On one nail, apply bright teal gel to approximately half the nail in an organic, curved shape. Don’t cure.
- Add magenta section – Apply hot magenta gel to the other half/section of the nail, leaving a small gap between the two colors.
- Blend only the edges – Use your thin brush to blend ONLY where the two colors would naturally meet, creating swirls in that border area. Keep the center of each color section pure and vibrant.
- Create flowing ribbons – Pull small amounts of each color into the opposite section with thin, ribbon-like swirls for movement.
- Cure immediately – Cure for 60 seconds to lock in the bold contrast. Repeat steps 4-8 on each nail.
- Add intensity layer – For more saturated color, apply a second layer following steps 4-7, then cure 60 seconds.
- High-gloss seal – Apply gel top coat to all nails, cap edges, cure 60 seconds. Apply second top coat for maximum shine, cure, and wipe clean with alcohol.
Troubleshooting Common Issues
Even with the right technique, you might encounter some challenges. Here’s how to fix the most common problems beginners face.
Problem: Colors Mixing Into Muddy Brown You’re over-swirling. Stop blending when you can still clearly see both individual colors—think marbled, not mixed. Try using a lighter hand and fewer swirl strokes, or choose colors from the same color family (like pink and purple) which blend more attractively even if over-mixed.
Problem: Design Looks Flat and One-Dimensional You skipped the translucent base layer. Always apply a sheer white or clear gel first—this allows light to pass through your colors, creating depth. Also ensure you’re using gel polish, not regular polish, as regular polish dries too quickly to achieve proper translucency.
Problem: Gel Polish Lifting Within Days Your prep work needs improvement. Make sure you’re buffing the nail surface to remove shine, wiping with alcohol to remove all oils, and most importantly—cap the free edge with every single layer including base coat, color, and top coat. Also check that you’re curing each layer for the full recommended time.
Problem: Swirls Look Choppy or Uneven Your polish is too thick. Apply thinner coats and build up gradually rather than trying to achieve full opacity in one layer. Also ensure you’re working quickly enough—if gel starts to self-level before you finish swirling, it will lose definition.
Problem: Can’t Get Smooth Color Transitions Use a very thin brush (size 00 or 000) and keep it clean between strokes. Wipe excess polish from your brush regularly. You can also try adding a tiny drop of clear gel to your colored gel on a palette to make it more fluid and easier to swirl.
Product Recommendations by Budget
You don’t need to break the bank for gorgeous lava lamp nails. Here are my tested recommendations at different price points.
Budget-Friendly (Under $40 total):
- Beetles Gel Polish Kit ($25-30 on Amazon) – Includes lamp, base coat, top coat, and multiple colors
- Makartt Nail Art Brushes ($8) – Set includes the thin liner brush you need for swirling
- Cuccio Cuticle Oil ($8) – Professional quality at drugstore prices
Mid-Range ($60-80 total):
- Modelones Gel Polish Set ($35) – Better pigmentation and consistency than budget options
- SUNUV 48W UV/LED Lamp ($25) – More powerful for faster, more complete curing
- OPI Natural Nail Base Coat ($10) – Superior adhesion prevents lifting
- Seche Vite Gel Effect Top Coat ($10) – Creates glass-like shine
Professional Quality ($100-150 total):
- CND Shellac Colors ($12-15 each) – Industry standard with perfect consistency for swirling
- Gelish Foundation Base ($15) – Strongest adhesion in the industry
- MelodySusie Portable LED Lamp ($40) – Rechargeable with professional-grade curing
- Young Nails Protein Bond ($18) – Professional-strength nail prep
- CND Cuticle Eraser ($12) – Keeps cuticles healthy and polish lasting longer
Best Single Investment: If you can only upgrade one product, invest in a quality lamp. The $20-30 SUNUV or MelodySusie lamps cure more evenly and completely than cheaper options, which directly impacts how long your manicure lasts.
Advanced Techniques to Level Up Your Lava Lamp Nails
Once you’ve mastered the basics, try these professional techniques to create even more impressive results.
The Cellophane Swirl Method: After applying both colors but before curing, gently press a small piece of crumpled cellophane or plastic wrap onto the wet gel, then lift straight up. This creates organic, unpredictable swirl patterns that look incredibly artistic. Cure immediately after removing the cellophane, then seal with top coat.
Gradient Base Technique: Instead of a solid translucent base, create a subtle gradient from white at the cuticle to clear at the tip before adding your lava lamp swirls on top. This adds an extra dimension of depth and makes the design look more complex than it actually is.
Reverse Stamping Integration: Use a stamper to pick up a swirl pattern from a stamping plate, then carefully apply it over your wet lava lamp gel before curing. This adds definition and detail that’s difficult to achieve by hand, especially for intricate designs.
Layered Depth Method: Apply your first lava lamp layer and cure, then add a second layer of swirls in slightly different colors or positions. This creates incredible depth—the top layer appears to float above the bottom layer, creating a true 3D effect that mimics actual lava lamps perfectly.
Magnetic Gel Hybrid: Use magnetic gel polish as one of your colors and wave a magnet over the wet gel before swirling your second color. The magnetic polish creates texture and pattern within the overall lava lamp design, adding complexity and visual interest.
Lava Lamp Nail Trends to Know
Translucent Layering Creates Depth
Sheer, buildable color application has become essential for achieving authentic lava lamp effects rather than flat, opaque designs. Multiple thin layers create dimension and allow light to pass through, mimicking the actual movement of liquid in real lava lamps. This technique requires patience but delivers professional-looking results that appear three-dimensional and sophisticated rather than painted-on or cartoonish.
Neon Revival with Modern Techniques
Bold neon colors are back but executed with contemporary swirling and gradient techniques that soften their intensity. Unlike the harsh neon nails of the past, current versions use blending and translucency to make bright colors wearable. This approach allows you to embrace vibrant hues without looking like you’re stuck in the 80s or headed to a rave.
Organic, Imperfect Art Gains Popularity
Perfectly precise nail art is giving way to organic, hand-painted effects that celebrate natural variation and artistic flow. Lava lamp nails fit perfectly into this trend since the unpredictable swirling is part of the design’s appeal. The shift toward embracing imperfection makes nail art more accessible and less intimidating for DIY enthusiasts.
Mixing Matte and Glossy Finishes
Combining different top coat finishes on the same nail creates striking contrast and elevates simple designs instantly. Applying matte finish to some swirls while leaving others glossy adds unexpected dimension and visual interest. This dual-finish approach works especially well with lava lamp nails where you can selectively highlight certain color flows.
Minimalist Color Palettes on Trend
While lava lamp nails can be bold, minimalist versions using two neutral or muted tones are gaining traction. Subtle variations like cream and beige or soft gray and white create sophisticated, office-appropriate lava lamp effects. This proves the technique isn’t limited to bold statements—it can be adapted for any aesthetic preference or lifestyle.
Extended Wear Gel Applications
Gel polish has become the preferred medium for lava lamp nails due to its extended wear and ability to stay wet long enough for proper blending. The gel formula allows more working time to create seamless swirls and transitions before curing. This technological advancement makes the technique more accessible and results more reliable for both professionals and at-home enthusiasts.
Essential Colors for Lava Lamp Nail Designs
- Tangerine Orange – Classic lava lamp shade that brings retro authenticity and warmth
- Deep Purple – Perfect contrast color that creates the iconic 70s psychedelic vibe
- Hot Pink – Bold and playful, ideal for energetic, attention-grabbing designs
- Electric Blue – Vibrant and modern, creates striking contrast with warm tones
- Soft Lavender – Pastel option that brings gentle, dreamy elegance to the design
- Mint Green – Fresh and cool-toned, perfect for subtle, sophisticated versions
- Rich Burgundy – Adds luxury and depth for moody, elegant interpretations
- Navy Blue – Sophisticated base color that grounds brighter accent swirls
- Coral Pink – Warm and flattering on all skin tones, brings sunset vibes
- Holographic Silver – Modern twist that adds futuristic shimmer and dimension
How to Choose the Right Lava Lamp Design
Consider Your Skin’s Undertone
Cool undertones (pink or blue-based) look stunning with jewel tones like purple, magenta, and blue-based pinks in their lava lamp designs. Warm undertones (yellow or golden) glow with orange, coral, yellow, and warm purples that complement rather than clash with natural coloring. Neutral undertones have the flexibility to wear both warm and cool color combinations, so experiment with what makes you feel most confident.
Match Design to Your Lifestyle
Bold, neon lava lamp nails work beautifully for creative professionals, students, and anyone in expressive work environments where personality is celebrated. Subtle, muted versions in neutral tones suit corporate settings, healthcare professionals, or anyone preferring understated elegance in their daily life. Consider how much attention you want your nails to draw and choose your color intensity accordingly.
Factor in Your Nail Length
Longer nails (medium to long) can handle complex multi-color lava lamp designs with intricate swirls without looking cluttered or overwhelming. Shorter nails benefit from simpler two-tone combinations with larger, bolder swirls that won’t get lost on the smaller canvas. Remember that vertical swirl placement elongates shorter nails while horizontal waves can make them appear wider.
Coordinate With Your Wardrobe
If your wardrobe consists mainly of neutrals like black, white, gray, and beige, bold lava lamp nails add personality without clashing. Those with colorful wardrobes should choose lava lamp colors that complement their most-worn pieces or stick with neutral versions. Consider whether you want your nails to be the statement piece or a complementary accent to your overall style.
Think About the Occasion
Special events like festivals, parties, or vacations are perfect opportunities for bold, vibrant lava lamp designs that might feel too intense for everyday. Workplace-appropriate versions use muted tones, shorter lengths, and subtle swirls that remain professional while still artistic. Weekend warriors can embrace the full spectrum of lava lamp creativity without worrying about Monday morning meetings.
Nail Maintenance & Longevity Tips
Apply Proper Base Coat
Always start with a quality base coat that bonds to your natural nail and creates a smooth surface for color application. This crucial step prevents staining from bold lava lamp colors and helps polish adhere better for extended wear. Skip the base coat and you’ll likely see chipping within days, especially with darker or more saturated color combinations.
Cure Gel Polish Properly
If using gel, cure each layer for the full recommended time in your UV or LED lamp to ensure complete hardening and adhesion. Under-cured gel remains tacky underneath and will lift prematurely, ruining your intricate lava lamp swirls within days. Over-curing isn’t a concern, so err on the side of longer cure times for maximum durability and longevity.
Seal Your Free Edges
Always cap the free edge of your nail with each layer—base coat, color, and top coat—to prevent chipping and peeling. This simple step creates a seal around the entire nail tip where chipping most commonly begins. Many people skip this on color layers, but it’s especially important for lava lamp nails with multiple color applications.
Moisturize Cuticles Daily
Apply cuticle oil at least once daily, preferably twice, to keep the skin around your nails hydrated and prevent lifting at the cuticle line. Dry cuticles can catch on clothing and pull polish away from the nail bed, destroying your design. Keep a small bottle of cuticle oil in your bag for convenient touch-ups throughout the day.
Wear Gloves for Wet Work
Protect your lava lamp nails by wearing gloves during dishes, cleaning, or any prolonged water exposure that can weaken polish bonds. Water causes nails to expand and contract, which leads to lifting and chipping of even the best-applied polish. Hot water is particularly damaging, so make gloves a non-negotiable habit for maximum manicure longevity.
Refresh Top Coat Weekly
Apply a fresh layer of quick-dry top coat every 5-7 days to maintain shine, seal any micro-cracks, and extend wear. This simple maintenance step takes two minutes but can add a full week to your manicure’s lifespan. Focus on sealing the free edge where wear and tear is most visible and problematic.
Common Mistakes to Avoid
Using Regular Polish Instead of Gel
Regular nail polish dries too quickly for effective lava lamp swirling, forcing you to rush and creating muddy, poorly blended results. The extended working time of gel polish is essential for achieving smooth, seamless color transitions that look intentional. If you must use regular polish, work in very small sections and add a gel-effect top coat for better blending.
Adding Too Many Colors
Overloading your design with four or more colors creates a muddy, chaotic look rather than the smooth, flowing effect you want. Stick to two or three complementary colors maximum to maintain visual clarity and authentic lava lamp aesthetics. More colors don’t make the design more impressive—they just make it look messy and amateur rather than artistic.
Blending Colors Completely
Over-mixing your swirls until colors fully combine defeats the purpose of lava lamp nails, which should maintain distinct color separation. The goal is flowing interaction between colors, not a uniform new shade from complete blending. Stop swirling while you can still see individual color ribbons moving through each other for the most authentic effect.
Skipping the Clear Base Layer
Applying colored gel directly to your natural nail without a translucent or clear layer first creates flat, opaque results without depth. A sheer base layer allows light to pass through, creating the dimensional, liquid-like quality that makes lava lamp nails special. This foundational step is what separates amateur attempts from professional-looking results that truly capture the effect.
Using Thick Polish Layers
Applying thick layers of gel or regular polish
prevents proper curing, creates bumpy texture, and makes swirling nearly impossible. Multiple thin layers are always superior to one or two thick applications for both appearance and durability. Thick polish also takes longer to dry or cure and is more prone to denting, smudging, and premature chipping.
Neglecting Edge Sealing
Failing to wrap the free edge with each polish layer is the number one cause of premature chipping and peeling. The tip of your nail experiences the most contact and friction, making edge sealing absolutely critical. This three-second step per nail can mean the difference between a manicure lasting three days versus three weeks.
Frequently Asked Questions
Can I do lava lamp nails with regular polish at home?
Yes, but gel polish is significantly easier because it stays wet longer, giving you adequate time to create smooth swirls and blends. With regular polish, you’ll need to work extremely quickly in small sections, and the results often look more rushed and less seamless. If using regular polish, consider mixing with a clear gel-effect top coat to extend working time slightly.
What nail shapes work best for lava lamp designs?
Almond, coffin, and stiletto shapes showcase lava lamp swirls beautifully because their length provides an ideal canvas for vertical flow and movement. Round and square shapes work well too, especially for simpler two-color designs with larger, bolder swirls. Ultimately, any nail shape can support lava lamp art—just adjust your swirl size and direction to complement your nail’s natural proportions.
How long do lava lamp nails typically last?
With proper application and gel polish, lava lamp nails can last 2-3 weeks without chipping or significant wear. Regular polish versions typically last 5-7 days before showing noticeable chips, especially at the tips. Longevity depends heavily on your application technique, top coat quality, and how hard you are on your hands in daily activities.
Do I need special tools to create lava lamp nails?
A thin nail art brush or even a toothpick is sufficient for creating swirls—no expensive or specialized tools required. You’ll need your choice of gel or regular polish in your selected colors and a quality top coat. The technique relies more on timing and method than equipment, making it accessible for beginners with basic nail supplies.
Can lava lamp nails be office-appropriate?
Absolutely—choosing muted, neutral colors like sage and cream or soft gray and beige creates sophisticated lava lamp nails perfect for professional settings. The swirling technique itself is artistic rather than flashy, so color choice determines appropriateness more than the design style. Keep nails at a moderate length and use a glossy or matte finish for the most polished, workplace-friendly look.
What’s the best way to remove lava lamp gel nails?
Soak cotton balls in acetone, place on each nail, wrap with foil, and let sit for 10-15 minutes before gently pushing off softened gel. Never peel or force gel polish off, as this damages your natural nail and can cause peeling and weakness. For stubborn areas, resoak rather than scraping aggressively—patience protects your nail health and ensures they’re ready for your next design.
Get Your Swirl On
Lava lamp nails offer endless creative possibilities, and now you have everything you need to recreate these mesmerizing designs right at home. With the detailed step-by-step tutorials for each design, product recommendations, and troubleshooting tips in this guide, you can achieve salon-quality results without the salon price tag.
Start with a simple two-color combination to build your confidence, then experiment with more complex color stories as your skills develop. Save your favorite designs, grab those supplies, and get ready to create nail art that’s uniquely yours—don’t forget to share your results and this article with friends who’ll love trying these groovy looks too!