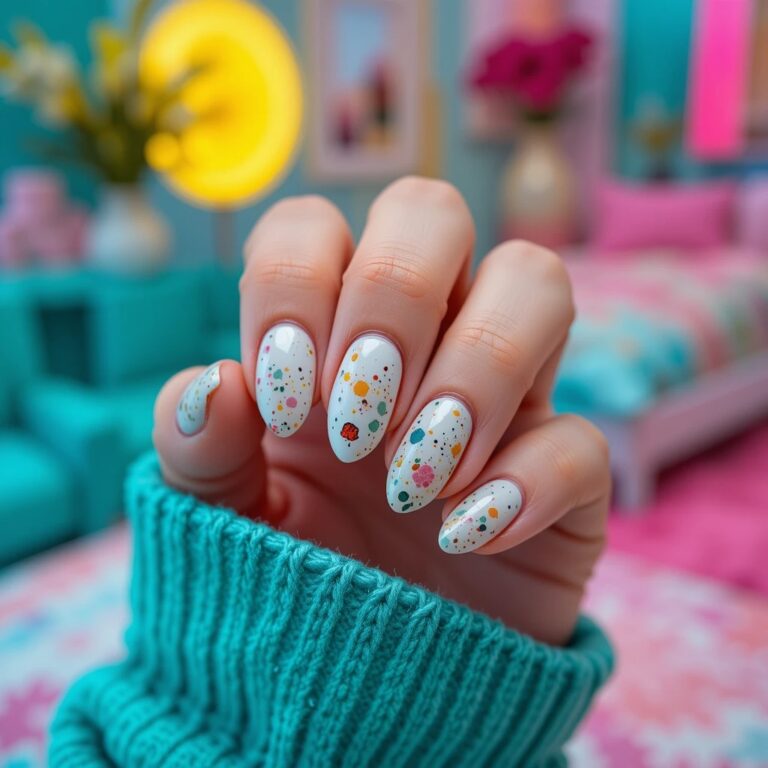
10 Ice Blue Nails Winter Ideas You’ll Love
Ice blue nails Winter are the ultimate winter power move—combining cool sophistication with that fresh, frosty vibe that perfectly captures the season’s magic. This shade flatters virtually every skin tone, transitions seamlessly from holiday parties to everyday wear, and brings a modern edge that feels both elegant and effortlessly chic.
Whether you’re drawn to minimalist chrome or detailed winter nail art, ice blue delivers that coveted winter glow without the maintenance headaches of darker, chip-showing shades.
Minimalist & Frosty Elegance
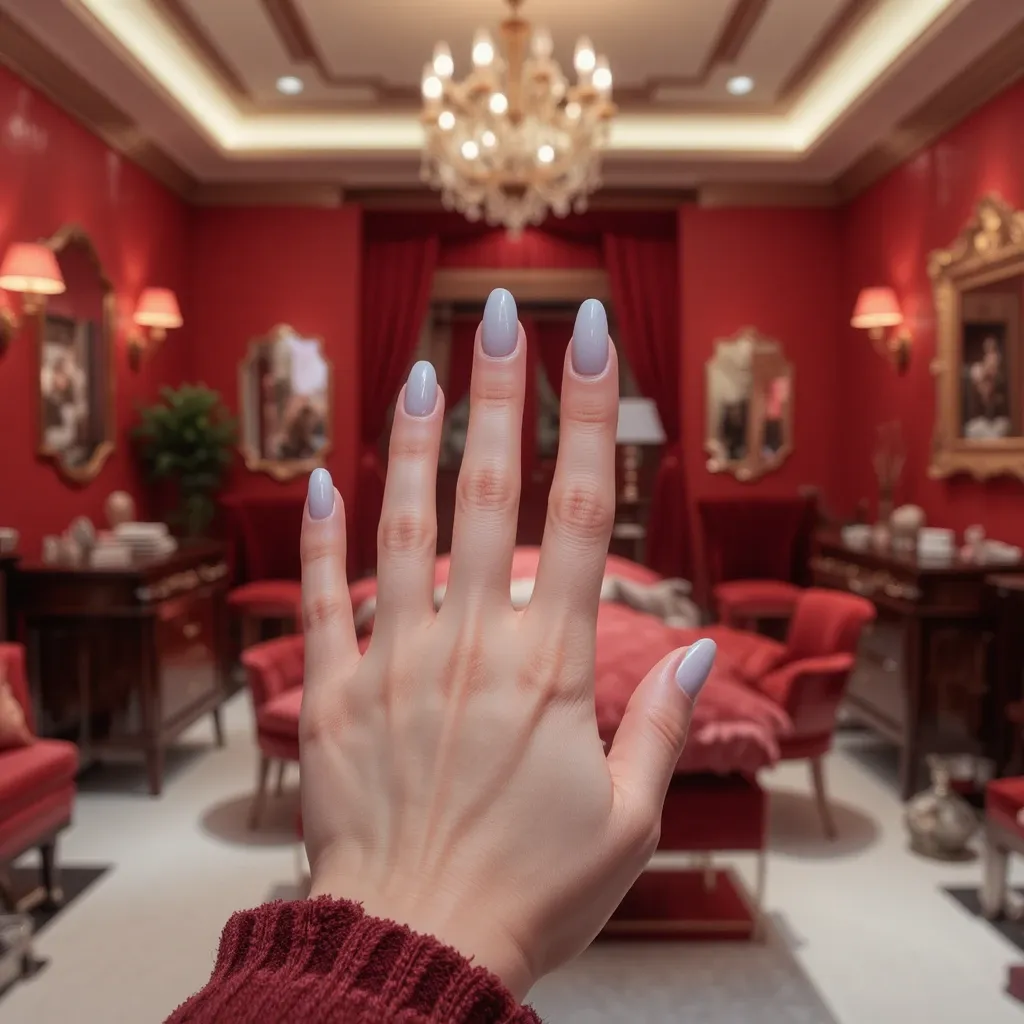
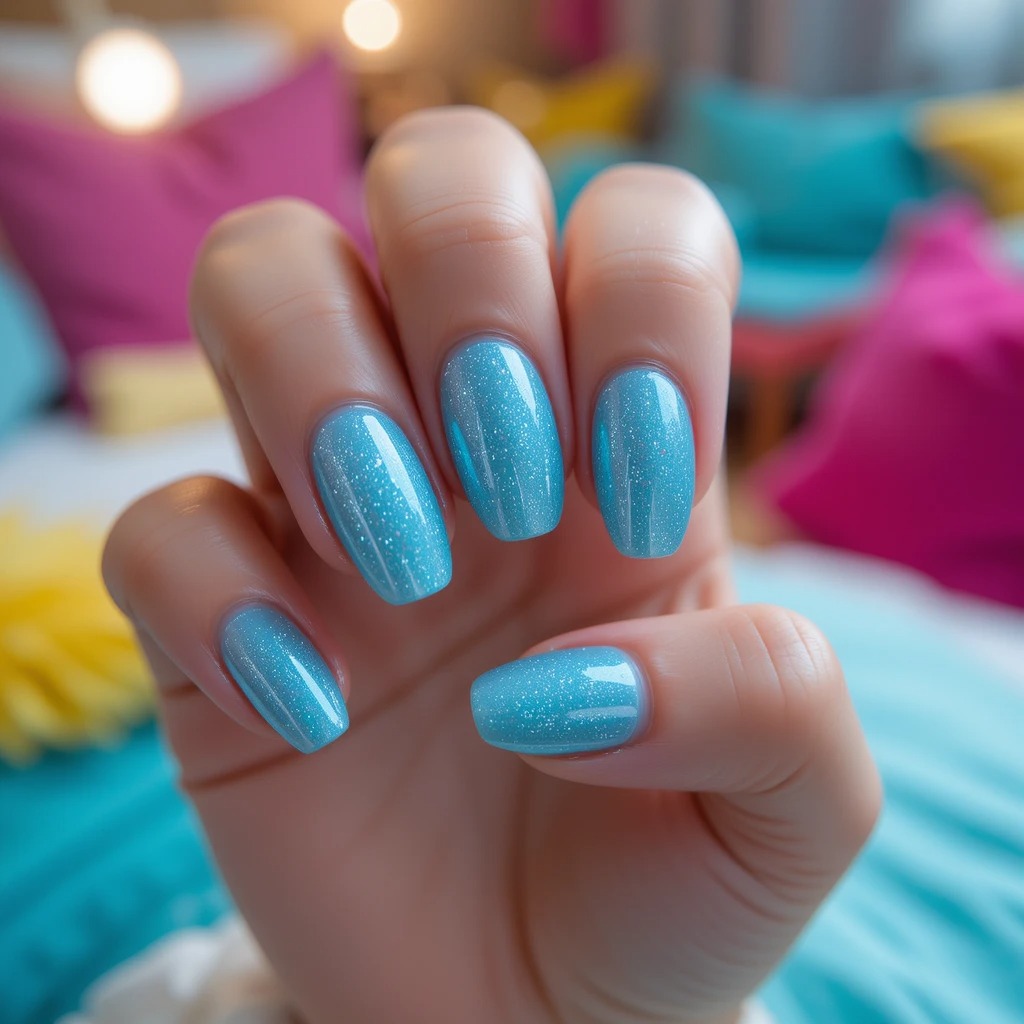
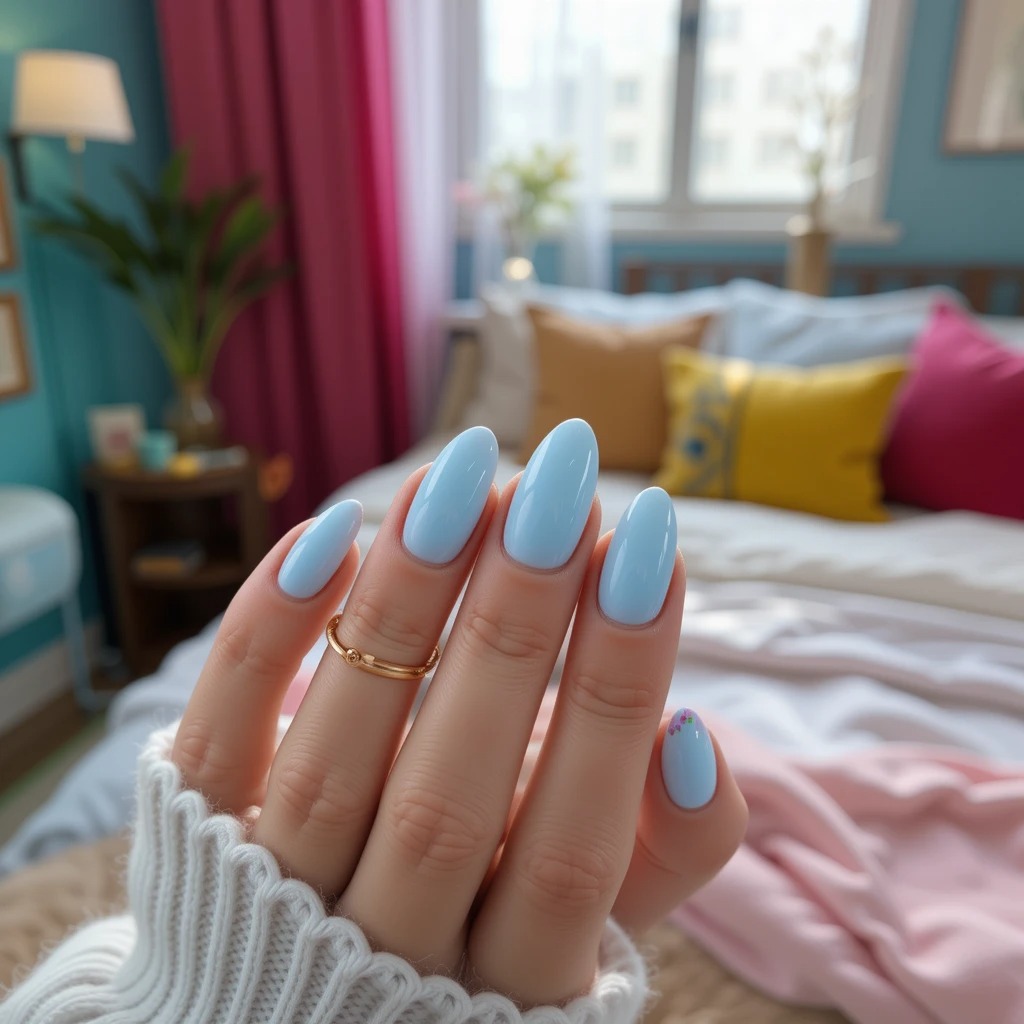
1. Classic Ice Blue Gloss
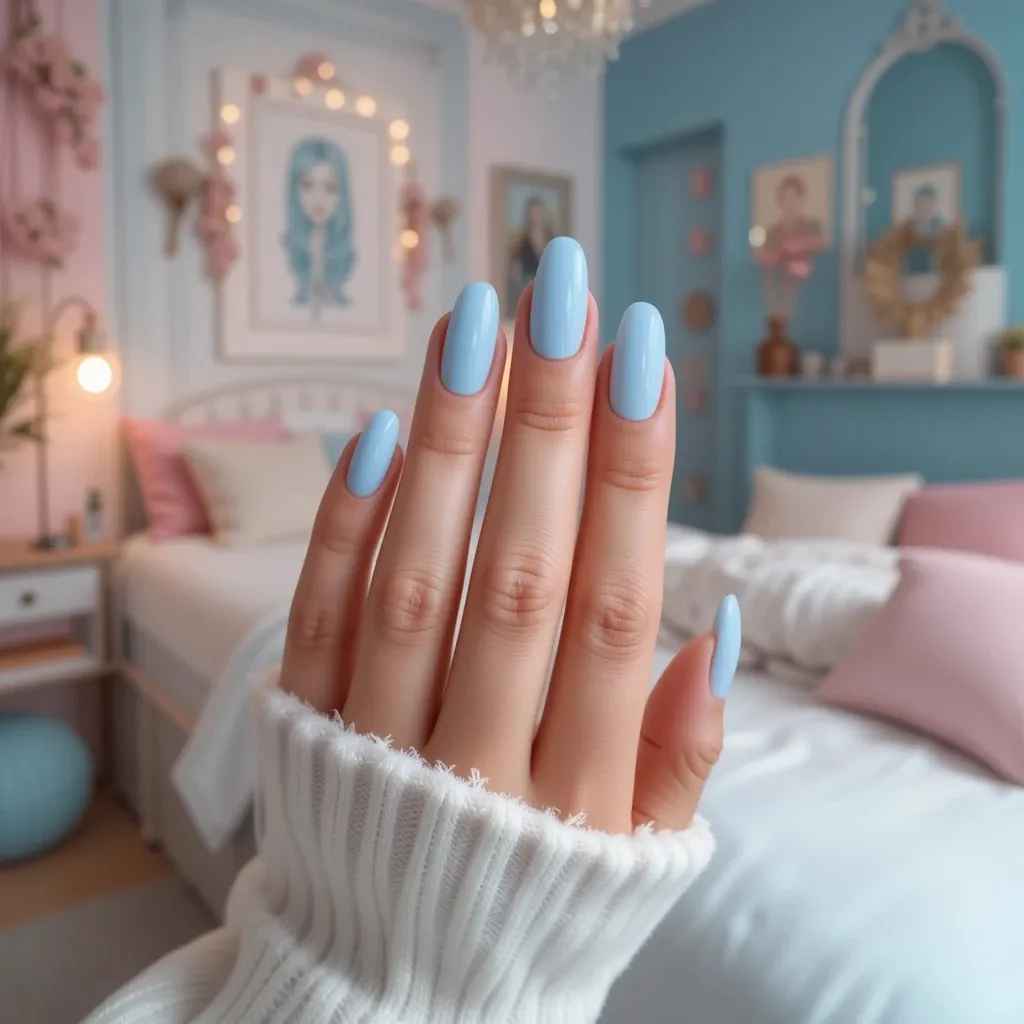
This is your quintessential winter nail—a pale, crystalline blue with a high-shine finish that catches light like fresh snow. The color sits somewhere between baby blue and silvery white, creating an ethereal, almost translucent effect. It’s clean, modern, and pairs beautifully with both casual knits and formal winter wear.
Why It Works for Winter: The glossy finish mimics the reflective quality of ice and winter light, making your hands look polished and bright even on gray days.
Pro Tip: Apply three thin coats instead of two thick ones to achieve that glassy, translucent depth that makes ice blue so mesmerizing.
How to Recreate at Home:
- Start with clean, shaped nails—almond or oval shapes work best for this elegant look
- Apply one thin coat of base coat and let dry completely (2 minutes)
- Apply your first coat of ice blue polish in thin, even strokes from cuticle to tip
- Wait 3-4 minutes between coats to prevent bubbling
- Apply second coat, slightly thicker, ensuring full coverage at the tips
- Apply a third coat if needed for opacity, focusing on building color gradually
- Finish with glossy quick-dry top coat, wrapping the tips to seal edges
- Clean up any polish on skin using a small brush dipped in acetone
Recommended Products: Essie “Borrowed & Blue” or OPI “It’s a Boy!” for the perfect ice blue shade
2. Matte Ice Blue Minimalist
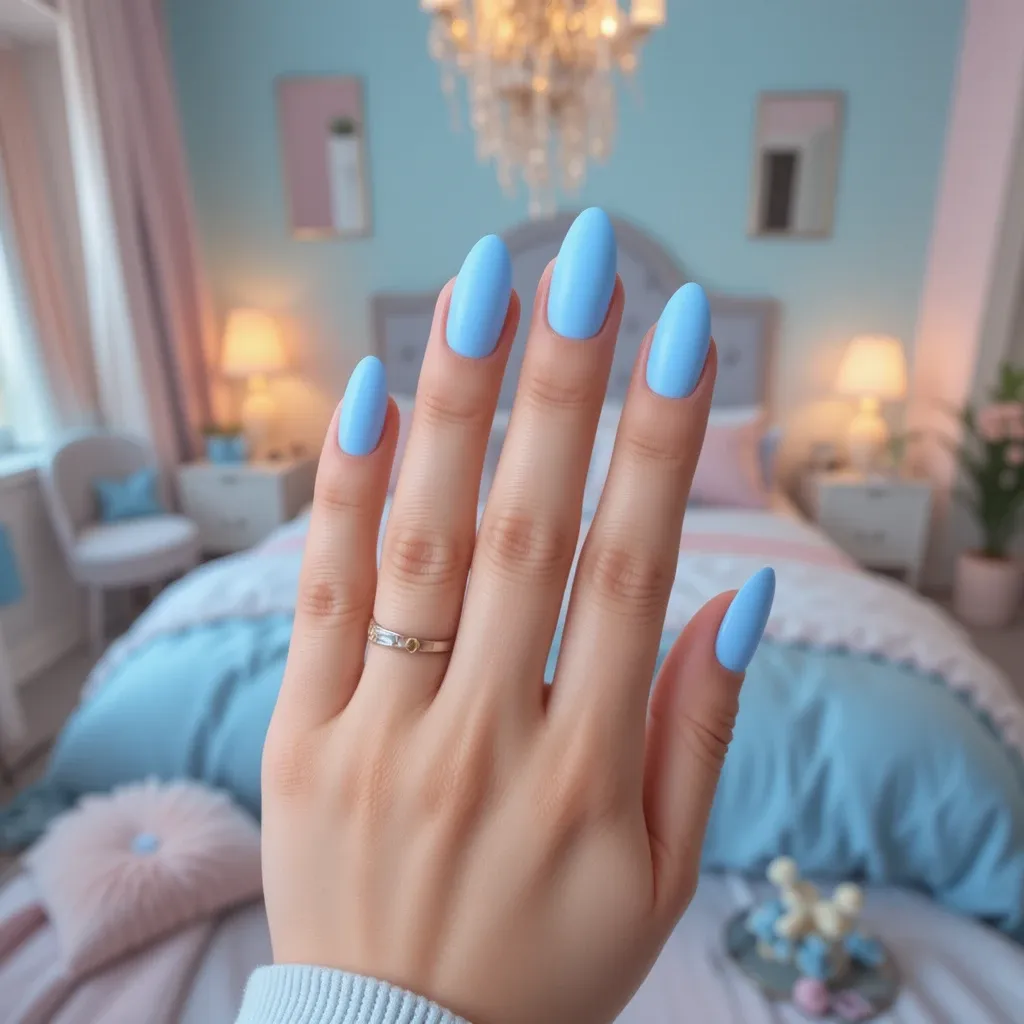
Take that same pale ice blue and give it a velvety matte finish for an ultra-modern, Scandinavian-inspired look. The matte texture adds depth and sophistication while softening the color into something almost cloud-like. This finish hides minor imperfections better than gloss and feels contemporary and fashion-forward.
Why It Works for Winter: Matte finishes are having a major moment, and this soft ice blue version feels like a breath of fresh winter air that works perfectly for those who want seasonal style without bold statements.
Pro Tip: Buff your nails well before application since matte finishes can emphasize surface texture, and use a matte top coat over regular ice blue polish to customize the finish.
How to Recreate at Home:
- Buff nail surface with a 240-grit buffer to create smooth canvas (don’t over-buff)
- Apply base coat and allow to dry thoroughly
- Apply 2-3 coats of ice blue polish, building to full opacity
- Let the color dry for 5-10 minutes—this is crucial for matte finishes
- Apply one coat of matte top coat in smooth, even strokes
- Avoid touching nails for 15 minutes to prevent texture marks
- Moisturize cuticles heavily after—matte finishes highlight dryness
Product Hack: Don’t have matte top coat? Lightly buff the surface of dried glossy polish with a fine buffer for a DIY matte effect
Recommended Products: Any ice blue polish + Essie “Matte About You” top coat or OPI “Matte Top Coat”
3. Icy Blue French Tips
Update the classic French manicure with ice blue tips instead of white for a fresh, winter-appropriate twist. The pale blue creates subtle definition without the stark contrast of traditional white tips. This design works on any nail length and brings just enough color to feel special.
Why It Works for Winter: French tips are timeless and professional, but the ice blue variation adds seasonal personality while maintaining workplace appropriateness.
Pro Tip: Use striping tape or guides to create crisp, even lines—precision matters more with colored tips than white.
How to Recreate at Home:
- Apply base coat and let dry
- Apply 2 coats of sheer nude or pale pink base color (Essie “Ballet Slippers” or OPI “Bubble Bath”)
- Let base color dry completely—at least 10 minutes
- Apply French tip guides or striping tape just below where you want the blue to start
- Press tape down firmly, especially at edges, to prevent bleeding
- Paint ice blue tips in 1-2 coats, depending on opacity needed
- Remove guides immediately while polish is still wet (this prevents peeling)
- Let dry 5 minutes, then apply glossy top coat over entire nail
- Use cleanup brush with acetone to perfect the smile line
Beginner Tip: If you don’t have French tip guides, use small round reinforcement stickers or cut regular tape to size
Recommended Products: OPI “Put It In Neutral” for base + Essie “Borrowed & Blue” for tips
4. Sheer Ice Blue Wash
Imagine a barely-there tint of ice blue, so sheer it looks like your nails are naturally tinged with winter sky. This is the “your nails but better” approach—fresh, clean, and effortlessly elegant. The sheerness allows your natural nail to show through, creating a soft, romantic effect.
Why It Works for Winter: This is perfect for conservative workplaces or anyone who prefers subtle beauty over bold statements while still embracing the season.
Pro Tip: Apply one to two coats maximum—over-building will lose that coveted sheerness and defeat the ethereal purpose.
How to Recreate at Home:
- Ensure nails are well-manicured—this look shows natural nail, so condition matters
- Apply base coat for protection and smoothness
- Apply ONE very thin coat of sheer ice blue polish
- Let dry and evaluate—you may want to stop here for maximum sheerness
- Apply a second thin coat only if desired, keeping it translucent
- Finish with clear or slightly tinted glossy top coat
- Buff any ridges beforehand for the smoothest appearance
DIY Sheer Polish Hack: Mix 1 drop of ice blue polish with 3-4 drops of clear polish on a palette to create custom sheer shade
Recommended Products: Essie “Find Me An Oasis” or Zoya “Blu” (naturally sheer formulas)
5. Ice Blue Ombré Fade
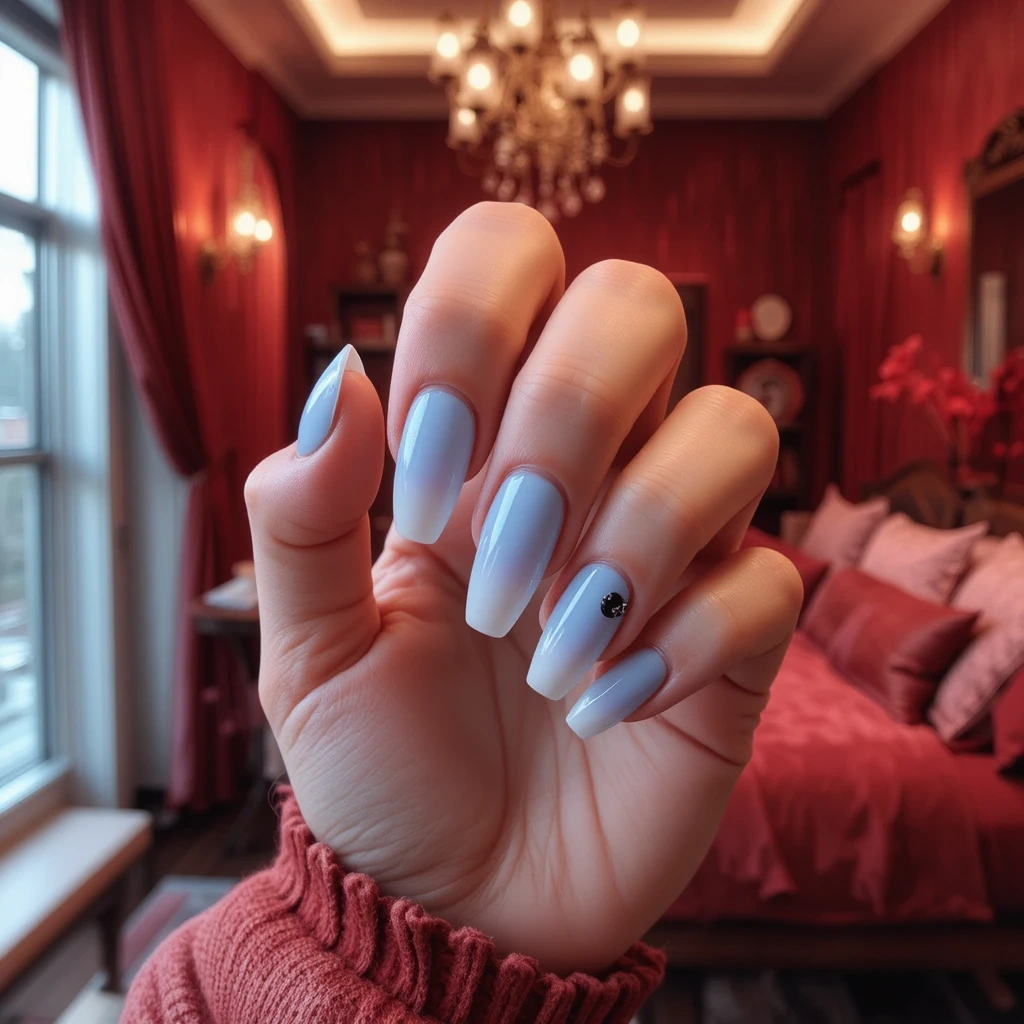
Start with deeper ice blue at the cuticle and gradually fade to almost white or clear at the tips. This creates a stunning gradient effect that feels dimensional and sophisticated, like winter sky meeting snow. The ombré technique adds visual interest without requiring intricate nail art skills or steady hands.
Why It Works for Winter: The gradient mimics natural winter lighting and creates elongating effects that flatter every nail length while feeling artistic and special.
Pro Tip: Use a makeup sponge to blend two shades of blue polish, dabbing gently from cuticle to tip for seamless blending.
How to Recreate at Home (Sponge Method):
- Apply base coat and let dry
- Apply 1-2 coats of white or pale blue base for best gradient effect
- On a small palette or plastic surface, paint stripes of your two colors side by side: darker ice blue and white/light blue
- Lightly dab a damp makeup sponge over the polish stripes to pick up both colors
- Gently bounce the sponge onto your nail, starting at cuticle with darker shade
- Repeat bouncing motion 2-3 times per nail, reloading sponge as needed
- The colors will blend naturally on the nail—don’t overwork it
- Let dry completely (this can take 10+ minutes due to thickness)
- Clean up excess polish on skin with acetone and brush
- Apply 2 coats of glossy top coat to smooth the textured gradient
Common Mistake to Avoid: Don’t use a dry sponge—dampen it slightly with water and squeeze out excess for best blending
Recommended Products: OPI “I Can Teal You Like Me” (darker blue) + OPI “Alpine Snow” (white)
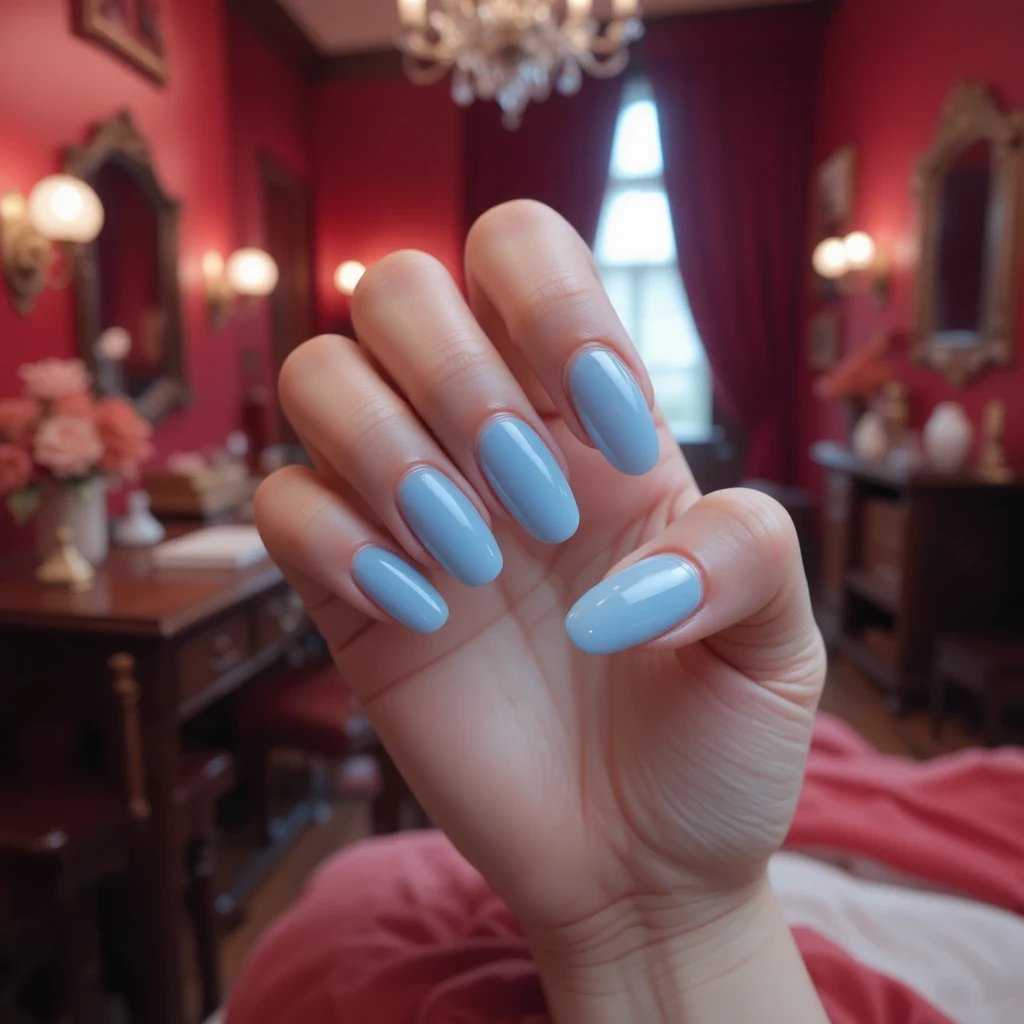
6. Powder Blue Minimalist
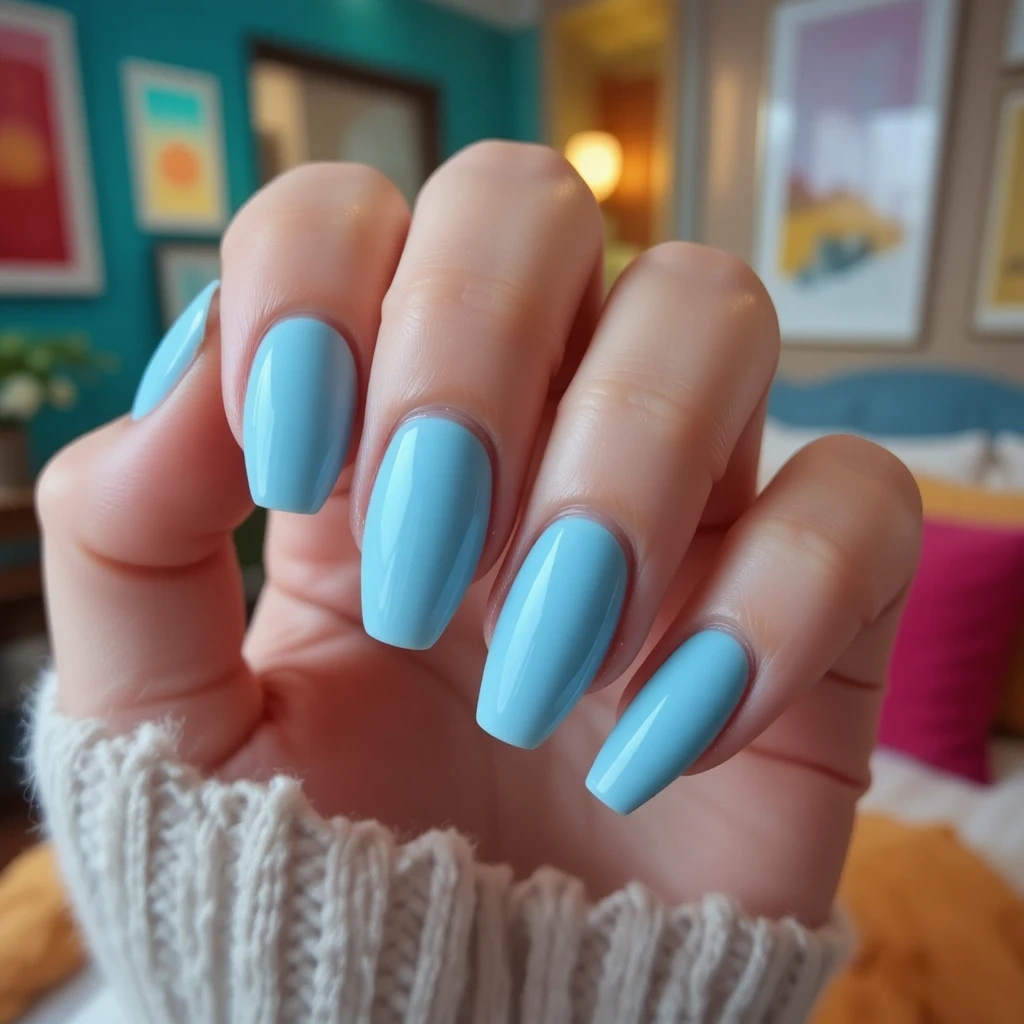
This slightly deeper version of ice blue leans toward a soft powder blue with cool undertones that feel vintage-inspired yet modern. The shade has more pigment than sheer ice blue but remains light and airy, perfect for everyday wear. It’s sophisticated enough for the office yet pretty enough for date nights and winter celebrations.
Why It Works for Winter: Powder blue offers more coverage and opacity than sheer ice blue, making it ideal for those who want color payoff without going bold.
Pro Tip: This shade looks stunning on shorter, natural nail lengths with a rounded or squoval shape for a classic, timeless aesthetic.
How to Recreate at Home:
- Shape nails to squoval (square with rounded corners) using a 180-grit file
- Push back cuticles gently after softening with warm water
- Apply thin base coat
- Apply first coat of powder blue polish in three strokes: center, left, right
- Let dry 3-4 minutes
- Apply second coat for full opacity, ensuring even coverage
- Seal with quick-dry top coat
- Apply cuticle oil around edges while polish dries
Nail Shape Guide for This Look: File straight across, then gently round the corners at a 45-degree angle
Recommended Products: Essie “Bikini So Teeny” or Sally Hansen “Blue Me Away”
Chrome & Metallic Winter Magic
7. Ice Blue Chrome Mirror

This is ice blue taken to its most futuristic, attention-grabbing extreme—a full-coverage chrome finish that reflects like a frozen mirror. The metallic sheen shifts from pale blue to silver depending on the light, creating mesmerizing dimension. It’s bold, glamorous, and undeniably eye-catching without being loud or garish.
Why It Works for Winter: Chrome finishes capture winter’s metallic, reflective quality—think icicles, silver ornaments, and frost on windows.
Pro Tip: Chrome powder application requires a perfectly smooth base—any ridges or texture will show through amplified.
How to Recreate at Home (Gel Polish Method):
- Buff nails smooth with 240-grit buffer—chrome shows every imperfection
- Apply gel base coat and cure under LED lamp (30-60 seconds)
- Apply 2 coats of pale blue or white gel polish, curing between coats
- Apply no-wipe gel top coat and cure (this is your chrome base)
- While still warm from lamp, use eyeshadow applicator to rub chrome powder onto nail
- Buff powder in circular motions until you achieve mirror finish
- Dust off excess powder with fluffy brush
- Seal with gel top coat and cure
- Wipe with alcohol to remove residue and reveal full chrome effect
How to Recreate at Home (Regular Polish Method):
- Same buffing and prep as above
- Apply base coat, 2 coats of light blue polish, and quick-dry top coat
- While top coat is still slightly tacky (1-2 minutes after application), apply chrome powder
- Rub powder onto nail with silicone tool or eyeshadow applicator
- Seal with another layer of top coat very gently (don’t disturb the powder)
Product Shopping List:
- Chrome powder: Born Pretty Ice Blue Chrome Powder or Makartt Mirror Powder
- Eyeshadow applicator or silicone buffing tool
- No-wipe gel top coat if using gel method
Beginner Tip: Start with just one or two accent nails for your first chrome attempt
8. Icy Blue Metallic Shimmer
Think of this as chrome’s softer, more approachable sister—ice blue packed with ultra-fine metallic shimmer particles. The effect is luminous and dimensional without the full mirror finish, creating a frosted metallic look. It has movement and sparkle but remains wearable and sophisticated rather than costume-y.
Why It Works for Winter: The shimmer catches light beautifully indoors and out, adding sparkle without glitter’s maintenance issues or removal challenges.
Pro Tip: Apply shimmer polish in thin, even coats to prevent patchiness and ensure the metallic particles distribute evenly.
How to Recreate at Home:
- Apply base coat to prevent staining from metallic particles
- Roll shimmer polish bottle between hands (don’t shake—creates bubbles)
- Apply first thin coat, allowing shimmer to settle evenly
- Let dry 5 minutes—shimmer formulas often need longer drying time
- Apply second coat, using smooth continuous strokes to prevent streaking
- If formula is thick, thin slightly with 1-2 drops of polish thinner (not remover)
- Finish with glossy top coat to amplify shimmer and smooth texture
- For extra dimension, layer shimmer over solid ice blue base
Formula Fix: If your shimmer polish is patchy, apply 1-2 coats of solid ice blue underneath, then top with shimmer
Recommended Products: OPI “This Color’s Making Waves” or Essie “Set In Stones”
9. Chrome Ice Blue Accent Nails
Keep most nails in classic ice blue gloss or matte, then add full chrome to your ring fingers only. This creates a stunning focal point without overwhelming your hands or committing to full chrome’s intensity. The contrast between finishes adds sophisticated dimension and modern edge to a simple manicure.
Why It Works for Winter: Accent nails let you experiment with bolder trends without full commitment or potential workplace issues while still embracing the chrome trend.
Pro Tip: Ensure your base ice blue and chrome finish share the same undertone—both cool and silvery—for cohesion.
How to Recreate at Home:
- Follow steps for Classic Ice Blue Gloss (idea #1) on all nails
- Let dry completely—at least 20 minutes
- On ring fingers only, apply no-wipe gel top coat OR regular quick-dry top coat
- Wait until slightly tacky (1-2 minutes for regular polish, cure for gel)
- Apply chrome powder to ring fingers only using applicator
- Buff to mirror finish
- Seal ring fingers with top coat
- Apply another layer of top coat to ALL nails for uniform shine
Design Variation: Try chrome on thumb and ring finger for balanced look
10. Icy Pearl Finish
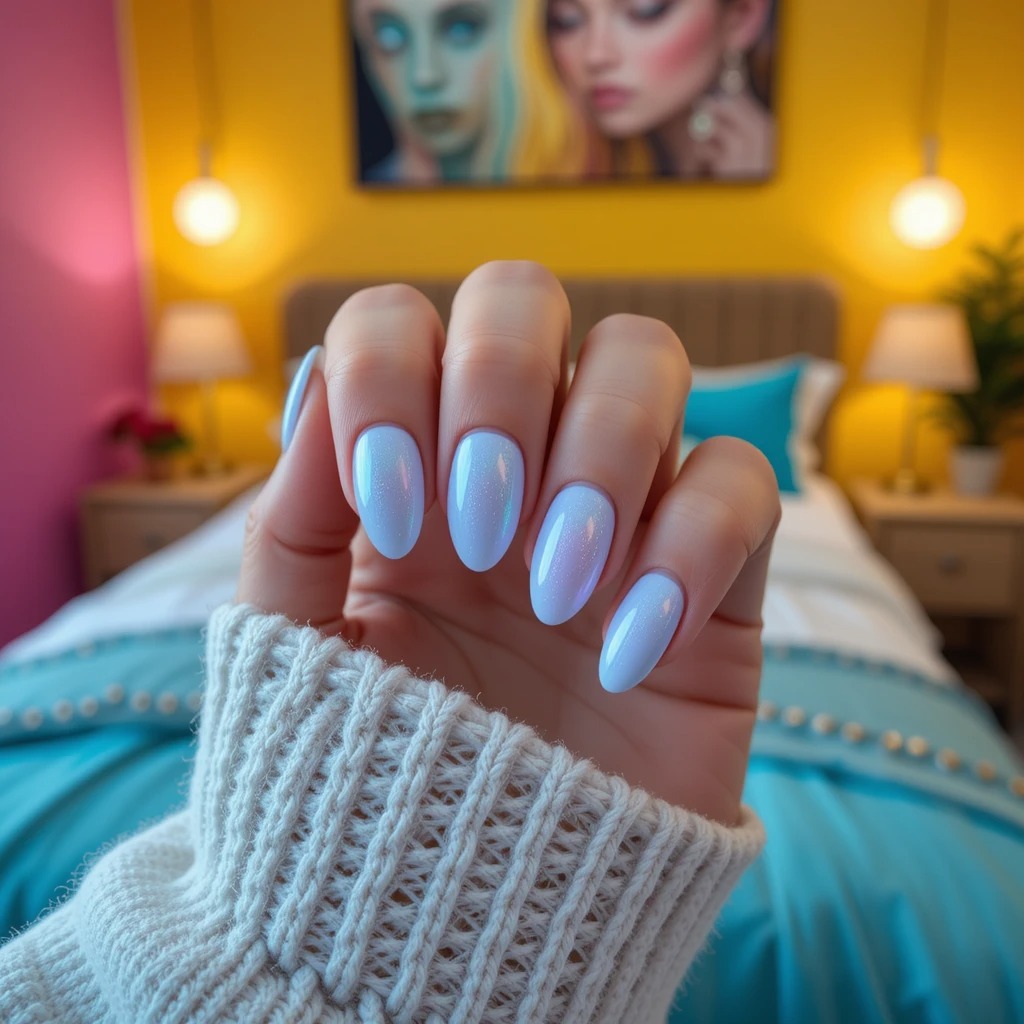
This sophisticated finish combines ice blue with an iridescent pearl effect, creating subtle color shifts between blue, silver, and lavender. The pearl sheen is softer than metallic but more complex than simple shimmer, offering understated luxury. It looks expensive and refined without trying too hard or appearing overly trendy.
Why It Works for Winter: Pearl finishes evoke frozen bubbles, winter moonlight, and that magical quality of fresh snow under streetlights.
Pro Tip: Pearl polishes can appear streaky if applied too thinly—use medium-thick coats for even coverage and depth.
How to Recreate at Home:
- Apply base coat for smooth application
- Shake pearl polish well—particles settle quickly
- Load brush with good amount of polish for even distribution
- Apply first coat in smooth, continuous strokes without over-brushing
- Let dry 5 minutes—pearl formulas can smudge if rushed
- Apply second coat slightly thicker for full pearl effect
- Optional: Layer pearl polish over solid ice blue for more intense shift
- Top with glossy coat to enhance iridescent effect
Layering Technique for Maximum Pearl: Apply 2 coats solid ice blue + 1-2 coats pearl top coat
Recommended Products: Zoya “Monet” or Essie “Virgin Snow” (pearl finish)
The Ice Blue Temperature Problem
Why Your Ice Blue Looks Different Indoors vs. Outdoors
Ice blue has this weird chameleon quality where the same polish looks completely different depending on temperature and lighting. Not just slightly different—dramatically different.
Indoor Winter Lighting (Yellow-Toned):
- Ice blue looks more GREEN
- Can appear almost teal under warm LED bulbs
- Loses its “ice” quality and looks tropical
Outdoor Winter Daylight (Blue-Toned):
- Ice blue looks PERFECT
- True crystalline blue appears
- The exact shade you wanted
Fluorescent Office Lighting:
- Ice blue looks GRAY
- Loses all personality
- Basically looks like you painted your nails with office walls
The Fix: Test your ice blue shade OUTSIDE in natural winter daylight before committing. What looks perfect in the salon’s lighting might look completely different in your actual life environments.
Ice Blue and the Skin Tone Surprise
The Undertone Rule Doesn’t Apply Like You Think
Everyone says “cool undertones wear cool colors” but ice blue breaks this rule spectacularly.
Warm-Toned Skin + Ice Blue: Creates stunning CONTRAST that makes both your skin and nails pop. The warmth in your skin makes ice blue look even cooler and more striking. It’s like putting ice cubes in warm water—the temperature difference is the whole point.
Cool-Toned Skin + Ice Blue: Can actually look TOO matchy, washing you out and making your hands look bluish or cold. You need more contrast, not less.
The Unexpected Truth: Medium to olive skin tones often look BEST in ice blue. The contrast is dramatic without being harsh, and the cool blue makes warm skin look glowy and healthy instead of sallow.
Test This: Hold ice blue polish next to your bare wrist. If it makes your skin look vibrant and healthy, you’re good. If your skin looks gray or washed out, try powder blue instead.
The Winter Glove Situation
How Gloves Destroy Ice Blue Nails Faster
Nobody warns you about this: wearing gloves daily ruins ice blue manicures in specific, annoying ways.
What Happens:
- Tips chip from the friction of pulling gloves on/off multiple times daily
- Edges lift from moisture trapped between glove liner and nails
- Chrome dulls from repeated fabric contact (microfiber is brutal on chrome)
- Color yellows if you wear dark-colored glove liners (dye transfer is real)
Winter Glove Survival Strategy:
- Gel only (regular polish won’t survive winter gloves)
- Cap those edges religiously (seal tips with every layer)
- Light-colored glove liners (prevent dye transfer)
- Smooth fabric only (avoid anything textured or fuzzy inside)
- Size up in gloves (tight gloves = more nail contact = more damage)
The Nuclear Option: Skip gloves, embrace cold hands, preserve manicure. (Not recommended, but people do it.)
Ice Blue in Holiday Photos: Yes or No?
The December Photo Dilemma
You’re taking family photos, holiday party pictures, Instagram content. Ice blue photographs weird in certain contexts.
Ice Blue Photographs Well:
- ✓ Outdoor winter shots (snow, evergreens, natural light)
- ✓ Minimalist modern settings
- ✓ Black and white photography
- ✓ Fashion/editorial style photos
Ice Blue Photographs Poorly:
- ✗ Warm-toned holiday settings (clashes with gold/red decorations)
- ✗ Traditional family photos (looks out of place with warm tones)
- ✗ Flash photography (can look gray or washed out)
- ✗ Against red or green holiday outfits (color theory nightmare)
The Fix: If you’re doing holiday photos, check your photographer’s typical editing style. Warm, golden edits make ice blue look strange. Cool, airy edits make ice blue look perfect.
The Office Fluorescent Light Test
Will Ice Blue Look Good at Work?
Office lighting is where ice blue either thrives or dies. Before committing to ice blue for professional settings, do this test:
The Test:
- Paint ONE nail ice blue
- Go to your actual office
- Look at your nail under your desk lamp
- Check it in the bathroom
- See it in the conference room
- Look at it by the window
If ice blue looks:
- Blue = You’re good, commit to all nails
- Gray = Abort, fluorescent lighting killed it
- Green = Yellow-toned office lights are ruining it
- Acceptable = Proceed with caution
Your office lighting is unique. What works in one building fails in another.
The Elsa Comparison (And How to Avoid It)
When Ice Blue Crosses into Frozen Territory
There’s a very specific point where ice blue nails stop being chic and start being “Are you dressed as Elsa?”
Safe from Elsa Comparisons:
- Minimalist ice blue (solid, simple)
- Chrome or metallic finishes (too futuristic for Elsa)
- Matte ice blue (too modern for Disney)
- French tips (too classic for costume)
Elsa Red Flags:
- Snowflake nail art (this is the killer)
- Glitter (especially silver or white)
- Long nails + ice blue + sparkle (triple threat)
- ANY combination with “Let It Go” on your playlist
How to Wear Ice Blue Without the Frozen Association: Keep it simple. No winter-themed nail art. No snowflakes. No sparkle. Just the color in a modern finish. The second you add winter decorations, you’ve crossed into costume territory.
Chrome Ice Blue: The Maintenance Nobody Tells You
Before You Chrome Your Winter Nails
Ice blue chrome looks INCREDIBLE in photos. In real life after 3 days? Different story.
What They Don’t Tell You:
- Fingerprints show on chrome IMMEDIATELY (every single touch)
- Dullness happens fast (chrome finish fades within a week)
- Scratches are permanent (one wrong move = visible forever)
- Chips look TERRIBLE on chrome (exposes dark base underneath)
- Reapplication needed weekly (salon visit or DIY touch-up)
Chrome Survival Time:
- Day 1-3: Perfect, Instagram-ready
- Day 4-7: Dulling, shows wear
- Day 8-10: Sad, scratched, regretful
- Day 11+: Why didn’t I just do regular ice blue?
Worth It For: Special events, photo shoots, 1-week maximum wear Skip It For: Everyday winter nails, 2+ week wear, anyone with a real job
Actually Practical Ice Blue for Real Winter
What Survives January-March
If you live somewhere with actual winter (not “cute jacket” winter, but “will my car start” winter), here’s what works:
Winter-Proof Ice Blue:
- Gel polish (only option that survives)
- Short to medium length (long nails break in cold)
- No embellishments (gloves destroy them)
- Glossy OR matte (not chrome—too high-maintenance)
What to Skip:
- Regular polish (chips in 2 days from gloves)
- Intricate nail art (too delicate for winter chaos)
- Chrome (dulls immediately)
- Very long nails (cold makes them brittle and snappy)
Real Winter Test: If you wear gloves daily, will this manicure survive? If the answer is no, pick something else.
The Workplace Winter Nail Hierarchy
Where Ice Blue Lands Professionally
Conservative Fields (Finance, Law, Healthcare):
- Sheer ice blue wash ✓
- Classic glossy ice blue ✓
- Ice blue French tips ✓
- Chrome ice blue ✗ (too flashy)
- Ice blue with glitter ✗ (too casual)
Moderate Fields (Education, Corporate, Admin):
- Any matte or glossy ice blue ✓
- Shimmer ice blue ✓
- Chrome accent nail MAYBE
- Full chrome MAYBE (depends on company culture)
Creative Fields (Design, Media, Fashion):
- Everything works ✓
- The weirder the better
The Truth: Ice blue reads as “trying to be appropriate while still having personality.” In conservative settings, that works. In creative settings, it might read as playing it safe.
Skin Tone Real Talk: Who Ice Blue Actually Flatters
The Undertone Thing Is Backwards
Fair Cool-Toned Skin: Ice blue can wash you out HARD. Your hands might look corpse-like. The solution? Powder blue (slightly warmer) or ice blue with shimmer (adds dimension).
Fair Warm-Toned Skin: Ice blue looks surprisingly good because of contrast. Your warm skin makes the cool blue pop instead of blending into nothing.
Medium Skin Tones: Ice blue is YOUR color. The contrast is perfect—not too harsh, not too subtle. You can wear any ice blue variation.
Deep Skin Tones: Ice blue creates stunning contrast but needs to be opaque (not sheer). Build up 3-4 coats or use gel for true color payoff.
Olive Skin: Ice blue is magical on you. The cool blue against warm olive undertones creates a glow that’s hard to explain but impossible to miss.
Winter Activity Durability Rankings
How Long Will Ice Blue Last During…
Daily Computer Work:
- Gel ice blue: 14-18 days
- Regular polish: 3-5 days
- Chrome: 7 days before looking rough
Winter Sports (Skiing, Skating):
- Gel: 7-10 days (gloves save you)
- Regular: 1-2 days (forget it)
- Chrome: 3-5 days (scratches from equipment)
Holiday Cooking/Hosting:
- Gel: 10-12 days
- Regular: 2-4 days
- Chrome: 5-7 days (heat and moisture dull it)
Sitting on Couch Doing Nothing:
- Any format: Full expected lifespan
- This is the ideal ice blue lifestyle
The January Slump Color Problem
Why Ice Blue Stops Working After New Year
Ice blue is perfect for December—sparkly, festive, winter wonderland vibes. January hits and suddenly your ice blue nails feel… wrong. Not objectively bad, just misaligned with the month’s energy.
The Vibe Shift:
- December: Festive, celebratory, magical
- January: Depressing, dark, endless
- Ice blue in December: Whimsical and seasonal
- Ice blue in January: Trying too hard to make winter fun
Solutions:
- Switch to deeper winter blues (navy, slate)
- Add warmth (ice blue with rose gold accents)
- Commit harder (full chrome, make it fashion)
- Accept the vibe mismatch (wear it anyway)
February Exception: Ice blue comes back for Valentine’s proximity. Cool blue + pink/red aesthetic = acceptable again.
Length Matters More Than You Think
How Nail Length Changes Ice Blue’s Entire Personality
Very Short (At or Below Fingertip): Ice blue looks CUTE and young. Almost childlike. Hard to make it look sophisticated at this length.
Short-Medium (1-3mm Past Fingertip): Sweet spot. Ice blue looks elegant and intentional. This is the length for everyday ice blue.
Medium-Long (4-6mm Past Fingertip): Ice blue starts looking dramatic. Still good, but requires more styling confidence.
Very Long (7mm+): Ice blue looks costume-y unless you’re doing full editorial glam. Proceed with caution.
The Rule: The shorter your nails, the more casual ice blue reads. The longer your nails, the more intentional/dramatic it becomes.
What to Actually Wear With Ice Blue Nails
Colors That Work:
- Black (classic contrast)
- White (crisp winter)
- Gray (tonal sophistication)
- Navy (monochromatic cool)
- Silver jewelry (obvious match)
Colors That Don’t:
- Red (Christmas, even in March)
- Green (Christmas energy)
- Gold jewelry (warm vs. cool clash)
- Brown (undertone fight)
- Burgundy (both want to be the cool tone)
The Exception: If your whole outfit is warm-toned, ice blue nails can work as the singular cool element. But you need to commit to it being the contrast point.
The Gel vs. Regular Decision for Ice Blue
What Actually Makes Sense
Choose Regular Polish If:
- You like changing colors weekly
- You’re testing ice blue for the first time
- Budget is tight
- You’re good at at-home application
Choose Gel If:
- You wear gloves daily
- You need 2+ weeks wear
- You want chrome or complex finishes
- You hate chipping (ice blue shows chips weird)
The Reality: Ice blue in regular polish chips FAST because it’s light-colored and shows every flaw. You’re touching up constantly or accepting visible wear. Gel is expensive but actually worth it for this specific shade.
Just Know What You’re Getting Into
Ice blue nails are gorgeous. They’re also high-maintenance in ways dark winter colors aren’t. Light colors show everything—chips, scratches, wear patterns, yellowing from hand creams.
If you’re committed to the ice blue winter aesthetic, get gel and embrace the upkeep. If you want easy winter nails, this isn’t it.
But if you’re willing to deal with the maintenance? Ice blue is the prettiest winter nail color that exists, and that’s just facts.