15 April Nails inspiration ideas That Look So Good
Most April nails guides just throw 15 color swatches at you and call it a day. This one is different: every color recommendation comes with specific why-it-works context, a pro tip that actually changes how your manicure holds up, and honest talk about what doesn’t look great. You’ll also get a full wear timeline, a comparison table, and real product names with prices — not vague suggestions.
How to Choose the Right April Nail Color for You
Before scrolling through 15 april nails options, figure out which category fits your life right now:
First time trying spring colors:
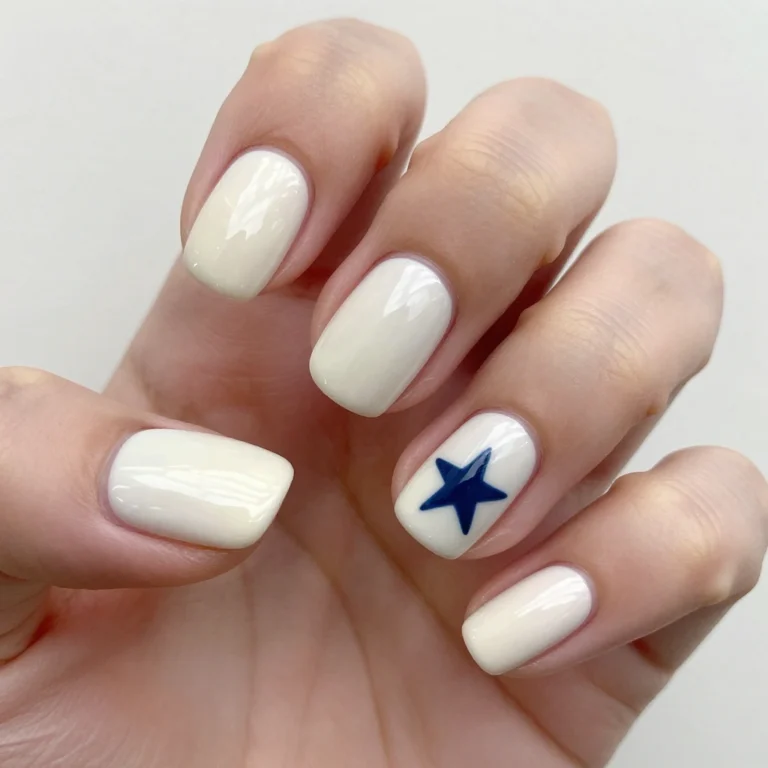
- Start with Cream Dream (#11) or Blush Pink Satin (#6) — both are universally flattering, professional, and impossible to mess up
Professional office environment:
- Sage Garden (#3), Soft Mauve (#15), Lilac Gray (#10), or Cream Dream (#11) all pass the boardroom test without looking boring
Special event coming up (wedding, brunch, event):
- Blush Pink Satin (#6) or Rose Gold Chrome (#14) photograph beautifully and feel intentional without being costume-y
Comfortable with nail art / want something editorial:
- Pistachio Pearl (#4) with a chrome top coat, or Terracotta Clay (#8) in matte finish for a high-fashion look
Short nails (at or just past the fingertip):
- Avoid very bright pastels — they can read juvenile at short length. Better choices: Sage Garden, Soft Mauve, or Terracotta Clay
You change your polish every week:
- Skip chrome and pearl finishes — they take longer to remove cleanly. Stick to cream finishes for easy polish-over or removal
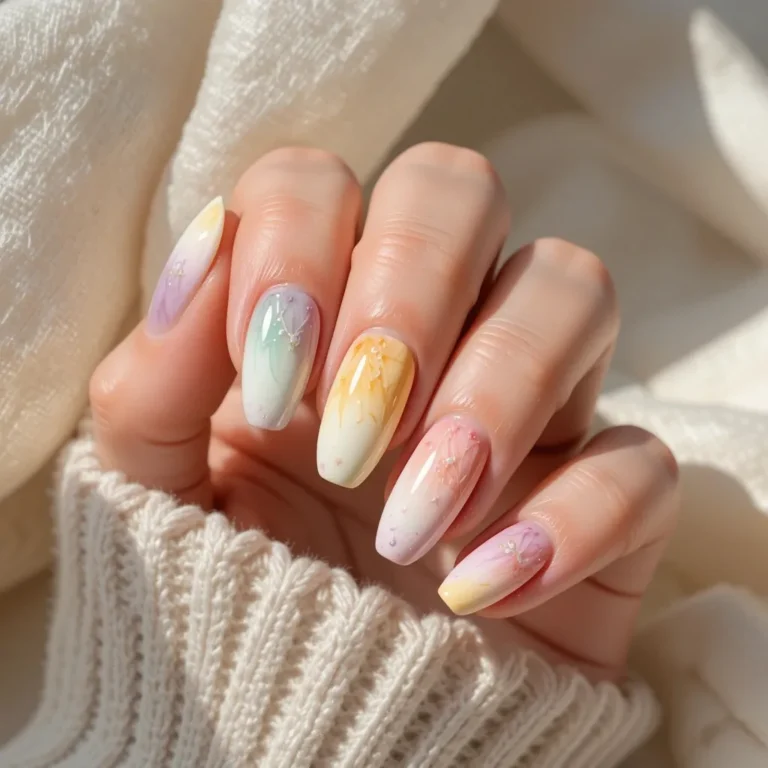
Soft & Romantic Pastels
1. Lavender Cloud
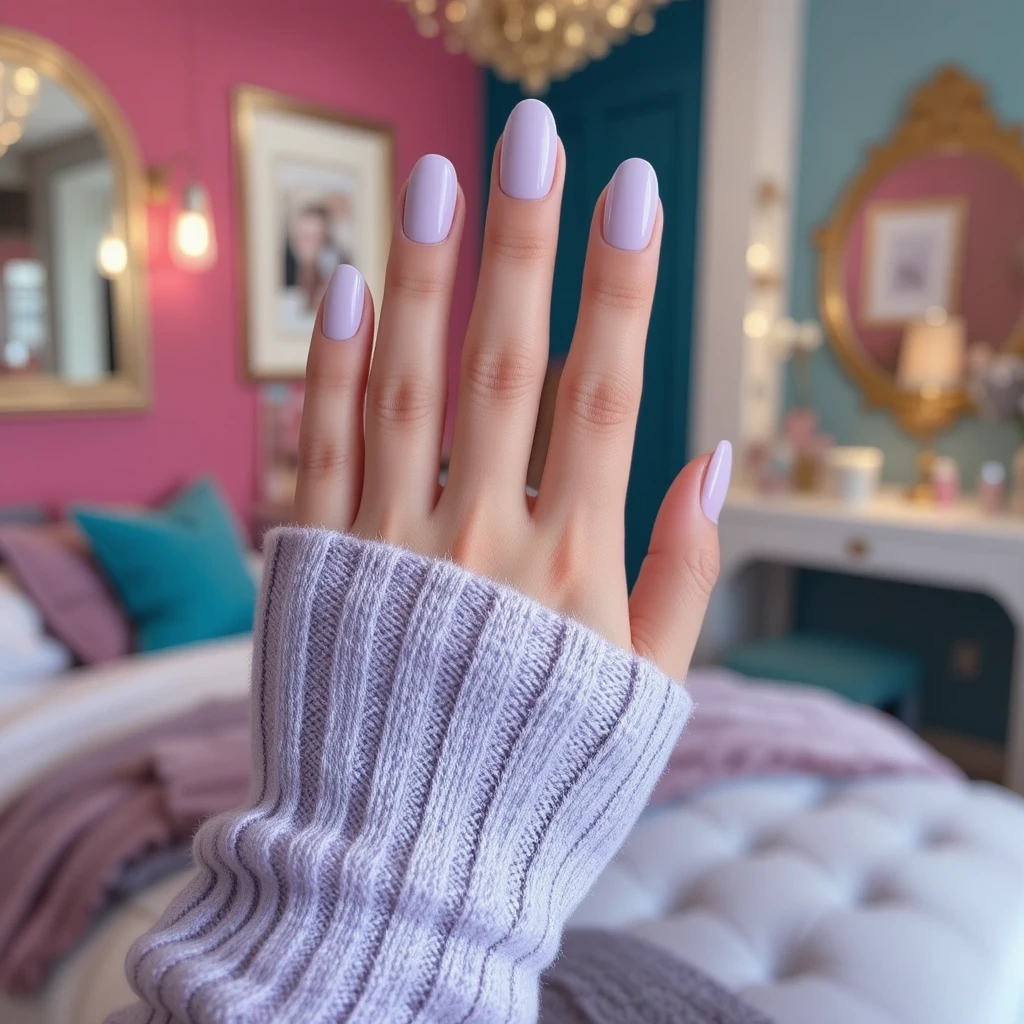
A dreamy soft lavender with a creamy finish that hovers somewhere between purple and gray, giving you that perfectly muted pastel vibe that feels sophisticated rather than juvenile. The color has enough pigment to look intentional and polished rather than washed out, while the creamy finish catches light softly without any metallic shimmer or gloss.
This shade feels like a spring morning—gentle, refreshing, and full of quiet confidence that doesn’t need to shout for attention.
| Detail | Info |
| Difficulty | Beginner |
| Time to complete | 20-25 minutes (3 thin coats + top coat) |
| Best for | Anyone who wants spring-appropriate nails that still look grown-up |
| Why it works | Lavender sits in that perfect zone between purple and gray — not too sweet, not too cold |
| What makes it different | The gray undertone keeps it from reading as Easter-egg lavender |
A dreamy soft lavender with a creamy finish — pigmented enough to look intentional but soft enough to feel like a spring morning. The gray undertones are the whole point: they keep this out of “little girl’s birthday party” territory and squarely in sophisticated seasonal territory.
Step-by-step:
- Shape and buff nails, push back cuticles
- Apply one thin layer of base coat (let dry fully — 2 minutes)
- Apply first thin coat of lavender; it will look streaky and sheer — that’s normal
- Wait 3-4 minutes, apply second coat
- Wait 3-4 minutes, apply third thin coat to build opacity
- Seal with glossy top coat
Pro Tip:
Three thin coats is non-negotiable for pastels. Two thick coats causes bubbling and uneven drying. The extra 5 minutes is worth it every time.
Product Pick:
OPI Nail Lacquer in ‘Do You Lilac It?’ ($11-13, available at Ulta or Amazon) — the formula is smooth and self-leveling, which is especially helpful for sheer pastel shades that show every brush stroke.
2. Butter Yellow Cream
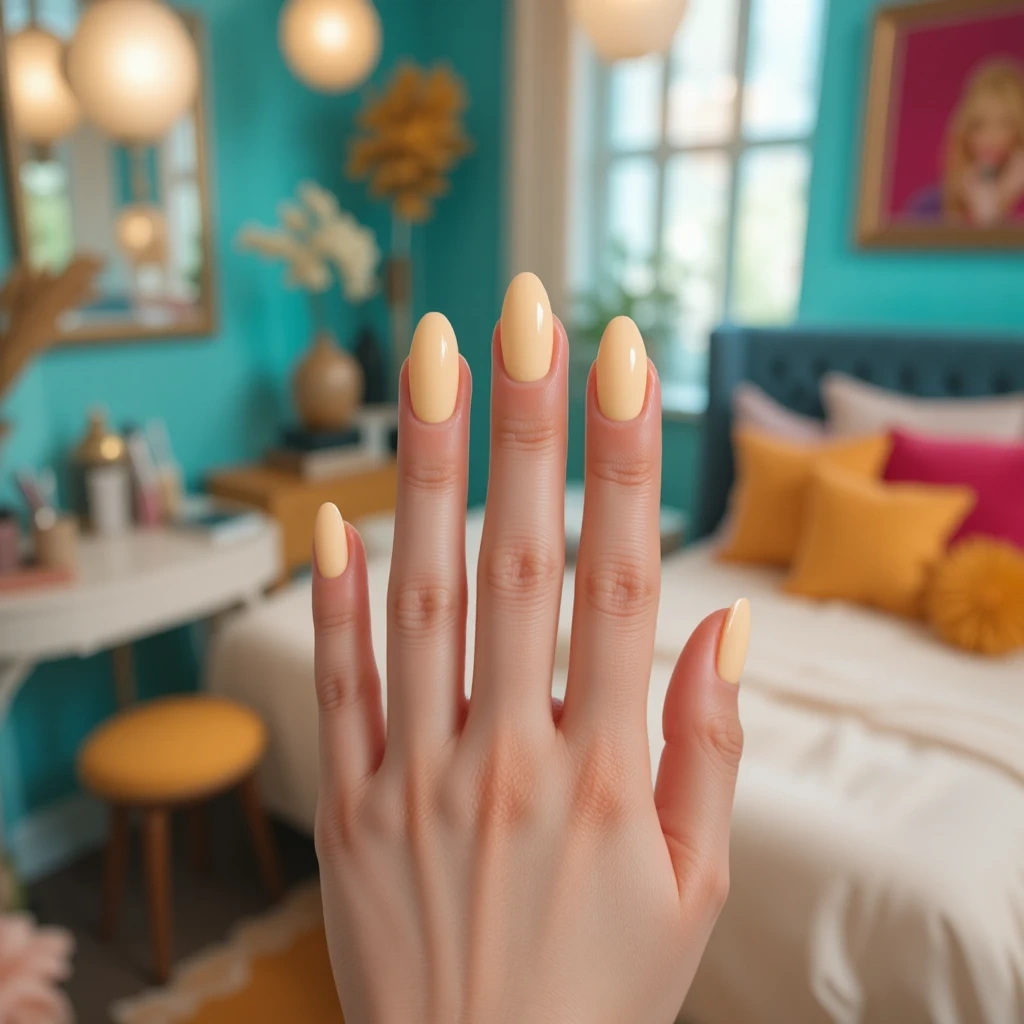
A warm, creamy yellow that leans slightly peachy—think melted butter or soft daffodils rather than bright neon or stark lemon tones. The finish is smooth and opaque with a slight creaminess that keeps the yellow from feeling too aggressive or childish, landing instead in that perfect zone of cheerful without being overwhelming.
This color radiates optimism and sunshine, making it impossible to look at your hands without feeling a little bit happier about life.
| Detail | Info |
| Difficulty | Beginner (but requires base coat — skip it and you’ll regret it) |
| Time to complete | 25 minutes |
| Best for | People who want cheerful spring energy without going full neon |
| Why it works | Warm peachy undertone makes it flattering on more skin tones than cool-toned yellows |
| What makes it different | Leans toward daffodil and melted butter, not school bus or lemon drop |
A warm, creamy yellow with enough peach to keep it soft. Yellow is tricky — it can look patchy, stain your nails, and photograph weird. This specific shade minimizes all three problems because the peachy warmth adds pigment density and the cream finish diffuses any unevenness.
Step-by-step:
- Shape nails and apply a white base coat (this is not optional with yellow — skip it and the color will look muddy and patchy)
- Let white base dry completely — at least 3 minutes
- Apply first thin coat of yellow
- Wait 4 minutes, apply second coat
- Apply third coat if needed for full opacity
- Seal with high-gloss top coat
Pro Tip:
Keep nails short to medium length with butter yellow. Very long nails in this shade can start to look costume-y, like you’re committed to a theme rather than just having nice nails.
Product Pick:
essie ‘Baguette Me Not’ ($10-12, drugstores or Amazon) — one of the few yellows with enough pigment to not look translucent after two coats. The warm undertone photographs better than most yellows in this price range.
Fresh Green Tones
3. Sage Garden

A muted, dusty sage green with gray undertones that feels earthy and grounded while still being distinctly spring-appropriate and fresh. The color has a sophisticated neutrality that works like a colored nude—interesting enough to be intentional but versatile enough to wear with absolutely everything in your wardrobe.
It’s the nail color equivalent of that perfect linen shirt—effortlessly chic, quietly elevated, and always appropriate no matter where your day takes you.
| Detail | Info |
| Difficulty | Beginner |
| Time to complete | 20 minutes |
| Best for | People who want something interesting but work-appropriate |
| Why it works | The gray undertone makes this feel like a sophisticated neutral rather than a statement color |
| What makes it different | Versatile enough to wear with absolutely anything — more like a colored nude than a bold shade |
Muted, dusty sage green with gray undertones. This is probably the most wearable color on this list — it goes with denim, work clothes, white linen, floral dresses, literally everything. The gray keeps it from being “look at my spring nails” obvious while the green keeps it from being boring.
Step-by-step:
- Prep nails normally — shape, buff, cuticle oil, let it absorb
- Apply base coat
- Apply two coats of sage (this shade typically covers well in two)
- Finish with matte top coat for an editorial vibe, or glossy for traditional polish look
Pro Tip:
Try this one with a matte top coat before defaulting to glossy. The matte finish elevates sage green significantly — it’s one of those combinations that genuinely looks like a professional did it.
Product Pick:
Zoya ‘Millie’ ($10, Zoya.com or Amazon) — the formula is dense and self-leveling, and the sage-gray combo looks better in person than in the bottle. Pairs well with Seche Vite matte top coat ($7-9).
4. Pistachio Pearl
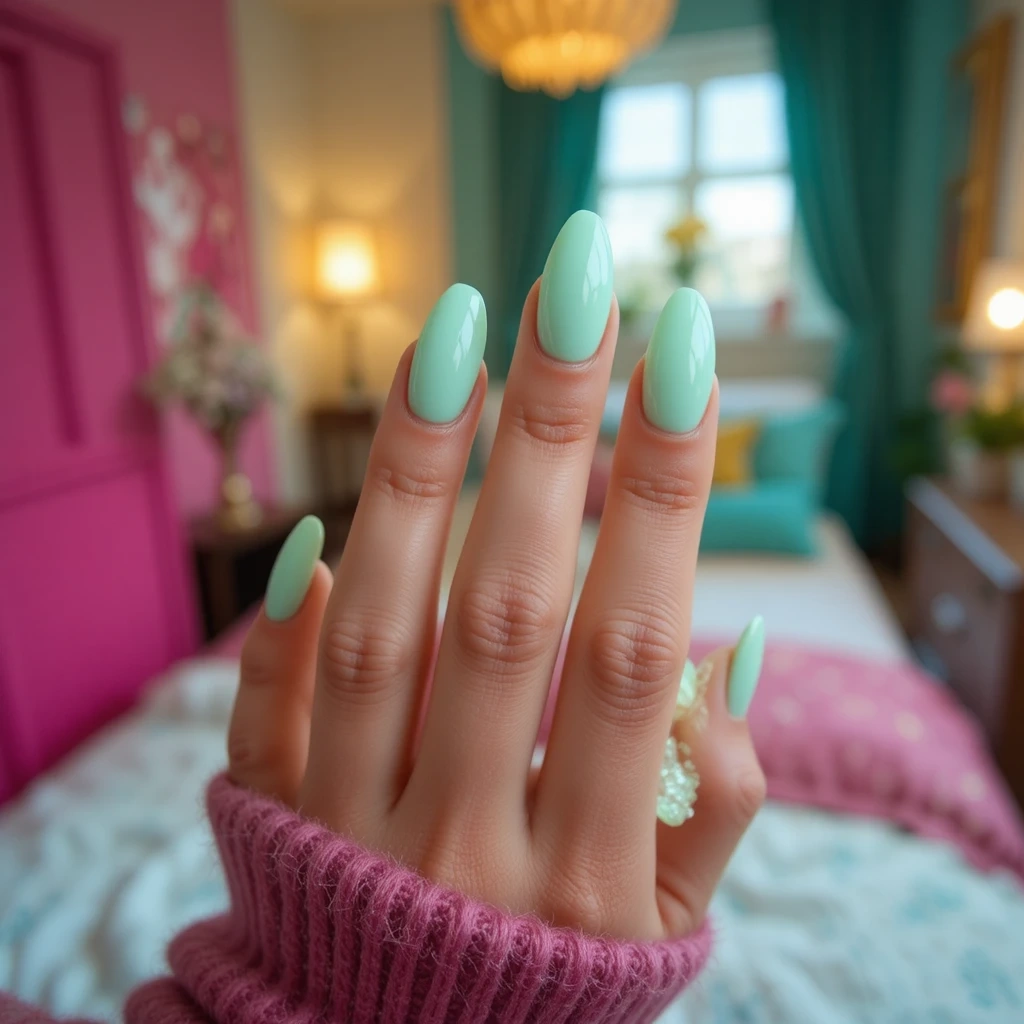
A light, minty pistachio green with subtle pearl shimmer that catches light without being obviously glittery or metallic—just enough shine to add dimension and interest. The pearl finish elevates what could be a simple pastel into something more special and complex, creating depth that shifts as you move your hands.
This color feels playful and fresh but still polished enough for professional settings, walking that perfect line between fun and appropriate.
| Detail | Info |
| Difficulty | Beginner-Intermediate (pearl finishes require careful layering) |
| Time to complete | 25-30 minutes |
| Best for | People who want a pastel that feels more special than a standard cream finish |
| Why it works | The pearl adds dimension without making it look glittery or costume-y |
| What makes it different | The shimmer shifts as you move your hands — standard pastels are flat, this one isn’t |
Light minty pistachio with subtle pearl shimmer. From across the room, it reads as a soft pastel. Up close, there’s real depth and movement to it. That shift is what makes this feel more expensive and intentional than a standard cream pastel.
Step-by-step:
- Buff nails lightly — pearl finishes are unforgiving of texture
- Apply base coat
- Apply first thin coat; the shimmer will look uneven at first — that’s normal
- Wait 3-4 minutes, apply second thin coat with smooth, even strokes (avoid going back over drying areas)
- Apply third coat if needed
- Seal with glossy top coat to intensify the pearl effect
Pro Tip:
Don’t over-buff during prep. The shimmer particles sit in the formula, and too much surface texture from buffing makes them scatter unevenly. A light pass with a fine buffer is enough.
Product Pick:
China Glaze ‘Re-Fresh Mint’ ($8-10, Sally Beauty or Amazon) — genuinely pistachio rather than green, and the pearl is subtle enough to be workplace-appropriate.
Unexpected Pops of Color
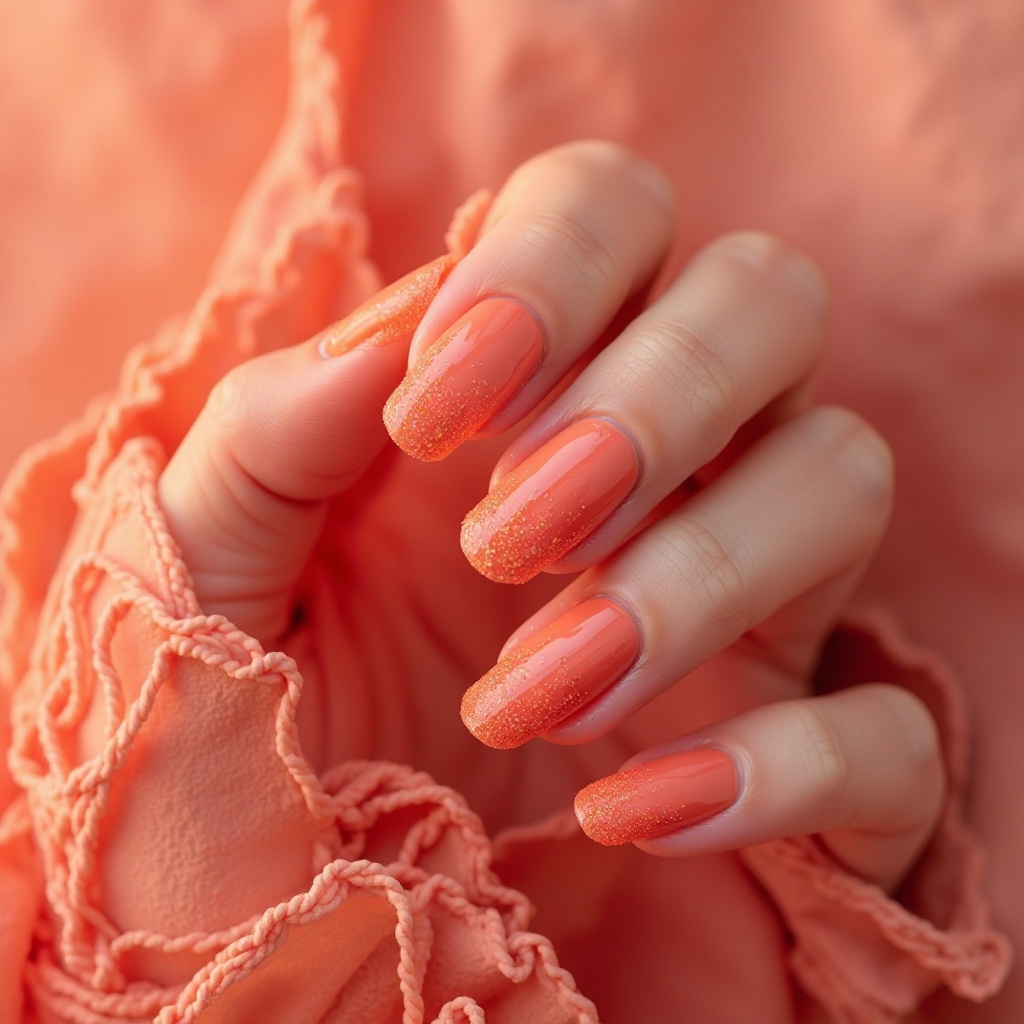
5. Coral Sunset
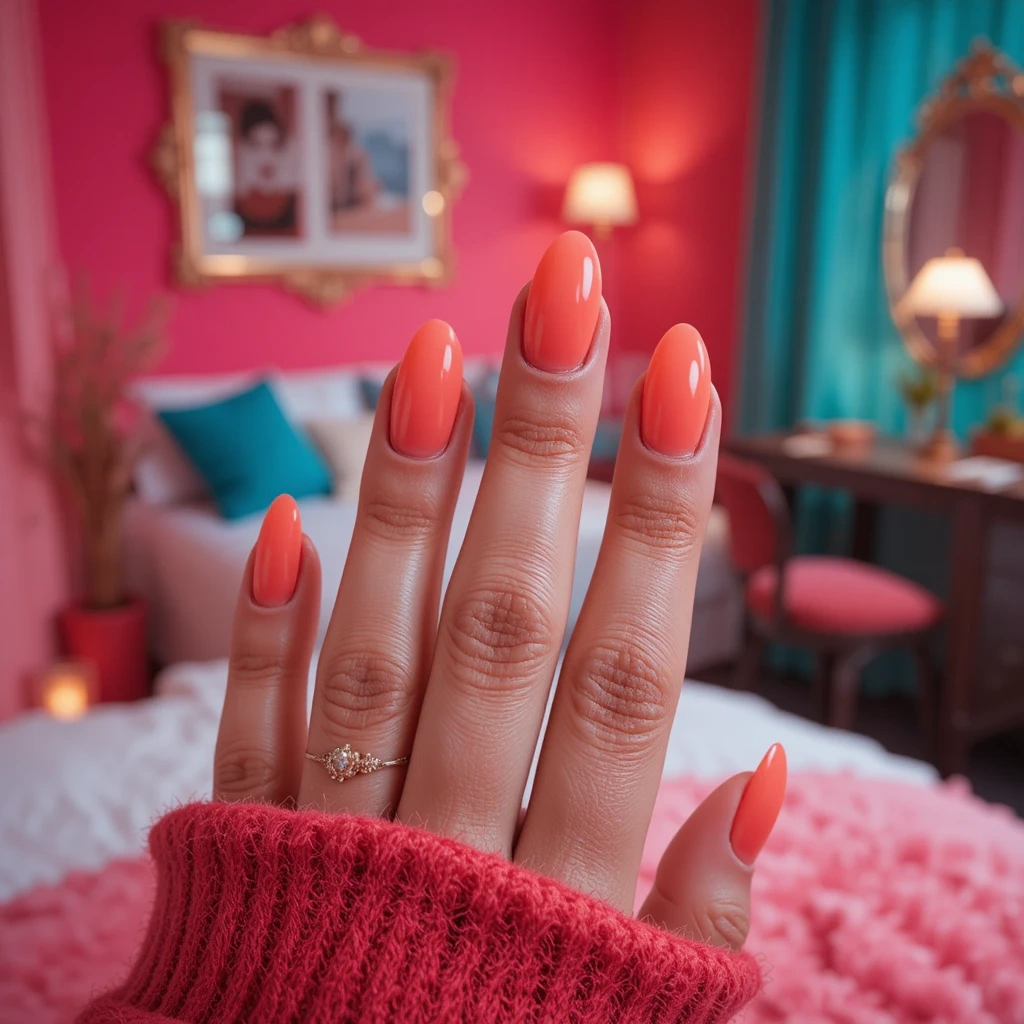
A vibrant coral that leans slightly orange with warm undertones—bold enough to make a statement but soft enough to feel wearable rather than aggressive or neon. The color has incredible depth and saturation that makes your nails look healthy and glowing, with enough warmth to complement most skin tones beautifully.
| Detail | Info |
| Difficulty | Beginner |
| Time to complete | 20 minutes |
| Best for | People who want bold but not neon, and warm skin tones especially |
| Why it works | Orange undertones make most skin look healthy and warm |
| What makes it different | Bridges spring pastels and summer brights — bold without feeling premature |
A vibrant coral that leans slightly orange — bold enough to feel intentional, warm enough to be flattering. From my experience with this kind of shade, it tends to read differently on different skin tones: warm/olive skin tones tend to love it, cooler skin tones may want to try a slightly pinker version first.
Step-by-step:
- Apply a quality base coat — orange-toned polishes stain nails badly without one
- Apply first coat (may look sheer and patchy — normal)
- Apply second coat after 3-4 minutes
- Check for even coverage; apply third coat at tips if needed
- Seal with a glossy top coat
Pro Tip:
If coral tends to look too orange on your skin, look for versions with more pink in them — packaging descriptions like ‘coral pink’ rather than ‘coral orange’ usually signal this shift.
Product Pick:
OPI ‘Toucan Do It If You Try’ ($12, Ulta or Amazon) — consistently saturated coverage in two coats, and the formula is thick enough that it doesn’t go on patchy like cheaper corals.
6. Blush Pink Satin
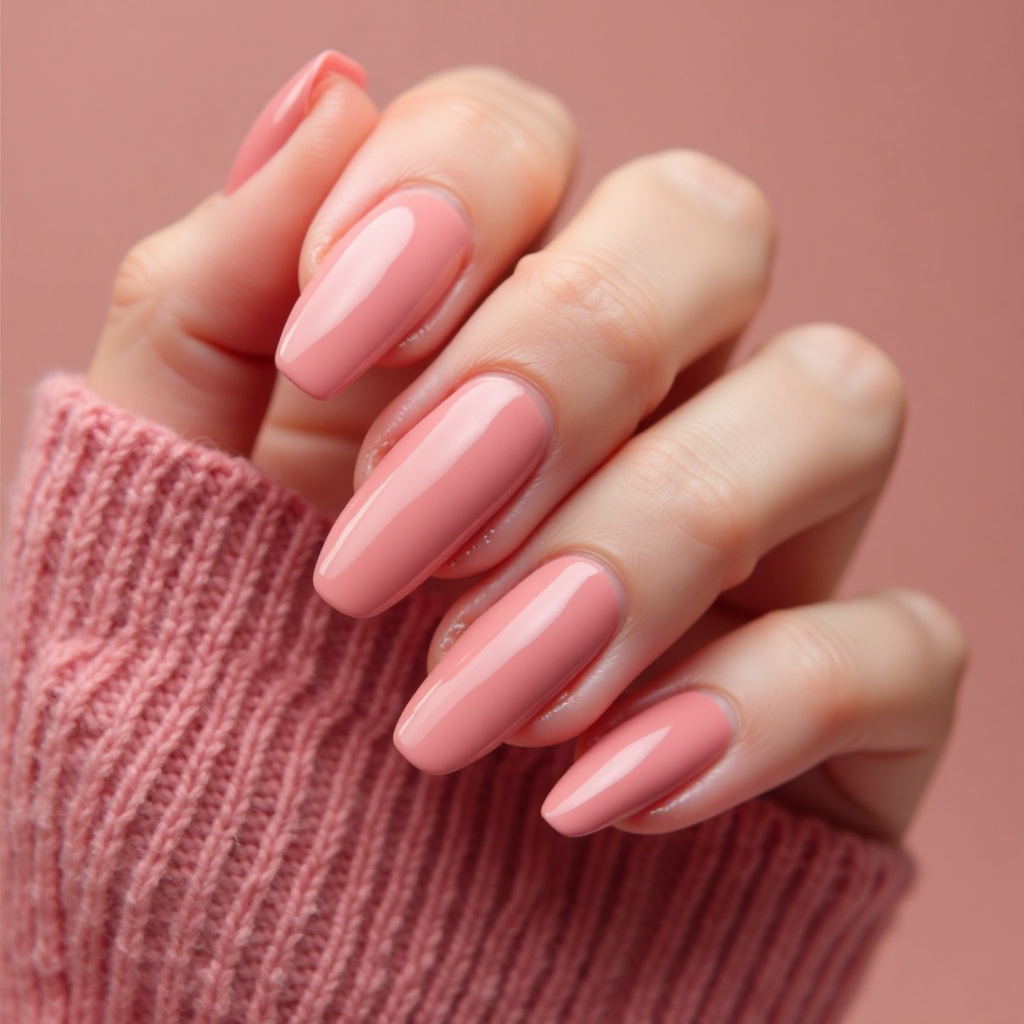
A sophisticated blush pink with a satin finish that sits perfectly between matte and glossy—not flat, not shiny, but that beautiful soft-focus effect that makes your nails look airbrushed and expensive. The color itself is a true neutral pink that leans slightly peachy, warm enough to flatter most skin tones while staying firmly in elegant territory.
This is the nail color equivalent of a cashmere sweater—luxurious, refined, and effortlessly polished without trying too hard.
| Detail | Info |
| Difficulty | Beginner — but satin finishes punish sloppy application |
| Time to complete | 25 minutes |
| Best for | Weddings, professional settings, anyone who wants elegant over trendy |
| Why it works | Satin finish is more modern than glossy and more wearable than matte |
| What makes it different | Has that airbrushed, expensive quality that standard glossy pink misses |
A neutral blush pink with a satin finish — not flat, not shiny, but that soft-focus effect that makes nails look professionally done. This is the nail color equivalent of a cashmere sweater: it works everywhere without trying hard.
Step-by-step:
- Prep nails carefully — satin finishes show every bump and ridge
- Apply base coat
- Apply first coat in smooth, confident strokes — don’t go back over drying areas
- Wait full 4 minutes before second coat (satin punishes impatience)
- Apply second coat; finish with a satin-specific top coat rather than glossy to preserve the finish
Pro Tip:
Satin finishes show smudges and fingerprints more than glossy. Don’t touch anything for at least an hour. Apply cuticle oil around the edges the next morning to keep the surrounding skin looking polished.
Product Pick:
Essie ‘Merino Cool’ ($9-11, Ulta or drugstores) — the satin formula is more forgiving than most for application, and the blush tone leans slightly warm which photographs beautifully.
7. Robin’s Egg Blue
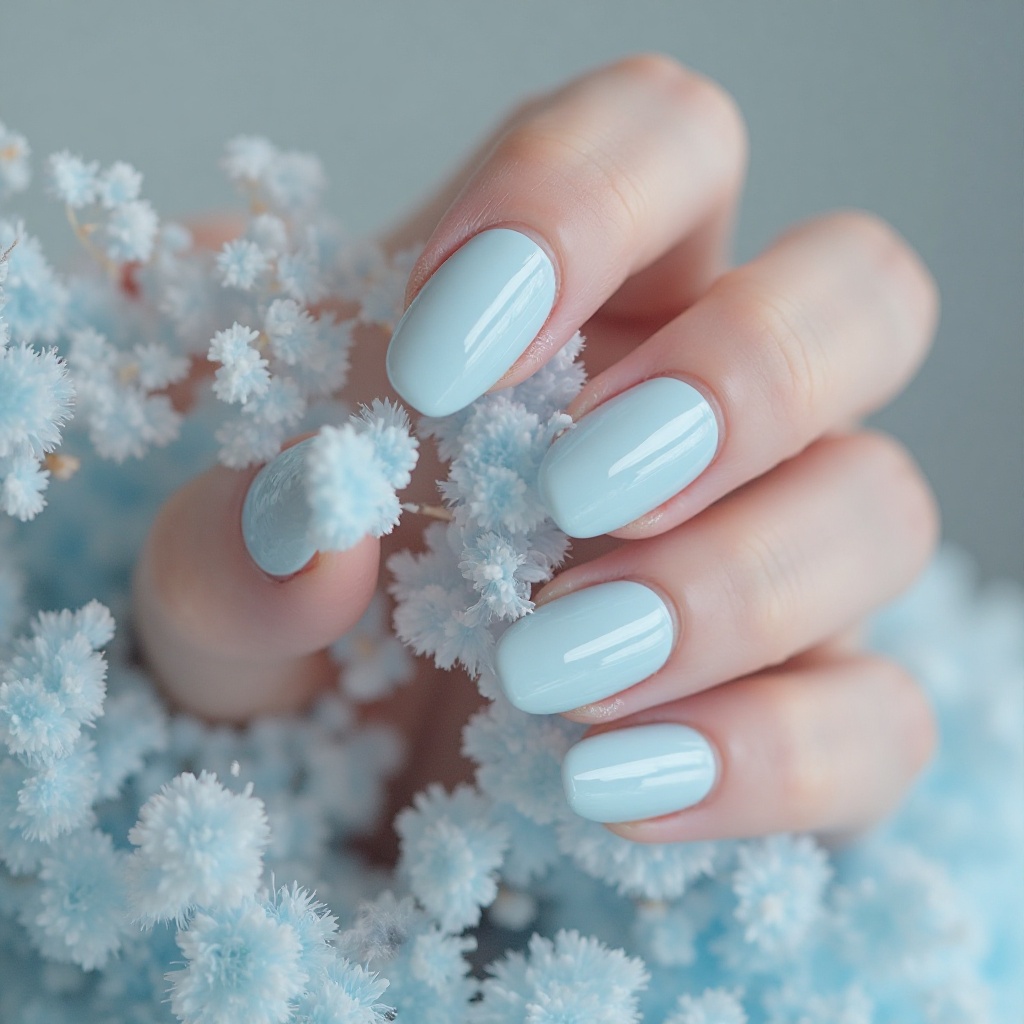
A soft, milky blue that captures that perfect robin’s egg shade—not too bright, not too gray, but that ideal springtime blue that feels cheerful without being childish. The color has a slightly creamy opacity that gives it depth and dimension, preventing it from looking washed out or chalky like some pale blues can.
| Detail | Info |
| Difficulty | Beginner |
| Time to complete | 20 minutes |
| Best for | People who want spring nails that feel fresh and unexpected without being bold |
| Why it works | Slightly creamy rather than stark — prevents that washed-out chalky look some pale blues have |
| What makes it different | Feels springlike without leaning Easter-basket obvious |
A soft, milky blue — not too bright, not too gray. Blue is underused for spring nails, and this particular shade is why: it’s cheerful without being childish, soft without being washed out. In my experience wearing this, it tends to generate the most “what color is that?” reactions out of any pastel.
Step-by-step:
- Apply a neutral base coat — do not skip this; blue without base coat emphasizes redness and dryness around the nail bed
- Apply first thin coat
- Wait 3-4 minutes, apply second coat
- Apply third coat if needed; keep strokes smooth
- Seal with glossy top coat
Pro Tip:
Keep nails at short-to-medium length with pale blue. Very long nails in light blue start to read as costume-y rather than editorial.
Product Pick:
Sally Hansen ‘Blue Me Away’ ($5-7, drugstores) — one of the better-pigmented drugstore blues that doesn’t look chalky after drying. Budget-friendly enough to use up quickly before it gets streaky.
8. Terracotta Clay
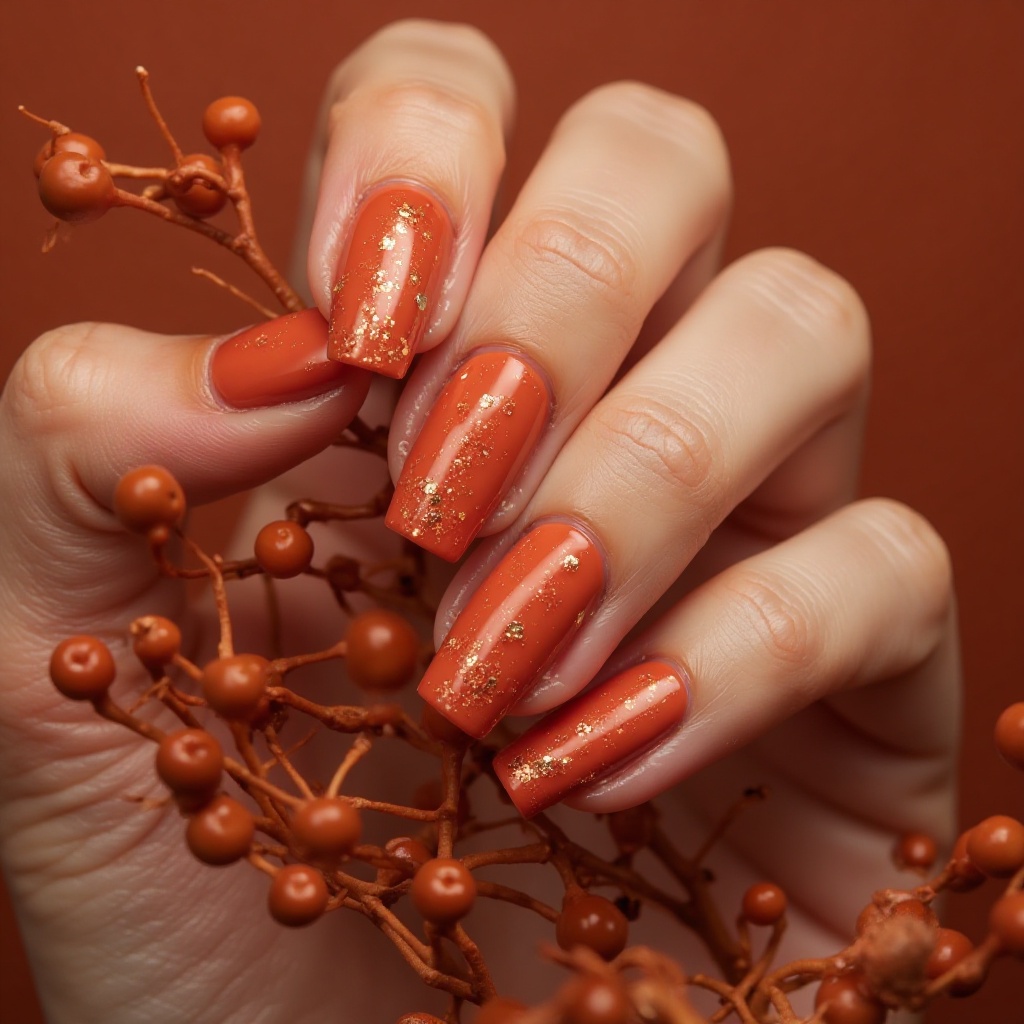
A warm, earthy terracotta that brings that gorgeous sun-baked clay color to your nails—reddish-brown with orange undertones that feels grounded and natural while still being distinctly colorful. The shade has a richness and depth that makes it feel sophisticated and intentional,
like you’ve put thought into your nail color rather than just grabbing whatever’s trendy. This color works like a neutral but with personality, complementing everything while actually adding interest to your look.
| Detail | Info |
| Difficulty | Beginner |
| Time to complete | 20 minutes |
| Best for | People who want a ‘colored neutral’ — interesting but wearable everywhere |
| Why it works | Warm reddish-brown complements almost every wardrobe color |
| What makes it different | Acts like a neutral but adds real personality — more interesting than beige, less bold than red |
Warm, earthy terracotta with orange undertones. This is one of those colors that sounds niche but works on nearly everyone. It pairs with denim, white, cream, natural fabrics, and basically everything in a spring wardrobe. The shade can pull differently depending on skin tone — test on one nail first to see if it leans orange or brown on you.
Step-by-step:
- Apply base coat
- Apply first coat — should cover reasonably well
- Wait 3-4 minutes, apply second coat
- Seal with matte top coat for editorial vibe, or glossy for a traditional finish
Pro Tip:
Terracotta in matte finish is genuinely impressive. It looks like something from a high-end salon and costs the same as any other nail polish. Worth trying even if you usually default to glossy.
Product Pick:
Orly ‘Prelude to a Kiss’ ($9-11, Ulta or Sally Beauty) — a reliable terracotta-orange with good pigment density that doesn’t require three coats to look opaque.
9. Peach Melba Cream
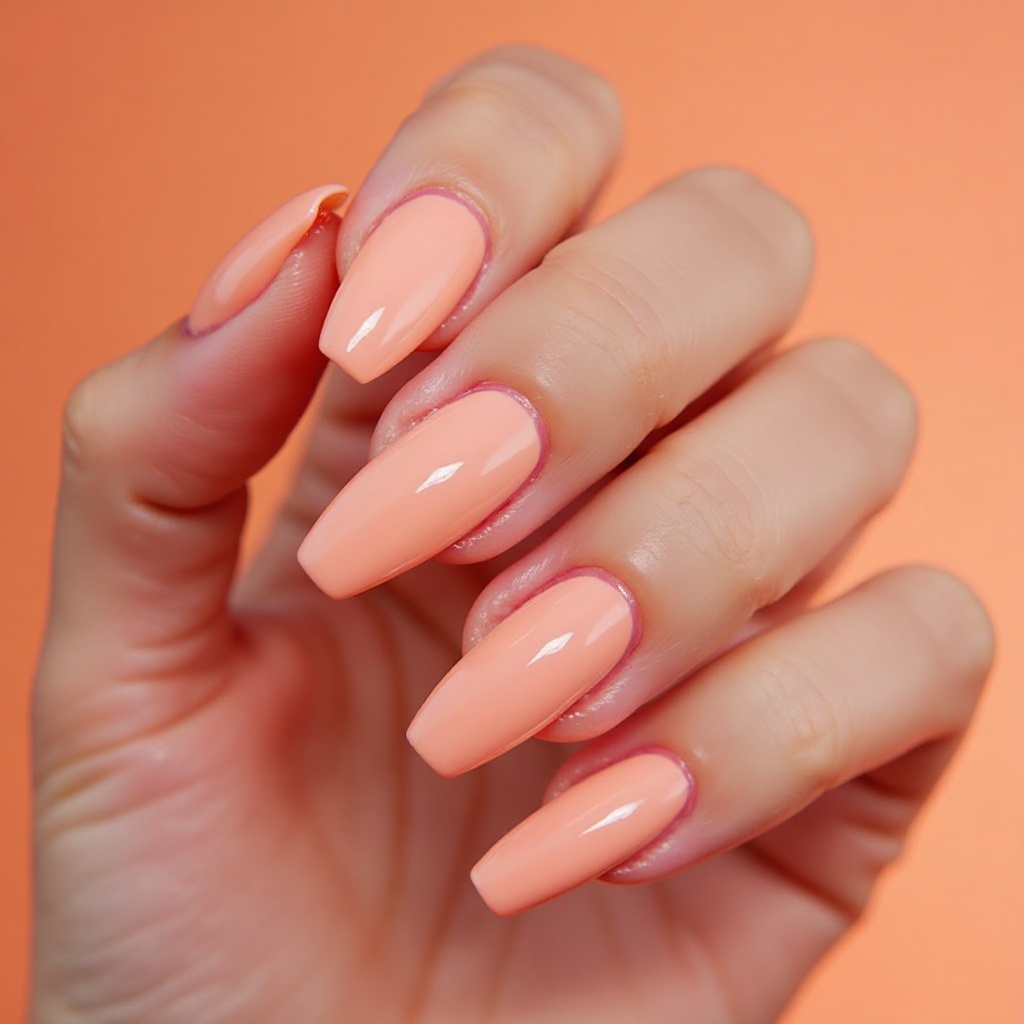
A luscious peach cream that’s soft and milky with just enough pink to keep it from going full orange—think ripe peaches, not neon traffic cones. The creamy finish gives the color a luxurious, high-end quality that makes your nails look healthy and well-cared-for, with that perfect opacity that covers in two coats without streaking.
| Detail | Info |
| Difficulty | Beginner |
| Time to complete | 20 minutes |
| Best for | Anyone who wants warm and sweet without going full orange |
| Why it works | Just enough pink to stay soft, just enough peach to feel warm and fresh |
| What makes it different | Cream formula gives it a luxurious, high-end quality even at drugstore prices |
A luscious milky peach with a tiny bit of pink to keep it soft. This is one of those shades that looks subtle in the bottle but genuinely glows on the nails. The cream finish covers evenly in two coats, which is rarer than you’d think for peachy shades.
Step-by-step:
- Apply base coat
- Apply first coat — should look slightly sheer
- Apply second coat after 3 minutes — should be fully opaque
- Seal with glossy top coat
Pro Tip:
Peach shades can stain nail beds, especially if worn repeatedly. Use a base coat every single time, and consider taking a week off between manicures to let nails breathe.
Product Pick:
Zoya ‘Paloma’ ($10, Zoya.com) — the peachy-cream formula is more pigmented than most, so coverage in two coats is genuinely achievable.
Sophisticated Neutrals with a Twist
10. Lilac Gray
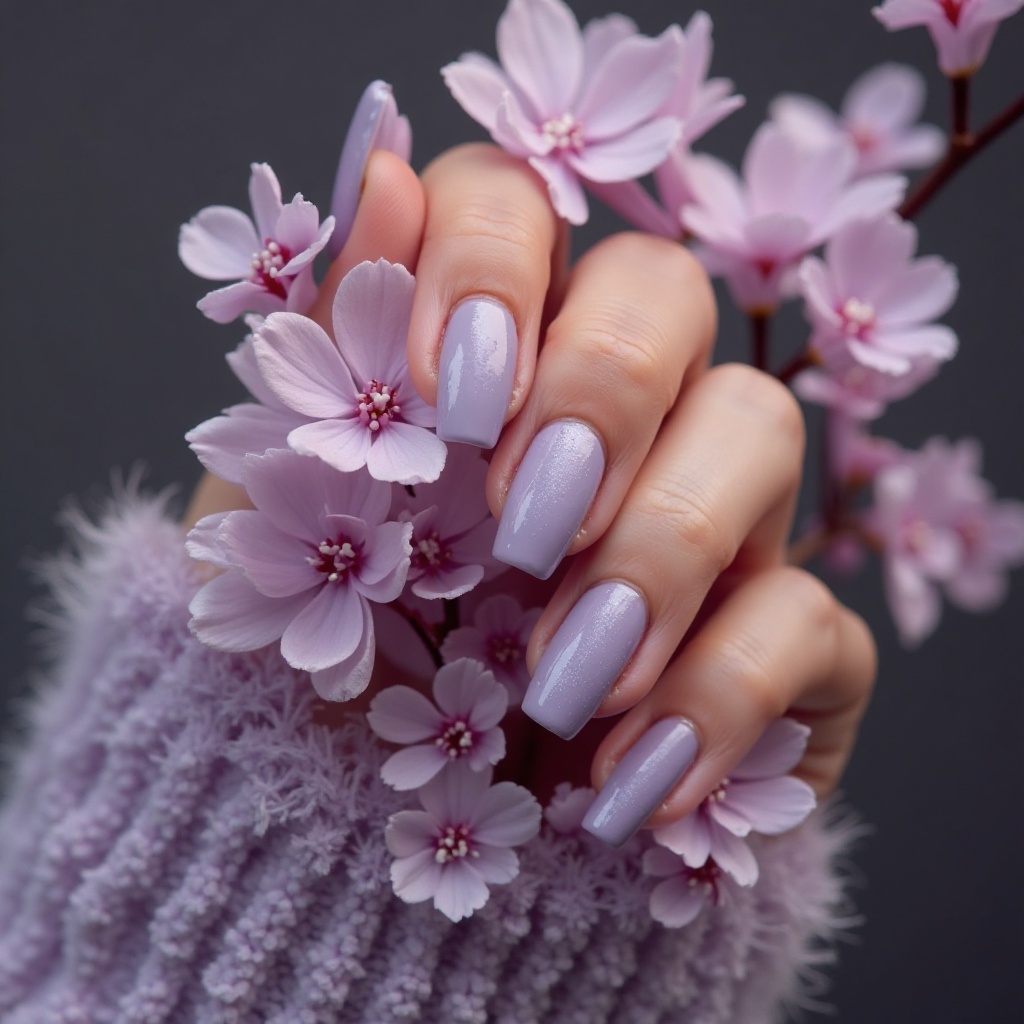
A sophisticated hybrid between lilac and gray that feels moody and complex—definitely not your typical pastel, but still soft enough to feel spring-appropriate. The color shifts between purple and gray depending on the light,
| Detail | Info |
| Difficulty | Beginner |
| Time to complete | 20 minutes |
| Best for | Early April when full pastels still feel too light, or for conservative offices |
| Why it works | Shifts between purple and gray depending on light — looks complex without being loud |
| What makes it different | Bridges winter dark tones and spring pastels — genuinely transitional |
A sophisticated hybrid — definitely spring-leaning, but still serious enough for professional settings. The color-shifting quality (more purple in warm light, more gray in cool light) keeps it visually interesting without being showy. This is the thinking person’s spring nail.
Step-by-step:
- Apply base coat
- Apply first coat — will look grayish at first
- Apply second coat; the lilac quality becomes more visible as it builds
- Seal with high-gloss top coat to bring out depth
Pro Tip:
Almond or oval shapes make this color look especially editorial. If you have squarish nails, consider filing a slight curve — it changes the whole look.
Product Pick:
OPI ‘I Mauve-r It’ ($12, Ulta) — genuinely complex formula that shifts well between the lilac and gray tones, rather than just looking like muted purple.
11. Cream Dream
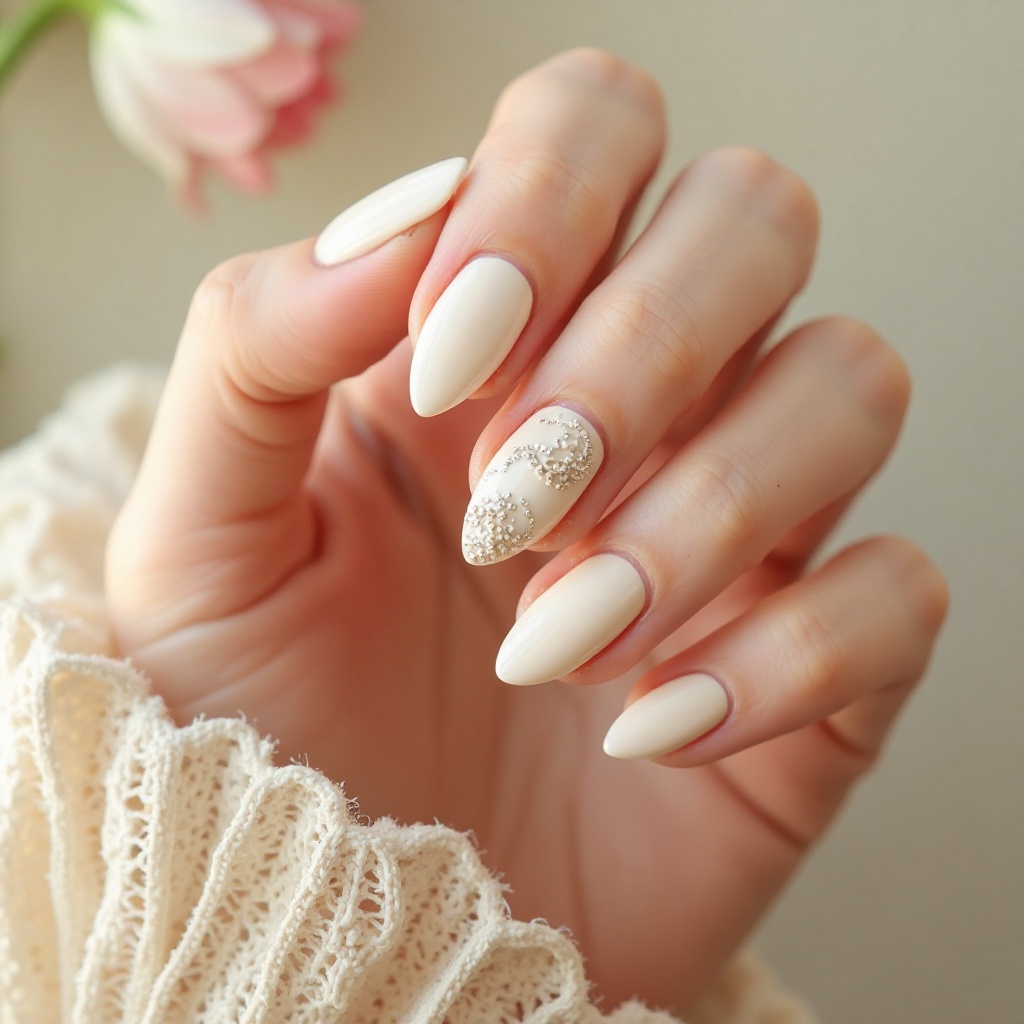
A warm off-white cream that’s richer than stark white but lighter than beige—think vanilla ice cream or fresh whipped cream with just a hint of yellow undertone. This isn’t technically a “color,” but it’s one of the chicest, most elegant options for April nails because it feels clean and fresh without being boring.
| Detail | Info |
| Difficulty | Beginner — but cheap formulas will look terrible, so don’t skimp |
| Time to complete | 20 minutes |
| Best for | Minimalists, professional settings, or when you want a blank canvas that looks intentional |
| Why it works | Warm vanilla undertone flatters more skin tones than stark white and doesn’t look clinical |
| What makes it different | Makes everything else in your outfit pop while still looking polished and put-together |
A warm off-white that’s richer than stark white and lighter than beige. This isn’t a boring choice — it’s a French-girl choice. The key is the formula: cheap cream polishes look chalky and uneven, which is the opposite of the look you want. Spend slightly more here and it pays off.
Step-by-step:
- Prep nails perfectly — cream shades hide nothing
- Apply base coat
- Apply first thin coat
- Apply second coat
- Apply high-gloss top coat — this prevents the cream from looking flat or chalky
Pro Tip:
Short, well-shaped nails in cream look genuinely elegant. Long nails can work too, but at any length the finish needs to be flawless — cream leaves nowhere to hide.
Product Pick:
Essie ‘Blanc’ ($9-11, Ulta or drugstores) — one of the most consistently smooth cream formulas at this price point. The slightly warm undertone is what sets it apart from stark whites.
Bold & Statement-Making
12. Peachy Keen
A vibrant peach that sits somewhere between coral and orange—warm, juicy, and full of that “I’m ready for sunshine” energy. The color has incredible saturation and depth that makes it feel luxurious and expensive, with enough orange to be bold but enough pink to stay soft and wearable.
| Detail | Info |
| Difficulty | Beginner |
| Time to complete | 20 minutes |
| Best for | People who want warm and vibrant but not ready for full coral or orange |
| Why it works | Sits between coral and orange — juicy enough to feel bold, soft enough to stay wearable |
| What makes it different | Genuinely glows against skin — makes hands look sun-kissed before you’ve been anywhere warm |
A vibrant peach with real saturation — this one doesn’t shy away. The warmth is the whole point. If coral feels too bold but cream feels too quiet, this is the middle ground. Try on one nail before committing if you’re worried about orange undertones on your skin.
Step-by-step:
- Apply base coat
- Apply first coat — coverage should be solid
- Apply second coat after 3 minutes
- Seal with glossy top coat
Product Pick:
Sinful Colors ‘Island Coral’ ($3-5, drugstores) — a surprising overachiever at drugstore prices. The coverage is better than polishes twice the price and the shade is genuinely gorgeous.
13. Periwinkle Blue
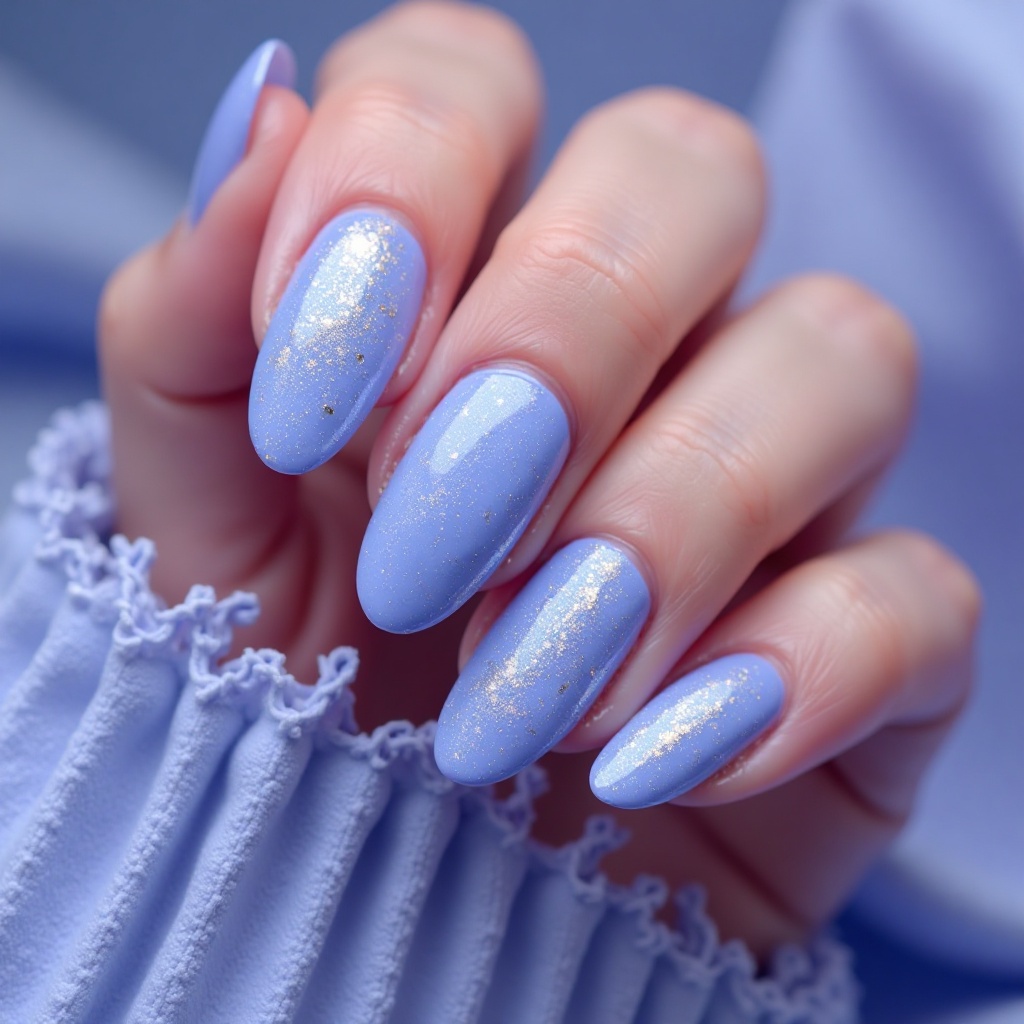
A blue-purple hybrid that leans slightly more blue than lavender—soft but saturated, interesting but wearable, and somehow both cool and warm at the same time. The color has a dreamy, almost watercolor quality that feels artistic and creative without being too bold or aggressive.
| Detail | Info |
| Difficulty | Beginner |
| Time to complete | 20-25 minutes |
| Best for | People who want something different from typical spring pastels without going full bold |
| Why it works | Blue-purple hybrid works with both cool and warm undertones — one of the more universally flattering colors on this list |
| What makes it different | Has a dreamy, almost watercolor quality that reads artistic rather than loud |
A blue-purple hybrid that leans slightly more blue than lavender. It can read differently on different skin tones — sometimes more blue, sometimes more purple — which is actually part of the appeal. Not everyone at the table will see the same color.
Step-by-step:
- Apply base coat
- Apply two coats, waiting 3-4 minutes between
- Add high-gloss top coat to bring out the color’s depth
Pro Tip:
Oval or almond shapes show off periwinkle particularly well. Square nails can make it feel a little more block-color; the curve of a rounded shape softens it.
Product Pick:
Orly ‘Skinny Dip’ ($8-10, Ulta) — consistently true to the periwinkle tone in the bottle, which isn’t always the case with this tricky color family.
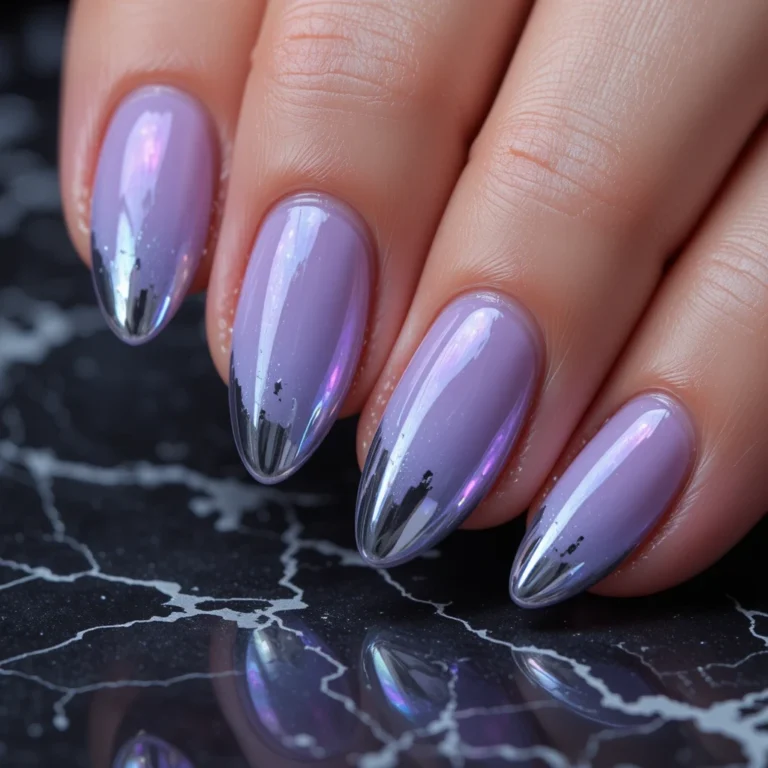
14. Rose Gold Chrome
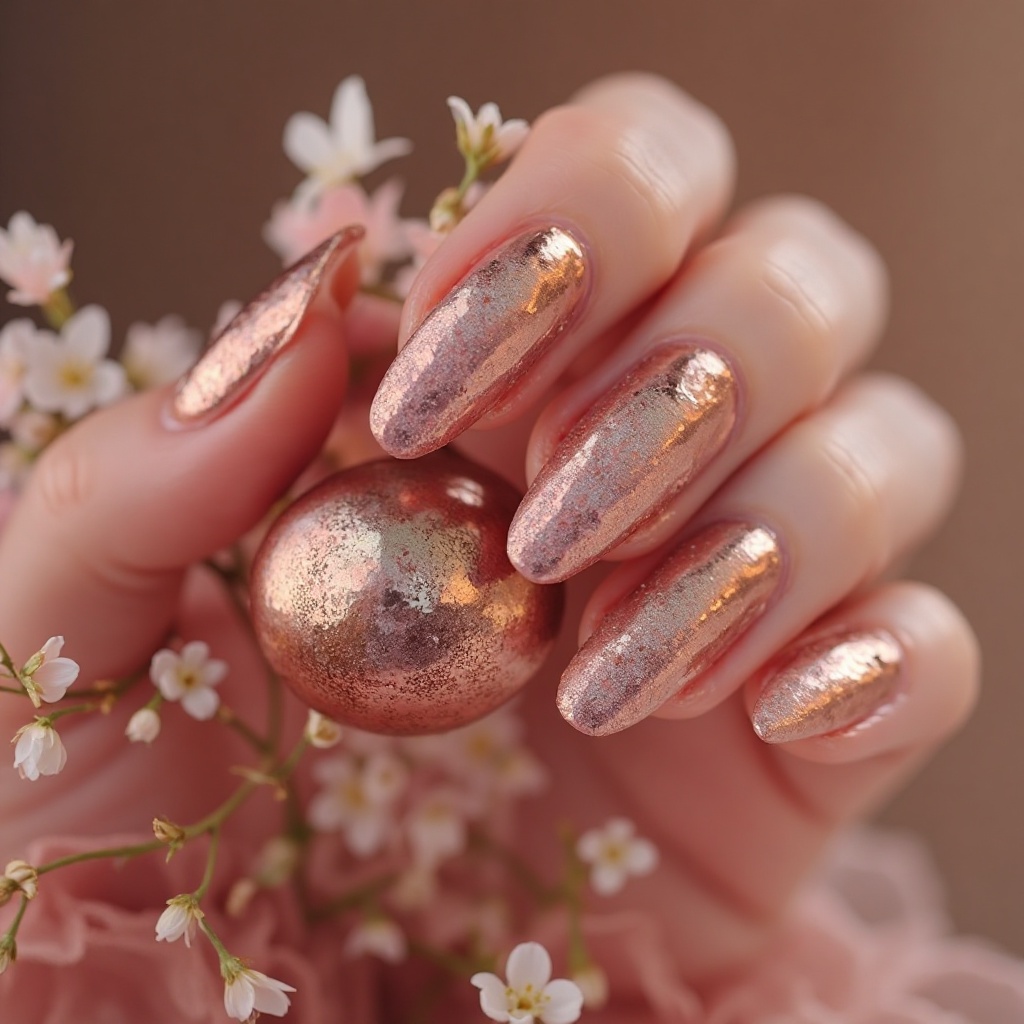
A metallic rose gold with a chrome finish that shifts between pink, gold, and copper depending on the light—bold, glamorous, and definitely a statement. The chrome finish gives it an almost liquid metal quality that catches light beautifully and makes your nails look expensive and high-end.
| Detail | Info |
| Difficulty | Intermediate — nail prep is non-negotiable here |
| Time to complete | 35-45 minutes |
| Best for | Special events, people who want something genuinely showstopping |
| Why it works | Chrome shifts between pink, gold, and copper depending on light — it’s visual movement on your nails |
| What makes it different | Has an almost liquid metal quality that no other finish replicates |
A metallic rose gold with a chrome finish. This is the one statement finish on this list — it catches light from across the room and shifts color as you move your hands. It’s not an everyday pick, but for events, it’s unmatched.
Step-by-step:
- Shape, buff, and smooth nails meticulously — chrome shows every imperfection
- Apply a quality gel base coat (chrome needs gel to adhere properly — regular base coat doesn’t work the same way)
- Apply 2 thin coats of gel color or a nude/clear gel base
- Cure under UV/LED lamp for the time specified by your brand
- Apply chrome powder with a silicone applicator or fingertip using circular buffing motions
- Seal with a chrome-compatible no-wipe gel top coat
Pro Tip:
Do not apply a standard glossy top coat over chrome — it dulls the finish. Use a gel top coat specifically formulated for chrome or the mirror effect will disappear.
Product Pick:
Beetles Gel Rose Gold Chrome Powder ($9-11, Amazon) — gives a genuine mirror effect when applied over a properly cured gel base. Comes with a silicone applicator, which is better than using a sponge.
15. Soft Mauve
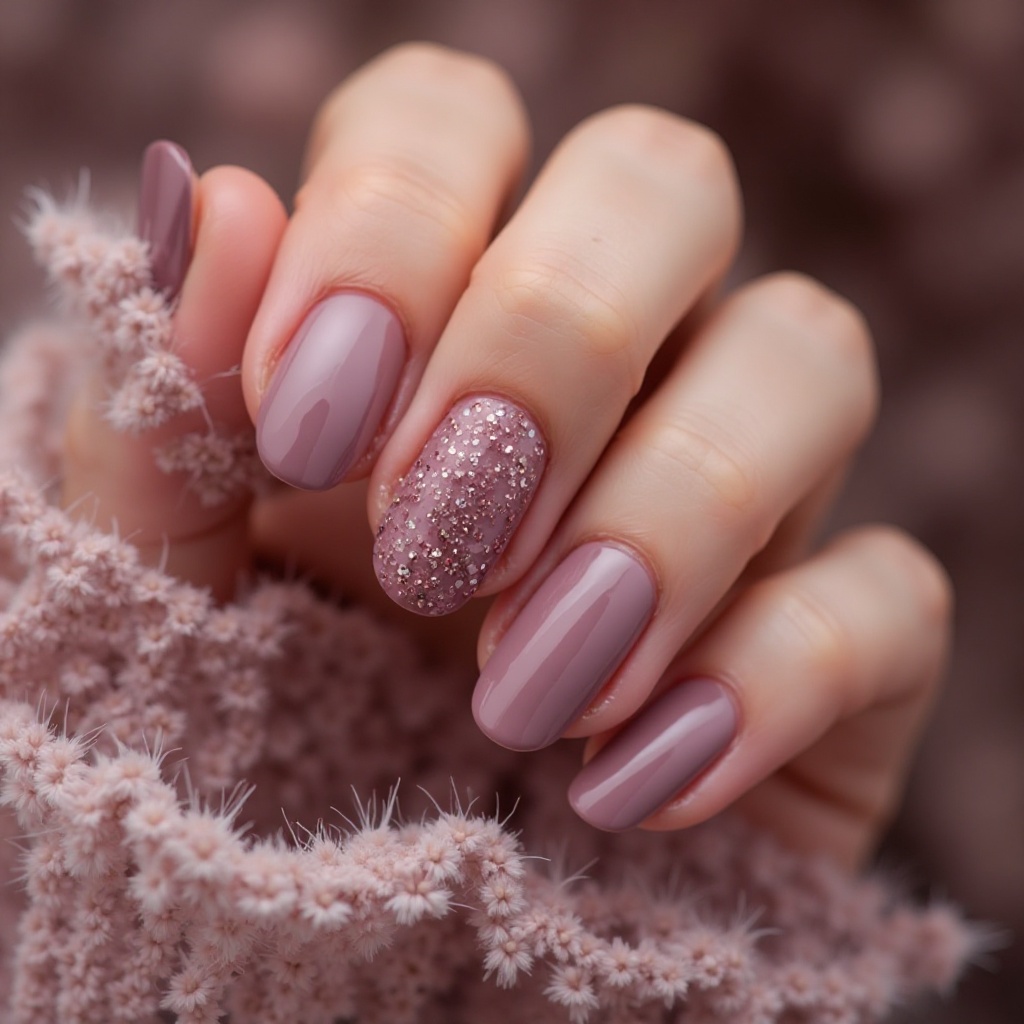
A dusty mauve that leans slightly more purple than pink with subtle brown undertones—sophisticated, complex, and endlessly wearable. The color feels vintage and romantic but still modern,
| Detail | Info |
| Difficulty | Beginner |
| Time to complete | 20 minutes |
| Best for | People who want ‘goes with everything’ but with actual personality |
| Why it works | Sits at the intersection of pink, purple, and brown — flatters all skin tones |
| What makes it different | Has a vintage quality that feels elevated without being trendy — it won’t look dated next month |
A dusty mauve that leans slightly more purple than pink with subtle brown undertones. This is the ultimate ‘goes with everything’ color that still has personality — more interesting than beige, more wearable than bold pink, more sophisticated than lavender.
Step-by-step:
- Apply base coat
- Apply two coats, waiting 3-4 minutes between
- Seal with glossy or satin top coat — both work well with mauve
Pro Tip:
Test this on one nail first — it can pull slightly more pink or more purple depending on skin tone. Neither is wrong, but it’s worth seeing before doing all ten.
Product Pick:
Zoya ‘Harlow’ ($10, Zoya.com) — the formula is smooth and the mauve tone is genuinely complex without being muddy.
Pros and Cons of Spring Pastel Nails
Before you commit to the full pastel April look, here’s the honest version:
Pros:
- ✅ Instantly updates your look — spring nails genuinely do shift how put-together you feel
- ✅ Pairs with practically everything in a spring wardrobe
- ✅ Photographically beautiful — pastels look especially good in natural light
- ✅ Most shades are professional enough for conservative offices
- ✅ Feels genuinely seasonal — it’s a tiny seasonal ritual that’s worth having
- ✅ Lighter tones are more forgiving with minor tip wear than dark shades
Cons:
- ❌ Removal takes 15-20 minutes for gel, and regular pastel polish can stain nail beds — you’ll need a strong remover
- ❌ Chips show badly on light colors — a small chip on cream nails is impossible to ignore, whereas a small chip on dark red disappears
- ❌ Pastels require white base coat with yellows and peaches, adding time to the process
- ❌ Cheap pastel formulas look chalky and terrible — you’re stuck buying mid-range and up
- ❌ Very short nails can make pastels look juvenile rather than sophisticated — you may need a more muted tone
- ❌ Not repairable — a chip in pastel polish is nearly impossible to fix without redoing the whole nail (color matching is brutal with pastels)
- ❌ Learning curve on application — pastel formulas are typically sheerer and more streak-prone than darker shades
Real Wear Timeline: What Your April Nails Look Like Week by Week
This is based on wearing regular polish with a quality top coat refreshed every 3 days — gel will hold longer, but the general pattern is similar.
Days 1-3
Honestly? Perfect. Your nails look exactly like the photos. The color is vibrant, the finish is pristine, and you’ll find yourself looking at your hands more than usual. This is the phase that makes you want to do your nails every week.
Days 4-7
Slight tip wear begins — you can see it if you look carefully but it’s not obvious to other people. A fresh layer of top coat on day 3 or 4 extends this phase significantly. Light colors may start showing minor chips if you’re tough on your hands. The color itself hasn’t faded; it’s the finish that starts to show.
Days 8-10
Now it’s visible. Pastels in particular start to look lived-in at the tips, and any chips are more noticeable than they’d be on darker polish. If you’ve been washing hands frequently (spring cleaning, allergy season), this can arrive by day 6. This is when most people decide it’s time to redo them.
Days 11-14
If you’ve made it here on regular polish, the nails have grown slightly which adds a visible gap at the cuticle. The color near the tips is likely chipped or worn. Some people rock the worn-in look; others find it genuinely distracting. Either way, it’s time to remove or redo. With gel, days 11-14 still look solid — you just have the growth gap to contend with.
Maintenance Tips by Time Period
Days 1-3: The Setup Phase
- Apply a fresh layer of top coat at day 2 or 3 — this one step probably doubles how long your manicure lasts. Don’t wait until you see wear; do it preventatively.
- Apply cuticle oil around the nail edges every morning. This keeps the skin looking healthy and prevents the dry flaking that makes even a fresh manicure look neglected. Any cuticle oil works; CND Solar Oil ($8-10) is the one most nail techs actually use.
- Avoid prolonged hot water for the first 24 hours — dishwashing, long hot showers. Heat and moisture cause polish to lift at the edges before it’s fully hardened.
Days 4-7: The Maintenance Phase
- Reapply top coat every 3 days — not ‘regularly,’ specifically every 3 days. On day 3, do it whether it needs it or not. This prevents the tip wear that leads to full chipping.
- Apply cuticle oil daily. After day 4, the skin around the nail starts to look dry which makes the whole manicure look older than it is.
- If you’re doing spring cleaning, wear rubber gloves. Cleaning products break down polish chemistry at a rate that’s genuinely depressing to watch.
Days 8-14: Damage Control
- Check tips daily — a tiny chip caught early can sometimes be sealed with a dot of matching polish and a top coat layer. A chip that’s been there for 2 days has already started spreading.
- Consider strategic removal: if three nails are perfect but two are badly chipped, you can remove just the chipped ones and redo those two. It won’t match perfectly but it’s better than all five looking rough.
- If you have gel: schedule your fill or soak-off for around day 14-16. Don’t leave gel on past 3 weeks — the growth gap gets large enough to catch on things and the lifting risk increases.
Common Mistakes & How to Fix Them
Mistake 1: Thick Coats on Pastels
What it looks like: Bubbling, uneven texture, polish that takes hours to dry and still dents easily.
Why it happens: Pastel formulas are often sheerer than dark polishes, so the natural instinct is to apply more product per coat to get coverage. The formula can’t cure evenly at that thickness.
The fix: Three thin coats, waiting 3-4 minutes between each. Set a timer. It feels slower but each coat actually dries before the next goes on, and the final result is smooth and durable. This fix works fully — there’s no downside to thin coats except the extra time.
Mistake 2: Skipping Base Coat With Yellows and Peaches
What it looks like: Nails with a yellow or orange tint after removing the polish — sometimes lasting weeks.
Why it happens: Yellow and orange pigments are small molecules that penetrate the nail plate. No base coat = direct contact.
The fix: White base coat, every time, without exception. If you’ve already stained your nails, a gentle buffing followed by soaking in lemon juice for 5-10 minutes can help, but it’s slow. Prevention is genuinely much easier than cure here.
Mistake 3: Wrong Top Coat on Chrome
What it looks like: You applied chrome powder and it looked incredible, then you sealed it and the mirror effect disappeared into a dull metallic.
Why it happens: Standard top coats contain solvents that break down the chrome powder’s surface reflection. The mirror effect requires an uninterrupted physical surface that most top coats disrupt.
The fix: Use a no-wipe gel top coat specifically labeled as chrome-compatible. Re-buff chrome powder into the sticky layer of the gel base, THEN seal with the right top coat. The fix is permanent as long as you use the correct top coat going forward — there’s no recovering a chrome nail once you’ve sealed it with the wrong product.
Mistake 4: Touching Satin-Finish Nails Too Soon
What it looks like: Fingerprint impressions, smudges, or small dents in what should be a smooth finish.
Why it happens: Satin finishes have a different drying chemistry than glossy — they feel dry to the touch faster than they actually are. The outer layer cures, but the polish beneath is still soft.
The fix: Don’t touch anything for at least an hour after application. The “quick dry” sprays marketed for this help somewhat but aren’t reliable for satin finishes. For partial smudges on an otherwise intact nail, a careful layer of satin top coat sometimes smooths them out — but it depends on how early you catch it.
Frequently Asked Questions
How do I keep April nail colors from looking chalky?
Two things: a quality formula (mid-range and up — Essie, OPI, Zoya rather than dollar store brands) and a high-gloss top coat applied while the last coat is still slightly tacky. Chalky appearance in pastels is almost always either a cheap formula or a missing/wrong top coat.
Can I wear bright spring colors to a conservative job?
Sage green, soft mauve, lilac gray, cream, and blush pink are generally safe for conservative professional settings. Bright coral, chrome, and statement yellows tend to read as more casual or creative. When in doubt, go one shade more muted than you think you need.
Why does my pastel polish peel off in sheets instead of chipping?
This is usually a prep issue — oil or lotion on the nail surface prevents adhesion. Make sure you’re wiping nails with a lint-free cloth dampened with acetone or nail prep solution before applying base coat. Even hand lotion from hours earlier can cause peeling if not removed.
How do I remove chrome powder nails without destroying my nails?
Chrome over gel requires the same soak-off process as any gel: saturate a cotton pad with pure acetone, hold it on each nail with foil for 10-15 minutes, then gently push off the softened gel with a cuticle pusher. Do not scrape hard — if it’s not coming off easily, soak for another 5 minutes. Forcing it is what damages the nail surface.
Where to Start
If you’re standing in the nail aisle feeling overwhelmed by 15 options, the honest answer is: start with Sage Garden or Soft Mauve. Both are genuinely wearable every day, work for professional and casual settings, and look good at any nail length. From there you can branch out.
And if you’re in allergy season or have spring cleaning coming up, strongly consider gel over regular polish — your manicure will last the month instead of the week, and April nails conditions are genuinely hard on regular polish.