20 Floral Nails Inspiration You’ll Love
Spring has sprung, and there’s no better time to let your nails blossom with gorgeous floral designs. Floral nails perfectly capture the season’s fresh, romantic energy while offering endless versatility—from delicate pressed petals to bold botanical prints.
Whether you’re drawn to minimalist daisy accents or lush garden scenes, these wearable designs transition seamlessly from brunch dates to office meetings. Plus, with gel and press-on options, you can enjoy weeks of petal-perfect nails without constant upkeep.
How to Create Floral Nails at Home: Essential Guide
Before diving into the inspiration, let’s cover the fundamentals that’ll help you recreate these looks yourself. Professional results at home are completely possible when you understand the techniques.
Tools You Actually Need (No Fancy Equipment Required)
The Basics – Under $20 Total:
- Dotting tools set – Bobby pins or toothpicks work in a pinch, but a proper 5-piece set from Amazon ($6-8) gives you consistent dot sizes for flower centers and petals
- Thin detail brush – One good striping brush (available at Sally Beauty for $3-5) handles stems, vines, and petal outlines
- White acrylic paint or polish – Regular white polish works, but acrylic craft paint ($2 at craft stores) stays opaque in one coat and doesn’t get stringy
The Game-Changers:
- Floral nail stickers/water decals – Born Pretty Store and Amazon sell realistic floral decals for $3-8 per sheet (I’ll show you exactly how to apply these below)
- Cleanup brush – Small angled makeup brush dipped in acetone or nail polish remover fixes mistakes without starting over
Three Easy Techniques Anyone Can Master
Technique 1: The Dotting Method (Easiest – Perfect for Beginners)
This creates simple 5-petal flowers using only dots. Dip your dotting tool in polish, place 5 dots in a circle, add a contrasting center dot. That’s it! Works for daisies, cherry blossoms, and abstract florals. Pro tip: Let base color dry completely first, or dots will drag and smear.
Technique 2: Water Decal Application (Foolproof Professional Results)
Cut out your floral decal, soak in room-temperature water for 20-30 seconds until it slides off the paper backing, slide onto your nail, press gently with a paper towel to remove water bubbles, seal with top coat. Mistake to avoid: Don’t oversoak (decals tear) or undersoak (they won’t slide off).
Technique 3: Drag-Petal Flowers (Looks Hard, Actually Simple)
Apply a thick dot of polish, use your detail brush or toothpick to drag outward from the dot to create petal shapes. Five drags create a flower. This works for roses, peonies, and tulips. Practice tip: Try this on paper first to get comfortable with the pressure and drag distance.
Step-by-Step: Creating Basic Floral Nails
Prep (Don’t Skip This!):
- Remove old polish completely with acetone-free remover
- Wash hands with soap to remove oils
- Push back cuticles gently with an orangewood stick
- Lightly buff nail surface with a fine-grit buffer to remove shine
- Wipe nails with rubbing alcohol on a lint-free pad
Application:
- Apply thin base coat, cap the free edge (swipe across the tip)
- Apply 2 thin coats of your base color (let each dry 2 minutes)
- Add your floral design using one of the three techniques above
- Let dry completely (5-10 minutes – use quick-dry drops to speed this up)
- Apply top coat generously, capping the free edge again
- Clean up edges with cleanup brush dipped in acetone
Time commitment: Simple designs take 30-45 minutes total. Complex hand-painted florals may take 60-90 minutes for all ten nails.
Minimalist & Dainty Florals
Pressed Petal Tips
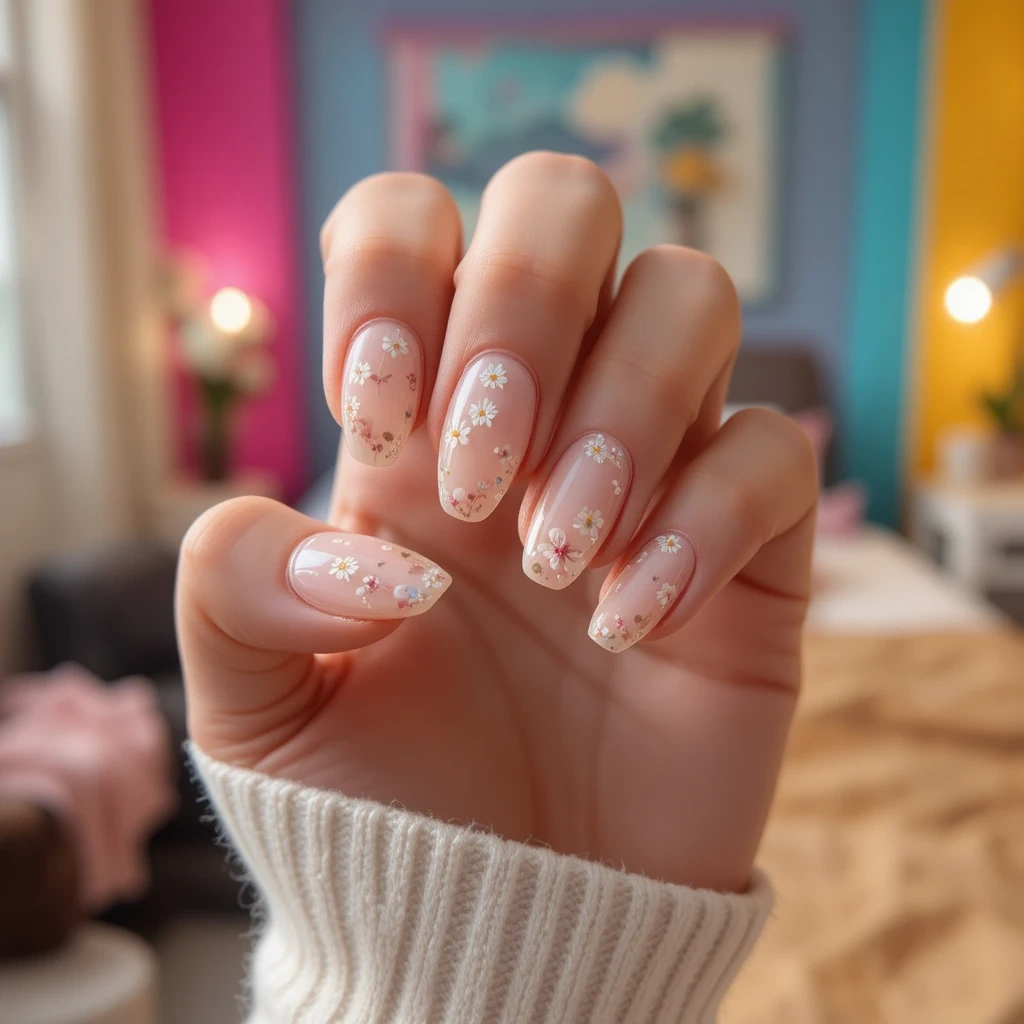
Delicate micro florals scattered across a sheer pink base create an ethereal, almost-floating effect that’s impossibly romantic. Tiny white daisies and baby’s breath designs concentrate near the cuticle or tips, leaving plenty of negative space for that modern minimalist vibe. The translucent base lets your natural nail peek through, making this design feel fresh rather than fussy.
Why It Works for Spring: This design captures spring’s gentle awakening without overwhelming your look, making it perfect for both casual weekends and professional settings where subtlety reigns supreme.
Pro Tip: Request a jelly base in soft pink or peachy nude—it’s more forgiving than stark sheer and gives your florals a subtle color pop.
DIY At Home: Use Essie Gel Couture Sheer Fantasy as your base (built-in jelly finish). Apply small floral water decals near tips and cuticles only—Winstonia Store sells “Pressed Flower” decal sets perfect for this. Seal with Sally Hansen Gel Top Coat. Difficulty: Beginner | Time: 20 minutes
Single Stem Accent
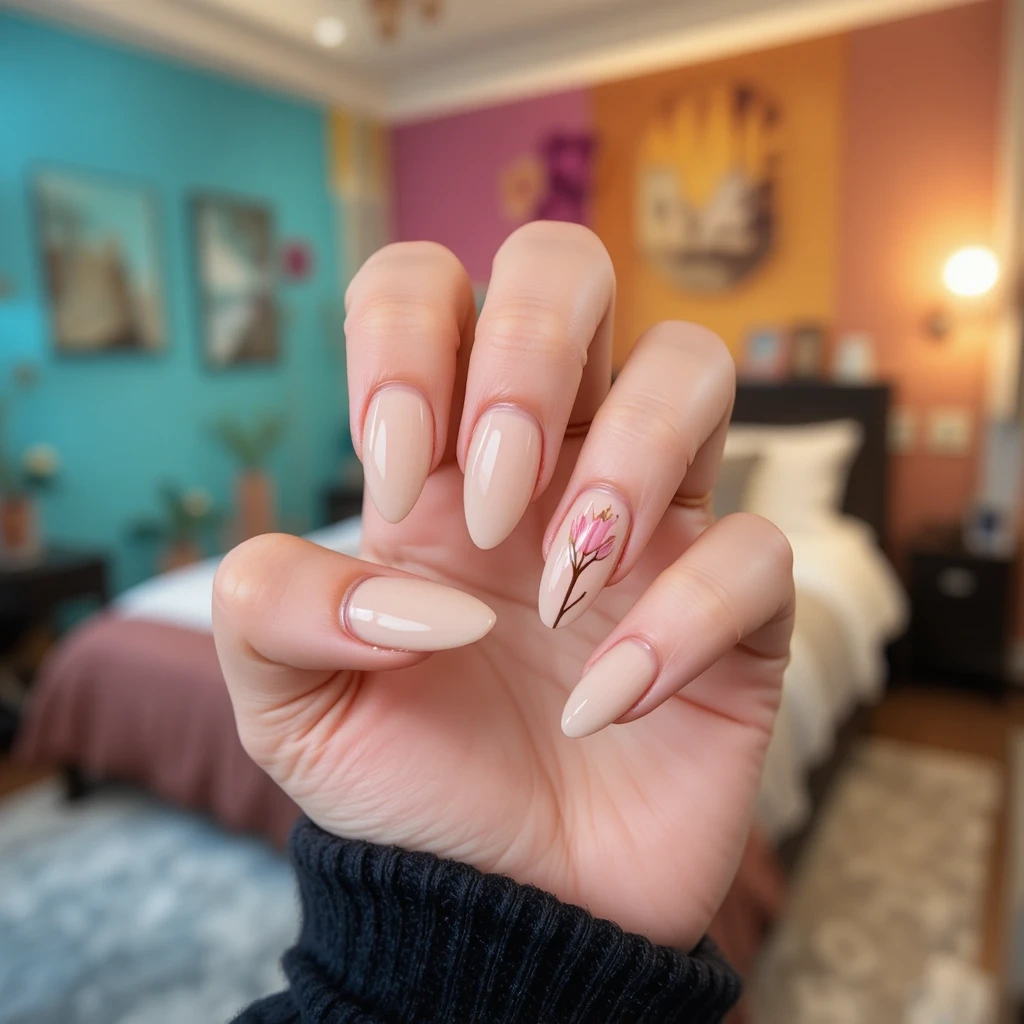
One elegant flower stem (think tulip or cherry blossom) painted vertically on a single accent nail creates maximum impact with minimal effort. The rest of your nails stay clean in complementary nude or soft pastel shades, letting that botanical accent nail truly shine. This design works beautifully with hand-painted details or high-quality nail stickers for precision.
Why It Works for Spring: It’s the perfect gateway into floral nails for those who prefer understated elegance, and it pairs beautifully with literally any outfit in your spring wardrobe.
Pro Tip: Choose almond or oval shapes to elongate the finger and create a natural canvas for your vertical stem design.
DIY At Home: Paint all nails with OPI Bubble Bath (perfect nude). On ring finger only, use a thin striping brush to paint one vertical brown/gray stem from cuticle to tip using Essie Chinchilly. Add 3-5 small pink dots along the stem using a dotting tool and Essie Ballet Slippers.
Finish with one tiny white dot in each pink flower center.
Products needed: Base nude, gray polish, pink polish, white polish or acrylic paint, striping brush, small dotting tool.
Difficulty: Easy | Time: 25 minutes
Tiny Daisy Chain
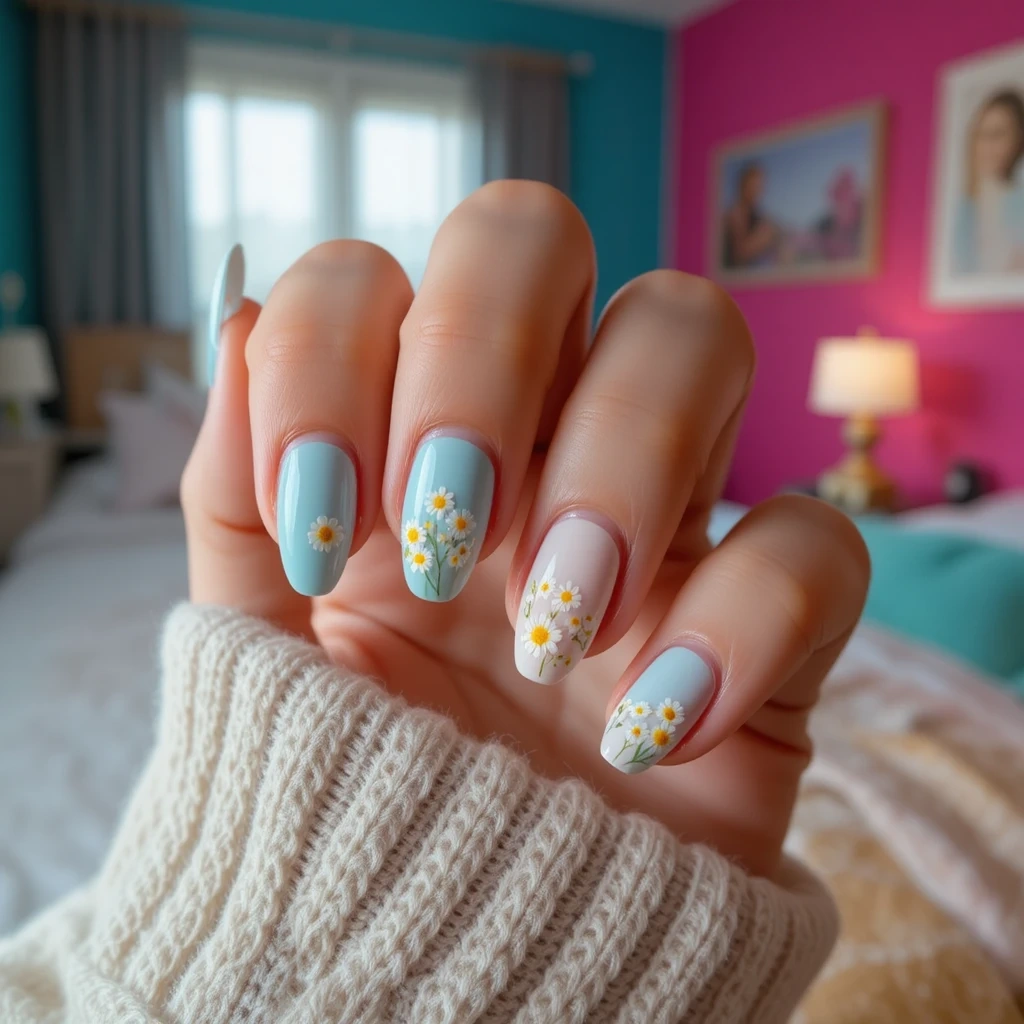
Miniature white daisies with sunny yellow centers line up along the tips or diagonally across each nail in a whimsical chain pattern. Set against a baby blue, mint green, or classic white base, these cheerful blooms feel playful without reading juvenile. The small scale keeps the design sophisticated while still delivering that flower-power punch.
Why It Works for Spring: Daisies are the ultimate spring flower—they’re cheerful, approachable, and instantly lift your mood every time you glance at your hands.
Pro Tip: Add a glossy topcoat to make the white petals pop, or go matte on the base color for trendy contrast texture.
DIY At Home: The Easy Way: Use Sally Hansen Xtreme Wear in Breezy Blue as base, apply daisy nail stickers in a diagonal line across each nail (Nail Art Decal Store on Amazon has perfect mini daisy strips).
The Hand-Painted Way: Use dotting method—make 5 tiny white dots in a circle using a 1mm dotting tool, add one yellow center dot. Repeat 3-4 times per nail in a line.
Difficulty: Beginner (stickers) / Intermediate (hand-painted) | Time: 20 minutes (stickers) / 45 minutes (painted)
Bold & Statement Florals
Watercolor Garden
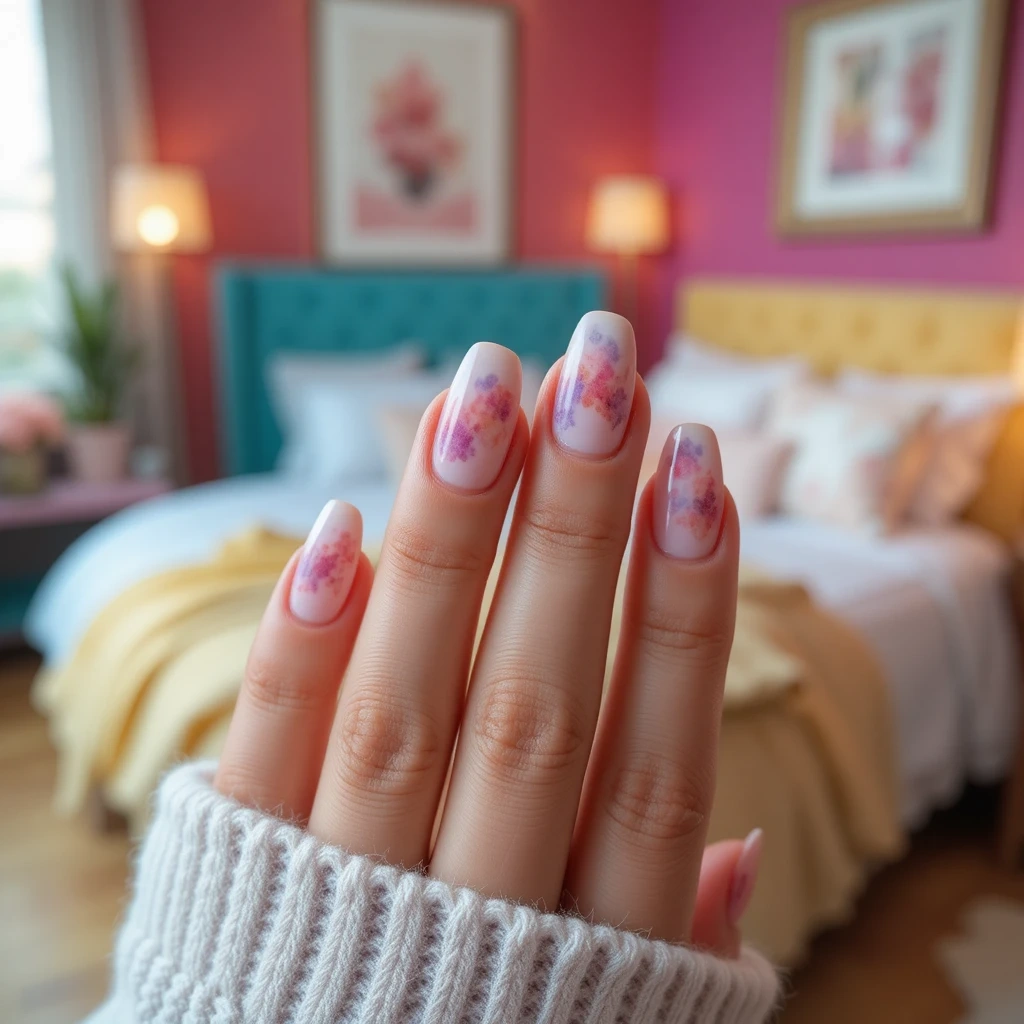
Soft, blurred floral blooms in pink, lavender, and peach create a dreamy watercolor painting effect across your nails. The colors blend and bleed into each other organically, mimicking actual watercolor techniques with darker pigment at petal edges and lighter centers. This artistic approach works best across all ten nails to create a cohesive gallery-worthy look.
Why It Works for Spring: The soft, painterly quality feels artistic and feminine without being overly precious, making it conversation-starter worthy for creative types.
Pro Tip: Work with a nail artist who specializes in watercolor techniques—this look requires skill with gel paints and blending tools for authentic results.
DIY At Home: Honest assessment: True watercolor technique requires gel paints and proper blending skills—difficult for beginners.
Alternative approach: Use watercolor floral nail wraps from NCLA Beauty or Dashing Diva for authentic look without the skill requirement.
Budget-friendly option: Apply sheer washes of pink, purple, and peach polish over white base in random organic shapes, let colors overlap naturally. Use a makeup sponge to dab and blend edges while still wet.
Difficulty: Advanced (hand-painted) / Beginner (wraps) | Time: 90+ minutes (painted) / 30 minutes (wraps)
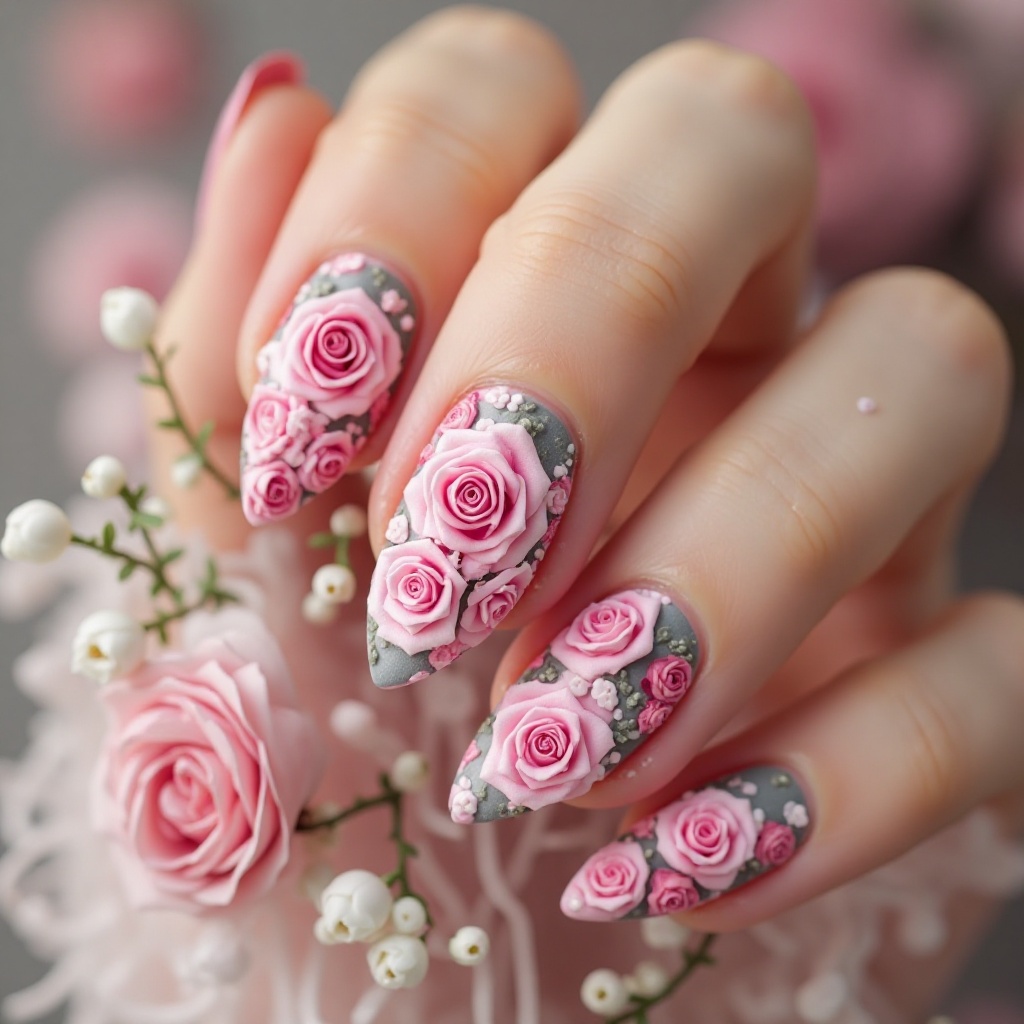
Vintage Rose Garden
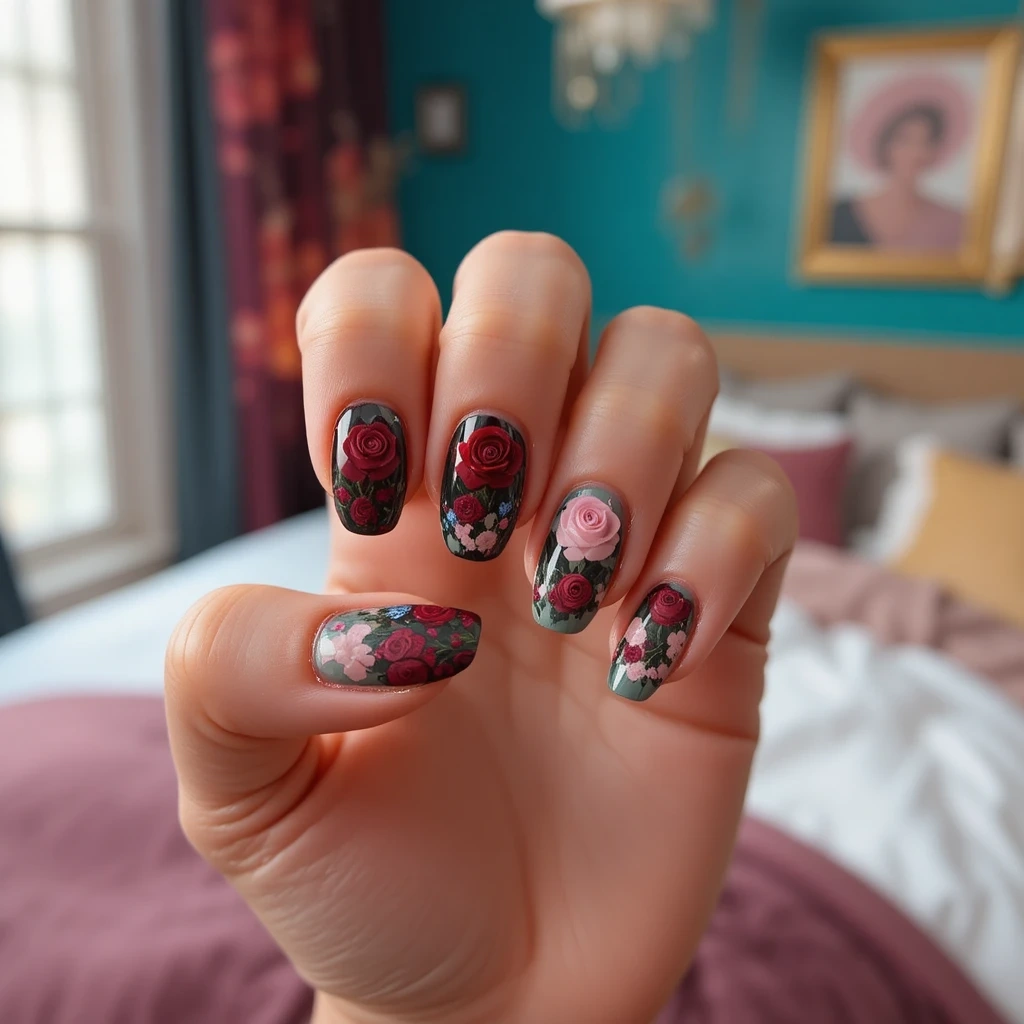
Deep red, blush pink, and burgundy roses painted in a classical illustrative style create timeless elegance with a romantic edge. These aren’t your grandmother’s florals though—set them against a moody sage green, dusty mauve, or even black base for modern contrast. The detailed shading and realistic petal work make each nail a miniature work of art.
Why It Works for Spring: Roses transcend seasons, but spring roses feel especially meaningful as gardens come back to life, and the vintage aesthetic taps into cottagecore and romantic fashion trends.
Pro Tip: Balance the drama by doing full florals on just 2-3 accent nails and keeping others in solid complementary shades.
DIY At Home: Realistic approach: This design is genuinely complex—consider using high-quality rose nail stickers or water decals (BTArtbox Vintage Rose Decals on Amazon look hand-painted). Apply to accent nails over Essie Exposed (mauve base) or China Glaze Westside Warrior (sage green).
For brave DIY-ers: Use the drag-petal technique with red, pink, and burgundy polishes, overlapping petals to create dimensional roses. YouTube search “drag rose nail art tutorial” for visual guidance.
Difficulty: Advanced (hand-painted) / Easy (decals) | Time: 60-90 minutes (painted) / 25 minutes (decals)
Tropical Hibiscus Pop
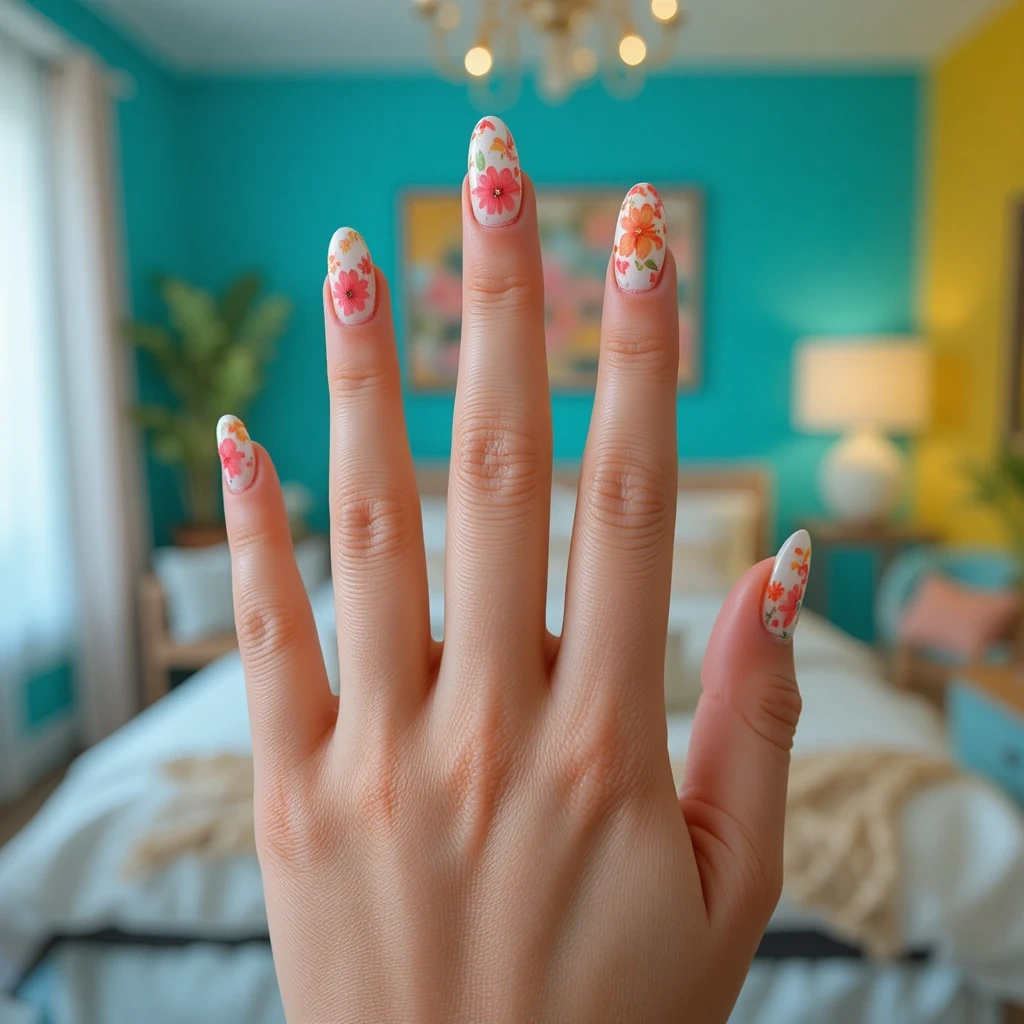
Vibrant coral, hot pink, and sunny yellow hibiscus flowers explode across a white or cream base for maximum tropical vacation energy. These larger-scale blooms typically feature one statement flower per nail with contrasting center details and occasional leaf accents in emerald green. The bold color saturation makes these impossible to ignore in the best way.
Why It Works for Spring: As temperatures rise, these nails channel beach getaway vibes even if you’re landlocked, and the cheerful colors boost your mood instantly.
Pro Tip: Keep your hibiscus to 2-3 accent nails and use solid bright bases on the rest to avoid visual overload.
DIY At Home: Paint all nails white (OPI Alpine Snow—2 coats). On ring and middle fingers only, use hibiscus flower nail decals (search “tropical flower nail stickers” on Amazon—brands like DAODER and Konsait have vibrant options).
Hand-painted alternative: Use the drag-petal technique with bright coral or pink polish—create 5 large petals dragging outward from center, add yellow center dot with stamen details using toothpick and black polish.
Products: White base, bright pink/coral/yellow polishes, green for leaves.
Difficulty: Intermediate | Time: 40 minutes
Lavender Sprig Simplicity
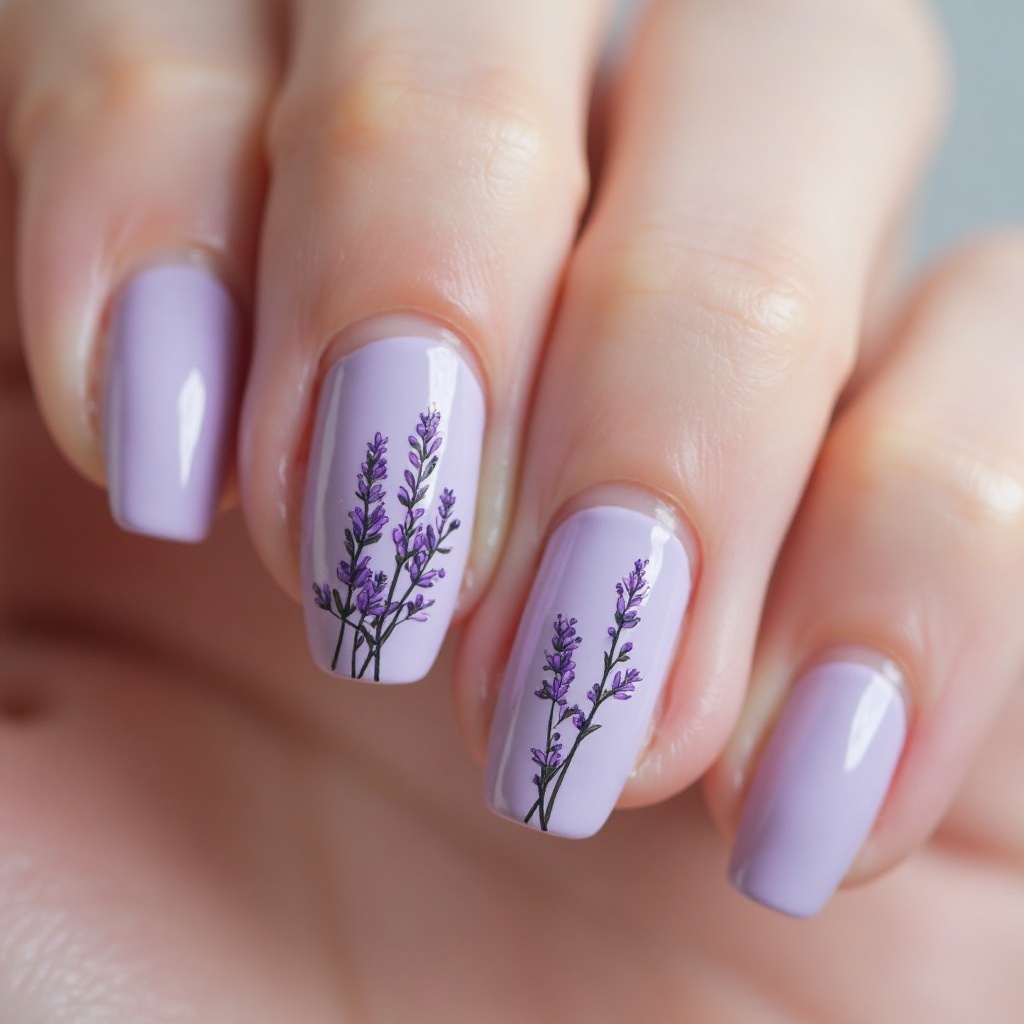
Delicate lavender sprigs with tiny purple blooms run vertically along one or two accent nails while the remaining nails wear soft gray or lilac solids. The minimalist botanical illustration style keeps things clean and modern, with thin stems and dotted flower clusters creating visual interest without clutter. This design feels spa-like and calming, perfect for those who love understated elegance.
Why It Works for Spring: Lavender represents the season’s peaceful transition and works beautifully for anyone seeking a nature-inspired look that’s office-appropriate and sophisticated.
Pro Tip: Pair with a satin finish instead of glossy for that elevated, barely-there luxe feel that photographs beautifully.
DIY At Home: Base all nails in Essie Chinchilly (soft gray). On ring and middle fingers, use a striping brush to paint two thin vertical lines in Essie Smokin’ Hot (darker gray/taupe) for stems. Using a toothpick, add 6-8 tiny dots in light purple (OPI Do You Lilac It) along each stem in pairs.
Simplified version: Use lavender stem nail stickers from Born Pretty instead of hand-painting.
Difficulty: Easy-Intermediate | Time: 30 minutes
Baby Breath Constellation
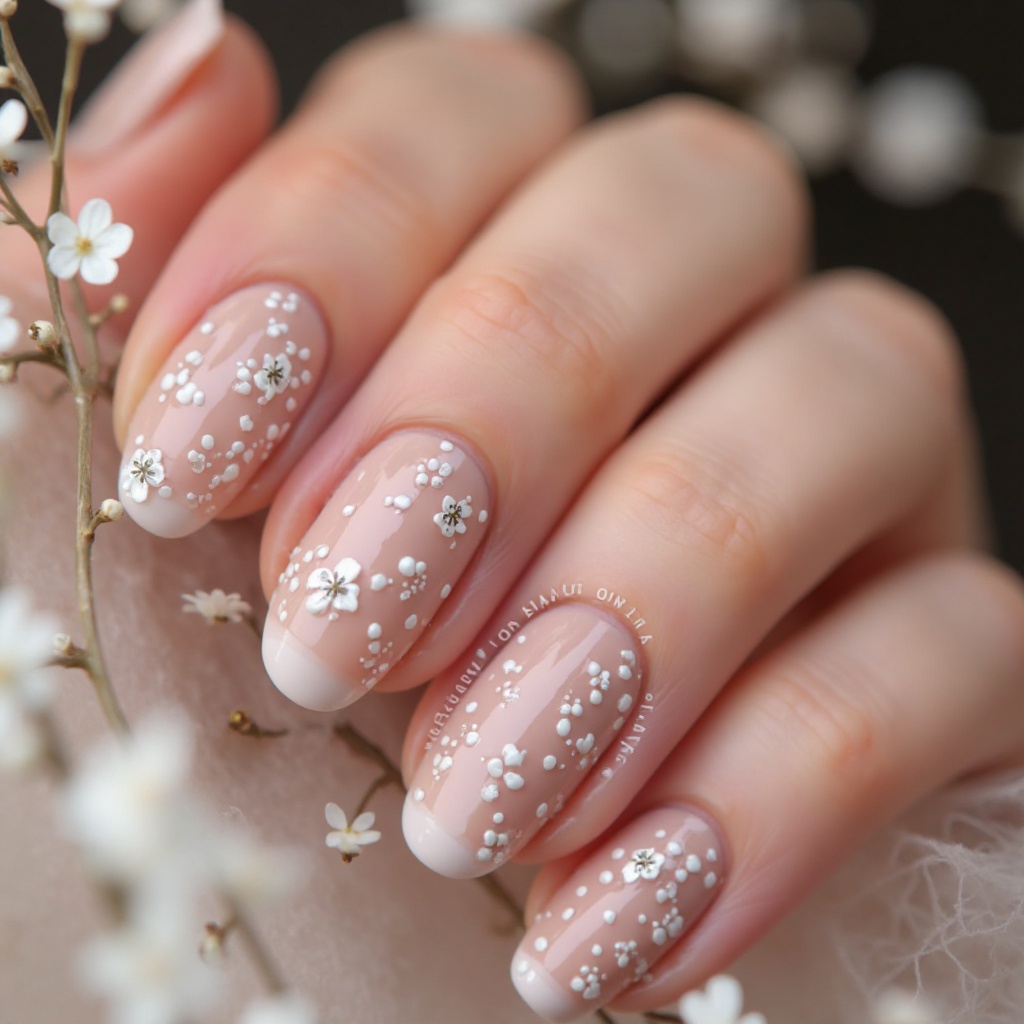
Scattered miniature white dots representing baby’s breath flowers create a starry, constellation-like pattern across nude or pale pink nails. The random placement feels organic and effortless, like flowers caught mid-breeze, while the tiny scale maintains sophistication. A few nails might feature slightly larger dot clusters for subtle variation without breaking the cohesive minimalist aesthetic.
Why It Works for Spring: This whisper-soft design gives you florals without screaming “I’m wearing flowers,” making it ideal for conservative work environments or minimalist style lovers.
Pro Tip: Use a dotting tool for perfect uniformity, and add one tiny green dot near some white ones to suggest stems without getting too literal.
DIY At Home: Apply 2 coats of OPI Bubble Bath or any sheer pink. Let dry completely. Use the tip of a toothpick (smaller than dotting tool) dipped in white acrylic paint to create random tiny dots across all nails—approximately 8-12 dots per nail in scattered placement. On 2-3 dots per nail, add one microscopic green dot beside the white using a toothpick and any green polish.
The trick: Less is more; sparse placement looks more sophisticated than crowded.
Difficulty: Beginner | Time: 20 minutes
Oversized Peony Drama
Giant peony blooms in soft pink, coral, and cream take up the entire nail surface, with petals so large they span from cuticle to tip. The scale creates impact while the soft color palette keeps things sophisticated rather than overwhelming. Subtle shading and highlight details make the petals look dimensional and almost touchable, like you’re wearing actual flower photography.
Why It Works for Spring: Peonies are spring’s most coveted bloom, and this design lets you wear the season’s star flower in show-stopping scale that feels luxurious and special-occasion worthy.
Pro Tip: This design works best on medium to long nails where the full peony can be appreciated—short nails should scale down to half-blooms instead.
DIY At Home: Best method for this look: Use full-nail peony nail wraps or water decals—the oversized scale is nearly impossible to hand-paint without professional tools. Color Street, NCLA, and Jamberry alternatives offer peony designs.
Application: Clean nails, apply decal, file off excess at tip, seal with top coat.
DIY painting attempt: Requires gel paints and ombre/blending skills beyond beginner level.
Difficulty: Beginner (wraps) / Expert (hand-painted) | Time: 30 minutes (wraps) / 2+ hours (painted)
Bold Poppy Field
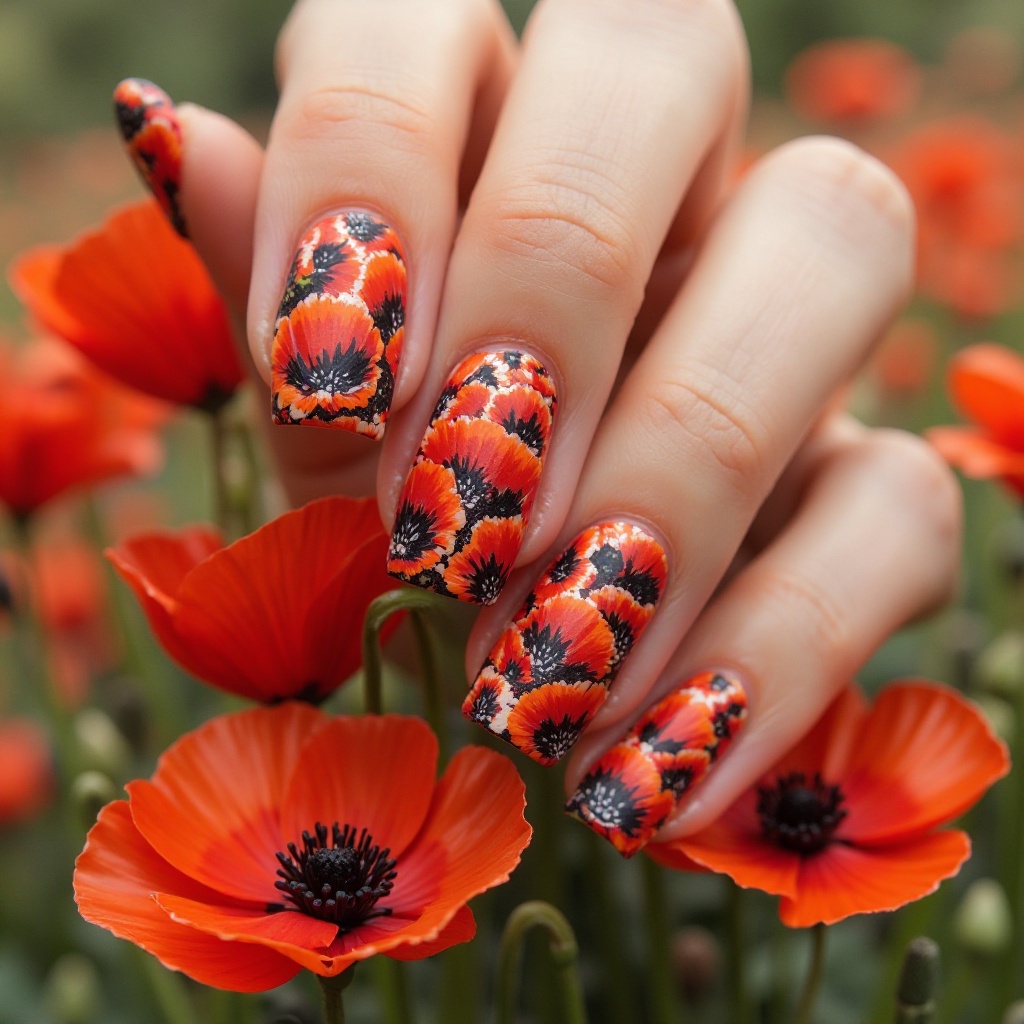
Bright red and orange poppies with distinctive black centers create a striking Impressionist-inspired design reminiscent of Monet’s famous fields. The vivid warm tones pop against soft green stems and leaves, with occasional blurred background flowers adding depth. This maximalist approach celebrates color and nature in equal measure, perfect for extroverts who love making statements.
Why It Works for Spring: Poppies represent remembrance and renewal, making them symbolically perfect for spring, while their bold colors satisfy anyone craving vibrancy after winter’s neutrals.
Pro Tip: Request a matte topcoat to enhance the painterly, canvas-like quality and make the colors appear even richer and more saturated.
DIY At Home: Start with a soft sage green or cream base. Simplified approach: Use poppy field nail wraps for instant Monet vibes.
Hand-painting method: Using a medium dotting tool, create 4-5 red or orange petals in loose flower shapes. Add black center using small dotting tool. Use striping brush with green to add simple stems. Don’t aim for perfection—the impressionist style looks better with loose, artistic strokes.
Key products: Sage green base, bright red or orange, black, green.
Difficulty: Intermediate | Time: 50 minutes
Elegant & Sophisticated Florals
Cherry Blossom Ombré

Soft pink gradients from white to dusty rose serve as the base for delicate cherry blossom branches with ivory petals and subtle brown stems. The ombré creates depth while the sparse branch placement keeps things elegant and zen-inspired rather than cluttered. Tiny dots in deeper pink add dimension to represent blossom clusters in the distance.
Why It Works for Spring: Cherry blossoms symbolize spring’s arrival and fleeting beauty, making them seasonally perfect and deeply meaningful for a nail design.
Pro Tip: Almond or coffin shapes showcase the vertical branch lines beautifully, and a satin finish splits the difference between glossy and matte.
DIY At Home: Creating the ombré base: Apply white polish to entire nail. While still wet, apply dusty pink (Essie Mademoiselle) to a makeup sponge and dab onto lower half of nail, bouncing sponge to blend the gradient. Let dry.
Adding cherry blossoms: Use a striping brush with brown polish (Essie Hot Coco) to paint diagonal branch lines. Use toothpick to add clusters of 5-dot flowers in white. Add tiny pink dots near some flowers for depth.
Easier version: Use cherry blossom branch nail stickers over your ombré base.
Difficulty: Intermediate | Time: 45 minutes
French Tip Florals
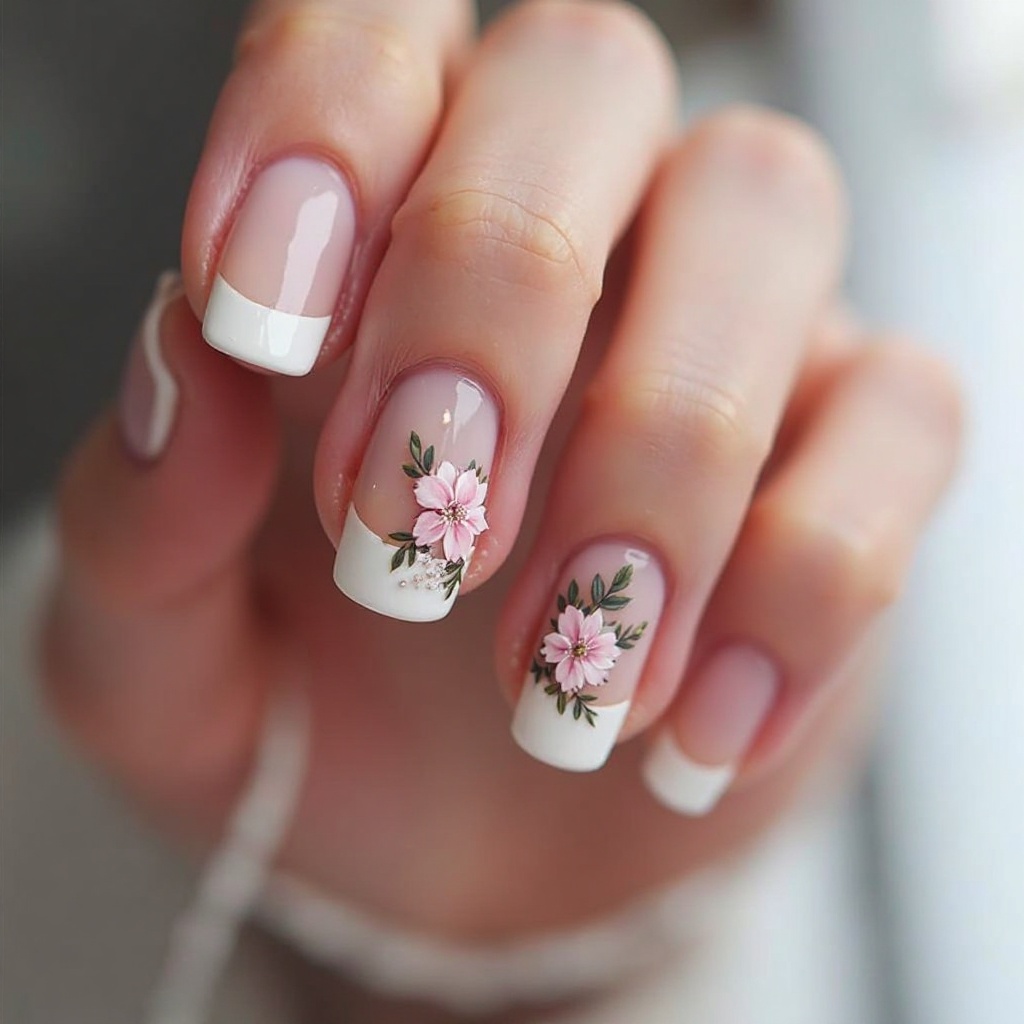
Classic French tips get a springtime upgrade with tiny flowers painted along the white tip line or cascading from the smile line. Think micro roses, forget-me-nots, or abstract blooms in soft pinks, lavender, and white that enhance rather than replace the timeless French aesthetic. The nude or sheer base keeps it professional while the florals add personality.
Why It Works for Spring: This design modernizes a classic for spring while maintaining the elongating, polished effect French tips are famous for.
Pro Tip: Use a slightly wider white tip than traditional French (3-4mm) to give your florals adequate space without crowding.
DIY At Home: Step 1—Create French tips: Use French manicure guides/stickers (Sally Hansen or any drugstore brand) to create clean white tips. Step 2—Add micro florals: Using a toothpick and pink, purple, or yellow polish, add 3-4 tiny 5-dot flowers along the white tip line. Vary colors for interest.
Even easier: Apply traditional French tips, then use tiny floral nail stickers designed for French tips (Marzipany Store on Amazon specializes in these).
Products needed: Nude base polish, white tip polish, French guides, dotting tool or toothpick.
Difficulty: Easy-Intermediate | Time: 35 minutes
Embossed Petal Texture
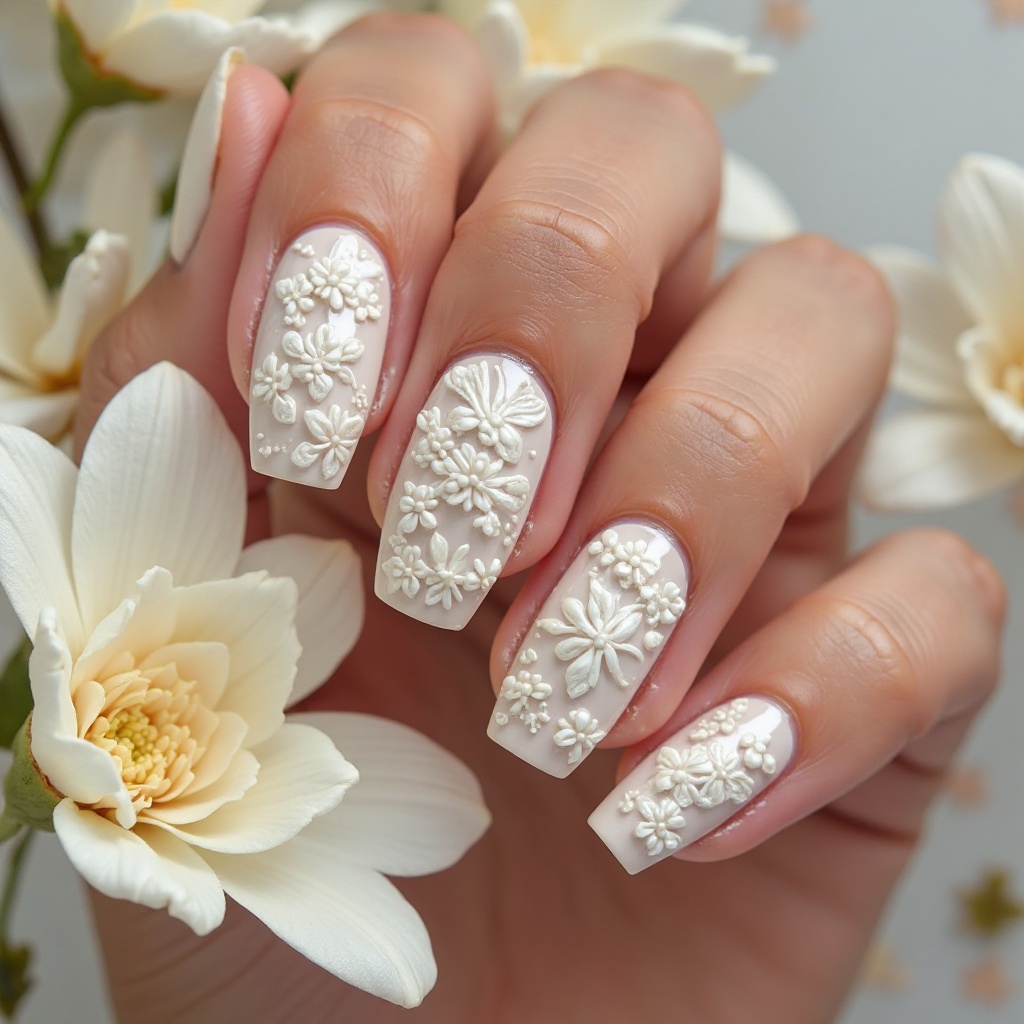
Raised gel creates actual 3D flower petals in white or cream against a coordinating base color, adding touchable dimension to your manicure. The embossed technique catches light beautifully and creates shadow play that makes the florals feel even more realistic and luxe. Pair with glossy bases and matte flowers (or vice versa) for maximum textural contrast.
Why It Works for Spring: The sculptural quality elevates florals from pretty to high-fashion, and the texture adds interest that photographs beautifully for social sharing.
Pro Tip: Keep embossed designs to accent nails only—too much texture can snag on fabrics and become impractical for daily wear.
DIY At Home: Honest truth: True 3D embossed gel requires UV lamp and special sculpting gel—not beginner-friendly at home.
Achievable alternative: Use textured floral nail stickers or 3D flower nail charms (available at nail supply stores). Apply flat floral decals, then add small 3D resin flower embellishments to centers using nail glue. Seal everything with thick top coat.
Budget option: Layer multiple coats of white polish in petal shapes, building up dimension (requires patience and 3-4 layers minimum).
Difficulty: Expert (gel sculpting) / Easy (3D stickers) | Time: 90+ minutes (gel) / 30 minutes (stickers)
Gilded Botanical Line Art
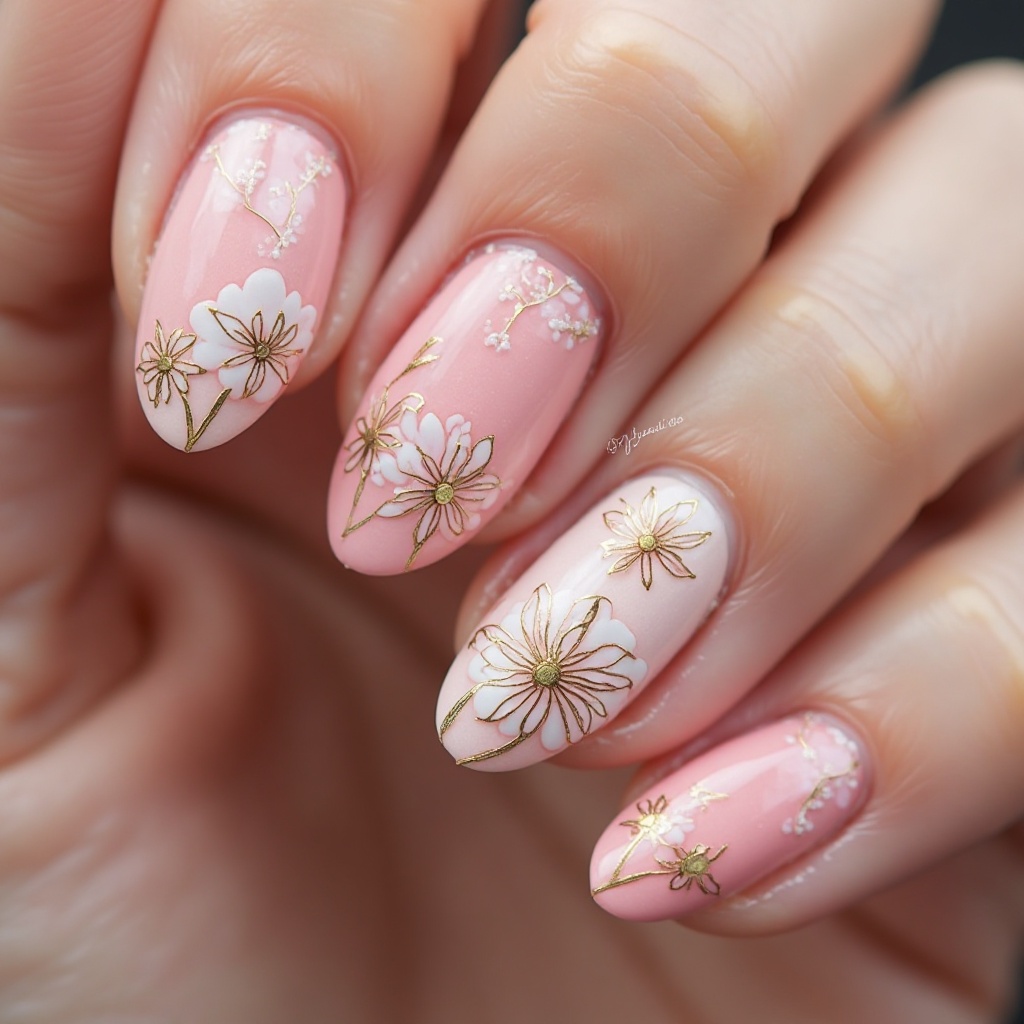
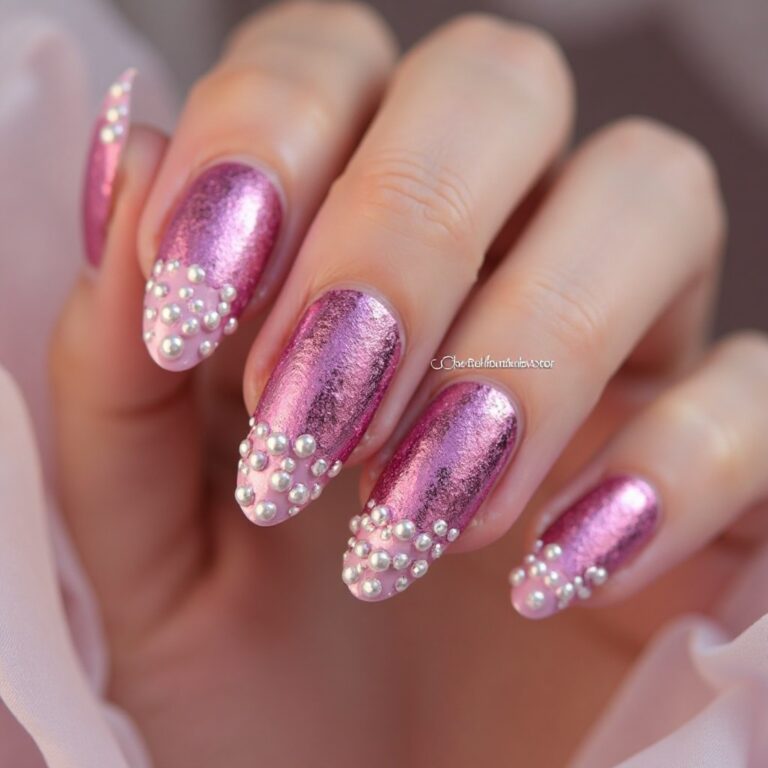
Fine gold or rose gold line-work creates elegant flower outlines against soft blush, champagne, or ivory bases for a refined jewelry-like effect. The metallic details might trace delicate stems, outline petals, or add decorative flourishes around blooms painted in coordinating soft tones. This sophisticated approach feels bridal-appropriate and luxuriously understated.
Why It Works for Spring: The metallic accents catch spring sunshine beautifully while maintaining elegance suitable for formal events, weddings, and upscale professional settings.
Pro Tip: Combine with a high-gloss topcoat to make the gold details shimmer, or add tiny pearl accents at flower centers for extra luxury.
DIY At Home: Apply 2 coats of blush pink or champagne base (Essie Penny Talk or Ballet Slippers). Let dry completely.
Creating gold line art: Use a thin striping brush with gold nail polish (Sally Hansen Golden-I or LA Colors Gold) to draw simple flower outlines—circles for blooms, curved lines for petals, straight lines for stems. Keep it minimal and delicate.
Game changer product: Gold nail art pens (Born Pretty Store or Amazon) give you control like a marker—much easier than polish and brush.
Practice tip: Sketch design on paper first to visualize placement.
Difficulty: Intermediate | Time: 40 minutes
Monochromatic White Garden
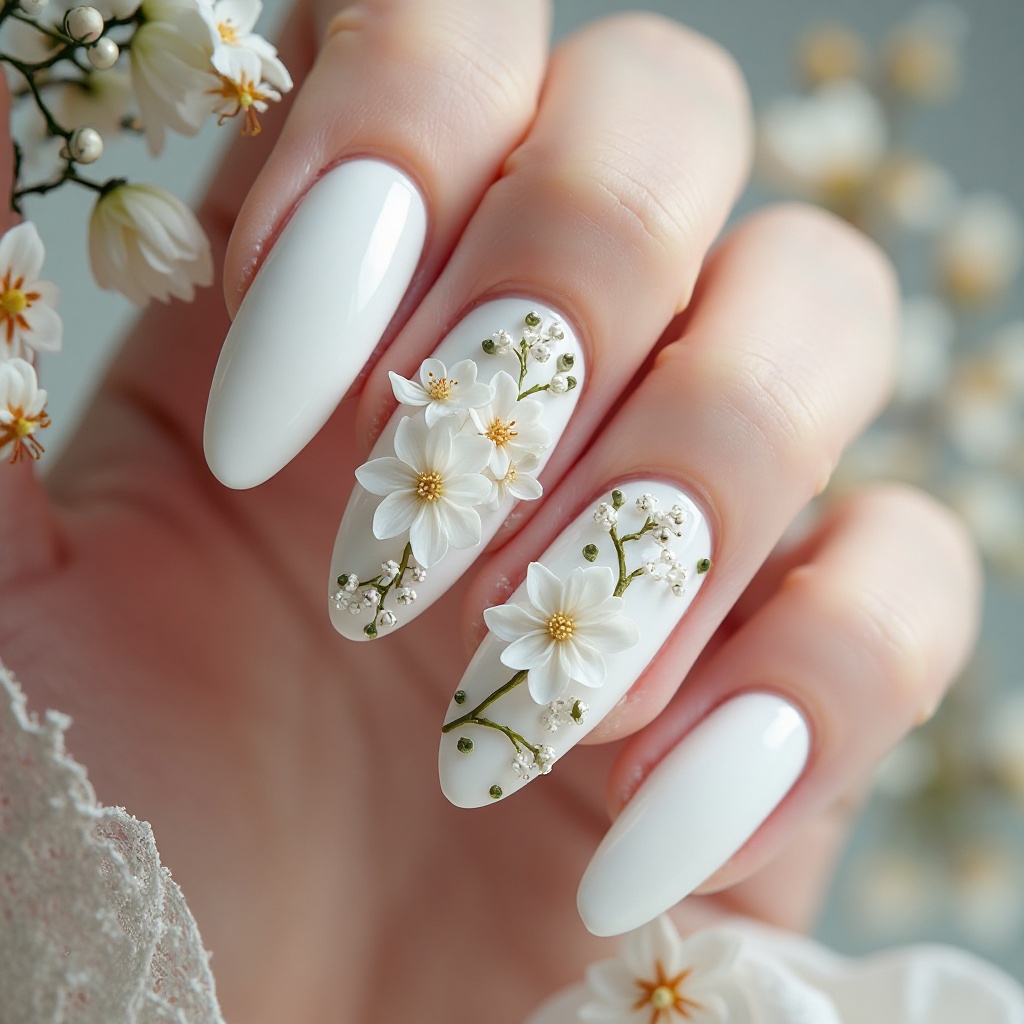
All-white florals in varying textures and finishes create a sophisticated tonal design that’s anything but boring. Glossy white petals, matte white bases, pearl-finish centers, and cream-colored stems layer together for depth and interest without introducing color. The effect is bridal, elegant, and surprisingly modern when executed with varied finishes and textures.
Why It Works for Spring: White represents fresh starts and purity, perfectly capturing spring’s renewal energy while offering maximum versatility to pair with any outfit.
Pro Tip: Add dimension by varying your white shades from true white to cream to ivory across different nail elements.
DIY At Home: The technique: Paint all nails with cream or ivory base (OPI My Vampire is Buff). On accent nails, use white polish to create simple 5-petal flowers using dotting method.
Creating texture variation: Apply matte top coat (Essie Matte About You) to base, keep flowers glossy by painting regular top coat only on flower areas using a detail brush.
Adding pearl finish: Mix tiny amount of pearl/shimmer polish into white for some flower centers.
Products needed: Cream base, true white, pearl white, matte top coat, glossy top coat.
Difficulty: Intermediate | Time: 45 minutes
Playful & Colorful Florals
Wildflower Meadow
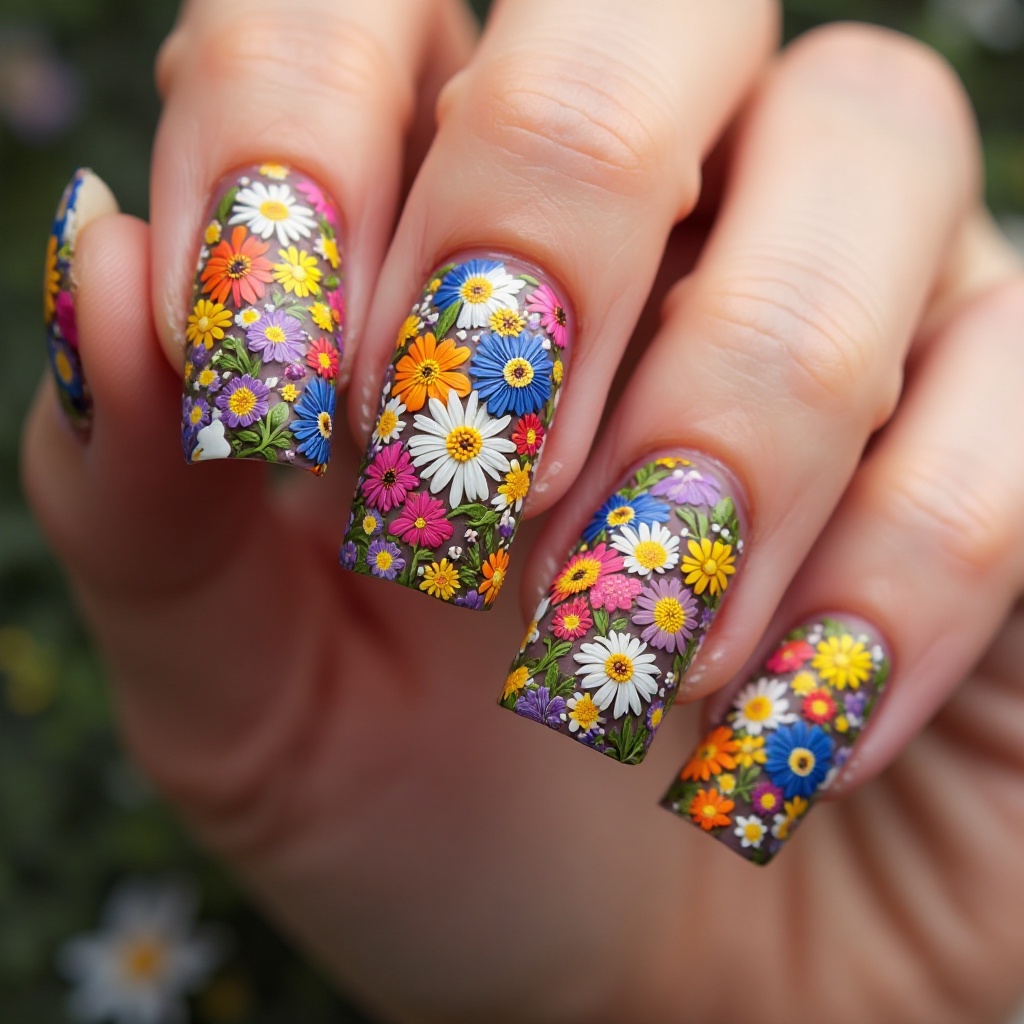
A chaotic-in-the-best-way mix of different flower varieties in purple, yellow, pink, orange, and blue scattered across each nail like you rolled through a wildflower field. No two nails match exactly, creating an organic, collected-over-time aesthetic that feels spontaneous and joyful. The busy pattern works surprisingly well because the flowers are small-scale and the color palette stays cohesive.
Why It Works for Spring: This maximalist approach captures spring’s abundance and variety, perfect for free spirits who love color and pattern mixing.
Pro Tip: Use a white or cream base to let all those colors pop, and seal with a thick glossy topcoat for longevity.
DIY At Home: Paint all nails white (provides the best color pop).
The easy method: Use mixed wildflower nail decals or nail wraps—search “wildflower meadow nail wraps” for options.
Hand-painting approach: Using dotting tools in various sizes and 4-6 bright polish colors, create random 5-petal flowers all over each nail.
Vary sizes and colors. Add tiny green leaves between some flowers with striping brush. The key is embracing imperfection—messy looks authentic here.
Time-saving tip: Mix dotting method with tiny floral stickers for faster results.
Difficulty: Easy-Intermediate | Time: 60 minutes (painted) / 25 minutes (decals)
Neon Outline Blooms
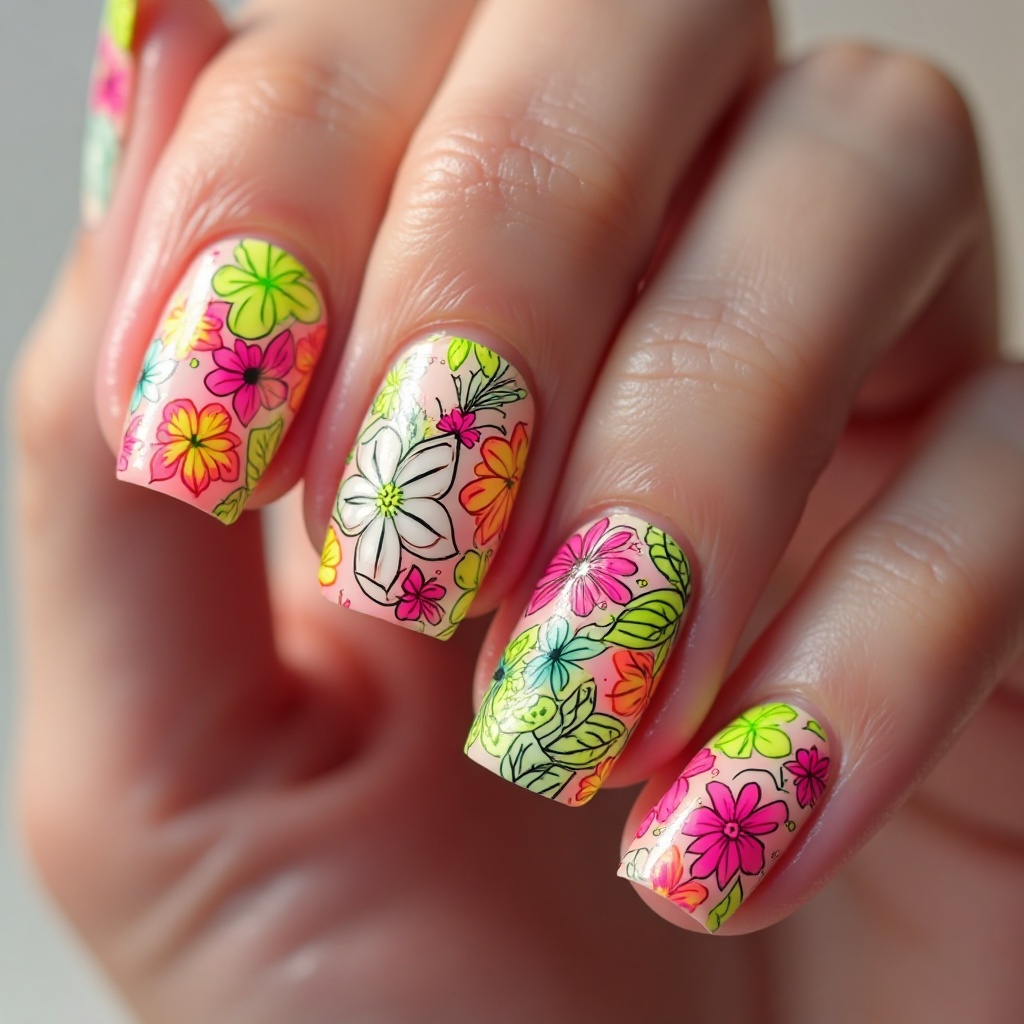
Bold neon pink, orange, yellow, and green outline simple flower shapes against a nude or white base for a modern, graphic take on florals. The line-art style keeps things contemporary while the eye-popping neon makes them anything but boring. This design walks the line between artistic illustration and playful doodle perfectly.
Why It Works for Spring: Neons are having a major moment, and this design lets you embrace the trend in a sophisticated way that doesn’t scream “club wear.”
Pro Tip: Neons glow under UV light, making these perfect for spring music festivals or nighttime events where you want to make an impression.
DIY At Home: Apply white or nude base.
Creating neon outlines: Use neon nail art pens (China Glaze, LA Colors, or nail art marker pens from Amazon) to draw simple flower outlines—just circles and petals, no fill. Draw 2-3 flowers per nail in different neon colors. No pens?
Use striping brush: Dip in neon polish and outline flowers freehand, but pens give MUCH better control for beginners. The secret: Keep shapes simple and geometric rather than realistic. Think doodle-style flowers.
Difficulty: Easy | Time: 30 minutes with pens, 45 minutes with brush
Rainbow Petal Mix

Each nail features a different color flower—think sunshine yellow poppies, electric blue cornflowers, hot pink cosmos, lavender sprigs, and coral zinnias. The rainbow effect feels celebratory and energetic while still maintaining cohesion through similar flower scales and a unified base color. It’s like wearing a spring bouquet that hits every color note.
Why It Works for Spring: The variety keeps things interesting for commitment-phobes who get bored with one look, and the rainbow symbolizes hope and new beginnings.
Pro Tip: Stick to either all warm-toned or all cool-toned flowers to keep the rainbow cohesive rather than chaotic.
DIY At Home: Paint all nails white or cream. Easiest approach: Buy a mixed-color floral nail sticker sheet where each sticker is a different color—apply one sticker per nail.
Hand-painting method: Choose 5 bright polish colors (yellow, pink, purple, blue, coral).
On each nail, use the drag-petal technique to create one medium flower using a different color per nail. Add green stem and leaves with striping brush.
Keep it cohesive: Use same flower style on each nail, just different colors.
Difficulty: Intermediate | Time: 50 minutes
Confetti Flower Party
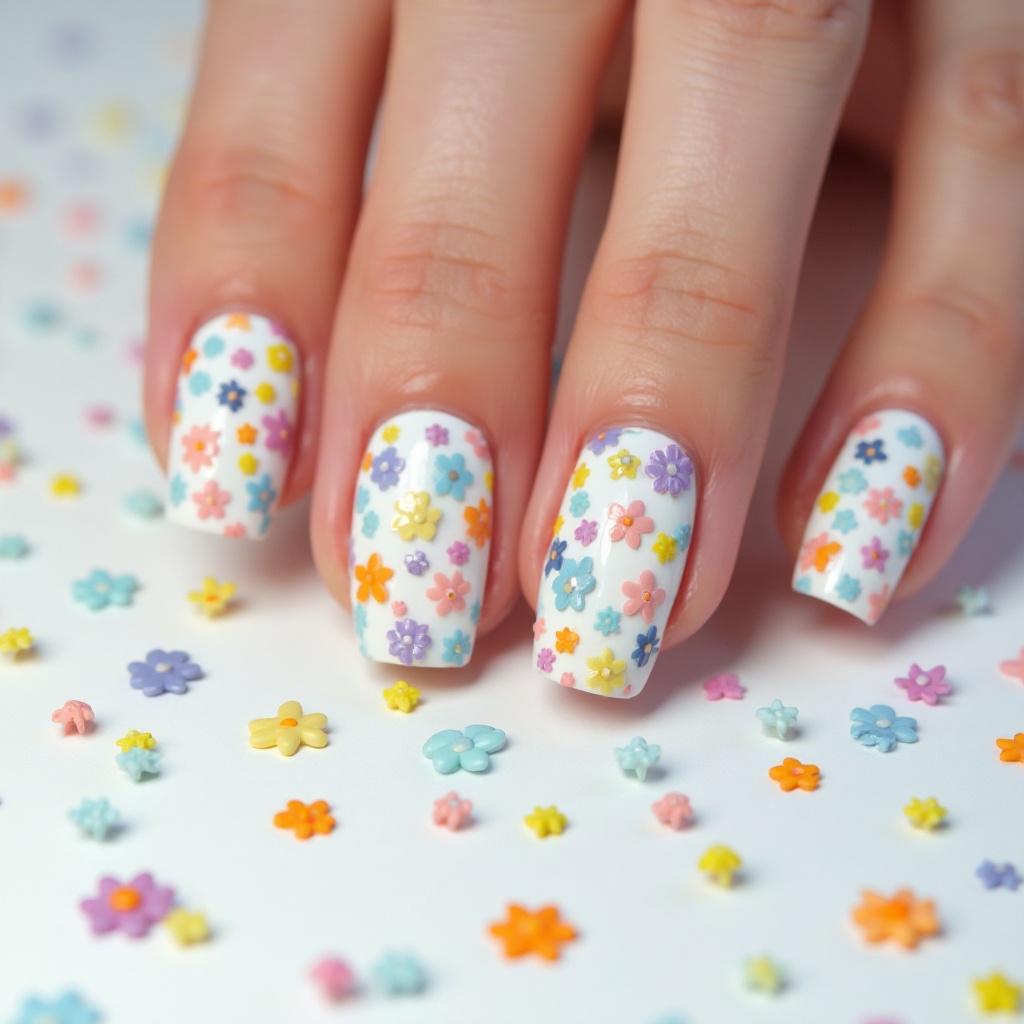
Tiny abstract flower shapes in bright pastels—think mint, peach, lilac, butter yellow, and sky blue—scatter randomly like confetti across a white base. The playful, almost childlike simplicity feels joyful and carefree, with each tiny bloom rendered in simple five-petal shapes. The random placement and cheerful colors create a party-on-your-nails vibe that’s impossible not to smile at.
Why It Works for Spring: This design channels spring break and celebration energy, perfect for anyone who wants their nails to feel fun rather than serious or formal.
Pro Tip: Balance the playfulness with short to medium nail length and almond shape to keep it sophisticated enough for adult wear.
DIY At Home: Apply 2 coats white base. Gather 4-5 pastel polishes (any light, bright colors).
The technique: Using a small dotting tool (or toothpick), create tiny 5-dot flowers scattered randomly across all nails—roughly 6-8 flowers per nail. Vary the colors randomly.
Spacing is key: Don’t crowd them; negative white space makes this design work. Add occasional single dots between flowers for “confetti” effect.
Time estimate: This goes faster than you think because tiny flowers are forgiving.
Difficulty: Beginner | Time: 35 minutes
Retro Flower Power
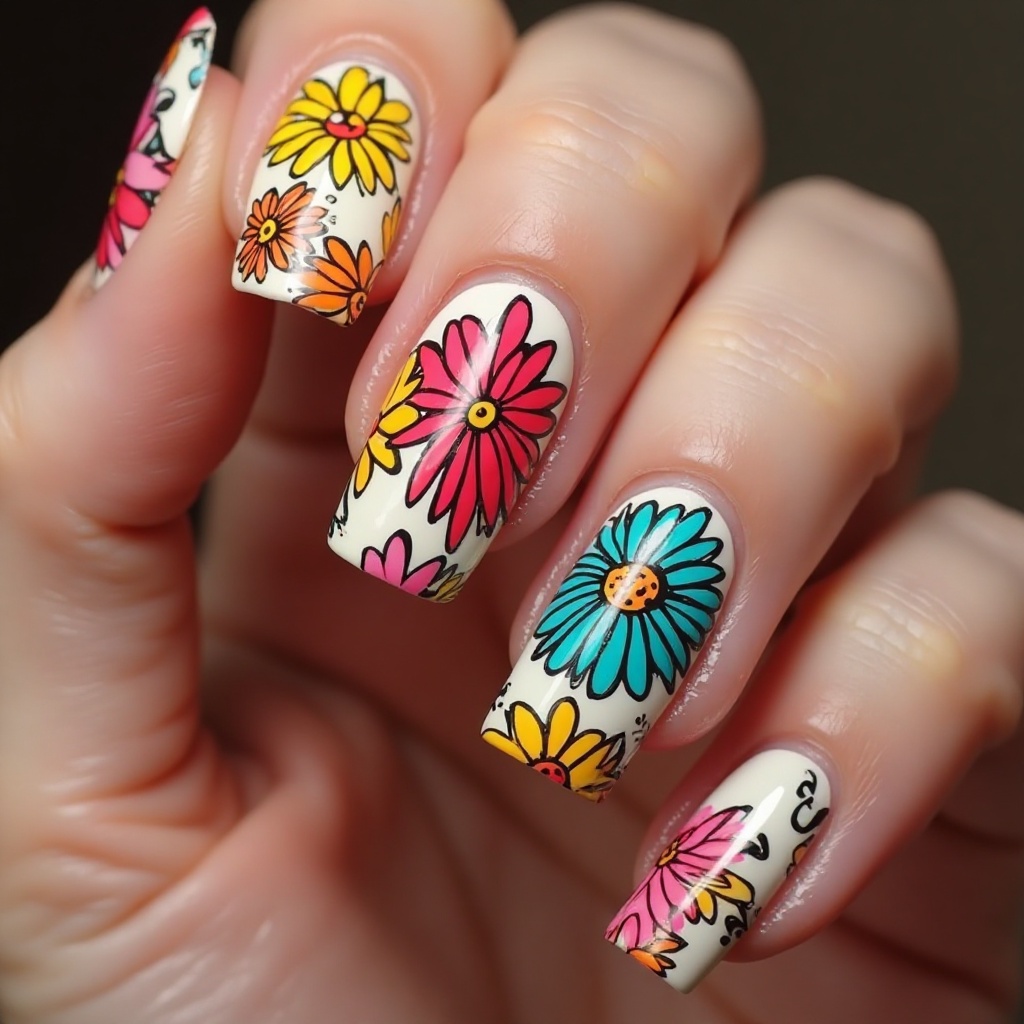
Bold 60s and 70s inspired daisies in orange, yellow, hot pink, and turquoise create a groovy throwback moment. Think thick black outlines, geometric petal shapes, and that unmistakable vintage graphic design aesthetic that’s back in a major way. The mod style works especially well on square or squoval nails where the geometric shapes sit naturally.
Why It Works for Spring: Vintage vibes are trending across fashion and beauty, and this design taps into nostalgia while feeling fresh and current thanks to modern color combinations.
Pro Tip: Pair with a glossy finish for authentic retro shine, and consider adding one accent nail with a coordinating geometric pattern instead of flowers.
DIY At Home: Paint nails in bright solid colors (orange, yellow, pink, turquoise—one color per nail or two colors alternating).
Creating retro daisies: Use black nail art pen or striping brush to draw bold flower outlines—thick circular center, 6-8 geometric petals around it. Keep lines chunky and imperfect for authentic retro vibe.
Alternative method: Search “retro daisy nail decals” for pre-made stickers in this exact style (they exist!).
The key to this look: Bold black outlines and geometric shapes, not realistic flowers.
Difficulty: Easy-Intermediate | Time: 40 minutes
Romantic & Feminine Florals
Soft Pink Rose Bouquet
Delicate pink roses in varying stages of bloom—from tight buds to full flowers—create a dreamy romantic design across each nail. The soft blush, dusty rose, and ballet pink tones blend together with sage green leaves for a classic romantic aesthetic. Subtle white highlights on petals add dimension and make the roses look freshly picked and dewy.
Why It Works for Spring: Pink roses are the universal symbol of romance and grace, making these perfect for date nights, weddings, or anyone embracing their feminine side.
Pro Tip: Add a subtle shimmer topcoat instead of flat glossy for a candlelit glow effect that elevates the romance factor.
DIY At Home: Realistic option: Use rose bouquet nail wraps or water decals (Lily & Fox Nail Wraps or Born Pretty rose decals look hand-painted).
Brave DIY route: Apply dusty pink base. Use drag-petal technique in darker and lighter pink shades to create layered rose petals—start with dark pink in center, drag lighter pink petals around it in circular pattern. Add sage green leaves with striping brush. YouTube “rose nail art tutorial” for visual guidance—this one genuinely requires watching someone do it.
Difficulty: Advanced (painting) / Beginner (wraps) | Time: 90 minutes (painting) / 30 minutes (wraps)
Forget-Me-Not Delicacy
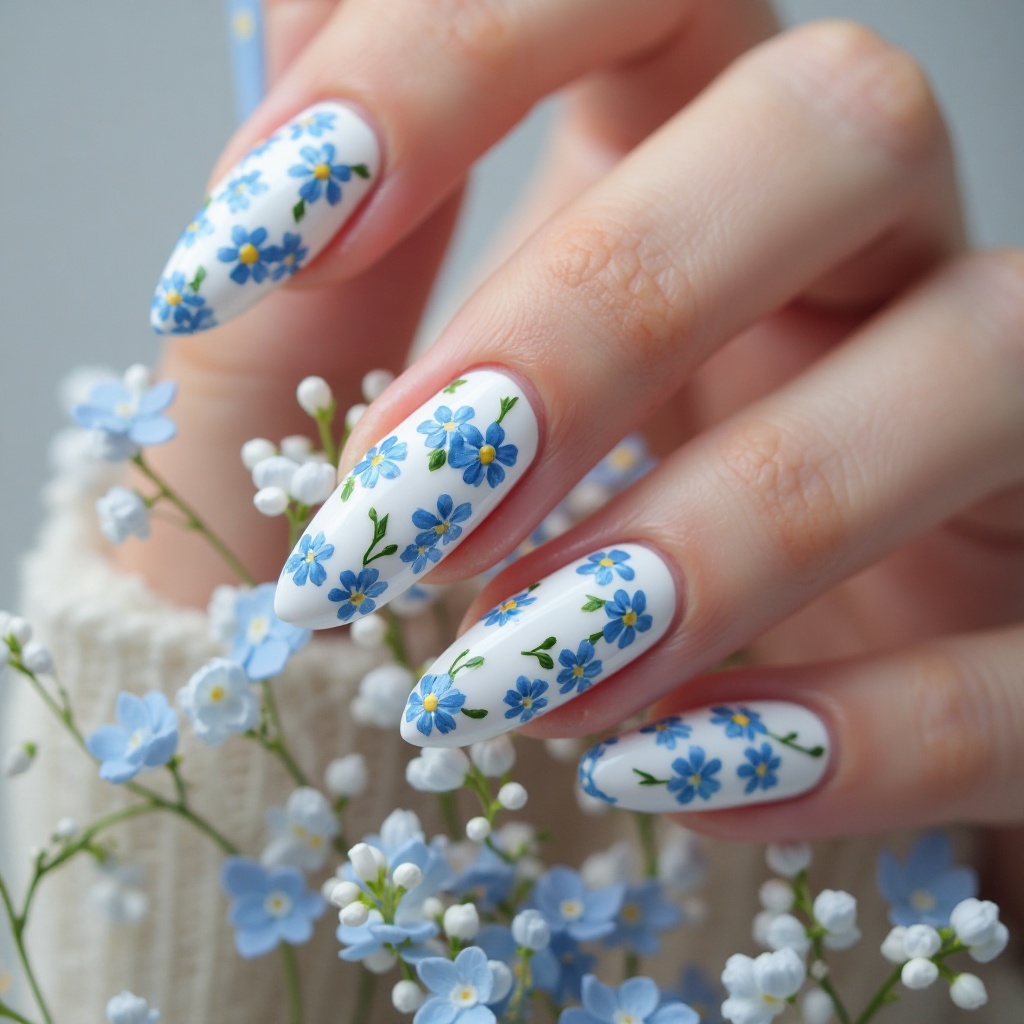
Tiny blue forget-me-nots with yellow centers create an incredibly sweet and nostalgic design on soft white or cream bases. The miniature scale of these five-petaled flowers keeps things delicate and precious, with occasional small clusters creating visual interest. Green stems and leaves stay minimal to let the signature blue blooms shine as the stars.
Why It Works for Spring: These symbolic flowers represent true love and remembrance, making them meaningful beyond just being pretty, and their soft blue stands out from typical pink floral designs.
Pro Tip: This design looks especially charming on short to medium nails where the tiny flowers maintain their precious, dainty quality.
DIY At Home: Paint all nails soft white or cream.
Creating forget-me-nots: Using smallest dotting tool or toothpick tip, create 5 tiny blue dots in circle formation (use any light blue polish). Add one microscopic yellow center dot. Create 3-5 flowers per nail in loose clusters. Use striping brush with green to add minimal stem lines.
This design is surprisingly easy because the flowers are SO small—imperfections disappear at that scale.
Product rec: Essie Bikini So Teeny (perfect light blue).
Difficulty: Easy | Time: 30 minutes
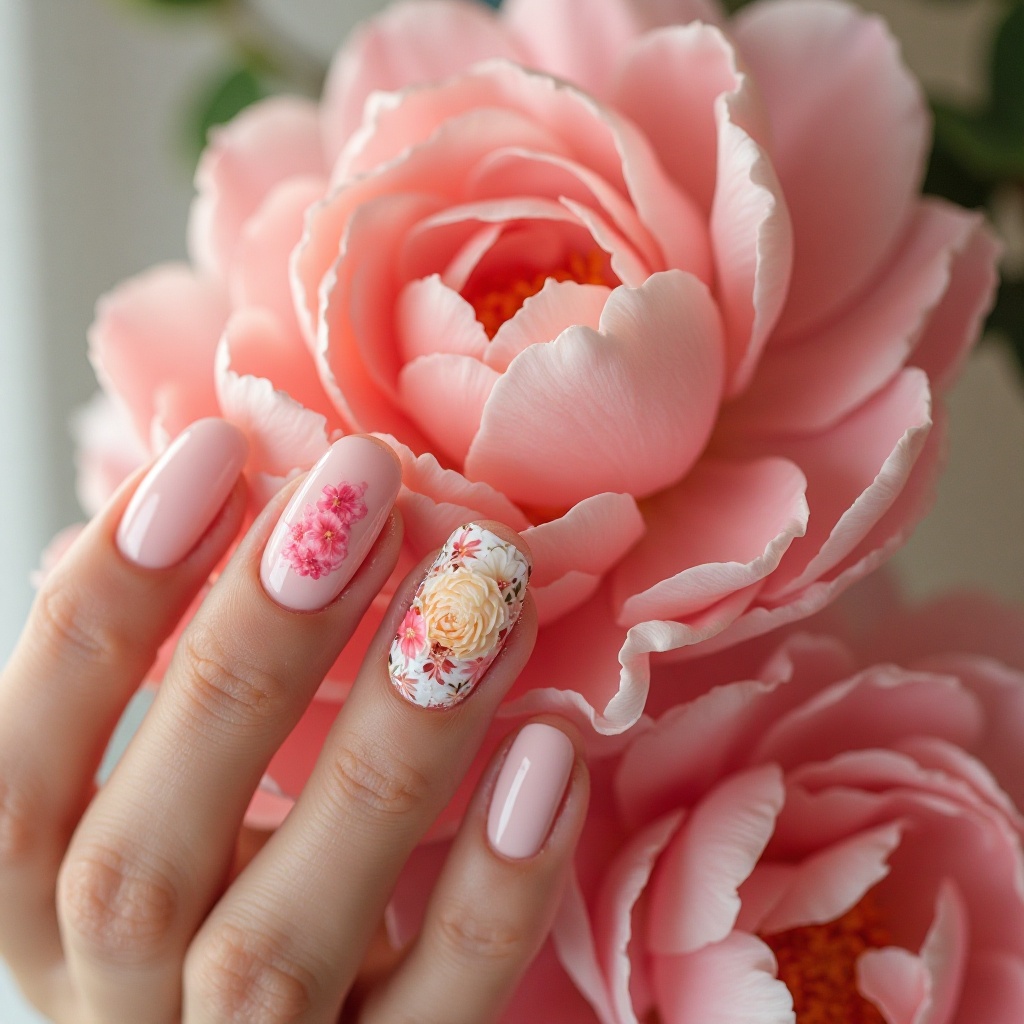
Blush Garden Romance
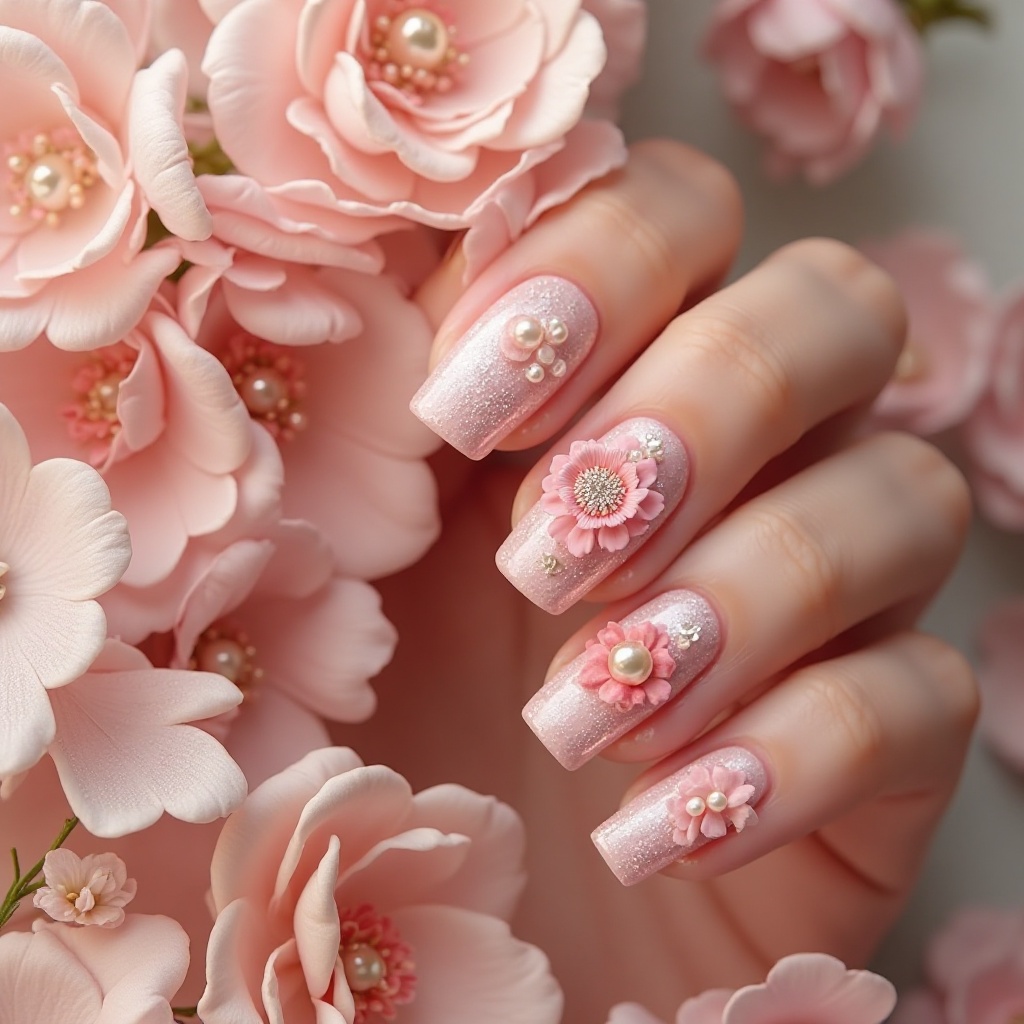
Layers of overlapping flowers in blush pink, nude, and soft peach create depth and dimension like you’re looking into a full garden. The tonal approach uses similar hues in different saturations—some flowers nearly disappear into the base while others pop forward. Pearl accents and subtle shimmer throughout add a dreamy, romantic haze to the entire design.
Why It Works for Spring: The soft, dreamy quality feels appropriate for spring weddings, showers, and romantic occasions while being subtle enough for everyday elegance.
Pro Tip: Request this design on your ring finger and middle finger only, keeping other nails in solid blush for a balanced, not-too-busy look.
DIY At Home: The layering technique: Apply blush pink base (Essie Fiji). Using 2-3 shades of pink (one lighter, one darker than base), create flowers using drag-petal method, overlapping some flowers. The overlapping creates the depth.
Add shimmer: Mix tiny drop of pearl polish into your lighter pink for some flowers.
Simplified version: Use ombre pink floral nail wraps that already have this layered effect built in.
Best for: Ring and middle fingers only, keep other nails solid blush.
Difficulty: Intermediate-Advanced | Time: 60 minutes
Spring Nail Trends to Know
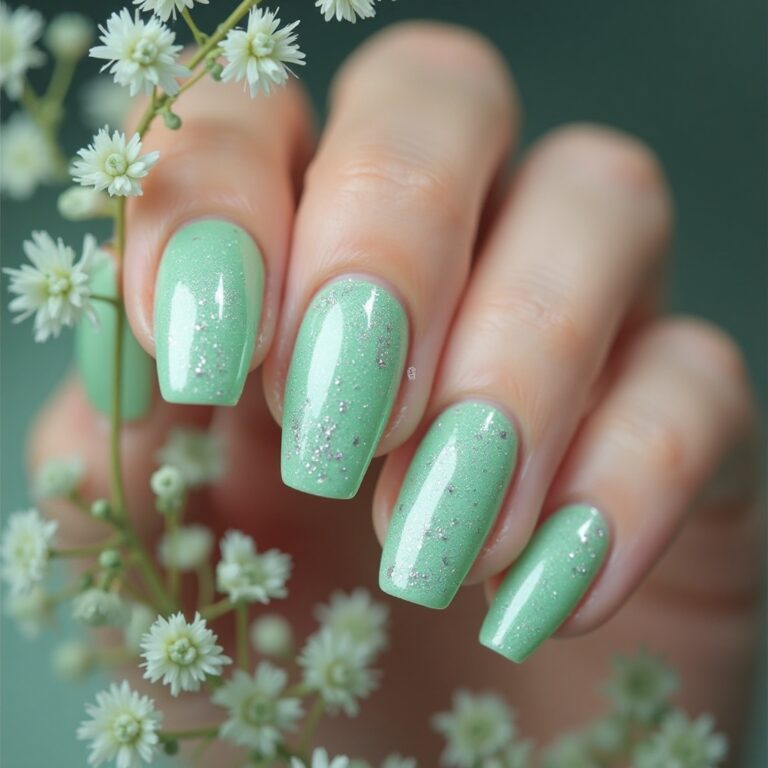
Jelly N ails with Embedded Florals Translucent gel polishes in soft tints create that coveted squishy, glass-like effect that’s dominating spring 2025. The see-through quality works perfectly for encapsulating dried flowers, floral decals, or hand-painted blooms that appear to float within the nail. This trend works especially well on longer nails where multiple layers create impressive depth.
Nail artists are getting creative with the jelly formula itself, mixing custom tints in peachy-pink, soft lavender, mint green, and pale yellow. The key is choosing a tint subtle enough to maintain that signature translucent quality while adding just enough color to complement your embedded florals.
DIY At Home: Use sheer jelly polishes like Essie Gel Couture Ballet Slippers or OPI Bubble Bath. Apply one coat, place small pressed flowers or tiny floral nail stickers on some nails, apply 2-3 more sheer coats over top to encapsulate. The layers create that glass effect. Seal with glossy top coat. Products you need: Sheer jelly polish, tiny dried flowers (Amazon sells nail art dried flowers) or small floral decals, glossy top coat. Time: 40 minutes | Difficulty: Intermediate
Negative Space Meets Botanical Art
Strategic bare nail placement combined with painted flower designs creates breathing room and modern minimalism that feels editorial. Rather than covering every millimeter with color, these designs intentionally use your natural nail as part of the composition—flowers start at the cuticle and fade toward the tip, or bloom only on one side of the nail.
This trend works beautifully for those transitioning from solid colors to nail art without fully committing. The negative space keeps designs wearable for professional settings while still delivering that artistic, fashion-forward edge.
DIY At Home: Leave nails bare (or use clear base coat only). Paint flowers on only half of each nail—either bottom half near cuticle or one side. Use the dotting method or small floral decals. The unpainted natural nail is intentional. Products: Clear base coat, 2-3 flower colors, top coat on painted areas only. Pro move: Use nail vinyls or tape to mask off the area you want to keep bare for crisp edges. Time: 35 minutes | Difficulty: Easy-Intermediate
Chrome and Metallic Floral Fusion
Mirror-finish chrome in rose gold, silver, and iridescent pearl is getting paired with traditional floral designs for unexpected futuristic edge. The chrome might outline flower petals, create reflective centers, or form an ombré base that transitions into painted blooms. This pairing of soft botanicals with high-shine metallics perfectly captures spring’s blend of nature and newness.
The most popular approach involves chrome accent nails alternating with floral designs rather than mixing both on every nail. This prevents visual overload while letting each element shine.
DIY At Home: The accessible method: Paint some nails with chrome polish (Sally Hansen Chrome or Essie Mirror Metallics), paint other nails with floral designs or apply floral decals. Alternate them. Adding chrome details: Use chrome nail powder (requires gel base and UV lamp—more advanced) OR use metallic nail art pens to outline flower petals in gold or silver on your floral nails. Beginner route: Chrome polish on accent nails + floral wraps on others. Time: 45 minutes | Difficulty: Easy (polish) / Advanced (powder)
Ultra-Thin French Tips with Florals
The classic French manicure is getting a delicate spring update with ultra-thin tip lines (1-2mm maximum) serving as the foundation for tiny flowers. These refined takes on French tips feel sophisticated and grown-up, with micro blooms painted along or just above the smile line.
The trend has evolved beyond white tips—soft pink, peach, and even pale lavender tips create subtle bases for coordinating floral designs. Some nail artists are creating “invisible” French tips using clear gel with only the floral details visible.
DIY At Home: Use French manicure tip guides for clean lines. Create thinner-than-normal white tips (1-2mm only). Along the white tip line, add 2-3 micro flowers per nail using toothpick and contrasting colors. Simplified version: Regular French tips + tiny pre-made floral stickers placed along smile line. Products: Nude base, white tip polish, French guides, floral stickers or dotting tool. Time: 35 minutes | Difficulty: Easy
Matte Finishes Transform Gardens
Velvety matte topcoats are transforming springtime florals from pretty to moody and sophisticated, adding unexpected depth you don’t get with glossy finishes. The lack of shine makes colors appear richer and more saturated—pinks look dustier, greens appear deeper, and whites take on a chalky elegance.
Many nail artists now mix finishes within a single design for maximum impact. Popular combinations include matte bases with glossy flowers, glossy bases with matte blooms, or alternating matte and glossy nails within one manicure.
DIY At Home: Create any floral design, let dry completely. Apply matte top coat (Essie Matte About You or Sally Hansen Matte Top Coat) over entire nail. For mixed finish: Use small detail brush to apply regular glossy top coat ONLY on the flower areas, keeping base matte. This requires precision but creates stunning contrast. Time-saver: Matte some nails, glossy others—easier than mixing finishes on same nail. Time: Add 10 minutes to any design | Difficulty: Easy (all matte) / Intermediate (mixed)
Abstract Botanical Impressionism
Loose, impressionistic flower shapes in painterly strokes are replacing photorealistic blooms for an artistic, gallery-worthy vibe. These designs borrow from abstract art and high-fashion prints, featuring blurred edges, unexpected color combinations, and compositions that suggest flowers rather than depicting them literally.
Think Monet’s garden paintings translated to your fingertips—color blocks that read as petals from a distance, brushstroke textures that create movement. This approach feels distinctly adult and sophisticated compared to literal floral illustrations.
DIY At Home: This style is forgiving because it’s SUPPOSED to look loose and imperfect! Apply white or cream base. Using a small flat brush (makeup eyeshadow brush works), dab different colors in rough petal shapes—don’t outline or get precise. Overlap colors while wet to create bleeding/blurred effect. Add rough center dots. The messier and more painterly, the better. Think: Quick confident strokes, not careful detail work. Colors: 3-4 coordinating shades. Time: 35 minutes | Difficulty: Easy-Intermediate
How to Choose the Right Spring Floral Nail Color
Match Floral Tones to Your Skin’s Undertones
Cool-toned skin glows with lavender, cool pink, icy blue, and true white floral designs—these shades enhance your natural rosiness without washing you out. Warm undertones shine with peach, coral, golden yellow, and cream-based florals that complement your natural warmth. If you’re neutral, you can wear nearly every spring shade, though peachy-pinks and soft mint greens tend to be universally flattering.
The quickest undertone test: check your wrist veins in natural light. Blue or purple veins indicate cool undertones, green veins mean warm, and if you see both equally you’re likely neutral.
At-home test: Hold different colored polishes near your face in natural light. The right undertone will make your skin look brighter and healthier; the wrong one makes you look washed out or sallow. Trust your immediate reaction.
Choose Based on Nail Length and Shape
Short nails (under 5mm of free edge) look best with micro florals, single accent stems, or French tip flowers that don’t overwhelm limited real estate. Tiny scattered blooms, delicate line art, and minimalist designs prevent that cramped, cluttered look while still delivering floral impact.
Medium nails (5-10mm) can handle more variety—half-coverage florals, small-to-medium blooms, or designs that feature 2-3 flowers per nail. This sweet-spot length works for both dainty and statement designs depending on your mood.
Long nails (10mm+) provide the perfect canvas for statement watercolor gardens, oversized peonies, full botanical scenes, and intricate multi-flower designs. Shape matters: Almond and stiletto create elegant vertical space for stems and vines, oval balances versatility with femininity, square tips provide stable geometric canvases for symmetrical blooms, and coffin/ballerina shapes showcase elaborate floral artwork beautifully.
Practical tip: Take a photo of your bare nails and sketch/overlay your desired design digitally to see if scale works before committing.
Factor in Your Lifestyle and Activities
High-activity lifestyles need chip-resistant gel formulas with smaller-scale designs—scattered micro florals hide wear better than large solid color blocks. If you’re constantly typing, gardening, or using your hands for detailed work, avoid raised 3D florals that can snag and choose flat, sealed designs instead.
Office professionals benefit from subtle pressed petal tips, French floral hybrids, or monochromatic white gardens that read polished rather than playful. Creative fields allow bolder watercolor gardens, neon outlines, or maximalist wildflower designs without raising eyebrows.
Finish selection for your lifestyle: Matte finishes show chips faster than glossy but hide scratches better—glossy reveals every tiny nick while matte camouflages minor wear. Gel polish lasts 2-3 weeks regardless of design, but intricate hand-painted florals with lots of detail lines show chips more obviously than simple designs, so factor in your tolerance for imperfection.
Coordinate with Your Wardrobe Colors
Spring wardrobes heavy in pastels benefit from florals in the same soft color family—lavender flowers if you live in purple tones, peachy blooms for coral lovers, soft pink roses for blush enthusiasts. This monochromatic approach creates cohesion between your overall aesthetic and your nails.
If your closet runs neutral (white, beige, gray, black), you have freedom to go bold with tropical hibiscus, rainbow petals, or neon outlines since your nails become the color statement. Those who wear lots of patterns might prefer subtle single-stem designs or pressed petals that don’t compete visually with busy clothing.
The easy wardrobe compatibility test: Lay your most-worn spring pieces together and note the dominant colors. Choose florals that either match this palette exactly or provide complementary contrast—if you wear lots of cool blues and grays, warm coral or peach florals create beautiful visual interest.
Select for Specific Occasions
Conservative professional settings call for nude-based florals, subtle pressed petals, thin French tips with micro blooms, or monochromatic white gardens that feel polished and appropriate. Avoid neon, oversized designs, or anything that draws more attention than your work.
Casual everyday wear allows maximum creativity—watercolor gardens, wildflower meadows, playful confetti flowers, and retro designs all work beautifully for running errands, weekend brunches, and relaxed social settings.
Special events guide: Oversized peonies for weddings, tropical hibiscus for beach events, gilded botanicals for formal occasions, bold poppies for art gallery openings. Match design complexity to formality—simple elegant designs for black-tie events, playful maximalist designs for casual celebrations. Spring outdoor activities like picnics and garden parties pair perfectly with wildflower meadows or cherry blossom designs that echo the natural setting.
Nail Maintenance & Longevity Tips for Spring
Protect Against Spring Gardening and Outdoor Activities
Increased outdoor time, gardening, and spring cleaning can wreak havoc on detailed floral designs, especially hand-painted artwork that chips more easily than solid colors. Wear nitrile gloves (they fit better than latex) for any wet work, yard activities, or cleaning sessions to prevent premature wear.
Intricate floral designs show chips more obviously than solid colors because the damage interrupts the artwork’s flow. Gardening soil is particularly destructive—it gets under nails and causes lifting at the cuticle line where your design starts.
Pro move: Keep a dedicated pair of cotton-lined gardening gloves and cleaning gloves by your back door and sink. The 10 seconds it takes to put them on saves hours of touch-up work and extends your manicure by a full week.
Quick fix for minor damage: Keep a small bottle of your base color and clear top coat handy for spot touch-ups between full manicures.
Combat Seasonal Dryness with Consistent Hydration
Spring’s transition from winter dryness to humid warmth causes nail expansion and contraction that compromises polish adhesion, leading to premature chipping and peeling. Your nails are porous and react to environmental moisture changes, which is why polish that looked perfect Monday can start lifting by Friday.
Apply cuticle oil minimum twice daily—morning and night—focusing on the cuticle area, sidewalls, and under the free edge. Jojoba oil absorbs quickly and mimics skin’s natural sebum, while vitamin E oil provides deeper conditioning for severely dry nails.
Product recommendations: CND Solar Oil ($8), Burt’s Bees Lemon Butter Cuticle Cream ($6), or pure jojoba oil from health food stores ($10). Keep a cuticle oil pen in your bag, car, and desk drawer for moisture maintenance throughout the day, especially after washing hands.
Mistake to avoid: Don’t rely on hand lotion alone for nail hydration. Most hand creams contain silicones that sit on top of skin rather than penetrating the nail plate. You need actual oils that absorb into the nail structure.
Time Your Salon Appointments Strategically
Gel manicures typically last 2-3 weeks, but floral designs with lots of fine detail may look tired around day 14 when regrowth creates visible gaps at the cuticle. The more intricate the design, the more obvious that growth line becomes because it interrupts the artwork’s composition.
Book fills every two weeks for acrylics with florals to maintain crisp designs without that grown-out look. For regular gel polish, plan complete changes every 2.5-3 weeks before excessive regrowth makes your beautiful florals look sloppy.
DIY maintenance schedule: Press-on florals give you flexibility to swap designs with spring’s rapidly changing trends without commitment or damage—wear each set 5-7 days, remove, let nails breathe for a day, then apply a fresh design. This rotation keeps you current and prevents nail damage from long-term wear.
Pro move: Schedule appointments for early weekdays (Monday-Wednesday) when salons are less crowded and your tech has more time for detailed floral work. Weekend appointments often feel rushed and details suffer.
Invest in Quality Base and Top Coats
Professional-grade base and top coats make the difference between florals that last 2 days versus 2+ weeks, yet many people skip investing in quality formulas. A good base coat creates proper adhesion and prevents staining from bold floral pigments, while a quality top coat seals everything and provides chip resistance.
Base coat recommendations: OPI Natural Nail Base Coat ($10), Essie First Base ($9), Orly Bonder ($9)—all create flexible foundations that prevent cracking and peeling.
Top coat must-haves: Seche Vite Quick Dry Top Coat ($10)—dries in minutes with glass-like shine. Out the Door Top Coat ($8)—budget-friendly quick-dry option. Glisten & Glow HK Girl Top Coat ($12)—long-wearing with serious scratch resistance.
Reapply top coat every 2-3 days over regular polish florals to refresh shine and seal any minor chips before they spread. This simple maintenance step can double your manicure’s lifespan with minimal effort.
Application trick: Apply top coat in thin layers, capping the free edge each time. Thick gloopy layers look nice initially but chip faster.
Avoid These Polish-Destroying Elements
Chlorine from pools strips polish and causes yellowing—wear waterproof gloves for pool cleaning and apply a thick top coat layer before swimming. Salt water is equally destructive, drying out nails and lifting polish at edges—rinse hands with fresh water immediately after ocean dips.
Hand sanitizer contains high alcohol concentrations that break down polish formulas, causing bubbling and peeling; let sanitizer dry completely before touching anything and consider switching to gentler alcohol-free formulas during a fresh manicure. Hot water from long showers or dish washing expands nails, then they contract when cool, which cracks polish—wear gloves for dishes and keep showers under 10 minutes.
Acetone-based products (nail polish remover, some cleaning supplies) dissolve polish on contact; use acetone-free removers when fixing mistakes and wear gloves for household cleaning. UV exposure yellows white florals and fades bright colors; apply SPF hand cream or wear UPF gloves when driving for extended periods.
The prevention rule: If you wouldn’t want it on your face, keep it away from your fresh floral manicure. Most nail damage happens from neglecting this simple principle.
Know When to Remove and Start Fresh
Watch for these signs it’s removal time: visible regrowth beyond 3-4mm creating obvious gaps in your floral design, multiple chips exposing natural nail in high-impact areas (tips and sidewalls), yellowing of white floral elements from sun exposure or product buildup, lifting at cuticles that allows water underneath (this leads to bacterial growth), or general dullness even after top coat refresh.
Proper removal for regular polish: Soak cotton pad in acetone-free remover (acetone damages nails over time), press onto nail for 30 seconds to dissolve polish, wipe gently toward tip. Never scrub back and forth—it damages the nail surface.
Gel removal at home: Buff off shiny top layer lightly, soak cotton pads in pure acetone, place on each nail, wrap fingertips in aluminum foil, wait 10-15 minutes, gently push off softened gel with orangewood stick. Never force or peel.
Recovery schedule: Give nails a break between gel or acrylic applications if you notice thinning, peeling, or brittleness—one week bare minimum, two weeks ideally. During break periods, use strengthening treatments like OPI Nail Envy ($18) or Nailtiques Formula 2 ($17) to rebuild damaged nail plates.
Common Floral Nail Mistakes (And How to Fix Them)
Choosing Florals Too Large for Your Nail Size
The problem: Oversized flower designs on short or narrow nails look cramped and awkward, with petals getting cut off at the sides or flowers appearing squashed. When the floral design overwhelms the available space, it loses its beauty and just looks messy.
The fix:
- Scale flowers to fit your actual nail dimensions—if you have small nail beds, choose micro florals, scattered petals, or single delicate stems
- Save large peonies, oversized hibiscus, and full watercolor gardens for medium to long nails where they have room to breathe
- Use the “1/3 rule”—your largest flower element shouldn’t take up more than 1/3 of your nail surface
- Test by placing decals or drawing designs on fake practice nails first
Pro tip: Bring reference photos that feature nails similar in size and shape to yours rather than aspirational long almond nails if yours are short and square.
Applying Too Many Floral Elements Per Nail
The problem: Cramming multiple flowers, leaves, stems, and accents onto each nail creates visual chaos that’s overwhelming rather than beautiful. Your eye doesn’t know where to focus, and the intricate details that make florals special get lost in the clutter.
The fix:
- Follow the “less is more” principle—one medium flower or 2-3 micro florals per nail maximum
- Use negative space intentionally to let your florals breathe
- Consider doing full floral coverage on just 1-2 accent nails and keeping the rest simple with solid complementary colors
- Remember that restraint looks more expensive and elevated than busy maximalism
Pro tip: If you love detailed florals, go for complexity in shading and detail work on fewer blooms rather than quantity of flowers.
Skipping Proper Nail Prep for Detailed Designs
The problem: Jumping straight to floral application without proper prep causes premature chipping, especially with intricate hand-painted designs that require perfect adhesion. Oil residue, previous polish remnants, or uneven nail surfaces prevent proper bonding and your beautiful florals start peeling within days.
The fix:
- Always start with clean, oil-free nails—wash hands with soap, then wipe nails with rubbing alcohol
- Push back and remove cuticles properly so polish can reach the base of your nail without gaps
- Lightly buff the nail surface with a fine-grit buffer (180 grit or higher) to remove shine and create texture for better adhesion
- Apply a quality base coat and let it dry completely before any color or design work
- Dehydrate nails before gel application using rubbing alcohol or nail dehydrator
Pro tip: The prep work takes 10 extra minutes but extends your manicure lifespan by 1-2 weeks—it’s the most valuable time investment in your entire manicure process.
Choosing the Wrong Finish for Your Floral Style
The problem: Matte finishes on designs that need dimension (like watercolor florals) fall flat, while glossy finishes on vintage roses can look too modern and plastic. The wrong finish choice undermines your floral design’s intended aesthetic and makes even beautiful nail art look amateurish.
The fix:
- Match finish to design intent: glossy for tropical, fresh-picked florals; matte for vintage, romantic, or moody designs; satin for elegant, sophisticated looks
- Consider mixing finishes—glossy base with matte flowers or vice versa creates dimensional interest
- Test finish choices on a single nail before committing to all ten
- Remember that matte shows chips faster but glossy shows every scratch
- Use satin/semi-matte finishes (like OPI Natural Nail Top Coat) as a middle ground
Pro tip: When in doubt, choose glossy—it’s more forgiving of application imperfections and maintains that fresh-manicure look longer than matte alternatives.
Not Sealing the Free Edge
The problem: Forgetting to cap the free edge (painting the tip of your nail) with both base and top coat causes chipping to start within 24-48 hours. This is especially problematic with detailed floral designs where the artwork often extends to the tips—once chipping starts, it ruins the entire composition quickly.
The fix:
- After applying base coat, swipe the brush across the free edge tip before curing or drying
- Do the same with each color layer and your floral design elements
- Finish by capping with top coat, paying special attention to seal those tips completely
- This “wrap the tip” technique creates a protective seal that prevents water infiltration and mechanical damage
- Reapply top coat to tips every 2-3 days for extended wear
Pro tip: Think of your nail tip as the most vulnerable point—it hits surfaces constantly throughout your day, so it needs triple the protection of your nail plate surface.
Floral Nail FAQ
Q: Will floral designs look good on short nails? A: Absolutely! Choose micro florals, single-stem accents, tiny daisy chains, or French tip florals specifically designed for limited space. The key is scaling the flower size to your nail—smaller nails need smaller blooms. Avoid oversized peonies or full watercolor gardens that need more canvas.
Q: How long do floral nail designs typically last? A: Gel florals last 2-3 weeks before regrowth becomes obvious. Regular polish florals last 5-7 days with proper top coat maintenance. Press-on floral nails last 5-10 days depending on application and care. Hand-painted florals may show wear slightly faster than decals or wraps due to the layering.
Q: Can I create floral nails at home without artistic skills? A: Yes! Use floral nail stickers, water decals, or nail wraps for professional results with zero painting skills required. The dotting method (5 dots in a circle) creates simple flowers anyone can do. Nail art pens give you marker-like control for outlines. Start with these beginner-friendly methods before attempting freehand painting.
Q: What’s the easiest floral design for complete beginners? A: The dotting method for tiny daisies or cherry blossoms. You literally just make 5 small dots in a circle with one color, add a contrasting center dot, and you have a flower. It takes 20-30 minutes for all ten nails and looks surprisingly professional with practice.
Q: Do I need gel polish for floral nails, or can I use regular polish? A: Regular polish works perfectly fine for floral designs! Gel lasts longer and provides a harder surface for layering details, but regular polish with quality base and top coats can achieve beautiful florals that last a week. The choice depends on your patience for reapplication and budget.
Q: How do I prevent my hand-painted florals from smudging? A: Work on completely dry base layers—wait 3-5 minutes between coats. Use quick-dry drops or spray after painting florals. Apply thin layers rather than thick gloops that take forever to dry. Use acrylic paint instead of polish for details (it dries faster and doesn’t string). Seal immediately with top coat once design is dry.
Q: Can I mix different floral styles on different nails? A: Yes, but keep a unifying element for cohesion—same color palette, same base color, or same flower scale. For example, mix daisies and roses but keep them all in pink/white tones. Or do different flowers per nail but all the same size. Complete randomness can look chaotic rather than intentional.
Q: What should I do if my floral decals keep wrinkling or bubbling? A: You’re either oversoaking them (making them too soft) or not pressing out water bubbles properly. Soak decals only 20-30 seconds maximum. Once applied, use a lint-free wipe or paper towel to press firmly from center outward, pushing all water and air bubbles to the edges. Seal immediately with top coat.
Ready to embrace spring’s most romantic nail trend? Save your favorite floral designs from this list, screenshot inspirations to show your nail tech, and don’t be afraid to try these techniques at home—start with the beginner-friendly options and work your way up!
Remember, practice makes progress, and even “imperfect” floral nails are better than bare nails. Share this article with your nail-obsessed friends, tag us in your DIY floral nail photos, and let’s celebrate spring together one bloom at a time!