17 Stunning Tulip Nails Ideas to Embrace Fresh Spring Elegance
Tulip nails are having a major moment this spring, and it’s easy to see why. These delicate, floral-inspired designs capture the essence of the season with their soft petals, fresh color palettes, and romantic appeal.
Whether you’re drawn to minimalist blooms or bold botanical statements, tulip nails offer the perfect balance of elegance and wearability that transitions beautifully from brunch dates to garden parties.
Minimalist & Romantic Tulips
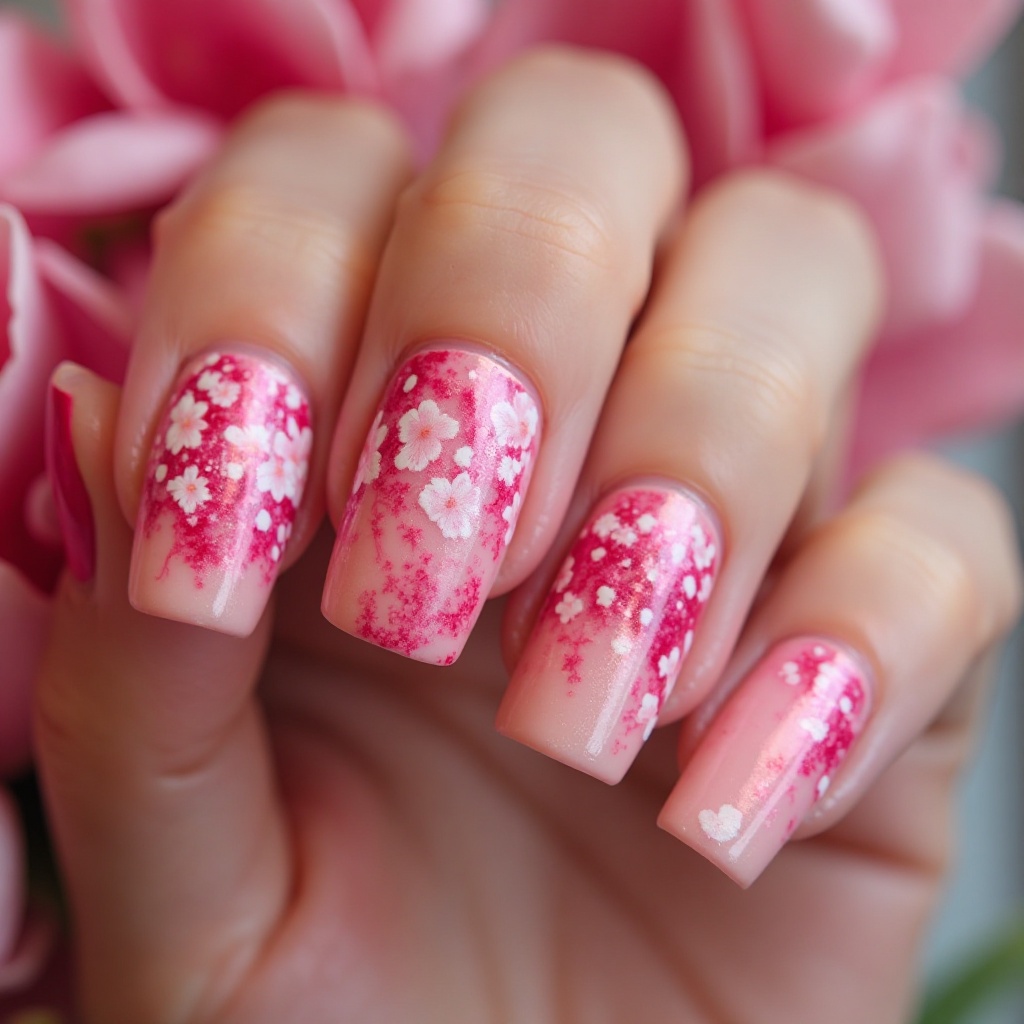
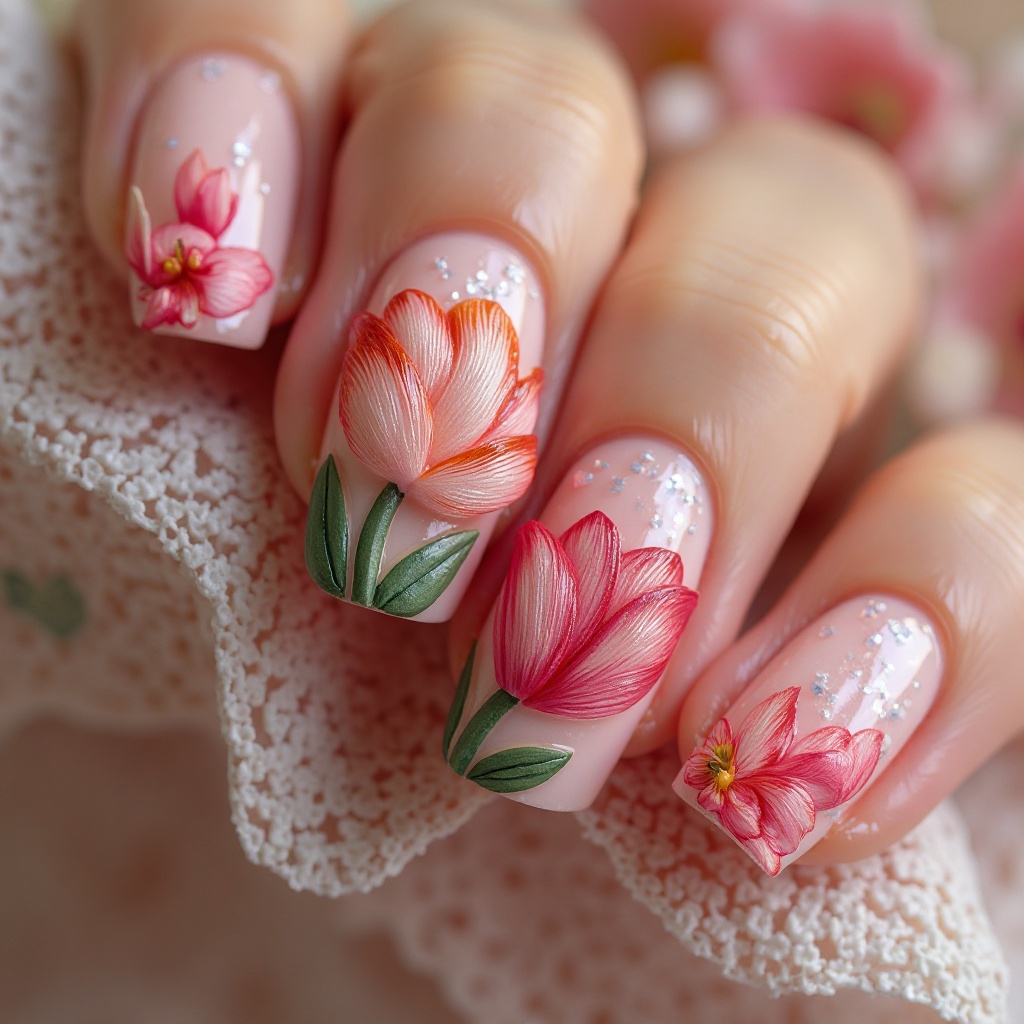
1. Soft Pink Tulip Tips
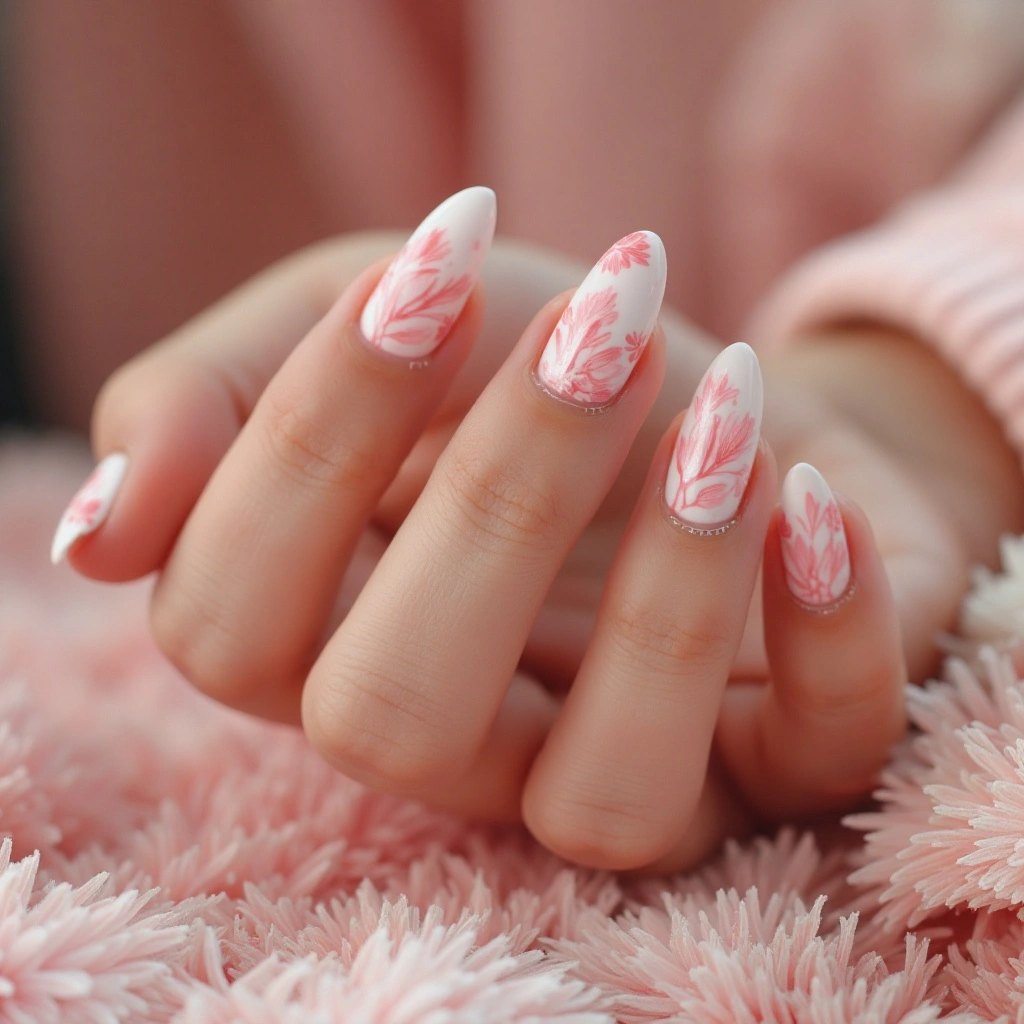
Delicate baby pink tulips painted along the tips of almond-shaped nails create an effortlessly feminine look. The petals are rendered in watercolor-style strokes with subtle white highlights, giving them a dreamy, ethereal quality. A glossy topcoat enhances the fresh-picked flower effect while keeping the design soft and sophisticated.
Why It Works for Spring:
- The barely-there pink base elongates fingers while the tip placement keeps the design practical for everyday wear
- Perfect for weddings, bridal showers, or anyone wanting a romantic touch without overwhelming color
Pro Tip:
- Request thin, wispy brush strokes for the petals to maintain that delicate watercolor effect
- Pair with an almond or oval shape to mirror the natural tulip silhouette
DIY at Home:
Start with a sheer pink base (Essie “Ballet Slippers” or OPI “Bubble Bath” work perfectly). After it dries completely, use a small detail brush dipped in slightly darker pink to paint three small petals at each nail tip using the 5-stroke technique.
Immediately while wet, dab a tiny bit of white polish on a toothpick at the center of each petal—let it blend naturally for that watercolor effect. The key is working quickly while polish is still wet. Seal with clear top coat once fully dry (wait 5 minutes). Expected time: 30-40 minutes for both hands.
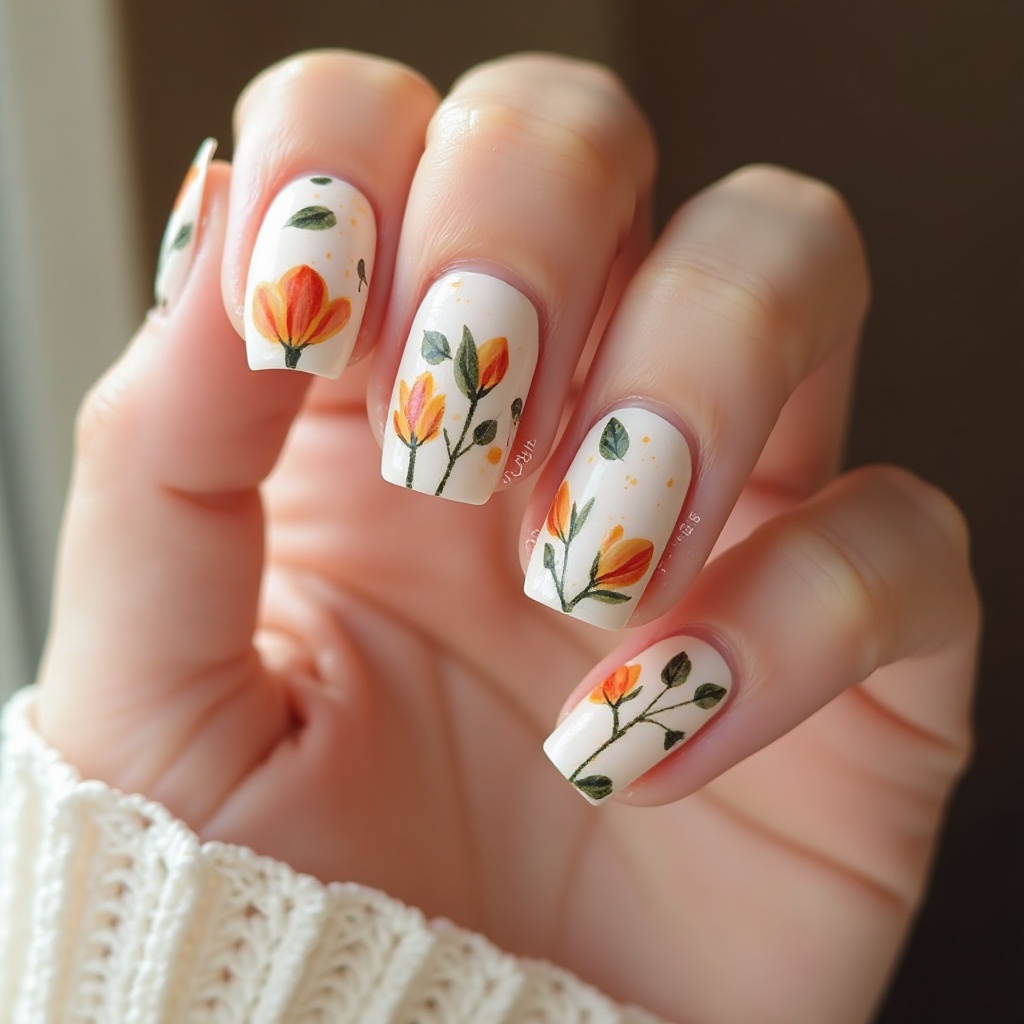
2. White Tulip French Twist
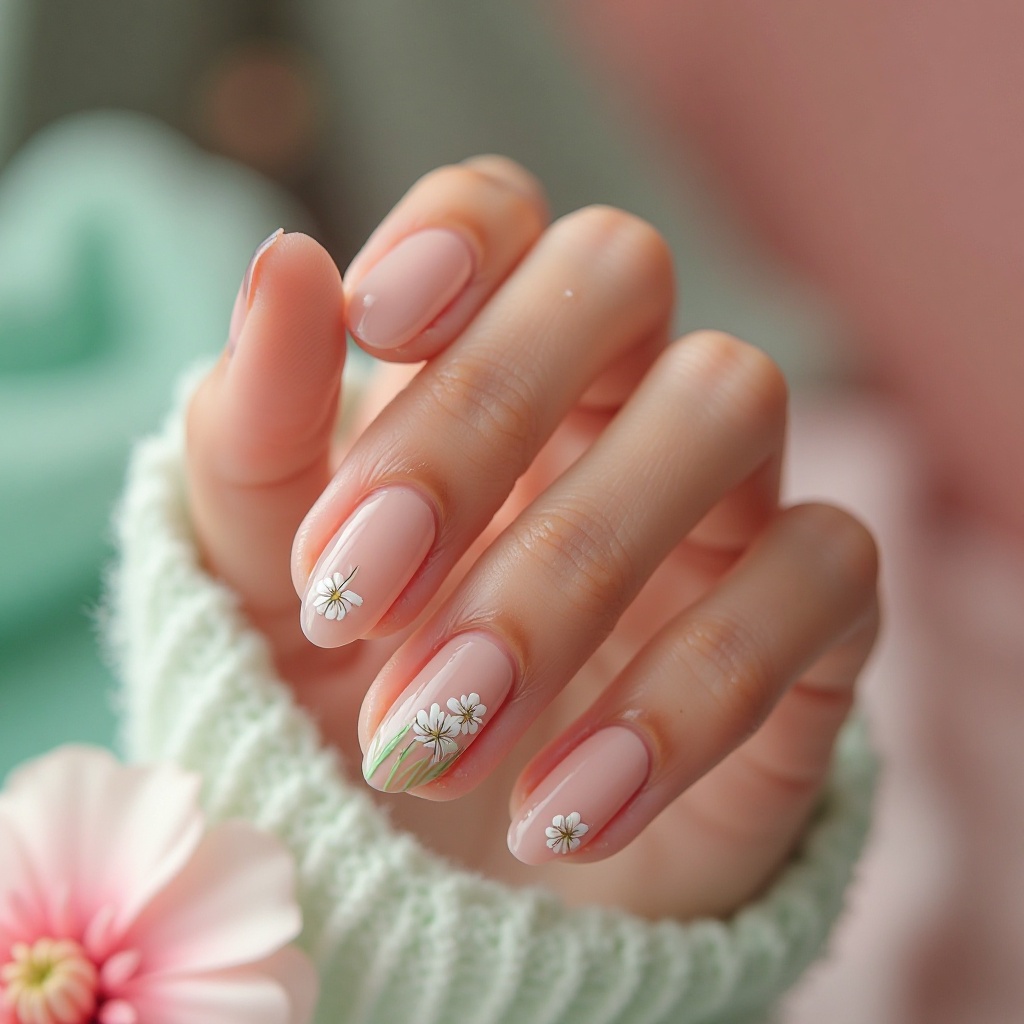
Classic French tips get a springtime upgrade with tiny white tulips painted on a sheer nude base. Each nail features one to two tulips with soft green stems, positioned diagonally across the nail bed. The minimalist approach keeps it sophisticated while the floral detail adds unexpected charm.
Why It Works for Spring:
- Combines the timeless elegance of French manicure with seasonal freshness
- The white-on-nude palette works with any outfit and feels clean and modern
Pro Tip:
- Keep tulips small and strategically placed—one accent nail or alternating pattern prevents the design from feeling busy
- Choose a sheer pink or peachy nude base for warmth against cooler skin tones
DIY at Home:
Apply two coats of sheer nude polish (Sally Hansen “Sheer Bare” or Essie “Marshmallow”). Once completely dry (5-7 minutes), use a thin striping brush to paint tiny green stems diagonally—think thin curved lines, not thick. Then use white polish with your detail brush to add 3 small petals at the top of each stem using the basic tulip technique.
Keep flowers small (about 1/4 of your nail width). Only do this on your ring finger and thumb, leaving other nails simple nude for a sophisticated look. Expected time: 25-30 minutes.
Bold & Colorful Blooms
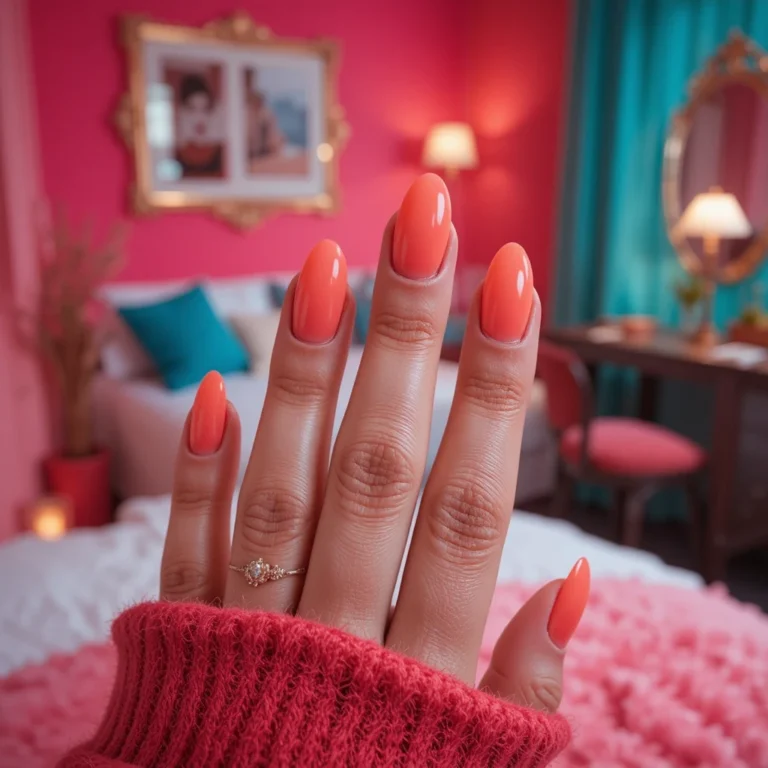
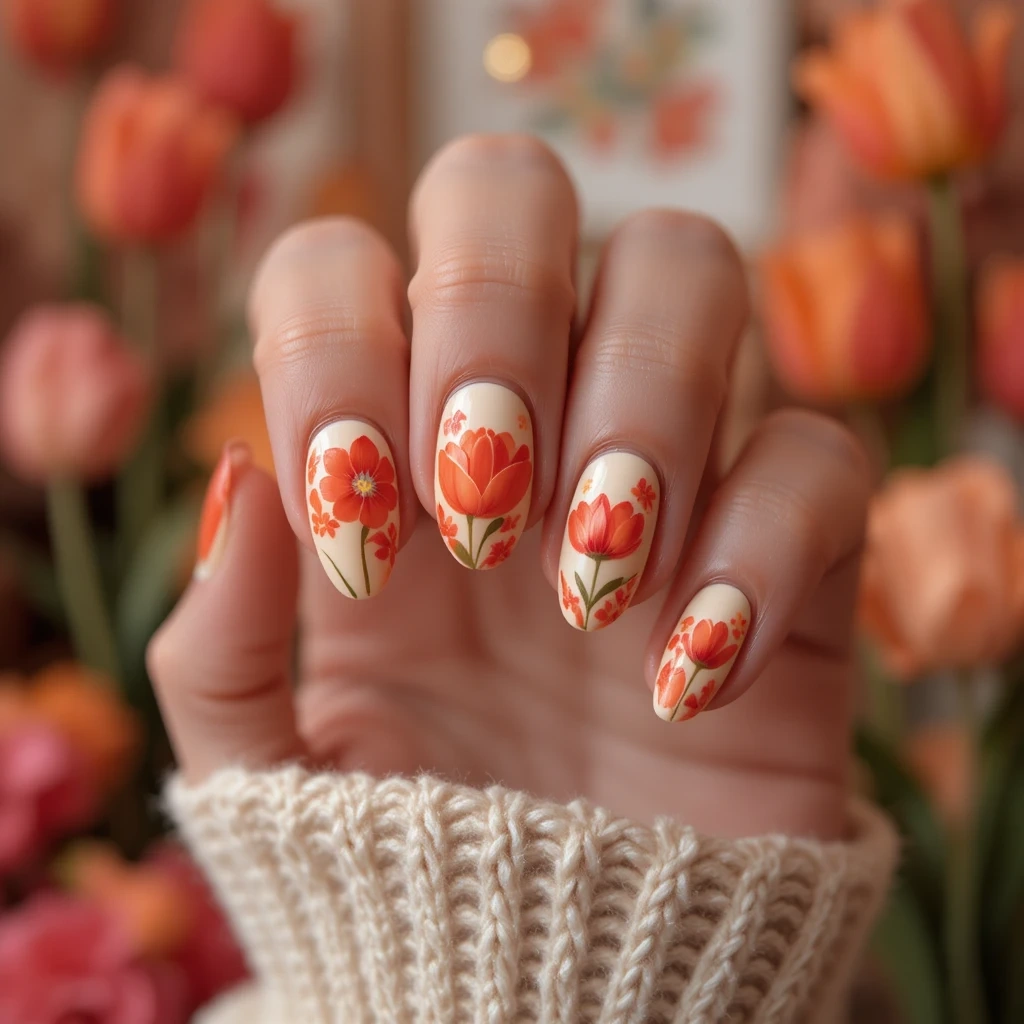
3. Sunset Tulip Garden
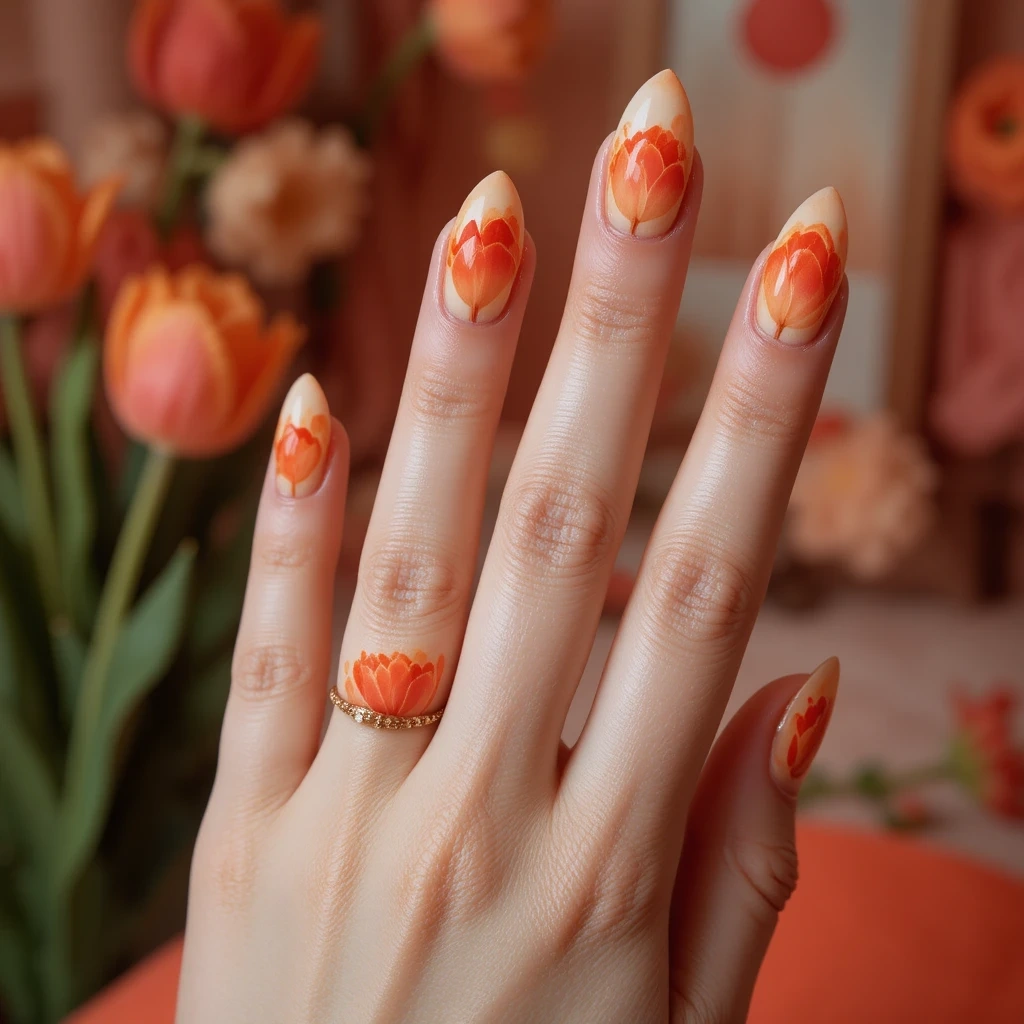
Vibrant orange and coral tulips burst across a warm cream base, creating a bold statement that screams spring confidence. The flowers feature gradient petals that shift from deep tangerine to soft peach, with dimensional shading that makes them pop. Scattered across different nails in varying sizes, this design feels like walking through a tulip field at golden hour.
Why It Works for Spring:
- The warm color palette complements the longer, sunnier days and brings instant mood-boosting energy
- Perfect for those who want to make a statement and aren’t afraid of eye-catching nail art
Pro Tip:
- Request a matte topcoat on the base with glossy flowers to create textural contrast
- Works best on medium to long nails where the larger blooms have space to shine
DIY at Home:
Apply two coats of warm cream polish (China Glaze “Vanilla Oasis”). Once dry, create gradient petals by applying orange polish to a small makeup sponge, then dabbing coral on one edge. Press gently onto your nail where you want the tulip to be, creating an ombré petal effect. Use a cleanup brush dipped in acetone to shape the blob into petal forms.
Repeat for 2-3 tulips per nail, varying sizes. Add thin green stems with a striping brush. This technique takes practice—try on your non-dominant hand first. Expected time: 45-60 minutes. Product recommendation: LA Colors Color Craze nail polishes are budget-friendly and come in excellent warm tones.
Elegant Accent & Chrome Details
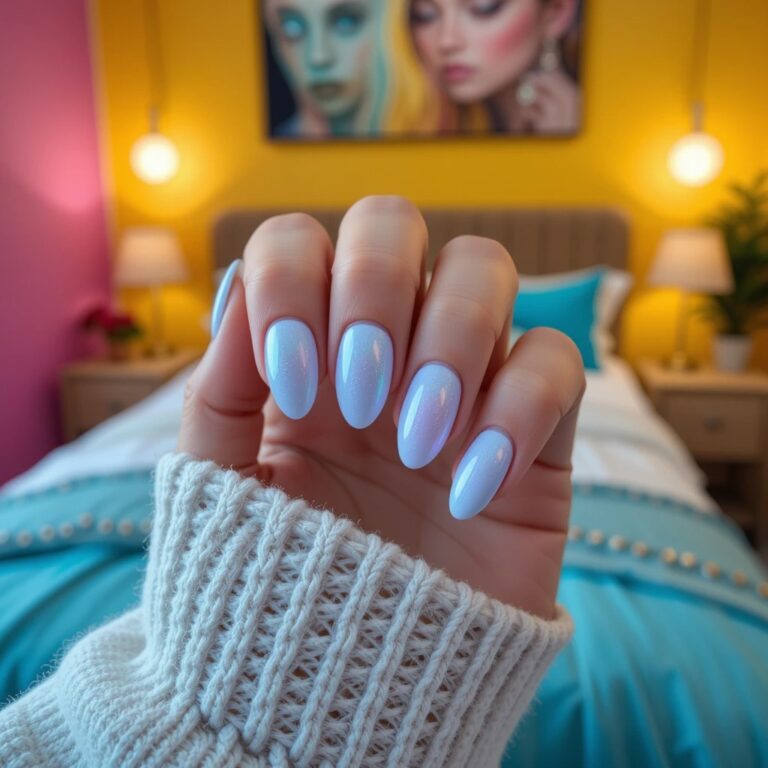
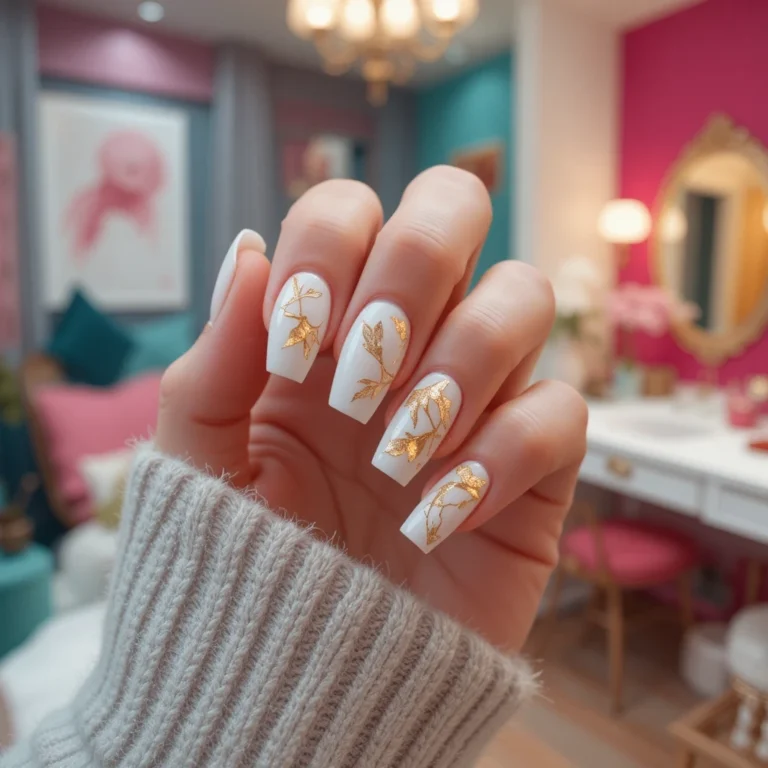
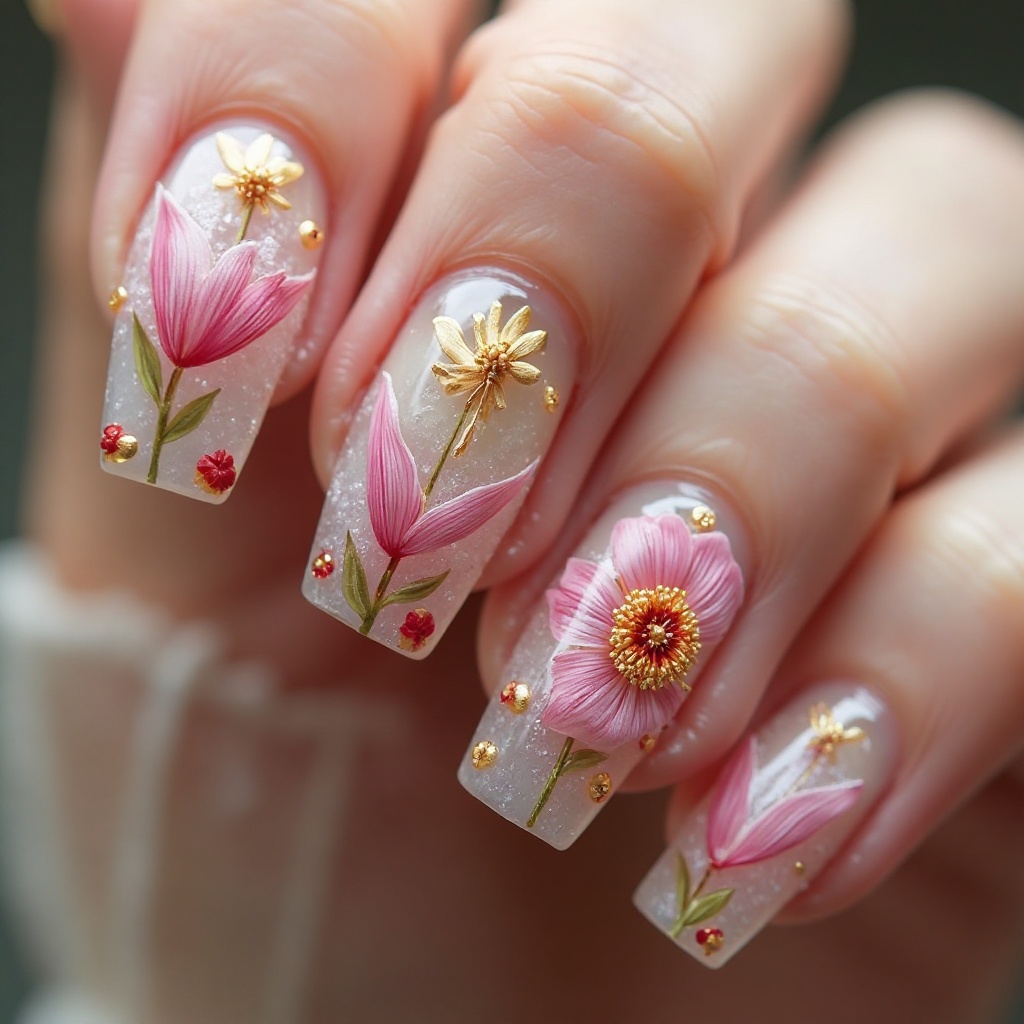
4. Lavender Tulip with Gold Foil
Soft lavender tulips float on a milky white base, accented with delicate gold foil stems and leaves that catch the light. The purple petals have a semi-translucent quality that feels fresh and airy, while the metallic details add just enough glamour. One or two accent nails feature this design, while others remain a clean milky white.
Why It Works for Spring:
- Lavender is a quintessential spring color that feels both calming and sophisticated
- The gold foil elevates the design from casual to special-occasion-worthy without feeling overdone
Pro Tip:
- Apply gold foil while the nail art is still slightly tacky for the best adhesion
- Choose square or squoval shapes to provide a stable canvas for the detailed foil work
DIY at Home:
Paint all nails with two coats of milky white polish (Zoya “Snow White”). On your ring and middle fingers only, paint small lavender tulips using the 5-stroke method once the base is completely dry. Before adding top coat, use tweezers to place small pieces of gold foil (available in craft stores, $3-5 per pack) as stems and leaves—press gently onto slightly tacky clear polish for adhesion.
Seal everything with top coat, being careful not to disturb the foil. The foil can shift, so work slowly and use a gentle dabbing motion with your top coat brush. Expected time: 35-40 minutes. Product tip: Revlon “Lilac Pastelle” is an excellent sheer lavender for this look.
5. Sage Green Tulip Medley
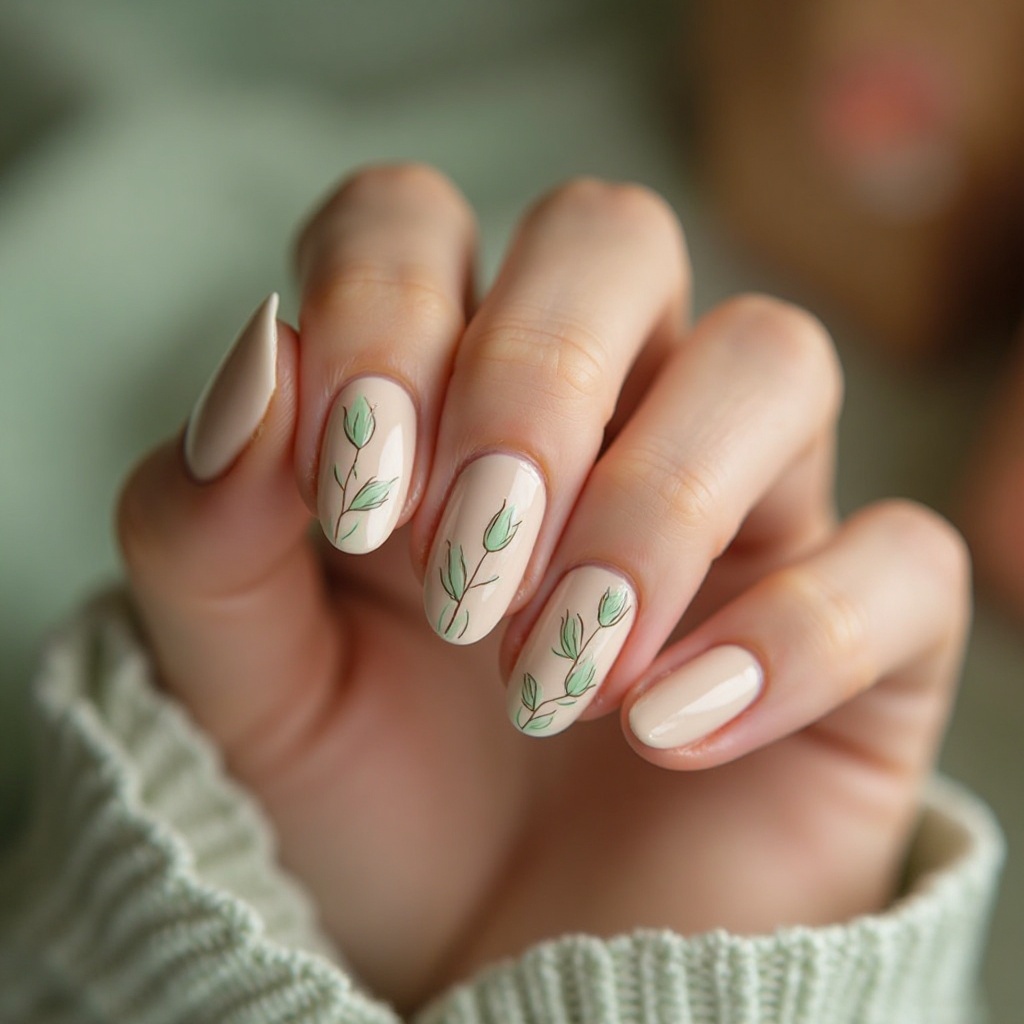
Muted sage green tulips in various stages of bloom create a botanical illustration effect across short to medium nails. Some flowers are shown in profile, others face forward, and a few are captured as closed buds, all painted with fine detail. The base is a sheer milky nude that lets the green take center stage, with tiny brown stems connecting the compositions.
Why It Works for Spring:
- Sage green is incredibly on-trend and offers a fresh alternative to traditional pink florals
- The varied tulip positions create visual interest while maintaining an earthy, grounded aesthetic
Pro Tip:
- This design works beautifully on shorter nails since the variety of bloom angles fills space efficiently
- Request a semi-matte finish to enhance the botanical illustration vibe
DIY at Home:
Apply sheer nude base. Mix a tiny drop of forest green with white polish on aluminum foil to create custom sage color (or use Essie “Turquoise & Caicos” mixed with white). For variety, paint some tulips facing forward (3 petals visible), some in profile (curved single stroke), and some as closed buds (two small strokes meeting at a point).
Use a brown or dark green thin brush for stems. This design requires patience but is very forgiving because the “sketchy” quality is part of the aesthetic—imperfect lines actually add to the botanical illustration feel. Expected time: 40-50 minutes.
Dreamy Pastel Collections
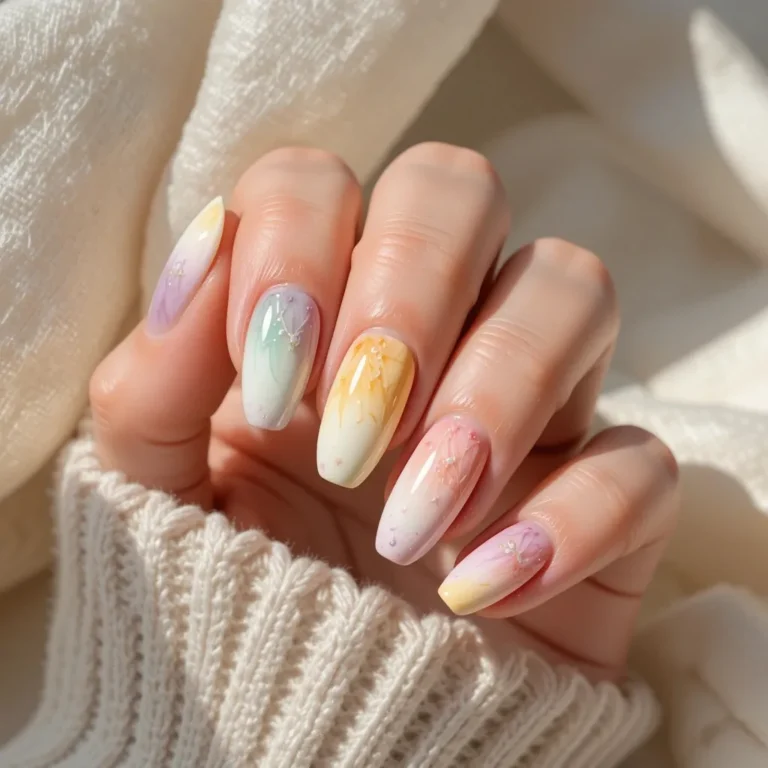
6. Rainbow Pastel Tulip Mix
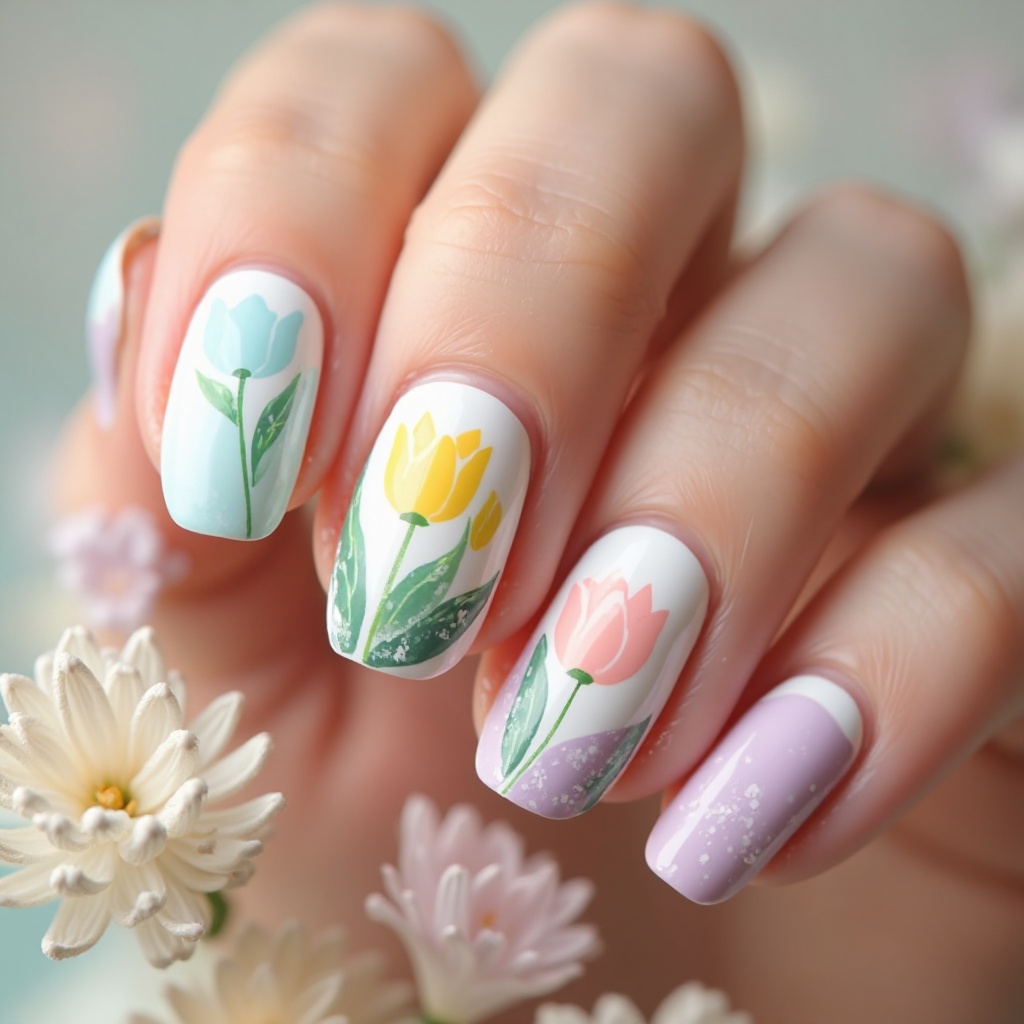
Each nail showcases a different pastel tulip—baby blue, mint green, soft yellow, pale pink, and lilac—on a crisp white base. The tulips are painted in a simple, graphic style with clean lines and solid color fills. This playful approach feels cheerful without being childish, like an Easter egg hunt in bloom form.
Why It Works for Spring:
The variety prevents boredom while maintaining cohesion through the shared pastel palette. It’s conversation-starting nail art that still feels sophisticated and wearable for adults.
Pro Tip:
Keep the tulip shapes consistent across all nails even as colors vary—this creates visual harmony. Request each tulip to face the same direction for a polished, intentional look.
DIY at Home:
This is actually one of the easier designs for beginners. Paint all nails with two coats of white polish (any bright white works). Once completely dry, dedicate each nail to one pastel color. On your thumb, paint a baby blue tulip using the 5-stroke method. On your index, use mint green. Continue with yellow, pink, and lilac on remaining fingers. Keep all tulips the same size and position (centered, facing the same direction).
The uniformity of placement makes the color variety look intentional rather than chaotic. No stems needed—the graphic simplicity is part of the charm. Expected time: 30-35 minutes. Product tip: Sinful Colors pastel collection offers all these shades for under $2 each.
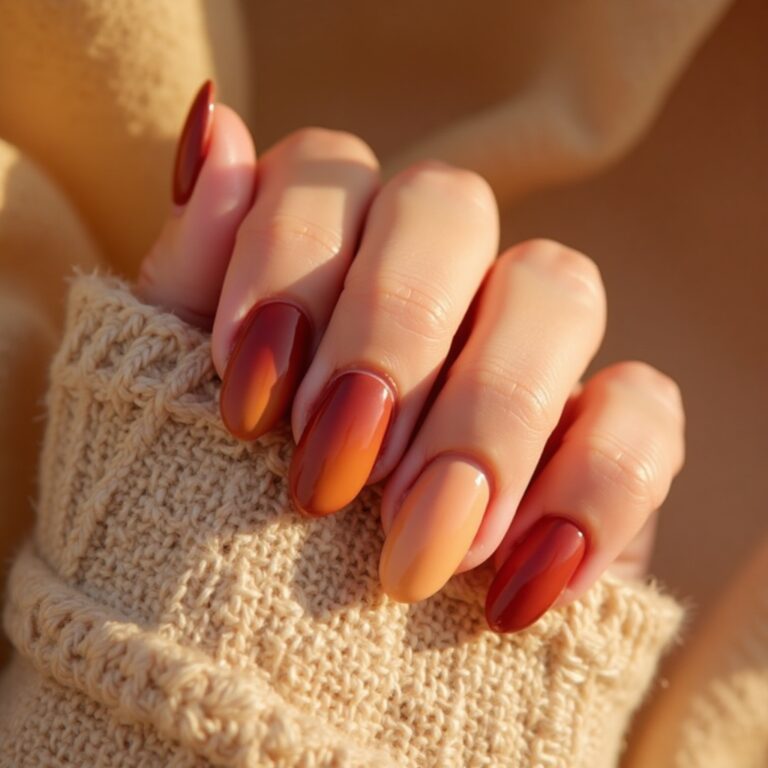
7. Ombré Pink Tulip Fade
A gradient base that transitions from deep rose at the cuticle to pale blush at the tips gets adorned with tonal pink tulips throughout. The flowers blend seamlessly into the ombré background, creating a monochromatic masterpiece. Some petals are outlined in slightly darker pink for definition without harsh contrast.
Why It Works for Spring:
The tonal approach feels incredibly refined and modern, like high-fashion nail art. The ombré technique adds depth while the tulips provide interesting focal points at different intensities.
Pro Tip:
Ensure your nail tech uses at least three shades of pink for a smooth gradient transition. The tulips should be painted in the mid-tone pink so they’re visible but not jarring against the fade.
DIY at Home:
This requires the makeup sponge technique. On a small cosmetic sponge, paint vertical stripes of three pink shades: deep rose, medium pink, and pale blush, slightly overlapping. Press and roll the sponge onto your nail from cuticle to tip. Repeat 2-3 times for opacity, letting dry between layers.
Clean up edges with acetone on a small brush. Once the gradient is completely dry (8-10 minutes), add tulips in the medium pink shade—they’ll be most visible in the darker and lighter areas of the gradient. This is an intermediate technique; expect some mess and cleanup. Expected time: 50-60 minutes. Essie “Eternal Optimist,” “Not Just a Pretty Face,” and “Minimalistic” create a beautiful pink gradient trio.
Artistic & Detailed Designs
8. Black Line Art Tulips
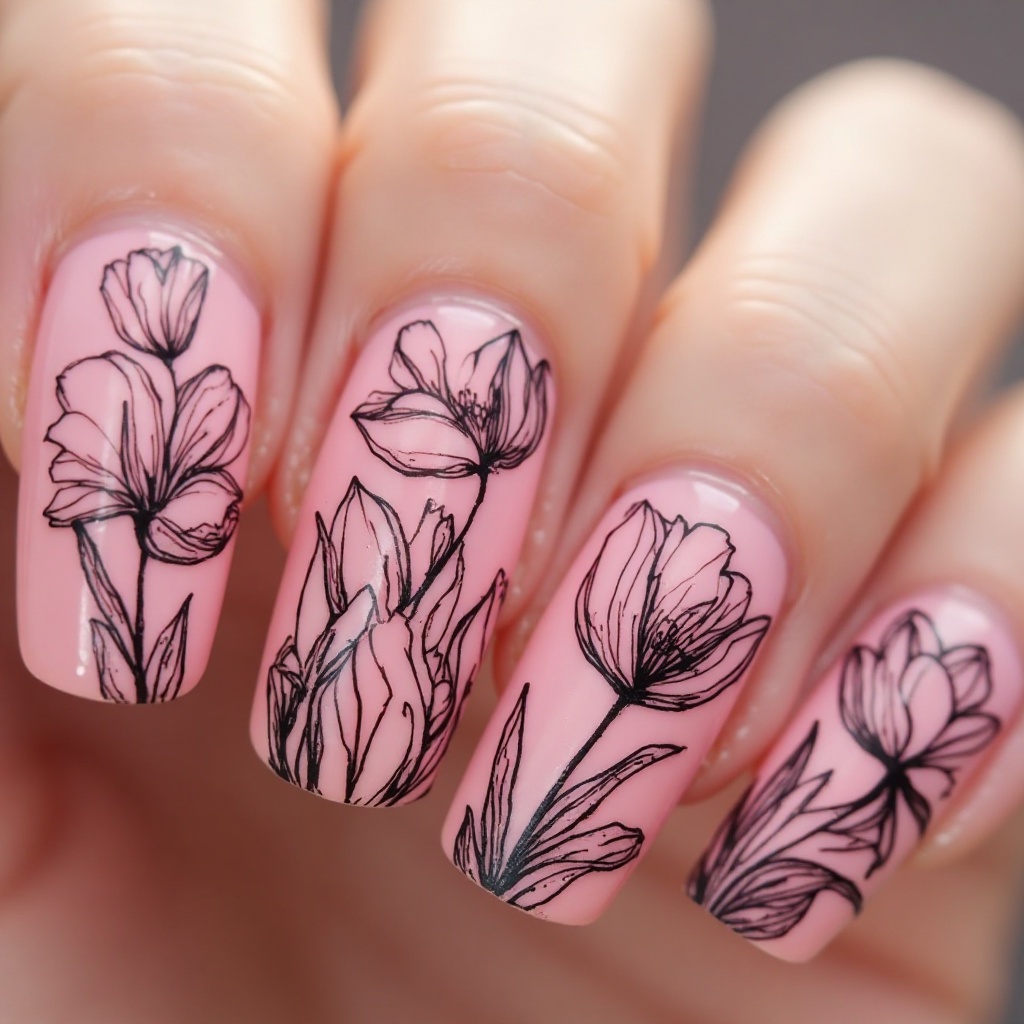
Delicate black line drawings of tulips dance across a sheer pink jelly base, creating an artistic sketch effect. The flowers are rendered with single, confident brush strokes that capture their essence without filling in color. Small details like visible stamens and leaf veins add botanical accuracy.
Why It Works for Spring:
This design bridges the gap between nail art and fine art, appealing to minimalists who appreciate thoughtful detail. The line work feels contemporary and fresh, like having wearable illustrations on your fingertips.
Pro Tip:
Request ultra-thin lines using a striper brush for the most refined result. The jelly base should be sheer enough to show your natural nail through it, creating that modern translucent effect.
DIY at Home:
This is the most beginner-friendly detailed design because you’re only working with line work—no color-filling required. Apply 2-3 coats of sheer pink jelly polish (Essie “Fiji” or Sally Hansen “Rosy Quartz”). Once completely dry, use a thin striping brush or nail art pen dipped in black polish to draw simple tulip outlines—one continuous line for the stem, three curved lines for petals. Don’t worry about perfection; the “sketchy” quality looks intentional.
Add a tiny line inside each petal and small lines for leaves. If you mess up, a toothpick dipped in acetone can erase before it dries. The sheer base is forgiving because there’s no stark contrast. Expected time: 25-30 minutes. Product tip: Sally Hansen I Heart Nail Art pens in black ($5) make this foolproof.
9. Pressed Flower Tulip Illusion
Tiny dried tulip petals appear to be pressed between layers of clear polish, though they’re actually meticulously hand-painted to create this trompe l’oeil effect. The base is crystal clear, and the “pressed flowers” have the flat, faded quality of real dried botanicals with visible petal texture.
Why It Works for Spring:
This nature-inspired design feels organic and unique, as if you’ve captured actual spring blooms under glass. It’s unexpectedly wearable despite being so detailed and artistic.
Pro Tip:
The key to this look is layering thin washes of translucent color rather than opaque paint. Request multiple thin topcoat layers to create genuine depth between the painted “petals.”
DIY at Home:
This is an advanced technique but achievable with patience. Start with clear base coat only. Mix your tulip color with clear top coat (about 1:3 ratio) to make it translucent. Using a thin brush, paint very thin, irregular tulip petals directly on your natural nail—they should look faded and flat, not vibrant. Add small imperfections and slightly irregular edges like real pressed flowers have.
Let dry completely (5 minutes), then apply a layer of clear top coat. Wait 3 minutes, then add another subtle layer of translucent color in spots to create depth variation. Finish with 2 more layers of clear top coat, waiting 3 minutes between each. The multiple clear layers create the “encased” illusion. Expected time: 60-70 minutes due to drying time. This looks stunning but requires patience.
Luxe & Glamorous Statements
10. Chrome Tulip Silhouettes
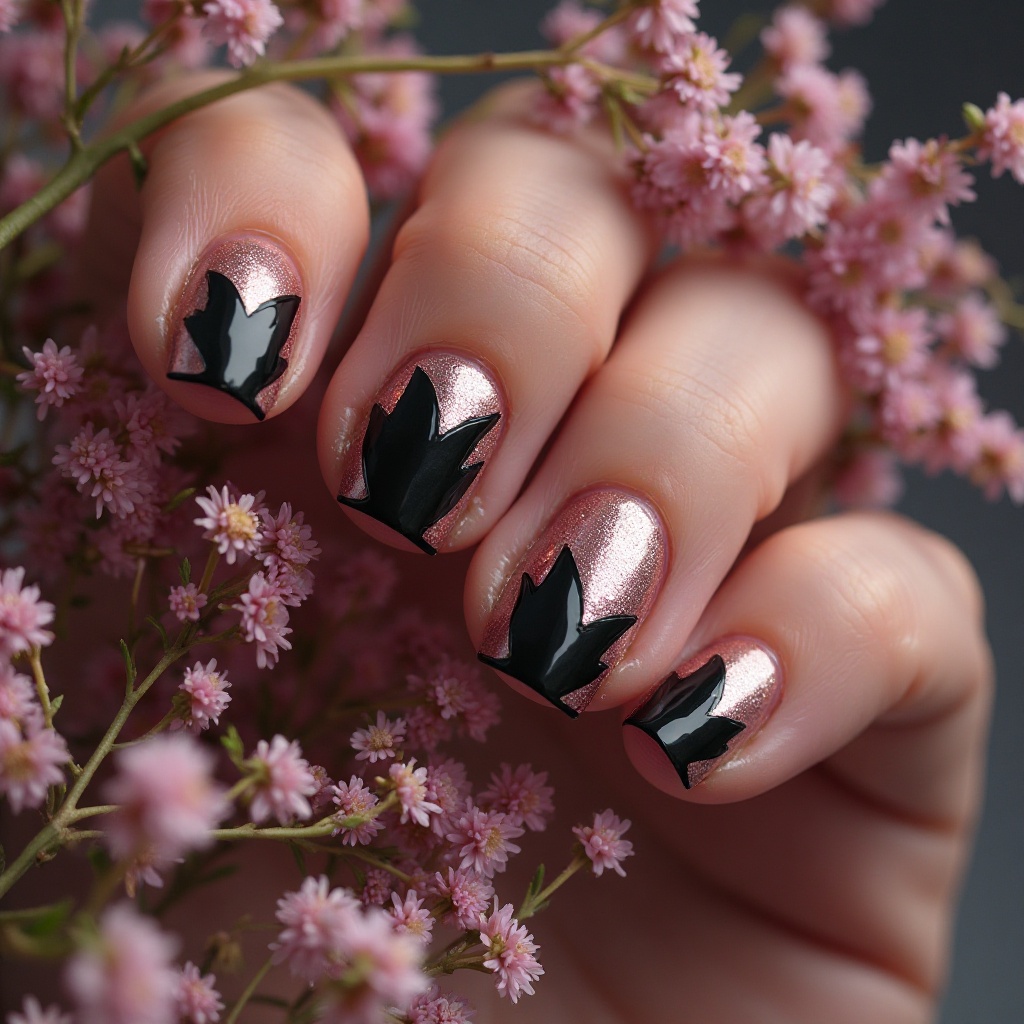
Mirror-finish chrome nails serve as the base for matte black tulip silhouettes that create dramatic negative space. The contrast between the reflective chrome and flat black is striking, while the tulip shapes soften what could otherwise feel too edgy. Available in rose gold, silver, or holographic chrome finishes.
Why It Works for Spring:
It takes the soft tulip motif in an unexpectedly bold direction, perfect for fashion-forward individuals. The chrome catches light beautifully, making hands look polished and expensive.
Pro Tip:
Chrome powder application requires a gel base, so plan for a longer appointment. Keep the tulip silhouettes simple and bold—intricate details get lost against the reflective background.
DIY at Home:
Chrome requires gel polish and a UV/LED lamp. Apply black gel base, cure. Apply no-wipe gel top coat, cure. While still warm from the lamp, rub chrome powder onto nails using a silicone applicator or finger until mirror-finish appears. Dust off excess.
Here’s the trick: use small vinyl nail stickers or hand-cut tape in tulip shapes, place them on the chrome surface, then apply matte black gel polish over everything. Cure under lamp. Carefully peel off stickers to reveal chrome tulip shapes surrounded by matte black. Seal with gel top coat and cure. This is advanced and requires an investment in supplies (gel system $40-80), but creates salon-quality results. Expected time: 45-55 minutes.
11. 3D Sculpted Tulip Accents
One or two accent nails feature actual three-dimensional tulips sculpted from acrylic or gel, while the remaining nails showcase a coordinating solid color or subtle tulip print. The 3D blooms are delicate and lightweight, crafted petal by petal with realistic curves and depth.
Why It Works for Spring:
This design makes an unforgettable statement for special occasions like bridal showers or spring galas. The dimensional element feels luxurious and shows serious nail artistry.
Pro Tip:
Limit 3D elements to one or two nails maximum—more becomes impractical for daily activities. Choose your non-dominant hand’s ring finger for the sculptural element to minimize snag risk.
DIY at Home – Simplified Version:
True 3D acrylic sculpting requires professional training, but you can create a raised effect at home. On one accent nail, use a dotting tool to place thick dots of polish in tulip petal arrangement. Before it dries, use a toothpick to shape and pull the thick polish into petal forms. The thick application creates slight dimension. Apply multiple layers to build height (let each dry before adding the next).
For a more dramatic effect, use acrylic paint instead of polish since it holds shape better. This won’t be truly 3D but creates a raised, textured tulip. Alternatively, purchase press-on nail art embellishments (small 3D flowers) from Amazon or craft stores ($5-12) and adhere them to accent nails using nail glue. Expected time: 40-50 minutes for DIY raised version.
Soft Neutral Options
12. Taupe Tulip Elegance
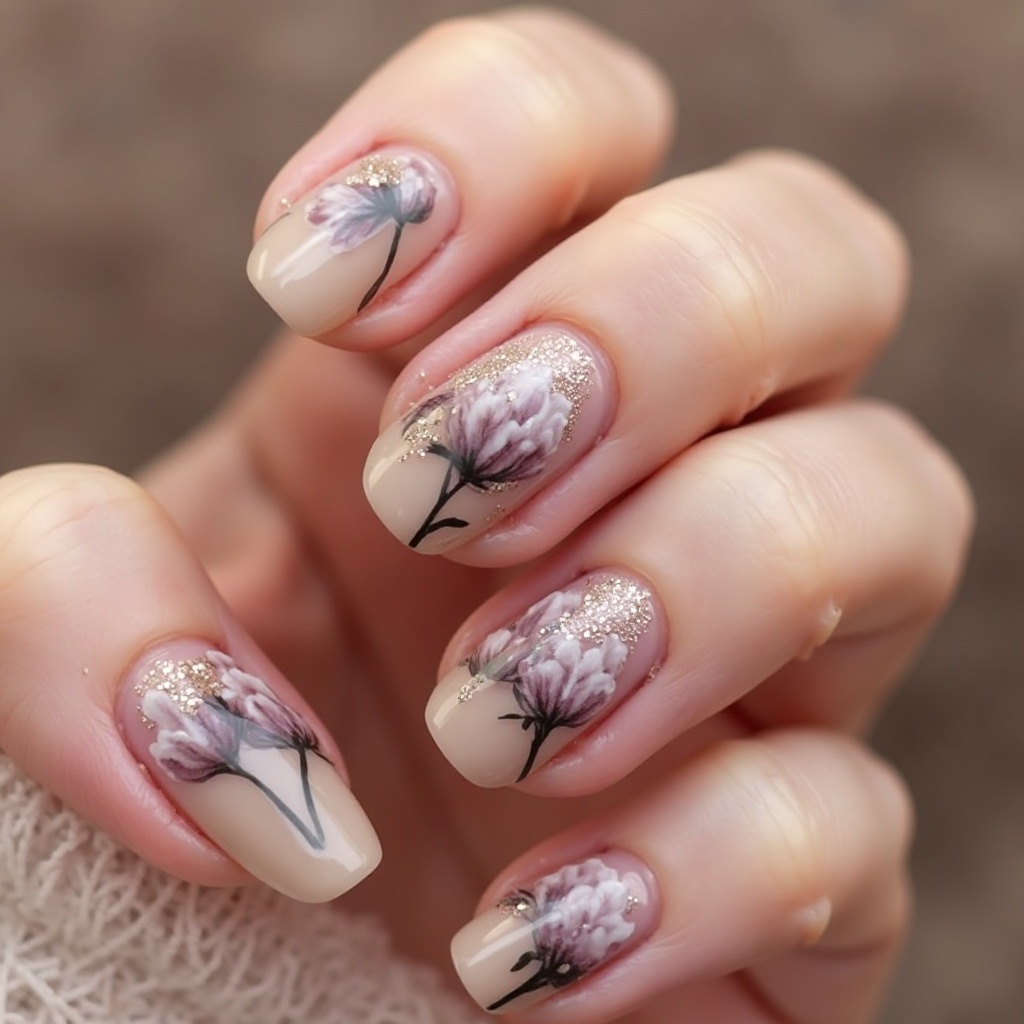
Warm taupe tulips with subtle mauve undertones bloom across a barely-there beige base. The neutral-on-neutral palette feels incredibly sophisticated, with just enough tonal variation to make the flowers visible. Tiny champagne shimmer accents on the petal edges catch light without screaming “glitter.”
Why It Works for Spring:
Perfect for professional settings or those who love spring florals but work in conservative environments. The muted tones feel expensive and refined while still celebrating the season.
Pro Tip:
This design relies on perfect execution since there’s nowhere for mistakes to hide. Request an experienced nail artist and ensure lighting is optimal during application for precise detail work.
DIY at Home:
The key challenge here is creating enough contrast between similar neutrals. Apply two coats of pale beige (OPI “Samoan Sand”). Mix a custom taupe by combining a tiny bit of purple with brown and nude polish on foil. Paint tulips using the 5-stroke method. Because the colors are so close, precision matters—use a cleanup brush with acetone to perfect edges.
After tulips dry completely, use a tiny brush or toothpick to add barely-there champagne shimmer polish (like Essie “Penny Talk”) just on petal edges. The subtle shimmer creates definition that tonal contrast alone doesn’t provide. Work in excellent lighting for this one. Expected time: 40-45 minutes.
13. Cream and Caramel Tulip Combo
Creamy off-white tulips alternate with warm caramel-colored blooms on a soft ivory base. The monochromatic neutrals create a cozy, approachable vibe that feels like spring in a coffee shop. Matte finish enhances the sophisticated, understated aesthetic.
Why It Works for Spring:
These warm neutrals complement every skin tone and coordinate with any wardrobe. It’s spring nail art for the person who gravitates toward beiges, tans, and neutral palettes year-round.
Pro Tip:
The matte topcoat is essential to this look’s success—glossy finish would make it too sweet. Reapply matte topcoat every few days as it can become shiny with wear.
DIY at Home:
Paint all nails with soft ivory base (Sally Hansen “Coconut Milk”). On alternating nails, paint cream-colored tulips; on the others, paint caramel tulips. The alternating pattern creates rhythm. The colors are close enough that you need clean application—use a cleanup brush for crisp edges.
Once everything is completely dry (6-8 minutes), apply matte top coat to all nails. Matte top coat is crucial here; it unifies the subtle color differences and creates that sophisticated cafe aesthetic. Expected time: 30-35 minutes. Product tip: Essie Matte About You top coat ($9) is excellent and long-lasting.
Bold Maximalist Looks
14. Full-Coverage Tulip Mural
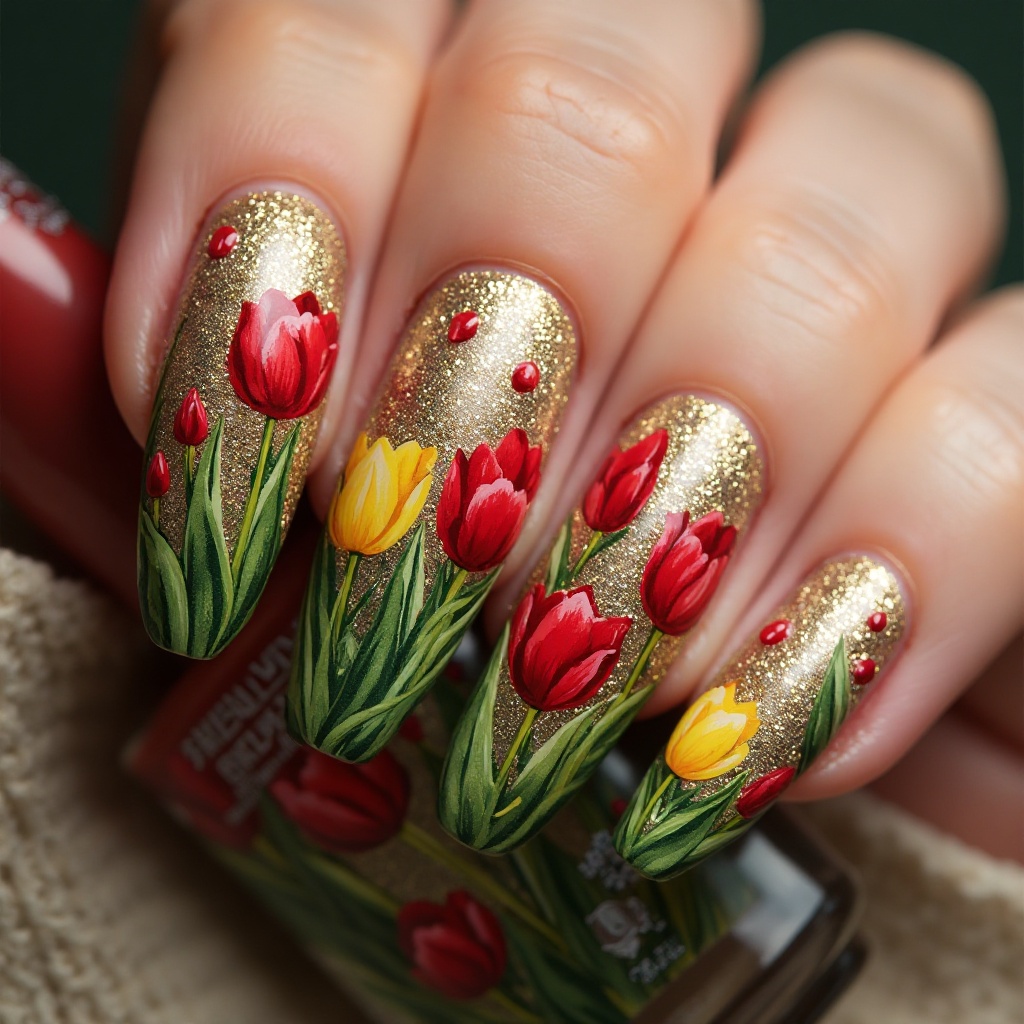
Every single nail becomes part of a connected tulip garden scene, with flowers, stems, and leaves flowing from nail to nail. When you place your fingers together, the design aligns to create one cohesive botanical illustration. Rich jewel tones of ruby red, emerald green, and golden yellow make it pop.
Why It Works for Spring:
This is nail art as wearable art—ambitious, eye-catching, and guaranteed to receive compliments. It celebrates spring with maximum enthusiasm and shows serious commitment to the aesthetic.
Pro Tip:
Take a photo of your hand in the exact position your nail tech will use as reference. This ensures the mural connects properly when your fingers are together. Book a double appointment slot for the time this requires.
DIY at Home:
This is the most challenging DIY design. Before painting anything, plan your composition by sketching on paper the exact width of each of your nails. Decide where each stem and flower will flow across the “canvas” of your hand. Apply a coordinating base color to all nails (cream or pale yellow works well). Once dry, starting with your pinky, paint the first section of your design. Move nail-by-nail, continuously checking that elements line up when you hold fingers together.
Use a thin brush for stems that span multiple nails. This requires artistic skill and lots of patience—consider this an afternoon project, not a quick manicure. Expected time: 90-120 minutes. Honestly, this one is best left to professionals unless you have painting experience and lots of patience.
15. Neon Tulip Pop Art

Electric neon tulips in hot pink, lime green, and electric orange explode across a stark white base in a pop art style. Bold black outlines give each flower a graphic quality, while the fluorescent colors feel energetic and modern. The result is spring on steroids.
Why It Works for Spring:
For the bold personality who wants spring nails that match their vibrant energy. These attention-grabbing colors feel playful and contemporary, especially stunning against deeper skin tones where the neons really glow.
Pro Tip:
Neon polishes can be sheer, so request a white base layer first for maximum color intensity. These pigments fade faster than traditional colors, so book touch-ups every 10-12 days.
DIY at Home:
Paint all nails with bright white base—this is crucial for neon vibrancy. Once dry, paint large, simple tulips in neon colors using the 5-stroke method. Because neons can be sheer, apply 2-3 coats of each tulip color, letting dry between coats. After the neon tulips are completely dry and opaque (8-10 minutes), use a thin brush or nail art pen to outline each petal and add a black stem in bold, graphic strokes.
The black outline is what creates the pop art effect and makes the design cohesive. Expected time: 45-50 minutes. Product tip: China Glaze Electric Nights collection or OPI Neons have the best pigmentation. Use a white polish underneath neon colors for true vibrancy.
Nature-Inspired Unique Concepts
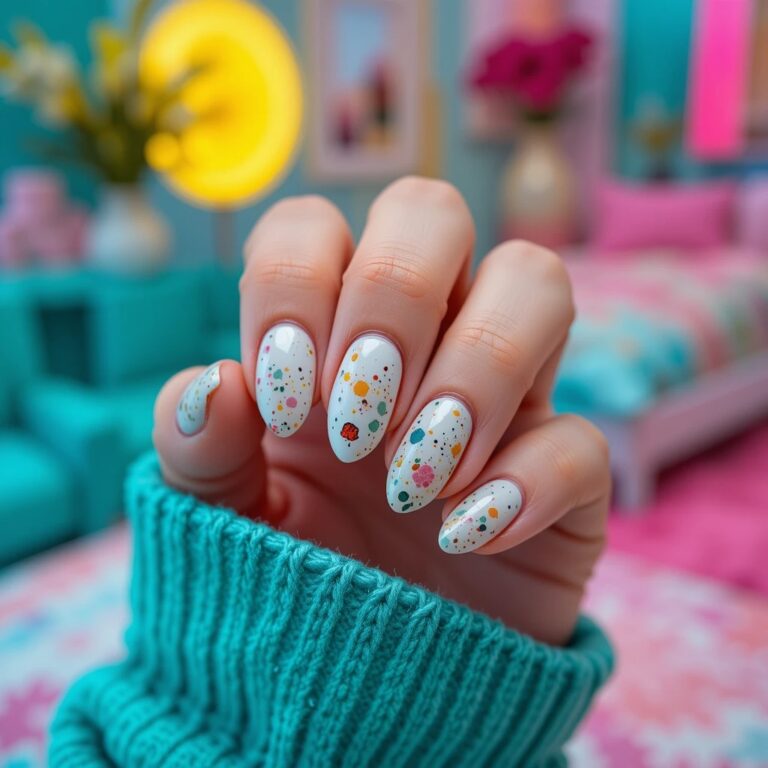
16. Dewdrop Tulip Morning
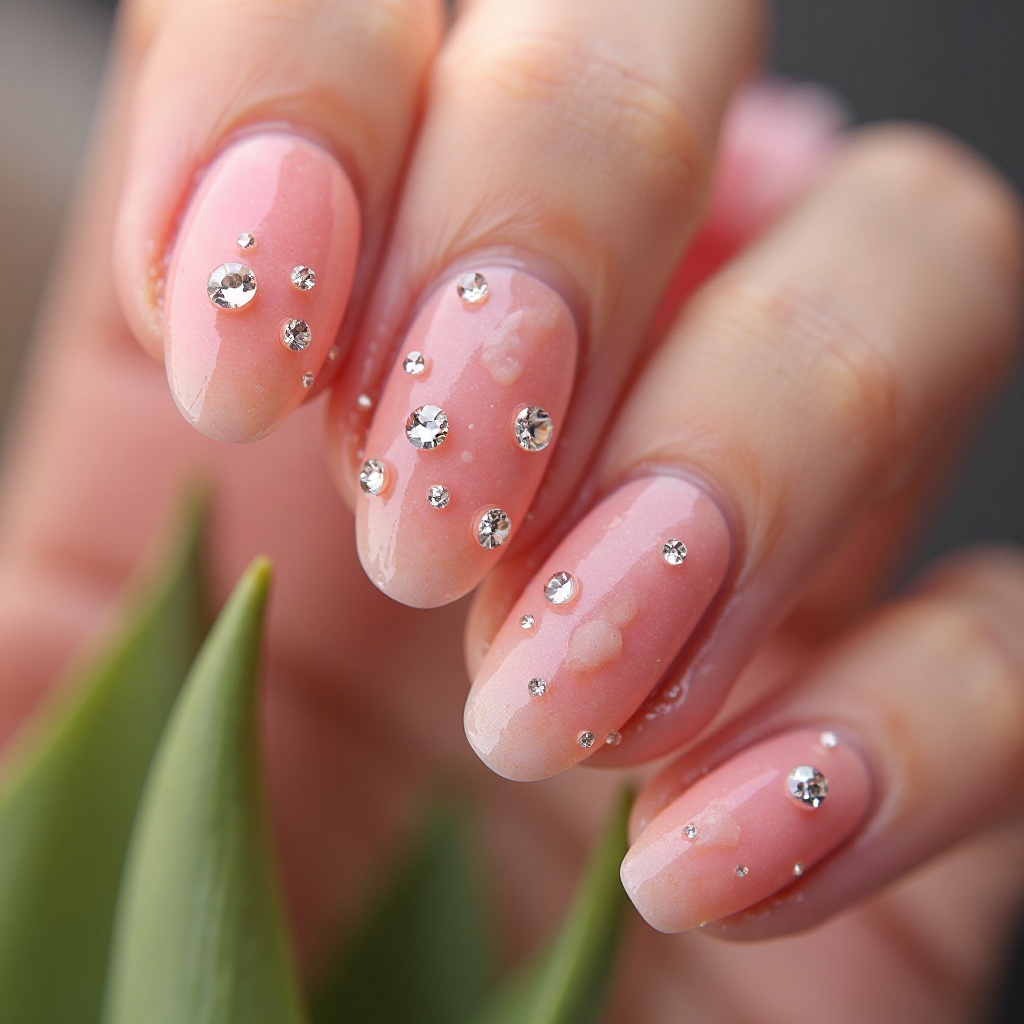
Pale pink tulips get adorned with tiny crystal rhinestones positioned as morning dewdrops on the petals. The base is a sheer peachy nude that mimics early morning light, and the strategically placed crystals catch light like actual water droplets. Glossy finish enhances the fresh, just-watered garden effect.
Why It Works for Spring:
The rhinestone detail transforms a simple tulip design into something magical and dimensional. It captures that specific spring morning aesthetic when everything feels new and fresh.
Pro Tip:
Use flat-back crystals in varied sizes—2-3 per tulip maximum. Apply them while the top coat is still tacky, then seal with another thin topcoat layer for security.
DIY at Home:
Apply sheer peachy nude base (Essie “A Crewed Interest”). Paint small pale pink tulips using the basic technique. Before applying top coat, arrange your crystals—plan placement for 2-3 small rhinestones per tulip. Apply top coat to the entire nail. While it’s still tacky (about 30 seconds after application), use tweezers or a dotting tool with a tiny bit of clear polish on the tip to pick up and place each rhinestone on the petals.
Position them like water drops would naturally sit—on petal edges and centers. Don’t submerge them in top coat; let them sit on the surface. After all rhinestones are placed and top coat has dried (3 minutes), carefully apply one more thin layer of top coat around (not over) the rhinestones to seal the edges. Expected time: 35-40 minutes. Product tip: Amazon sells multi-size crystal rhinestone packs for nails ($6-10) with enough for dozens of manicures.
17. Two-Tone Tulip Geometry
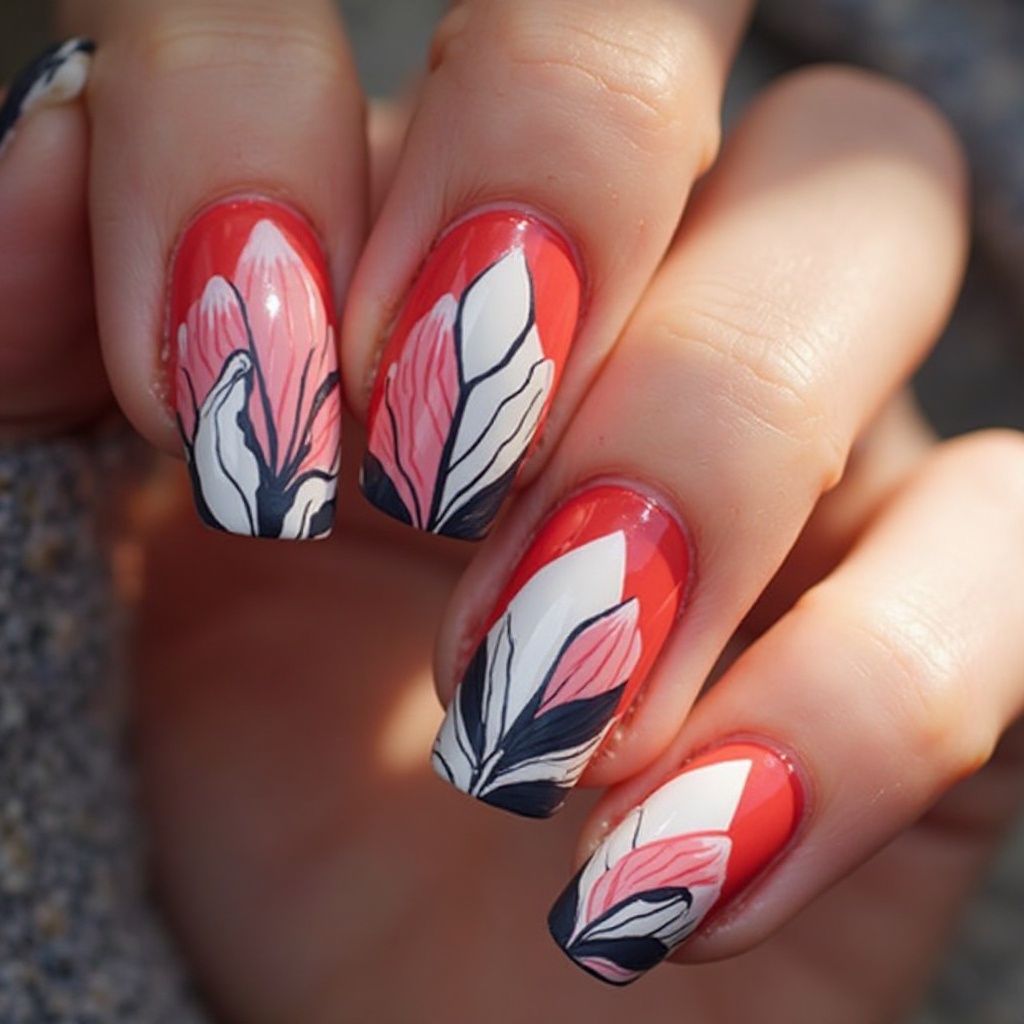
Tulips are painted in bold color-blocking style, with each petal split into two contrasting colors—like coral and white, or navy and pink. The geometric division of color creates a modern, abstract take on traditional floral nail art. Clean lines where colors meet are essential to the sharp, contemporary aesthetic.
Why It Works for Spring:
This bridges the gap between floral femininity and bold graphic design. It’s spring nails for the person who appreciates flowers but wants them presented in an unexpected, artistic way.
Pro Tip:
The crisp color division requires steady hands and potentially nail art tape for clean edges. Request gel polish which allows time to perfect the lines before curing under the lamp.
DIY at Home:
This requires precision but is achievable with tape. Paint your base color (white works well). Once dry, plan your tulip placement. Paint the first half of each petal in your first color (e.g., coral). Let this dry completely—minimum 5 minutes. Cut small pieces of nail art striping tape and place them along the edge where you want the color division. Paint the second color (e.g., white) up to and slightly over the tape.
While the second color is still wet, carefully peel away the tape at a 45-degree angle to reveal a clean line. If the line isn’t perfect, use a thin cleanup brush with acetone to sharpen it. This technique takes practice—do your non-dominant hand first. Expected time: 50-60 minutes. Product tip: Nail art striping tape ($3-5) is reusable and makes geometric designs much easier than freehand.
Common Tulip Nail Mistakes (And How to Fix Them)
Choosing Tulip Designs Too Large for Your Nail Size
The problem: Oversized tulip designs on short or narrow nails look crowded and overwhelm your hands rather than enhancing them. The flowers appear cartoonish instead of elegant, and fine details get lost when everything is squeezed into limited space.
The fix:
- Request scaled-down tulips appropriate for your nail size—your nail tech can adjust patterns
- Choose single tulip blooms per nail instead of full garden scenes
- Opt for bud or partial petal designs that imply the flower without showing the whole thing
- Consider tulip silhouettes or outline art which reads clearly even when small
Pro tip: Bring reference photos but tell your nail tech to scale appropriately for your nail size rather than copying exactly.
Skipping the Base Coat Under Detailed Tulip Art
The problem: Base coat might seem unnecessary when you’re getting elaborate nail art anyway, but skipping it leads to staining from pigmented polishes and shorter manicure life. Dark tulip colors can permanently discolor your natural nails.
The fix:
- Always apply a quality base coat as your foundation layer, even under nail art
- Choose strengthening base coats that also protect from staining
- Let the base coat dry completely before any art begins
- For particularly staining colors like deep coral or terracotta, use two thin base coat layers
Pro tip: If you already have stained nails, buff gently and apply a whitening treatment before your next manicure.
Neglecting Cuticle Prep Before Tulip Application
The problem: Tulip designs applied over dry, ragged cuticles and hangnails look messy no matter how skilled the nail artist. Overgrown cuticles also cause polish to lift and chip faster, destroying your beautiful spring nail art within days.
The fix:
- Soak fingers in warm soapy water for 5 minutes before your appointment
- Gently push back cuticles with a wooden stick, never cut them
- Apply cuticle remover gel to dissolve excess dead skin around nail edges
- Moisturize cuticles daily between appointments to maintain smooth, healthy appearance
Pro tip: Book your tulip nail appointment at least 2 days after any major cuticle trimming to avoid inflammation that can interfere with polish adhesion.
Using Too Many Colors in One Tulip Design
The problem: Attempting to incorporate every spring color in one manicure creates visual chaos rather than cohesive nail art. The tulips compete for attention and the overall effect reads as cluttered instead of sophisticated.
The fix:
- Limit your tulip design to 2-3 main colors maximum
- Choose colors from the same tonal family (all pastels or all earthy tones)
- Let one color be the star and use others as subtle accents
- Consider monochromatic tulip designs in varying shades of one color
Pro tip: If you love multiple colors, rotate tulip shades with each manicure change rather than trying to fit everything into one design.
Forgetting to Seal the Free Edge
The problem: Even the most beautiful tulip nail art chips immediately if the free edge isn’t properly sealed. This common oversight causes polish to lift and peel from the tips within 24 hours, especially with detailed designs that took time to perfect.
The fix:
- Ensure your nail tech runs top coat over and slightly under the free edge
- Cap the tip by swiping top coat across it in addition to painting the nail surface
- Reapply top coat at home every few days, always capping the free edge again
- Avoid using your nails as tools which breaks the seal at edges
Pro tip: If you notice early lifting at tips, apply a thin layer of clear top coat to reseal immediately rather than waiting for the entire manicure to fail.
Tulip Nail FAQ
Will tulip designs look good on short nails?
Absolutely! Short nails look stunning with smaller, simplified tulip designs like single blooms, tulip tips, or minimal line art. Choose lighter color palettes and avoid overcrowding—one well-placed tulip per nail is often perfect for shorter lengths.
How long do hand-painted tulip nails typically last?
Gel tulip designs last 2-3 weeks with proper care, while regular polish versions need refreshing after 5-7 days. Intricate details require extra protection, so daily cuticle oil application and avoiding harsh chemicals significantly extends wear time.
Can I wear bold tulip nail art to a professional office?
Yes, but choose sophisticated versions like taupe tulips on nude bases, subtle lavender with gold accents, or sage green botanical illustrations. Keep designs to 1-2 accent nails and avoid neon colors or 3D elements in conservative workplaces.
What skin tones look best with pink tulip designs?
Pink tulips flatter all skin tones when you choose the right shade—cool-toned pinks suit fair and cool complexions, while warm peachy-pinks complement deeper and warm skin beautifully. Avoid ashy pinks on very warm or deep skin as they can look washed out.
How do I prevent my tulip nail art from chipping quickly?
Use quality base and top coats, cap the free edge with top coat, avoid prolonged water exposure, wear gloves for household tasks, and reapply top coat every 3-4 days. Gel formulas chip less than regular polish for detailed designs.
Should I choose matte or glossy finish for tulip nails?
Glossy finishes make tulips look fresh and dewy like real flowers, while matte creates sophisticated botanical illustration effects. For best results, mix finishes—try matte bases with glossy tulip blooms for dimensional contrast.
Can I combine tulip designs with other spring nail trends?
Definitely! Tulips work beautifully with chrome accents, ombré backgrounds, negative space techniques, and mixed textures. Just ensure the combined elements complement rather than compete—less is often more for cohesive nail art.
How do I make my tulip manicure last through spring gardening season?
Wear fitted gardening gloves without exception, apply heavy cuticle oil before and after outdoor work, choose gel over regular polish, keep tulip art on accent nails only, and book maintenance appointments every 2 weeks during peak gardening months.
Embrace the Beauty of Tulip Nails This Spring
Tulip nails perfectly capture spring’s fresh energy and romantic spirit while remaining surprisingly versatile and wearable. From minimalist pink tips to bold sunset gardens and modern geometric designs, these 17 ideas offer something for every style, occasion, and nail length.
Save your favorite looks to your Pinterest boards, screenshot inspiration for your next nail appointment, and don’t be afraid to customize colors and details to make them uniquely yours—your nail tech will love bringing these botanical beauties to life on your fingertips!