7 Baseball Nails Ideas – Game Day Glam for Your Fingertips
Baseball nails are that perfect intersection of sporty and stylish—proof you can show team spirit without sacrificing your aesthetic. Whether you’re catching a game at the stadium, tailgating in the parking lot, or just want nails that say “I know my batting averages,” these designs work.
From classic baseball stitching to creative field-inspired looks, here are 7 ways to bring game day energy to your manicure without looking like you’re wearing a costume.
Minimalist & Classic Baseball
1. Classic White Baseball Stitch

Clean white base with delicate red curved stitching that mimics an actual baseball, creating an instantly recognizable sports motif. The crisp contrast between bright white and cherry red gives this design a fresh, athletic vibe that’s surprisingly sophisticated. This look works beautifully on short to medium nails with a glossy finish that catches light like a new ball fresh out of the box.
Why It Works for Baseball Season:
- The iconic baseball imagery is unmistakable and perfect for game days without being overly busy or complicated
- White and red color combo is universally flattering and matches virtually any team gear or casual outfit
Pro Tip:
- Use a thin striping brush or nail art pen for precise curved stitches, and apply them on just the ring finger as an accent nail if you prefer a subtler look
- Almond or oval nail shapes showcase the stitching detail beautifully
How to Create This Look at Home:
Step 1: Perfect Your White Base Apply a base coat and let it dry completely (about 2 minutes). Paint two thin coats of white polish, allowing 3-4 minutes drying time between coats. Thin coats prevent bubbling and dry faster than one thick coat, giving you a smoother, more professional finish.
Step 2: Create the Baseball Stitches Load a thin striping brush with red polish, wiping off excess on the bottle rim. Starting at one side of the nail, paint a gentle curved line (like a smile shape). Add short perpendicular dashes across this curve, spacing them about 2mm apart to mimic real baseball stitching.
Step 3: Perfect Your Technique If your hand shakes, rest your pinky finger on a stable surface while painting for better control. Practice the stitch pattern on paper first to build muscle memory. For beginners, try painting just two stitches on each accent nail instead of covering the entire nail.
Step 4: Seal and Protect Once the red stitching is completely dry (wait 5 minutes), apply a glossy top coat to seal everything. This prevents chipping and makes the white pop even brighter. Reapply top coat every 2-3 days to extend wear time.
Beginner-Friendly Alternative: Use baseball-themed nail stickers or water decals instead of hand-painting. They apply in seconds and look professionally done—just press on, smooth out bubbles, and seal with top coat.
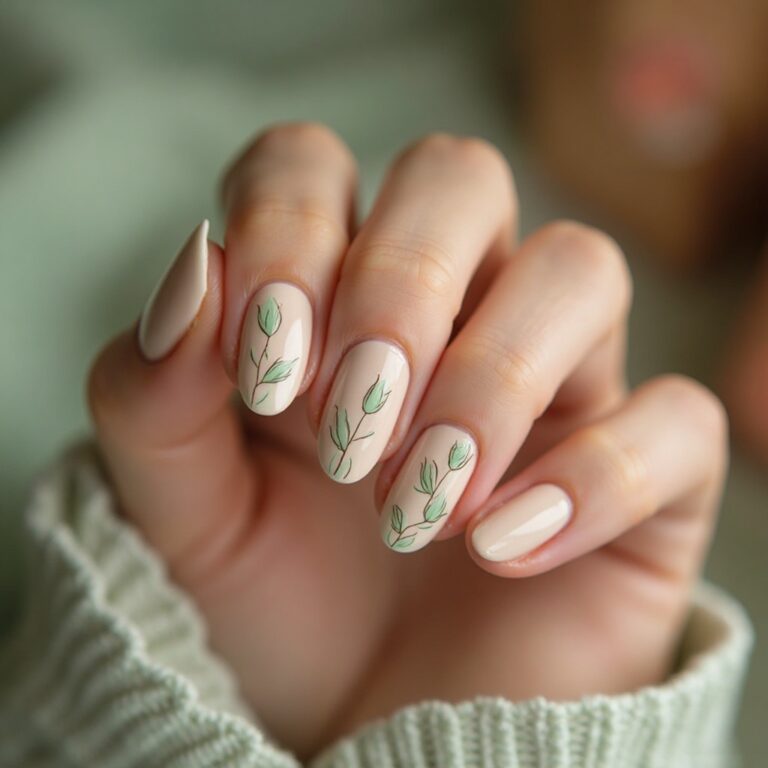
2. Diamond Dust Neutrals
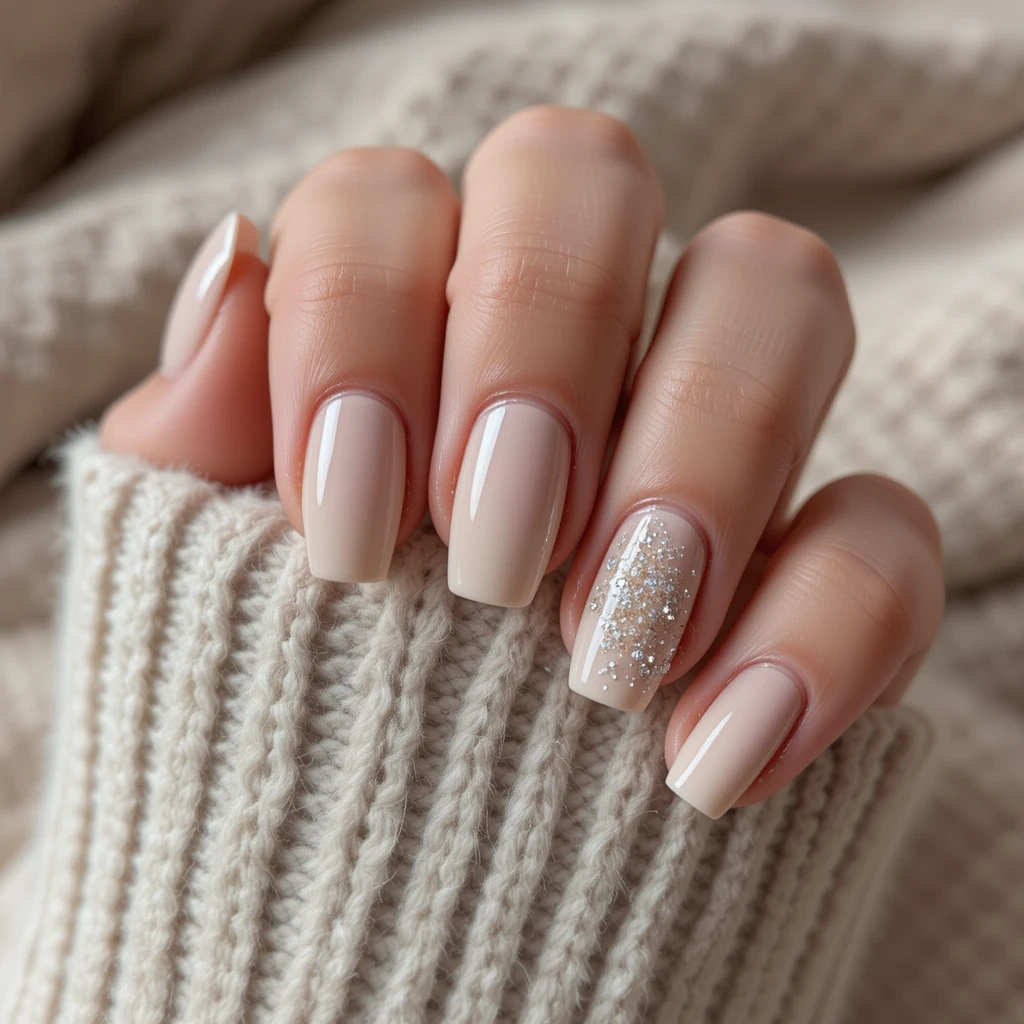
Soft beige or nude base with a single glitter accent nail featuring fine diamond-shaped confetti that references the baseball diamond. The neutral palette keeps things understated while the strategic sparkle adds just enough personality and sports reference. This design transitions seamlessly from the ballpark to brunch with its sophisticated, low-key glamour.
Why It Works for Baseball Season:
- The diamond motif is a clever, subtle nod to baseball that non-fans will still find chic and elegant
- Neutral tones are incredibly versatile and won’t clash with team jerseys or everyday wardrobe choices
Pro Tip:
- Apply diamond glitter over a sticky base coat on just one or two accent nails to keep the look balanced and refined
- Square or squoval shapes give you more surface area to showcase the glitter pattern
How to Create This Look at Home:
Step 1: Choose Your Perfect Nude Select a nude polish that’s one shade lighter than your skin tone for a flattering, natural look. Apply base coat, then two thin coats of your nude polish. The key to professional-looking nudes is building color gradually rather than applying thick coats that can look streaky.
Step 2: Prepare Your Glitter Accent On your ring finger or middle finger (pick just one per hand), apply a layer of clear polish while it’s still tacky. This creates a sticky surface for glitter to adhere to properly. Work quickly before it dries completely.
Step 3: Apply Diamond Glitter If using loose diamond-shaped glitter, pick up pieces with a slightly damp brush and place them intentionally on the nail. For glitter polish, apply one coat and let it dry, then add a second coat focusing glitter at the nail base and fading toward the tip for dimension.
Step 4: Smooth the Surface Apply a generous layer of top coat over the glitter nail, waiting 30 seconds, then applying a second thick layer. This encapsulates the glitter completely and prevents rough, catchy texture. The extra top coat is essential for glitter longevity.
Product Recommendations:
- OPI “Samoan Sand” or Essie “Topless & Barefoot” for warm-toned nudes
- Sally Hansen “Tickled Pink” or OPI “Bubble Bath” for cool-toned nudes
- Diamond-shaped glitter: Amazon carries affordable multi-packs for under $8
Bold Team Spirit
3. Double Team Stripe
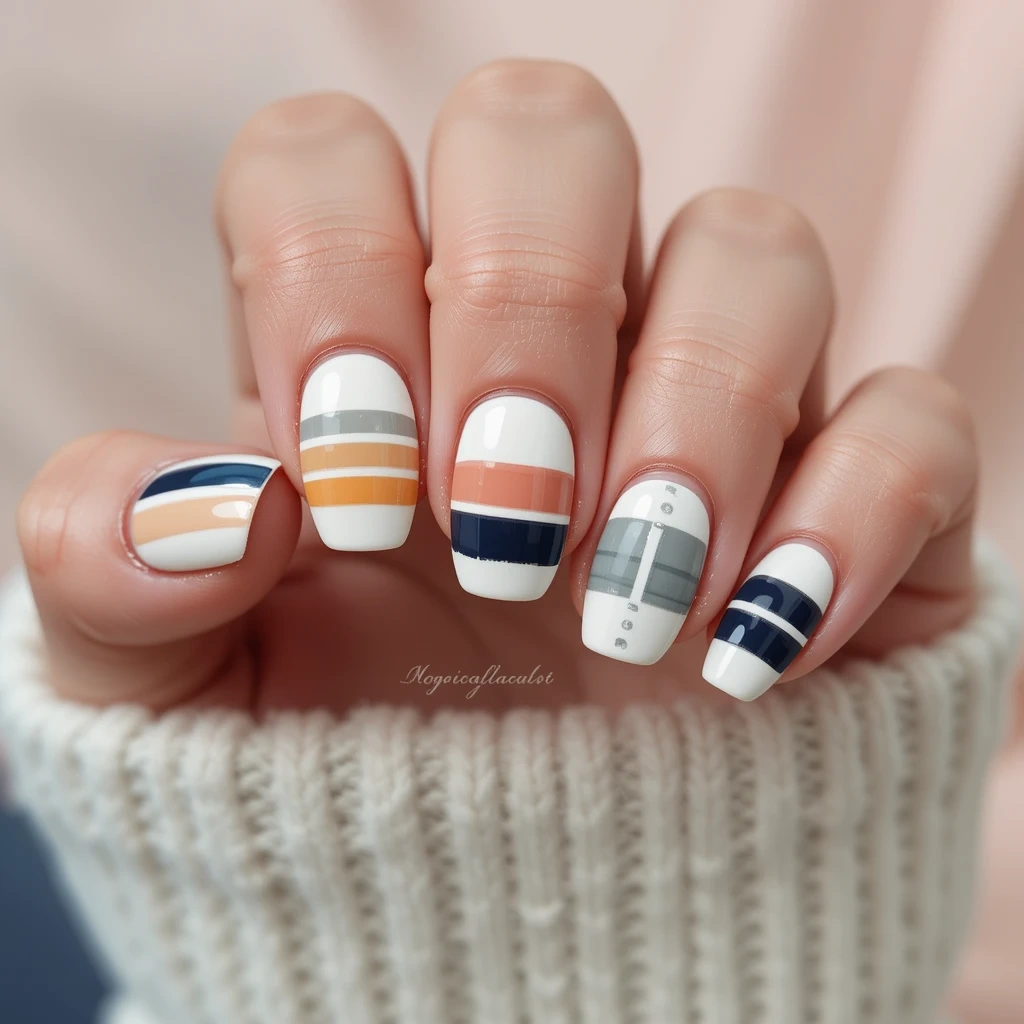
Two bold horizontal stripes in your favorite team’s colors painted across each nail, separated by a thin white or metallic line for definition. The graphic, color-blocked design makes a strong statement while remaining clean and modern rather than cluttered. This look channels vintage sports uniforms with a contemporary nail art twist that feels fresh and intentional.
Why It Works for Baseball Season:
- Shows undeniable team loyalty in a design that’s more sophisticated than simply painting nails solid team colors
- The striped pattern is eye-catching from a distance, perfect for cheering in the stands or group photos
Pro Tip:
- Use striping tape to create perfectly straight, crisp lines that look professionally done
- Matte finish makes the colors pop even more and gives the design a modern, athletic aesthetic
How to Create This Look at Home:
Step 1: Plan Your Stripe Placement Paint your entire nail with your lighter team color as the base. Let it dry completely (8-10 minutes) before adding tape. Rushing this step causes the base color to peel when you remove tape later.
Step 2: Apply Striping Tape Place thin nail striping tape horizontally across your nail where you want the white dividing line. Press firmly, especially at the edges, to prevent polish from bleeding underneath. Add a second piece of tape parallel to the first, leaving space for your second color stripe.
Step 3: Paint Between the Tape Apply your second team color in the exposed section between the tape pieces. Use two thin coats for solid coverage. Wait 3-4 minutes until the polish is mostly dry but still slightly tacky before removing tape.
Step 4: Remove Tape at the Right Time Gently peel away striping tape at a 45-degree angle while the polish is still slightly tacky. This prevents both peeling the base color and creating ragged edges. If you wait until polish is completely dry, you risk pulling up the color with the tape.
Step 5: Add Final Details Once everything is dry, add a thin metallic gold or silver line where the tape was using a striping brush if desired. Seal with top coat. For matte finish, use a matte top coat instead of glossy.
Time-Saving Hack: Use pre-cut nail vinyl stencils designed for striping. They’re reusable, easier for beginners, and create consistently perfect lines every time. You can find them on Amazon or Etsy for $5-10.
4. Number Game Accent
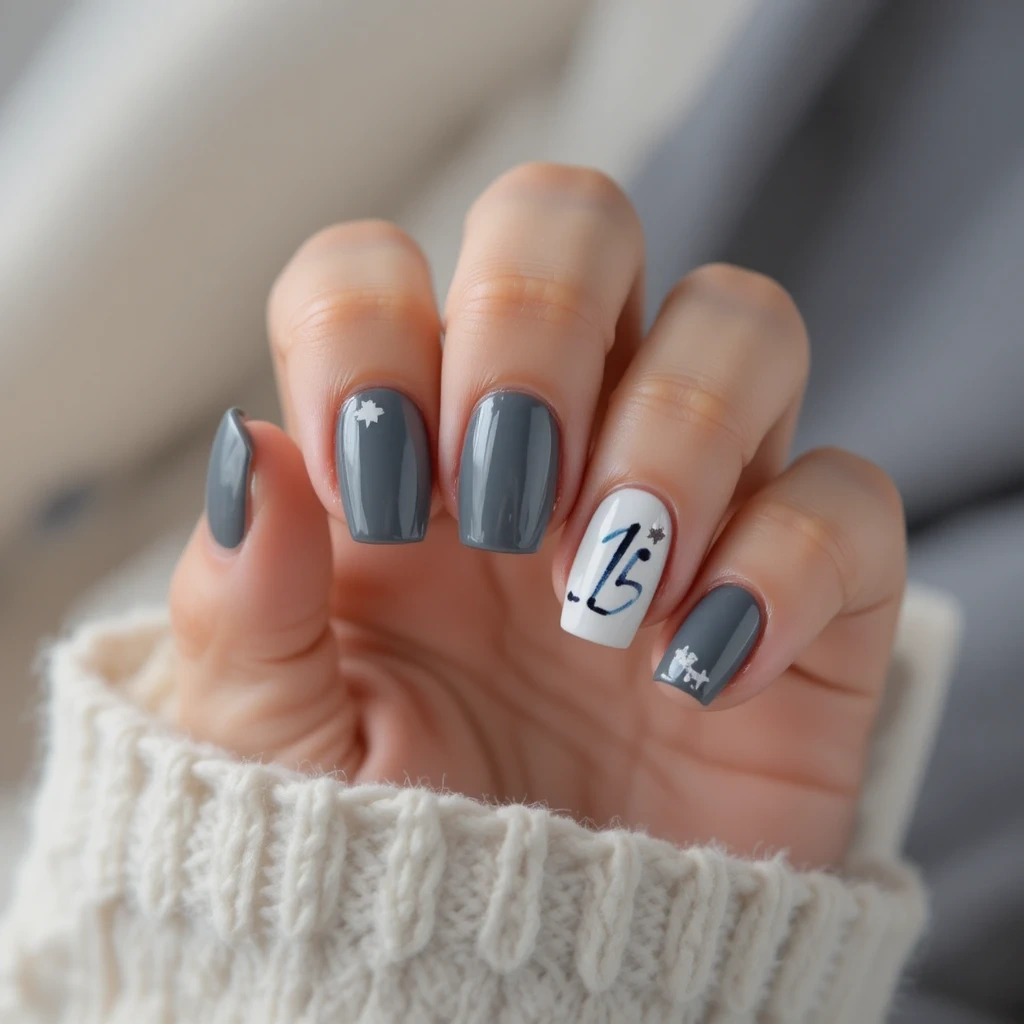
Solid team color base on all nails with your favorite player’s number hand-painted or stamped on one or two accent nails. The personalized touch makes this design special and meaningful while keeping the overall look cohesive and balanced. Pair the number with a small heart, star, or your team’s logo for extra charm without overwhelming the design.
Why It Works for Baseball Season:
- Celebrates your favorite player in a personal way that sparks conversations and connects you with fellow fans
- The single accent approach keeps the manicure wearable for everyday life, not just game days
Pro Tip:
- Use nail stamping plates or vinyl number stencils for clean, consistent numerals that look sharp and professional
- Coffin or stiletto shapes give you vertical space that makes numbers easier to read and more impactful
How to Create This Look at Home:
Step 1: Create a Solid Base Apply base coat, then two coats of your team’s primary color on all nails. Make sure coverage is completely opaque and even before moving to the number detail. This usually takes 2-3 thin coats rather than one thick coat.
Step 2: Hand-Painting Numbers (Traditional Method) Using a thin nail art brush loaded with contrasting color (white or gold works best), paint the number slowly and deliberately. Start with the outline, then fill in the center. Let the first coat dry, then add a second coat for solid coverage and crisp edges.
Step 3: Using Nail Stamping (Easier Method) Apply stamping polish to the number design on your stamping plate. Scrape away excess with the card, then quickly press the stamper onto the image and transfer it to your nail. This method takes practice but creates salon-quality results once you master it.
Step 4: Using Number Stencils (Easiest Method) Place a vinyl number stencil on your dried base color. Paint over it with contrasting polish, then carefully peel away the stencil while polish is still slightly wet. This method is most beginner-friendly and yields consistent results.
Step 5: Add Dimension For extra impact, outline your number with a thin gold or silver line using a striping brush. Add a tiny star or heart next to the number using a dotting tool. Seal everything with top coat for lasting wear.
Recommended Stamping Plates:
- Maniology has sports-themed plates with numbers and baseball designs
- Clear Jelly Stamper offers alphabet and number sets perfect for player jerseys
- Budget option: Born Pretty stamping plates on Amazon ($3-5 each)
Playful & Creative
5. Mini Baseball & Bat
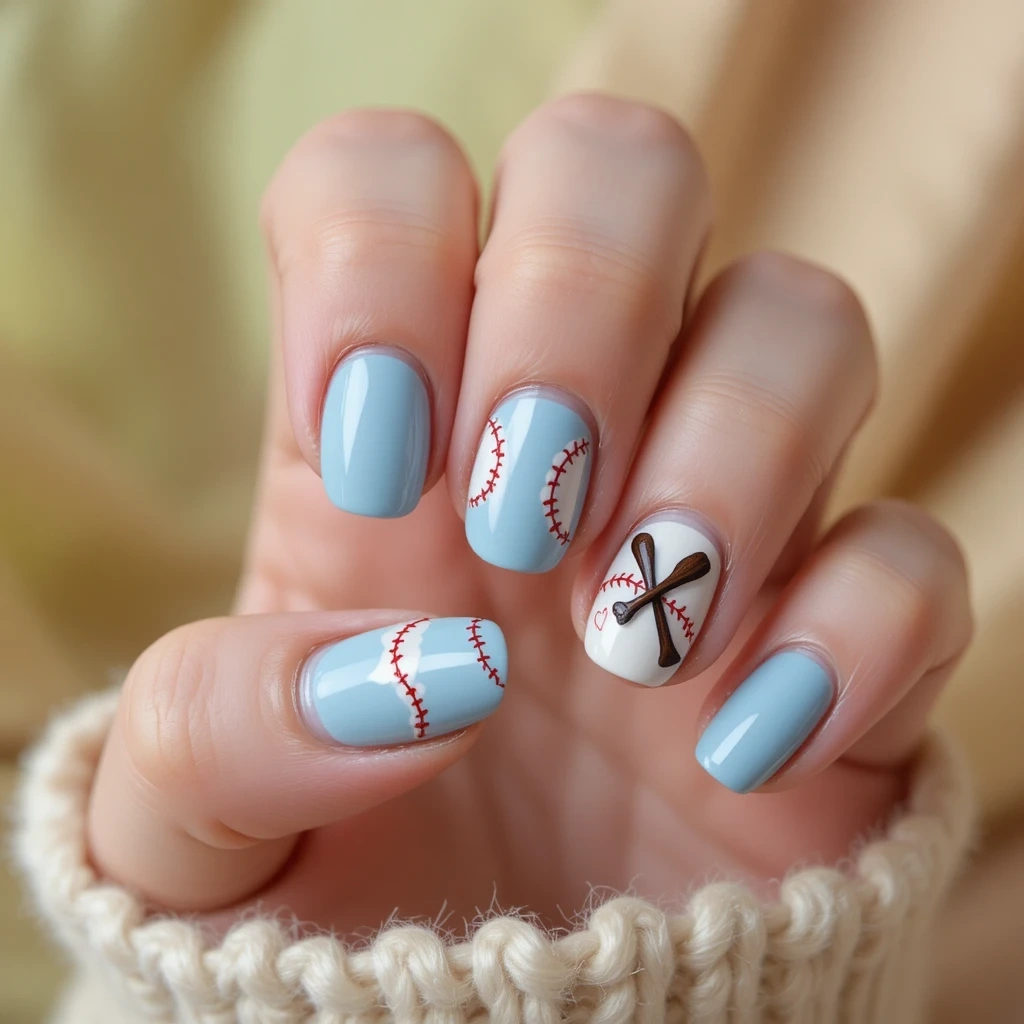
Tiny baseball illustrations on a soft cream or sky blue base, with one accent nail featuring a crossed bat design in brown or black. The miniature artwork is adorable and whimsical while still being recognizably sporty and thematic. This design has a playful, illustrated quality that feels like wearing tiny sports cartoons on your nails.
Why It Works for Baseball Season:
- The illustrated approach feels fun and lighthearted, perfect for casual game days or showing personality
- Cream and blue backgrounds are unexpected alternatives to white, making the design feel more unique and artistic
Pro Tip:
- Use dotting tools and thin brushes to create small-scale artwork, or try water decals if hand-painting feels intimidating
- Keep nails at a short to medium length so the tiny details remain visible and don’t get distorted
How to Create This Look at Home:
Step 1: Prep Your Canvas Apply base coat and two coats of cream or sky blue polish. Let dry completely (10 minutes minimum). The smoother your base, the easier it is to add tiny details on top.
Step 2: Create Mini Baseballs Using a dotting tool or toothpick, make small white circles for baseballs (about 3mm diameter). Once dry, add two tiny curved red lines across each circle with a striping brush or toothpick to create the stitching detail. Less is more—2-3 small baseballs per nail maximum.
Step 3: Paint Baseball Bats On your accent nail, use a thin brush to paint two crossed lines in brown or black polish. Start with thin lines, let dry, then go over them again to build width. Add a small white baseball at the intersection where the bats cross for a complete look.
Step 4: Refine Your Details Use a toothpick dipped in nail polish remover to clean up any wobbly lines or mistakes. This works best when polish is still slightly wet. For perfectly round baseballs, use the smallest dotting tool you have or the rounded end of a bobby pin.
Step 5: Seal Your Artwork Apply a generous top coat to protect your detailed work. Be gentle and use a dabbing motion rather than brushing strokes to avoid smudging the tiny illustrations.
Beginner Alternative: Purchase baseball-themed water decals or nail stickers online. They come pre-designed with perfect little baseballs and bats—just soak, apply, and seal with top coat. This gets you professional-looking results in 5 minutes.
Where to Find Water Decals:
- Etsy has hundreds of baseball nail decal options from independent sellers
- Amazon offers multi-pack sports decals for under $10
- AliExpress has affordable options if you’re willing to wait for shipping
6. Grass & Diamond Green
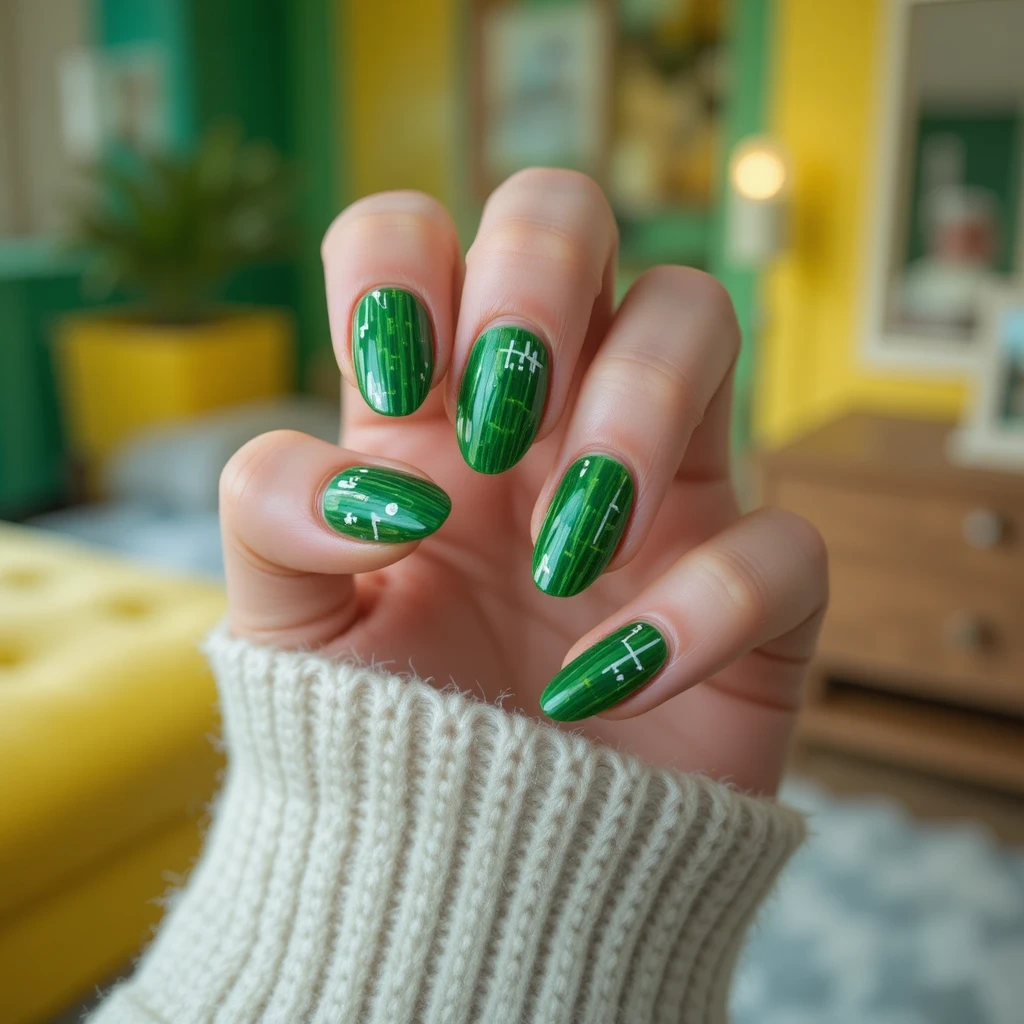
Rich grass green base that references the outfield, with white baseline details or tiny white dots mimicking stadium lights. The unexpected green gives this baseball manicure an earthy, fresh twist that stands out from typical red-white-blue combinations. Add a glossy topcoat to make the green shimmer like sun-soaked grass during a day game.
Why It Works for Baseball Season:
- The field-inspired color is unique and immediately evokes the baseball atmosphere without relying on obvious imagery
- Green is surprisingly flattering on most skin tones and pairs beautifully with denim and casual spring/summer wardrobes
Pro Tip:
- Choose a vibrant, saturated green rather than olive or forest tones to keep the design feeling sporty and energetic
- Round or oval shapes complement the organic, field-inspired theme better than sharp geometric shapes
How to Create This Look at Home:
Step 1: Select the Right Green Choose a bright, grass-green shade that reads as fresh and sporty (think kelly green or emerald). Avoid army greens or sage tones that lean too muted. Apply base coat, then 2-3 thin coats of green until completely opaque.
Step 2: Add Stadium Light Details Using a dotting tool and white polish, create small dots near the tips of your nails in a pattern that suggests stadium lights. Place 3-5 dots per nail in a slight arc formation. Vary the dot sizes slightly for a more organic, realistic look.
Step 3: Paint Baseline Details On one or two accent nails, use a thin striping brush to paint clean white lines representing baseball field baselines. Create a simple diamond shape or just paint one or two straight lines near the nail base for subtle field reference.
Step 4: Layer for Depth Once white details are dry, apply a slightly darker green polish (if available) with a sponge to the lower third of your nails for an ombré grass effect. This adds dimension and makes the design more interesting.
Step 5: Finish with Glossy Shine Apply a thick layer of glossy top coat to make the green shine like fresh-cut, sun-drenched grass. The high shine is essential for this look—matte would make it feel too flat and dull.
Color Recommendations:
- Essie “Pretty Edgy” – perfect bright grass green
- OPI “I’m Sooo Swamped!” – sporty kelly green
- Sinful Colors “Go Go Girl” – budget-friendly bright green under $3
Quick Shortcut: If painting straight lines feels difficult, use thin nail striping tape left on the nail (don’t remove it) in white or silver as your baselines. Apply it after the green base dries, seal with top coat, and you’re done.
Elegant & Sophisticated
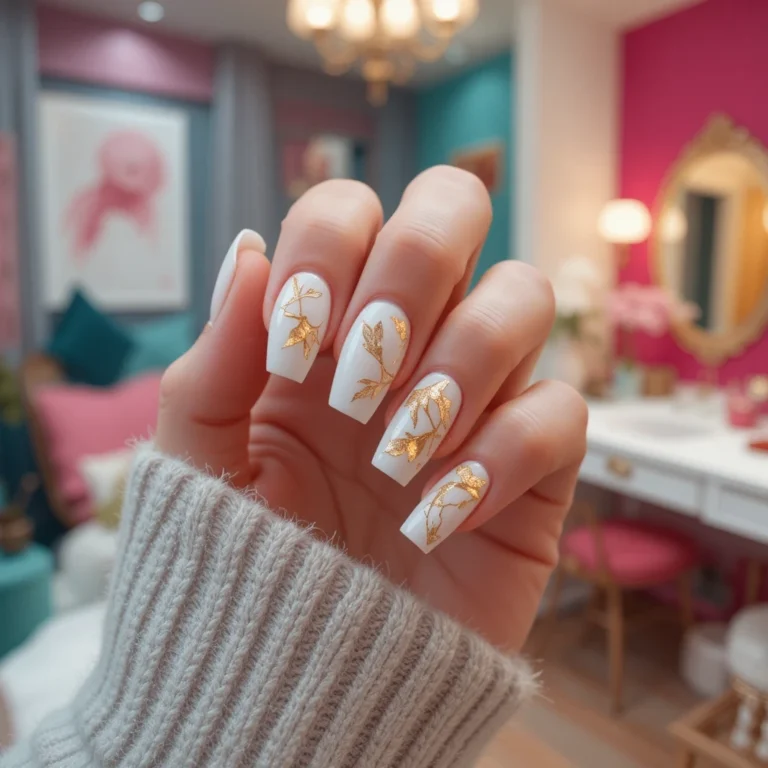
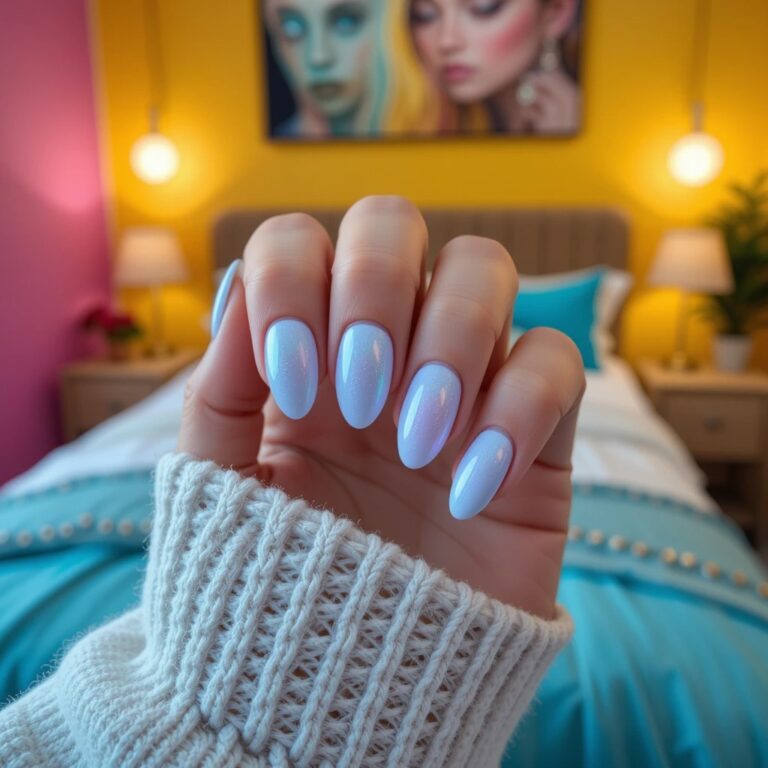
7. Chrome Baseball Shimmer
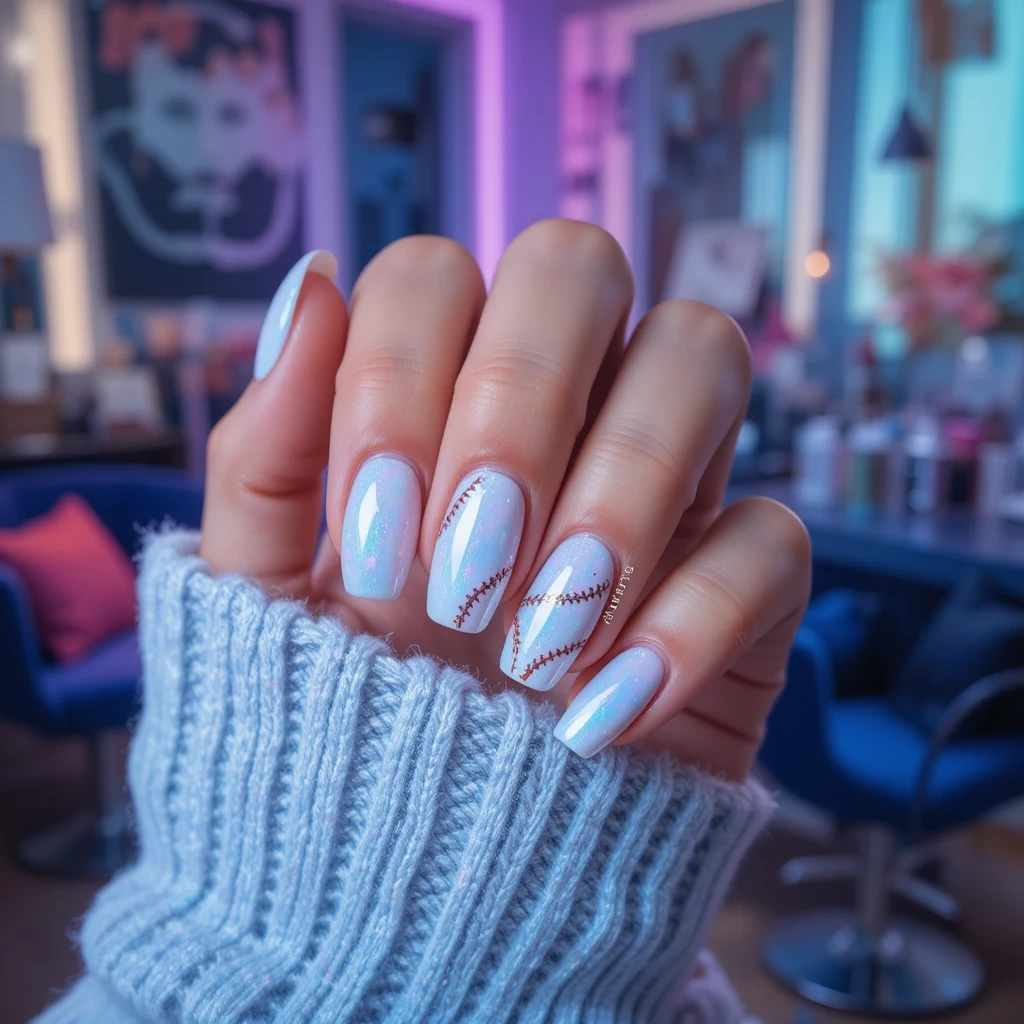
Pearlescent white chrome base with subtle holographic effect that catches light like stadium floodlights on a night game. One accent nail features delicate rose gold or silver stitching detail for that baseball reference without being literal. The luxe finish elevates the sporty theme into something genuinely glamorous and red-carpet worthy.
Why It Works for Baseball Season:
- Transforms the baseball theme into something elegant enough for dinners, date nights, or upscale events beyond the ballpark
- The chrome finish is on-trend and adds dimension that photographs beautifully for social media sharing
Pro Tip:
- Apply chrome powder over a gel base for the most reflective, mirror-like finish that lasts
- Stiletto or almond shapes maximize the chrome’s light-catching properties and create an elongating effect
How to Create This Look at Home:
Step 1: Understanding Chrome Application Chrome powder works best over gel polish (requires UV/LED lamp) but can work over regular polish with the right technique. If using regular polish, choose a high-shine white as your base. For gel, apply white gel base and cure completely.
Step 2: Apply Chrome Powder (Gel Method) After curing white gel polish (don’t apply regular top coat yet), rub chrome powder onto the tacky layer using a silicone applicator or your finger with a latex glove. Buff in circular motions until you achieve full mirror coverage. Seal with gel top coat and cure.
Step 3: Apply Chrome Polish (Regular Polish Method) If you don’t have gel setup, use chrome nail polish instead of powder (brands like Sally Hansen Chrome or Essie Mirror Effect). Apply over dried white base, using thin coats and allowing full drying time. Results won’t be quite as mirror-like as powder but still beautiful.
Step 4: Add Stitching Detail On your accent nail(s), use a thin brush and rose gold or silver polish to paint delicate baseball stitching. On chrome, details can get lost, so make stitching slightly more pronounced. Let dry completely before top coat.
Step 5: Seal for Longevity Apply a high-shine top coat (gel or regular depending on your method). Chrome needs extra protection to prevent dulling from oils and daily wear. Reapply top coat every other day to maintain that mirror shine.
Chrome Application Tips:
- Work one nail at a time—chrome powder sets quickly
- Buff powder gently but thoroughly for even coverage
- Clean up edges with a small brush dipped in acetone before sealing
- Wash hands before applying to remove oils that prevent adhesion
Product Recommendations:
- Beetles Chrome Powder Kit (includes multiple colors, applicators) – $12-15 on Amazon
- Kiara Sky Chrome Powder – professional quality, $8-10
- Sally Hansen Insta-Dri Chrome polish – drugstore option for non-gel method, $7-8
Budget-Friendly Shortcut: Use a holographic or chrome top coat over white polish instead of true chrome powder. While not as intense, it gives a similar shimmery effect for a fraction of the cost (under $5 at drugstores).
Step-by-Step Baseball Nail Application Guide
Whether you’re a complete beginner or just want to improve your technique, following proper application steps makes all the difference between a manicure that lasts 2 days and one that looks fresh for 2 weeks.
Prep Work (Don’t Skip This!) Start with clean, dry nails. Remove all old polish completely using acetone-based remover. Push back cuticles gently with a wooden stick (never cut them—this causes infection risk and damage). File nails to your desired shape using smooth, one-direction strokes rather than sawing back and forth, which weakens nails.
Base Coat Application Apply a thin layer of base coat to each nail, starting slightly away from the cuticle and pulling toward the free edge. Base coat prevents staining from dark polishes and helps color adhere better. Let it dry for 2-3 minutes until no longer tacky to touch.
Color Application Strategy Apply polish in three strokes: one down the center, one on each side. Use thin coats and build coverage with multiple layers rather than applying thick goopy coats that take forever to dry and bubble easily. Wait 3-4 minutes between each coat for best results.
Detail Work Timing Only add details like stitching, stripes, or numbers after your base color is completely dry—at least 10 minutes. Testing by gently tapping nails together; if they feel sticky or tacky, wait longer. Rushing this step causes smudging and ruins your work.
Top Coat Technique Apply top coat generously, slightly overlapping onto the nail tip to “cap” the edge and prevent chipping. Use the same three-stroke method as color application. Top coat should go on all nail art elements plus wrap slightly under the free edge for maximum protection.
Quick-Dry Methods Let nails air dry for at least 10 minutes before doing anything with your hands. Speed up drying with cold water (run hands under cool tap water for 1 minute after 5 minutes of air drying) or quick-dry drops/spray. Avoid fans or blowing on nails—this causes bubbling.
Common Mistakes to Avoid When Creating Baseball Nails
Mistake #1: Skipping Base Coat Many beginners skip base coat to save time, but this causes staining (especially with dark team colors) and makes polish chip faster. Always use base coat—it takes 30 seconds and extends your manicure’s life by days.
Mistake #2: Thick Polish Layers Applying thick coats of polish seems faster but actually takes longer to dry and creates a gummy, bubble-prone mess. Multiple thin layers always look better and last longer than one thick coat.
Mistake #3: Adding Details Too Soon Painting stitching or stripes before the base color is completely dry causes smearing and frustration. When in doubt, wait an extra 5 minutes. Your patience will be rewarded with crisp, clean lines.
Mistake #4: Wrong Brush for the Job Trying to paint thin lines with the regular polish brush leads to thick, wobbly results. Invest in a thin striping brush (under $5) for details. It makes intricate work 10 times easier.
Mistake #5: Not Sealing Nail Art Forgetting to apply top coat over details causes them to chip off within hours. Always seal everything—every design element, every detail—with top coat for protection.
Mistake #6: Starting Without a Plan Beginning nail art without visualizing the design first leads to unbalanced, cluttered results. Sketch your design on paper first or look at reference photos to plan your approach.
Baseball Nail Trends to Know
Classic Sport Motifs with Modern Finishes Traditional baseball imagery like stitching, bats, and diamonds are being reimagined with contemporary finishes like matte, chrome, and holographic effects. The combination of nostalgic sports symbols with current nail trends creates designs that feel both timeless and fresh. This blend appeals to longtime baseball fans while attracting newcomers who appreciate the aesthetic without necessarily being die-hard sports enthusiasts.
Team Color Blocking Bold, graphic color blocking using team colors has become a go-to approach for sports nails that make a statement. Rather than intricate artwork, these designs rely on strategic color placement and clean lines to create impact. The minimalist approach to team spirit feels modern and sophisticated while remaining unmistakably loyal.
Micro Detail Artwork Tiny, intricate baseball-themed illustrations are trending as nail artists push the boundaries of miniature painting. From microscopic baseball gloves to detailed stadium scenes, these designs showcase serious skill and artistry. The delicate nature of micro art makes each manicure feel like a unique piece of wearable art.
Mixed Finish Combinations Combining glossy, matte, and metallic finishes within a single baseball manicure creates depth and visual interest. This technique allows you to highlight certain elements—like making stitching details pop with gloss while keeping the base matte. The textural variety elevates simple designs into something more complex and professionally executed.
Negative Space Designs Using the natural nail as part of the baseball design through negative space techniques creates an airy, modern look. Baseball stitching outlined on bare nail, or team colors framing unpainted sections, feels fresh and different. This trend works especially well for those who want baseball nails that feel less costume-like and more everyday wearable.
Subtle Sporty Elegance The newest trend moves away from obvious baseball imagery toward subtle nods that only true fans would recognize. Think diamond-shaped glitter placement, field-green accent nails, or stripe patterns that reference team uniforms without screaming “sports manicure.” This approach allows fans to show their love in a sophisticated way that doesn’t compromise personal style.
How to Choose the Right Baseball Nail Color
Match Your Skin’s Undertones
- Cool undertones (pink or blue hues) look stunning with classic baseball red-white-blue combinations, navy team colors, and crisp white bases
- Warm undertones (yellow or golden hues) pair beautifully with cream bases instead of stark white, rust-toned reds, and earthy greens
- Neutral undertones can pull off virtually any team color palette, making you the perfect canvas for bold or subtle baseball designs
Consider Your Nail Length
- Short nails showcase simple, bold designs best—think solid team colors, single accent stitching, or minimal stripe patterns that don’t require much space
- Medium nails offer the sweet spot for most baseball designs, providing enough surface area for detail work while remaining practical for daily activities
- Long nails can handle intricate artwork, multiple design elements per nail, and elaborate scenes like tiny stadium illustrations or complex team logos
Factor in Your Lifestyle
- Active lifestyles benefit from shorter nails with durable gel polish in classic baseball colors that disguise chips and maintain their fresh appearance
- Office or professional settings call for subtler approaches like nude bases with minimal baseball accents, sophisticated team color combinations, or negative space designs
- Social or creative environments give you freedom to experiment with bold colors, dimensional embellishments, and eye-catching designs that spark conversations
Coordinate With Your Wardrobe
- If you wear your team jersey frequently, choose nail designs that complement rather than exactly match to avoid looking too matchy-matchy
- Neutral-based baseball nails with accent details work seamlessly with any outfit, from athleisure to business casual to weekend denim
- Consider your most-worn colors when selecting team shades—if you live in black and white, any team palette will coordinate effortlessly
Think About the Occasion
- Game day attendance deserves bold, unmistakable team spirit nails that photograph well and show your enthusiasm from the stands
- Everyday wear calls for more subdued baseball references that nod to your fandom without overwhelming your overall look
- Special baseball events like playoffs or opening day are perfect opportunities to go all-out with elaborate designs, embellishments, and detailed artwork
Nail Maintenance & Longevity Tips for Baseball Season
Protect Against Sun and Heat Exposure Spring and summer baseball season means outdoor games with intense sun exposure that can fade nail polish and dry out your cuticles. Apply cuticle oil with SPF daily, and consider gel polish for baseball designs since it resists fading better than regular lacquer. Reapply topcoat every 2-3 days to maintain shine and create a protective barrier against UV damage and heat.
Combat Stadium Snack Stains Ballpark food like mustard, ketchup, and hot dog toppings can stain lighter baseball nail colors, especially whites and creams. Wash hands immediately after eating messy stadium fare, and consider applying an extra layer of glossy topcoat before games. If staining occurs, a gentle nail polish remover on a cotton swab can spot-clean without ruining your entire manicure.
Maintain Design Integrity Baseball nail art with fine details like stitching or numbers requires extra care to prevent smudging or chipping of intricate elements. Allow each layer to dry completely before adding the next, and always seal detailed artwork with a quality topcoat. Touch up small chips immediately with a matching polish and topcoat to prevent the damage from spreading across the design.
Manage Active Hands Cheering, clapping, and general game day excitement can be tough on manicures, causing chips and breaks. Keep nails at a comfortable, practical length during active baseball season, and file any rough edges immediately to prevent catching. Consider strengthening treatments or hard gel overlays if you’re prone to breaking nails during enthusiastic celebrations.
Schedule Strategic Touch-Ups Plan your baseball manicure timing around your team’s schedule so you have fresh nails for important games. Most gel manicures last 2-3 weeks, while regular polish needs refreshing after 5-7 days for optimal appearance. Book appointments a day or two before big games to ensure your nails look crisp and camera-ready for all those stadium selfies.
Address Seasonal Dryness Air conditioning at indoor stadiums and hot outdoor conditions both contribute to dry cuticles and brittle nails. Carry a small cuticle oil pen in your bag and apply throughout the day, especially before and after games. Hydrated nails and cuticles resist chipping and maintain flexibility, helping your baseball manicure last longer and look fresher.
Troubleshooting Common Baseball Nail Issues
Problem: Stitching Lines Look Wobbly Practice your hand-painting technique on paper first before touching your nails. Rest your painting hand on a stable surface and use your pinky as an anchor point for steadier control. If hand-painting still feels impossible, switch to nail stamping or stickers—there’s no shame in using tools that make the job easier.
Problem: Colors Bleed Together This happens when you don’t wait long enough between layers. Always wait until the previous layer is completely dry (test by gently tapping nails together). Use striping tape when creating color blocks to get crisp lines, and remove it while the top layer is still slightly tacky.
Problem: Glitter Won’t Stay Put Apply glitter over wet clear polish, not dry polish, so it has something to stick to. Press glitter gently into the wet polish with a silicone tool or clean finger. Always use multiple layers of thick top coat over glitter to encapsulate it completely—this is non-negotiable for glitter longevity.
Problem: Chrome Looks Patchy Make sure your base color is completely cured or dry before applying chrome powder. Work in small circular motions and buff thoroughly until you achieve even coverage. If using chrome polish instead of powder, thin coats work better than thick ones.
Problem: White Polish Looks Streaky White is notoriously difficult to apply smoothly. Use a high-quality white polish (cheap formulas are always streaky), apply 3 thin coats instead of 2 thick ones, and let each coat dry fully. Starting with a white or light-colored base coat underneath also helps coverage.
Problem: Design Chips Within 24 Hours You’re likely not wrapping your tips with top coat. Always brush top coat slightly over and under the free edge to seal the tip. Also check that you’re dehydrating nails properly before starting (wipe with rubbing alcohol) and not skipping base coat.
Conclusion
Baseball nails offer the perfect blend of team spirit and personal style, giving you endless ways to celebrate America’s favorite pastime right on your fingertips. With the step-by-step tutorials, product recommendations, and troubleshooting tips in this guide, you now have everything you need to create professional-looking baseball manicures at home—no expensive salon visit required.
Whether you choose minimalist stitching, bold team colors, or elegant chrome finishes, remember that practice makes progress, and even simple designs make a statement when done with care.
Save your favorite techniques, gather your supplies, and get ready to show off your baseball pride with a manicure that’s truly a home run—and don’t forget to share your creations and tag fellow fans who’ll appreciate your creative team spirit!