8 Yellow Nails Inspo You’ll Want to Copy ASAP
Yellow nails hit different—they’re bold without trying too hard, cheerful without being childish, and surprisingly versatile once you find your shade. Whether you’re into soft buttery tones that whisper or neon brights that scream, yellow brings instant personality to your hands.
The best part? Yellow nails works year-round, not just summer. From minimalist French tips to full chrome luxury, here are 8 yellow nail looks that’ll change your mind if you thought this color wasn’t for you.
Minimalist & Soft Yellow
1. Butter Cream Dream
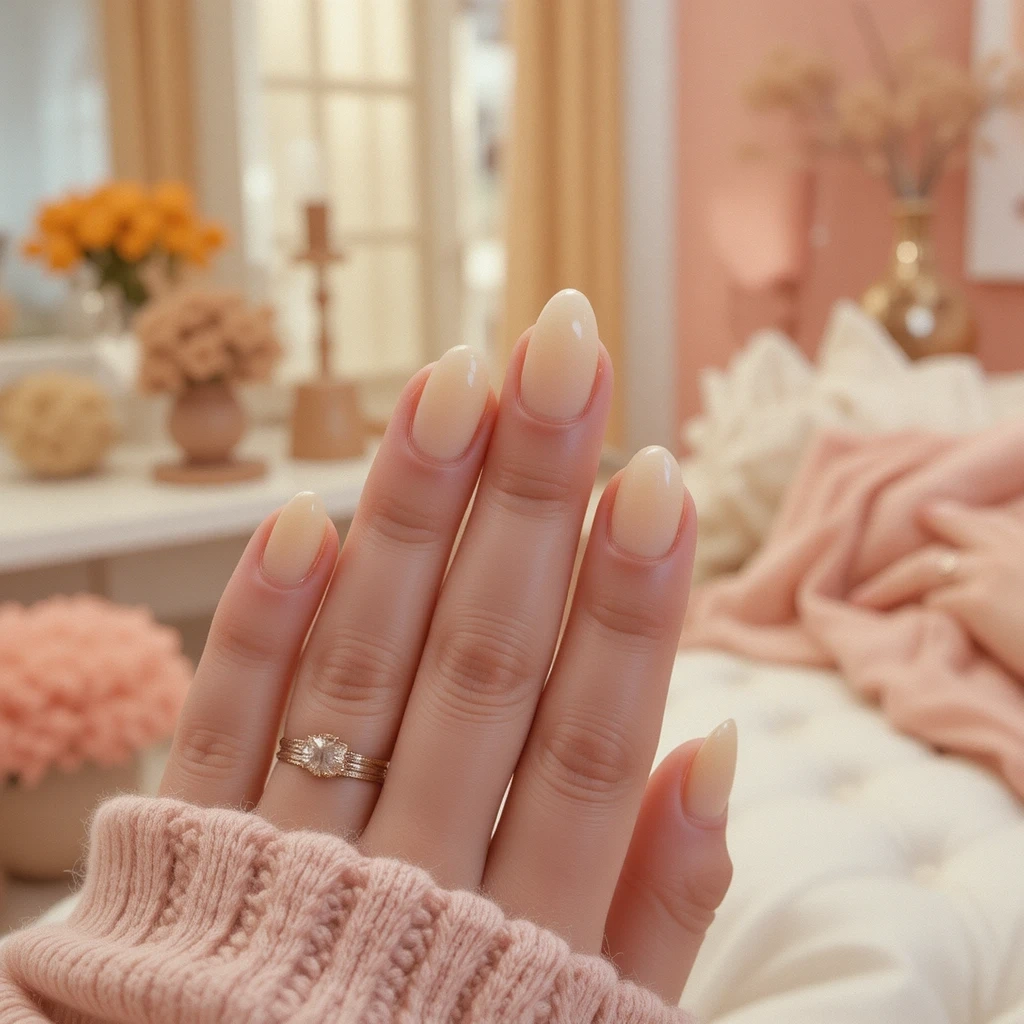
A soft, creamy pale yellow with a glossy finish that feels luxurious without being loud. This sophisticated shade has just enough color to stand out from traditional nudes while maintaining an elegant, understated vibe. Perfect for those who want to dip their toes into yellow without going too bold—it’s like sunshine filtered through sheer curtains.
How to Recreate This Look at Home:
Start by prepping your nails with a gentle file and cuticle pusher. Apply a clear base coat to protect your natural nails from staining—yellow pigments can leave a residue if applied directly. For the butter cream shade, look for polishes labeled “vanilla,” “buttercup,” or “pale yellow” from brands like OPI’s “Bee Mine Forever” or Essie’s “Aim to Misbehave.”
The key to achieving that creamy, streak-free finish is in the application technique. Apply your first coat very thin, almost sheer, and let it dry completely for 3-4 minutes. Your second coat should be slightly thicker with minimal brush strokes—load the brush adequately and apply in one smooth motion from cuticle to tip. If you see any streaks, resist the urge to go back over them; instead, add a third thin coat after drying.
Finish with a high-gloss top coat like Seche Vite or Sally Hansen Insta-Dri to enhance that creamy, polished effect. The glossy finish is crucial for this look—it transforms a simple pale yellow into something that looks professionally done. Reapply top coat every two days to maintain the shine and prevent chipping.
Best Products for This Look:
- Base coat: OPI Natural Nail Base Coat
- Color: Essie “Aim to Misbehave” or OPI “Bee Mine Forever”
- Top coat: Seche Vite Dry Fast Top Coat
- Recommended nail shape: Almond or oval for maximum elegance
2. Lemon Sorbet Tips
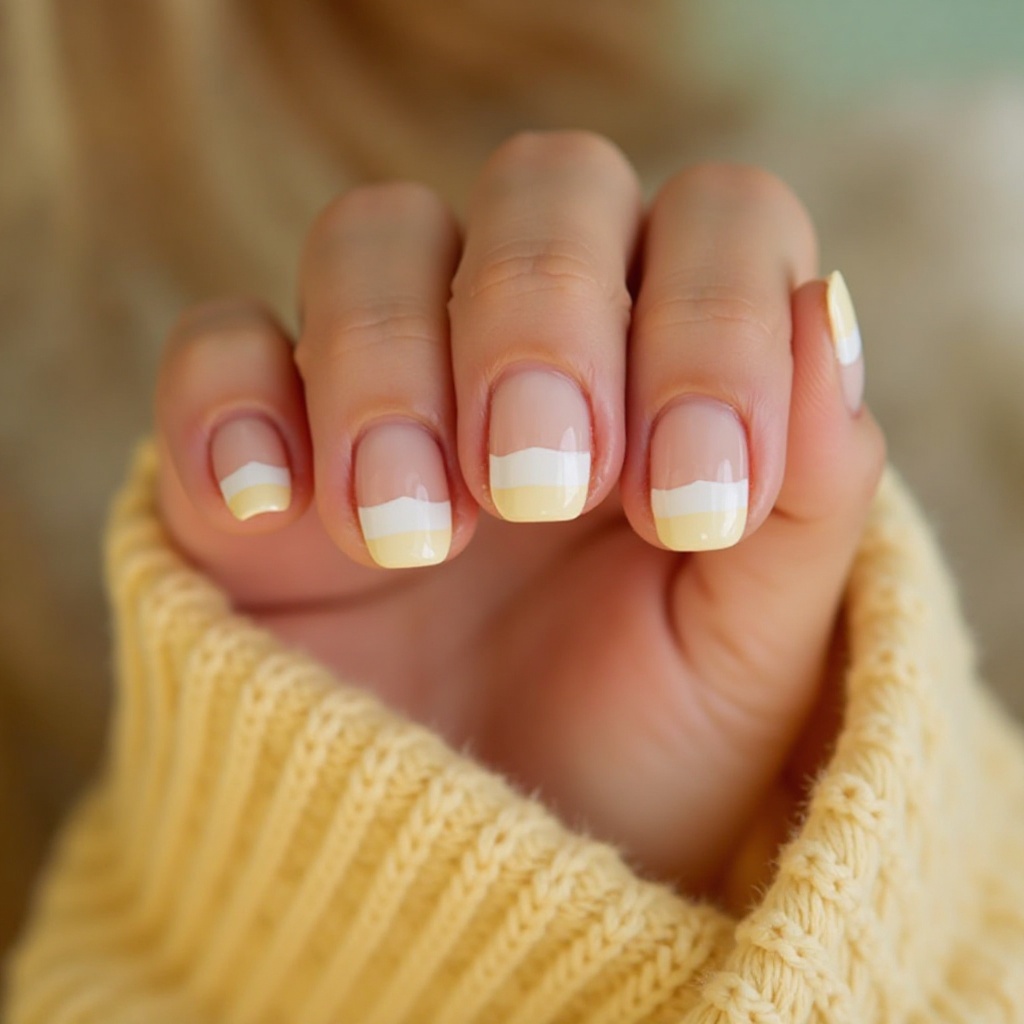
Classic French tips reimagined with a pale lemon yellow instead of traditional white, creating a fresh twist on a timeless style. The sheer nude base keeps it grounded while the yellow tips add playful brightness. This design works beautifully on short to medium length nails and feels modern yet wearable.
How to Recreate This Look at Home:
French tips can seem intimidating, but with the right tools, anyone can achieve salon-quality results. Start with a sheer nude or pink base polish—brands like Essie’s “Ballet Slippers” or OPI’s “Bubble Bath” work perfectly. Apply two coats and let dry completely for at least 10 minutes before moving to the tip application.
For the yellow tips, you have two options: freehand or guides. If you’re new to nail art, invest in French tip guides (available at any drugstore for under $5). Apply them just below where you want your yellow tips to start, press firmly to seal, and paint over the exposed tip area with your pale yellow polish. For freehand application, use a thin nail art brush or a striping brush for more control. Dip the brush in your yellow polish and carefully outline the tip’s edge, then fill in.
The secret to professional-looking French tips is consistency in tip thickness across all nails. Before you start, use a white eyeliner pencil to mark a guide dot on each nail at the same distance from the tip—this ensures uniformity. For beginners, thinner tips (2-3mm) are more forgiving and easier to keep consistent than thicker ones.
Step-by-Step Process:
- Apply base coat and let dry (2 minutes)
- Apply 2 coats of sheer nude/pink base, drying 3 minutes between coats
- If using guides, apply them 2-3mm from the tip edge and press firmly
- Paint yellow tips in 2 thin coats for opacity
- Remove guides immediately while polish is still wet (if using)
- Clean up any mistakes with a small brush dipped in acetone
- Seal everything with a glossy top coat
- Apply cuticle oil for a professional finish
Recommended Products:
- Base: Essie “Ballet Slippers” or OPI “Bubble Bath”
- Tips: Sally Hansen “Mellow Yellow” or China Glaze “Lemon Fizz”
- Tools: French tip guides, thin nail art brush, cleanup brush
- Alternative: Yellow French tip stickers for foolproof application
Bold & Vibrant Yellow
3. Sunflower Shine
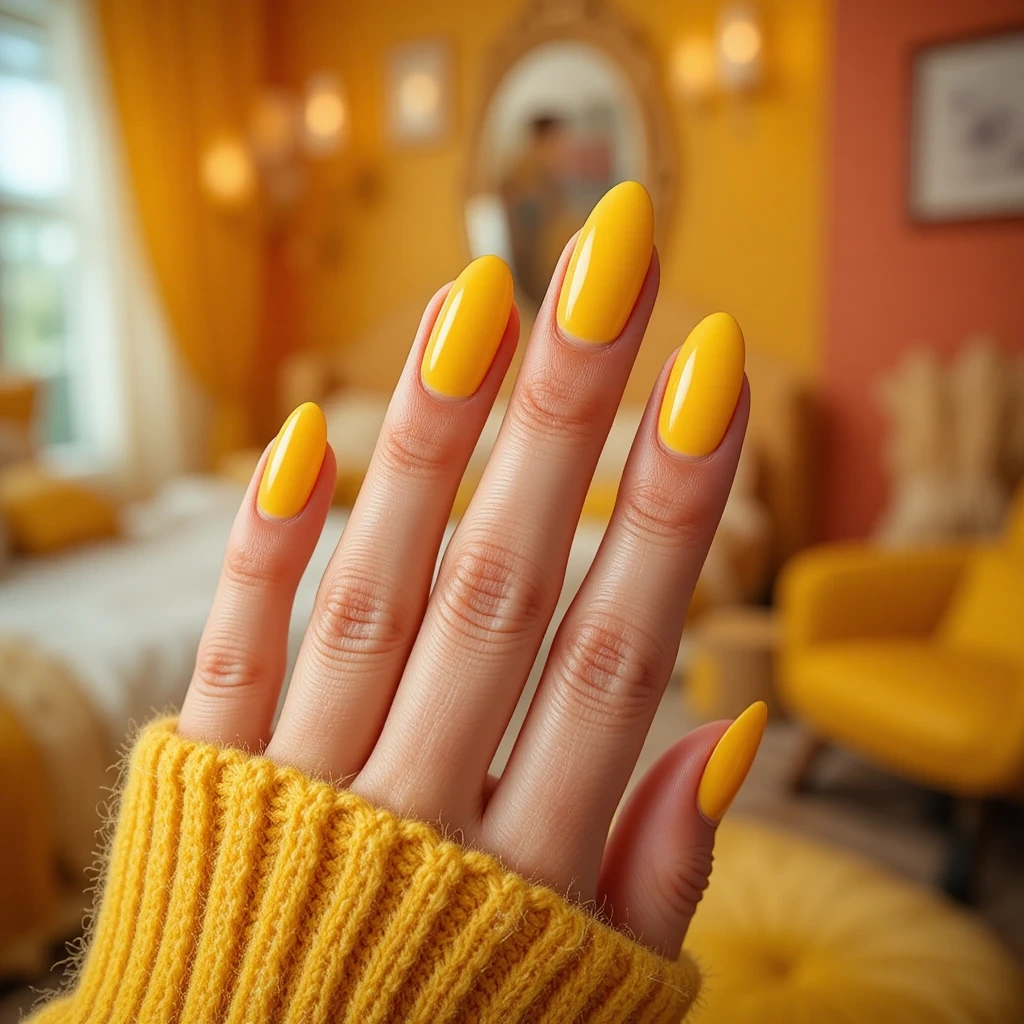
A rich, true yellow with a glossy finish that demands attention and radiates pure joy and confidence. This is yellow in its full glory—not pastel, not neon, but that perfect sunflower shade that feels warm and inviting. The high-shine finish amplifies the color’s intensity while keeping it polished rather than flat.
How to Recreate This Look at Home:
Achieving a rich, streak-free yellow requires proper nail preparation and layering technique. Yellow is one of the trickiest colors to apply because it shows every imperfection and tends to be sheer in formula. The solution? Start with a white base coat specifically designed for color application—this makes your yellow pop brighter and helps you achieve full opacity in fewer coats.
After your white base has dried completely (wait at least 5 minutes), apply your first coat of yellow extremely thin. Think of it as a tinted layer rather than full coverage—you should still see white peeking through. This prevents the dreaded streaky, goopy appearance that ruins many yellow manicures. Wait 3-4 minutes for it to dry to the touch, then apply a second thin coat. Most people will need a third coat for that perfect, opaque sunflower shade.
The glossy finish is non-negotiable for this look. Apply a thick layer of high-shine top coat, making sure to cap the free edge of your nail (brush over the tip) to seal everything in. This prevents chipping and gives you that freshly-done salon shine. For maintenance, reapply top coat every 2-3 days—this is the secret to making any manicure last a full week.
Common Mistakes to Avoid:
- Skipping the white base coat (results in multiple yellow coats needed)
- Applying coats too thick (causes streaking and extended drying time)
- Not waiting between coats (leads to smudging and bubbling)
- Forgetting to cap the free edge with top coat (causes premature chipping)
Product Recommendations:
- White base: OPI “Alpine Snow” or any white polish
- Yellow: China Glaze “Happy Go Lucky,” OPI “I Just Can’t Cope-acabana,” or Essie “Aim to Misbehave”
- High-shine top coat: Essie Gel Couture Top Coat or OPI Top Coat
- Quick-dry drops: Sally Hansen Insta-Dri Anti-Chip Top Coat (if you’re impatient)
Pro Application Timeline:
- Base coat: dry 2 minutes
- White base: 2 coats, dry 4 minutes between
- Yellow polish: 3 thin coats, dry 3-4 minutes between each
- Top coat: thick application, dry 10 minutes before activity
- Total time: 35-40 minutes for a professional finish
4. Neon Electric Yellow
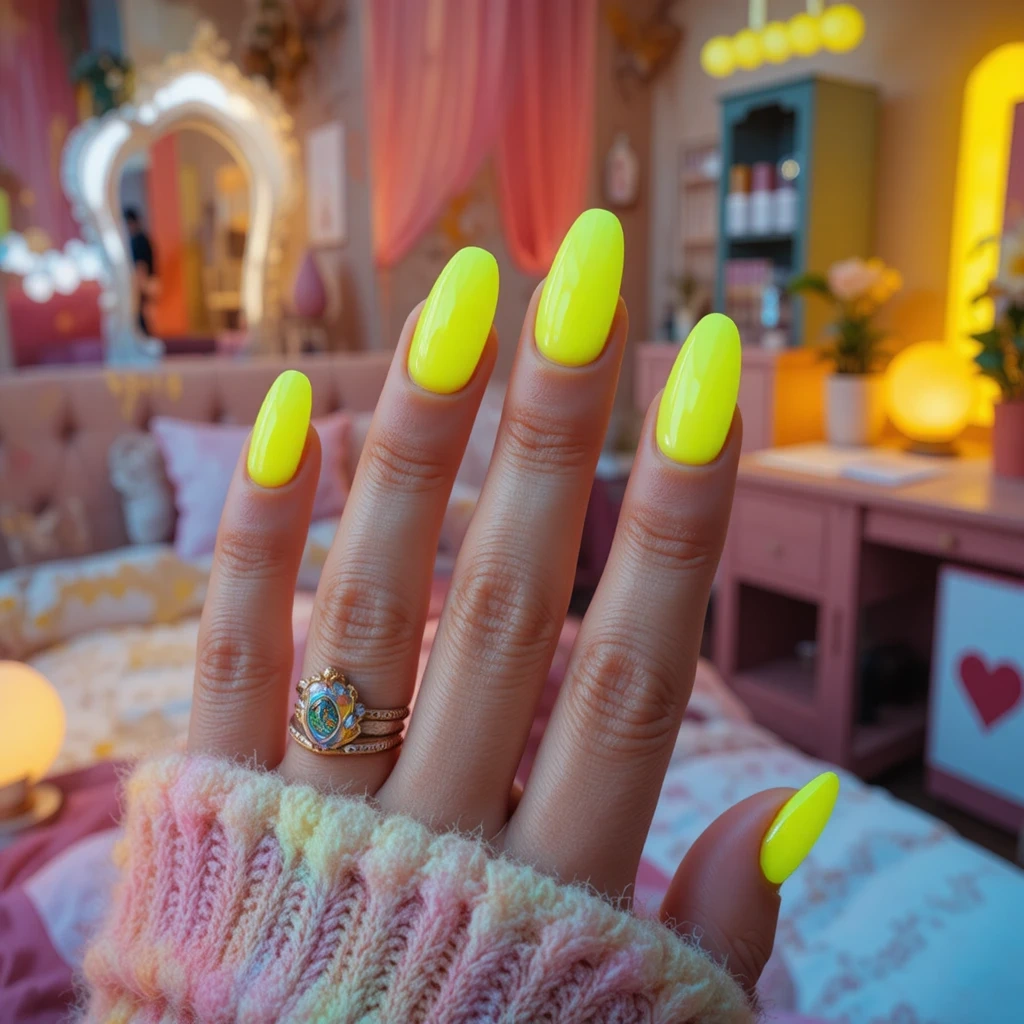
An eye-catching neon yellow that practically glows, perfect for making a fearless fashion statement. This shade has cool undertones that give it that electric, almost-fluorescent quality that photographs beautifully. It’s bold, it’s fun, and it absolutely refuses to be ignored—ideal for festivals, vacations, or anytime you want maximum impact.
How to Recreate This Look at Home:
Neon polishes have a unique formula that behaves differently from traditional polish, so understanding how to work with them is crucial. Neons are typically sheer and require more coats than regular colors—plan on 3-4 coats for full opacity. The trade-off is that they dry faster than cream polishes, so you can layer more quickly without waiting as long between coats.
Start with a pure white base coat (not just any base coat—it must be white). This is absolutely essential for neon colors because they need a bright background to achieve that fluorescent glow. OPI’s “Alpine Snow” or Essie’s “Blanc” work perfectly. Apply two coats of white and let dry for about 5 minutes until completely dry to the touch.
Now for the neon yellow: shake the bottle vigorously for 30 seconds before application—neon pigments settle quickly and shaking ensures even color distribution. Apply your first coat very thin, working quickly because neons can get sticky. Don’t worry that it looks sheer and uneven; this is normal. Apply 2-3 more thin coats, waiting only 2 minutes between each since neons dry faster. The color will build gradually with each layer.
Special Considerations for Neon Polish:
- Neons fade faster in sunlight than regular polish—expect 5-7 days of vibrancy
- They can stain nails more easily, so never skip base coat
- Matte top coat creates a completely different neon effect (try both!)
- Neons photograph incredibly well but may look different in various lighting
Detailed Supply List:
- Base coat: any clear base coat
- White base: OPI “Alpine Snow” or Essie “Blanc” (2 coats needed)
- Neon yellow: China Glaze “Sun-Kissed,” Orly “Glowstick,” or OPI “Hate to Burst Your Bubble”
- Top coat options: Glossy for maximum glow OR matte for modern edge
- Optional: UV-resistant top coat to extend color vibrancy
Application Timeline:
- Clear base coat: 2 minutes dry time
- White base: 2 coats, 3 minutes between, 5 minutes after final coat
- Neon yellow: 3-4 thin coats, 2 minutes between each
- Top coat: apply and wait 10 minutes before any hand activity
- Total time: 30-35 minutes
Elegant Accents & Metallics
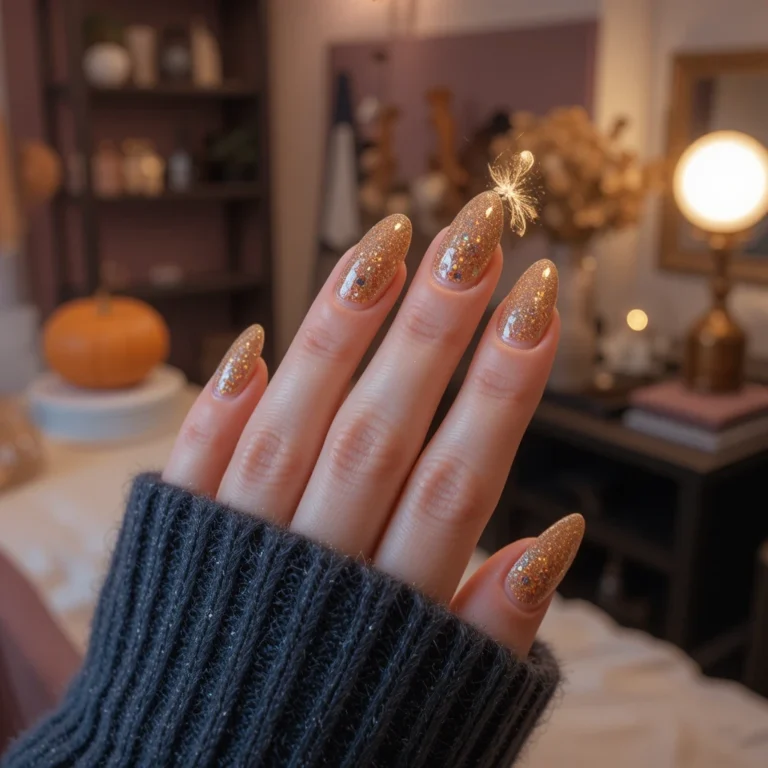
5. Gold-Dusted Yellow
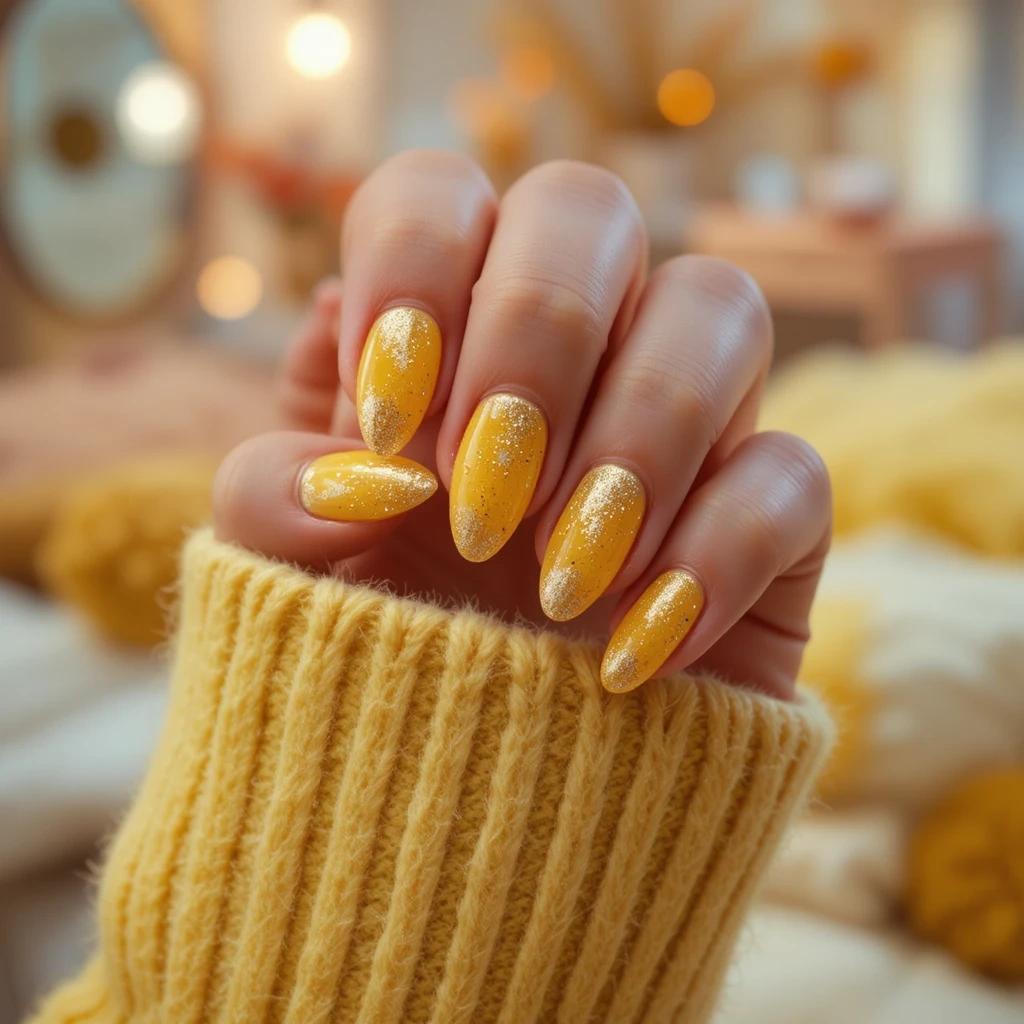
A sophisticated yellow base with delicate gold shimmer particles that catch the light beautifully. The shimmer adds dimension and luxury without overwhelming the base color, creating depth that solid colors can’t achieve. This design walks the line between playful and elegant, making it surprisingly versatile for various occasions.
How to Recreate This Look at Home:
Creating this multi-dimensional look requires layering different polish finishes, which is easier than it sounds. Start with your solid yellow base color—choose a medium to bright yellow for the best contrast with the gold shimmer. Apply your base coat, then two coats of your chosen yellow polish following the thin-coat method (thin first coat, slightly thicker second coat, 3 minutes drying between).
Once your yellow base is completely dry (wait at least 5 minutes), you’ll add the shimmer layer. You have two options here: use a dedicated gold shimmer polish applied lightly over the entire nail, or create a gradient effect by concentrating shimmer more heavily toward the tips. For the gradient approach, apply shimmer polish to a makeup sponge, dab off excess, then gently press onto the tip area of your nail, fading toward the cuticle. This creates beautiful dimension that looks professionally done.
The key to this look is using the right type of shimmer polish—you want fine, delicate gold particles rather than chunky glitter. Look for polishes described as “shimmer,” “micro-glitter,” or “metallic fleck” rather than “glitter.” The particles should be small enough to create a subtle sparkle rather than obvious chunks of glitter.
Two Techniques for Gold Shimmer Application:
Full Coverage Method:
- Apply yellow base (2 coats), let dry 5 minutes
- Apply one thin coat of gold shimmer polish over entire nail
- Seal with top coat immediately
- Best for: Even sparkle, simpler application, beginners
Gradient Method (More Advanced):
- Apply yellow base (2 coats), let dry 5 minutes
- Paint shimmer polish onto makeup sponge
- Dab sponge onto nail tips, concentrating color at tips
- Fade upward toward cuticle with lighter dabbing
- Clean up excess shimmer on skin with acetone-dipped brush
- Seal with thick top coat to smooth texture
- Best for: Dimensional look, sunset effect, special occasions
Product Recommendations:
- Yellow base: Any bright or medium yellow (Essie “Aim to Misbehave,” Sally Hansen “Mellow Yellow”)
- Gold shimmer: Essie “As Gold As It Gets,” OPI “Goldeneye,” China Glaze “Champagne Kisses”
- Tools for gradient: Makeup sponge (cut into small pieces), cleanup brush
- Top coat: Extra important here—use a thick, smoothing top coat to even out shimmer texture
Troubleshooting Tips:
- If shimmer looks too chunky: Apply another layer of top coat to smooth
- If gradient looks patchy: Layer more shimmer gradually until even
- If shimmer won’t stick: Make sure yellow base is completely dry first
- For cleaner application: Use liquid latex or tape around nails before sponging
6. Yellow Chrome Luxury
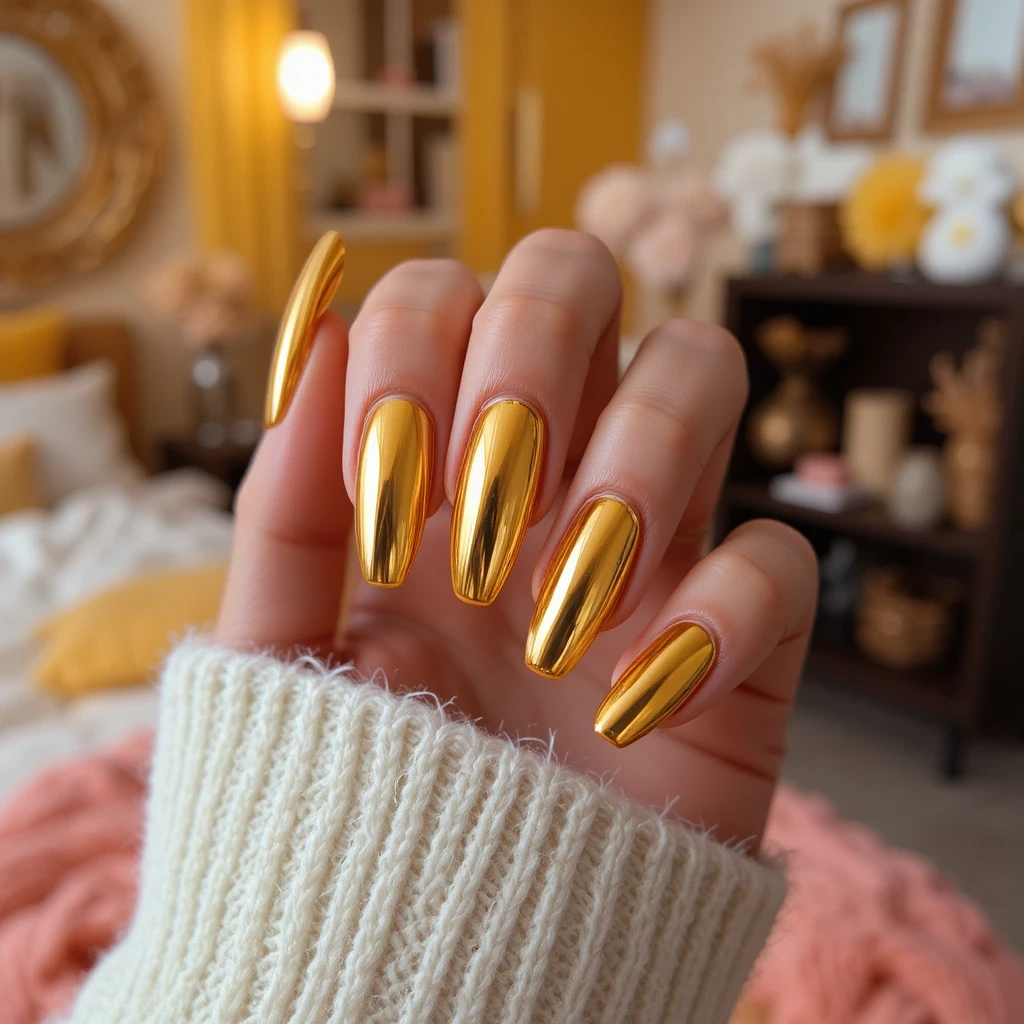
A mirror-like chrome finish in warm yellow gold that looks expensive and futuristic. The reflective surface creates a liquid metal effect that shifts and changes in different lighting. This high-impact style makes short nails look luxe and elongates longer nails with its sleek, seamless finish.
How to Recreate This Look at Home:
Chrome nails require a different process than traditional polish since they involve chrome powder rubbed onto gel polish—but don’t let that intimidate you. While this is the most advanced technique in this article, it’s totally doable at home with the right supplies and patience. You’ll need a gel polish system (base, color, top coat) and a gel UV or LED lamp in addition to chrome powder.
Here’s the process: Start by applying a gel base coat and cure under your lamp according to manufacturer instructions (usually 30-60 seconds). Apply two thin coats of a yellow or gold gel polish, curing between each coat. This base color will show through the chrome slightly, so choose a warm golden yellow rather than a cool lemon shade. After your final color coat, cure it but don’t apply top coat yet.
Now for the chrome magic: Apply a no-wipe gel top coat (this is crucial—regular top coat won’t work) and cure it. While it’s still slightly tacky, use a silicone applicator or your finger (with a finger cot) to rub chrome powder onto the nail in circular motions. You’ll see it transform into a mirror finish right before your eyes. Brush off excess powder, then seal everything with a special chrome-compatible top coat and cure one final time.
Complete Chrome Supply Checklist:
- Gel lamp: LED (faster) or UV lamp
- Gel base coat: Any brand compatible with your lamp
- Gel color: Warm yellow or gold gel polish (Sally Hansen Miracle Gel doesn’t work—needs true gel)
- No-wipe gel top coat: Essential for chrome application
- Chrome powder: Gold or yellow-gold chrome powder (available on Amazon, $8-15)
- Silicone applicator: Often comes with chrome powder, or use eyeshadow applicator
- Chrome-safe top coat: Regular top coat can dull chrome finish
- Nail prep: Alcohol wipes, cuticle pusher, nail file
Step-by-Step Chrome Application:
- Prep nails: push cuticles, file shape, wipe with alcohol
- Apply gel base coat, cure 30-60 seconds
- Apply first thin coat of yellow/gold gel polish, cure 30-60 seconds
- Apply second coat of gel color, cure 30-60 seconds
- Apply no-wipe gel top coat, cure 30-60 seconds
- While slightly tacky, rub chrome powder onto nail in circular motions
- Brush away excess powder with soft brush
- Apply chrome-compatible top coat (don’t touch nail surface first)
- Cure final time 30-60 seconds
- Wipe with alcohol if needed, apply cuticle oil
Beginner-Friendly Alternative: If gel polish feels too advanced, try chrome nail wraps or chrome press-on nails in yellow gold tones. Brands like Dashing Diva and Static Nails offer chrome finishes that apply like stickers and last up to two weeks. This gives you the chrome look without investing in gel equipment.
Common Chrome Mistakes:
- Using regular top coat before chrome (needs no-wipe gel specifically)
- Not curing long enough (causes chrome to look patchy)
- Applying chrome to wet polish (needs fully cured gel)
- Using wrong top coat to seal (dulls chrome effect)
- Not buffing nails smooth first (chrome shows every imperfection)
Artistic & Creative Yellow
7. Sunshine Ombré
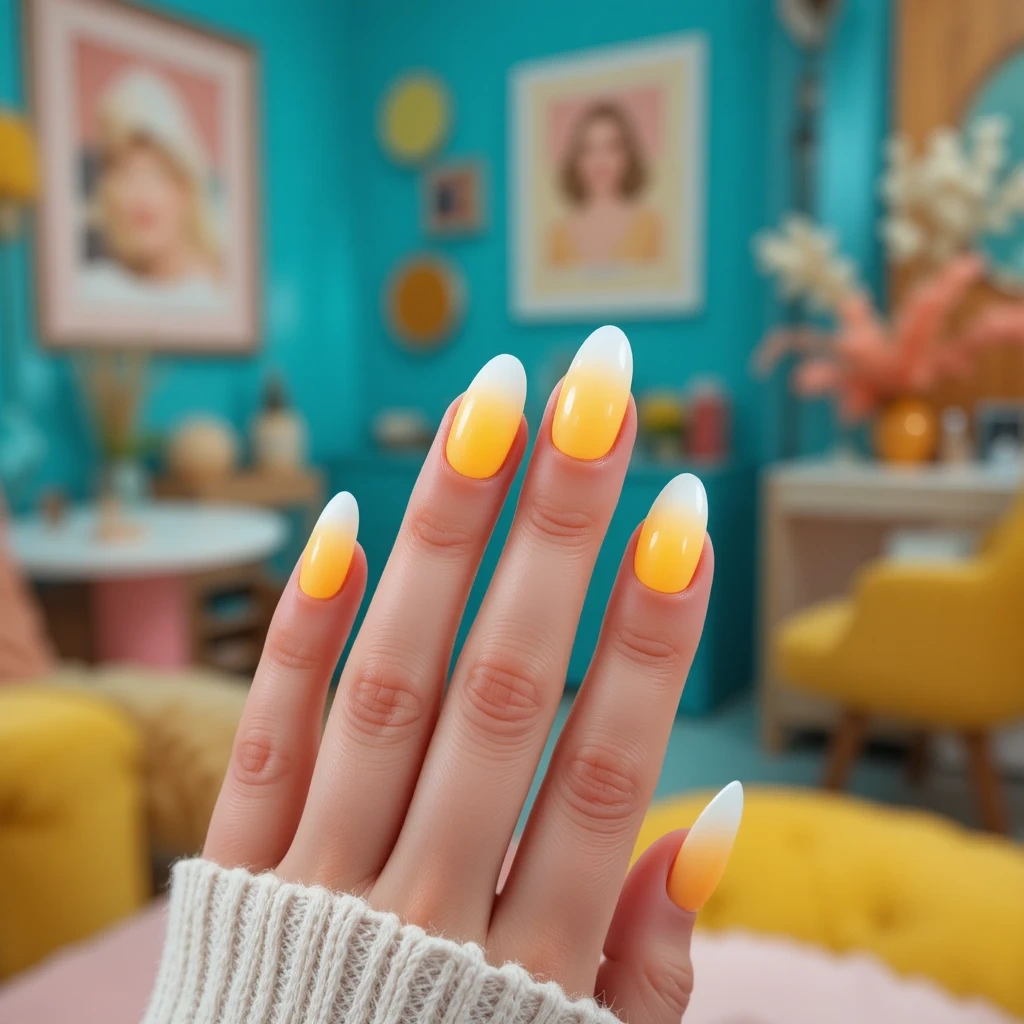
A gradient that transitions from white or cream at the cuticle to vibrant yellow at the tips, creating a sunrise effect. The soft blend gives dimension and movement while making the yellow feel less overwhelming than full coverage. This technique works on any nail length and adds visual interest without requiring intricate nail art skills.
How to Recreate This Look at Home:
The makeup sponge method is the secret to creating smooth, professional-looking gradients at home. You’ll need: your chosen nail polishes (white or cream and bright yellow), makeup sponges cut into small pieces, a small brush for cleanup, and acetone or nail polish remover. Before you begin, apply liquid latex or tape around your nails to protect your skin from excess polish—this makes cleanup infinitely easier.
Start with a white or nude base coat applied to all nails—this creates a smooth canvas and helps your gradient colors show up more vibrantly. Let this dry completely for at least 5 minutes. While waiting, prepare your gradient on a small piece of plastic, foil, or a plastic bag. Paint a stripe of your lightest color (white or cream), then immediately next to it paint a stripe of your yellow, making sure they slightly overlap where they meet.
Now quickly press your makeup sponge into both colors, then gently dab it onto your nail starting at the tip and working toward the cuticle with a bouncing motion. The key is to work quickly before the polish dries on the sponge. Reload your sponge and repeat 2-3 times, letting it dry slightly between layers to build up opacity. You’ll notice the gradient becomes smoother and more vibrant with each layer.
Detailed Ombré Tutorial:
Prep Phase (5 minutes):
- Apply base coat to all nails, dry completely
- Apply one coat of white or nude to all nails, dry 5 minutes
- Cut makeup sponge into 10 small rectangles (one per nail)
- Apply liquid latex or tape around each nail
- Set up workspace with polish, foil, cleanup supplies
Gradient Creation (per nail – 3 minutes):
- On foil, paint vertical stripe of white/cream polish
- Immediately next to it, paint stripe of yellow (slightly overlapping)
- Press sponge into both colors to pick up gradient
- Dab excess onto foil (prevents flooding nail)
- Bounce sponge onto nail from tip toward cuticle
- Reload sponge with fresh polish for second layer
- Dab again, building opacity and smoothing blend
- Repeat 3-4 times total until you achieve desired gradient
Cleanup & Sealing (10 minutes):
- Let gradient dry 5 minutes before cleanup
- Remove liquid latex or tape carefully
- Use small brush dipped in acetone to clean skin
- Apply thick coat of top coat to smooth texture
- Let dry 10 minutes before activity
Product Suggestions:
- Base colors: White (OPI “Alpine Snow”) or cream (Essie “Ballet Slippers”)
- Yellow: Any bright yellow for contrast
- Sponges: Makeup wedge sponges (cheap at drugstore)
- Skin barrier: liquid latex (Peel-Off Base Coat) or tape
- Top coat: Thick, smoothing formula essential for evening texture
Ombré Troubleshooting:
- Gradient looks patchy: Add more layers gradually
- Colors not blending: Work faster while polish is wet
- Too much texture: Apply 2-3 coats of top coat
- Yellow too sheer: Use white base instead of nude
- Sponge dragging: Dab don’t swipe, reload frequently
Time-Saving Tips:
- Do one hand completely before starting the second
- Keep acetone and cleanup brush nearby for quick fixes
- If gradient isn’t perfect, apply extra top coat—this hides many sins
- Practice on paper first to understand color placement
8. Daisy Accent Nails
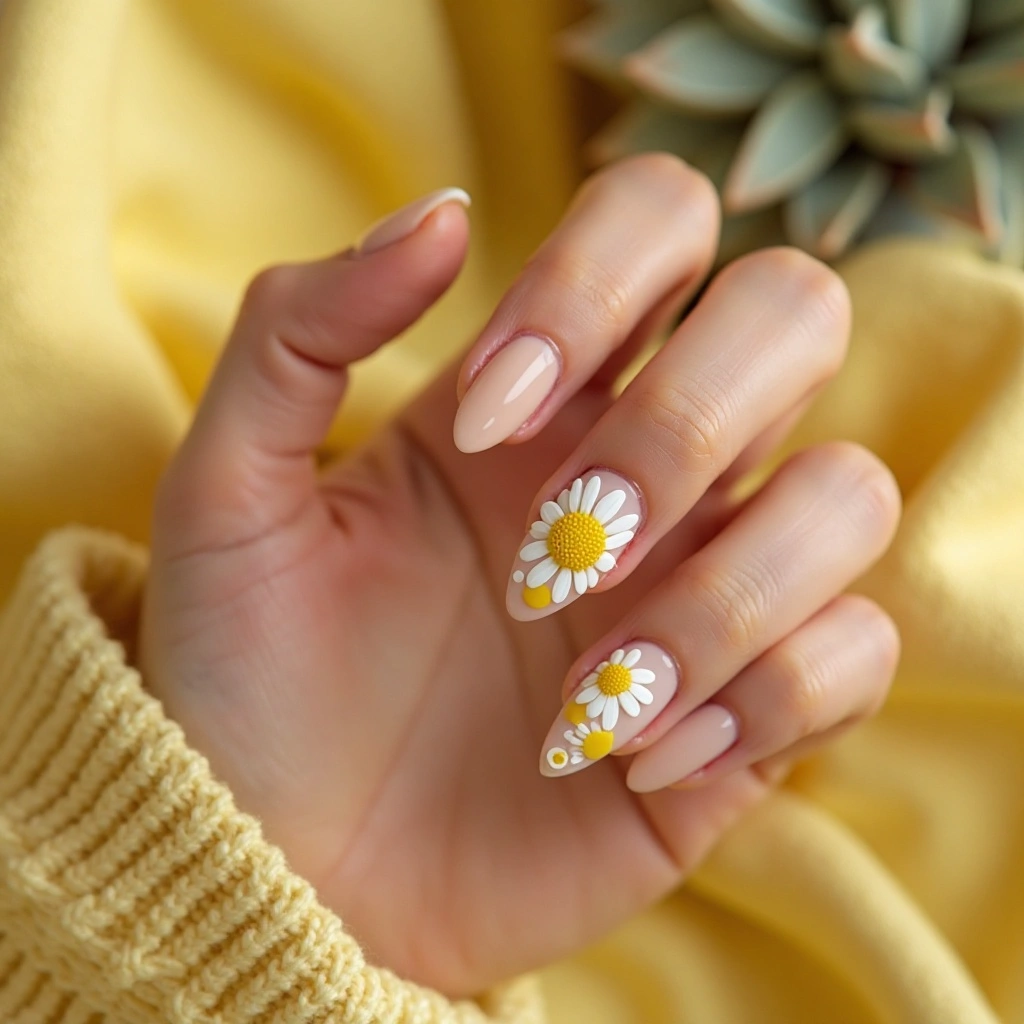
A neutral nude or white base on most nails with one or two accent nails featuring cheerful white daisy designs on yellow. The contrast between minimal base nails and detailed accent creates balance and keeps the look from feeling too busy. This design captures spring and summer energy while remaining wearable and fresh.
How to Recreate This Look at Home:
This is the perfect beginner-friendly nail art project because you only need to create detailed designs on 2-4 nails rather than all ten. Start by choosing which nails will be your accent nails—typically the ring finger on each hand is classic, but you can also do ring finger and thumb for more visual interest. Apply your neutral base color (nude, white, or soft pink) to all nails with two coats, letting dry completely.
For your accent nails, apply two coats of your chosen yellow shade and let dry for at least 5 minutes—this is crucial because you’ll be adding designs on top. Now for the daisies: you have three options depending on your skill level and available time. Option 1 (easiest): Use daisy nail decals or stickers available at drugstores or online. Option 2 (intermediate): Use a dotting tool to create daisies with white polish. Option 3 (advanced): Hand-paint daisies with a thin nail art brush.
Let’s focus on the dotting tool method since it gives you hand-painted results with much less skill required. You’ll need a dotting tool (or substitute with a toothpick or bobby pin) and white polish. Dip your dotting tool in white polish and create five dots arranged in a circle to form the petals—imagine a flower shape. Wipe your tool clean, then use the smallest end to add a tiny yellow or gold dot in the center. Repeat this pattern 2-3 times on each accent nail, varying placement for a natural scattered look.
Three Methods for Daisy Application:
Method 1: Decals (Easiest – 5 minutes)
- Apply base colors to all nails, dry completely
- Peel daisy decal from sheet using tweezers
- Place on yellow accent nail where desired
- Press firmly and smooth out bubbles
- Seal with top coat
- Best for: Perfect daisies, no artistic skill needed
- Products: Amazon or drugstore daisy nail decals
Method 2: Dotting Tool (Intermediate – 15 minutes)
- Apply base colors, dry completely 5 minutes
- Pour small amount of white polish onto foil
- Dip dotting tool in white polish
- Create 5 dots in circular pattern for petals
- Let dry 2 minutes
- Use smallest dotting end for yellow center dot
- Repeat to create 2-3 daisies per accent nail
- Seal with top coat
- Best for: Hand-painted look, customizable placement
- Tools needed: Dotting tool set ($5-10) or toothpick
Method 3: Hand-Painted (Advanced – 25 minutes)
- Apply base colors, dry completely
- Use thin nail art brush with white polish
- Paint small petal shapes in circular arrangement
- Add yellow center with brush or dotting tool
- Add small green stems or leaves if desired
- Seal with top coat
- Best for: Detailed, artistic daisies, custom designs
- Tools needed: Thin nail art brushes, steady hand
Complete Supply List:
- Base nude/white: Essie “Ballet Slippers,” OPI “Bubble Bath,” or pure white
- Yellow for accents: Any bright or medium yellow
- White for daisies: OPI “Alpine Snow” or any crisp white
- Yellow/gold for centers: Tiny amount of yellow or gold polish
- Tools: Dotting tool set OR toothpick/bobby pin as substitute
- Optional: Thin nail art brush for advanced painting
- Optional: Nail decals for easiest application
- Top coat: Essential for sealing design
Design Placement Tips:
- Place 2-3 daisies on each accent nail for balance
- Vary sizes slightly for natural look
- Position daisies at different angles, not all facing same direction
- Leave some negative space—don’t overcrowd
- Consider one larger daisy with smaller ones around it
Beginner Tips:
- Practice daisy shapes on paper first
- Start with fewer daisies; you can always add more
- If you mess up, dip cotton swab in acetone for spot cleanup
- Don’t worry about perfection—hand-painted charm is part of the appeal
- Let each daisy dry 1-2 minutes before adding more nearby
How to Make Yellow Nails Work for You: Complete Beginner’s Guide
Yellow can feel intimidating if you’ve never worn it before, but with the right approach, anyone can rock this sunny shade. The secret isn’t just choosing the right color—it’s understanding how yellow interacts with your unique skin tone, lifestyle, and personal style.
Understanding Undertones:
Your skin’s undertones determine which yellow shades will look harmonious versus jarring on you. To find your undertones, look at the veins on your wrist in natural light. Blue or purple veins indicate cool undertones—you’ll shine in lemon yellows, neon brights, and shades with slight green undertones. Green veins mean warm undertones—reach for golden yellows, mustard, amber, and honey shades. Can’t tell if your veins are blue or green? You likely have neutral undertones and can wear the full spectrum of yellows, so experiment freely.
Another quick test: Does gold or silver jewelry look better on you? Gold looks best on warm undertones (go for golden yellows), while silver flatters cool undertones (choose lemon or icy yellows). If both look equally good, you’re neutral and can pull off anything. When shopping for yellow polish, test shades on one nail first before committing to a full manicure—what looks perfect in the bottle might surprise you on your actual hands.
Matching Yellow to Your Nail Length:
Nail length dramatically affects how yellow reads on your hands. Short nails (those barely extending past your fingertip) look most elegant in softer yellows like butter cream or pale lemon rather than bold, bright shades which can overwhelm small nail beds. Consider French tips with yellow instead of full coverage, or use yellow as an accent nail paired with neutrals on other fingers. Chrome and metallic finishes also work beautifully on short nails because the reflective quality creates visual length.
Medium-length nails (with 2-5mm of free edge) are the sweet spot for yellow—you can handle most shades successfully. This length benefits from glossy finishes that create the illusion of even longer nails. Ombré and gradient techniques work particularly well here, as they draw the eye upward. You have the most versatility at this length, so don’t be afraid to experiment with different yellow tones.
Long nails (extending 5mm+ beyond the fingertip) provide the perfect canvas for bold, saturated yellows that would overwhelm shorter lengths. Neons, true saturated yellows, and complex nail art designs all shine on longer nails. You can also play with matte finishes, which tend to make colors look more muted and sophisticated. Just remember that very long nails in bright yellow make a strong statement—make sure it aligns with your personal style and lifestyle.
Lifestyle Considerations:
Your daily activities should influence both your yellow shade choice and your application method. If you work in a conservative professional environment like law, finance, or corporate settings, softer yellows in muted tones (think mustard, goldenrod, or pale butter) will feel more appropriate than neon brights. French tips with yellow instead of white offer a professional-yet-modern compromise. Consider that gel polish or dip powder lasts 2-3 weeks versus regular polish’s 5-7 days—invest in longer-lasting methods if you don’t have time for weekly touch-ups.
For active lifestyles involving frequent hand washing, cleaning, typing, or physical work, choose shorter nail lengths (short to medium) in any yellow shade, but opt for gel or dip powder formulas that resist chipping better than regular polish. Skip intricate nail art that’s time-consuming to maintain. If you’re a teacher, healthcare worker, or parent, shorter nails in cheerful yellows bring personality while remaining practical.
Creative fields, remote work, and casual environments allow for maximum yellow experimentation. This is your chance to try those bold neons, chrome finishes, and artistic designs. You can refresh your polish more frequently without professional concerns, so play with trendier, statement-making looks.
Coordinating with Your Wardrobe:
Yellow is surprisingly versatile and pairs beautifully with more colors than you’d expect. It’s a natural complement to denim (both light and dark washes), creating a fresh, casual vibe. Yellow nails look stunning with all-black outfits, providing an unexpected pop of color that elevates your entire look. Navy blue and yellow create a nautical, preppy combination that works year-round. Surprisingly, yellow pairs gorgeously with pink and purple—don’t be afraid of this color combo.
Consider your most-worn clothing colors when choosing your yellow shade. If your wardrobe leans heavily neutral (black, white, gray, beige), any yellow will add welcome brightness. If you wear lots of warm colors (browns, oranges, reds), choose warm yellows like golden or amber tones. Cool-toned wardrobes (blues, purples, silvers) pair best with lemon yellows or neon brights.
Think seasonally too: pastel buttery yellows feel fresh for spring with floral dresses and light fabrics. Neon yellows scream summer and pair with beachwear and bright clothing. Mustard and golden yellows complement fall’s earth tones and cozy sweaters. Metallic gold-yellows and chrome finishes add glamour to winter’s dark, rich colors.
Testing Before Committing:
The best way to know if a yellow shade works for you is to try it risk-free. Press-on nails have come incredibly far in recent years and offer an affordable way to test yellow without commitment. Brands like Static Nails, Olive & June, and Kiss offer various yellow shades in press-on form. Wear them for a day or two to see how you feel—do they make you smile when you see them, or do you feel self-conscious? Do they work with your usual outfits?
Another option: apply your chosen yellow to just your ring finger as an accent nail while keeping other nails neutral. Live with it for a few days. If you love seeing that pop of yellow every time you look at your hands, commit to a full yellow manicure. If it feels too bold, you’ve identified your comfort level without wasting product or time.
Start conservatively if you’re new to yellow: choose softer, muted shades first and work your way toward brighter tones as you become comfortable. Remember that yellow looks different in various lighting—check your color in natural daylight (near a window), indoor lighting, and outdoors before deciding. What looks perfect in your bathroom might look too bright or too muted in your office or in photographs.
Current Yellow Nail Trends You Need to Know
The nail world moves fast, and yellow has evolved far beyond basic sunny shades. Understanding current trends helps you create looks that feel modern and Instagram-worthy rather than dated. Here’s what’s dominating salons and social media right now.
Yellow as a Year-Round Neutral:
The biggest shift in how we think about yellow nails is treating them as a versatile neutral rather than a seasonal color reserved for summer. Fashion-forward nail enthusiasts are pairing yellow with everything from winter’s dark knits to spring’s pastel florals, proving this shade works 365 days a year. The key is choosing the right yellow tone for each season: buttery pastels for spring, bright neons for summer, rich mustard for fall, and metallic golds for winter.
This trend works because yellow brings warmth and optimism to any outfit or season, much like how camel or tan neutrals function in your wardrobe. From professional boardrooms to casual weekend brunches, the right yellow shade fits seamlessly when styled with intention. Start viewing yellow as you would nude or pink—a foundational color that can be dressed up or down depending on finish, nail art, and how you style it.
Warm Metallic Takeover:
Gold-toned yellows and chrome finishes in warm buttery shades are absolutely dominating both salon requests and social media feeds. These metallic variations offer yellow’s warmth combined with luxury and dimension that photographs beautifully for Instagram and Pinterest. The reflective quality makes them perfect for special occasions like weddings and parties, yet they remain surprisingly wearable for everyday life.
The trend ranges from subtle gold shimmer dusted over yellow bases to full mirror-chrome finishes in yellow-gold tones. What makes this trend accessible is that it works on any nail length—short nails look expensive and luxe, while long nails create dramatic, editorial-worthy impact. If you’re hesitant about solid yellow, gold metallics offer an entry point that feels more sophisticated and less bold while still delivering that sunny warmth.
Strategic Minimalist Accents:
Rather than committing to full yellow manicures, many are incorporating yellow strategically through French tips, single accent nails, or delicate line work and geometric designs. This approach makes yellow more approachable and versatile—perfect for those who want personality without overwhelming boldness. Yellow French tips have exploded in popularity as a modern update to the classic white-tipped manicure.
Single accent nails in yellow paired with nude or white bases create visual interest while remaining office-appropriate and easy to wear. Thin yellow line details, dots, or geometric shapes on neutral nails give you yellow’s cheerful energy in small, controlled doses. This trend proves you don’t need full coverage to make yellow work for you—sometimes less really is more.
Matte Yellow Sophistication:
Matte finishes in yellow create an unexpectedly sophisticated look that feels modern, editorial, and completely different from glossy yellows. The flat finish softens yellow’s natural brightness, giving it an almost velvety appearance that photographs beautifully and looks expensive. This trend works especially well in deeper shades like mustard, goldenrod, and amber for fall and winter months.
Matte yellow challenges the assumption that yellow must be bright and glossy—instead, it can be moody, subtle, and refined. The finish makes even neon yellows feel more wearable and less overwhelming. If you find glossy yellow too attention-grabbing, try the same shade in a matte finish for a completely different vibe. Simply apply your regular yellow polish and finish with a matte top coat for an instant transformation.
Monochromatic Yellow Mixing:
Wearing multiple shades of yellow across different nails—from pale butter on pinkies to deep mustard on thumbs—creates depth and dimension while proving yellow can be as nuanced as any neutral palette. This monochromatic approach feels cohesive yet interesting, preventing the look from feeling flat or one-dimensional. It’s like wearing different shades of nude or pink, but with yellow’s cheerful personality.
Start with a palette of 3-5 yellow shades ranging from light to dark or warm to cool. Apply them to different nails intentionally—perhaps lightest on pinkies, darkest on thumbs and ring fingers, with medium tones on other fingers. The variation creates visual flow that’s pleasing to the eye while letting you experiment with multiple yellow tones in one manicure. This trend works beautifully for those who can’t decide on just one yellow shade.
Negative Space Yellow Designs:
Incorporating bare nail or clear polish with yellow geometric shapes, swirls, abstract art, or line work keeps looks fresh, airy, and modern. These designs prevent yellow from overwhelming while showcasing creativity and current nail art trends. The breathing room created by negative space makes even bold yellow feel balanced and intentional rather than overpowering.
This trend ranges from simple yellow tips with clear bases (reverse French manicures) to complex geometric patterns where yellow and bare nail alternate in graphic designs. Half-moon manicures—where the cuticle area remains natural while tips are yellow—offer vintage charm with modern execution. Abstract squiggles, dots, and asymmetrical patterns in yellow on clear bases feel artistic and Instagram-worthy while remaining surprisingly wearable for everyday life.
Nail Care Essentials: Keeping Your Yellow Manicure Perfect
A stunning yellow manicure starts long before you pick up a polish bottle. Proper nail care, smart application techniques, and ongoing maintenance determine whether your manicure lasts three days or three weeks. Here’s everything you need to know.
Preparation Makes Perfect:
The foundation of any long-lasting manicure is proper nail preparation, yet most people skip or rush this crucial step. Start with clean, completely dry nails—any oils, lotions, or moisture on the nail plate prevent polish from adhering properly, leading to premature chipping. Use a nail brush and soap to thoroughly clean nails, then wipe each nail with rubbing alcohol or nail dehydrator to remove all oils.
Push back your cuticles gently using a cuticle pusher or orange wood stick—never cut them unless you’re a professional, as cutting can lead to infection and damage. File your nails to your desired shape using a fine-grit file (180-240 grit), always filing in one direction rather than sawing back and forth, which weakens nails. Lightly buff the surface of your nails with a buffing block to smooth out ridges and create better polish adhesion—but don’t over-buff, which thins the nail plate.
The final prep step many people skip: use a nail dehydrator or primer. This removes all remaining oils and creates the perfect surface for base coat adhesion. You can use rubbing alcohol as a substitute, but dedicated nail dehydrators work better. This single step can add 3-5 days to your manicure’s lifespan—it’s worth the extra minute.
Layering Strategy for Longevity:
How you apply your polish matters just as much as what products you use. Always start with a quality base coat—this creates a smooth surface, protects your nails from yellow pigment staining, and provides adhesion for color coats. Let base coat dry for a full 2 minutes before moving to color application. Rushing this step causes peeling and chipping.
For the color coats, thin is always better than thick. Your first coat should be almost sheer—think of it as a tinted layer rather than full coverage. This prevents the dreaded streaky, goopy appearance and allows for faster, more even drying. Wait 3-4 minutes between coats, testing by gently touching the side of your nail (never the top) to ensure it’s dry to the touch. Most yellows need 2-3 coats for full opacity—embrace this rather than trying to achieve coverage in one thick coat.
The top coat is your insurance policy against chipping and fading. Apply it generously, making sure to cap the free edge of your nail (brush over the tip) to seal everything in. This single step prevents water from seeping under your polish and causing premature lifting. After your top coat has dried for 10 minutes, apply quick-dry drops or spray if you’re impatient—these truly work and can reduce full drying time from 2 hours to 30 minutes.
Daily Protection Practices:
Your manicure’s worst enemies are water, chemicals, and impact. Wear gloves whenever you’re washing dishes, cleaning with chemicals, or doing any activity that involves prolonged water exposure or harsh substances. Water causes nails to expand and contract, leading to polish lifting and chipping. Chemicals break down polish bonds, causing premature fading and degradation.
Apply cuticle oil at least once daily (twice is better) to keep the nail bed hydrated and prevent polish from lifting at the edges where it meets your skin. Focus the oil on your cuticles and the skin around your nails, massaging it in thoroughly. This simple habit can extend your manicure by several days while improving your overall nail health. Keep a small bottle or pen of cuticle oil at your desk, bedside table, or in your purse for easy application.
Reapply top coat every 2-3 days to maintain shine and create a fresh protective barrier. This takes just 5 minutes but can double your manicure’s lifespan. Over time, top coat wears down from daily activities—refreshing it prevents the underlying color from becoming vulnerable to damage. Think of it as a maintenance routine rather than a one-time application.
Seasonal Challenges and Solutions:
Each season presents unique challenges for nail health and polish longevity. Summer’s intense UV exposure can fade yellow polish quickly (since yellow is particularly photosensitive), so opt for gel formulas with built-in UV protection or use a UV-resistant top coat. Chlorine and salt water are extremely damaging—apply an extra thick layer of top coat and reapply immediately after swimming. Consider shorter nails during summer to reduce breakage from increased outdoor activities.
Winter dryness wreaks havoc on both nails and polish, causing brittleness and excessive chipping. Combat this by increasing your moisturizing routine—apply hand cream and cuticle oil multiple times daily. Consider shorter nail lengths during winter months since dry nails break more easily. Use a humidifier in your bedroom to prevent extreme dryness that causes nails and polish to become brittle overnight.
Spring and fall temperature fluctuations affect polish curing time—what takes 5 minutes to dry in summer might take 8 minutes in cooler weather. Adjust your timing expectations accordingly and don’t rush the process. Sudden temperature changes (going from heated indoors to cold outdoors) can cause polish to contract and expand, leading to cracking—another reason to refresh your top coat frequently.
Timing Your Touch-Ups:
Knowing when to refresh versus remove and start over saves time and maintains beautiful nails. Gel manicures in yellow typically last 2-3 weeks before needing fills or complete removal. Watch for lifting at the cuticles or tips—address this immediately by applying extra top coat to seal down lifted edges before moisture gets underneath. If lifting is significant (you can see separation), it’s time for removal.
Regular polish should be removed at the first signs of significant chipping (usually 5-7 days) to maintain a neat appearance. Small chips at the tips can be fixed by carefully filing away the chipped area, applying a thin layer of your yellow color just to that spot, and sealing with top coat. This spot-fix can add 2-3 days to an otherwise perfect manicure with one small chip.
If you notice fading but no chipping, you don’t necessarily need to start over—simply apply one fresh coat of color followed by top coat to revive the vibrancy. This works especially well with yellow, which tends to fade before chipping. Keep your polish bottle accessible for these quick refreshes that take just 10 minutes but restore your manicure’s fresh appearance.
Product Quality Matters:
Not all nail products are created equal, and with yellow polish especially, quality makes a dramatic difference. Cheap yellow polishes tend to be extremely sheer (requiring 5+ coats), streak badly, and fade within days. Invest in reputable polish brands like OPI, Essie, China Glaze, or Sally Hansen—the few extra dollars deliver better pigmentation, smoother application, and longer wear time.
For gel systems, never mix brands unless you’ve researched compatibility. Using one brand’s base coat with another’s color and a third brand’s top coat can cause premature lifting, chipping, or inadequate curing. Stick with complete systems from one manufacturer for best results. If you’re building a home gel kit, Gelish, CND Shellac, and OPI GelColor are reliable professional-quality options.
Replace your top coat every 6 months even if it’s not empty. Old top coat thickens and loses effectiveness, providing less protection and causing faster chipping. If your top coat has become gloopy, add a few drops of nail polish thinner (never acetone) to restore consistency—but if it’s very old, just replace it. This single product has the biggest impact on your manicure’s longevity, so keep it fresh.
Conclusion
Yellow nails aren’t just about color—they’re about bringing confidence, creativity, and joy to your daily routine. Whether you’re starting with simple butter cream shades or diving into chrome finishes and intricate daisy designs, each technique in this guide gives you the tools to create salon-quality results at home.
Save your favorite ideas, gather your supplies, and set aside an hour this weekend to try one of these sunny styles. Don’t forget to share your yellow nail creations on social media and tag us—we love seeing how you make these looks your own. Your perfect yellow manicure is waiting!