8 Fall Nails Ideas to Elevate Your Autumn Style
Fall is the perfect time to refresh your manicure with rich, cozy hues that capture the season’s warmth. Whether you’re drawn to deep burgundies, earthy neutrals, or unexpected pops of color, fall nails offer the perfect canvas for expressing your style while staying on-trend.
These ideas blend seasonal elegance with wearable sophistication, giving you options that transition seamlessly from pumpkin patch visits to holiday gatherings.
Minimalist & Nude Fall Nails
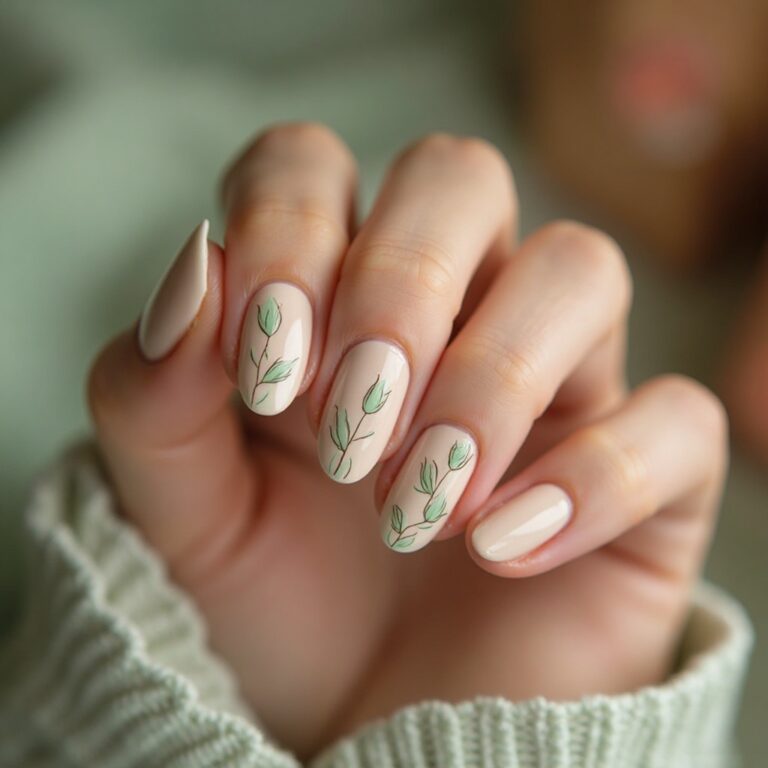
1. Caramel Latte Nude
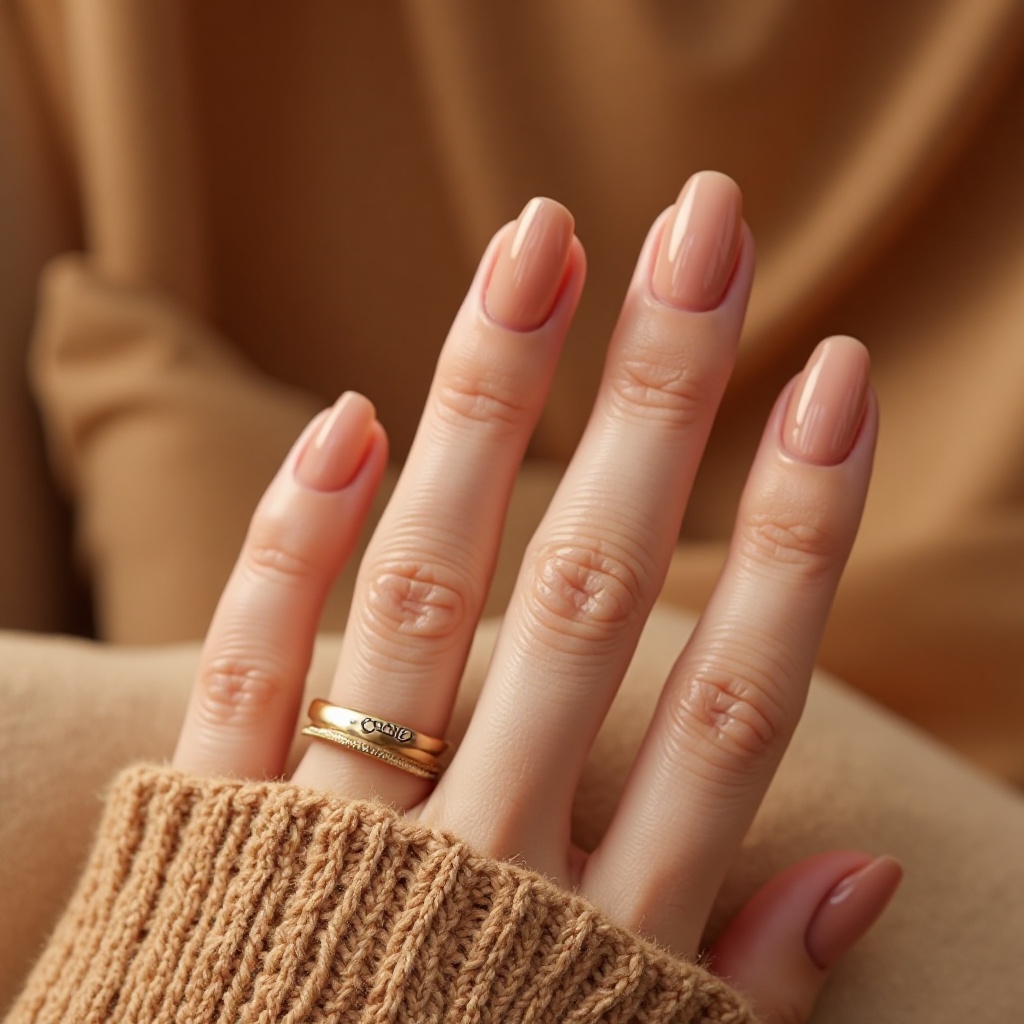
This warm, medium-toned nude channels the creamy richness of your favorite fall beverage with a subtle peachy-brown undertone. The color sits perfectly between tan and mauve, offering depth without being too bold, and works beautifully in both glossy and matte finishes. It’s sophisticated enough for professional settings while still feeling seasonally appropriate and fresh.
Why It Works for Fall:
- Complements the warm color palette of autumn without competing with statement sweaters and scarves
- The caramel undertones mirror fall’s natural landscape and cozy aesthetic perfectly
Pro Tip:
- Pair with almond or oval nail shapes for maximum elegance
- Add a single gold foil accent nail to elevate the look for evening events
How to Recreate at Home:
- Prep your nails: Push back cuticles, file to your desired almond or oval shape, and buff the surface lightly to remove shine
- Apply base coat: One thin layer, let dry 2 minutes
- First color coat: Apply a thin, even layer starting from the center of the nail and working outward. Let dry 3-5 minutes
- Second coat: Apply another thin layer for full opacity. Thin coats prevent bubbling and dry faster
- Finish: Apply glossy top coat OR wait until polish is completely dry (20+ minutes) and apply matte top coat
Recommended Products:
- OPI “Barefoot in Barcelona” or Essie “Picked Perfect” for the caramel nude shade
- Seche Vite top coat for glossy finish
- Essie Matte About You top coat for matte finish
Beginner Troubleshooting:
- Streaky application? The formula might be too thick—add 2-3 drops of nail polish thinner (not remover)
- Bubbles in polish? You’re shaking the bottle. Roll it between your palms instead
- Polish flooding cuticles? Leave a tiny gap (1mm) between polish and cuticle. Use a small brush dipped in acetone for cleanup
2. Toasted Almond Chrome
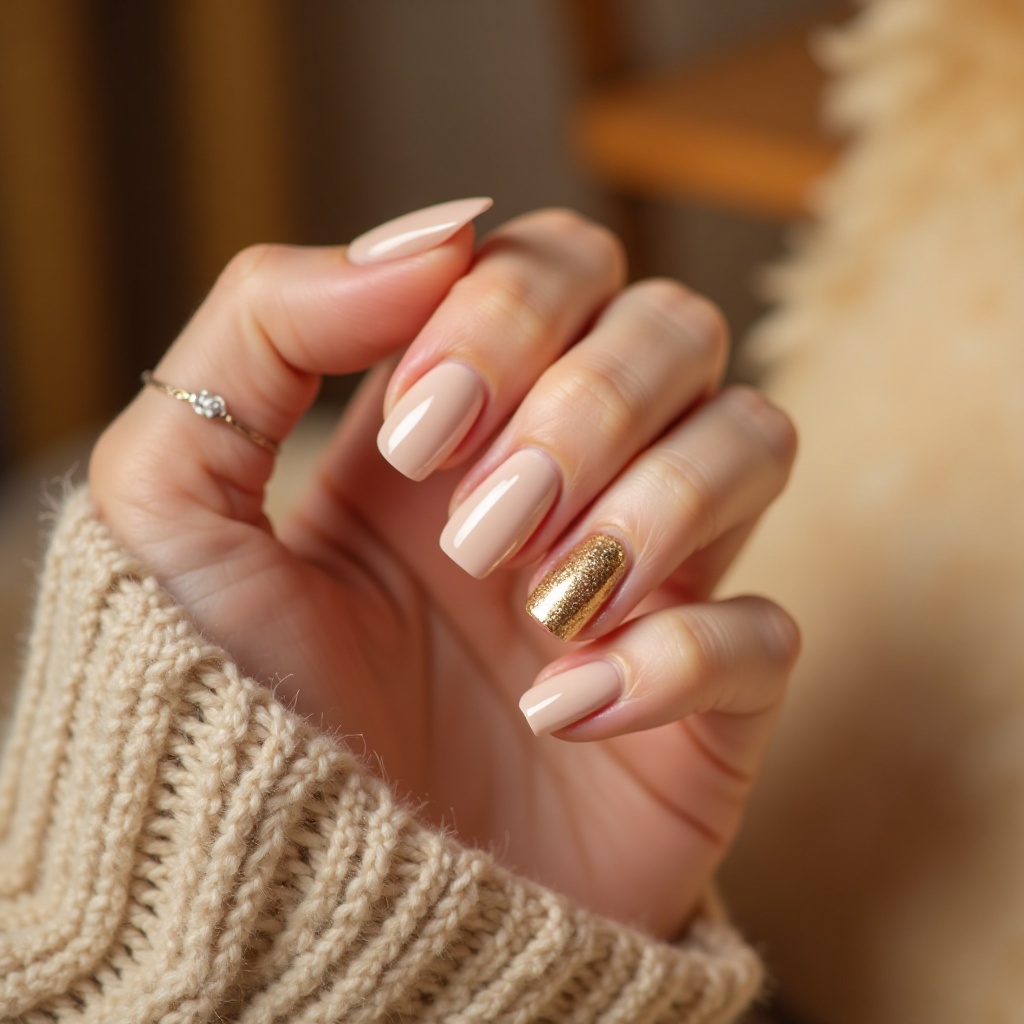
Imagine a soft, sandy beige infused with warm gold chrome shimmer that catches the light like autumn sunshine through leaves. This nail combines the subtlety of a neutral base with just enough metallic dimension to feel special and elevated. The chrome finish transforms throughout the day, shifting from muted elegance to luminous sophistication depending on the lighting.
Why It Works for Fall:
- Brings warmth to shorter days while maintaining a polished, understated aesthetic
- Chrome finish adds festive dimension perfect for fall celebrations without feeling overly dressy
Pro Tip:
- Use a rubber base coat before chrome powder application to ensure smooth, even coverage
- Square or squoval shapes showcase the chrome effect most dramatically
How to Recreate at Home:
Chrome powder can seem intimidating, but it’s actually easier than nail art! Here’s the foolproof method:
- Base preparation: Apply regular base coat and your nude/beige base color (2 coats), cure if using gel
- No-wipe top coat: This is crucial—apply a gel top coat that doesn’t leave a sticky residue, cure for 60 seconds
- Chrome application: While nail is still warm from the lamp, use the applicator sponge (comes with chrome powder) to rub powder onto the nail in circular motions. You’ll see it transform immediately
- Buff it in: Continue rubbing gently until the entire nail is covered and shiny
- Seal it: Apply gel top coat over the chrome, cure for 60 seconds. Done!
Recommended Products:
- Beetles Gel Polish in “Bare Beige” or similar warm nude
- Makartt Chrome Powder in “Gold/Champagne”
- Modelones No-Wipe Gel Top Coat
- Any 48W LED nail lamp
Beginner Tips:
- Chrome powder shows every imperfection, so make sure your base color is completely smooth
- Work one nail at a time—the nail needs to be warm from the lamp for the chrome to adhere properly
- Less powder is more; you can always add more but can’t easily remove excess
- Regular polish chrome exists (Born Pretty chrome powders work with regular polish) but gel gives better results
Time Investment: 45 minutes for your first attempt, 25 minutes once you get the hang of it
Deep & Moody Fall Nails
3. Burgundy Wine Velvet
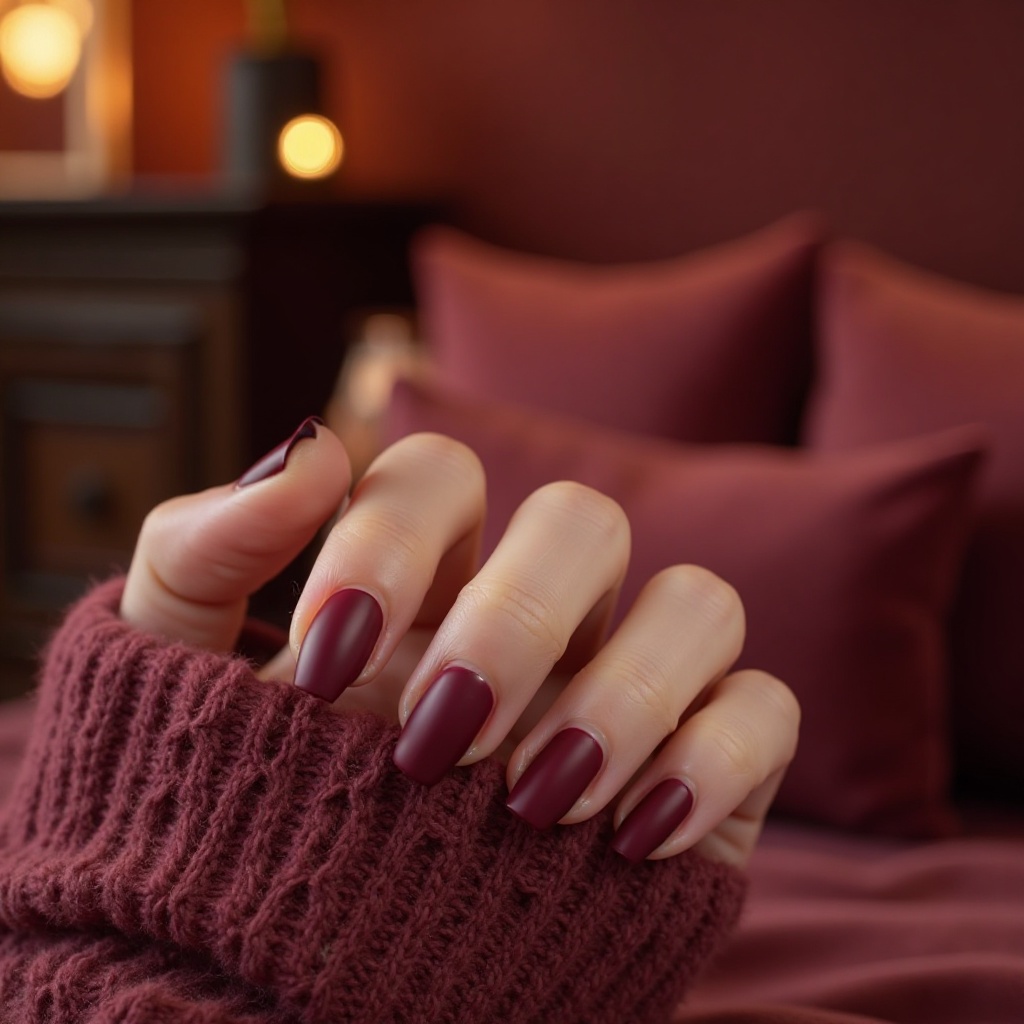
This is the quintessential fall nail—a deep, luxurious burgundy with subtle purple undertones that evokes fine wine and cozy evenings. The matte velvet finish gives it an expensive, fashion-forward edge that feels modern rather than traditional. It’s bold enough to make a statement but refined enough to wear anywhere, from board meetings to date nights.
Why It Works for Fall:
- Perfectly captures autumn’s rich, romantic color story and pairs beautifully with fall wardrobes
- The depth of color feels appropriate for shorter, cooler days and complements seasonal makeup trends
Pro Tip:
- Apply matte topcoat in thin layers to avoid texture issues or dulling the color depth
- Stiletto or coffin shapes amplify the dramatic, editorial vibe of this shade
How to Recreate at Home:
Dark colors require extra precision, but these steps ensure a clean, professional finish:
- Crucial first step: Apply base coat. Non-negotiable for dark shades—they WILL stain your nails yellow without it
- Thin coats are everything: Apply 3 thin coats rather than 2 thick ones. Thick coats of dark polish take forever to dry and are more likely to smudge
- Drying time: Wait 5 full minutes between coats. Set a timer. Seriously.
- Clean up as you go: Dip a small brush or cotton swab in acetone and clean up any polish that got on your skin before it dries
- Matte magic: Once polish is COMPLETELY dry (wait 30 minutes), apply matte top coat in one smooth stroke per nail
Recommended Products:
- OPI “Malaga Wine” or Essie “Bahama Mama”
- Orly Bonder base coat (prevents staining better than most)
- Sally Hansen Insta-Dri Matte Top Coat
Insider Tricks:
- Paint your dominant hand first while you’re fresh and focused
- Rest your hand on a flat surface and bring the brush to the nail (not the other way around)
- If you smudge after 10+ minutes of drying, don’t try to fix it. Let it dry completely, then apply another thin coat over the entire nail
- Matte top coats can feel rough at first—this is normal and gets smoother after 24 hours
Common Mistake to Avoid: Applying matte top coat before the color is fully dry will cause dragging and streaks. When in doubt, wait longer.
4. Forest Green with Gold Foil
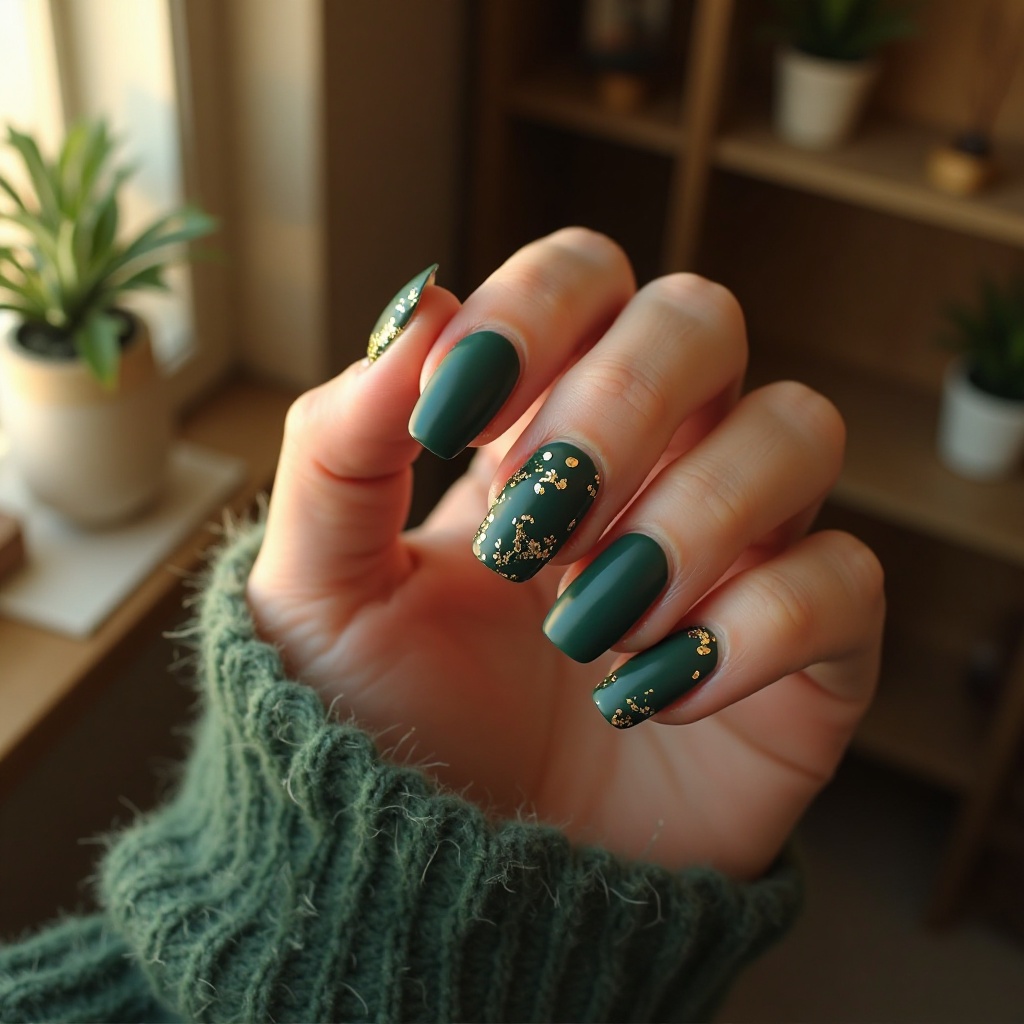
A deep, saturated hunter green serves as the perfect backdrop for scattered gold foil accents that mimic leaves catching sunlight. This combination feels earthy yet luxurious, bringing together nature-inspired color with metallic glamour. The contrast between the matte green base and reflective gold creates visual interest that’s seasonally perfect without being costume-y.
Why It Works for Fall:
- Evergreen shades are underutilized in fall but perfectly complement the season’s color palette
- Gold foil adds festive touch ideal for Thanksgiving and early holiday gatherings
Pro Tip:
- Apply gold foil randomly on 1-2 accent nails rather than all fingers for balanced sophistication
- Seal foil with glossy topcoat while keeping base nails matte for dimensional contrast
How to Recreate at Home:
Foil application seems tricky but is actually beginner-friendly once you understand the process:
- Green base: Apply base coat, then 2-3 coats of deep green polish on all nails. Let dry completely (20-30 minutes)
- Matte finish: Apply matte top coat to all nails. Let dry 10 minutes
- Choose accent nails: Pick your ring finger and middle finger on each hand (or just ring fingers for more subtle look)
- Foil adhesive: Apply a thin layer of nail foil glue or clear polish to your accent nails in random patches (not the whole nail). Wait until it’s tacky but not wet—about 45-60 seconds
- Press foil: Place gold foil sheet (shiny side up) over the tacky areas and press down firmly with your finger for 10 seconds
- Peel off: Quickly peel away the foil sheet—the gold will stick where you applied adhesive
- Seal accent nails only: Apply glossy top coat ONLY to the foiled nails to create that dimensional contrast
Recommended Products:
- China Glaze “Emerald Fitzgerald” or Essie “Going Incognito”
- Beetles Nail Foil Sheets (Gold variety pack)
- Twinkled T Foil Transfer Gel (specifically for foil adhesion)
Beginner-Friendly Approach: Instead of foil glue, you can use this easier method:
- Apply clear polish to random spots on accent nails
- While still wet, press gold foil pieces onto the polish
- The foil will stick as the polish dries
- This gives a less precise but still beautiful scattered effect
Design Variations:
- Create a “falling leaves” pattern by concentrating foil near the tips
- Do a gradient effect with more foil at the base fading toward tips
- Add tiny foil dots across all nails instead of accent nails for subtle sparkle
Time Investment: 40 minutes total
Cool-Toned Elegance
5. Slate Gray with Silver Shimmer

This sophisticated cool gray has subtle blue undertones and is infused with fine silver micro-shimmer that creates an ethereal, almost foggy effect. It’s the perfect embodiment of crisp fall mornings and overcast skies, offering a contemporary alternative to traditional autumn browns. The shimmer adds just enough dimension to prevent the gray from feeling flat or dull.
Why It Works for Fall:
- Provides a fresh, modern take on fall nails that complements both warm and cool-toned wardrobes
- Gray shades are incredibly versatile and won’t clash with seasonal burgundies, oranges, or greens
Pro Tip:
- Layer the shimmer polish over a solid gray base for controllable intensity
- Short to medium length nails in round or oval shapes keep this look polished rather than edgy
How to Recreate at Home:
Layering shimmer over a base color gives you control over the final effect:
- Gray foundation: Apply base coat, then 2 coats of slate gray polish. Let dry completely
- Shimmer layer: Apply 1-2 thin coats of silver shimmer polish over the gray
- One coat = subtle, professional shimmer
- Two coats = more dramatic, evening-appropriate sparkle
- Top coat: Finish with glossy top coat to enhance the shimmer effect
Recommended Products:
- Essie “Petal Pushers” or OPI “Cement the Deal” for gray base
- Sally Hansen Insta-Dri “Flashy” or Essie “Set in Stones” for silver shimmer
- Seche Vite top coat (makes shimmer more reflective)
DIY Shimmer Creation: Can’t find the perfect shimmer shade? Make your own:
- Mix loose cosmetic glitter or mica powder with clear polish
- Start with 1/4 teaspoon glitter to 1 bottle of clear polish
- Shake well and test—add more glitter if needed
- This works with any base color to create custom shimmer polishes
Application Tips:
- Shimmer polishes tend to be thinner—don’t overload the brush
- If you get too much shimmer in one area, gently dab (don’t wipe) with the brush to redistribute
- Apply shimmer in one smooth stroke per section of nail to avoid patchiness
Shape Recommendation: This look works best on shorter nails (just past fingertip) with round or oval shapes—the subtle shimmer complements the understated length perfectly.
6. Navy Blue Glossy
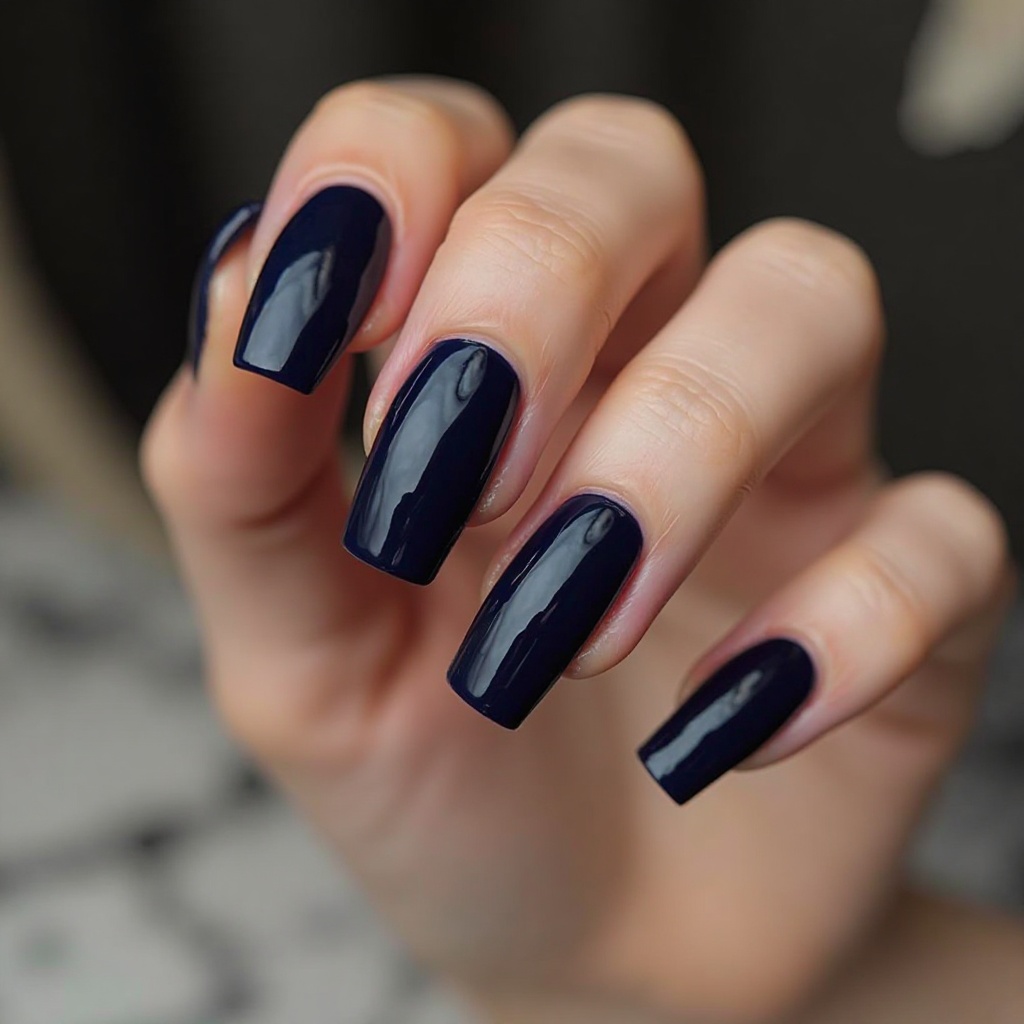
Deep, inky navy with a high-shine glossy finish brings unexpected sophistication to fall manicures with its almost-black richness. This shade walks the line between professional polish and after-hours elegance, working equally well in corporate settings and cocktail parties. The glossy finish makes the dark color feel intentional and refined rather than gothic or heavy.
Why It Works for Fall:
- Navy is seasonally appropriate but less expected than typical fall browns and oranges
- The deep cool tone pairs beautifully with denim, leather jackets, and fall’s cozy textures
Pro Tip:
- Apply three thin coats rather than two thick ones to avoid streaking and achieve true opacity
- Pair with nude or metallic accent nails on ring fingers for added visual interest
How to Recreate at Home:
Navy can be streaky, so proper technique is essential:
- Prep is everything: Base coat is mandatory—navy stains like crazy
- First coat (barely there): Apply the thinnest possible coat just to tint the nail. It will look terrible and streaky. That’s normal. Let dry 3-4 minutes
- Second coat (build coverage): Apply a thin coat focusing on even coverage. Still might look slightly streaky. Let dry 5 minutes
- Third coat (perfection): This coat evens everything out. Apply with confidence in smooth strokes
- Ultra-glossy finish: Apply quick-dry top coat immediately after the third coat for maximum shine
Recommended Products:
- OPI “Russian Navy” or Essie “After School Boy Blazer”
- Orly Bonder Rubberized Base Coat (prevents staining)
- Out The Door top coat (gives the glossiest finish)
The Streak-Free Secret: The key to perfect navy nails is letting each coat dry longer than you think necessary. Navy’s pigment density means wet coats will drag and streak if you rush. Set actual timers between coats.
Quick-Dry Method: If you’re impatient (same):
- After each coat, dip nails in ice water for 2 minutes
- This sets the polish faster and prevents smudging
- Still wait the recommended time before the next coat, but it firms up the previous layer
Accent Nail Ideas:
- Ring finger in champagne gold
- Ring finger in nude with gold foil
- All navy with one thin gold stripe down center of ring finger nails
Removal Tip: Dark polishes are stubborn. Soak cotton pads in acetone, press on nails, wrap in foil, wait 5 minutes. The polish will wipe off easily instead of requiring aggressive rubbing.
Warm & Earthy Tones
7. Terracotta Matte
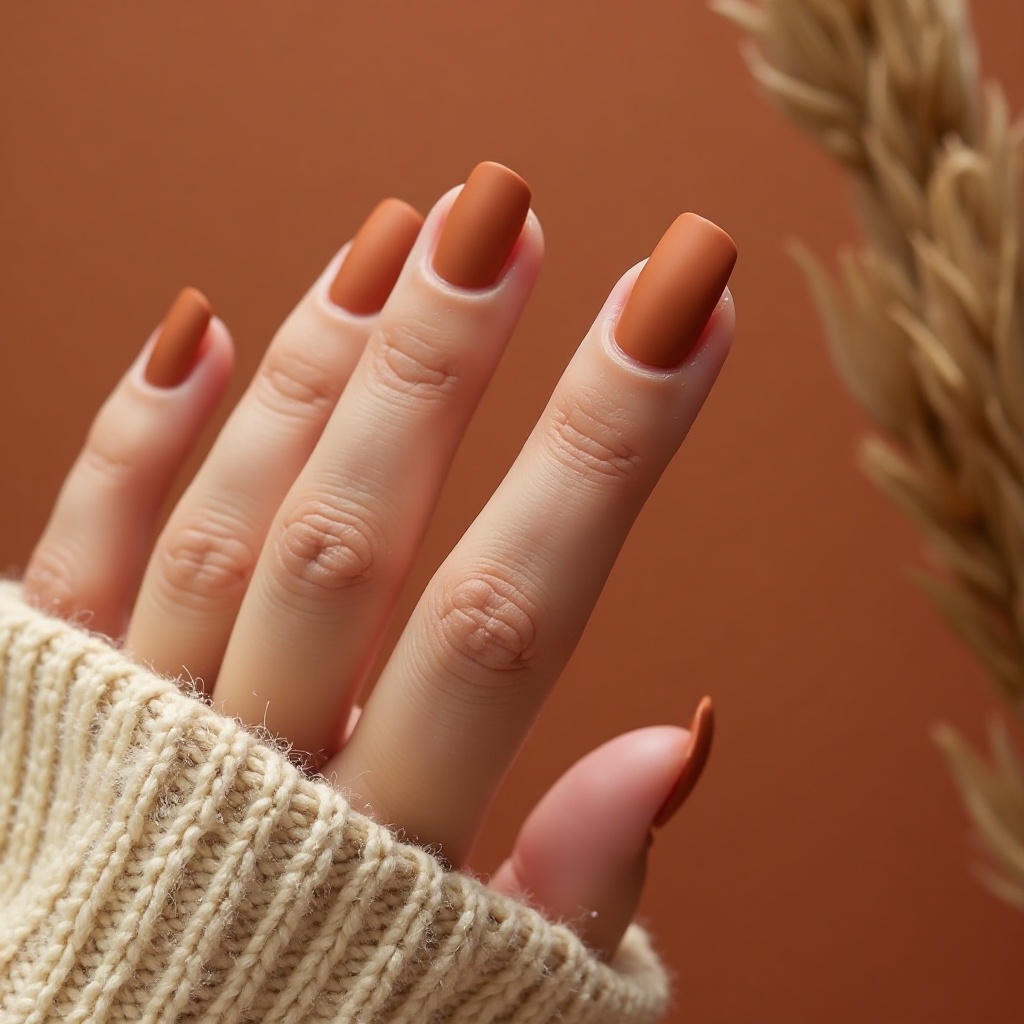
This warm, clay-inspired orange-brown perfectly captures fall’s earthy essence with its sun-baked, southwestern vibe and ultra-smooth matte texture. It’s bold without being bright, offering the warmth of orange tempered by brown’s grounding sophistication. The matte finish gives it a velvety, touchable quality that feels luxurious and modern.
Why It Works for Fall:
- Terracotta is having a major moment and perfectly embodies autumn’s warm, cozy aesthetic
- The color flatters most skin tones and coordinates effortlessly with fall fashion staples
Pro Tip:
- Exfoliate cuticles thoroughly before application—matte finishes highlight any imperfections
- Reapply matte topcoat every 3-4 days to maintain the velvety texture as oils dull the finish
How to Recreate at Home:
Matte finishes are unforgiving of imperfections, so prep is crucial:
- Intensive prep: Push back cuticles, remove any dead skin around nails with a gentle scrub, and wipe nails with rubbing alcohol to remove all oils
- Smooth surface: Lightly buff the nail surface—any ridges will show through matte polish
- Base coat: Apply and let dry completely (3 minutes)
- Terracotta application: Apply 2-3 thin, even coats. Matte formulas are more forgiving of brush strokes than glossy, but still aim for smooth application
- Let it cure: Wait 15-20 minutes until completely dry before matte top coat
- Matte top coat: Apply in thin, even strokes. Do NOT go back over areas you’ve already coated—this causes texture issues
Recommended Products:
- OPI “Crawfishin’ for a Compliment” or Essie “Cliff Hanger”
- CND Matte Top Coat (doesn’t dull the color as much as cheaper options)
- Glass nail file for smoothest edges
Maintaining the Matte Finish: Matte polish absorbs skin oils and becomes shiny at the tips within 3-4 days. Here’s how to fix it:
- Wipe nails with rubbing alcohol
- Apply a fresh thin coat of matte top coat
- This takes 5 minutes and extends your manicure by another week
Troubleshooting Matte Mishaps:
- Matte top coat made color look dull/lighter? You applied it too thick. Remove and try again with a thinner coat
- Rough, bumpy texture? The color wasn’t fully dry. Wait 30+ minutes next time
- Streaky matte finish? Don’t go over the same area twice. One smooth stroke per section
Easy Variation: Not ready to commit to all-matte? Do glossy terracotta on all nails except your ring fingers—make those matte for a modern mixed-finish look.
8. Burnt Orange Ombré
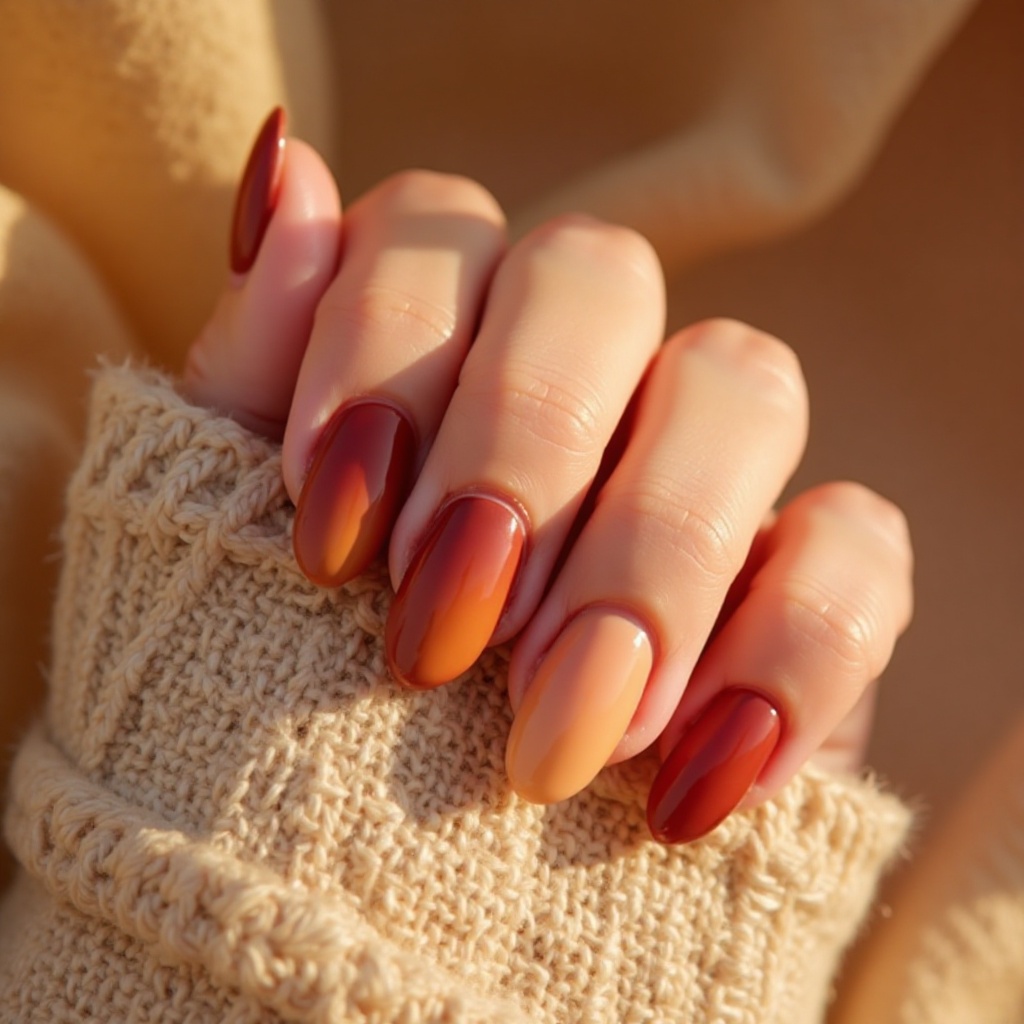
Start with a deep rust at the base that gradually fades to a warm peachy-orange at the tips, creating a sunset-inspired gradient effect. This technique adds visual movement and dimension while incorporating multiple fall-friendly shades in one cohesive look. The ombré effect feels artistic and intentional, perfect for those who want something more complex than a single shade.
Why It Works for Fall:
- Captures multiple fall color trends in one sophisticated, artistic design
- The gradient effect adds visual interest that photographs beautifully for social media
Pro Tip:
- Use a makeup sponge to dab colors together where they meet for seamless blending
- Apply ombré to longer nail lengths (medium to long) where the gradient has room to develop properly
How to Recreate at Home (Easier Than You Think!):
Ombré looks complicated but is actually very beginner-friendly using the sponge method:
Supplies Needed:
- 2 coordinating orange shades (one deep rust, one peachy-orange)
- Makeup sponges (cheap triangle ones work great)
- Small piece of aluminum foil or plastic as your palette
- Liquid latex or Vaseline for easy cleanup
- Base coat and glossy top coat
Step-by-Step Process:
- Prep for less cleanup: Paint liquid latex or spread Vaseline on the skin around your nails. Trust me on this—it makes cleanup 10x easier
- Base color: Apply base coat, then 2 coats of your lighter peachy-orange color on all nails. Let dry completely (15 minutes)
- Create gradient on sponge: On your foil palette, paint a stripe of deep rust, then immediately paint a stripe of peachy-orange next to it, slightly overlapping. The colors will blend where they meet
- Sponge application: Dab your makeup sponge into the gradient you created, picking up both colors
- Apply to nail: Gently bounce/dab the sponge onto your nail, positioning the deep rust at the base and peachy-orange at the tip. Dab multiple times to build up color
- Repeat: Reload sponge and repeat on each nail. It’s okay if they’re not identical—slight variation looks natural
- Cleanup: Peel off liquid latex or wipe away Vaseline with a cotton swab
- Seal it: Apply 2 coats of glossy top coat to smooth out the sponge texture and make it look professional
Recommended Products:
- Essie “Playing Koi” (deep rust) + “Tart Deco” (peachy-orange)
- NYX Professional Makeup Liquid Latex for mess-free cleanup
- Beauty blender or makeup sponges (cut into small pieces)
Beginner Shortcuts:
- Not ready for two colors? Use one color and white. Paint white at tips, your color at base, sponge to blend
- Can’t get smooth blend? After sponging, lightly dab with a clean damp sponge to further blend
- Faster method: Some brands make ombré polishes that do the gradient for you (Sally Hansen Color Therapy line)
Common Issues Solved:
- Sponge creating bubbles? It’s too wet. Dab on paper towel first, or use a denser sponge
- Colors look muddy? They’re too close in shade. Choose one very deep and one very light for contrast
- Can see sponge texture? Apply 2-3 layers of top coat to fill in and smooth
Time Investment: 45-60 minutes for your first try, 30 minutes once you get the technique down
Design Variations:
- Vertical ombré (dark on one side fading to light on the other)
- Three-color sunset (rust to orange to yellow)
- Glitter ombré (add gold glitter to the sponge where colors meet)
What’s Actually Trending This Fall
The biggest shift this season? Mixed finishes—pairing matte bases with glossy accents, or adding chrome tips to cream colors. It’s an instant upgrade that requires zero nail art skills. Chrome and metallics are also leaning warmer (think gold and copper, not silver), which makes sense given fall’s cozy color story.
Shorter nails are finally having their moment after years of talon domination. We’re seeing more natural lengths with rounded shapes that actually let you, you know, use your hands. And instead of full nail art on every finger, the move is one or two strategic accent nails with gold foil or a single gemstone—enough to be interesting, not so much that it’s high-maintenance.
Color-wise, it’s not just the usual pumpkin spice palette. Sage greens, dusty lavenders, and warm grays are sneaking into the fall lineup alongside traditional burgundies and browns.
Keeping Your Fall Mani Fresh: The Complete Maintenance Guide
Fall weather is brutal on nails. Dry air, constant hand-washing, moving between heated buildings and cold outdoors—it all adds up to chipped polish and brittle nails. Here’s your comprehensive maintenance routine:
Daily Care (Takes 2 Minutes)
Morning:
- Apply cuticle oil to all nails, massaging into cuticles and nail edges
- Wear gloves when going outside (actually wear them, don’t just carry them)
Evening:
- Reapply cuticle oil before bed
- If you notice minor chips, dab a tiny amount of polish on the chip and seal with top coat
Best Cuticle Oils:
- Jojoba oil (absorbs quickly, mimics skin’s natural oils)
- CND Solar Oil (cult favorite for a reason)
- Burt’s Bees Lemon Butter Cuticle Cream (for extra dry cuticles)
Weekly Maintenance
For Regular Polish:
- Day 3-4: Apply a fresh layer of top coat to extend wear and add shine
- Day 6-7: Remove and start fresh (or do touch-ups if you’re busy)
For Gel Polish:
- Book fills every 2.5 weeks instead of 3—fall conditions make polish lift faster
- If you can’t get to the salon, apply cuticle oil heavily to prevent lifting at the base
What to Watch For:
- Lifting at edges (means moisture got under the polish—remove and redo to prevent peeling entire nail)
- White spots on nails (sign of dehydration—increase water intake and cuticle oil)
- Chipping at tips (file the edge smooth and apply another coat of color + top coat)
Monthly Deep Care
Once a month, give your nails a complete reset:
- Remove all polish (soak method for dark colors)
- Trim and shape nails with glass file
- Soak hands in warm water with olive oil for 10 minutes
- Push back cuticles gently (never cut unless you’re trained—you risk infection)
- Buff nails lightly to smooth ridges
- Deep moisturize with thick hand cream and cuticle oil
- Let nails breathe for 24 hours before applying new polish
Preventing Common Fall Nail Problems
Brittleness:
- Take biotin supplements (check with your doctor first)
- Avoid acetone-based removers—use acetone-free or soy-based
- Keep nails slightly shorter in fall to prevent breaking
Yellow Staining:
- ALWAYS use base coat, especially under dark colors
- If already stained: buff lightly and apply whitening toothpaste, let sit 5 minutes, scrub with nail brush
- Prevention: Remove dark polish after 5-7 days maximum
Peeling:
- Stop using your nails as tools (seriously, open that package with scissors)
- Seal the free edge by wrapping polish over the tip
- File in one direction only, not back and forth
Product Recommendations for Fall Nail Health
Must-Have Products:
- Glass nail file ($8-12): Gentler than metal, seals nail edge to prevent splitting
- Cuticle remover gel ($6): Blue Cross Cuticle Remover works in 45 seconds
- Strengthening treatment ($10-15): OPI Nail Envy or Sally Hansen Mega Strength
- Quick-dry drops ($8): OPI RapiDry or Essie Good to Go
Nice-to-Have Upgrades:
- UV nail lamp ($25-40): For at-home gel manicures that last 2+ weeks
- Electric nail file ($20-30): Makes shaping faster and more precise
- Paraffin wax warmer ($30): Deep conditioning treatment for dry fall hands
Make It Your Own: Customization Ideas
The best fall nail is whatever makes you feel like the main character in your own autumn montage. Here’s how to take these 8 ideas and make them uniquely yours:
Easy Customizations (No Special Skills Required)
Mix Finishes:
- Glossy + matte: Try burgundy matte on all fingers except ring fingers—make those glossy
- Chrome + cream: Do cream terracotta on most nails, chrome on accent nails
- Shimmer gradient: Apply shimmer only on the top half of nails for an unexpected twist
Play with Accent Nails:
- Instead of ring fingers, try thumb + pinky for asymmetrical interest
- Do every other nail in your accent color for a checkerboard vibe
- Create a “feature nail” on just one hand (usually your non-dominant hand that’s more visible)
Adjust Intensity:
- Make any look more subtle by doing it on just 2-3 nails per hand
- Make any look bolder by adding a second accent color
- Take ombré from two colors to three for more dimension
Intermediate Customizations
Color Swaps: All these techniques work with different color families:
- Try the foil technique with navy base instead of green
- Do ombré in burgundy to pink instead of orange tones
- Use purple-gray instead of blue-gray for the shimmer look
Add Simple Nail Art: Even if you’re not an artist, you can add:
- Tiny gold dots using a bobby pin dipped in polish
- Thin stripe down the center using striping tape (peel-off tape that creates clean lines)
- Single rhinestone on accent nails (apply with toothpick while polish is wet)
Seasonal Transitions:
- Early fall: Stick with lighter versions (peachy terracotta, lighter burgundy)
- Mid-fall: Go for the full saturated versions described above
- Late fall/early winter: Add more metallics and deeper shades
Advanced Customizations (For Experienced DIYers)
Combine Techniques:
- Navy base + gold foil + matte top coat on accent nails
- Ombré from terracotta to burgundy with gold foil at the gradient line
- Chrome over ombré (apply chrome powder to just the tips after ombré technique)
Create Your Own Color Stories: Instead of using pre-made shades, mix polishes to create custom colors:
- Mix burgundy + brown for a custom terracotta shade
- Add white to any color to create your own nude
- Blend two shimmers for unique metallic effects
Texture Play:
- Add sugar or sand texture powder to wet polish for gritty, artistic finish
- Layer different types of glitter (fine + chunky) for dimension
- Use velvet powder (like chrome but fuzzy) for ultra-luxe matte effect
Your Fall Nail Journey: Where to Start
Feeling overwhelmed by options? Here’s my recommendation based on your experience level:
Complete Beginners: Start with #1 (Caramel Latte Nude) or #6 (Navy Blue Glossy)
- These are single-color applications with no special techniques
- Focus on mastering thin, even coats and cleanup
- Once comfortable, try adding a single gold foil accent nail to #1
Some Polish Experience: Try #7 (Terracotta Matte) or #5 (Slate Gray with Silver Shimmer)
- Introduces you to different finishes without complex techniques
- Teaches you how layering works
- Matte finish is forgiving of small imperfections in application
Ready for a Challenge: Go for #8 (Burnt Orange Ombré) or #4 (Forest Green with Gold Foil)
- Multi-step processes that build real skills
- Impressive results that photograph beautifully
- Techniques you can apply to unlimited color combinations
Want Salon-Quality at Home: Invest time in #2 (Toasted Almond Chrome)
- Requires special products but results are stunning
- Once you learn chrome application, you can chrome anything
- Lasts 2-3 weeks with gel system
Final Tips for DIY Success
Set Yourself Up Right:
- Good lighting is crucial—work near a window or use a bright desk lamp
- Rest your hand on a flat, stable surface
- Put your phone away—distractions cause mistakes
- Work when you’re relaxed, not rushed
Invest in Quality Where It Matters:
- Splurge on: base coat, top coat, cuticle oil, glass nail file
- Save on: color polishes (drugstore brands are great), tools, accessories
- The foundation products affect longevity way more than the color brand
Practice on One Hand First:
- Perfect your technique on your non-dominant hand
- If you hate it, remove it and try again before doing the other hand
- Your dominant hand will always be easier since you have more control
Remember:
- No one’s first attempt is perfect—give yourself grace
- Even “failed” attempts teach you what not to do next time
- You can always remove and start over
- The more you practice, the faster and better you’ll get
Screenshot your favorites, gather your supplies, and pick a cozy fall afternoon to experiment. Your perfect fall nails are waiting—and now you have everything you need to create them yourself.
Happy polishing!