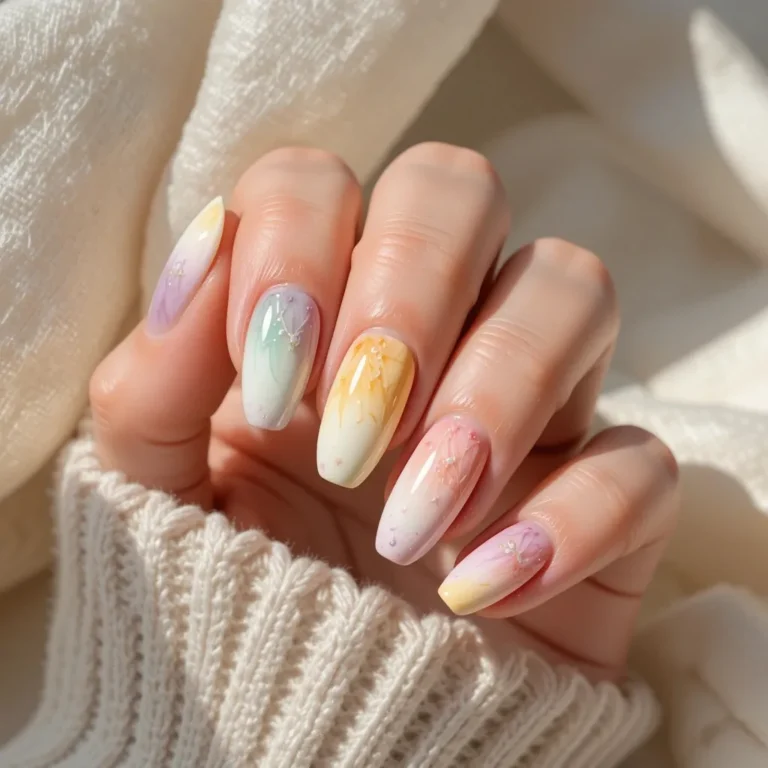
15 Stunning June Nails That Feel Like Summer
June is the perfect time to refresh your manicure with colors and designs that capture the essence of early summer. Whether you’re drawn to soft pastels, bold brights, or elegant neutrals, June nails offer endless possibilities that transition beautifully from beach days to evening events.
This month calls for versatile, low-maintenance looks that can withstand sun, saltwater, and all your summer adventures while keeping your hands looking polished and fresh.
Minimalist & Nude June Nails
Peachy Cream Dream

A warm peachy-nude that flatters every skin tone with a glossy, glass-like finish that catches the light beautifully. This shade offers the perfect balance between natural and polished, creating an effortlessly chic look that works for any occasion. The creamy formula provides full coverage in two coats, giving your nails a healthy, sun-kissed glow without any shimmer or glitter.
Why It Works for June:
- Complements sun-kissed skin and pairs effortlessly with white linen and floral prints
- Perfect for weddings, graduations, and outdoor events throughout the month
Pro Tip:
- Apply on almond or oval nails for maximum elegance
- Finish with a thick glossy top coat for that expensive salon look
How to Recreate This Look at Home:
- Prep your nails: Push back cuticles gently with a cuticle pusher after soaking hands in warm water for 2-3 minutes. File nails into an almond or oval shape by filing from the sides toward the center at a 45-degree angle.
- Apply base coat: Use one thin layer and let dry for 60 seconds. This prevents staining and helps polish adhere better.
- First color coat: Apply polish starting from the center of the nail, then each side. Use light pressure and don’t overload the brush. Let dry 2 minutes.
- Second color coat: Apply slightly thicker than the first coat for full opacity. Wait 3-4 minutes before top coat.
- Seal with top coat: Apply generously, wrapping the free edge (paint the tip) to prevent chipping. This is the secret to that glass-like finish.
Recommended Products:
- OPI “Samoan Sand” or “Tiramisu for Two”
- Essie “Au Natural” or “Spin the Bottle”
- Sally Hansen “Buff and Tumble”
- Seche Vite Top Coat for maximum shine
Beginner Mistake to Avoid: Don’t shake the bottle—roll it between your palms instead. Shaking creates air bubbles that ruin the smooth finish.
Milky White Minimalism
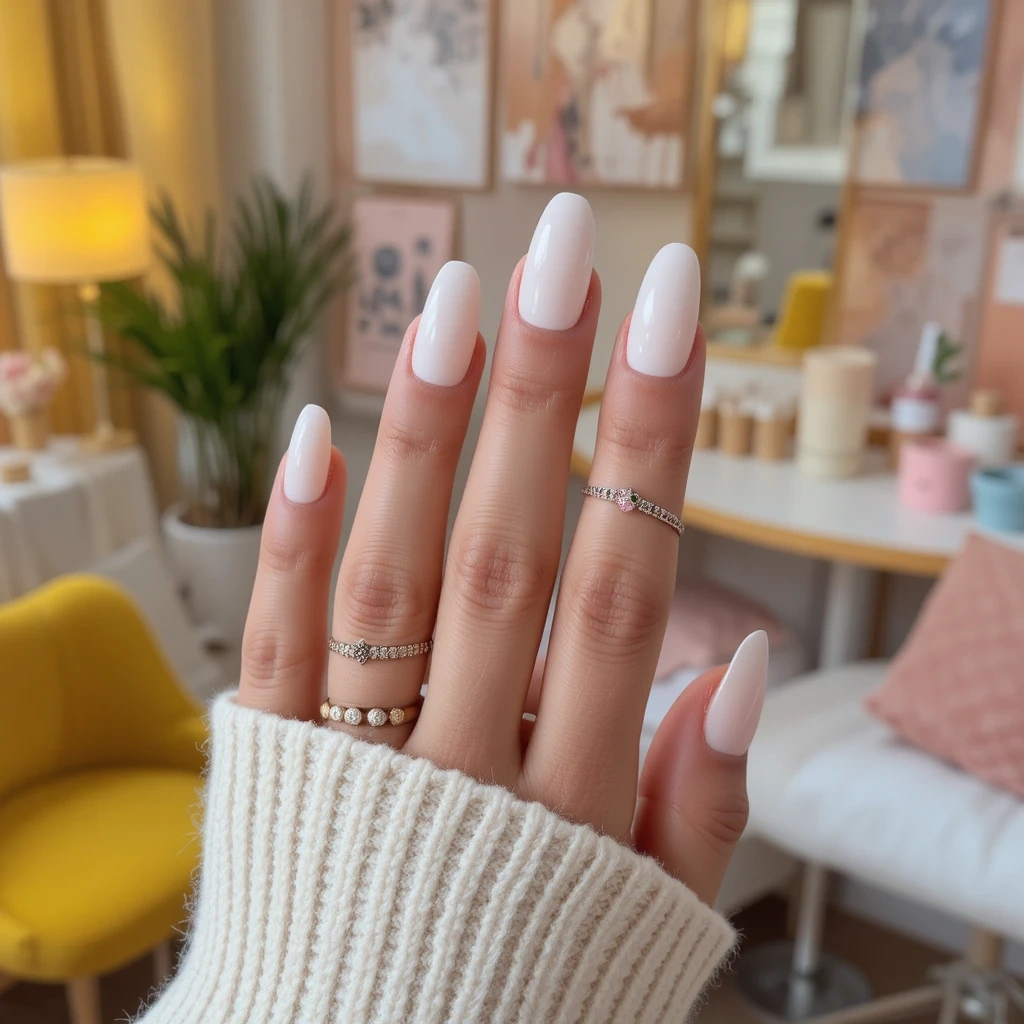
A pure, opaque milky white that delivers crisp, clean perfection without any sheerness or streaking. This modern neutral creates a striking canvas that makes your hands look refined and elongated instantly. The creamy, pigmented formula ensures even application without the frustration of multiple layers or visible nail lines.
Why It Works for June:
- Acts as the ultimate versatile base that transitions from casual daytime to sophisticated evening looks
- Reflects summer’s brightness while remaining timeless and sophisticated
Pro Tip:
- Perfect for short to medium square nails that want a fresh, editorial vibe
- Add a single rhinestone accent on the ring finger for subtle June sparkle
How to Recreate This Look at Home:
- Perfect your base: White shows every imperfection, so take extra time buffing your nail surface gently with a 240-grit buffer. This creates the smooth canvas you need.
- Use a white base coat: Apply one coat of white base polish (like OPI “Alpine Snow” thinned slightly with polish thinner). This prevents the VNL (visible nail line) problem that plagues white polish.
- Apply color in thin layers: White builds better in 3 thin coats than 2 thick ones. Let each coat dry 2 minutes. Cap the free edge with each coat.
- Clean up edges: Dip a small brush in acetone and clean up any polish that touched your skin. This makes the difference between DIY and salon-quality.
- Top coat is essential: White chips faster than other colors, so use 2 layers of top coat, waiting 5 minutes between layers.
Adding the Rhinestone Accent:
- After your second color coat (while still slightly tacky), place rhinestone with a dotting tool or toothpick
- Press gently into place at the base of your ring fingernail
- Apply top coat over the entire nail, including the rhinestone, to seal it in place
- Use extra top coat around the edges of the rhinestone
Recommended Products:
- Essie “Blanc” (the gold standard for white)
- OPI “Alpine Snow”
- Zoya “Snow White”
- Rhinestones: Swarovski flat-back crystals in size SS5 or SS7
Beginner Mistake to Avoid: Most white polishes need 3 coats, not 2. Don’t try to rush it with thick coats—you’ll get bubbles and an uneven finish.
Icy Lavender Frost

A pale, cool-toned lavender with a subtle shimmer that evokes early morning dewdrops on summer flowers. This ethereal shade offers a dreamy, romantic quality that feels fresh and youthful without being overly sweet. The delicate shimmer particles create dimension and movement, catching light beautifully throughout your busy June days.
Why It Works for June:
- Captures the essence of blooming lilacs and wisteria while remaining wearable and sophisticated
- Cool tones prevent hands from looking washed out in bright summer sunlight
Pro Tip:
- Apply three thin coats for full opacity and the most luminous finish
- Style on coffin or stiletto nails for a soft, feminine statement
How to Recreate This Look at Home:
- Start with longer nails: This look really shines on longer nail lengths. If your natural nails aren’t long enough, consider press-ons or gel extensions.
- Shape carefully: For coffin nails, file straight across the tip, then file each corner at an angle to create the tapered “coffin” shape. Go slowly—it’s easier to take off more than to add back.
- Layer properly: Shimmer polishes can apply unevenly. Use these coating techniques:
- Coat 1: Very thin, let dry 2 minutes
- Coat 2: Medium thickness, let dry 3 minutes
- Coat 3: Thin again, let dry 4 minutes
- Maximize shimmer: Apply polish in the same direction with each coat (base to tip) so shimmer particles align and reflect light uniformly.
- Double up on top coat: Shimmer finishes need 2 layers of top coat to smooth the texture and prevent the sparkle from dulling.
Shaping Coffin Nails Step-by-Step:
- Grow or extend nails to at least 1/4 inch past fingertip
- File straight across the tip to create a flat edge
- File each corner at a 45-degree angle moving toward the center
- Round the corners slightly so they’re not sharp
- Smooth edges with a fine-grit file (240+)
Recommended Products:
- Essie “She’s Picture Perfect” or “Virgin Snow”
- OPI “Don’t Toot My Flute”
- Sally Hansen “Fairy Teal” (surprisingly reads as lavender)
- China Glaze “Spontaneous”
Beginner Mistake to Avoid: Shimmer polishes thicken over time. Add 2-3 drops of polish thinner (not nail polish remover) to restore the right consistency if your bottle has gotten goopy.
Sage Green Serenity
A muted, dusty sage green with gray undertones that brings botanical elegance to your fingertips effortlessly. This nature-inspired shade feels calming and grounded while still making a subtle style statement that’s perfect for summer. The sophisticated muted tone works as both a neutral and a color, giving you incredible versatility with outfits.
Why It Works for June:
- Complements the lush greenery of early summer gardens and outdoor settings beautifully
- Offers a refreshing alternative to typical summer brights while feeling seasonally appropriate
Pro Tip:
- Perfect for medium to long oval nails that want an organic, elegant look
- Add a glossy top coat for a fresh-picked herb garden vibe, or go matte for modern sophistication
How to Recreate This Look at Home:
- Achieve the perfect oval shape: Start with square nails, then file each corner in a gentle curve. The highest point should be slightly off-center toward the tip. Test by looking at your nail from the side—it should form a smooth, egg-like curve.
- Prep is everything for muted colors: Sage green shows every ridge and bump. Buff your nails gently in one direction only to smooth the surface.
- Apply color evenly: Muted colors can look patchy if applied wrong:
- Wipe excess polish off one side of the brush before applying
- Use 3 thin coats instead of 2 thick ones
- Wait 2 minutes between coats
- Choose your finish:
- For glossy: Use a high-shine top coat like Seche Vite
- For matte: Let final color coat dry 5 minutes, then apply matte top coat in thin, even strokes without going over the same area twice
- Maintain the look: Matte finishes show oils, so avoid touching your nails for the first hour after application.
Creating the Perfect Matte Finish:
- Let color dry completely (10 minutes) before matte top coat
- Apply matte top coat in one smooth stroke per nail—don’t go back over it
- Don’t use cuticle oil until at least 4 hours after application (oils destroy matte finish)
- To refresh matte look after a few days, apply another thin layer of matte top coat
Recommended Products:
- Essie “Social-Lights” or “Satin Sister”
- OPI “Suzi – The First Lady of Nails”
- Zoya “Sage”
- Sally Hansen “Jaded”
- Matte top coat: Essie “Matte About You” or OPI “Matte Top Coat”
Beginner Mistake to Avoid: Matte top coat can make colors look darker. Test your shade with matte top coat on a practice nail wheel or one accent nail first.
Soft Steel Gray
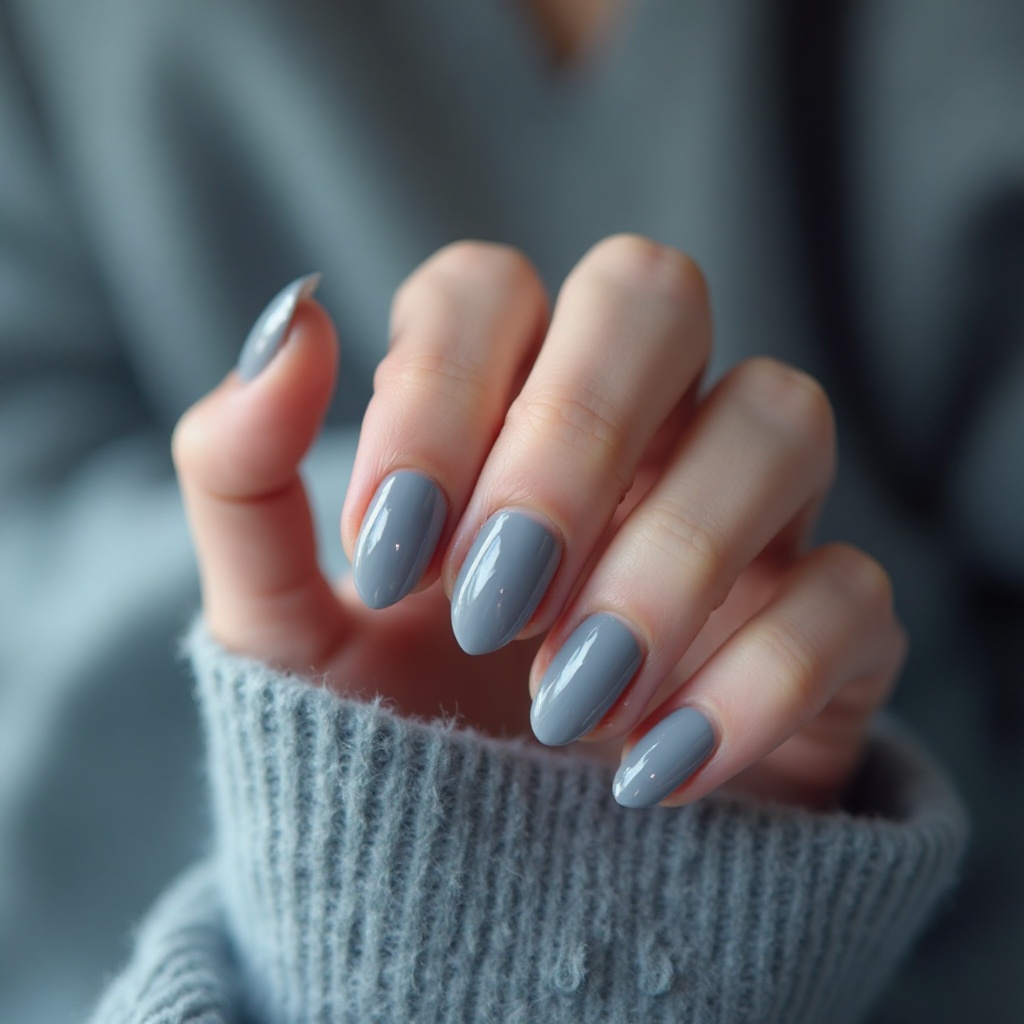
A cool, medium gray with subtle blue undertones that delivers modern minimalism with an unexpected edge. This sophisticated neutral reads as effortlessly chic rather than boring, offering a contemporary alternative to traditional nudes. The smooth, opaque formula creates a sleek finish that looks expensive and intentional on any nail length.
Why It Works for June:
- Provides a cooling visual effect perfect for rising summer temperatures
- Pairs seamlessly with both silver and gold jewelry, denim, and summer’s white wardrobe staples
Pro Tip:
- Apply on short to medium square nails for a sleek, architectural look
- Layer with a chrome powder on one accent nail for subtle dimension
How to Recreate This Look at Home:
- Create perfectly square nails: File straight across the tip, keeping the file perpendicular to your nail. Barely round the corners—just enough to prevent snagging. The sides should be straight with no taper.
- Apply polish for opaque coverage: Gray can look streaky if not applied properly:
- Coat 1: Thin, even layer covering the entire nail
- Wait 2 minutes
- Coat 2: Normal thickness, slightly thicker than first coat
- Wait 3 minutes
- Coat 3 (if needed): Very thin, just to even out any patches
- Keep edges clean: Gray shows mistakes easily. Use cleanup brush dipped in acetone immediately after each coat.
Adding Chrome Powder Accent (Optional but Stunning):
- You’ll need: Chrome powder (silver or holographic), eyeshadow applicator or silicone tool, no-wipe gel top coat
- Apply base on accent nail: Use your gray polish as usual on the ring finger, 2 coats
- Apply no-wipe gel top coat: Use a no-wipe gel top coat (or regular gel top coat without wiping the tacky layer). Cure under LED lamp 30 seconds.
- Apply chrome powder: Using the applicator, rub chrome powder onto the nail in small circular motions until the entire surface is covered and shiny. Buff gently.
- Seal the chrome: Apply regular gel top coat over the chrome, cure 60 seconds. The chrome is now permanent.
If you don’t have a lamp: Mix a tiny bit of silver or holographic eyeshadow with clear polish and paint just the tip of your ring fingernail for a similar metallic effect.
Recommended Products:
- Essie “Petal Pushers” or “Cocktail Bling”
- OPI “Embrace the Gray”
- Zoya “August”
- Sally Hansen “Steely Serene”
- Chrome powder: Makartt Chrome Powder Set or Born Pretty Holographic Powder
Beginner Mistake to Avoid: Square nails chip faster at the corners. Always cap the free edge (paint the tip of your nail) with each coat of color and top coat to seal the edges.
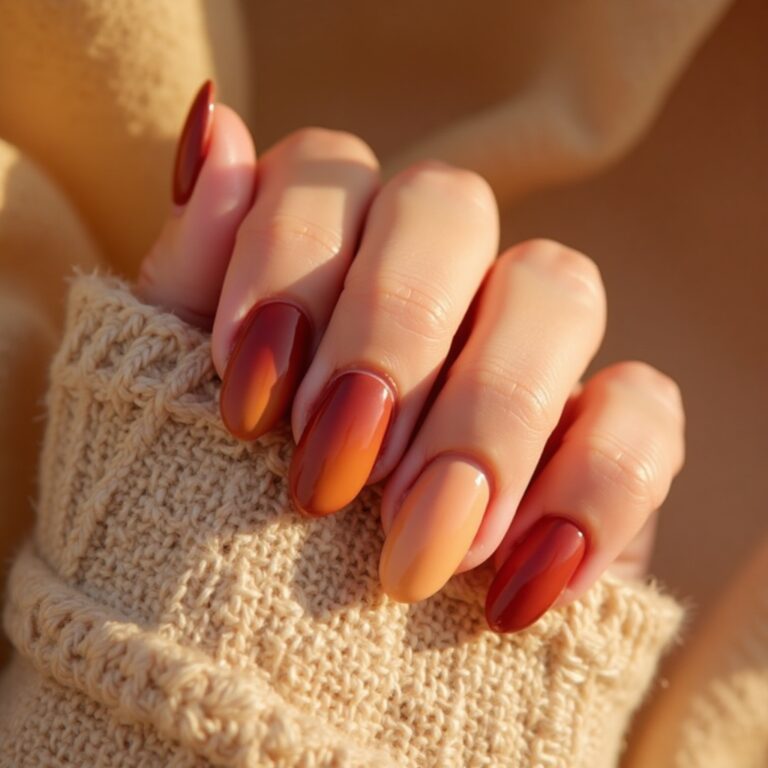
Deep & Moody June Contrast
Navy Blue Depth
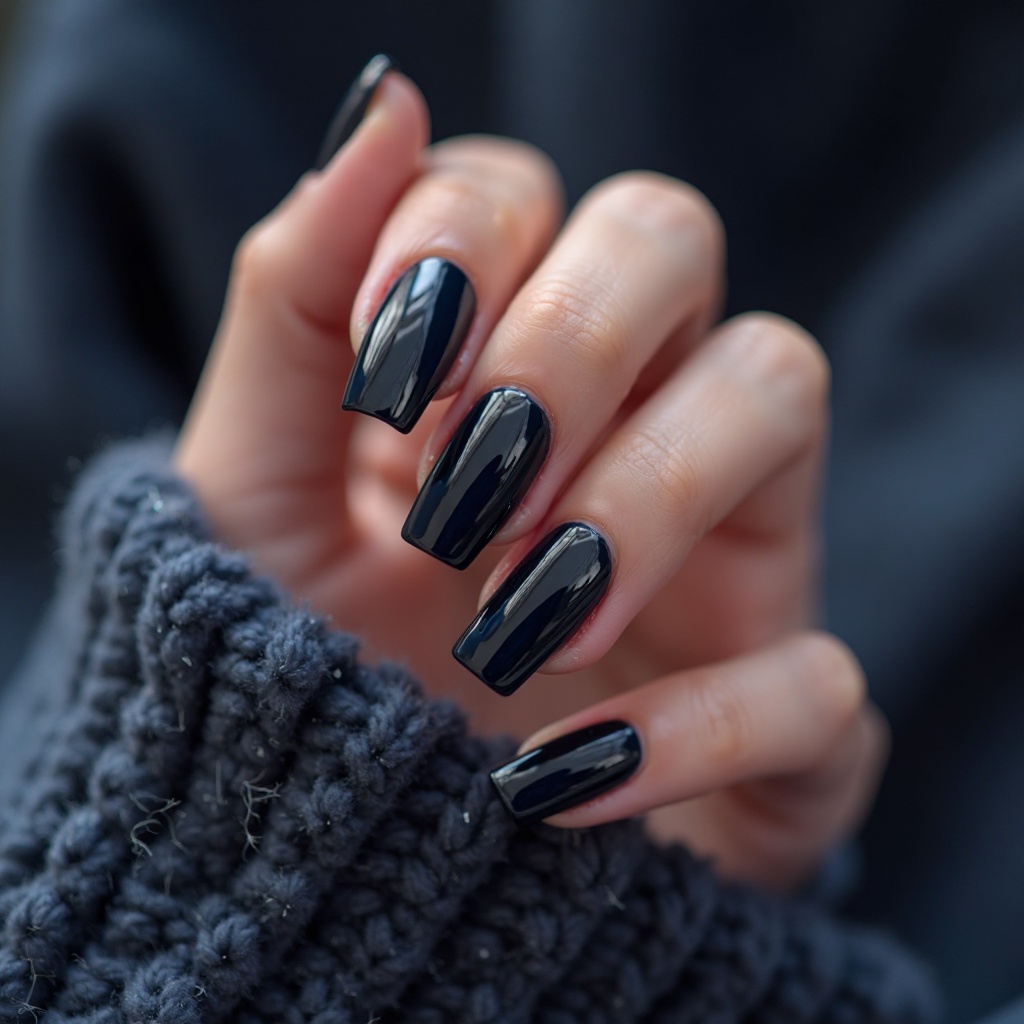
A rich, inky navy blue that provides striking contrast against sun-kissed summer skin with sophisticated appeal. This deep shade offers all the elegance of black but with more dimension and visual interest in natural light. The glossy finish intensifies the color’s depth, creating a polished look that transitions seamlessly from day to night.
Why It Works for June:
- Creates beautiful contrast with white summer outfits, gold jewelry, and bronzed skin
- Adds unexpected sophistication to casual summer looks without feeling too heavy or gothic
Pro Tip:
- Choose a gel formula for extended wear during beach vacations and pool days
- Style on almond or oval nails for the most flattering, elongating effect
How to Recreate This Look at Home:
For Regular Polish:
- Apply white base coat: Dark colors can stain nails. Use a white or opaque base coat as a barrier.
- Thin coats are key: Dark polish shows brush strokes and gets gloopy:
- Coat 1: Very thin, don’t worry about full coverage
- Wait 3 minutes (dark polish needs longer dry time)
- Coat 2: Medium thickness for full opacity
- Wait 5 minutes before top coat
- Clean up immediately: Navy shows every mistake. Keep cleanup brush and acetone handy.
- Use a thick top coat: Dark colors benefit from a thick, glossy top coat to add depth and shine.
For Gel Polish (Best for Summer Durability):
You’ll need: LED or UV lamp, gel base coat, gel navy polish, gel top coat, lint-free wipes, isopropyl alcohol (91%), cuticle pusher
Step-by-Step Gel Application:
- Prep nails thoroughly: Push back cuticles, lightly buff the nail surface with a 180-grit file, wipe with alcohol to remove oils
- Apply gel base coat: Thin layer, cap the free edge, cure 30 seconds (LED) or 2 minutes (UV)
- First color coat: Very thin layer of navy gel, cap free edge, cure 30-60 seconds
- Second color coat: Normal thickness, cure 60 seconds
- Apply gel top coat: Generous layer, cap free edge, cure 60 seconds
- Wipe with alcohol: Use lint-free wipe with alcohol to remove the sticky layer
- Apply cuticle oil: Gel can dry out cuticles, so oil is essential
Gel Removal at Home:
- File off the shiny top layer gently
- Soak cotton pads in acetone, place on nails
- Wrap each finger in foil, wait 15 minutes
- Gently push off softened gel with cuticle pusher
- Buff nails smooth, apply cuticle oil
Recommended Products:
- Regular polish: OPI “Lincoln Park After Dark” or Essie “After School Boy Blazer”
- Gel polish: Gelish “Fashion Week Chic” or OPI GelColor “Lincoln Park After Dark”
- Gel lamp: MelodySusie or SUNUV (affordable, reliable)
Beginner Mistake to Avoid: Thick gel coats don’t cure properly and peel faster. Always apply thin layers and cure between each step.
Deep Plum Luxury
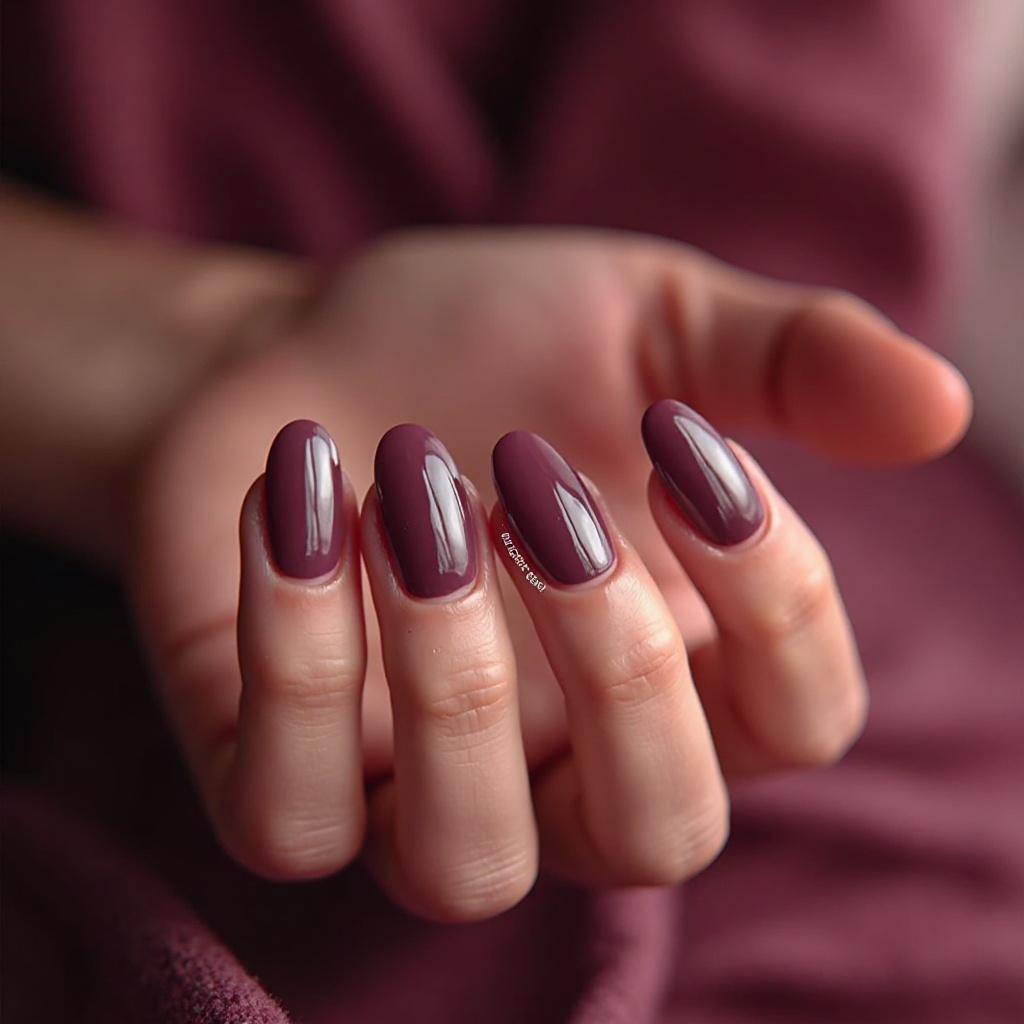
A luscious, wine-toned plum with subtle burgundy undertones that exudes confidence and timeless elegance. This rich berry shade offers depth and drama while remaining wearable and sophisticated for any occasion. The creamy, pigmented formula glides on smoothly, delivering full coverage that looks salon-perfect even with at-home application.
Why It Works for June:
- Provides a sophisticated alternative to bright summer colors for evening events and formal occasions
- Complements both warm and cool skin tones while adding instant polish to any look
Pro Tip:
- Apply two coats for maximum richness and finish with a high-gloss top coat
- Pairs beautifully with rose gold accessories and adds depth to summer florals
How to Recreate This Look at Home:
- Prep for rich color: Plum shades benefit from a smooth base. Gently buff nails and push back cuticles completely. Any raised cuticle skin will cause the polish line to look uneven.
- Use proper polish consistency: If your plum polish is too thick, add 2 drops of polish thinner. Rich colors need to flow smoothly for even application.
- Perfect application technique:
- Place one drop of polish in the center of the nail
- Push the brush toward the cuticle, stopping just short of touching skin
- Sweep down the center stripe
- Repeat on each side of the nail
- This technique prevents flooding the cuticles
- Two coats are enough: Plums are naturally pigmented. First coat should be thin, second coat medium thickness. Waiting 3 minutes between coats prevents dragging.
- Maximize the glossy finish: Use a thick top coat like Seche Vite. The high-shine finish makes plum look like expensive lacquer instead of flat paint.
Troubleshooting Common Issues:
- Polish looks patchy: Let first coat dry completely (3 minutes minimum) before second coat
- Color looks muddy: You’re applying too thick. Thin the polish and start over with thin layers
- Edges peel quickly: You didn’t cap the free edge. Paint the tip of your nail with each coat
Recommended Products:
- OPI “Lincoln Park After Dark” (reads as deep plum in certain lights)
- Essie “Bahama Mama”
- Zoya “Casey” or “Toni”
- Sally Hansen “Pat on the Black” (has plum undertones)
Beginner Mistake to Avoid: Dark colors dry slower than you think. Wait at least 10 minutes before touching anything, or you’ll leave fingerprints in what looks like dry polish.
Charcoal Matte Mystery
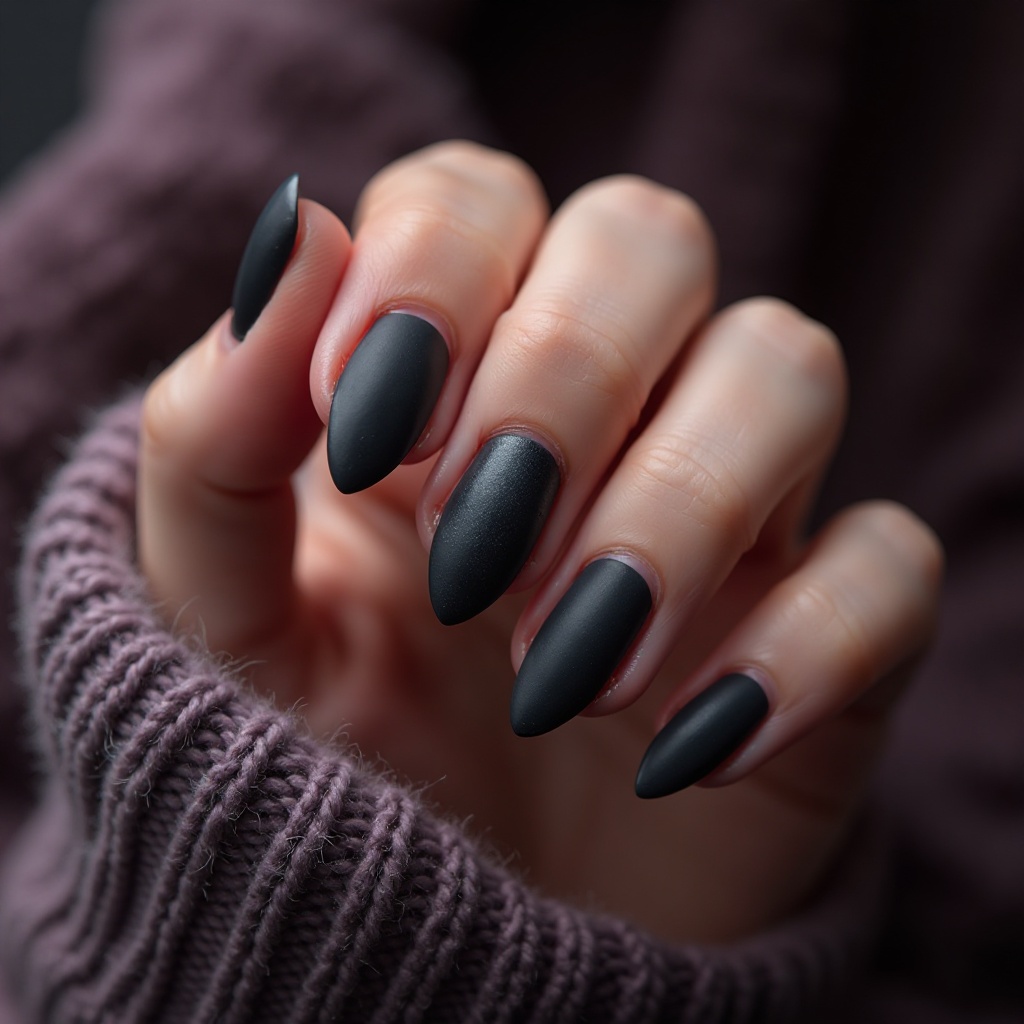
A deep charcoal gray with a velvety matte finish that delivers edgy sophistication without the harshness of black. This moody neutral creates a striking statement that feels modern, artistic, and deliberately understated all at once. The soft, touchable finish adds textural interest that makes your manicure feel intentional and fashion-forward.
Why It Works for June:
- Offers a cooling visual effect while providing enough contrast to stand out against summer’s bright palette
- Perfect for creative professionals and anyone wanting an alternative to traditional summer pastels
Pro Tip:
- Keep nails medium length with a square or squoval shape for the most modern effect
- Add a single glossy accent nail on the ring finger for subtle contrast and dimension
How to Recreate This Look at Home:
- Shape your nails squoval: This hybrid shape is flattering and practical. File straight across the tip (square), then gently round just the corners. The result should look like a soft square.
- Apply color for matte finish:
- Use 2-3 coats of charcoal polish, letting each dry 3 minutes
- Don’t worry about getting super glossy color—the matte top coat will even everything out
- Make sure the last color coat is completely dry (5-10 minutes) before matte top coat
- Apply matte top coat correctly:
- Load the brush well but wipe off excess
- Apply in one smooth motion from cuticle to tip—NO second strokes
- Going over the same area twice causes streaks
- Let dry completely (matte sets faster than gloss)
- Create the glossy accent nail:
- On ring fingers only, skip the matte top coat
- Apply high-gloss top coat instead (like Seche Vite)
- This contrast is what makes the look modern and intentional
- Maintain the matte finish: Avoid hand creams and oils for 4 hours after application. After that, apply oils only to cuticles, not the nail surface.
Creating Perfect Squoval Nails:
- File tips straight across to desired length
- File each corner at a 45-degree angle, removing just the sharp edges
- Blend the corners into the sides with a gentle curve
- Check symmetry by holding hands together
- Smooth any rough edges with a fine buffer
Making Matte Last Longer:
- Reapply matte top coat every 3-4 days to refresh the finish
- Use a quick-dry spray after application to set it faster
- Avoid hot water for the first hour after application
- When washing hands, dry nails immediately—water spots show on matte
Recommended Products:
- Base color: Essie “Sew Psyched” or Sally Hansen “Rebel Rock”
- OPI “Dark Side of the Mood”
- Zoya “Freja”
- Matte top coat: Essie “Matte About You” (best for dark colors)
Beginner Mistake to Avoid: Using the same matte top coat bottle too many times without cleaning the brush will cause streaking. Wipe the brush clean with acetone every few uses.
Elegant Accent & Chrome Details
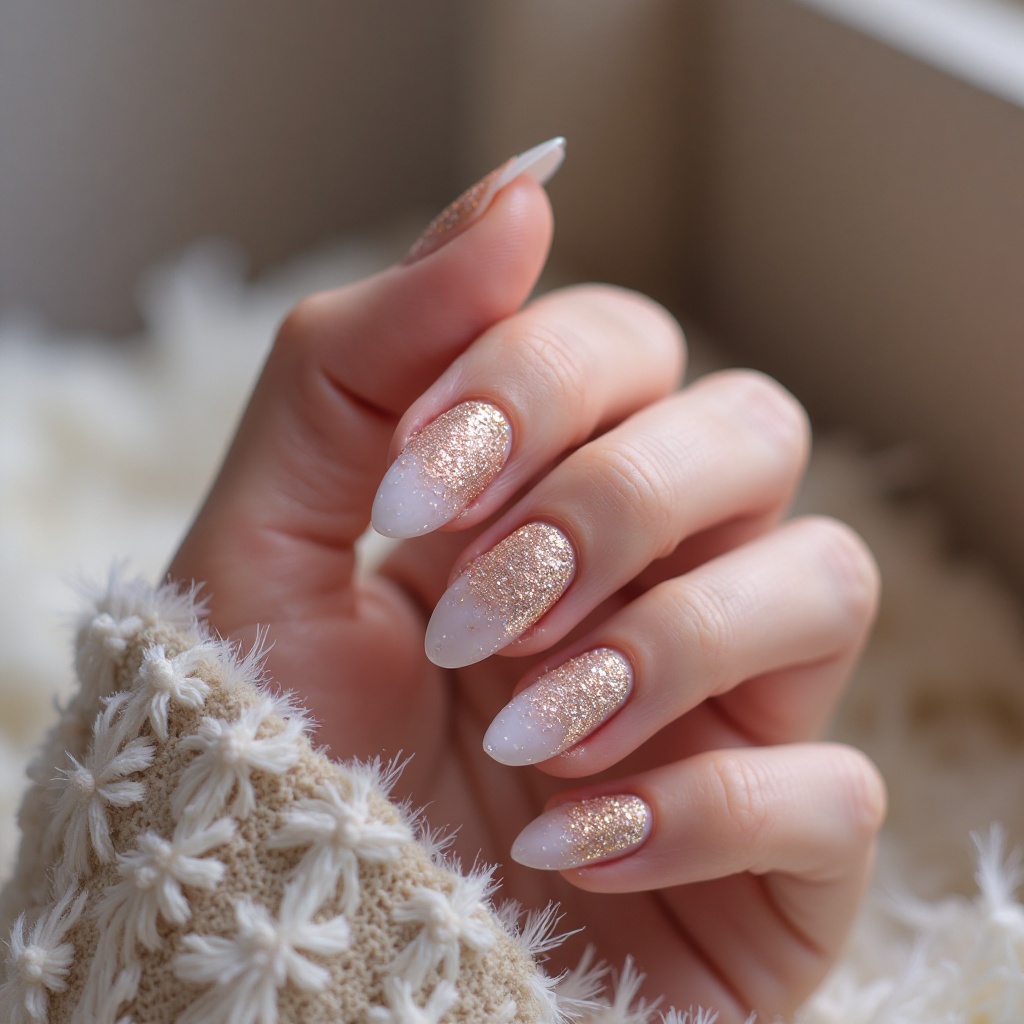
Pearl Chrome French
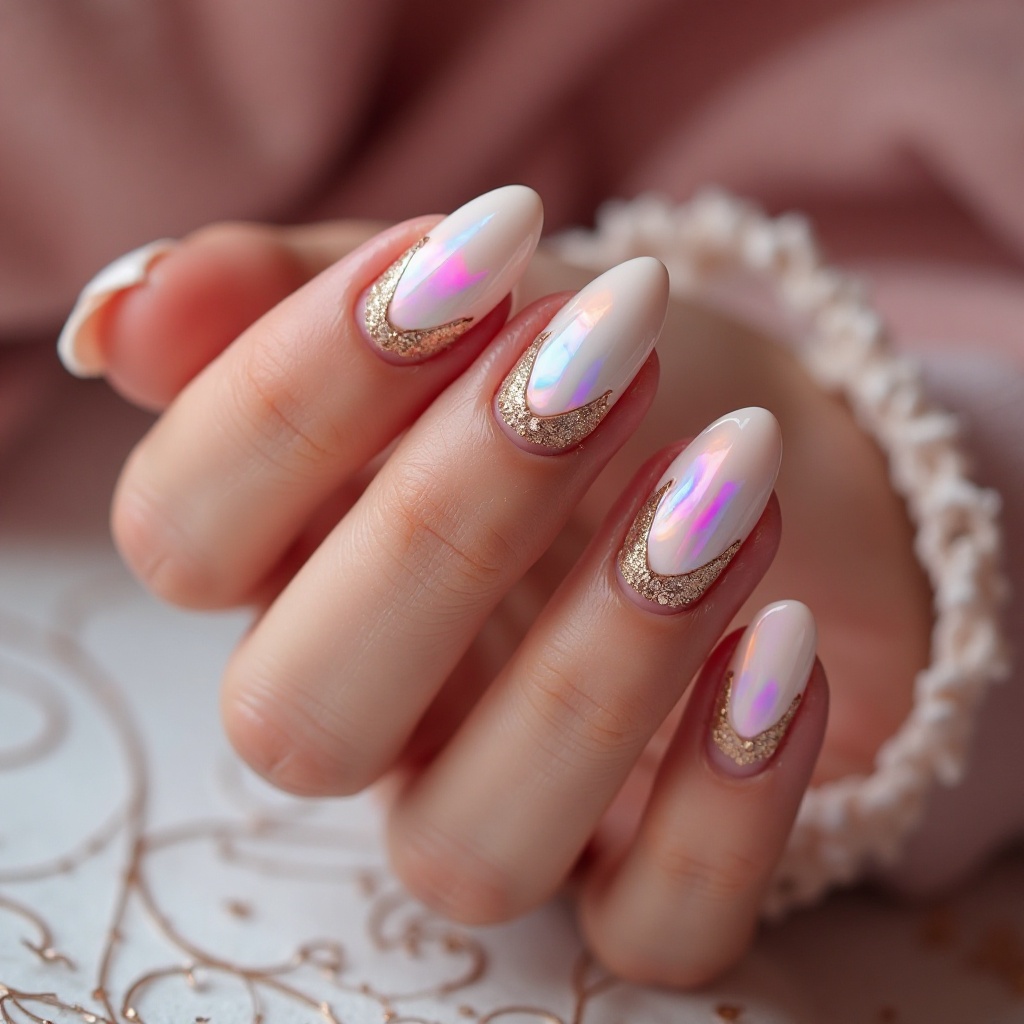
A classic French manicure reimagined with iridescent pearl chrome tips that shift between pink, blue, and gold. This modern twist on a timeless design brings dimension and luxury to the traditional French while maintaining its elegant simplicity. The chrome powder creates an eye-catching finish that feels special and celebratory without being over-the-top or costume-like.
Why It Works for June:
- Perfect for weddings, graduations, and formal June events that call for elevated elegance
- The neutral base ensures versatility while the chrome tips add just enough personality and sparkle
Pro Tip:
- Apply chrome powder only to the tips for a gradient effect that looks seamless
- Choose oval or almond nails for the most sophisticated, feminine French silhouette
How to Recreate This Look at Home:
Supplies You’ll Need:
- Nude or sheer pink base polish
- White gel polish (for the French tip base)
- Pearl chrome powder (unicorn or pearl finish)
- Gel top coat (no-wipe formula for chrome application)
- LED/UV lamp
- Small eyeshadow applicator or chrome applicator
- Nail art brush or striping brush for clean lines
- Cuticle cleanup brush
Step-by-Step Chrome French Tips:
- Prep and shape: File nails into oval or almond shape. The curved shape makes drawing the French tip smile line easier.
- Apply nude base: Use 1-2 coats of sheer pink or nude regular polish on the entire nail. Let dry completely. This creates the natural French base.
- Create the French smile line with gel:
- Apply white gel polish to tips only
- Method 1 (easier): Use a nail art brush to paint a curved smile line where you want the tip to start, then fill in to the free edge
- Method 2 (precise): Place a curved French tip guide sticker, paint white gel over it, carefully remove sticker
- Cure 60 seconds
- Apply another coat of white gel if needed: Tips should be fully opaque white. Cure 60 seconds.
- Apply no-wipe gel top coat over TIPS ONLY: Paint top coat only on the white tips (this is where the chrome will go). Cure 30 seconds—you want it slightly tacky.
- Apply chrome powder:
- Dip applicator in pearl chrome powder
- Rub onto the tacky gel tips using firm circular motions
- Buff until the tips are completely shiny and iridescent
- Brush off excess powder with a soft brush
- Seal with gel top coat: Apply regular gel top coat over the entire nail (base and chrome tips). Cure 60 seconds.
- Wipe and finish: Wipe nails with alcohol to remove tacky layer. Apply cuticle oil.
Alternative Method Without Gel (Regular Polish):
If you don’t have a gel lamp, try this simpler version:
- Apply nude base and white tips with regular polish (use French tip guides for clean lines)
- Once completely dry, paint just the tips with clear polish
- While still wet, dip tips into iridescent eyeshadow or mix iridescent powder with clear polish and paint tips
- Seal entire nail with thick glossy top coat
- Note: This won’t be as mirror-like as true chrome but creates a pretty pearlescent effect
Creating Perfect French Tip Smile Lines:
- Use French tip guide stickers for consistent curves (Nailene or Sally Hansen brands)
- If drawing freehand, start from the sides and meet in the middle
- Make the highest point of the curve slightly off-center for a natural look
- Practice on a nail wheel or piece of paper first
Recommended Products:
- Chrome powder: Born Pretty Pearl Chrome Powder, Makartt Unicorn Chrome
- Gel polish: Beetles White Gel Polish, Melodysusie Gel System
- French tip guides: Nailene French Manicure Strips
- No-wipe top coat: Modelones No Wipe Top Coat
Beginner Mistake to Avoid: Applying chrome powder to fully-cured gel won’t work—it needs that tacky layer to stick. If your gel is too dry, apply another thin layer of no-wipe top coat and cure 20 seconds only.
Rose Gold Accent Elegance
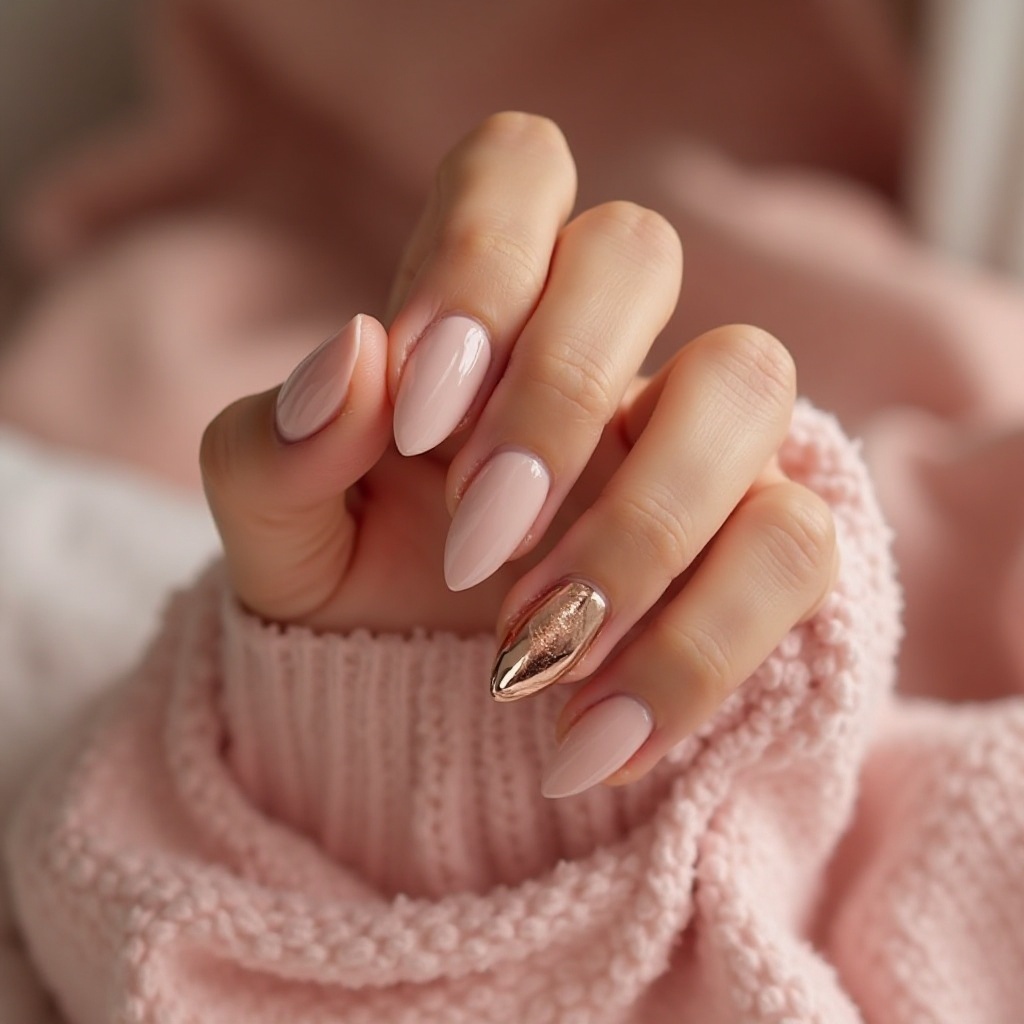
A sheer nude base with a single rose gold chrome accent nail that delivers maximum impact with minimal effort. This sophisticated design lets you embrace metallic trends without overwhelming your hands or competing with your outfits. The strategic placement on the ring finger creates a focal point that draws the eye and adds intentional style.
Why It Works for June:
- Complements both casual and formal summer wardrobes while adding a touch of luxury
- The rose gold tone flatters warm undertones and pairs beautifully with summer’s bronzed glow
Pro Tip:
- Use a sheer pink or peachy nude as your base for the most cohesive, elevated look
- Apply chrome powder to only the ring finger on each hand for balanced visual interest
How to Recreate This Look at Home:
Supplies You’ll Need:
- Sheer pink/nude base polish
- White or nude gel polish (for accent nail base)
- Rose gold chrome powder
- Gel base and top coat
- LED/UV lamp
- Chrome applicator or eyeshadow applicator
- Cleanup brush
Step-by-Step Instructions:
- Prep all nails: Standard nail prep—push cuticles, shape nails, buff lightly, wipe with alcohol.
- Apply sheer base to 8 nails (skip ring fingers):
- Apply 1-2 coats of sheer pink nude to thumbs, index, middle, and pinky fingers
- Let each coat dry 2 minutes
- Apply glossy top coat, let dry completely
- Create chrome accent nails (ring fingers only): Step 1: Apply gel base coat to ring fingers only. Cure 30 seconds. Step 2: Apply white or light nude gel polish to ring fingers (2 coats if needed for opacity). The lighter the base, the more vibrant the rose gold will be. Cure 60 seconds. Step 3: Apply no-wipe gel top coat to ring fingers. Cure 30 seconds only (keep it slightly tacky). Step 4: Apply rose gold chrome powder:
- Scoop small amount onto applicator
- Rub onto tacky gel in circular motions
- Buff gently until the entire nail is shiny and metallic
- Use firm pressure—don’t be afraid to really buff it
- Dust off excess powder with clean brush
- Apply cuticle oil to all fingers to complete the manicure.
Choosing the Right Nude Base:
The sheer nude shade should complement your skin tone:
- Fair skin: Light peachy-pink sheers (Essie “Fiji,” OPI “Bubble Bath”)
- Medium skin: Warm nude sheers (OPI “Samoan Sand,” Essie “Au Natural”)
- Deep skin: Rich mauve-nude sheers (OPI “Tickle My France-y,” Essie “Spin the Bottle”)
Simplified Version Without Gel:
- Apply sheer nude to all nails (2 coats), let dry completely
- On ring fingers, apply rose gold metallic polish (like Essie “Penny Talk” or Sally Hansen “Rose Glow”)
- Apply top coat to all nails
- While not technically chrome, this gives a similar rose gold accent effect
Troubleshooting Chrome Application:
- Chrome looks patchy: Base gel wasn’t opaque enough or surface wasn’t tacky enough. Add another coat of gel, cure less time (20-30 seconds).
- Chrome rubs off when sealing: Apply top coat very gently, don’t drag the brush.
- Chrome looks dull: Buff more with the applicator before sealing.
Recommended Products:
- Rose gold chrome powder: Beetles Rose Gold Chrome, Born Pretty Rose Gold Mirror Powder
- Sheer base polish: OPI “Bubble Bath,” Essie “Fiji,” Zoya “Avril”
- Gel system: Beetles Complete Gel Kit or Melodysusie Gel Nail Polish Kit
Beginner Mistake to Avoid: Using regular top coat over chrome powder (without gel) will cause the chrome to lose its mirror finish. Chrome needs to be sealed with gel top coat specifically.
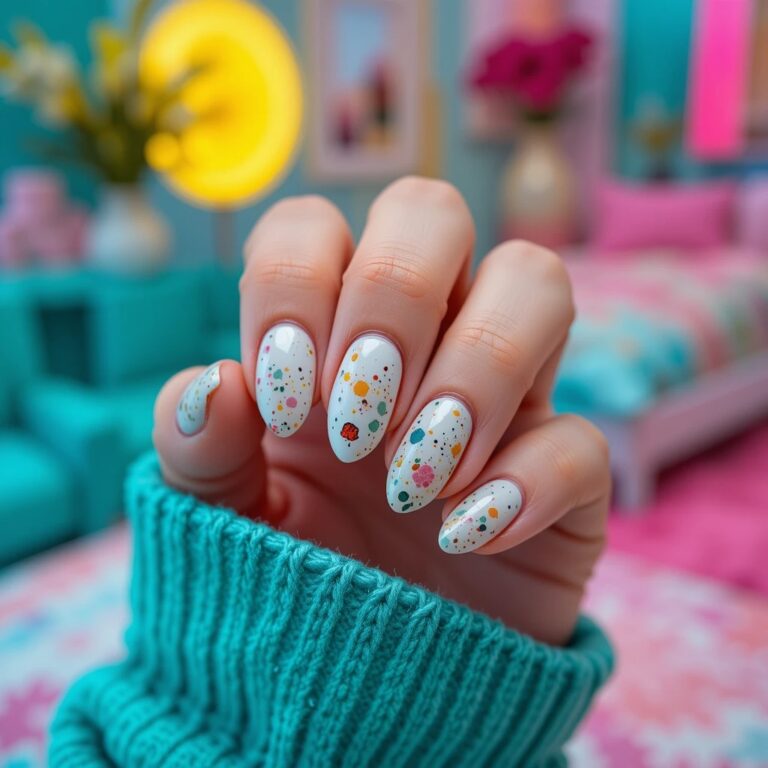
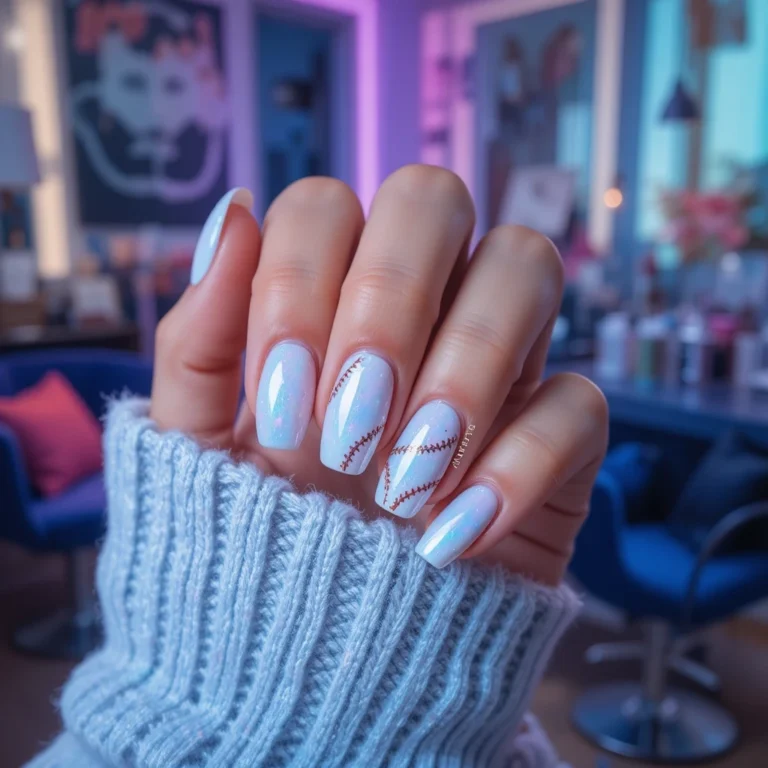
Holographic Glitter Tips
Clear or nude nails with fine holographic glitter concentrated at the tips, creating a subtle sparkle gradient. This playful design captures light beautifully, giving your nails a magical, dimensional quality that shifts with movement. The concentrated placement keeps the look wearable for everyday while still delivering that special occasion sparkle.
Why It Works for June:
- Perfect for beach vacations and outdoor festivals where sunlight makes the holographic effect truly shine
- Adds festive energy without the commitment or maintenance of full glitter nails
Pro Tip:
- Apply glitter in thin layers, building density toward the tip for a natural gradient
- Seal with a thick glossy top coat to smooth the texture and maximize longevity
How to Recreate This Look at Home:
Supplies You’ll Need:
- Clear or sheer nude base polish
- Fine holographic glitter (loose) or holographic glitter polish
- Makeup sponge (cut into small wedges)
- Small cup or palette
- Thick glossy top coat (you’ll need extra)
- Cleanup brush and acetone
Method 1: Using Loose Holographic Glitter (Most Dramatic Effect)
- Prep and base: Apply clear base coat to all nails. Apply 1-2 coats of clear or sheer nude polish. Let dry completely.
- Create glitter gradient:
- Pour small amount of loose holographic glitter onto palette
- Cut makeup sponge into small wedge
- Dip sponge into clear polish to dampen
- Dip dampened sponge into glitter
- Dab sponge onto the tip of your nail (just the free edge and slightly beyond)
- Use a patting motion, building up glitter density
- Concentrate most glitter at the very tip, patting more lightly as you move toward the middle of the nail for gradient effect
- Let dry 2 minutes
- Build the gradient: Repeat the dabbing process 2-3 times, each time focusing more glitter at the tips. Let dry between applications.
- Seal the glitter:
- Apply thick top coat over entire nail
- Wait 2 minutes, apply second layer of top coat
- Focus on smoothing over the textured glitter
- For extra smooth finish, apply third layer of top coat once dry
- Let dry 10 minutes before touching anything
- Clean up: Use cleanup brush with acetone to remove glitter that fell on skin.
Method 2: Using Holographic Glitter Polish (Easier, Less Dramatic)
- Apply base: Clear base coat, then 1-2 coats of clear or nude polish. Let dry.
- Apply glitter polish:
- Load brush with holographic glitter polish
- Wipe off excess on one side of brush
- Paint only the tips of nails, concentrating color at the free edge
- Use lighter pressure as you move down the nail to create gradient
- Let dry 3 minutes
- Build intensity: Apply second coat of glitter polish, again focusing on tips. Let dry.
- Seal: Apply 2 coats of thick glossy top coat, letting dry between coats.
Creating a Smooth Gradient:
- Start your first glitter application about 1/4 of the way down from the tip
- Second application: focus on the tip only but feather upward slightly
- Third application: heavy concentration at the free edge only
- This builds a natural fade from dense sparkle to none
Quick Cleanup Trick:
- Before starting, apply liquid latex or Elmer’s school glue around your nail to your skin
- Let dry, then proceed with glitter application
- When done, peel off the latex/glue with all the excess glitter attached
- This saves significant cleanup time
Recommended Products:
- Loose glitter: Solvent-resistant ultra-fine holographic glitter from The Glitter Guy or Twinkle Dust
- Glitter polish: ILNP “Juliette,” Color Club “Harp On It,” Essie “Belugaria”
- Extra thick top coat: SuperChic Lacquer “Marvel Liquid Macro Top Coat,” Vibrant Vinyls “Fast & Hard”
Beginner Mistake to Avoid: Using thin top coat over glitter won’t smooth the texture—you’ll feel every glitter piece. You need a thick, self-leveling top coat (often called “squishy” top coat) and multiple layers to create a glass-smooth surface.
Bright & Bold June Statements
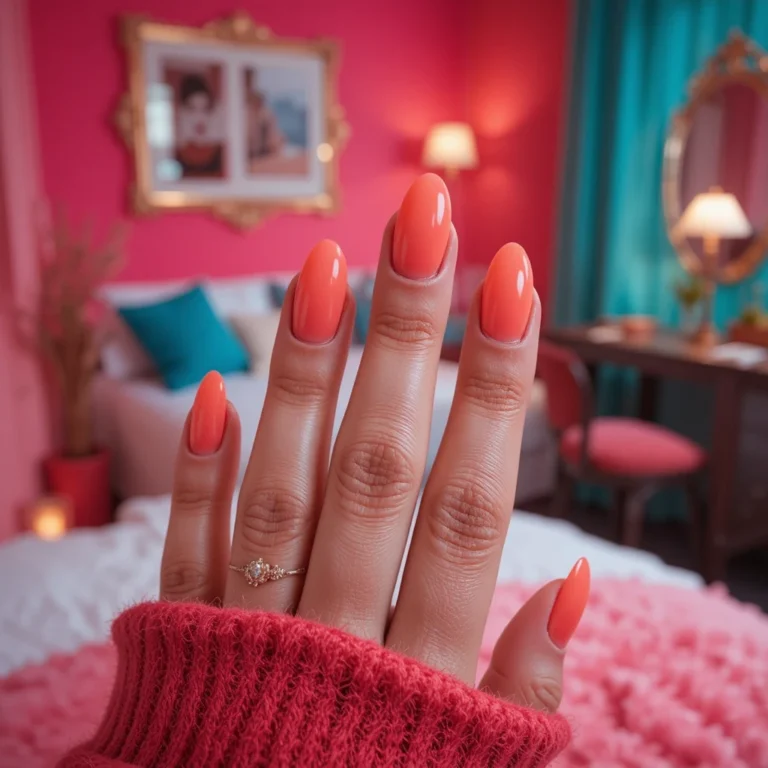
Coral Crush
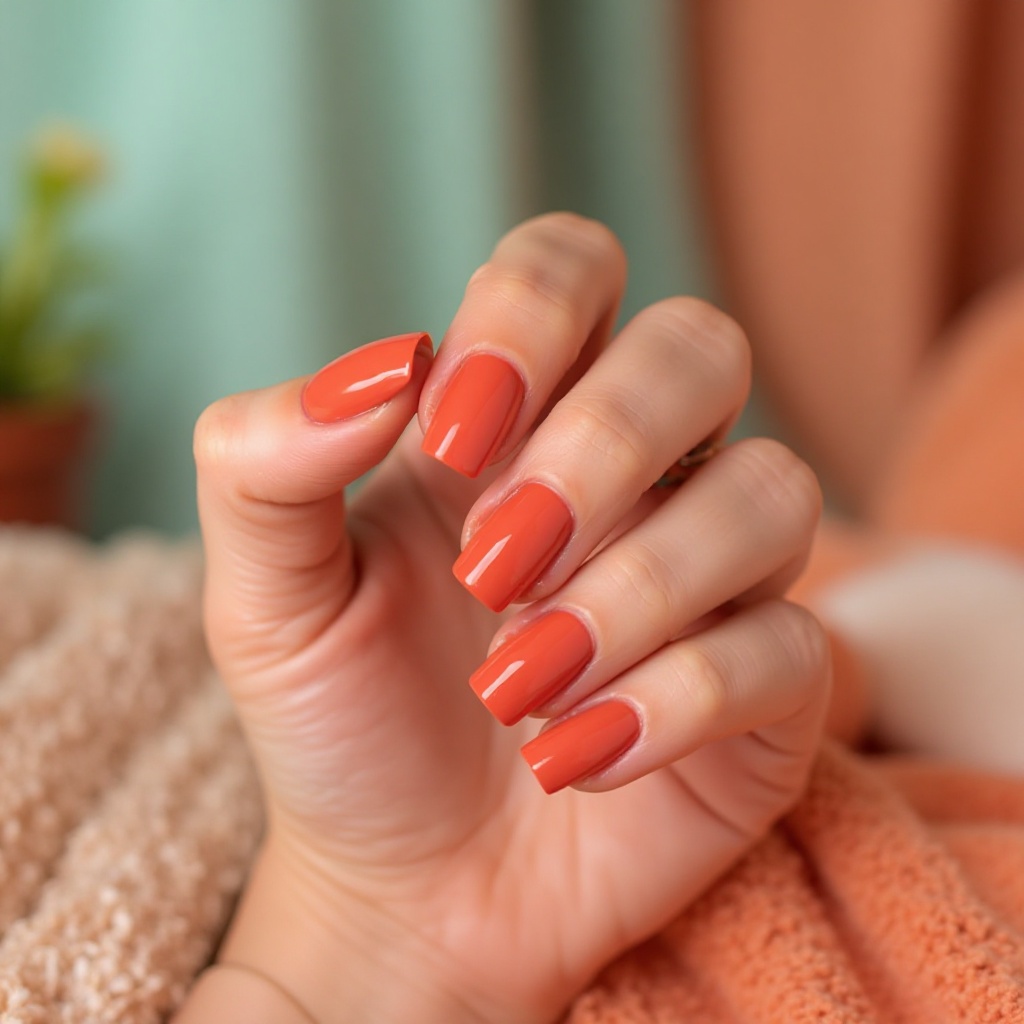
A vibrant, warm coral with subtle orange undertones that instantly brightens your mood and your manicure. This energetic shade captures the essence of summer sunsets, tropical flowers, and warm beach days in a single color. The creamy, highly pigmented formula delivers bold color payoff in just two coats, ensuring rich, even coverage.
Why It Works for June:
- Complements sun-kissed skin beautifully while adding an energetic pop of color to summer neutrals
- Bridges the gap between spring’s pastels and summer’s brights, making it perfect for early June
Pro Tip:
- Apply on short to medium oval nails for a fresh, youthful vibe
- Finish with a glossy top coat to intensify the color and add dimension
How to Recreate This Look at Home:
- Prep for bright colors: Bright corals show every flaw and can stain. Apply a strong base coat (like OPI Natural Nail Base Coat or Orly Bonder).
- Optional but recommended—white base layer: Apply one coat of white polish before coral. This makes the coral pop vibrantly and prevents potential staining of your natural nails.
- Apply coral polish:
- Coat 1: Medium thickness, even coverage. Don’t worry if it looks a bit streaky—that’s normal. Let dry 2 minutes.
- Coat 2: Normal thickness for full opacity. Cap the free edge. Let dry 3 minutes.
- Intensify with top coat: Bright colors look their best with a thick, glossy top coat that adds depth. Apply generously and cap the free edge.
- Prevent fading: Bright corals fade in sunlight. Apply a UV-protective top coat if you’re spending a lot of time outdoors, or plan to refresh your manicure every 5-6 days.
Shaping Oval Nails:
- Start with nails filed straight across
- File each side at an angle, creating a tapered point
- Round off the point by filing in gentle curves from each side
- The result should look like an egg: curved sides meeting at a rounded tip
- Check symmetry by placing fingers together
Making Bright Colors Last Longer:
- Apply thin coats rather than thick ones (prevents peeling)
- Let each coat dry completely before the next
- Reapply top coat every 2-3 days to refresh shine and prevent chipping
- Wear gloves when doing dishes or cleaning (bright colors chip easier)
Recommended Products:
- Essie “Tart Deco” or “Come Here”
- OPI “Coral-ing Your Spirit Animal”
- Zoya “Arizona” or “Wendy”
- Sally Hansen “Prick Your Finger” or “Peach Breeze”
Beginner Mistake to Avoid: Applying thick coats of bright polish to “save time” actually causes bubbling, smudging, and longer dry time. Always use thin to medium coats with bright colors.
Sunshine Yellow Glow
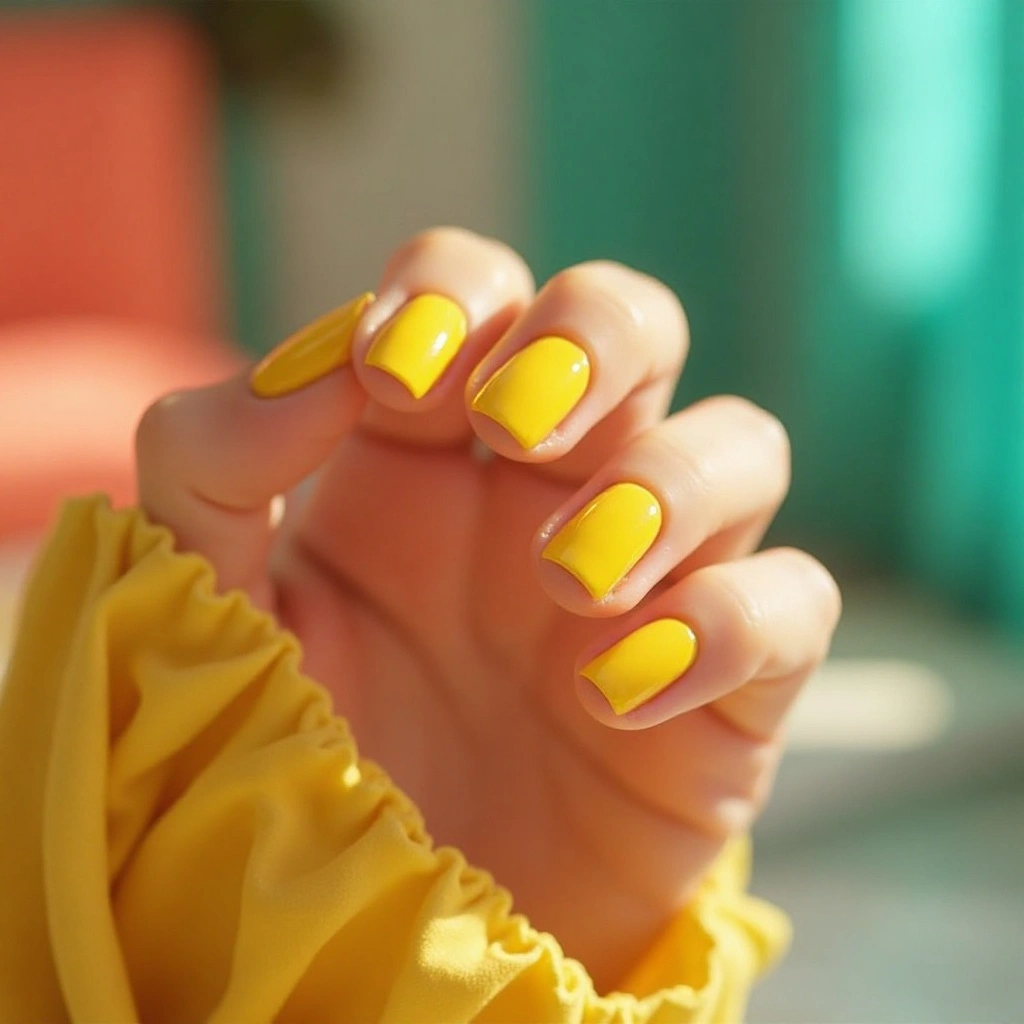
A pure, happy yellow that radiates optimism and perfectly captures June’s sunny, carefree energy in color form. This bold shade makes an unapologetic statement while remaining playful rather than overwhelming or harsh on the eyes. The opaque, creamy formula ensures even application without streaking, delivering sunny perfection in two smooth coats.
Why It Works for June:
- Embodies the joy and warmth of summer while complementing both casual and dressy warm-weather outfits
- Creates striking contrast against tan lines and makes your hands look bright and happy
Pro Tip:
- Best on short to medium nails in round or squoval shapes to keep it playful
- Use a white base coat underneath to prevent staining and enhance the yellow’s vibrancy
How to Recreate This Look at Home:
Important Pre-Application Steps:
Yellow polish is notorious for staining nails. Follow these protective steps:
- Apply strong base coat: Use a thick, opaque base coat. Wait for it to dry completely (2 minutes minimum).
- Apply white base layer: This is essential for yellow:
- Apply one coat of white polish over base coat
- Let dry 3 minutes (whites take longer)
- This prevents staining AND makes yellow appear more vibrant
- Check your yellow polish:
- Yellow thickens quickly. If it’s gloopy, add 2-3 drops of polish thinner
- Shake gently (don’t shake vigorously—causes bubbles)
- Wipe brush so it’s not overloaded
Application Process:
- First coat of yellow:
- Apply thin to medium coat
- Don’t panic if it looks streaky—yellow always does on first coat
- Let dry 3 minutes
- Second coat of yellow:
- Medium thickness coat
- Should be fully opaque now
- If still streaky, let this coat dry 3 minutes and add a third thin coat
- Cap free edge
- Let dry 4 minutes
- Apply top coat:
- Use a thick, glossy top coat
- Apply generously to seal the yellow
- Cap the free edge
- Let dry 10 minutes before touching anything
Shaping for Playful Looks:
Round nails: File straight across, then file corners in a smooth curve following your nail’s natural shape. The free edge should mirror your cuticle line.
Squoval nails: File straight across, then gently round just the corners. Less curved than oval, less angular than square.
Troubleshooting Yellow Polish:
- Staining happened: Use whitening toothpaste on nails, scrub gently with nail brush
- Streaky even after 3 coats: Polish is too old or too thick. Thin it or buy fresh bottle
- Turns greenish: Base coat wasn’t dry. The oils from your nail bed are showing through.
Making Yellow Last:
- Yellow chips notoriously fast. Reapply top coat every 2 days.
- Keep nails shorter if you’re hard on your hands—yellow shows every chip
- Avoid chlorine pools (turns yellow greenish)
Recommended Products:
- Essie “Aim to Misbehave” or “Sunny Business”
- OPI “Exotic Birds Do Not Tweet” (expensive but best yellow formula)
- Zoya “Pippa” or “Darcy”
- Sally Hansen “Mellow Yellow”
- White base: Essie “Blanc” or OPI “Alpine Snow”
Beginner Mistake to Avoid: Skipping the white base coat. Yellow will stain your nails green-yellow and will look dull and patchy. The white base layer is not optional—it’s essential.
Turquoise Tropical Dream
A bright, clear turquoise blue with slight green undertones that instantly transports you to crystal-clear Caribbean waters. This vacation-worthy shade delivers maximum summer vibes while remaining sophisticated enough for any setting beyond the beach. The vibrant, jewel-toned formula creates a stunning pop of color that looks expensive and intentional.
Why It Works for June:
- Evokes tropical destinations and ocean vibes while cooling down summer’s heat visually
- Stands out beautifully against white, tan, and coral summer wardrobe staples
Pro Tip:
- Apply three thin coats for full opacity and the truest, most vibrant turquoise color
- Style on medium to long almond nails for a glamorous, vacation-ready statement
How to Recreate This Look at Home:
Pre-Application:
- Prep thoroughly: Turquoise shows every ridge and imperfection. Gently buff nails with a fine buffer to smooth the surface.
- Apply protective base: Use a strong base coat to prevent staining (turquoise can stain like yellow).
- Optional white base: For the most vibrant turquoise, apply one thin coat of white polish over base coat. Let dry 3 minutes.
Application Technique for Vibrant Turquoise:
- First coat—very thin:
- Wipe one side of the brush before applying
- Apply a sheer, thin coat
- Let dry 2 minutes
- Second coat—thin to medium:
- Apply normal pressure
- Coverage should be better but might still be slightly translucent
- Let dry 3 minutes
- Third coat—medium:
- This coat brings full opacity and true color
- Cap free edge with each coat
- Let dry 4 minutes
- Top coat:
- Apply thick glossy top coat
- This intensifies the jewel-tone quality
- Cap free edge
- Let dry 10 minutes
Shaping Almond Nails for Maximum Elegance:
Almond nails require medium to long length:
- File straight sides: Start by filing the sides of your nails straight, creating a slight taper toward the tip
- Create the point: File each side at an angle moving toward the center, creating a gentle point
- Round the point: File the point itself in a curved motion to round it into an almond shape (not a stiletto point)
- Symmetry check: Hold your hands together—the shapes should mirror each other
- Smooth edges: Use a fine-grit file to smooth any rough edges
Maintaining Vibrant Turquoise:
- Turquoise fades in UV light. Apply UV-protective top coat if outdoors often
- Reapply top coat every 2-3 days to refresh the shine
- Chlorine and salt water dull the color—rinse hands after swimming
- Consider gel polish if you’ll be in water frequently (lasts 2-3 weeks)
Recommended Products:
- Essie “In The Cab-ana” or “Turquoise & Caicos”
- OPI “Fly” or “Can’t Find My Czechbook”
- Zoya “Robyn”
- China Glaze “For Audrey” (cult favorite turquoise)
Beginner Mistake to Avoid: Trying to achieve full turquoise opacity in two coats by applying thick layers. This causes bubbling, dragging, and uneven color. Three thin coats always look better than two thick ones.
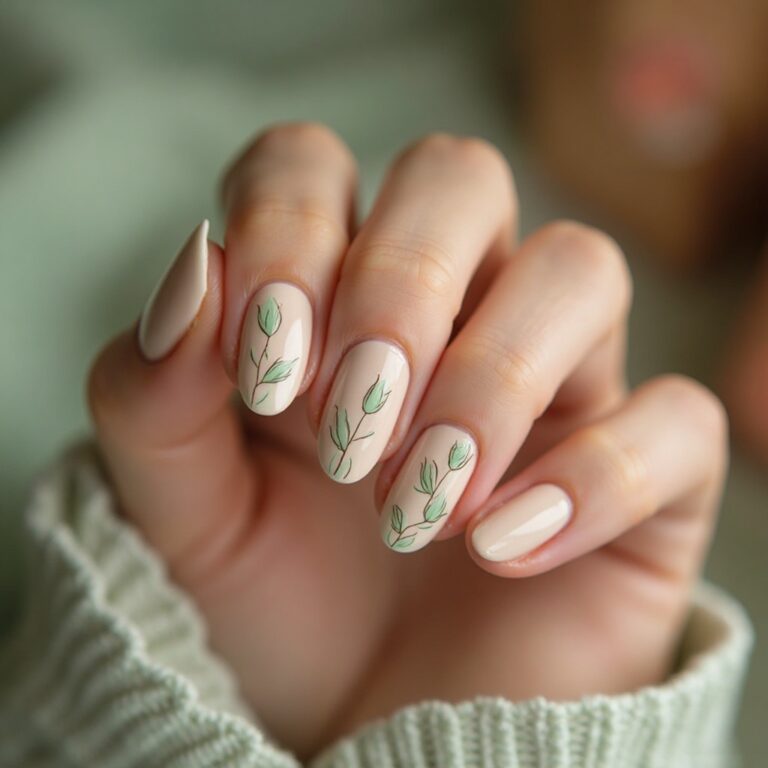
Soft & Romantic June Florals
Lavender Linen
A muted, dusty lavender with cool gray undertones that feels elegant, refined, and perfectly suited for June. This sophisticated pastel reads as mature and intentional rather than childish, offering subtle color without overwhelming boldness. The creamy, opaque formula provides full coverage that looks polished and expensive with minimal effort required.
Why It Works for June:
- Captures the romance of blooming summer flowers while remaining versatile for various occasions
- Cool tones create a refreshing visual effect perfect for warming weather and outdoor activities
Pro Tip:
- Perfect on medium oval or almond nails for an elegant, balanced look
- Add a matte top coat for modern sophistication or keep glossy for classic beauty
How to Recreate This Look at Home:
- Prep for muted colors: Dusty, muted shades show texture more than bold colors. Take extra time smoothing your nail surface with a gentle buffer.
- Apply base coat: Standard clear base coat is fine for lavender (it doesn’t stain).
- Application technique:
- Coat 1: Thin, even layer. Muted colors can look patchy if applied too thick. Let dry 2 minutes.
- Coat 2: Medium thickness. Should provide full, even coverage. Let dry 3 minutes.
- Optional Coat 3: If still patchy, apply very thin third coat. Let dry.
- Choose your finish:
For Glossy Finish:
- Apply thick, high-shine top coat like Seche Vite
- One generous coat is enough
- Let dry 10 minutes
For Matte Finish:
- Let final color coat dry 5-7 minutes (matte top coat requires fully dry base)
- Apply matte top coat in smooth, even strokes
- Don’t go over the same area twice—causes streaks
- Let dry 5 minutes
- Avoid touching nails or applying cuticle oil for at least 4 hours
- Maintenance:
- Glossy: Refresh with top coat every 2-3 days
- Matte: Reapply matte top coat every 3-4 days to maintain the velvety finish
Understanding Undertones in Lavender:
Different lavenders suit different skin tones:
- Cool lavender (like this one): Gray undertones, flatters cool and neutral skin tones
- Warm lavender: Pink undertones, flatters warm skin tones
- True lavender: Balanced, flatters all skin tones
Test on one nail first if you’re unsure.
Troubleshooting Matte Finish:
- Looks streaky: You went over it twice. Let dry and apply fresh coat without overlapping strokes
- Lost matte effect: Applied oil too soon or touched nails before fully dry
- Looks darker than expected: This is normal with matte top coat. All colors darken slightly when matted
Recommended Products:
- Glossy version: Essie “Lilacism” or “Virgin Snow”
- OPI “Do You Lilac It?”
- Zoya “Miley” or “Abby”
- Matte top coat: Essie “Matte About You,” OPI “Matte Top Coat”
Beginner Mistake to Avoid: Applying matte top coat over slightly wet color polish. It will streak, pill up, and look terrible. The color must be bone dry (wait 5+ minutes after final color coat).
Soft Apricot Bloom
A delicate peachy-apricot with warm undertones that brings a sun-kissed glow to your fingertips instantly and naturally. This fruit-inspired shade captures summer’s warmth while remaining soft enough to wear daily with any outfit. The sheer-to-opaque buildable formula lets you control the intensity, from barely-there tint to full coverage.
Why It Works for June:
- Enhances natural nail beauty while adding warmth that complements early summer tans beautifully
- Transitions seamlessly from casual daytime looks to elegant evening occasions without changing polish
Pro Tip:
- Build to desired opacity with two to four thin coats for the most natural effect
- Style on short to medium round nails for a fresh, approachable, youthful appearance
How to Recreate This Look at Home:
Understanding Buildable Formulas:
This polish is designed to be sheer or opaque depending on how many coats you apply. This gives you options:
- 2 coats: Sheer, “your nails but better” effect—great for natural, everyday look
- 3 coats: Medium coverage, noticeable color but still soft
- 4 coats: Full opacity, bold peachy color
Application Steps:
- Prep and base: Standard prep, apply clear base coat.
- Decide on your desired effect: Look at the polish—is it naturally sheer or opaque? This affects your technique:
- If sheer by nature: Apply thin coats, build slowly
- If opaque by nature: Apply very light pressure for sheerness, normal pressure for opacity
- Apply first coat:
- Very thin, wispy coat
- Should be quite sheer—that’s correct
- Let dry 2 minutes
- Apply second coat:
- Thin to medium coat
- Assess coverage—is this the look you want? If yes, stop here after top coat
- Let dry 2 minutes
- Optional third coat:
- For more color, apply another thin coat
- Let dry 2 minutes
- Assess again
- Optional fourth coat:
- For full opacity, apply final thin coat
- Let dry 3 minutes
- Top coat:
- Apply thick glossy top coat
- Let dry fully
Creating the Perfect Round Nail Shape:
Round nails are the most natural, youthful shape:
- Start by filing straight across at desired length
- File each corner in a gentle curve following your fingertip’s natural curve
- The free edge should form a soft semi-circle
- Check that the curve mirrors your cuticle line
- Smooth any edges with a fine buffer
When to Choose Sheer vs. Opaque:
- Sheer (2 coats): Professional settings, natural makeup days, when you want subtle polish
- Medium (3 coats): Most versatile, suitable for any occasion
- Opaque (4 coats): Evening events, summer parties, when you want a statement
Recommended Products:
- Essie “A Crewed Interest” or “Van D’Go”
- OPI “Stop It I’m Blushing” or “Crawfishin’ for a Compliment”
- Zoya “Carly” or “Cole”
- Sally Hansen “Peach Perfect”
Beginner Mistake to Avoid: Trying to achieve opacity in one or two thick coats with a naturally sheer formula. It will look goopy and uneven. Embrace the building process—it’s what makes this look natural and beautiful.
June-Specific Tips Worth Knowing
The Chrome Thing Is Real – And honestly? It’s perfect for June. Rose gold and pearl chrome catch sunlight in ways that regular polish just can’t. If you’re doing any outdoor events (weddings, graduations, beach trips), chrome photographs beautifully without looking too extra in person.
Your Gel Will Lift Faster – Pool chemicals and salt water are brutal on gel manicures. If you’re swimming daily, either switch to regular polish you can touch up easily, or book gel fills every 10 days instead of waiting the full two weeks. That gap where water gets in? That’s where the trouble starts.
Matte Actually Works in Summer – Sounds counterintuitive, but matte finishes photograph well, hide minor chips better than gloss, and give summer brights a sophisticated edge. The velvety texture also doesn’t show fingerprints, which matters when you’re constantly applying sunscreen.
Cuticle Oil Is Non-Negotiable – Sun, chlorine, and AC all dry out cuticles fast. Dry cuticles = peeling polish and hangnails. Apply oil morning and night, especially after swimming. Jojoba or vitamin E work best.
White Base Coat for Brights – If you’re doing yellow, coral, or turquoise, put down a white base coat first. It makes the color pop, prevents staining, and you’ll get full coverage in two coats instead of four.
Pick What Feels Right
June Nails got enough going on without overthinking your nails. Start with one of these 15 and adjust from there—swap finishes, change lengths, add an accent nail, whatever. The goal is nails that make you feel put-together without requiring a full maintenance schedule.
Bookmark your favorites, screenshot the ones you want to try, and if something catches your eye that’s completely different from your usual style? Even better. Summer’s the time to experiment.