10 Trendy Vacation Nails Ideas for Perfect Summer Getaway
Vacation nails are manicures designed specifically for travel — bright, playful, or resort-inspired looks that survive sun, saltwater, sand, and nonstop activity.
Think bold colors, tropical motifs, and finishes that still look good on day seven when you’re somewhere without a nail salon nearby.
10 Vacation Nail Ideas
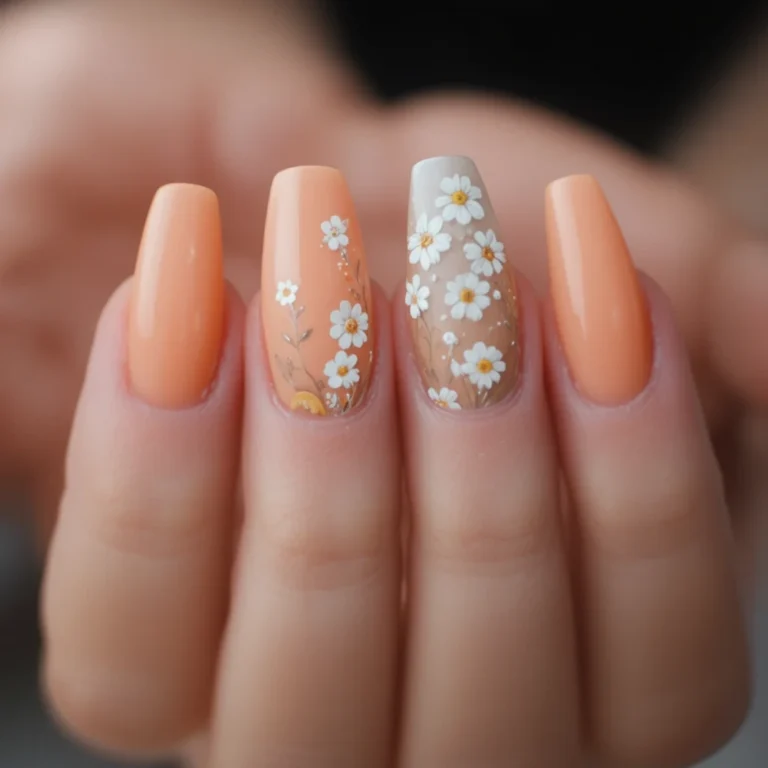
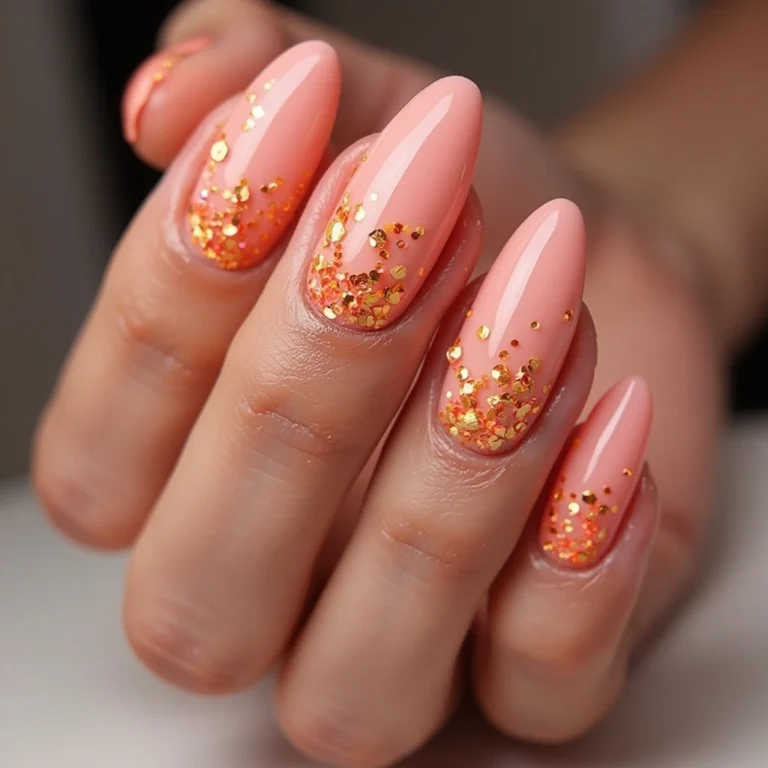
Design 1: Sunset Ombre on Coral and Gold
A warm gradient running from deep coral at the base to a soft champagne gold at the tips, finished with a glossy topcoat that catches light like a sunset on water. The gradient sits between orange and rose, with flecks of shimmer visible in the gold zone. It photographs warm and golden in natural light and is the kind of manicure strangers compliment at poolside.
Difficulty: Intermediate Time to complete: 35 minutes Best for: Anyone who wants something that looks expensive without screaming “vacation nail art” Why it works: Warm tones photograph beautifully against sunlit skin, and the ombre hides tip wear surprisingly well What makes it different: Most sunset nails go full neon — this one uses dusty, tonal shades that look more editorial than carnival
Product to have: Sally Hansen Miracle Gel Top Coat ($10, Walmart) — the extra thickness makes the gradient look smoother and more dimensional than a thin topcoat.
Design 2: Turquoise Ocean Solid with White Foam Tips
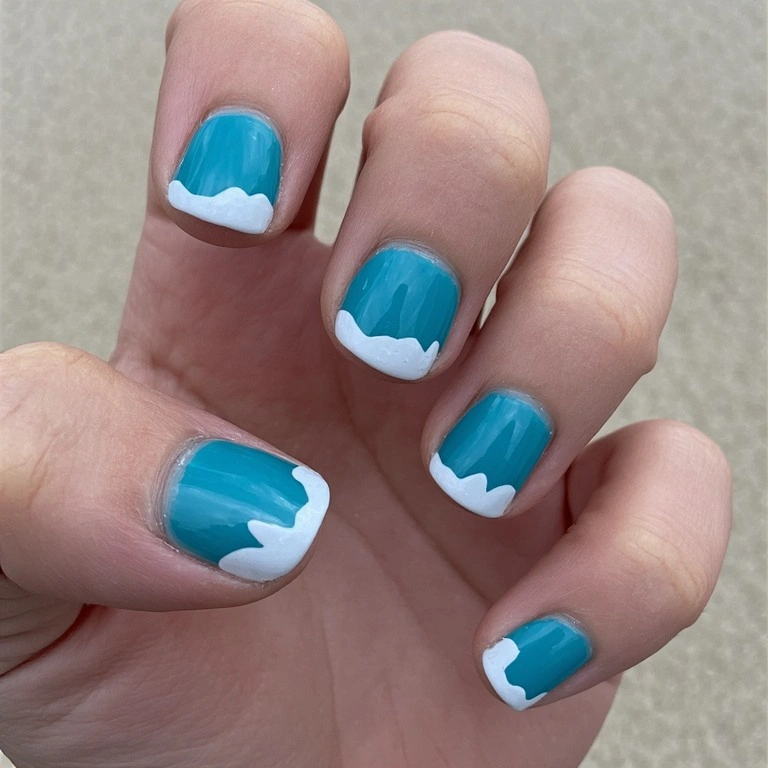
A deep, saturated turquoise on all nails except the tips, where a thin irregular line of white has been added freehand or with a fine brush to mimic sea foam. Not a clean French tip — the white line is deliberately uneven and slightly translucent, like water receding on sand.
Difficulty: Beginner to Intermediate Time to complete: 20 minutes Best for: Beach destinations, especially if you’re doing a lot of water photography Why it works: The ocean reference is subtle enough to work off the beach too — it reads as artistic, not costumey What makes it different: The irregular foam line instead of a crisp French tip makes it look hand-done in a good way
Product to have: Zoya “Yummy” specifically — I’ve tried four turquoises and this one doesn’t go green in sunlight the way cheaper formulas tend to.
Design 3: White Base with Hand-Painted Tropical Leaves
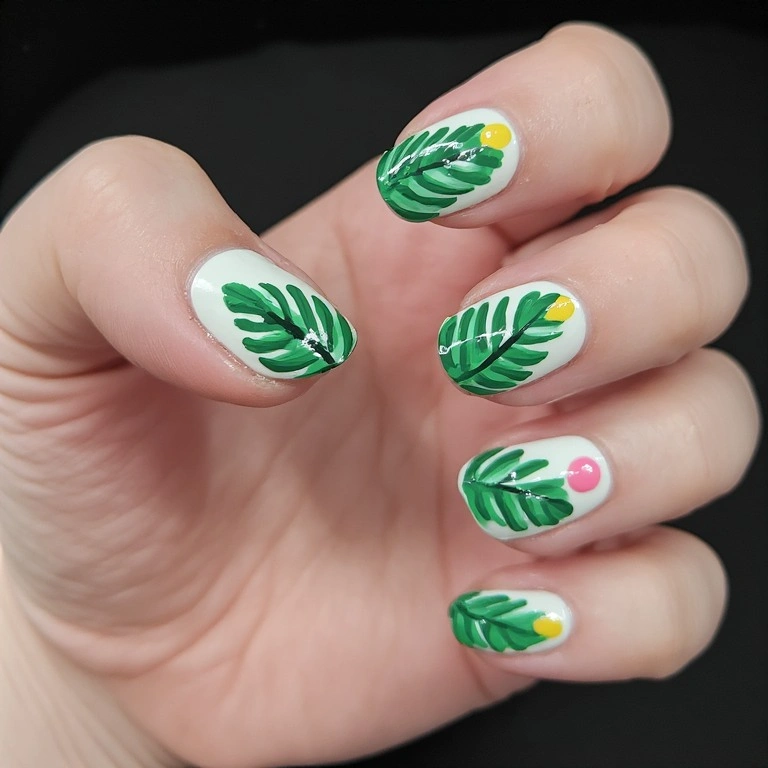
A clean white cream base with 2-3 deep green tropical leaves painted on an accent nail (or two), using a thin nail art brush. The leaves are painted as simple elongated shapes with a center vein line — no botanical degree required. Optional: add a tiny hot pink or yellow dot where a flower would be.
Difficulty: Intermediate Time to complete: 30 minutes Best for: People who want something that looks like professional nail art but isn’t actually that hard Why it works: White base makes colors pop and keeps the overall look fresh even as it ages What makes it different: Green-on-white is cleaner and more editorial than the typical tropical neon-on-neon approach
Product to have: Essie “Blanc” over any generic white — white polishes tend to streak, and this one covers in two smooth coats consistently.
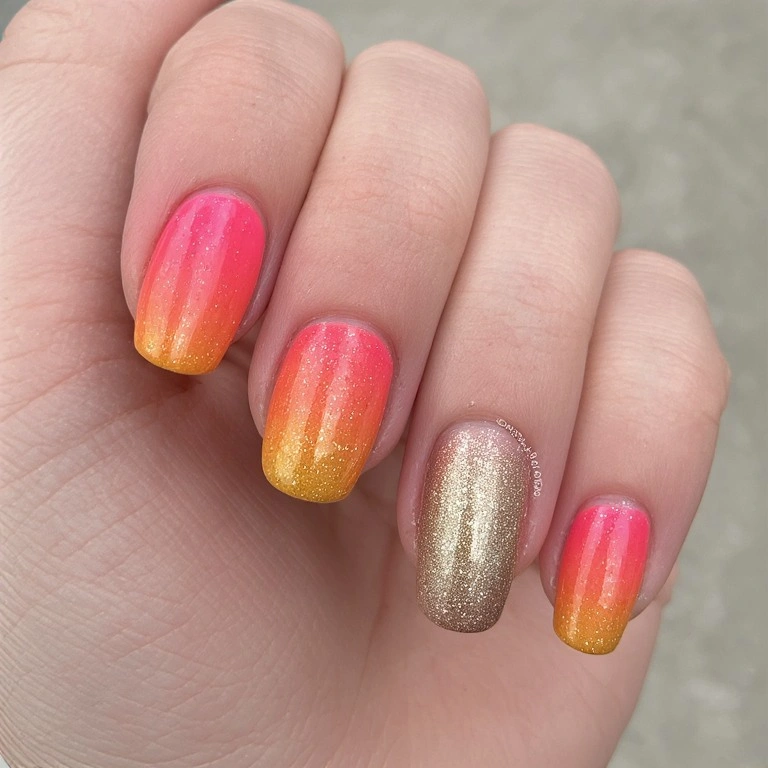
Design 4: Neon Pink with Gold Foil Accent
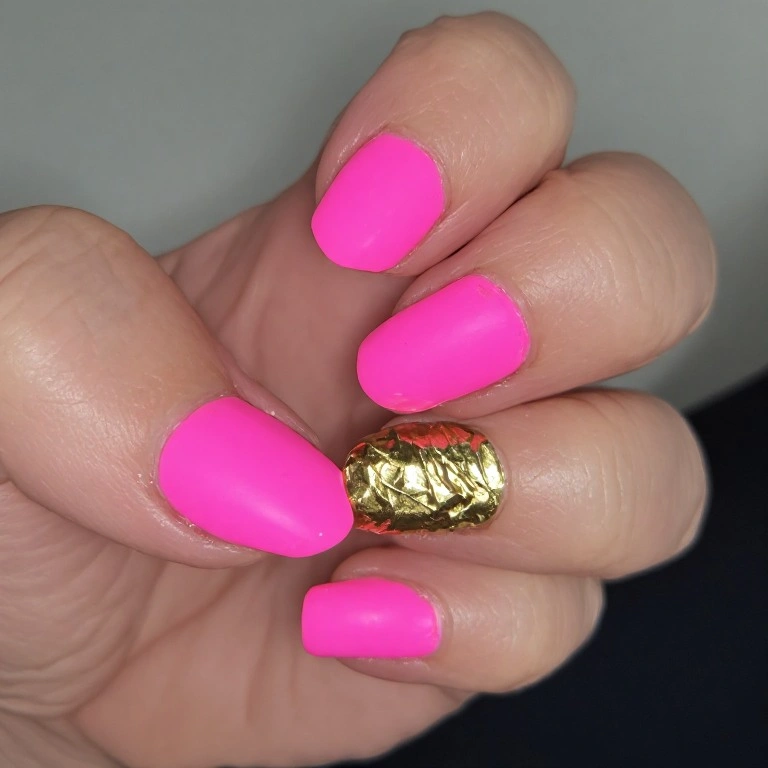
A saturated hot pink on all nails, with one accent nail covered in irregular gold foil pieces applied over tacky topcoat for a crinkled metallic look. The contrast between matte neon and metallic foil is intentionally loud — this is a statement manicure.
Difficulty: Beginner Time to complete: 25 minutes Best for: Nightlife-heavy vacations, bachelorette trips, anyone who wants to be photographed Why it works: Hot pink and gold is a timeless combination that somehow always looks current What makes it different: The irregular foil application looks more interesting than smooth gold chrome, which can look clinical
Product to have: The China Glaze neon specifically — I’ve used 6+ neon pinks and most look more fuchsia than neon in sunlight. This one actually glows.
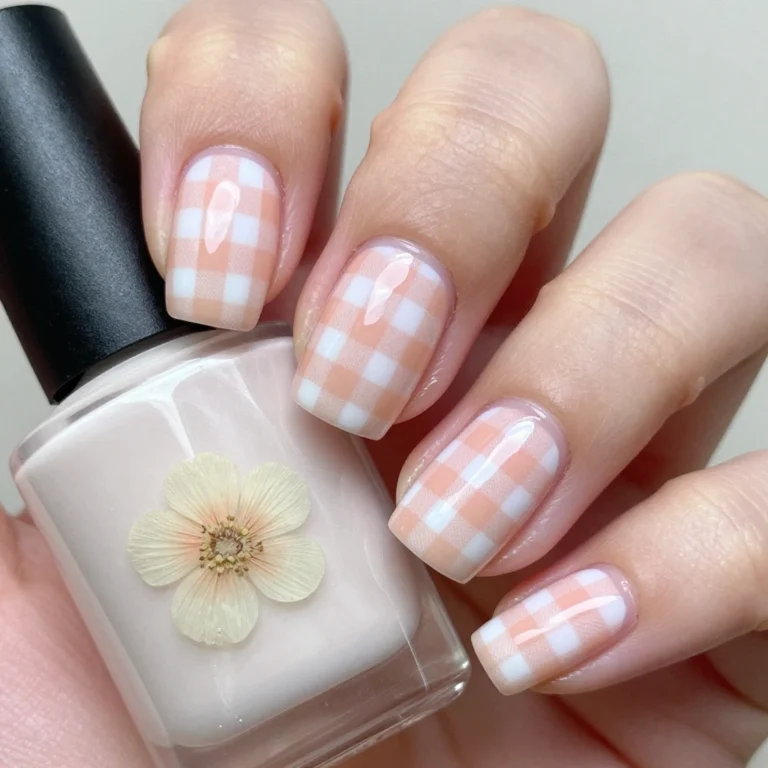
Design 5: French Tips with Thin Colored Line
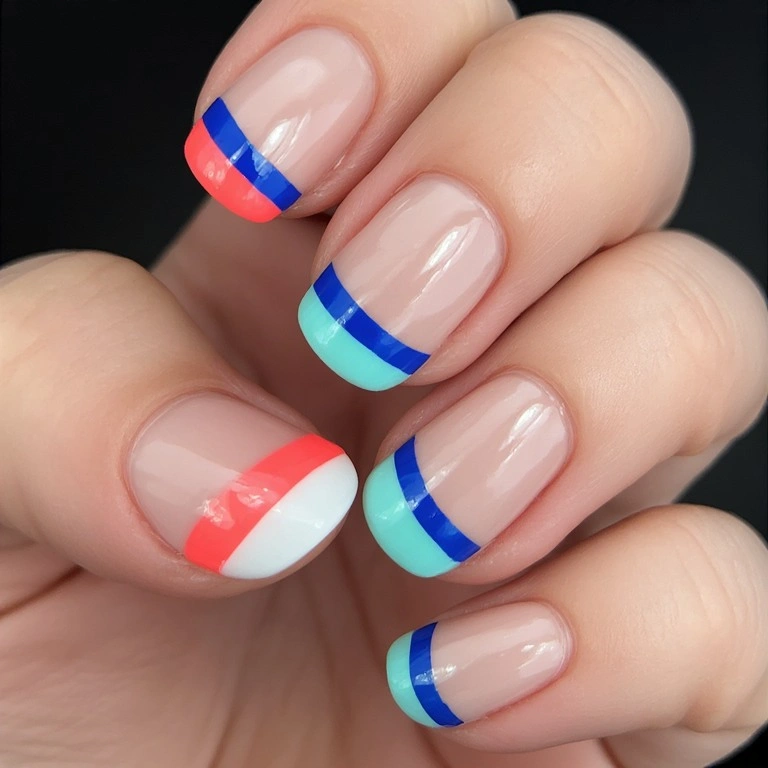
A classic sheer pink or nude French tip, but with a thin stripe of bright color painted along the smile line in place of (or just above) the white tip. Coral, cobalt blue, and mint all work beautifully. The line is painted with a thin striping brush over the cured French tip.
Difficulty: Beginner to Intermediate Time to complete: 20 minutes Best for: People who want a polished look that’s still vacation-appropriate — works at dinner and at the beach Why it works: It’s recognizably a French manicure, so it reads as sophisticated, but the color line signals that you’re somewhere fun What makes it different: The thin line is easier to paint than a full colored tip and looks more intentional than a standard French in a color
Product to have: French tip guides — I used to freehand these and it took three times as long. The guides are a 3-minute application and the result is noticeably cleaner.
Design 6: Watermelon Slices on Short Nails
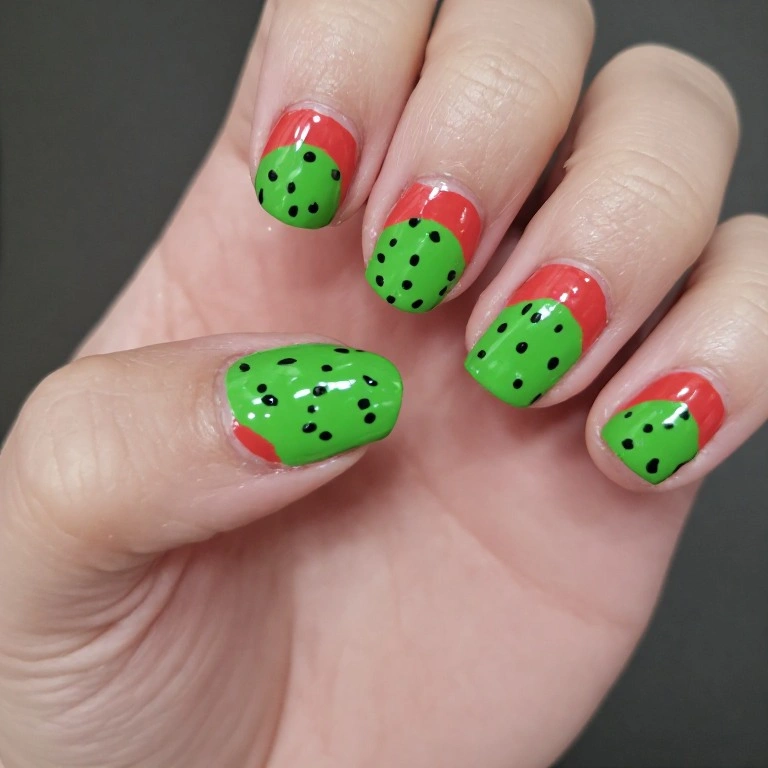
A bright green base with a red or coral arc painted across the upper half of the nail and tiny black dots painted in the red zone for seeds. On short nails this is adorable; on longer nails it can read a bit loud. This is one of those designs that photographs better than it sounds.
Difficulty: Intermediate Time to complete: 30 minutes Best for: People with shorter nails, casual beach trips, anyone who wants to commit to the vacation theme fully Why it works: It’s playful and completely intentional — there’s no ambiguity, which actually makes it easier to pull off than something half-themed What makes it different: The seed dots are the detail that makes this look hand-done versus a sticker
Product to have: A dotting tool — trying to make even seed dots with a brush takes 3x longer and they look less consistent. A dotting tool makes this design genuinely easy.
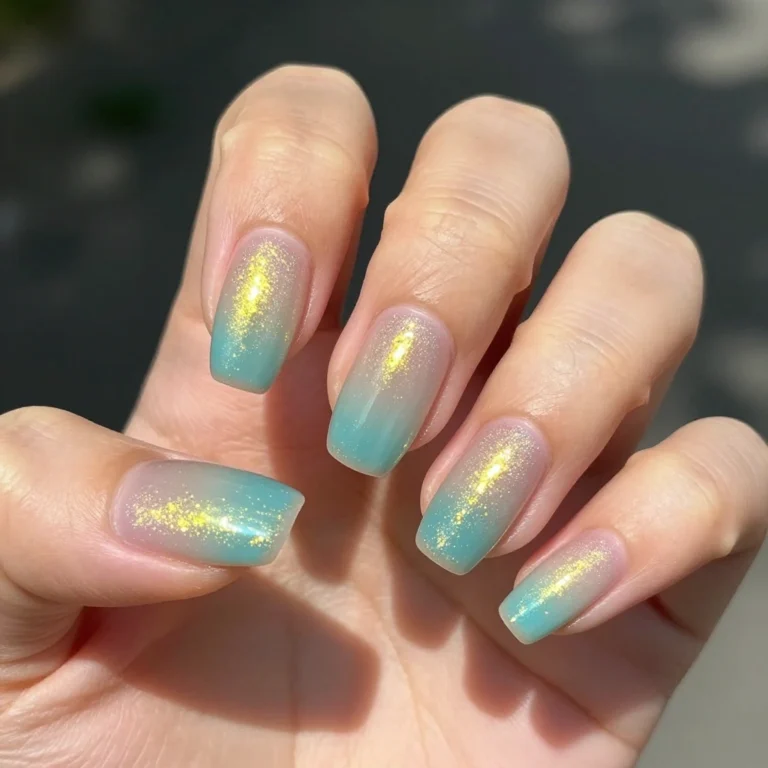
Design 7: Blue-to-White Ocean Gradient
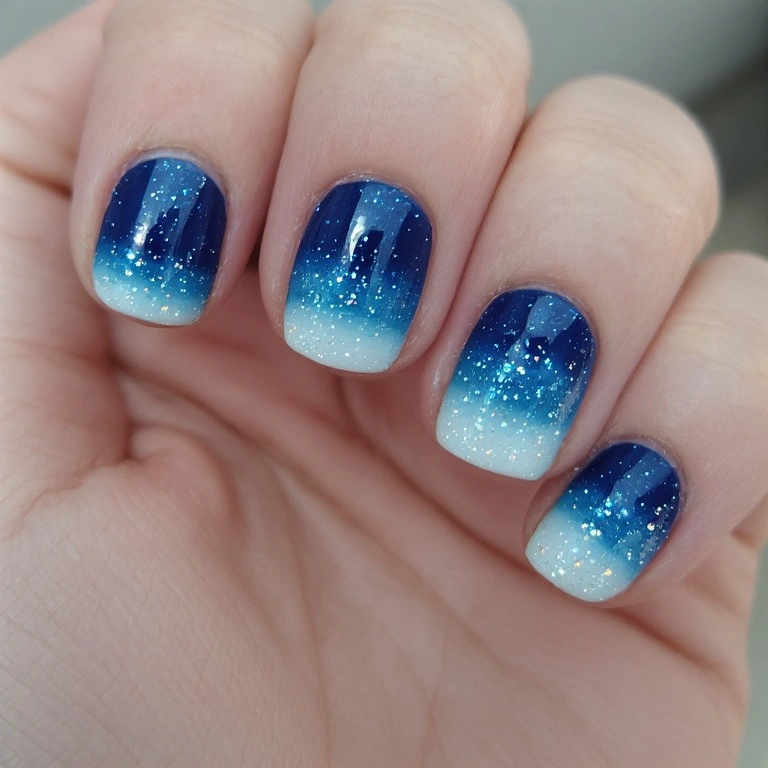
A deep navy or cobalt at the base fading to an almost-white pale blue at the tips, done with the sponge gradient technique. Add a light dusting of iridescent glitter at the very tips for a seafoam shimmer. No other embellishments — the gradient does all the work.
Difficulty: Intermediate Time to complete: 35 minutes Best for: People who want something elegant that still has a clear ocean reference Why it works: Blue gradient nails consistently look great in travel photography — they complement both sky and water backgrounds What makes it different: The iridescent tip instead of white gives it a more sophisticated finish than the typical two-color gradient
Product to have: OPI “Russian Navy” — it has a subtle shimmer in the formula that makes the dark end of the gradient more interesting than a flat navy.
Design 8: Tortoiseshell Glam
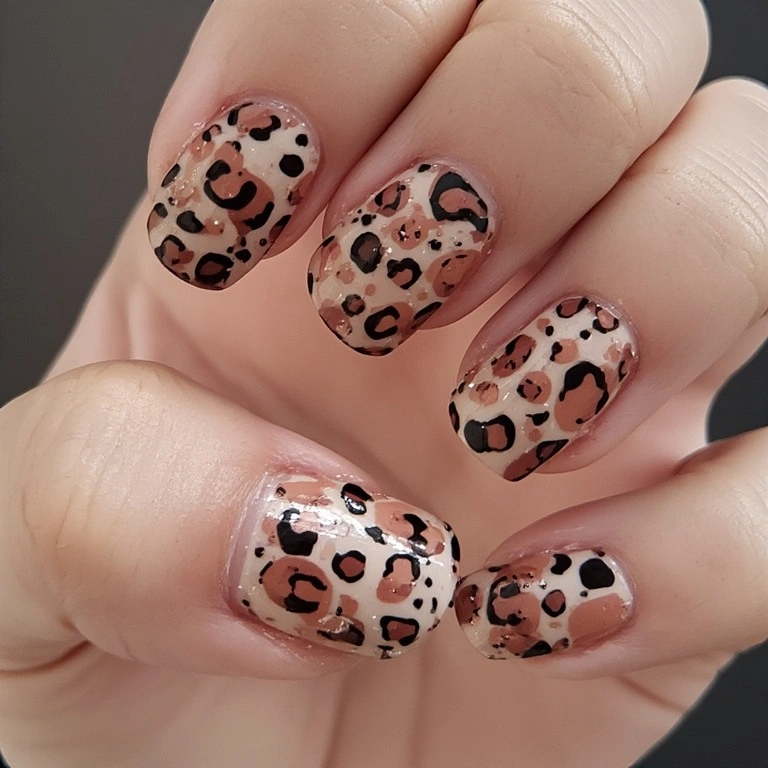
Amber, brown, and black spots layered over a nude base with a glossy finish, done with a dotting tool and then blended slightly while wet with a brush. This isn’t strictly “vacation,” but it’s one of the most photographed nail trends for a reason — it’s universally flattering and looks great in travel photos.
Difficulty: Intermediate to Advanced Time to complete: 40 minutes Best for: Upscale resort trips, Mediterranean cruises, anywhere with a sophisticated dress code Why it works: Tortoiseshell is a neutral that looks expensive across seasons and settings What makes it different: Most tortoiseshell tutorials overcomplicate this — three colors and light blending is genuinely enough
Product to have: A no-wipe gel topcoat if you’re using gel ($12, Amazon) — the glossy finish is what makes tortoiseshell look like actual tortoiseshell and not smeared nail polish.
Design 9: Palm Tree Silhouette on Sandy Nude
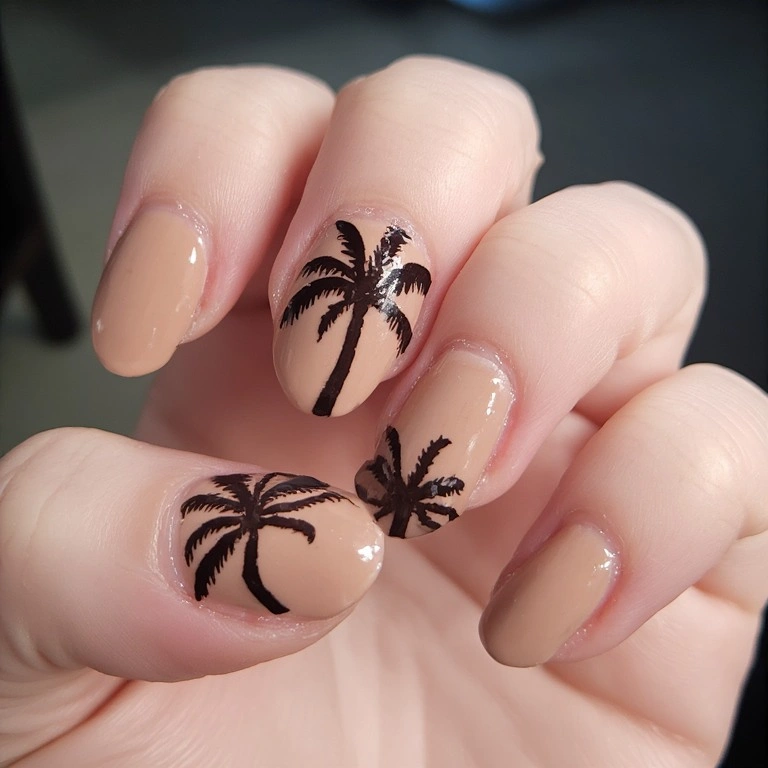
A warm beige or sandy nude base with a single palm tree silhouette painted on one or two accent nails in black or dark brown. The palm is simplified — a curved trunk line and a fan of 5-6 leaf strokes at the top. It looks more impressive than it is.
Difficulty: Intermediate Time to complete: 25 minutes Best for: Tropical destinations, Instagram content, people who want something conversation-starting Why it works: Silhouettes are more forgiving than detailed illustrations — you don’t need to get every leaf perfect What makes it different: Nude base keeps the overall look understated, so the palm reads as an accent rather than a costume
Product to have: A nail art liner brush with a very fine tip, specifically. Standard nail brushes are too wide for the trunk line and it ends up looking blocky.
Design 10: Holographic Chrome on Cobalt Blue
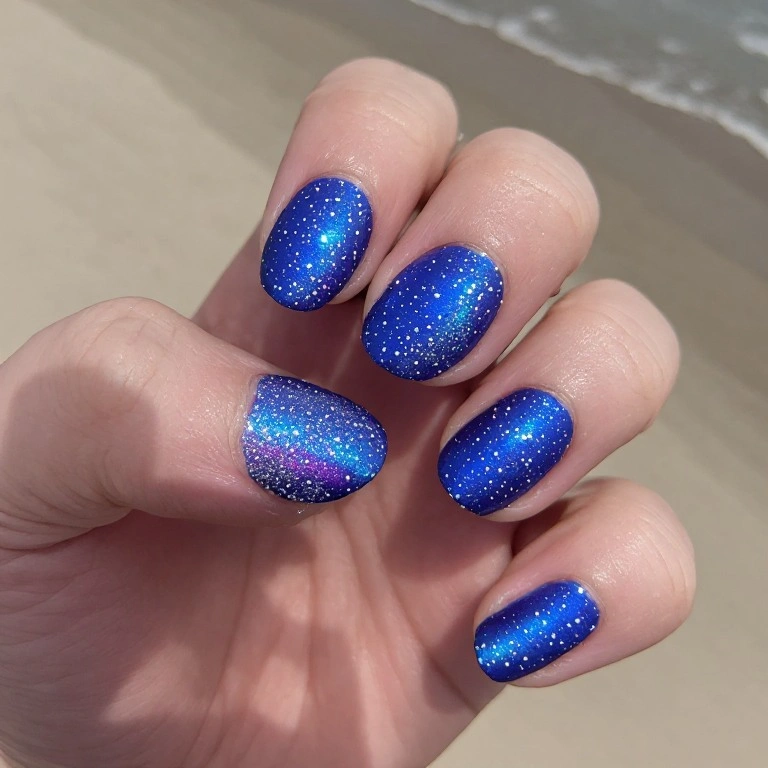
A rich cobalt blue gel base with holographic chrome powder rubbed over the top, creating an effect that shifts between blue, purple, and silver depending on the light. This catches sunlight in a way that looks genuinely surreal at the beach and is the most-complimented design I’ve worn on vacation.
Difficulty: Intermediate (requires gel lamp) Time to complete: 45 minutes Best for: Anyone who wants to commit to one truly show-stopping nail look for their trip Why it works: Chrome powder over deep blue shifts to purple and teal in different lights — it’s visually interesting without being overdone What makes it different: The cobalt base gives the chrome more depth than the silver or pale pink bases most chrome tutorials show
Product to have: A no-wipe gel topcoat ($12 on Amazon) — if you seal with a regular wipe-off gel coat, the chrome dulls. No-wipe topcoat preserves the mirror finish.
Pros and Cons of Vacation Nail Art
Pros
✅ Adds to the overall “I planned this trip” feeling — it sounds shallow but vacation nails genuinely make me feel more pulled-together when everything else is chaotic travel mode
✅ Gel specifically survives saltwater, chlorine, and sun better than any other at-home option — I’ve had gel manicures come back from a week at the beach looking almost fresh
✅ Press-ons have become a legitimate travel option — a full set takes 15 minutes to apply, and having a backup set in your bag means a broken nail isn’t a trip-ruining event
✅ Bold colors that you might avoid at home feel completely right on vacation — it’s the one time a neon pink or holographic silver reads as appropriate at every venue
✅ Doing your own nails before a trip saves $40–70 versus a salon appointment — that’s a nice dinner somewhere
✅ Nail art gives you something productive to do on flights or in hotel rooms when you’re settling in
✅ Vacation nail inspo is genuinely one of the more fun Pinterest rabbit holes — pre-trip planning feels like part of the experience
Cons
❌ Gel requires a UV lamp you have to pack or access somewhere — not ideal for minimalist packers
❌ Takes 45–90 minutes to do properly if you’re doing nail art — not always realistic the night before an early flight
❌ Glitter and chrome designs show tip wear faster than solid colors because the reflective quality emphasizes any chip or dullness
❌ Tropical humid climates can affect drying time for regular polish — what takes 20 minutes at home might still be tacky an hour later in high humidity
❌ Removal in a hotel room is messy — you need cotton balls, acetone, and a surface that can handle chemical drips
❌ Press-ons still pop off more easily in extended water exposure — swimming daily will shorten their life significantly
❌ Intricate nail art on your dominant hand is genuinely hard to DIY — the designs that look great are often the ones people pay a nail tech to do on both hands evenly
Common Vacation Nail Mistakes (And How to Fix Them)
Mistake 1: Applying Too Many Coats in a Hurry
What it looks like: Thick, globby nails that never fully cure or dry, with visible brush marks and bubbling.
Why it happens: When you’re excited and rushing the night before a trip, it’s tempting to add coat after coat. Wet layers trap solvents and the whole thing stays soft.
The fix:
- Apply thin coats and wait 2 full minutes between each
- If it’s already thick and bubbling, remove the topcoat layer while still soft with a topcoat-soaked brush
- Let the color layers cure for 10 minutes before reapplying topcoat
How well it works: Complete fix if you catch it before the topcoat dries. If the whole manicure has hardened with bubbles, removal and restart is honestly faster than trying to fix it.
Mistake 2: Skipping the Thin Brush Cleanup
What it looks like: Polish on the skin around the nail — a visible “flooded” edge that makes even good nail art look amateur.
Why it happens: It’s easy to skip cleanup when you’re rushing. But it’s the single most impactful step that separates professional-looking nails from DIY nails.
The fix:
- Dip a thin nail art brush or an angled brush in acetone
- Run it along the skin edge of each nail while polish is still wet
- One pass per nail; don’t scrub — it takes about 4 minutes total
How well it works: Perfect. This is a complete fix. It’s the most underrated step in DIY nail art.
Mistake 3: Applying Press-Ons Right Before Water Activities
What it looks like: Press-ons that start lifting after 30 minutes in the pool, then falling off entirely by the evening.
Why it happens: The adhesive needs 1–2 hours to fully bond before water exposure.
The fix:
- Apply press-ons the evening before a beach day, not the morning of
- Press firmly and hold each nail for 30 seconds during application
- Avoid getting nails wet for the first 2 hours after application
How well it works: This genuinely extends press-on wear to 4–6 days in light beach conditions. The difference between 2-hour and 1-day wear is mostly about application timing.
Mistake 4: Packing Only One Color and No Repair Kit
What it looks like: A chipped nail on day two with nothing to fix it, so it chips further and eventually you’re dealing with half a broken nail.
Why it happens: We don’t plan for nail emergencies when packing.
The fix:
- Pack one small bottle of your base color + topcoat (travel sizes exist)
- Add a tiny bottle of acetone on a cotton pad in a zip bag
- One backup press-on in your correct size takes up almost no space
How well it works: Entirely preventable. I now keep a small nail emergency kit in every checked bag — it takes up less space than a perfume sample.
Mistake 5: Using DEET Insect Repellent Near Gel Nails
What it looks like: Gel topcoat that suddenly looks cloudy, pitted, or softened — sometimes it literally dissolves.
Why it happens: DEET is a powerful solvent that breaks down the polymer chains in gel topcoat. It’s designed to eat through synthetic materials.
The fix:
- If you’ve already applied DEET on your nails, wipe immediately with a damp cloth — it’s time-sensitive
- Apply insect repellent on your arms and legs first, let it absorb, then use your hands
- Consider Picaridin-based repellent for destinations where bugs are serious — it’s nail-safe and nearly as effective as DEET
How well it works: Wiping quickly minimizes damage but doesn’t completely undo it if contact lasted more than 30 seconds. Prevention is the real fix here.
FAQs
How do I make regular polish last longer at the beach? Apply two thin coats of polish, then two coats of Sally Hansen Miracle Gel Top Coat ($10, Walmart) — not just one. Reapply the topcoat every 2–3 days. This won’t match gel durability but extends regular polish from 3–4 days to 6–7 days in beach conditions.
Can I get vacation nails if my nails are damaged or thin? Yes, but lean toward press-ons over gel for this trip. Thin or damaged nails benefit from a break from gel application and removal. KISS imPRESS Press-Ons ($9, Walgreens) are gentle enough that they don’t cause further damage when removed with the included tabs.
Why do my nails turn yellow in the sun? Lighter-colored polishes — especially whites and nudes — absorb UV and yellow over time. This is almost entirely prevented by applying a UV-protective topcoat. Seche Vite Dry Fast Top Coat ($9, Amazon) has a UV filter that most other topcoats don’t include.
What’s the easiest vacation nail design for absolute beginners? A solid bright color in a cream finish on all nails with a contrasting glitter on one accent nail. Choose a polish with good pigment (OPI and Essie both cover well in two coats) so you don’t need many layers. The less you do to nail art for the first time, the better it looks.
How long should I wait between gel manicures? At minimum, one week — two weeks is better. Gel removal involves acetone soaking that temporarily dehydrates the nail plate, and reapplying immediately doesn’t give it time to recover. I do a “naked nail week” with just cuticle oil between gel sets, which actually makes the next manicure last longer too.
Final Thoughts
Vacation nails range from a simple swipe of coral polish to a full-hand gel nail art session — there’s genuinely a version that works for your skill level, your trip type, and however much time you want to spend. If you’re starting out, I’d suggest trying the sunset ombre (Design 1) using the sponge technique and a quality topcoat, and seeing how it holds up.
Once you’re comfortable with gradients, the chrome or tropical leaf designs are a natural next step. My first five attempts at nail art looked rough, but each one taught me something — and even the imperfect ones looked more fun than bare nails in every single vacation photo.